Techtom AL-100 User manual
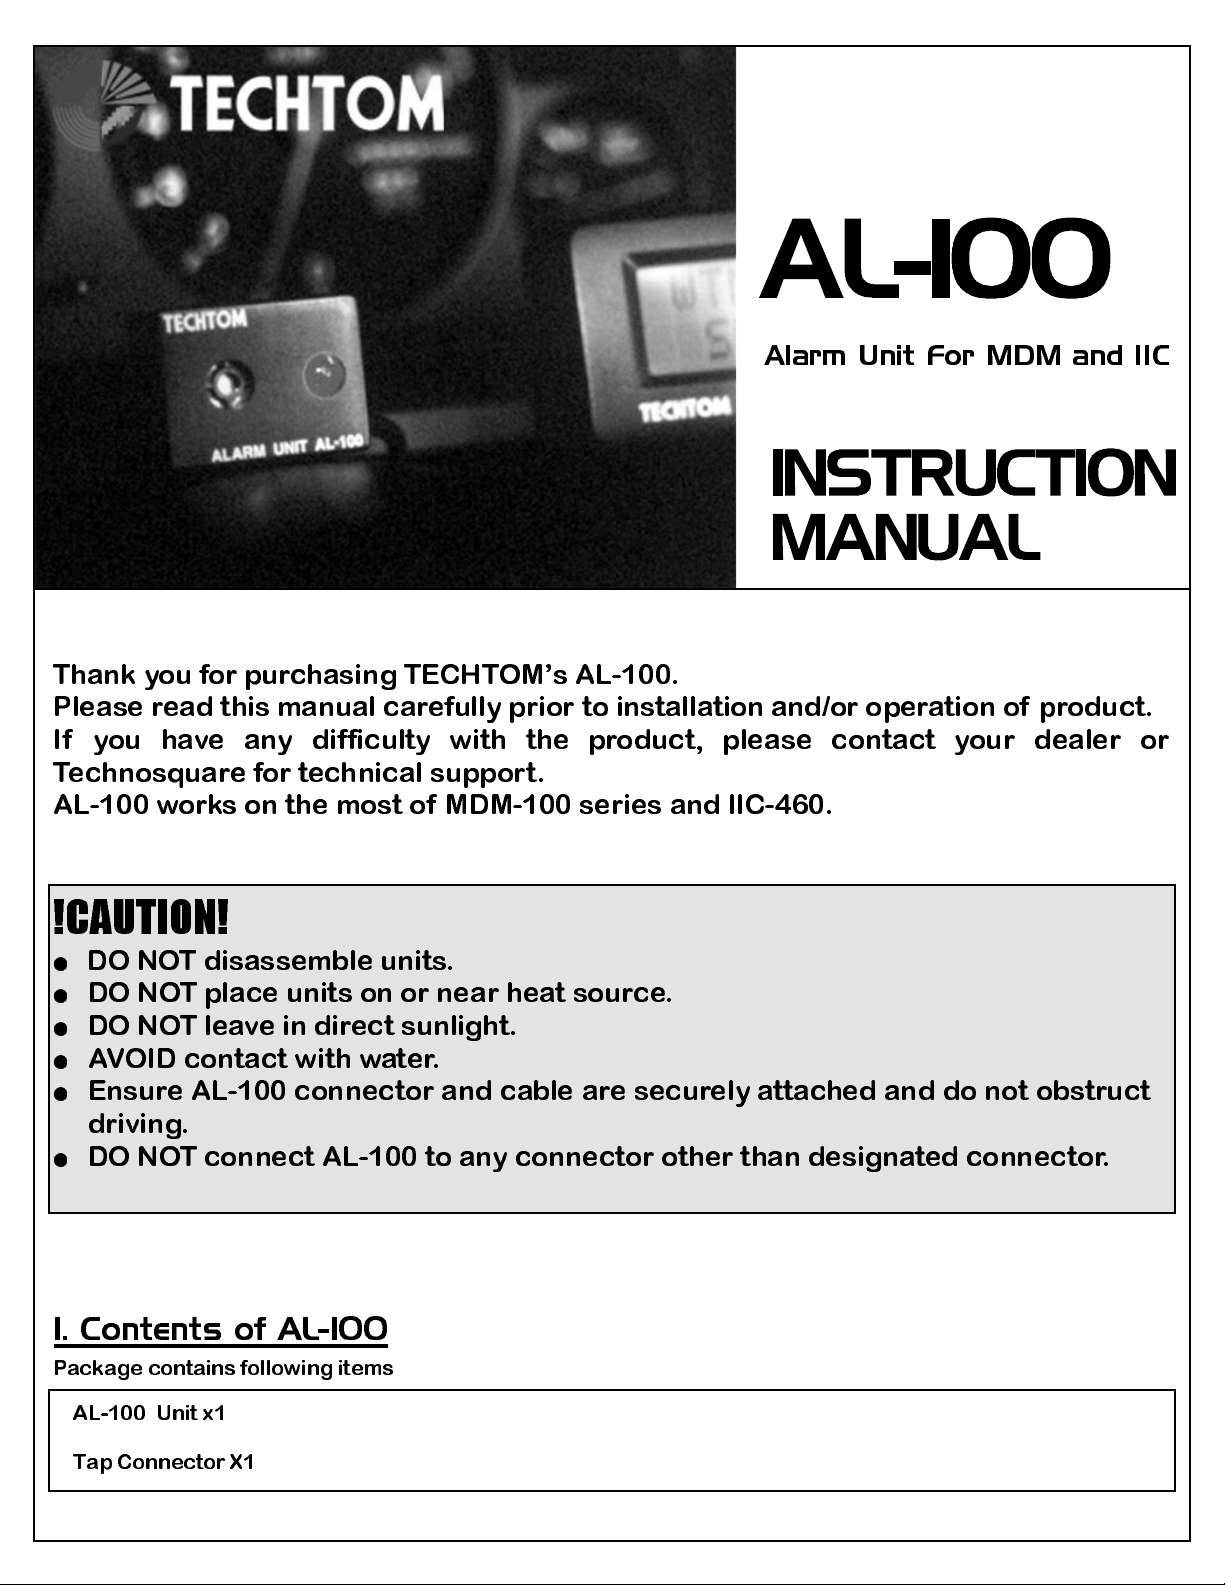
Alarm Unit For MDM and IIC
Thank you for purchasing TECHT OM’s AL-100.
Please rea this manual carefully prior to installation an /or operation of pro uct.
If you have any ifficulty with the pro uct, please contact your ealer or
Technosquare f or technical support.
AL-100 works on the most of MDM-100 series an IIC-460.
1. Contents of AL-100
Package contains following items
AL-100 Unit x1
Tap Connector X1
!CAUTION!
٨
DO NOT isassemble units.
٨
DO NOT place units on or near heat source.
٨
DO NOT leave in irect sunlight.
٨
AVOID contact with water.
٨
Ensure AL-100 connector an cable are securely attache an o not obstruct
riving.
٨
DO NOT connect AL-10 0 to any con ne ctor other than esi gnate conn e ctor.
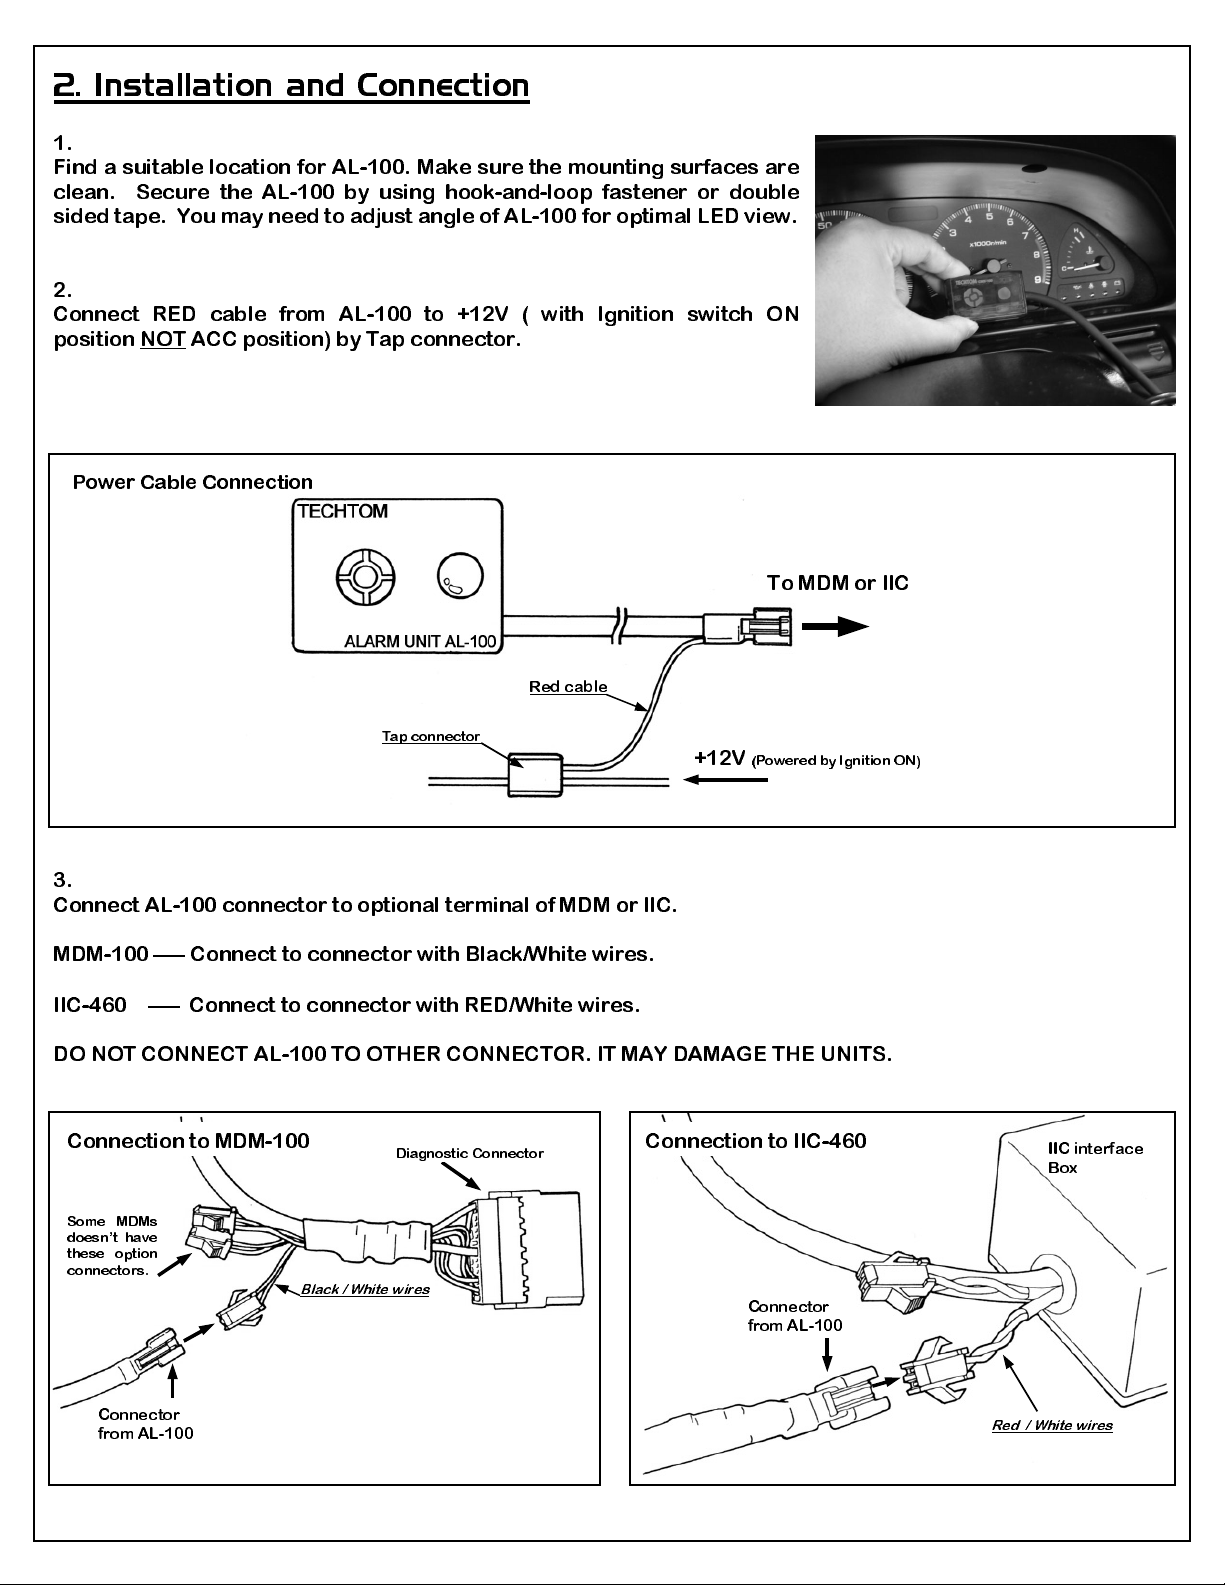
2. Installation and Connection
1.
Find a s itable l oca tio n for AL -100. Make s re the mo nt in g s rface s are
clean. Sec re the AL-100 by sing hook-and-loop fastener or do ble
sided tape. Yo may need to adj st angle of AL-100 for optimal LED view.
2.
Connect RED cable from AL-100 to +12V ( with Ignition switch ON
position NOT ACC position) by Tap connector.
3.
Connect AL-100 connector to optional terminal of MDM or IIC.
MDM-100 —– Connect to connector with Black/White wires.
IIC-460 —– Connect to connector with RED/White wires.
DO NOT CONNECT AL-100 TO OTHER CONNECTOR. IT MAY DAMAGE THE UNITS.
To MDM or IIC
Red cable
+12V
(Powered by Ignition ON)
Tap connector
Power Cable Connection
Connection to MDM-100
Connection to IIC-460
Diagnostic Connector
Some MDMs
doesn’t have
these option
connectors
Black / White wires
Connector
from AL-100
IIC interface
Box
Connector
from AL-100
Red / White wires

3. Setting Up
*To set up AL-100 for IIC-460 application, please refer to the IIC-460 instruction.
*To set up AL-100 for MDM-100Z FD3S), please refer to the instruction for MDM-100Z.
AL-100’s warning LED and b zzer will work at preset val e on one of the following items.
٨
Speed
٨
Engine RPM
٨
Water Temp.
٨
Air Flow Meter (Air Flow Meter is not available on MDM-100 for Toyota)
ALARM ENABLE SET
O F F
ALARM ENABLE SET
O N
Activate Alarm f ncti on
3. After entering 10th n mber, press and hold SELECT
b tton ntil Alarm settin g screen comes p.
4. By si n g UP or DOWN b tt on to enable alarm f nction
ON.
5. Press and hold SELECT b tton ntil alarm ite m selection
screen comes p.
A L A R M S E T U P
SPD Km/h
E N T E R C O D E
CODE= OOOOOOOOOOO
E N T E R C O D E
CODE= 0 0 3 4 8 9 9 4 9 6
Inp t Co de
1. Press and hol d SELECT b tt on then t rn the ign i tio n ON.
2. Release the b tto n when co de inp t screen com es p.
Enter the code by sing UP and Down b tton to set the
n mber, press SELECT to move to next n mber.
[CODE=0034899496]
A L A R M S E T U P
SPD Km/h
Alarm Set p
6. Choose the item yo want to enable alarm f nction.
7. Af ter selec tin g the item , press and hol d SELECT b tton
then c rrent setting val e for warning comes p in front
of the nit.
8. Use UP and DOWN b tt o n t o c han ge the val e to where
yo wa nt to alarm to be activate d.
9. Press and hol d SELECT b tton ntil MDM goes back to
normal operati n g mode.
A L A R M S E T U P
SPD>= 2 Km/h
A L A R M S E T U P
SPD>= 100 Km/h
Disable Alarm F ncti on
When yo need to disable alarm f nction, disable the
f nction by select in g OFF at alarm e na ble set screen.
Then yo may disconnect AL-100 if yo need to.
(Disconnecting Al-100 witho t disabling alarm f nction
may ca se da mage to M DM )
ALARM ENABLE SET
O N
ALARM ENABLE SET
O F F
4. Trouble S ooting
If AL-100 is not functioning properly, shut power off immediately and check the
connection of connectors and cable. If cause of problem is unknown, please contact
the dealer for technical support.
www .TechnoSquareIn c.com
Email: Con tact@Te ch noSq uar eInc. co m
TECHNOSQUARE, INC.
22521 S. Normandie Ave.
Torrance, CA 90501
Phone (310) 787-0847
FAX (310) 787-0948
1
. Technosquare, Inc warrants to the purchaser of this product that it will be free from defects in material and workmanship for a period of one (1) year from the date of
purchase. If the product should become defective within the warranty period, Technosquare, at it’s option, will repair or replace the product, or refund the purchaser’s
purchase price for the product, provided it is delivered at the purchaser’s expense to an authorized Technosquare service facility or to Technosquare.
2. Repair or replacement parts or products will be furnished on an exchange basis and will either be new or reconditioned. All replaced parts or products shall become the
property of Technosquare. This warrantyshall no applyif the product has been damaged by accident, misuse, abuse or as a result of unauthorized service or parts.
3. Warranty service is available to the purchaser by delivering the product during the warranty period to an authorized Technosquare service facilityor to Technosquare and
providing proof of purchase price and date. The purchaser shall bear all shipping, packing and insurance cost and all other costs, excluding labor and parts, necessary to
effectuate repair, replacement or refund under this warranty.
4. For more information on how to obtain warranty service, write or telephone Technosquare at 22521 Normandie Ave, Torrance, CA 90501, (310) 787-0847.
Limited 1-Year Hardware Warranty
IN-AL100-072202
Table of contents
Popular Automobile Accessories manuals by other brands


Samsung
Samsung HF1000 manual

Vixen Horns
Vixen Horns VXH1264Y installation guide

Temper
Temper CARdylet CL-CARGADOR-M-7.4/32-C user manual

Dakota Digital
Dakota Digital LED Tail Lights LAT-NR161 installation instructions

Bimmer Retrofit
Bimmer Retrofit GAT Next manual

Go Rhino
Go Rhino 3160MB Assembly instructions