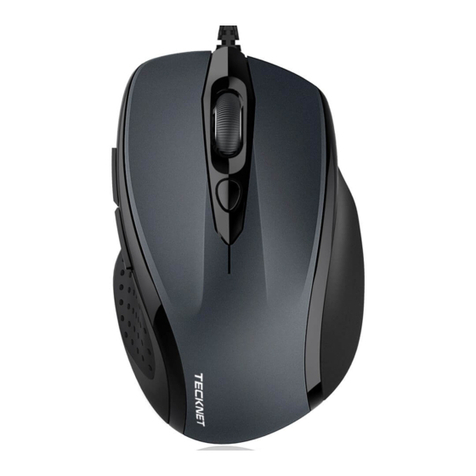
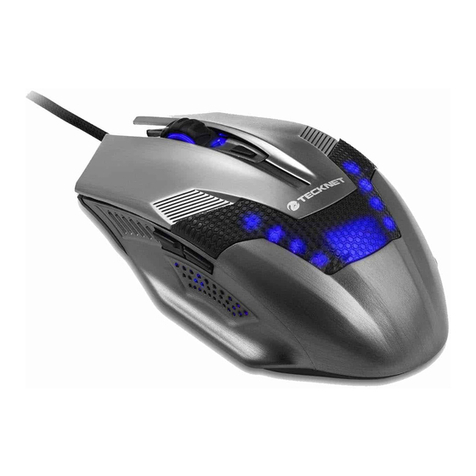
Tecknet EWM01576BA01 User manual

①
③
②
④
⑤
⑥
⑦
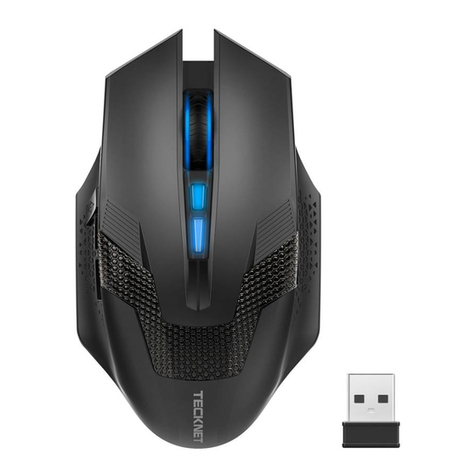
Package Contents:
User
Manual
x 1 x 1 x 1 x 1
Button Instructions:
Wireless Mouse
DE FR ES JPEN IT
User Manual

⑧
⑨
⑩
1. Left click button
2. Scroll wheel
3. Right click button
4. LED charging indicator
5. DPI Switch button
6. Forward button
7. Back button
8. Charging port
9. Power switch
10. Receiver
EN
1. Linksklicktaste
2. Scrollrad
3. Rechtsklicktaste
4. LED-Ladeanzeige
5. DPI-Wechseltaste
6. Vorwärtstaste
7. Zurück-Taste
8. Ladeanschluss
9. Netzschalter
10. Empfänger
DE
1. Bouton clic gauche
2. Molette de défilement
3. Bouton clic droit
4. Voyant de charge LED
5. Bouton changement DPI
6. Bouton avancer
7. Bouton reculer
8. Port de chargement
9. Bouton d’alimentation
10. Récepteur
FR
1. Botón de clic izquierdo
2. Rueda de desplazamiento
3. Botón de clic derecho
4. Indicador de carga LED
5. Botón de cambio de DPI
6. Botón de avance
7. Botón de retroceso
8. puerto de carga
9. Interruptor de encendido
10. Receptor
ES
1. Tasto sinistro
2. Rotellina di scorrimento
3. Tasto destro
4. Indicatore di ricarica LED
5. Tasto Interruttore DPI
6. Tasto Avanti
7. Tasto Indietro
8. Porta di ricarica
9. Interruttore di Alimentazione
10. Ricevitore
IT

System compatible:
Windows7/8/8.1/Mac/Android(Note: for MAC, the side buttons
cannot be used.)
The status of charging can be seen with the following LED
indicators.
Red: The battery is low
Orange: Charging
Off: Charging is complete
Charging method:
1. Connect the charging cable supplied with the mouse to
charge it. Connect the USB Type-C connector to the charging
port of the mouse and the USB A connector to a USB port
such as a PC as shown below.
2. Charging is complete when the LED turns off. Please unplug
the charging Cable.
(Charging time is about 3 to 4 hours)
Tips:
Even if the power switch is turned on, if the mouse has not been
used for a period of time, the mouse will go to sleep. Click the
mouse to return to working state.
(There may be a slight delay in the initial recovery)
Working current:
DPI:
Receive distance:
Battery capacity:
Charging Cable:
<3mA
800/1200/1600/2000/2400DPI
<10m
300mAH
Type-C
Product Specifications:
EN EN

Systemkompatibel:
Windows7/8/8.1/Mac/Android(Hinweis: Bei einem MAC können
die Seitentasten nicht verwendet werden.)
Der Ladezustand wird mit den folgenden LED-Anzeigen
angezeigt.
Rot: Der Akku ist schwach
Orange: Aufladen
Aus: Der Ladevorgang ist abgeschlossen
Lademethode:
1. Schließen Sie das mit der Maus gelieferte Ladekabel an, um
sie aufzuladen. Verbinden Sie den USB-Typ-C-Anschluss mit
dem Ladeanschluss der Maus und den USB-A-Anschluss mit
einem USB-Anschluss wie z. B. einem PC (siehe Abbildung
unten).
2. Der Ladevorgang ist abgeschlossen, wenn die LED erlischt.
Bitte ziehen Sie dann das Ladekabel ab.
(Die Ladezeit beträgt ca. 3 bis 4 Stunden)
Tipps:
Selbst wenn der Netzschalter eingeschaltet ist, die Maus längere
Zeit jedoch nicht benutzt wurde, geht die Maus in den
Ruhezustand. Klicken Sie mit der Maus, um zum Arbeitszustand
zurückzukehren.
(Es kann zu einer leichten Verzögerung bei der ersten
Wiederherstellung kommen)
Arbeitsstrom:
DPI:
Empfangsentfernung:
Batteriekapazität:
Ladekabel:
<3mA
800/1200/1600/2000/2400DPI
<10m
300mAH
Type-C
Produktspezifikationen:
DE DE

Systèmes compatibles:
Windows7/8/8.1/Mac/Android(Remarque : pour MAC, les
boutons latéraux ne peuvent pas être utilisés.)
Le statut du chargement est indiqué par les voyants LED
suivants.
Rouge : La batterie est faible
Orange : Chargement
Éteint : Chargement terminé
Méthode de chargement:
1. Connectez le câble de chargement fourni avec la souris pour
charger. Connectez le connecteur USB Type-C au port de
chargement de la souris et le connecteur USB A au port USB
comme un PC comme montré ci-dessous.
2. Lorsque le chargement est terminé, quand le LED s’éteint,
veuillez débrancher le câble de chargement.
(Le temps de chargement est d’environ 3 à 4 heures)
Conseils:
Même si le courant est éteint, si la souris n’a pas été utilisée
depuis longtemps, la souris va se mettre en veille. Cliquez sur
retour pour la réactiver.
(Il peut y avoir un décalage dans la récupération initiale)
Courant de fonctionnement :
DPI:
Portée de réception:
Capacité de la batterie:
Câble de chargement:
<3mA
800/1200/1600/2000/2400DPI
<10m
300mAH
Type-C
Spécifications du produit:
FR FR

Compatible con:
Windows7/8/8.1/Mac/Android(Nota: para MAC, no se pueden
usar los botones laterales.)
El estado de carga se puede ver con los siguientes indicadores
LED.
Rojo: la batería está baja
Naranja: carga
Apagado: la carga está completa
Método de carga:
1. Conecte el cable de carga suministrado con el mouse para
cargarlo. Conecte el conector USB tipo C al puerto de carga
del mouse y el conector USB A a un puerto USB como una PC,
como se muestra a continuación.
2. La carga se completa cuando el LED se apaga. Desenchufe el
cable de carga. El tiempo de carga es de aproximadamente 3
a 4 horas).
Consejos:
Incluso si el interruptor de encendido está on, si el mouse no se
ha utilizado durante un período, el mouse se apagará. Haga clic
con el mouse para volver al estado de trabajo. (Puede haber un
ligero retraso en la recuperación inicial)
Corriente de trabajo:
DPI:
Distancia de recepción:
Capacidad de la batería:
Cable de carga:
<3mA
800/1200/1600/2000/2400DPI
<10m
300mAH
Tipo-C
Especificaciones del producto:
ES ES

Compatibile con il sistema:
Windows7/8/8.1/Mac/Android(Nota: con il MAC non si possono
usare i tasti laterali.)
Lo stato della ricarica può essere visto con i seguenti indicatori
LED.
Rosso: la batteria è scarica
Arancione: ricarica in corso
Off: ricarica completata
Come si ricarica:
1. Collegare il cavo per la ricarica fornito con il mouse per
ricaricarlo. Collegare il connettore USB Type-C alla porta per
la ricarica del mouse e il connettore USB A ad una porta USB,
ad esempio ad un PC, come illustrato di seguito.
2. La ricarica è completa quando il LED si spegne. Scollegare il
Cavo per la ricarica.
(Il tempo di ricarica è di circa 3 a 4 ore)
Suggerimenti:
Anche se l'interruttore di alimentazione fosse acceso, se il
mouse non fosse stato usato per un periodo di tempo, il mouse
passerà alla modalità di sospensione (sleep). Fare clic con il
mouse per tornare allo stato di operatività.
(Potrebbe verificarsi un leggero ritardo nel recupero iniziale)
Corrente di funzionamento:
DPI:
Distanza di ricezione:
Capacità della batteria:
Cavo di ricarica
<3mA
800/1200/1600/2000/2400DPI
<10 metri
300mAH
Tipo-C
Specifiche del Prodotto:
ES ES

IMPORTANT SAFETY INSTRUCTIONS-CAREFULLY
FOLLOW THESE INSTRUCTIONS.
1. SAVE THESE INSTRUCTIONS - This sheet contains
important safety and operating instructions.
2. Before using the product, read all instructions and
caution markings on the product, accessories and
device using our product.
3. This appliance is not intended for use by persons
(including children) with reduced physical, sensory
or mental capabilities, or lack of experience and
knowledge, unless they have been given
supervision or instruction concerning use of the
appliance by a person responsible for their safety.
4. Children should be supervised to ensure that they
do not play with the appliance.
5. Keep the product away from fire or explosion may
occur.
6. Do not place product in or near inflammable,
explosive or hazardous object.
7. Do not place in or near water, rain, excess moisture
or extreme heat.
8. Do not operate product with damaged cord or
plug.
9. Do not operate product if it has been damaged in
any way.
10. Do not disassemble the product. Disassembly may
result in a risk of safety hazards.
11. Do not throw or shake the product.
Limited 18-Month warranty
What this warranty covers.
Shenzhen Unichain Technology Co., LTD. (Manufac-
turer: “Unichain”) warrants to the original purchaser
of this TeckNet product that the product shall be free of defects
in design, assembly, material, or workmanship.
What the period of coverage is.
Unichain warrants the TeckNet product for 18 Months.
What will we do to correct problems?
Unichain will repair or replace, at its option, any defective
product free of charge (except for shipping charges for the
product).
What is not covered by this warranty?
All above warranties are null and void if the TeckNet product is
not provided to Unichain for inspection upon Unichain’s
request at the sole expense of the purchaser, or if Unichain
determines that the TeckNet product has been improperly
installed, altered in any way, or tampered with. The TeckNet
Product Warranty does not protect against acts of God such as
flood, earthquake, lightning, war, vandalism, theft, normal-use
wear and tear, erosion, depletion, obsolescence, abuse, damage
due to low voltage disturbances (i.e. brownouts or sags),
non-authorized program, or system equipment modification or
alteration.
How to claim the warranty
Please contact retailers or visit TeckNet website
www.tecknet.co.uk for more information.
Disclaimer
Every effort has been made to ensure that the information and
procedures in this guide are accurate and complete, no liability
can be accepted for any errors or omissions and we reserve the
right to make any changes without further notice to any
products mentioned herein.
SHOPIVATE EURO LIMITED
20-22 Wenlock Road,London,UK,N1 7GU
EC REP
Table of contents
Languages:
Other Tecknet Mouse manuals

Tecknet
Tecknet bm306 User manual

Tecknet
Tecknet EUM01888 User manual

Tecknet
Tecknet M008 User manual

Tecknet
Tecknet M001 User manual

Tecknet
Tecknet M021 User manual

Tecknet
Tecknet M002 User manual

Tecknet
Tecknet WM389 Operating and safety instructions

Tecknet
Tecknet WM289 User manual

Tecknet
Tecknet TK-MS001 User manual

Tecknet
Tecknet UM013 User manual

Tecknet
Tecknet M011 User manual

Tecknet
Tecknet M002 User manual

Tecknet
Tecknet M001 User manual

Tecknet
Tecknet M010 User manual

Tecknet
Tecknet M001 User manual

Tecknet
Tecknet M002 User manual

Tecknet
Tecknet M001 User manual

Tecknet
Tecknet GM299 User manual

Tecknet
Tecknet M268 User manual

Tecknet
Tecknet X9800 User manual