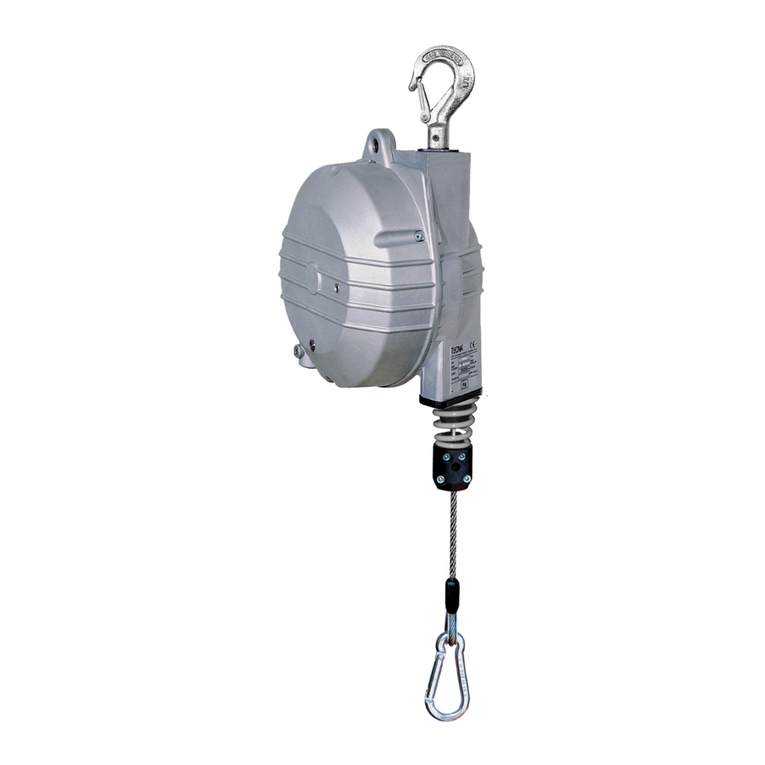
TECNA 9200 User manual

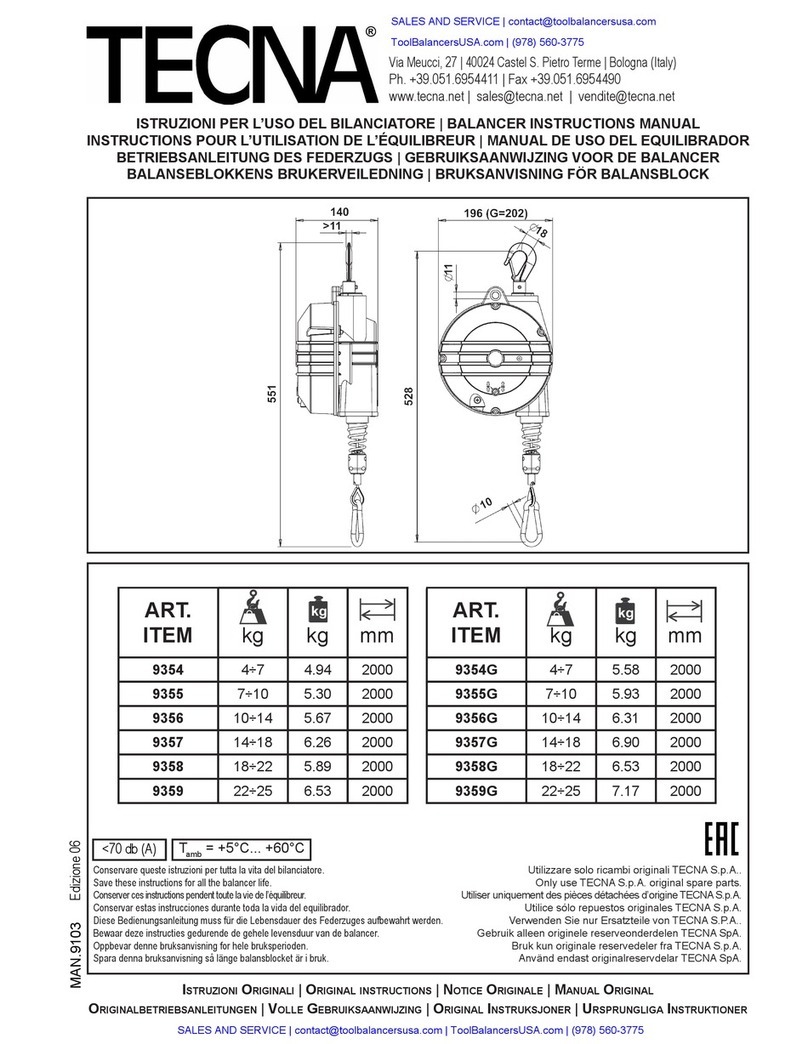
ART.
ITEM kg kg mm
9200 0.4÷0.8 1.25 1350
9201 0.75÷1.5 1.30 1350
9202 1.2÷2.5 1.35 1350
9203 3.0÷5.0 1.35 900
Via Meucci, 27 | 40024 Castel S. Pietro Terme | Bologna (Italy)
Ph. +39.051.6954411 | Fax +39.051.6954490
www.tecna.net | sales@tecna.net | vendite@tecna.net
ISTRUZIONI PER L’USO DEL BILANCIATORE | BALANCER INSTRUCTIONS MANUAL
INSTRUCTIONS POUR L’UTILISATION DE L’ÉQUILIBREUR | MANUAL DE USO DEL EQUILIBRADOR
BETRIEBSANLEITUNG DES FEDERZUGS | GEBRUIKSAANWIJZING VOOR DE BALANCER
BALANSEBLOKKENS BRUKERVEILEDNING | BRUKSANVISNING FÖR BALANSBLOCK
Tamb = +5°C... +60°C
Edizione 05
MAN.9109
<70 db (A)
ISTRUZIONI ORIGINALI | ORIGINAL INSTRUCTIONS | NOTICE ORIGINALE | MANUAL ORIGINAL
ORIGINALBETRIEBSANLEITUNGEN | VOLLE GEBRUIKSAANWIJZING | ORIGINAL INSTRUKSJONER | URSPRUNGLIGA INSTRUKTIONER
Utilizzare solo ricambi originali TECNA S.p.A..
Only use TECNA S.p.A. original spare parts.
Utiliser uniquement des pièces détachées d’origine TECNA S.p.A.
Utilice sólo repuestos originales TECNA S.p.A.
Verwenden Sie nur Ersatzteile von TECNA S.P.A..
Gebruik alleen originele reserveonderdelen Tecna SpA.
Bruk kun originale reservedeler fra TECNA S.p.A.
Använd endast originalreservdelar Tecna SpA.
Conservare queste istruzioni per tutta la vita del bilanciatore.
Save these instructions for all the balancer life.
Conserver ces instructions pendent toute la vie de l’équilibreur.
Conservar estas instrucciones durante toda la vida del equilibrador.
Diese Bedienungsanleitung muss für die Lebensdauer des Federzuges aufbewahrt werden.
Bewaar deze instructies gedurende de gehele levensduur van de balancer.
Oppbevar denne bruksanvisning for hele bruksperioden.
Spara denna bruksanvisning så länge balansblocket är i bruk.
ToolBalancersUSA.com | (978) 560-3775

2
Il bilanciatore deve essere installato prima di essere utilizzato. Tale operazione deve essere
eseguita nel rispetto delle istruzioni contenute in questo manuale da parte di persone esperte:
UN’INSTALLAZIONE NON CORRETTA PUÒ CAUSARE DANNI ALLE PERSONE E/O ALLE COSE.
Questo manuale contiene importanti informazioni che consentono di utilizzare l’apparecchio in
condizioni di sicurezza.
Assicurarsi di aver compreso bene tutte le istruzioni prima di utilizzare il bilanciatore.
IL MANCATO RISPETTO DI QUESTE AVVERTENZE PUÒ ARRECARE LESIONI.
Il bilanciatore è stato realizzato in conformità alle Direttive Comunitarie pertinenti ed applicabili nel momento della sua immissione
sul mercato, che prevedono la marcatura CE del prodotto.
USO PREVISTO
L’uso previsto di un bilanciatore è quello di annullare il peso costante di un utensile durante una movimentazione verticale.
Il bilanciatore è destinato esclusivamente ad essere utilizzato manualmente da un solo operatore alla volta.
Il bilanciatore è destinato ad utilizzo in ambiente chiuso con temperature tra 5°C e 60°C.
Per un migliore utilizzo del bilanciatore è consigliabile la sospensione baricentrica del carico.
con ogni norma relativa ai bilanciatori, utensili e posti di lavoro.
Portata del bilanciatore da valore minimo a valore massimo espressa in kg;
Lunghezza del tubo del bilanciatore espressa in mm;
Massa del bilanciatore in kg.
SPECIFICHE TECNICHE
Diametro interno del tubo: Ø 6 mm (9200/9201/9202) Ø 8 mm (9203)
Pressione massima nel tubo: 8 bar 8 bar
Temperatura massima dell’aria nel tubo: 50°C 50°C
Attacchi ingresso/uscita aria: G1/4 G3/8
La TECNA S.p.A. non è responsabile per utilizzi diversi da quelli sopra riportati.
USO IMPROPRIO
Non permettere l’utilizzo del bilanciatore da parte di minori.
Non operare, transitare o sostare sotto al bilanciatore e al suo carico.
Non idoneo per utilizzi in ambienti alimentari o medicali.
Non idoneo per utilizzo all’aperto o in ambienti con presenza di agenti chimici corrosivi.
Ad esclusione dei modelli ATEX i Bilanciatori non sono idonei per utilizzo in ambienti con atmosfera potenzialmente esplosiva.
Non utilizzare con carichi al di fuori di quelli riportati sulla targa.
PROVE STATICHE E DINAMICHE
Prove statiche e dinamiche (direttiva macchine 2006/42/EC, allegato I, punto 4.1.3) vengono eseguite a campioni per ogni lotto di
produzione.
Le prove statiche sono eseguite collegando al bilanciatore un carico 1.25 volte superiore alla portata massima, fatto accompagnare
bilanciatore caricato 1.1 volte carico massimo.
SCELTA DEL BILANCIATORE
Valutare il carico complessivo da equilibrare: utensile, accessori e parti dei tubi o cavi sostenuti dal bilanciatore. Il carico complessivo
da equilibrare deve essere compreso fra la portata minima e massima del bilanciatore.
MESSA IN SERVIZIO DEL BILANCIATORE
Valutare l’estensione dell’area di lavoro e, se opportuno, appendere il bilanciatore ad un carrello in modo da consentire il corretto
utilizzo in una zona di ampiezza adeguata all’attività da svolgere.
ISTRUZIONI ORIGINALI
IT

3
Per evitare usure anomale il carico deve essere applicato verticalmente. Il bilanciatore deve poter essere libero di muoversi nella
sua sospensione cosi che possa allinearsi alla direzione del carico.
Il bilanciatore deve essere installato su una struttura con opportuna resistenza meccanica. Resistenza meccanica struttura > 5*(Peso
Bilanciatore + Carico MAX.).
È possibile installare più bilanciatori ad una medesima struttura principale fatto salvo che ognuno abbia un attacco indipendente e
che la struttura abbia resistenza meccanica superiore 5 volte al peso di tutti i bilanciatori e dei relativi carichi massimi.
È possibile installare più bilanciatori ad una medesima struttura secondaria (fune di sicurezza) fatto salvo che ognuno abbia un attacco
indipendente e che la struttura abbia resistenza meccanica superiore 5 volte al peso di tutti i bilanciatori e dei relativi carichi massimi.
In fase di messa in funzione si suggerisce di utilizzare la seguente procedura:
- Collegare il dispositivo di sicurezza alla struttura secondaria.
- Sollevare il carico da collegare al bilanciatore.
- Collegare il tubo (23) (Fig.2) al nipplo (16) (Fig.2);
- Collegare l’alimentazione di aria compressa al nipplo del tubo (23) (Fig.2);
- Collegare l’utensile al nipplo (21) (Fig.2-4).
- Fare scendere il carico facendo srotolare il tubo del bilanciatore e regolare il morsetto limitatore di corsa per non portare il carico
al di sopra dell’operatore (immagini di come eseguire la regolazione).
la forza del bilanciatore. Ruotare nel senso indicato dal segno – per diminuire la forza del bilanciatore.
dell’attrezzatura, evitando zone d’ombra, abbagliamenti ed effetti stroboscopici.
Attenzione!!! Per i bilanciatori non dotati di gancio di sospensione è opportuno predisporre un attacco che non blocchi i movimenti
(oscillazione e rotazione) necessari al corretto funzionamento del bilanciatore.
Utilizzare il foro (A) (Fig.1) per la sospensione principale e il foro (S) (Fig.1) per la sospensione di
sicurezza.
Collegare sempre la sospensione di sicurezza (S) utilizzando esclusivamente gli accessori forniti
in dotazione (Fig.1) ad un sostegno opportunamente dimensionato. Il supporto di sicurezza NON
DEVE ESSERE lo stesso usato per la sospensione principale (A) (Fig.1). La massima caduta in
caso di rottura della sospensione principale non deve essere maggiore di 100 mm. Serrare i
dadi dei morsetti 21215 (Fig.1) con una coppia di 2 Nm.
REGOLAZIONE DEL BILANCIATORE
Per permettere al bilanciatore di equilibrare carichi maggiori entro la capacità di carico ammessa, ruotare il pomello (4) come mo-
strato in (Fig.2) (in senso antiorario,indicato dal segno “+”.la regolazione non è continua, ma a scatti: dopo ogni scatto il pomello (4)
deve tornare a contatto con la targa (5) (Fig.2). Per carichi più leggeri estrarre il pomello (4) e, tenendolo ben stretto, ruotarlo come
mostrato in (Fig.3): dopo ogni scatto il pomello deve tornare a contatto con la targa (5) (Fig.3).
rompendo. NON MODIFICARE LA REGOLAZIONE DEL BILANCIATORE PER SOPPORTARE UGUALMENTE IL CARICO MA
INTERPELLARE IMMEDIATAMENTE IL PERSONALE SPECIALIZZATO AUTORIZZATO ALLA MANUTENZIONE.
Non utilizzare con carico massimo applicato superiore al carico massimo consentito e bilanciato mediante l’uso del regolatore.
UTILIZZO DEL BILANCIATORE
Impugnare l’utensile appeso al bilanciatore ed effettuare le operazioni richieste; quindi accompagnare l’utensile in una posizione di
equilibrio, sulla verticale del bilanciatore, e rilasciarlo.
Lo svolgimento del tubo non deve mai essere completo: la corsa di lavoro deve terminare almeno 100 mm prima del limite inferiore
della corsa .
Se necessario spostare e bloccare il morsetto (18) (Fig.4) per limitare la corsa verso I’alto.
Non sganciare il carico se il morsetto (18) (Fig.4) non è appoggiato alla graffatura del tubo (PO-
SIZIONE VISIBILE IN FIGURA 4).
- non abbandonare il carico in posizione non verticale;
- non lanciare il carico appeso ad un altro operatore;
- non spostare il carico tirando la fune del bilanciatore;
- non appendere carichi non compresi tra i limiti superiore e inferiore della portata ammessa;
- non appendere più di un utensile al bilanciatore.
ISTRUZIONI ORIGINALI IT

4
Il rischio maggiore connesso con l’uso del bilanciatore consiste nell’eventuale riavvolgimento
incontrollato del tubo.
1 se, per qualsiasi motivo, il tubo non viene riavvolto dal bilanciatore, NON intervenire e interpellare immediatamente il servizio assistenza;
2 non sganciare mai il carico se il tubo non è completamente avvolto nel tamburo, evitare il contatto del tubo con il passatubo;
3 nel caso si trovasse il bilanciatore con il tubo svolto e nessun carico applicato, NON intervenire e interpellare immediatamente il
servizio assistenza.
4 Durante l’uso il tubo deve essere dritto e non deve essere in contatto con rimandi o pulegge o eventuali strutture esterne poste in
vicinanza del punto di installazione ed utilizzo del bilanciatore.
5 È consentito l’utilizzo del bilanciatore esclusivamente con il tubo in verticale.
6 La regolazione della corsa del bilanciatore deve essere tale da garantire la posizione dell’utensile ad una altezza pari o inferiore
7 Non torcere (oltre 360°) il tubo durante l’uso, se il carico deve ruotare rispetto al bilanciatore prevedere l’uso di opportuno accessorio.
Dopo l’intervento dei dispositivi che evitano la caduta del carico o il rientro incontrollato della
fune è necessaria una revisione del bilanciatore. A tal proposito contattare il Vs. rivenditore.
Quando il bilanciatore viene utilizzato con un utensile elettrico fare riferimento al manuale di
quest’ultimo per la gestione degli eventuali rischi residui.
Non utilizzare il bilanciatore impugnandolo dal tubo, ma impugnare l’utensile ad esso collegato.
SOSTITUZIONE DEL CARICO/CAMBIO UTENSILE
Prima di procedere al cambio utensile è necessario riavvolgere completamente il tubo del bilanciatore senza utilizzare il dispositivo
di regolazione della corsa come dispositivo di blocco.
Se sono presenti dispositivi di blocco è possibile anche procedere nella seguente maniera:
- Sostenere il carico in maniera differente (non tramite il tubo del bilanciatore).
- Scollegare il carico dal bilanciatore.
- Collegare il nuovo carico, portarlo in posizione verticale al di sotto del bilanciatore con tubo in tensione.
- Regolare il bilanciatore, se necessario, per equilibrare il nuovo carico (nuovo carico con peso differente dal precedente).
Non allontanarsi per nessun motivo dal bilanciatore se a questo non è collegato un carico.
ISPEZIONE
Il bilanciatore deve essere regolarmente sottoposto a ispezione visiva (per esempio una volta per ogni turno di lavoro), in particolare
del tubo e dei raccordi pneumatici.
- Non rimuovere alcuna targhetta. Far sostituire qualsiasi targhetta deteriorata;
- Almeno una volta all’anno il bilanciatore deve essere ispezionato da personale specializzato e autorizzato.
In caso di comportamento anomalo del bilanciatore contattare il Vs. rivenditore.
MANUTENZIONE
La manutenzione può essere effettuata solo da personale specializzato e autorizzato.
Utilizzare solo ricambi originali TECNA S.p.A.. Per la richiesta di parti di ricambio, il Cliente è pregato di rivolgersi al fornitore dell’ap-
fornitore o direttamente il costruttore.
Non disassemblare mai il bilanciatore. La manutenzione deve essere eseguita solo da personale
specializzato e autorizzato.
GARANZIA
fa decadere
la garanzia.
ATTENZIONE: Il tubo e la molla del tamburo non sono coperti da garanzia.
ISTRUZIONI ORIGINALI
IT

5
SMALTIMENTO
Al termine della vita operativa del bilanciatore procedere come segue:
- Riavvolgere completamente il tubo.
- Scollegare il carico dal bilanciatore
- Scollegare il bilanciatore dalle sospensioni primaria e di sicurezza.
- Procedere a scaricare completamente la molla del bilanciatore.
Scaricato il bilanciatore è possibile procedere alla rottamazione dello stesso nel rispetto delle normativa vigente in merito.
ISTRUZIONI ORIGINALI IT

6
Install the balancer before using it. This operation is to be carried out by skilled personnel who
must comply with the directions outlined in this manual:
A WRONG INSTALLATION COULD CAUSE INJURY/DAMAGE TO PEOPLE/PROPERTY.
This manual contains important information in order to use the balancer safely.
Be sure to have clearly understood all the instructions before using the balancer.
FAILURE TO DO SO COULD CAUSE INJURY.
The balancer was built in conformity with European Community Directives that were pertinent and applicable when the balancer was
put on the market and that entail the CE marking of the product.
INTENDED USE
The intended use of a balancer is to eliminate the constant weight of a tool during a vertical movement.
The balancer is only intended to be used manually by one operator at a time.
The balancer is intended to be used indoors with temperatures between 5°C and 60°C.
For a better use of the balancer, it is recommended that the load is suspended at the centre of gravity.
-
dance with every regulation with regard to balancers, tools and workplaces.
Balancer capacity from minimum to maximum value expressed in kg;
Length of the balancer pipe expressed in mm;
Balancer mass in kg.
TECHNICAL SPECIFICATIONS
Internal diameter of the pipe: Ø 6 mm (9200/9201/9202) Ø 8 mm (9203)
Maximum pressure: 8 bar 8 bar
Maximum temperature: 50°C 50°C
Air inlet/outlet connections: G1/4 G3/8
TECNA S.p.A. will not be deemed liable for using these balancers for any other application.
MISUSE
Do not permit children or people under age to use the balancer.
Do not work, transit or linger underneath the balancer.
Do not use in food or medical environments.
Do not use outdoors or in environments with corrosive chemicals.
Except for ATEX models, Balancers are not suitable for use in environments with potentially explosive atmospheres.
Do not use with loads beyond those shown on the data plate.
STATIC AND DYNAMIC TESTS
Static and Dynamic sample testing (Machine Directive 2006/42/EC, Annex I, section 4.1.3) are performed for each production lot.
The static tests are performed by connecting to the balancer a load 1.25 times higher than the maximum allowed capacity then by
accompanying it to the stroke end (rope all out) for 10 minutes (as reported on DIN 15112:1979).
The dynamic test is performed by checking the proper operation of the balancer (rope extraction and rewinding) for 1-hour time with
the balancer charged 1.1 times the maximum allowed load.
CHOOSING THE BALANCER
Assess the total load to be balanced: tool, accessories and sections of hoses or cables to be lifted by the balancer. The overall load
to be balanced must fall within the balancer’s minimum and maximum load-bearing capacity.
STARTING UP THE BALANCER
Assess the range of the work area and, if appropriate, hang the balancer to a roller guide to be able to use it properly in an area
wide enough to carry out the required activities.
In order to avoid anomalous wear, the load must be applied vertically. The balancer must in any case be free to move in its suspension
so that it can line up with the direction of the load.
The balancer must be installed on a structure having an adequate mechanical resistance. Mechanical resistance of the structure >
5*(Balancer weight + Max load).
TRANSLATION OF THE ORIGINAL INSTRUCTIONS
EN

7
It is possible to install more than one balancer to the same main structure only if each balancer has an independent connection
It is possible to install more than one balancer to the same secondary structure (i.e. safety rope) only if each balancer has an
plus all maximum loads.
When starting up a balancer, we suggest that the following procedure is used:
- Connect the safety device to the secondary structure.
- Lift the load to be hanged to the balancer.
- Connect pipe (23) (Fig.2) to nipple (16) (Fig.2);
- Connect the compressed air supply to the nipple on pipe (23) (Fig.2);
- Connect the tool to nipple (21) (Fig.2-4).
- Lower the load by unwinding the balancer’s pipe and adjust the stroke limiter clamp to avoid bringing the load above the operator.
- Adjust the balancer strength as long as the hanged load is balanced. Rotate in the direction of the + sign to increase the strength
of the balancer. Rotate in the direction of the – sign to decrease the strength of the balancer.
Ensure that the working area is adequately lightened to allow a good overview of the operations and of all the equipment, avoiding
dark areas, dazzling and strobe effects.
to block the movements (oscillations and rotations) which are functional to the correct operation of the balancer itself.
Use the hole (A) (Fig.1) for main suspension and hole (S) (Fig.1) for safety suspension.
Always connect the safety suspension (S), with exclusive use of the supplied standard
fittings (Fig.1), to a suitably sized support. The safety support MUST NOT BE the same one
used for the main suspension (A) (Fig.1). If the main suspension breaks, the max falling
distance must not be more than 100 mm. Tighten the nuts of the clamps 21215 (Fig.1) with
a torque of 2 Nm.
BALANCER ADJUSTMENT
To allow the balancer to balance heavier loads within the load capacity accepted, turn knob (4) as shown in (Fig.2) (anti-clockwise,
indicated by the “+”.symbol, adjustment is not continuous but in steps: after each step, the knob (4) must go back into contact with
plate (5) (Fig.2). For lighter loads, extract the knob (4) and, gripping it tightly, turn it as shown in (Fig.3): after each step, the knob
must go back into contact with plate (5) (Fig.3).
When the load has been adjusted, check that the entire length of the pipe can run freely: the movement must not be limited by the
complete winding of the spring. Check the stroke several times at different speeds.
NOTE: a reduction of the ability of the balancer to hold the hanging load might mean that the drum spring is about to break. DO NOT
MODIFY THE BALANCER ADJUSTMENT TO SUSTAIN THE LOAD ANYHOW, INSTEAD CALL IMMEDIATELY THE SPECIALIZED
PERSONNEL AUTHORIZED TO MAINTENANCE.
Do not use by hanging a maximum load greater than the maximum load allowed and by balancing the same through the regulator.
USING THE BALANCER
Grip the tool hanging from the balancer and carry out the required operations. Then accompany the tool as far as it balances, on
the vertical line of the balancer, and release it.
The load to be balanced must be hung on snap-hook (24) (Fig.4). Ensure that the snap-hook is closed correctly after having hung
the load.
The pipe must never be fully unwound: the work travel must end at least 100 mm before it reaches the lower limit of the run:
If necessary, move and block the clamp (18) (Fig.4) to limit the upward run.
Do not unhook the load if the clamp (18) (Fig.4) does not lean onto the pipe’s swaging (POSITION
SHOWN IN FIGURE 4).
- Do not leave the load if it is not in a vertical position;
- Do not swing/throw the hanging load to another operator;
- Do not move the load by pulling the balancer’s rope;
- Do not hang loads that are not within the upper and lower ranges of the admissible load-bearing capacity;
- Do not hang more than one tool on the balancer.
The highest risk linked to the use of the balancer consists in the uncontrolled rewinding of the
pipe.
1 If, for any reason, the pipe is not rewound by the balancer, DO NOT intervene and call immediately the maintenance service;
TRANSLATION OF THE ORIGINAL INSTRUCTIONS EN

8
2 Never unhook the load if the pipe is not completely wound in the drum, prevent the pipe from touching the pipe-guide.
the maintenance service;
4 During use, the pipe must be straight and must not be in contact with any pulley, ring or external structure close to the place where
the balancer is installed and used;
5 The use of the balancer is allowed only with its pipe in a vertical position.
6 The adjustment of the balancer stroke must be done so to ensure the positioning of the tool at a height equal or lower to that of
the operator, notwithstanding the place where the balancer is installed.
7 Do not twist (beyond 360°) the pipe during use, if the load must turn during operation then provide that the dedicated tool is used.
8 Should the balancer be provided with a locking device, use it when the tool hung to it is not used (end of work shift).
After the intervention of the devices that avoid the load fall or the uncontrolled rewinding of the
rope, a revision of the balancer is necessary. To this end, contact your dealer.
When the balancer is used with an electrical tool, please refer to the user manual of the electrical
tool for the management of eventual residual risks.
Do not use the balancer by holding it from the pipe; hold only the hanged tool.
CHANGING THE LOAD / CHANGING THE TOOL
Before proceeding with the tool change, it is necessary to rewind completely the balancer pipe without using the stroke adjustment
device as a locking device.
Should the balancer be provided with locking devices, it is also possible to proceed as follows:
- Sustain the load in a different way (not through the balancer pipe).
- Unhook the load from the balancer
- Hook the new load; bring it to a vertical position below the balancer with the pipe stretched.
- Adjust the balancer, if needed, to balance the new load (when the new load has a different weight).
Do not move away from the balancer if a load is not hooked.
INSPECTION
To check the cables, regarding rejection criteria (cable replacement), refer to ISO 4309:2011.
(See Fig.5 for some examples).
- check that the pipe’s movement is smooth and that it does not make any strange noises;
- do not remove any labels. Replace any damaged labels;
- the balancer must be inspected at least once a year by skilled, authorized personnel.
In case of unusual behaviour of the balancer, contact your dealer.
MAINTENANCE
Maintenance may be carried out only by skilled and authorized personnel.
Use original TECNA S.p.A. spare parts only. When requesting spare parts, the Customer should kindly contact the supplier of the
the supplier or the manufacturer directly.
Never disassemble the balancer. Maintenance is to be carried out only by skilled, authorized
personnel.
WARRANTY
The use of non-original TECNA S.p.A. spare parts will negatively affect safety and performance and, in any case, it will void the warranty.
WARNING: The pipe and the drum-spring are not covered by warranty.
TRANSLATION OF THE ORIGINAL INSTRUCTIONS
EN

9
DISPOSAL
At the end of the work life of the balancer, proceed as follows:
- Rewind the pipe completely
- Unhook the load from the balancer
- Unhook the balancer from the primary and safety connections.
- Proceed to fully discharge the balancer spring.
Once the balancer has been discharged, it must be disposed of complying with the rules and regulations in force.
TRANSLATION OF THE ORIGINAL INSTRUCTIONS EN

10
L’équilibreur doit être installé avant d’être utilisé. Cette opération doit être effectuée par des
UNE MAUVAISE INSTALLATION PEUT CAUSER DES DOMMAGES AUX PERSONNES ET/OU AUX
CHOSES.
Ce manuel contient des informations importantes permettant d’utiliser l’appareil en sécurité.
S’assurer d’avoir compris toutes les instructions avant d’utiliser l’équilibreur.
LE NON-RESPECT DE CES AVERTISSEMENTS PEUT CAUSER DES BLESSURES.
L’équilibreur a été réalisé conformément aux Directives Communautaires pertinentes et applicables au moment où il a été mis sur
le marché, prévoyant le marquage CE du produit.
USAGE PREVU
L’utilisation prévue pour un équilibreur est celle d’annuler le poids constant d’un outil lors d’un mouvement vertical.
L’équilibreur est destiné uniquement à être utilisé manuellement par un seul opérateur à la fois.
L’équilibreur est destiné à être utilisé dans un environnement fermé à des températures comprises entre 5°C et 60°C.
On recommande une suspension barycentrique de la charge pour une meilleure utilisation de l’équilibreur.
Il est nécessaire d’utiliser, de contrôler et de conserver en parfait état de fonctionnement l’éq-
uilibreur, conformément à toute norme relative aux équilibreurs, aux outils et aux postes de
travail.
Capacité de l’équilibreur de la valeur minimum à la valeur maximum en kg;
Longueur du tube de l’équilibreur en mm;
Masse de l’équilibreur en kg.
SPÉCIFICATIONS TECHNIQUES
Diamètre intérieur du tube: Ø 6 mm (9200/9201/9202) Ø 8 mm (9203)
Pression maximale: 8 bar 8 bar
Température maximale: 50°C 50°C
Raccords entrée/sortie d’air: G1/4 G3/8
La société TECNA S.p.A. n’est pas responsable envers les clients qui utilisent ces équilibreurs pour d’autres applications.
USAGE IMPROPRE
Ne pas permettre l’utilisation de l’équilibreur par des mineurs.
Ne pas travailler, passer ou stationner sous l’équilibreur et sa charge.
Ne s’adapte pas à une utilisation dans des environnements de produits alimentaires ou pharmaceutiques.
Ne s’adapte pas à une utilisation en extérieur ou en présence de produits chimiques corrosifs.
En excluant les modèles ATEX les équilibreurs ne sont pas adaptés pour une utilisation dans des milieux présentant une atmosphère
potentiellement explosive.
N’utiliser pas avec des charges supérieures à celles indiquées sur la plaque signalétique.
TESTS STATIQUES ET DINAMIQUES
Les tests statiques et dynamiques (Directive Machines 2006/42/EC, annexe I, point 4.1.3) ont été effectués sur des échantillons
aléatoires prélevés de chaque lot de fabrication.
Les tests statiques sont effectués en appliquant à l’équilibreur une charge de 1.25 fois plus élevée que la charge maximale et faite
15112:1979).
pendant 1 heure de temps avec l’équilibreur chargé 1.1 fois par rapport à la charge maximale.
CHOIX DE L’EQUILIBREUR
globale à équilibrer doit être comprise entre la capacité minimale et la capacité maximale de l’équilibreur.
MISE EN SERVICE DE L’EQUILIBREUR
une zone dont l’étendue est adaptée à l’action à accomplir.
TRADUCTION DE LA NOTICE ORIGINALE
FR

11
ou d’autres systèmes de sécurité.
Pour éviter toute usure anormale, la charge doit être appliquée verticalement. L’équilibreur doit être libre de se déplacer dans sa
suspension pour s’aligner à la direction de la charge.
L’équilibreur doit être installé sur une structure à résistance mécanique appropriée. Résistance mécanique de la structure > 5 *
(Poids Equilibreur + charge MAX.).
Il est possible d’installer plusieurs équilibreurs à la même structure principale, sauf que chacun a une attaque séparée et que la
structure possède une résistance mécanique supérieure à 5 fois le poids de tous les équilibreurs et de leurs charges maximales.
séparée et que la structure possède une résistance mécanique supérieure à 5 fois le poids de tous les équilibreurs et de leurs
charges maximales.
Pendant la mise en service, il est suggéré de suivre la procédure suivante:
- Relier le dispositif de sécurité à la structure secondaire.
- Soulever la charge à attacher à l’équilibreur.
- Connecter le tube (23) (Fig.2) au nipple (16) (Fig.2);
- Connecter l’alimentation d’air comprimé au nipple du tube (23) (Fig.2);
- Connecter l’outil au nipple (21) (Fig.2-4).
de dépasser la hauteur de l’opérateur.
- Régler la force de l’équilibreur pour équilibrer la charge appliquée. Tourner dans le sens indiqué par le signe + pour augmenter la
force de l’équilibreur. Tourner dans le sens indiqué par le signe - pour diminuer la force de l’équilibreur.
Attention!!! Pour les équilibreurs pas équipés de crochet de suspension, il convient de prédisposer une attache qui ne bloque pas
les mouvements (oscillation et rotation) requis pour le bon fonctionnement de l’équilibreur.
Utiliser le trou (A) (Fig.1) pour la suspension principale et le trou (S) (Fig.1) pour la suspension
de sécurité.
Relier toujours la suspension de sécurité (S) en utilisant uniquement les accessoires fournis
avec l’équilibreur (Fig.1), à un support bien dimensionné. Le support de sécurité NE DOIT PAS
ETRE le même que celui utilisé pour la suspension principale (A) (Fig.1). La chute maximale en
cas de rupture de la suspension principale ne doit pas être de plus de 100 mm. Serrer les écrous
des serrages 21215 (Fig.1) au couple de 2 Nm.
REGLAGE DE L’EQUILIBREUR
Pour permettre à l’équilibreur d’équilibrer des charges plus grandes, dans la capacité de charge admise, tourner le bouton (4)
mais à déclic): après chaque déclic, le bouton (4) doit revenir en contact avec la plaque (5) (Fig.2). Pour des charges plus légères,
extraire le bouton (4) et, en le tenant fermement, le tourner comme indiqué sur la (Fig.3): après chaque déclic, le bouton doit revenir
en contact avec la plaque (5) (Fig.3).
en train de se casser. NE PAS MODIFIER LE RÉGLAGE DE L’ÉQUILIBREUR POUR SUPPORTER QUAND MÊME LA CHARGE,
MAIS CONSULTER IMMÉDIATEMENT LE PERSONNEL SPÉCIALISÉ AUTORISÉ A L’ENTRETIEN.
régulateur.
UTILISATION DE L’EQUILIBREUR
Empoigner l’outil suspendu à l’équilibreur et effectuer les opérations nécessaires; puis accompagner l’outil dans une position d’éq-
Le déroulement du tube ne doit jamais être total: la course de travail doit se terminer au moins 100 mm avant la limite inférieure
de la course.
Si nécessaire, déplacer et bloquer le serrage (18) (Fig.4) pour limiter la course vers le haut.
Si nécessaire, déplacer et bloquer le serrage (18) (Fig.4) pour limiter la course vers le haut.
Ne pas décrocher la charge si la borne (20) (Fig.4) n’est pas appuyée à l’agrafage du tube (PO-
SITION VISIBLE A LA FIGURE 4).
TRADUCTION DE LA NOTICE ORIGINALE FR

12
- Ne pas abandonner la charge en position non verticale;
- Ne pas lancer la charge suspendue à un autre opérateur;
- Ne pas suspendre des charges non comprises entre les limites supérieure et inférieure de la capacité admise;
- Ne pas suspendre plus d’un outil à l’équilibreur.
Le risque le plus grand lié à l’utilisation de l’équilibreur consiste en l’éventuel ré-enroulement
incontrôlé du tube;
1 Si, pour quelque raison que ce soit, le tube n’est pas ré enroulé par l’équilibreur, NE PAS intervenir et contacter immédiatement le
service d’assistance;
2 Ne jamais décrocher la charge si le tube n’est pas complètement enroulé sur le tambour, éviter le contact du tube avec le passe-tube;
3 Si l’on trouve l’équilibreur avec le tube déroulé et aucune charge appliquée, NE PAS intervenir et contacter immédiatement le service
d’assistance.
4 Pendant l’utilisation, le tube doit être vertical et ne doit pas être en contact avec des poulies ou des structures externes ou situées
dans la proximité du point de l’installation et d’utilisation de l’équilibreur.
5 L’utilisation de l’équilibreur est autorisée uniquement avec le tube en vertical.
6 Le réglage de la course de l’équilibreur doit assurer la position de l’outil à une hauteur inférieure ou égale à l’opérateur, quel que ce
soit le point d’accrochage de la machine.
7 Ne pas tourner (au-delà de 360°) le tube pendant l’utilisation, si la charge doit tourner par rapport à l’équilibreur il faut prévoir l’utilisation
de l’accessoire approprié.
Après l’intervention des dispositifs qui empêchent à la charge de tomber ou le ré-enroulement
incontrôlé du câble il est nécessaire une révision de l’équilibreur. À cet égard, veuillez contacter
votre revendeur.
Lorsque l’équilibreur est utilisé avec un outil électrique, il faut faire référence à sa notice d’uti-
lisation pour la gestion de tous les risques résiduels.
Ne pas utiliser l’équilibreur en le prenant par le tube. Au contraire, il faut saisir le bien l’outil
relié.
REMPLACEMENT DE LA CHARGE / CHANGEMENT D’OUTIL
Avant de décrocher l’outil, il est nécessaire d’enrouler complètement le tube de l’équilibreur sans utiliser le dispositif de réglage de
la course en tant que système de blocage.
S’il y a des systèmes de blocage, il est aussi possible de procéder de la manière suivante:
- Supporter la charge d’une manière différente (pas avec le tube de l’équilibreur).
- Décrocher la charge de l’équilibreur.
- Accrocher la nouvelle charge, la positionner verticalement au-dessous de l’équilibreur avec le tube en tension.
- Régler l’équilibreur, si nécessaire, pour équilibrer la nouvelle charge (nouvelle charge avec un poids différent de la précédente).
Ne jamais s’éloigner de l’équilibreur s’il n’y a pas une charge accroché au même.
INSPECTION
L’équilibreur doit être soumis régulièrement à une inspection visuelle (par exemple une fois pour chaque période de travail), notam-
câble), faire référence aux prescriptions de la norme ISO 4309:2011. (Quelques exemples, voir
- N’enlever aucune étiquette. Faire remplacer toute étiquette endommagée;
- Au moins une fois par an, l’équilibreur doit être contrôlé par du personnel spécialisé et autorisé.
En cas de comportement anormal de l’équilibrer, veuillez contacter votre revendeur.
TRADUCTION DE LA NOTICE ORIGINALE
FR

13
ENTRETIEN
L’entretien peut être effectué uniquement par du personnel spécialisé et autorisé.
Utiliser uniquement des pièces détachées d’origine TECNA S.p.A. Pour la commande des pièces détachées, le client est prié de
fournisseur ou directement le constructeur.
Ne jamais désassembler l’équilibreur. L’entretien doit être effectué uniquement par du personnel
spécialisé et autorisé.
GARANTIE
L’utilisation de pièces détachées non d’origine TECNA S.p.A. nuit à la sécurité, aux performances et, en tout cas, entraîne l’annu-
lation de la garantie.
ATTENTION: le tube et le ressort du tambour ne sont pas couverts par la garantie.
FIN DE VIE
- Enrouler le tube complètement.
- Décrocher la charge de l’équilibreur.
- Décrocher l’équilibreur de la suspension primaire et de sécurité.
- Décharger complètement le ressort de l’équilibreur.
Après avoir déchargé l’équilibreur, il est possible de procéder à la démolition conformément aux normes en vigueur.
TRADUCTION DE LA NOTICE ORIGINALE FR

14
El equilibrador debe ser instalado antes del uso. Esta operación debe ser realizada por personas
expertas, en observancia de las instrucciones contenidas en este manual:
UNA INSTALACIÓN INCORRECTA PUEDE CAUSAR DAÑOS A PERSONAS Y/U OBJETOS.
Este manual contiene importante información para utilizar el aparato en condiciones de seguridad.
Cerciórese de haber comprendido bien todas las instrucciones antes de utilizar el equilibrador.
LA INOBSERVANCIA DE ESTAS ADVERTENCIAS PUEDE CAUSAR LESIONES.
El equilibrador ha sido realizado en conformidad con las Directivas Comunitarias pertinentes y aplicables en el momento de su
lanzamiento en el mercado, que prevén la marca CE del producto.
USO PREVISTO
El uso previsto de un equilibrador es anular el peso constante de una herramienta durante un movimiento vertical.
El equilibrador se diseñó para ser utilizado sólo manualmente por un operador a la vez.
El equilibrador es para uso en ambiente cerrado, con temperaturas entre 5 ° C y 60 ° C.
Para un mejor uso del equilibrador se recomienda de suspender la carga cerca de su centro de gravedad.
Es necesario utilizar, controlar y conservar el equilibrador en perfectas condiciones, en confor-
midad con todas las normas relativas a los equilibradores, utensilios y puestos de trabajo.
Capacidad del equilibrador de valor mínimo a valor máximo expreso en kg;
Longitud del tubo del equilibrador expreso en mm;
Cuerpo del equilibrador en kg.
ESPECIFICACIONES TÉCNICAS
Diámetro interior del tubo: Ø 6 mm (9200/9201/9202) Ø 8 mm (9203)
Presión máxima: 8 bar 8 bar
Temperatura máxima: 50°C 50°C
Conexiones entrada/salida aire: G1/4 G3/8
TECNA S.p.A. no es responsable ante aquellos clientes que utilizan estos equilibradores para otras aplicaciones.
USO IMPROPIO
No permita que el equilibrador sea utilizado por menores.
No trabaje, transite ní permanezca debajo del equilibrador.
No apto para uso en industria alimentaria y farmacéutica.
No apto para uso al aire libre o en presencia de productos químicos corrosivos.
Excluyendo los modelos ATEX, los equilibradores no son aptos para uso en ambientes con atmósfera potencialmente explosiva.
No utilizar con tipos de cargas no indicadas en la placa.
ENSAYOS ESTÁTICOS Y DINÁMICOS
Los ensayos estáticos y dinámicos (Directiva Máquinas 2006/42/EC, anex. I, punto 4.1.3) se realizan tomando muestras aleatorias
de cada lote de producción.
Los ensayos estáticos se realizan colgando del equilibrador una carga de 1.25 veces superior a su capacidad máxima, acompañandola
hora de tiempo con una carga colgada del equilibrador de 1.1 veces superior a su capacidad máxima.
ELECCIÓN DEL EQUILIBRADOR
Evalúe la carga total a equilibrar: utensilio, accesorios y partes de los tubos o cables suejtados por el equilibrador. La carga total a
equilibrar debe estar comprendida entre la capacidad mínima y máxima del equilibrador.
PUESTA EN FUNCIONAMIENTO DEL EQUILIBRADOR
Evalúe la extensión del área de trabajo y, si se precisa, cuelgue el equilibrador de un carro para permitir el correcto uso en una zona
de amplitud adecuada a la actividad a realizar.
de seguridad.
Para evitar desgastes anómalos, la carga se debe aplicar verticalmente. El equilibrador tendrá que poder moverse libremente en
su suspensión para que pueda alinearse con la
dirección de la carga.
TRADUCCIÓN DEL MANUAL ORIGINAL
ES

15
El equilibrador tiene que ser instalado en una estructura con resistencia mecánica adecuada. Resistencia mecánica estructura > 5
* (Peso del Equilibrador + Capacidad MÁX).
Puede instalar varios equilibradores en la misma estructura principal, excepto cuando cada uno tenga un enganche separado y
cuando la estructura tenga una resistencia
mecánica superior a cinco veces el peso de todos los equilibradores y de sus capacidades de carga máximas.
Es posible instalar varios equilibradores en la misma estructura secundaria (cable de seguridad), a excepción que cada uno tenga
un enganche separado y que la estructura tenga
una resistencia mecánica superior a cinco veces el peso de todos los equilibradores y de sus capacidades de carga máximas.
Durante la puesta en funcionamiento se sugiere usar el siguiente procedimiento:
- Conectar el dispositivo de seguridad en la estructura secundaria.
- Levantar la carga que se desea enganchar del equilibrador.
- Conecte el tubo (23) (Fig.2) al niple (16) (Fig.2);
- Conecte la alimentación de aire comprimido al niple del tubo (23) (Fig.2);
- Conecte el utensilio al niple (21) (Fig.2-4).
- Bajar la carga desenrollando el tubo del equilibrador y ajustar la abrazadera que limita la carrera para evitar que la carga exceda
la altura del operador.
- Ajustar la fuerza del equilibrador hasta equilibrar la carga enganchada. Girar en la dirección indicada por el signo + para aumentar
la fuerza del equilibrador. Girar en la dirección indicada por el signo - para disminuir la fuerza del equilibrador.
Asegurar una iluminación correcta de las áreas de trabajo para permitir una buena vista de las operaciones y todos los elementos
estroboscópicos.
Atención !!! Para los equilibradores no equipados con gancho de suspensión, es conveniente prever un enganche que no bloquee
los movimientos (oscilación y rotación) necesarios para el correcto funcionamiento del equilibrador.
de seguridad.
Fije siempre la suspensión de seguridad (S) a un soporte adecuadamente dimensionado, utilizan-
do exclusivamente los accesorios suministrados (Fig.1). El soporte de seguridad NO DEBE SER
el mismo utilizado para la suspensión principal (A) (Fig.1). La máxima caída en caso de rotura
de la suspensión principal no debe superar los 100 mm. Apriete las tuercas de las abrazaderas
21215 (Fig.1) con un par de torsión de 2 Nm.
REGULACIÓN DEL EQUILIBRADOR
por el símbolo “+”; la regulación no es continua, sino a saltos): después de cada salto el pomo (4) debe volver a ponerse en contacto
con la placa (5) (Fig.2). Para equilibrar cargas más ligeras extraiga el pomo (4) y, manteniéndolo bien apretado, gírelo tal como se
ilustra en la (Fig.3): después de cada salto el pomo debe volver a ponerse en contacto con la placa (5) (Fig.3).
está rompiendo. NO MODIFIQUE LA REGULACIÓN DEL EQUILIBRADOR PARA SOPORTAR IGUALMENTE LA CARGA. DIRÍJASE
INMEDIATAMENTE A PERSONAL CAPACITADO Y AUTORIZADO AL MANTENIMIENTO.
No utilize con una carga superior a la carga máxima permitida y equilibrada usando el regulador.
USO DEL EQUILIBRADOR
Empuñe el utensilio colgado del equilibrador y realice las operaciones requeridas; luego, acompañe el utensilio hasta una posición
de equilibrio, en la vertical del equilibrador, y suéltelo.
quede bien cerrado.
El desenvolvimiento del tubo jamás deberá ser completo: la carrera de trabajo debe terminar al menos 100 mm antes del límite
inferior del recorrido.
No desganche la carga si la abrazadera (18) (Fig.4) no está apoyada a la grapa del tubo (POSI-
CIÓN VISIBLE EN FIG.4)
- no suelte la carga en posición no vertical;
- no lance la carga suspendida a otro operador;
TRADUCCIÓN DEL MANUAL ORIGINAL ES

16
- no desplaze la carga tirando el cable del equilibrador;
- no cuelgue las cargas que no están comprendidas entre los límites superior e inferior de la capacidad admitida;
- no cuelgue más de un utensilio del equilibrador.
El riesgo mayor vinculado al uso del equilibrador consiste en el posible enrollamiento incon-
trolado del tubo;
1 si por cualquier razón el tubo no es enrollado por el equilibrador, NO intervenga y contacte inmediatamente con el servicio de
asistencia.
2 no desenganche la carga si el tubo no está completamente enrollado en el tambor. evitar el contacto con el tubo passatubo;
3 si el tubo está desenrollado y no hay ninguna carga aplicada, NO intervenga y contacte inmediatamente con el servicio de asistencia.
4 durante el uso, el tubo debe permanecer siempre en posición vertical y no debe estar en contacto con poleas o posibles estructuras
externas colocadas en la proximidad del punto de instalación y uso del equilibrador.
5 está permitido el utilizo del equilibrador solamente con el tubo en posición vertical.
6 el ajuste de la carrera del equilibrador debe asegurar la posición de la herramienta a una altura igual o menor a la del operador,
7 no tuerza (más de 360°) el tubo durante el uso, si la carga debe girar respecto al equilibrador preveer el uso del accesorio apropiado.
Después de la intervención de los dispositivos que impiden la caída de la carga o el enrolla-
miento incontrolado del cable se requerirá la revisión del equilibrador. En este sentido, por favor
contacte con su proveedor.
Si utiliza el equilibrador con una herramienta eléctrica consulte el manual de esta para la gestión
de cualquier riesgo residual.
No utilice el equilibrador sujetándolo por el tubo; sujételo usando la herramienta colga-
da.
REEMPLAZO DE LA CARGA / CAMBIO DE HERRAMIENTAS
Antes de proceder al cambio de la herramienta colgada es necesario enrollar completamente el tubo del equilibrador sin utilizar el
dispositivo de ajuste de carrera como sistema de bloqueo.
Al contrario, si presenta sistemas de bloqueo se puede proceder de la siguiente manera:
- Sujetar la carga de manera alternativa (no usar el tubo del equilibrador).
- Desenganchar la carga del equilibrador.
- Enganchar la nueva carga, colocarla verticalmente bajo el equilibrador con el tubo en tensión.
- Ajustar el equilibrador, si es necesario, pare equilibrar la nueva carga (nueva carga con peso diferente de la anterior).
No se aleje por ningún motivo del equilibrador si no presenta una carga colgada.
INSPECCIÓN
El equilibrador debe ser sometido periódicamente a inspección visual (por ejemplo, una vez por turno de trabajo), en particular,
presentes), así como las condiciones de los ganchos y del cable.
Para el control de los cables siguiendo los criterios de deshecho (sustitucion del cable), tomar como
referencia las prescripciones de la norma ISO 4309:2011. (Algunos ejemplos veanse en Fig.5).
- No quite ninguna etiqueta. Haga sustituir las placas eventualmente deterioradas;
- Al menos una vez por año el equilibrador debe ser inspeccionado por personal especializado y autorizado.
En caso de un comportamiento anormal del equilibrador contacte con su proveedor.
MANTENIMIENTO
El mantenimiento puede ser efectuado solo por personal capacitado y autorizado.
Utilize solo repuestos de TECNA S.p.A. Se ruega el Cliente cuando solicita repuestos dirigirse al proveedor del aparato o directamente
aparato o directamente con el fabricante.
Jamás desmonte el equilibrador. El mantenimiento debe ser realizado exclusivamente por per-
sonal capacitado y autorizado.
TRADUCCIÓN DEL MANUAL ORIGINAL
ES

17
GARANTÍA
-
cidad de la garantía.
ATENCIÓN: el tubo y el muelle del tambor no están sujetos a garantía.
FIN DE VIDA
- Enrollar completametne el tubo
- Descolgar la carga del equilibrador
- Descolgar el equilibrador de la suspensión primaria y de seguridad.
- Descargar completamente el muelle del equilibrador.
Descargado el equilibrador es posible deshechar el mismo en observancia de la normativa vigente.
TRADUCCIÓN DEL MANUAL ORIGINAL ES

18
Der Federzug ist vor der Verwendung zu installieren. Dieser Vorgang ist unter Befolgen der in
diesem Handbuch enthaltenen Anweisungen durch Fachpersonal vorzunehmen:
EINE NICHT KORREKTE INSTALLATION KANN SCHÄDEN AN PERSONEN UND/ODER GEGENSTÄND-
EN HERVORRUFEN.
Dieses Handbuch enthält wichtige Informationen, welche die Bedienung des Gerätes in Sicherheit
ermöglichen.
Stellen Sie sicher, die Anweisungen gut verstanden zu haben, bevor Sie den Federzug einsetzen.
DIE NICHTBEACHTUNG DIESER HINWEISE KANN ZU VERLETZUNGEN FÜHREN.
Der Federzug wurde in Übereinstimmung mit den zum Zeitpunkt seiner Markteinführung zutreffenden und geltenden Europarichtlinien,
welche die CE-Markierung des Produkts vorsehen, hergestellt.
VORGESEHENER EINSATZBEREICH
Der vorgesehene Einsatzbereich eines Federzugs ist der Ausgleich des konstanten Gewichts eines Werkzeugs während der
vertikalen Bewegung.
Der Federzug ist zur ausschließlichen manuellen Verwendung durch nur jeweils einen Bediener bestimmt.
Der Federzug ist zur Verwendung bei Temperaturen zwischen 5°C und 60°C bestimmt.
Es ist notwendig, den Federzug in Übereinstimmung mit allen Vorschriften hinsichtlich Federzüge,
Werkzeuge und Arbeitsplätze zu kontrollieren und dessen volle Funktionstüchtigkeit zu erhalten.
Traglastbereich (min.÷max.) des Federzugs in kg;
Seilauszugslänge des Federzugs in mm;
Masse des Federzugs in kg.
TECHNISCHE SPEZIFIKATIONEN
Innendurchmesser des Schlauches: Ø 6 mm (9200/9201/9202) Ø 8 mm (9203)
Höchstdruck: 8 bar 8 bar
Höchsttemperatur: 50 °C 50 °C
Lufteinlass-/-auslassstutzen: G1/4 G1/4
Die Firma TECNA S.p.A. haftet nicht für von den obenstehend angegebenen abweichenden Verwendungen.
FEHLANWENDUNGEN
Erlauben Sie Minderjährigen nicht die Bedienung des Federzugs.
Arbeiten Sie nicht unter dem Federzug und seiner Last, gehen Sie nicht darunter durch und halten Sie sich nicht darunter auf.
Nicht geeignet für die Verwendung im Lebensmittel- oder Arzneimittelbereich.
Nicht geeignet für die Verwendung im Freien oder in Umgebungen mit Vorhandendein korrosiver chemischer Agenzien.
Mit Ausnahme der ATEX-Modelle sind die Federzüge nicht geeignet für den Einsatz in Umgebungen mit potentiell explosiver Atmosphäre.
Nicht mit Lasten außerhalb der auf der Plakette angegebenen Werte verwenden.
STATISCHE UND DYNAMISCHE TESTS
Statische und dynamische Tests (Maschinenrichtlinie 2006/42/EG, Anlage I, Punkt 4.1.3) werden stichprobenartig für jede Pro-
duktionscharge ausgeführt.
Die statischen Tests werden ausgeführt, indem am Federzug eine 1.25 Mal über der maximalen Nutzlast liegende Last angebracht
und für 10 Minuten bis zum Endanschlag (Seil ganz herausgezogen) geführt wird (wie angegeben in DIN 15112:1979).
Der dynamische Test erfolgt durch die Überprüfung des einwandfreien Betriebs des Federzugs (Ausziehen und Einfahren des Seils)
für eine Zeit von 1 Stunde mit dem 1.1-fachen der Höchstlast belasteten Federzug.
WAHL DES FEDERZUGS
Bewerten Sie die auszugleichende Gesamtlast: Werkzeug, Zubehör und Teile der vom Federzug gehaltenen Rohre oder Kabel. Das
auszugleichende Gesamtgewicht muss zwischen der minimalen und maximalen Nutzlast des Federzugs liegen.
INBETRIEBNAHME DES FEDERZUGS
Bewerten Sie die Ausdehnung des Arbeitsbereiches und hängen Sie den Federzug gegebenenfalls an einen Support, sodass die
korrekte Bedienung in einer der Ausführung der Tätigkeit entsprechend weiten Zone ermöglicht wird.
Wenn für die Installation Schraubbefestigungsvorrichtungen eingesetzt werden, sind selbstblockierende Muttern, Splinte oder andere
Sicherheitssysteme zu verwenden.
ORIGINALBETRIEBSANLEITUNG
DE

19
Zur Vermeidung eines anormalen Verschleißes muss die Last vertikal angebracht werden. Der Federzug muss sich in seiner Au-
fhängung frei bewegen können, so dass er sich in Seilzugrichtung einstellen kann.
Der Federzug ist auf einer Tragkonstruktion mit angemessener mechanischer Festigkeit zu installieren. Mechanische Festigkeit der
Tragkonstruktion > 5*(Federzuggewicht + Last MAX.).
Es ist möglich, mehrere Federzüge auf ein und derselben Haupttragkonstruktion zu installieren, unter der Voraussetzung, dass
jeder Federzug einen unabhängigen Ansatz hat und dass die Tragkonstruktion die 5-fache mechanische Festigkeit aller Federzüge
und aller maximalen Lasten hat.
Es ist möglich, mehrere Federzüge auf ein und derselben Sekundärtragkonstruktion zu installieren, unter der Voraussetzung, dass
jeder Federzug einen unabhängigen Ansatz hat und dass die Tragkonstruktion die 5-fache mechanische Festigkeit aller Federzüge
und aller maximalen Lasten hat.
- Installieren Sie den Federzug mit Hilfe des Einhänghakens, falls vorhanden, oder der Befestigungsöffnung an der Haupttragkonstruktion.
- Verbinden Sie die Sicherheitsvorrichtung an der Sekundärtragkonstruktion.
- Heben Sie die mit dem Federzug zu verbindende Last an.
- Schließen Sie den Schlauch (23) (Abb.2) an den Nippel (16) (Abb.2) an;
- Verbinden Sie die Druckluftversorgung mit dem Nippel des Schlauches (23) (Abb.2);
- Verbinden Sie das Werkzeug mit dem Nippel (21) (Abb.2-4).
- Lassen Sie die Last sinken, indem Sie das Seil des Federzugs abrollen lassen und regulieren Sie die Laufbegrenzungsklemme,
um die Last nicht über den Bediener zu bringen.
- Regulieren Sie die Kraft des Federzugs bis zum Ausgleich der angeschlossenen Last. Drehen Sie in der durch das Zeichen +
angegebenen Richtung, um die Kraft des Federzugs zu erhöhen. Drehen Sie in der durch das Zeichen - angegebenen Richtung,
um die Kraft des Federzugs zu verringern.
Stellen Sie eine ausreichende Beleuchtung des Arbeitsbereiches sicher, um eine gute Sicht auf die Arbeitsschritte und alle Elemente
der Ausrüstung ohne Schattenzonen, Blendwirkungen und stroboskopische Effekte zu ermöglichen.
Achtung!!! Für Federzüge mit Einhänghaken ist es zweckmäßig, einen Einsatz vorzusehen, der die für den einwandfreien Betrieb
des Federzugs erforderlichen Bewegungen (Schwingung und Drehung) nicht blockiert
Verwenden Sie die Öffnung (A) (Abb.1) für die Hauptaufhängung und die Öffnung (S) (Abb.1) für
die Sicherheitsaufhängung.
Verbinden Sie die Sicherheitsaufhängung (S) unter ausschließlicher Verwendung des mitgelie-
ferten Zubehörs (Abb.1) mit einer ausreichend bemessenen Halterung. Der Sicherheits-Support
DARF NICHT derselbe wie der für die die Hauptaufhängung (A) (Abb.1) verwendete sein. Die ma-
ximale Fallhöhe bei einer Beschädigung der Hauptaufhängung darf 100 mm nicht überschreiten.
Drehen Sie die Muttern der Klemmen 21215 (Abb.1) mit einem Drehmoment von 2 Nm fest.
EINSTELLUNG DES FEDERZUGS
Damit der Federzug größere Lasten innerhalb des zulässigen Traglastbereiches ausgleichen kann, drehen Sie den Knauf (4) wie in
der (Abb.2) gezeigt (im Gegenuhr zeigersinn, gekennzeichnet durch das Zeichen +; die Einstellung erfolgt nicht stufenlos, sondern
schrittweise: Nach jedem Schritt muss der Knauf (4) wieder Kontakt mit der Plakette (5) (Abb.2) haben). Ziehen Sie den Knauf (4)
bei leichteren Lasten heraus, halten ihn gut fest und drehen ihn wie in der (Abb.3) gezeigt: Nach jedem Schritt muss der Knauf
wieder Kontakt mit der Plakette (5) (Abb.3) haben.
Nach der Einstellung der Last stellen Sie sicher, dass der Schlauch auf seiner gesamten Länge frei laufen kann: Die Bewegung
darf durch die vollständige Aufwicklung der Feder nicht begrenzt werden. Prüfen Sie den Lauf mehrmals bei verschiedenen Ge-
schwindigkeiten.
HINWEIS: Eine Minderung der Tragfähigkeit des Federzugs zur Aufnahme der angehängten Last kann bedeuten, dass die Feder
der Trommel bald bricht. ÄNDERN SIE DIE EINSTELLUNG DES FEDERZUGS NICHT MIT DEM ZIEL, DIE LAST DENNOCH AU-
FZUNEHMEN, SONDERN NEHMEN SIE UNVERZÜGLICH KONTAKT MIT ZUR WARTUNG BEFUGTEM FACHPERSONAL AUF.
Nicht mit einer beaufschlagten Last über der maximal zulässigen und mit Hilfe des Reglers ausbalancierten Last verwenden.
VERWENDUNG DES FEDERZUGS
Ergreifen Sie das am Federzug angehängte Werkzeug und führen Sie die geforderten Arbeitsschritte aus. Begleiten Sie das Werkzeug
anschließend in eine Gleichgewichtsposition auf der Senkrechten des Federzugs und lassen es wieder los.
Die auszugleichende Last ist am Karabinerhaken (24) (Abb.4) einzuhängen. Stellen Sie sicher, dass der Karabinerhaken nach dem
Anbringen der Last geschlossen ist.
Die Abwicklung des Schlauches darf niemals vollständig erfolgen: Der Arbeitslauf muss mindestens 100 mm vor der unteren
Laufgrenze enden.
Blockieren Sie die Klemme (18) (Abb.4) gegebenenfalls, um den Lauf nach oben zu begrenzen.
ORIGINALBETRIEBSANLEITUNG DE

20
Last nicht abnehmen, wenn die Klemme (18) (Abb.4) nicht auf der Verklammerung des Schut-
zausrüstungen anliegt (SIEHE ABBILDUNG 4).
- Die Last darf nicht in einer nicht vertikalen Position losgelassen werden;
- Die angehängte Last darf nicht in Richtung eines anderen Mitarbeiters geworfen werden;
- Die Last darf nicht durch Ziehen am Seil des Federzugs verschoben werden;
- Das Anhängen von Lasten, die nicht innerhalb der zulässigen Mindest- und Höchstnutzlast liegen, ist verboten;
- Das Anhängen von mehr als einem Werkzeug an den Federzug ist verboten.
Das größte Risiko in Verbindung mit der Verwendung des Federzugs besteht im eventuellen
unkontrollierten Wiederaufwickeln des Schutzausrüstungen.
1 Sollte das Schutzausrüstungen aus irgendeinem Grund nicht vom Federzug aufgewickelt werden, greifen Sie NICHT selbst ein,
sondern verständigen unverzüglich den Kundendienst.
2 Hängen Sie niemals die Last aus, wenn die Trommel nicht vollständig in der Trommel aufgewickelt ist. Vermeiden Sie den Kontakt
des Schutzausrüstungen mit dem Seildurchgang
3 Sollte das Schutzausrüstungen des Federzugs abgewickelt und keine Last angebracht sein, greifen Sie NICHT selbst ein, sondern
verständigen unverzüglich den Kundendienst.
4 Während der Verwendung muss das Schutzausrüstungen gerade sein und darf keine Berührung mit Umlenkungen oder Riemen-
scheiben oder eventuellen externen Strukturen in der Nähe der Installations- und Einsatzstelle des Federzugs haben.
5 Der Federzug darf nur mit dem Schutzausrüstungen in der Vertikalen verwendet werden.
6 Die Einstellung des Federzuglaufs muss derart sein, dass die Position des Werkzeugs auf Höhe kleiner oder gleich derjenigen
des Bedieners unabhängig vom Befestigungspunkt der Maschine ist.
7 Verdrehen Sie das Schutzausrüstungen nicht (über 360°) während der Verwendung. Wenn die Last in Bezug auf den Federzug
drehen muss, ist der Einsatz passenden Zubehörs vorzusehen.
8 Wenn der Federzug über eine Blockiervorrichtung verfügt, betätigen Sie diese bei Nichtbenutzung des an diesem angebrachten
Werkzeug (Ende der Arbeitsschicht).
Nach der Auslösung der Vorrichtungen, die den Sturz der Last oder das unkontrollierte Einfahren
des Seils vermeiden, ist eine Überholung des Federzugs erforderlich. Nehmen Sie diesbezüglich
Kontakt mit Ihrem Vertragshändler auf.
Wenn der Federzug mit einem Elektrowerkzeug verwendet wird, nehmen Sie Bezug auf das
Handrad des letzteren zur Verwaltung der eventuellen Restgefahren.
Verwenden Sie den Federzug nicht, indem Sie ihn am Schutzausrüstungen ergreifen, sondern
ergreifen Sie mit diesem verbundenen Werkzeug.
LASTWECHSEL/AUSWECHSELUNG DES WERKZEUGS
Ist es vor dem Auswechseln des Werkzeugs notwendig, das Schutzausrüstungen des Federzugs vollständig aufzuwickeln, ohne die
Laufreguliervorrichtung als Blockiervorrichtung zu verwenden.
Falls Blockiervorrichtungen vorhanden sind, ist es möglich, wie folgt vorzugehen:
- Stützen Sie die Last auf andere Weise (nicht mittels des Schutzausrüstungen des Federzugs).
- Trennen Sie die Last vom Federzug.
- Verbinden Sie die neue Last und bringen diese in die vertikale Position unter dem Federzug mit angespanntem Schutzausrüstungen.
- Regulieren Sie den Federzug, falls erforderlich, um die neue Last auszugleichen (neue Last mit anderem Gewicht als dem vorherigen).
Entfernen Sie sich aus keinem Grund vom Federzug, wenn an diesem keine Last angebracht.
INSPEKTION
Der Federzug ist regelmäßig einer Sichtprüfung zu unterziehen (zum Beispiel einmal pro Arbeitsschicht). Dabei ist insbesondere der
Zustand der Aufhängungen (A) und (S) (Abb.1a/b), der Befestigungsschrauben und der selbstsperrenden Systeme (falls verwendet)
sowie die Beschaffenheit der Haken und des Seils zu kontrollieren.
Zur Überprüfung der Seile hinsichtlich Ihrer Ablegereife (Ersatz des Seiles) beziehen Sie sich
auf die Vorschriften der Norm ISO 4309:2011. (Einige Beispiele siehe Abb.5).
-Stellen Sie sicher, dass die Bewegung des Schutzausrüstungen leichtgängig ist und keine ungewöhnlichen Geräusche auftreten.
- Entfernen Sie keinerlei Etikette. Lassen Sie jegliches beschädigte Schild ersetzen.
ORIGINALBETRIEBSANLEITUNG
DE
This manual suits for next models
3
Table of contents
Languages:
Other TECNA Industrial Equipment manuals
Popular Industrial Equipment manuals by other brands
Eaton
Eaton NZM3-XDV Series Instruction leaflet
Forbes Marshall
Forbes Marshall SOFT31 Installation and maintenance manual
Eaton
Eaton NZM2-XUHIV20 Series Instruction leaflet

Siemens
Siemens 3VA9 1 0RL 0 Series operating instructions
Endress+Hauser
Endress+Hauser T13 technical information

SMW Autoblok
SMW Autoblok Mario Pinto LT Use and maintenance instructions
