TEEHO TE006 User manual
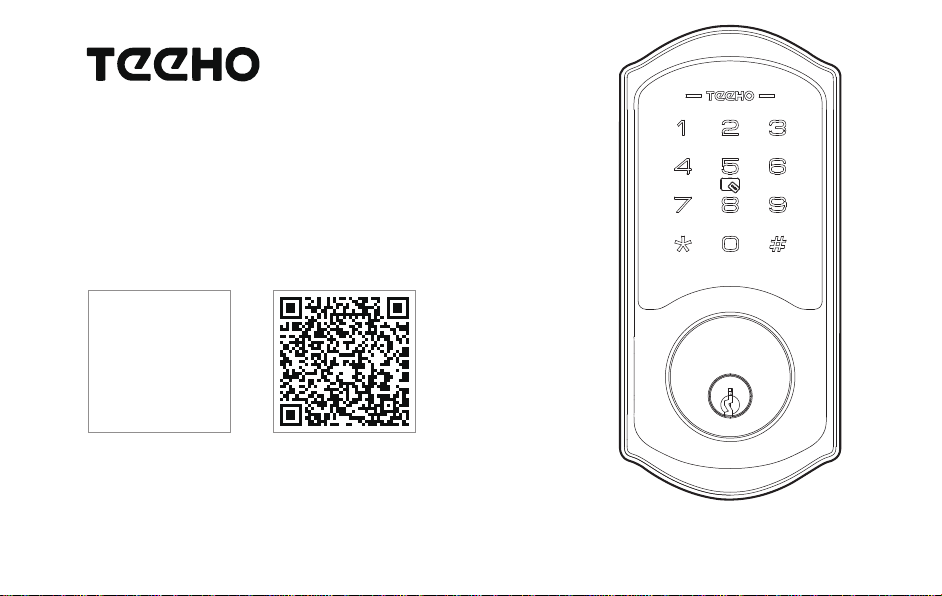
TE006
Smart Lock
Installation Guide / Programming Instructions
Thank you for purchasing our products. Please review this manual thoroughly before operating your device.
All pictures in this manual are for illustration purpose only. Actual product may vary due to product upgrade.
Scan QR code to watch
Installation Video
Scan QR code to download
DDLock App

TOOL REQUIRED:
Do not use an electric screwdriver during installation.
Installation Overview
STEP 1: Prepare the door and check dimensions
STEP 2: Install the latch and strike
STEP 3: Install exterior assembly
STEP 4: Install interior assembly
P 3
P 4
P 6
P 7
Programming Instructions
P 9
P10
P 11
P 12
At a Glance
How to Use
Definitions
Factory Default Settings
DDLock Use Guide
P 13
P14
P 15
P 16
P 17
P 18
P 19
P 20
P 21
P 23
HOW TO REGISTER
Pairing Your Lock
Admin Passcode Management & Lock Page Overview
APP Unlock / Lock & Passcode
IC Card & eKeys
Authorized Admin & Passage Mode and Auto-Lock
Lock Settings
Troubleshooting
FCC Statement
Information & Safety Warnings
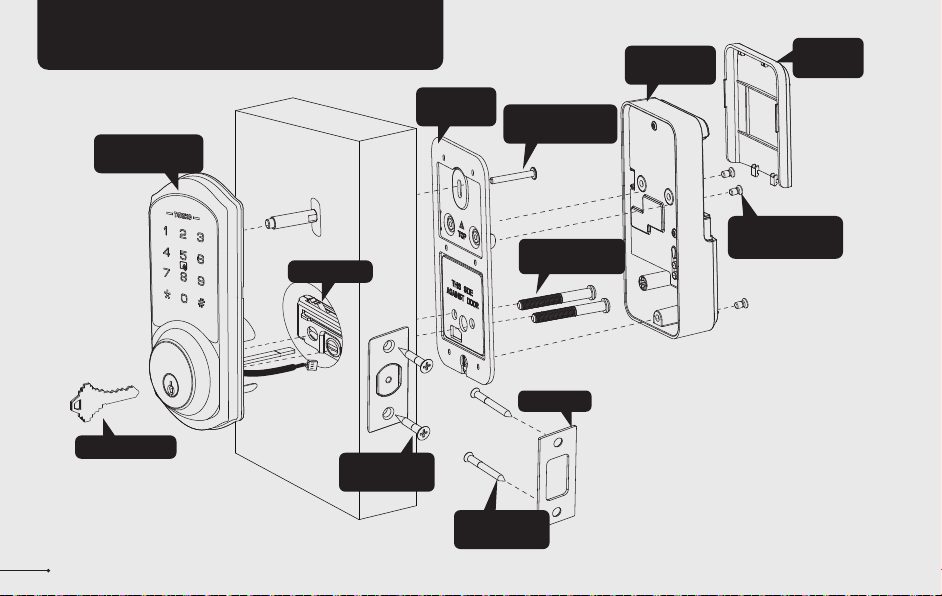
INSTALLATION OVERVIEW
1
Interior Assembly
Screws (L)
Strike (D)
Mounting
plate Screws (K)
Mounting
plate (E)
Backup key (A)
Exterior Assembly
Screw (F)
Latch (C)
Interior
Assembly (G)
Battery
Cover (H)
Strike Screws
(I)
Latch Screws
(J)
Exterior Assembly
(B)
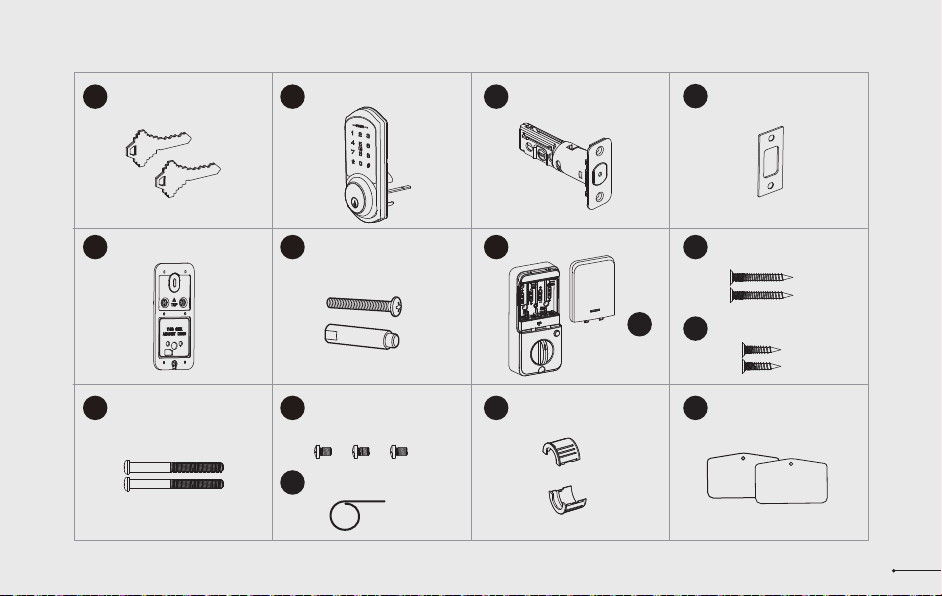
Latch x1 Strike x1
Exterior Assembly x1
Mounting Plate x1 Exterior Assembly
Screw (Optional) Strike Screws x2
Mounting plate Screws x2
Latch Screws x2
A B C
E F I
J
K
D
Parts List
If any parts are lost or damaged, please contact Customer Support. 2
Backup Key x2
Interior Assembly x1
Battery Cover x1
G
H
Interior Assembly
Screws x3
L
MReset Tool x1
Drive-In Collar (Optional)
NIC card x2
O

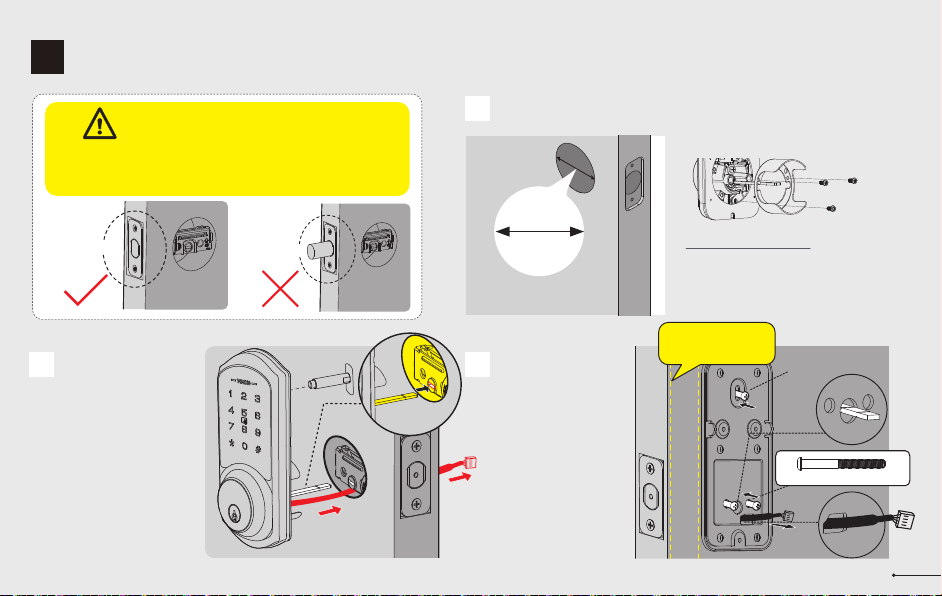
Measure to confirm
that the hole in the
door edge is 1"
(25mm).
Measure to confirm
that the backset is
either 2-3/8" or
2-3/4" (60 or 70mm)
2-3/8" or 2-3/4"
(60 or 70mm)
Make sure the hole in
the door frame is
drilled a minimum of
1’’ (25mm) deep, to
leave enough space
for the deadbolt to
extend into the door
frame when the door
is locked.
Measure to confirm
that the door is 1-3/8"
to 2" (35 mm or
50mm) thick.
A
Measure to
confirm that the
hole in the door is
1-1/2’’ or 2-1/8"
(38mm or 54mm)
B
CD
Prepare the door and check dimensions
1
STEP
3
1"
25mm
1-3/8" to 2"
(35mm or 50mm)
1-1/2" or 2-1/8"
(38 or 54mm) 1"
25mm
Make sure the door frame is aligned with the door.
There are no obstructions stuck in the door frame.
Notes:

4
chiseled
not chiseled
Install the latch and strike
2
STEP
Hold the latch in front of the door hole,
with the latch face flush against the
door edge. Is the slotted hole centered
in the door hole?
No adjustment is required.
Proceed to next step.
Slotted hole is
NOT centered.
A
B
YES
NO
Rotate and pull the
latch as shown to
extend latch.
2-3/8"
(60mm)
2-3/4"
(70mm)
Determine backset
and adjust the latch
Install the latch
Latch Screws (J)
up
Drive-In Collar
(N)
180°
90°
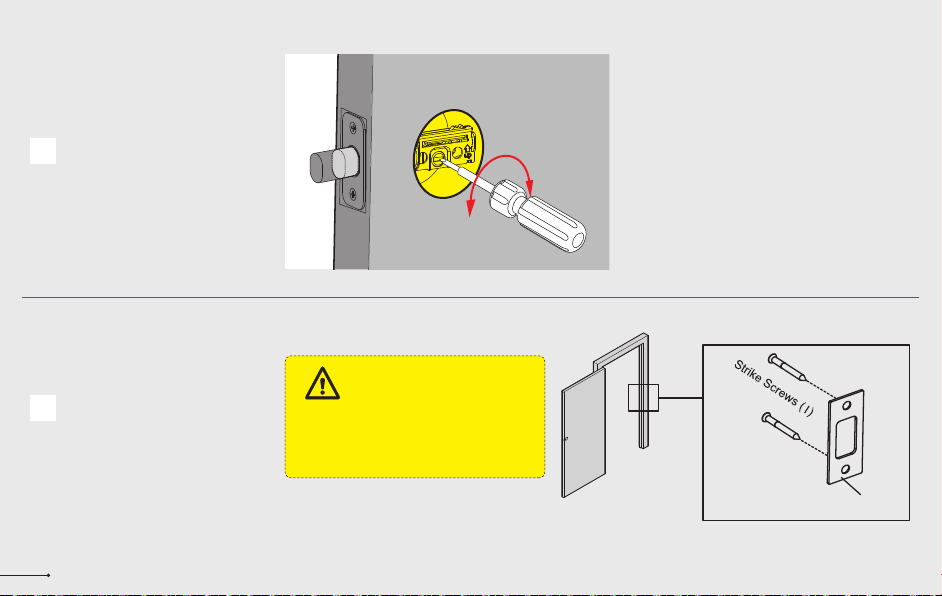
CUse a screwdriver to test if
deadbolt works smoothly.
DInstall strike on the door frame. Make sure the hole in door frame is
drilled a minimum of 1" (25mm)
deep.
IMPORTANT:
5
D
Install exterior assembly
3
STEP
6
Unlocked
Before installation, make sure the latch is fully
retracted (in the unlocked position)
IMPORTANT:
Locked
B
With the latch fully
retracted (in the
unlocked position),
route the cable below
the latch, and insert
the tailpiece through
the slot in the latch.
C
Secure the mounting
plate with the supplied
screws. Do not
overtighten screws.
Remove the spacer
Proceed to next step
A
1-1/2" (38mm)
2-1/8" (54mm)
Measure the diameter of
the hole in the door.
1-1/2" or 2-1/8"
(38 or 54mm)
Torque
blade
Mounting plate Screws(K)
Exterior Assembly
Screw (L) (Optional)
Tailpiece
Keep parallel to
door edge.
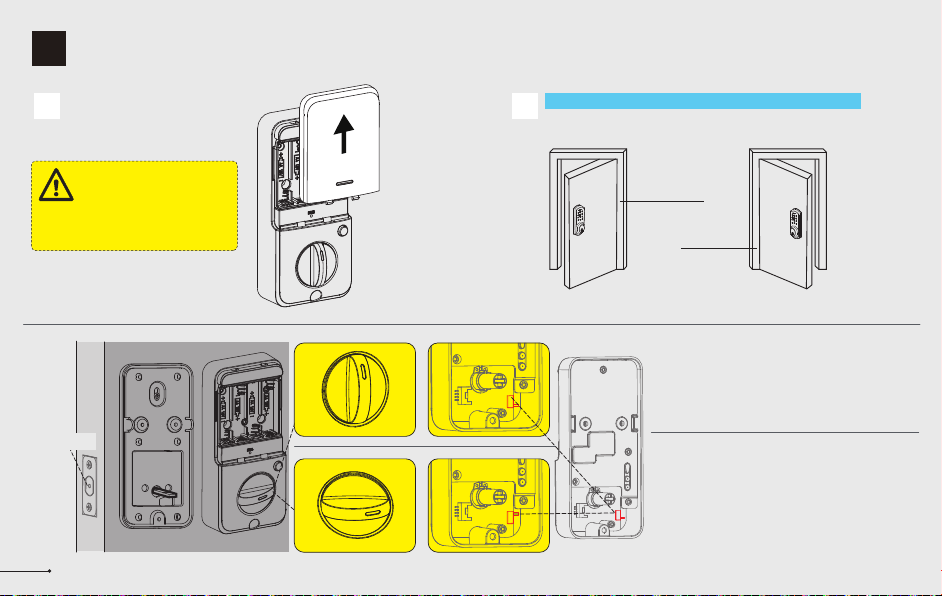
Install interior assembly
4
STEP
Do not load batteries until lock is
completely installed.
IMPORTANT:
Push the battery cover out in
the direction as illustrated.
A
7
Unlocked
LR
LR
LR
If the direction of the slide switch is set incorrectly, it
can be reset in DDLock App.
Notes:
Move the slide switch to “R”
Turn the thumb turn to the Vertical position.
Left handed door
Move the slide switch to “L”
Turn the thumb turn to the Horizontal position.
Right handed door
BDetermine the door is right handed or left handed.
Door hinge
on the right
Right handed door Left handed door
Door hinge
on the left

8
Install interior assembly
4
STEP
Insert the cable
connector to the
socket. Push the
connector in firmly
until it is completely
attached.
C
Insert 4 AA Alkaline
batteries and put
on the battery
cover.
E
Attach Interior
Assembly to
Mounting Plate and
tighten 3 Screws.
D
Unlocked
Interior Assembly
Screws (L)
Other TEEHO Lock manuals


