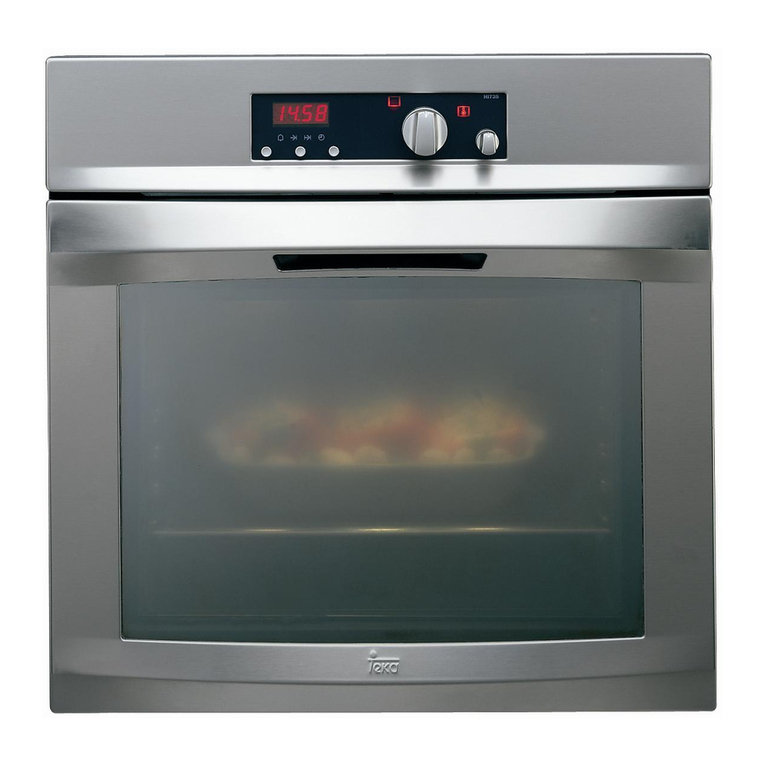
Teka HP-740I User manual

HORNO DE ENCASTRE
AUTOLIMPIANTE PIROLÍTICO
FORNO DE ENCASTRAR
AUTOLIMPIANTE PIROLITICO
SELF-CLEANING PYROLITIC
BUILT-IN OVEN
EINBAUBACKÖFEN
MIT SELBSTREINIGERFUNKTION

In Übereinstimmung mit den Anforderungen der Europäischen
Richtlinie 2002/96/EG über Elektro- und Elektronik-Altgeräte
(WEEE) ist vorliegendes Gerät mit einer Markierung versehen.
Sie leisten einen positiven Beitrag für den Schutz der Umwelt und die
Gesundheit des Menschen, wenn Sie dieses Gerät einer gesonderten
Abfallsammlung zuführen. Im unsortierten Siedlungsmüll könnte ein
solches Gerät durch unsachgemäße Entsorgung negative
Konsequenzen nach sich ziehen.
Auf dem Produkt oder der beiliegenden Produktdokumentation ist
folgendes Symbol einer durchgestrichenen Abfalltonne
abgebildet. Es weist darauf hin, dass eine Entsorgung im normalen
Haushaltsabfall nicht zulässig ist Entsorgen Sie dieses Produkt im
Recyclinghof mit einer getrennten Sammlung für Elektro- und
Elektronikgeräte.
Die Entsorgung muss gemäß den örtlichen Bestimmungen zur
Abfallbeseitigung erfolgen.
Bitte wenden Sie sich an die zuständigen Behörden Ihrer
Gemeindeverwaltung, an den lokalen Recyclinghof für Haushaltsmüll
oder an den Händler, bei dem Sie dieses Gerät erworben haben, um
weitere Informationen über Behandlung, Verwertung und
Wiederverwendung dieses Produkts zu erhalten.
This appliance is marked according to the European directive
2002/96/EC on Waste Electrical and Electronic Equipment (WEEE).
By ensuring this product is disposed of correctly, you will help prevent
potential negative consequences for the environment and human
health, which could otherwise be caused by inappropriate waste
handling of this product.
The symbol on the product, or on the documents
accompanying the product, indicates that this appliance may not be
treated as household waste. Instead it shall be handed over to the
applicable collection point for the recycling of electrical and electronic
equipment.
Disposal must be carried out in accordance with local environmental
regulations for waste disposal.
For more detailed information about treatment, recovery and
recycling of this product, please contact your local city office, your
household waste disposal service or the shop where you purchased
the product.
Cet appareil porte le symbole du recyclage conformément à la
Directive Européenne 2002/96/CE concernant les Déchets
d'Équipements Électriques et Électroniques (DEEE ou WEEE).
En procédant correctement à la mise au rebut de cet appareil, vous
contribuerez à empêcher toute conséquence nuisible pour
l'environnement et la santé de l'homme.
Le symbole présent sur l'appareil ou sur la documentation qui
l'accompagne indique que ce produit ne peut en aucun cas être traité
comme déchet ménager. Il doit par conséquent être remis à un centre
de collecte des déchets chargé du recyclage des équipements
électriques et électroniques.
Pour la mise au rebut, respectez les normes relatives à l'élimination
des déchets en vigueur dans le pays d'installation.
Pour obtenir de plus amples détails au sujet du traitement, de la
récupération et du recyclage de cet appareil, veuillez vous adresser au
bureau compétent de votre commune, à la société de collecte des
déchets ou directement à votre revendeur.
Dit apparaat is voorzien van het merkteken volgens de Europese
richtlijn 2002/96/EG inzake Afgedankte elektrische en elektronische
apparaten (AEEA).
Door ervoor te zorgen dat dit product op de juiste manier als afval
wordt verwerkt, helpt u mogelijk negatieve consequenties voor het
milieu en de menselijke gezondheid te voorkomen die anders zouden
kunnen worden veroorzaakt door onjuiste verwerking van dit
product als afval.
Het symbool op het product of op de bijbehorende
documentatie geeft aan dat dit product niet als huishoudelijk afval mag
worden behandeld. In plaats daarvan moet het worden afgegeven bij
een verzamelpunt voor recycling van elektrische en elektronische
apparaten.
Afdanking moet worden uitgevoerd in overeenstemming met de
plaatselijke milieuvoorschriften voor afvalverwerking.
Voor nadere informatie over de behandeling, terugwinning en
recycling van dit product wordt u verzocht contact op te nemen met
het stadskantoor in uw woonplaats, uw afvalophaaldienst of de winkel
waar u het product heeft aangeschaft.
Este aparato lleva el marcado CE en conformidad con la Directiva
2002/96/EC del Parlamento Europeo y del Consejo sobre residuos de
aparatos eléctricos y electrónicos (RAEE).
La correcta eliminación de este producto evita consecuencias
negativas para el medioambiente y la salud.
El símbolo en el producto o en los documentos que se incluyen
con el producto, indica que no se puede tratar como residuo
doméstico. Es necesario entregarlo en un punto de recogida para
reciclar aparatos eléctricos y electrónicos.
Deséchelo con arreglo a las normas medioambientales para
eliminación de residuos.
Para obtener información más detallada sobre el tratamiento,
recuperación y reciclaje de este producto, póngase en contacto con
el ayuntamiento, con el servicio de eliminación de residuos urbanos o
la tienda donde adquirió el producto.
Este aparelho está classificado de acordo com a Directiva Europeia
2002/96/EC sobre Resíduos de equipamento eléctrico e electrónico
(REEE).
Ao garantir a eliminação adequada deste produto, estará a ajudar a
evitar potenciais consequências negativas para o ambiente e para a
saúde pública, que poderiam derivar de um manuseamento de
desperdícios inadequado deste produto.
O símbolo no produto, ou nos documentos que acompanham
o produto, indica que este aparelho não pode receber um tratamento
semelhante ao de um desperdício doméstico.
Pelo contrário, deverá ser depositado no respectivo centro de
recolha para a reciclagem de equipamento eléctrico e electrónico.
A eliminação deverá ser efectuada em conformidade com as normas
ambientais locais para a eliminação de desperdícios.
Para obter informações mais detalhadas sobre o tratamento, a
recuperação e a reciclagem deste produto, contacte o Departamento
na sua localidade, o seu serviço de eliminação de desperdícios
domésticos ou a loja onde adquiriu o produto.
Questo apparecchio è contrassegnato in conformità alla Direttiva Europea
2002/96/EC, Waste Electrical and Electronic Equipment (WEEE).
Assicurandosi che questo prodotto sia smaltito in modo corretto,
l'utente contribuisce a prevenire le potenziali conseguenze negative
per l'ambiente e la salute.
Il simbolo sul prodotto, o sulla documentazione di
accompagnamento, indica che questo prodotto non deve essere
trattato come rifiuto domestico ma deve essere consegnato presso
l'idoneo punto di raccolta per il riciclaggio di apparecchiature
elettriche ed elettroniche.
Disfarsene seguendo le normative locali per lo smaltimento dei rifiuti.
Per ulteriori informazioni sul trattamento, recupero e riciclaggio di
questo prodotto, contattare l'idoneo ufficio locale, il servizio di
raccolta dei rifiuti domestici o il negozio presso il quale il prodotto è
stato acquistato.
Αυτή ησυσκευή φέρει σήµανση σύµφωνα µετην Ευρωπαϊκή οδηγία
2002/96/ΕΕ σχετικά µεΑπορριπτόµενα ηλεκτρικά και ηλεκτρονικά
εξαρτήµατα (WEEE).
Εξασφαλίζοντας ότι το προϊόν αυτό απορρίπτεται σωστά, θα βοηθήσετε
στην πρόληψη πιθανά αρνητικών επιπτώσεων για το περιβάλλον και
την ανθρώπινη υγεία, οι οποίες θα µπορούσαν να δηµιουργηθούν από
τον ακατάλληλο χειρισµόαυτού του προϊόντος ως απόρριµµα.
Το σύµβολο πάνω στο προϊόν, ήστα έγγραφα που συνοδεύουν
το προϊόν, υποδεικνύει ότι αυτή ησυσκευή δεν µπορεί να θεωρηθεί
οικιακό απόρριµµα. Αντί γι αυτό θα πρέπει να παραδοθεί στο κατάλληλο
σηµείο περισυλλογής για την ανακύκλωση των ηλεκτρικών και
ηλεκτρονικών εξαρτηµάτων.
∆ιαλύστε το τηρώντας την τοπική νοµοθεσία για τη διάθεση των
απορριµµάτων.
Για πιο λεπτοµερείς πληροφορίες σχετικά µετην επεξεργασία, την
περισυλλογή και την ανακύκλωση αυτού του προϊόντος, παρακαλούµε
επικοινωνήστε µετο αρµόδιο γραφείο της τοπικής σας αυτοδιοίκησης,
την τοπική σας υπηρεσία αποκοµιδής οικιακών απορριµµάτων ήτο
κατάστηµαόπου αγοράσατε αυτό το προϊόν.
Denna produkt är märkt enligt EG-direktiv 2002/96/EEC beträffande
elektriskt och elektroniskt avfall (Waste Electrical and Electronic
Equipment, WEEE).
Genom att säkerställa en korrekt kassering av denna produkt bidrar
du till att förhindra potentiella, negativa konsekvenser för vår miljö
och vår hälsa, som annars kan bli följden om produkten inte hanteras
på rätt sätt.
Symbolen på produkten, eller i medföljande dokumentation,
indikerar att denna produkt inte får behandlas som vanligt
hushållsavfall. Den skall i stället lämnas in på en lämplig
uppsamlingsplats för återvinning av elektrisk och elektronisk
utrustning.
Produkten måste kasseras enligt lokala miljöbestämmelser för
avfallshantering.
För mer information om hantering, återvinning och återanvändning av
denna produkt, var god kontakta de lokala myndigheterna, ortens
sophanteringstjänst eller butiken där produkten inhandlades.
D
GB
F
E
P
1

Thank you for the trust you have shown in purchasing one of our high
quality products Our company sincerely hopes you obtain the very best
performance from this appliance which fully satisfies the needs behind your
choosing it.
For this purpose, we kindly
ask that you carefully read the instructions in
this manual, with particular attention to the paragraphs concerning the
accessories and instruments provided with the appliance. The manufacturer
will not in any way be held liable for any accidents caused b
y improper
installation or use of the appliance.
In order to produce appliances that are up
-
to
-
date with modern technology
and/or to ensure continuous improvement in the quality of its products,
TEKA reserves the right to make modifications with no advance
notice.
GENERAL INFORMATION
The label with the technical information is found at the base of the hole of the oven. The
label is visible when the oven is open. It includes data and information required for proper
installation.
Fig. 1
NUM.
MOD.
DIM.
HZ
TOL
.
TEKA
00006
The reference for the appliance and its dimensions are provided here. It is intended only for
column installation.
Please comply fully with the instructions provided for insertion into the furniture unit. Give
special attention to the ventilation holes, which are indispensable to ensure proper cooling
of the built
-
in surface and of the appliance.
In order to ensure user safety, the material of the furniture unit where the appliance will be
installed, the covering materials and the glues used must be capable of withstanding a
temperature of 120 °C.
The oven must have a suitable earth connection in compliance with current applicable
regulations.
61

ELECTRICAL CONNECTION
Check that the nominal voltage corresponds to that on the characteristics
label.
Connection to the power mains must be made via an omni-polar switch that corresponds to
the installed power. The distance of separation of the contacts must be at least 3 mm and
allow disconnection of the appliance in case of emergency or for maint
enance and cleaning.
Provide an earth connection to ensure the safety of the installer.
The oven must have a suitable earth connection in compliance with current applicable
regulations.
The appliance is supplied complete with a power cord. If it needs to be replaced, it will be
necessary to run the cable through the cable passage and make the connection as shown in
the provided diagram. The earth connection of the power cord must be longer that the other
wires to ensure that it disconnects in the event of traction with the cable passage open.
Tighten the screws of the cable passage, then close the cover.
ATTENTION: always make sure that the power supply is disconnected before cleaning the
oven in any way.
62

INSTRUCTIONS FOR USE
General instructions
ATTENTION:
the door of the oven may be quite hot during operation. Keep children
away from the oven.
During cooking, the accessories (grill, drip pan) get hot. The use of protective gloves is
advisable.
Do not use the appliance to heat the room.
When connecting other electrical devices near the oven, check that their power cords do
not come into contact with the oven.
In order to ensure and preserve the safety of the oven, any maintenance work, especially
on the electrical components, must be performed exclusively by
specialized personnel.
Wait for the oven to cool off to lukewarm before cleaning it. In this way, it will be possible
to eliminate dirt before they build up on the inside.
To cook roasts and cakes, use only pans that are made of refractory material. The size of
pans to be used depends on the size and amount of food to be cooked. It is advisable to
use stainless steel pans which absorb and spread the heat evenly.
To replace the light bulb of the oven, make sure you disconnect the electrical power
supply fir
st.
Prior to start
-
up
Before turning on the oven after it has been inserted in the furniture unit, make sure that
no electrically live parts are accessible and that all packing materials have been properly
disposed of.
Once this has been done, you will be
able to turn on the oven, following the proper
instructions.
First start
-
up
Before turning on the oven for the first time, clean the inside carefully with a delicate detergent
and lukewarm water. Then leave the oven on for 30 minutes at full power to get r
id of any
unpleasant odours which may be caused by residual grease or oil from the manufacturing
process. Once these steps are complete, the oven is ready for use.
ATTENTION: always make sure that the power supply is disconnected before cleaning the
oven i
n any way.
63

CONTROL PANEL
123
4
1. Function selector
2. Electronic programmer
3. Thermostat
4. Door locked
Fig. 2
64

OVEN FUNCTIONS
OVEN LIGHT
With this function the thermostat must be on "0" position.
GRILL
Select your temperature; use this function to grill foods.
Keep the oven door closed.
BOTTOM ELEMENT ONLY
It is recommended for slow cooking.
TRADITIONAL OVEN COOKING
traditional cooking, it is recommended to preheat the oven.
VENTILATED TRADITIONAL OVEN COOKING
This cooking mode integrates natural convection and ventilation.
Keep the door closed.
It is recommended that the oven be pre-heated.
MULTIFUNCTION
The fan and the circular element come on.
The heat is diffused by the fan to give an even temperature in the oven.
It is not necessary to pre-heat the oven before introducing the food.
65

DEFROST
The oven light will stay on during this function.
The fan motor comes on, but there is no heat. The oven door should be kept closed.
This function will help cut down the defrosting time by about onthird of the normal time.
VENTILATED GRILL
The fan and the grill element allow a fast and deep cooking for particular food.
It is recommended that the oven be pre-heated for a few minutes.
PYROLITIC CLEANING
Select this function with the selector. See the instructions on the electronic programmer paragraph.
66

Oven cooking chart
Food Temp. °C Shelf Position
(*)
Cooking time
(mins).
Cooking
Function
Cake
Bun 180 2 55-65
Fruit Cake 200 1 30-40
Buttermilk curd cake 180 2 35-40
Mould leaven cake 200 1 25-35
Choux pastry 190 2 20-30
Puff or flaky pastry 200 2 15-25
Biscuits 190 3 15-20
Lasagna 225 2 40-50
Meat
Fillet beef 225 2-3 50-80
Roast beef 225 2-3 50-80
Roast veal 225 2-3 60-80
Roast pork 170-180 2 45-60
Roast lamp 225 2 45-55
Roast.beef 225 2-3 50-60
Roast hare 200 2 60-90
Roast turkey 180 2 240ca.
Roast goose 200 2 150-210
Roast duck 200 2 120-180
Roast chicken 200 2 60-90
Thigh roe deer 200 2-3 90-150
Thigh stag 180 2-3 90-180
Fis h 180 2-3 10-40
Vegetable
Stew ing vegetable 170-190 2-3 40-50
Pizza 240 1 15-25
Grill cooking
Chop 4 8-12
Pork sausage 4 10-13
Grill ckichen 3 25-35
Spit chicken 50-65
Spit roast veal 50-65
Note :
(*)= The start shelf position number is button oven
the oven should be preheated before use.
67

How to use the grill
Lay the food in the wire shelf or, in a tray in
case of small pieces.
The rack must be positioned in the highest
runner possible and the grease drip pan in
the runner below. Close the door and turn on
the element as follows:
Top side Under side
64
85
10 8
15 12
12 10
52
Fish (e.g. trout ,salmon)
Sausages
Toast
Cooking time in minutes
Slices of meat of medium thickness
Slices of thin meat
Slices of thin descaled fish
Dishes for grilling
68

ELECTRONIC PROGRAMMER
Key functions:
PIRO
lets you change the time of pyrolysis
(from a minimum of one and a half hours up
to a maximum of three hours)
Key for selecting the function you want
to recall and to decrease the time shown on
the display
OK
Key to confirm the selection you wan
t to
modify
Key for selecting the function you
want to recall and to increase the time shown
on the display.
Keypad lock key
69

OPERATION
CONNECTION TO THE ELECTRICAL MAINS
When the oven is connected to the electrical mains, all the function symbols light up to confirm that the programmer is
operating properly.
The
oven cannot be turned on in this phase.
The programmer will then show the flashing message "TIME", while the keys light up steady.
Setting the time
To set the time, press the key "
"; the figures shown will increase.
If you exceed the current time, you c
an decrease the figures on the display by pressing the key "
".
If the time displayed is 00:00 it is not possible to go any further back to set the time.
As a confirmation of acceptance of the modifications you have made to the current time, the programme
r will emit a
short beep two seconds after you release the previously pressed key.
You can now turn on the oven.
Note
: each time you press the OK key, at any time, the oven will emit a beep.
The acoustic signal will continue for 1 minute if not interrupte
d before that by pressing any key.
Changing the time
Press the key
or as an alternative key
until the time shown on the display and the message start flashing
simultaneously. Press the OK key to confirm the time change.
The numerals on the display will flash as before, while the message TIME will flash faster. You ca
n now update or
change the time.
Press the keys
or
to change and set the desired time. The programmer will start using the new time two
seconds after the last command is given.
Note: if there is a power outage, the current time shown on the disp
lay is lost.
When the power comes back on, you will need to re
-
programme the time.
Night light function
The programmer reduces the luminosity of the display between 00.00 and 06.00
ALARM FUNCTION
This function is only to remind the user of a certain
event.
The maximum time which can be set is 23 hours and 59 minutes.
When the set time has elapsed, the system activates an acoustic signal for a maximum of 65 seconds and the symbol
starts to flash.
To silence the buzzer, press any key.
Programming and modification:
Press the key
or the key
until the symbol
on the display lights up.
The symbol will start to flash.
Press the OK key to confirm.
The symbol starts to flash more rapidly than before.
Pres
s the keys
or
to set the desired time. The maximum time which can be set is 23 hours and 59
minutes.
The oven will emit a double beep for confirmation and will start counting two seconds after the last command
is given.
As an alternative, after s
etting the alarm you can press the OK key. The oven will emit a first sound since the
OK key was pressed, followed by two beeps to confirm that the countdown has started.
The display will go back to showing the current time and the symbol will stay on stea
dy.
Viewing the remaining time:
70

Press the key
or the key
until the symbol
on the display lights up. The symbol will start
flashing.
Press the OK key.
The display will show the time remaining until activation of the buzzer.
The symbol
will flash.
The information wil
l continue to be displayed for 4 seconds. Then the display will go back to showing the
current time and the symbol
will stay on steady.
N.B. if the time remaining is less than 10 minutes, the time display format changes from HH MM (hours and
m
inutes) to M SS (minutes and seconds)
Permanent display of countdown
Press the key
or the key
until the symbol
on the display lights up. The symbol will start
flashing.
Press and hold the key OK until the display shows the message Back ;
the message TIME will go off and the countdown is shown for the time remaining u
ntil activation of the
buzzer.
COOKING DURATION FUNCTION
This function makes it possible to keep the oven on for a previously programmed length of time.
When the time is up, the oven will shut off.
The programmer activates an alarm buzzer and the symbol
flashes.
The maximum time which can be set for cooking is 23 hours and 59 minutes.
Programming and modification:
Press the key
or the key
until the symbol on the display lights up.
The symbol will start to flash.
Press the OK key to
confirm that you want to set a time for cooking duration.
The symbol will start flashing more rapidly than before and the programmer will display the flashing
message 00:00
Press the keys
or
to set the COOKING DURATION time. The maximum
time which can be set is 23
hours and 59 minutes.
The oven will emit a double beep for confirmation and will start the countdown two seconds after the last
command is given.
As an alternative, after setting the cooking duration, you can press the OK key.
The oven will emit a first sound
since the OK key was pressed, followed by two beeps to confirm that the countdown has started.
The display will go back to showing the current time and the symbol
will stay on steady.
Viewing:
Press the key
or the key
until the symbol
on the display lights up.
The symbol will start to flash.
Press the OK key.
The display will show the remaining time until cooking time is complete.
The symbol
will flash.
The information will continue to be displayed for 4 seconds. The display will then go back to showing the
current time and the symbol
will stay on steady.
N.B. if the time remaining is less than 10 minutes, the time display forma
t changes from HH MM (hours and
minutes) to M SS (minutes and seconds)
Permanent display of the time of cooking duration
Press the key
or the key
until the symbol
The symbol will
start to flash.
Press and hold the
key OK until the display shows the message BACK ;
the message TIME goes off, and the display shows the countdown of the time remaining until the end of
cooking which was previously set.
71

END OF COOKING FUNCTION
This function lets you keep the oven on u
ntil reaching a previously programmed time.
Once the end of cooking time is reached, the oven will shut off.
The maximum time which can be set for end of cooking is 23 hours and 59 minutes.
Programming and modification:
Press the key
or the key
until the symbol on the display lights up.
The symbol will start to flash.
Press the OK key to confirm that you want to set a time for cooking duration.
The symbol will start flashing more rapidly than before and the programm
er will display the current
time.
Press the keys
or
to set the COOKING DURATION time. Maximum time which can be set: 23.59.
The oven will emit a double beep for confirmation and will start counting two seconds after the last command
is given.
As
an alternative, if you press the OK key during cooking, the system will emit a first sound because the OK
key has been pressed followed by two beeps to confirm the countdown.
The system will go back to showing the current time and the symbol
will
stay on steady.
Viewing:
Press the key
or the key
until the symbol
on the display lights up.
The symbol will start to flash.
Press the OK key.
The display will show the remaining time until cooking time is complete.
The symbol
will fl
ash.
The information will continue to be displayed for 4 seconds. The display will then go back to showing the
current time and the symbol
will stay on steady.
72

AUTOMATIC COOKING FUNCTION
This function lets you have the oven turned on at a
certain time, and leave it on for a previously programmed length of
time.
The time the oven is on is equal to the programmed end
-
of
-
cooking time minus the length of the cooking time.
Once the end of cooking time is reached, the oven will shut off.
Prog
ramming and modification:
you can programmed automatic cooking in two modes, 1 and 2
Mode 1
Press the key
or the key
until the symbol
duration of cooking" on the display lights up.
The symbol will start to flash.
Press the OK key to confirm that you want to set a time for cooking duration.
The symbol will start flashing more rapidly than
before and the programmer will display the current
time.
Press the keys
or
to set the COOKING DURATION time. The maximum time which can be set is 23
hours and 59 minutes.
The oven will emit a double beep for confirmation and will start counting tw
o seconds after the last command
is given.
The display will go back to showing the current time and the symbol
will stay on steady.
Press the key
or the key
until the symbol on the display lights up.
The symbol will start to flash.
Press the OK key to confirm that you want to set a time for cooking duration.
The symbol will start flashing more rapidly than before and the programmer will display the current
time.
Press the keys
or
to set the END OF COOKING time. The m
aximum time which can be set is 23
hours and 59 minutes.
The display will emit a double beep for confirmation and will start counting two seconds after the last
command is given.
The system will go back to showing the current time. The symbols
and
will stay on steady.
The oven will shut off at the programmed end of cooking time, and there will be an acoustic signal.
The icons
and
will flash.
If no key is pressed, after 1 minute the buzzer will shut off on its own.
Icons
conti
nue to flash until any key is pressed.
Mode 2
Press the key
Press the key
until the symbol on the display lights up.
(end of cooking)
The symbol will start to flash.
Press the OK key to confirm.
The symbol will start flashing more ra
pidly than before and the programmer will display the current
time.
Press the keys
or
to set the END OF COOKING time. The maximum time which can be set is 23
hours and 59 minutes.
A double beep will be emitted for confirmation and the countdown will start two seconds after the last
command is given.
The display will go back to showing the current time and the symbol
will stay on steady.
Press the key
or the key
until the symbol on the display lights up.
The symbol will star
t to flash.
Press the OK key to confirm that you want to set a time for end of cooking.
73

The symbol will start flashing more rapidly than before and the programmer will display the current
time.
Press the keys
or
to set the COOKING DURAT
ION time. The maximum time which can be set is 23
hours and 59 minutes.
The oven will emit a double beep for confirmation and will start counting two seconds after the last command
is given.
Attention: the DURATION OF COOKING time cannot be greater than the time remaining between the
current time and the time for END OF COOKING.
The display will go back to showing the current time. The symbols
and
will stay on steady.
The oven shuts off, and it will come back on to start cooking at the time esta
blished by the difference between
the end of cooking time and the cooking duration time.
The oven will shut off at the programmed end of cooking time, and there will be an acoustic signal.
The icons
and
will flash.
If no key is pressed, after 1
minute the buzzer will shut off on its own.
Icons
continue to flash until reset by pressing any key.
PROGRAMME DELETION
To delete a cooking programme, set the cooking duration to zero, or if the end of cooking function is
active, select it a
nd decrease the time down to the current time.
If an automatic programme is active, it is sufficient to set the cooking duration time to zero.
PIRO FUNCTION
If you use the selector to select the PIRO function, the programmer will show the following sym
bols
and
and the message PIRO. The latter will be displayed for 15 seconds. After that, the
remaining pyrolysis time will be shown and the message BACK will come on to indicate that countdown is
occurring.
PIRO lets you ch
ange the time of pyrolysis (from a minimum of one and a half hours up to a maximum of
three hours).
To set the time, you will first need to disable the keypad lock by pressing the "key
-
symbol" button; the icon
will go off. Then press the
PIRO key, and increase the time with the key
or decrease it with the
key
.
If a PIRO cycle is activated and, after the display of the remaining pyrolysis time, another cooking function
is set or the oven is shut off, the programmer will delete the pyro
lysis. An alarm signal is sounded an the
icon
flashes.
To activate the oven and to de
-
activate the alarm, press any key.
If the countdown reaches its end, the oven will shut down and an alarm will sound. The icon
will
al
so flash.
To activate the oven and to de
-
activate the alarm, press any key.
74

CHILD SAFETY FUNCTION
After setting a programme, it is possible to de
-
activate the keypad of the programmer by pressing the "key"
button until the symbol comes on.
N.B. You can stop cooking at any time by setting the selector to zero.
When the oven is off, if you press the "KEY" button and then you turn the selector knob to a cooking
position, the oven will not come on.
With the selector in any position other t
han zero (PIRO cycle excluded), the oven will shut down if the
"key" button is pressed.
TEMPERATURE INDICATOR
This consists of a vertical bar composed of 5 segments and 2 luminous messages.
Initially, all the segments will be off. When the oven starts
working, the segments of the scale will come on
one at a time, from lowest to highest in a certain time while the oven is on.
In order for the last segment to light up, the thermostat must determine that the desired temperature has been
reached.
During
pyrolysis operation, the segments will come on in the same manner but at different times.
The segments switch off when the oven is shut down. The segments shut down at intervals of five minutes
from one another.
75

Replacing the oven light - Fig. 8
The oven is equipped with a lamp having the
following features:
25W
screw cap E-14
T 300°C
WARNING: disconnect the appliance from the
power supply.
lf the oven light needs to be replaced, the
protective cover «A» must be removed by
turning it anticlockwise. After the light has
been replace, refit the protective cover «A».
(Fig. 8).
Removing the oven door - Fig. 9
To aid cleaning and make access to the oven
interior easier, the oven door can be simply
removed.
To facilitate cleaning of the oven, the door can
be removed via the hinges as follows:
hinges with movable bolt
The hinges A are provided with two movable
bolts B.
When bolt B is raised, the hinge is released
from its housing.
Having done this, the door must be lifted
upwards and removed, sliding it towards the
outside;
grip the sides of the door near the hinges when
performing these operations.
To refit the door, firstly slide the hinges into
their slots.
Before closing the door, remember to rotate
the two movable bolts B used to hook the two
hinges.
Fig. 9
A
B
Fig. 8
76

TECHNICAL SPECIFICATIONS
Appliance compliant with current standards concerning the elimination of radio
-
electrical interference. Power supply: 220V 50Hz
HP
-
740I
Oven light bulb
0,025 kW
Pyrolysis smoke catalyser
0,150 kW
Tangential fan
0,025 kW
Fan
0,025 kW
Upper heating element
0,900 kW
Lower heating element
1,300 kW
Fan heating element
2,300 kW
Grill heating element
1,600 kW
Maximum absorbed power:
3,100 kW
Electrical cable: H05 RR
-
F
cross section 3 x 2,5
mm
2
Usable oven dimensions:
Width: 440
mm
Depth: 390mm
Height: 340mm
Volume: 59 litres
77

INSTALLATION
ATTENTION: THIS APPLIANCE MUST BE INSTALLED BY A TECHNICIAN IN
COMPLIANCE WITH THE INSTRUCTIONS PROVIDED BY THE MANUFACTURER.
BEFORE DOING ANY WORK ON THE APPLIANCE, MAKE SURE IT IS DIS
CONNECTED
FROM THE POWER SUPPLY.
Legislative standards, technical regulations and directives
Installation of the device must be carried out in compliance with current legal standards
and with applicable safety standards
Oven installation:
The oven must be installed in a module with dimensions of 600 mm, built into a set of
furniture. It is necessary to provide an opening of at least 85/90 mm both above and below
the furniture unit to allow proper ventilation of the appliance (see figure 5).
During installation, do not lift the oven by the door. Generally speaking, do not subject the
oven to any sort of stress.
Fig. 5
78
Table of contents
Other Teka Oven manuals