Tekno C201AU User manual

C201AU
Owner’s manual
Manuel d’utilisation et d’entretien
Libro de instrucciones de uso y mantenimiento
For service questions, contact Ladybug at 1-800-997-6584.
For sales inquiries, contact Sylvane at 1-800-934-9194 or visit
www.sylvane.com.
ENGLISH
1
Do not use this machine if there are
signs of damage (cracks, breaks), if
the power cord is damaged, or if you
suspect that there may be an internal
defect (for example, after the machine
has fallen).
If the power cord is damaged, a ma-
nufacturer-authorised service centre
must replace it since a special tool is
needed to access it.
Read the rating-plate located under
the machine; make sure the voltage
and input ratings comply with the
system’s capacity.
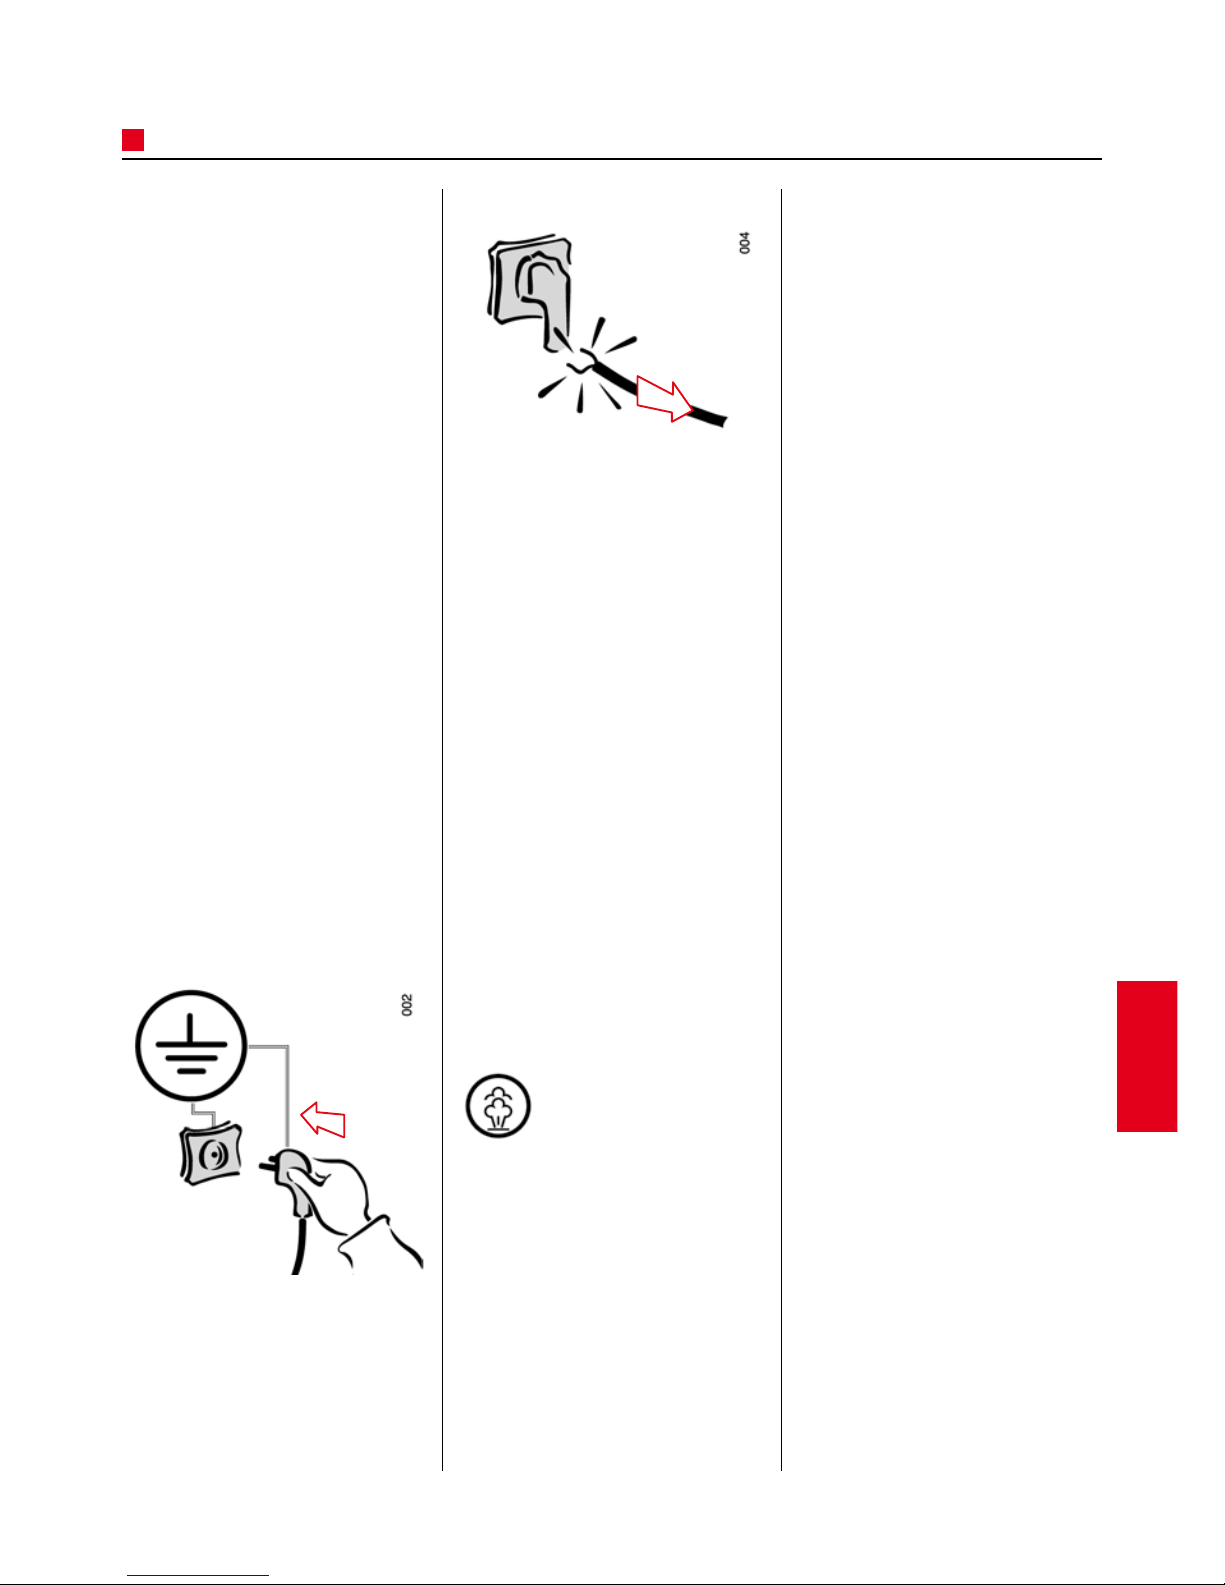
Plug the machine into a grounded
outlet.
While moving the machine, avoid
tugging on the power cord.
Disconnect the machine from the
electrical power source by pulling the
plug. Do not disconnect it by pulling
on the cord, since this could damage
the machine.
Do not leave the machine unatten-
ded while it is plugged in.
Do not let children or other incom-
petent persons use the machine.
Do not attach devices that exceed
the indicated input rating to the
machine!
Only use the machine’s original
accessories, which are guaranteed
compatible by the manufacturer.
This machine has been manufac-
tured for use in enclosed (covered)
areas.
Do not submerge the machine in
water!
Not or space heating purposes.
Do not point the steam
jet at persons or
other living beings. This
machine produces high-temperature
steam. Avoid direct contact with
the skin.
ATTENTION! danger of burning.
WARNING: danger of scalding.
Vapor must never be directed
toward equipment containing
electrical parts, like the inside of
ovens.
Do not place any type of substance
(detergents or anything else) in the
steam generator if not specifically
approved by the manufacturer.
Before using the machine to clean
surfaces that may get damaged (e.g.
synthetic fibres, plastics, wood,
etc.), check their capacity to with-
stand high temperatures by doing
a trial run on a hidden area and by
carefully following manufacturer’s
instructions.
Only use original replacement parts
for any necessary repairs. Please
see an authorised service centre.
Disconnect the equipment from the
electrical system before proceeding
with cleaning or maintenance ope-
rations. Disconnect after use.
The aperture for cleaning the steam
generator must not be open during
use.
WARNING!
ENGLISH
2
USE
HOW TO CONNECT THE ACCES-
SORIES
Make sure that the appliance is di-
sconnected from the mains socket.
Attach the connector (C) to the
heater as follows:
Hook the socket flap on to the lower
hook of the connector.
Pull the flap well open.
Insert the connector into the socket
until it clicks into place.
Press the button to unlock and extract
the connector.
CABLE REWIND
Turn the steam generator as shown
in the diagram in order to rewind the
cable inside the coiler. Fasten the
cable terminal with the special lock.
HANDLE
This is attached to the heater by
means of the connector (C) and
enables all the cleaning accessories
to be attached. The grip has a button
for the distri bution of steam (S)
and a safety lock. To block or release
distribution of the steam use the
button positioned on the side of the
grip. The lock and release position
is indicated in the icon positioned
on this grip. The push-button for
delivering steam is a low voltage
(12V) switch. The handle is provided
with a selector for steam level. Select
the wished steam level, than push the
button (S) to relase steam. 1 = low - 2
= middle - 3 = max
EXTENSIONS
These are connected to the handle
so that the work field is widened. The
extensions have the same attachment.
HOW TO FASTEN THE PIECES
TOGHETER
All the pieces have a bayonnet joint.
To connect the handle to the exten-
sions or to the accessories simply
insert and push as shown in the
drawing (A). To extract the accessory
turn the ring clockwise and pull (B).
ENGLISH
3
LARGE BRUSH
The large brush can be used together
with a cloth. The two spring clamps
fasten the cloth at the sides.
1. Press on the writing “open”
to block the clamp in an open
position.
2. Place the cloth in the correct
position. 3. Press on the writing
“close” to block the cloth.
The large brush has an articulated
joint so that the handle can be tur-
ned 90° to the right and to the left.
To bend the large brush, lift the tab
and pull it in the direction shown in
the diagram so as to free the handle.
To lock the handle into position:
hold it upright, turn the tab in the
opposite direction to the one shown
in the diagram.
NOZZLE
This is attached to the extensions or
directly on to the handle. It can rea-
ch even the most awkward corners.
MEDDLERS AND SCRAPER
This enables special points to be
cleaned which would be otherwise
inaccessible to the other accesso-
ries. They are attached to the end of
the nozzle.
WINDOW CLEANER
This is attached to the extensions
or directly on to the handle.The win-
dow cleaner combines steam with
the mechanical action of a rubber
spatula.
TRIANGULAR BRUSH
This is attached to the extensions or
directly on to the handle.
Can be used to clean fabric.
A cotton or microfiber cloth can
be fixed to the brush for cleaning
operations.
IRON
For instructions on how to use the
iron please refer to the relevant
instruction handbook.
Other accessories other specific
accessories are available as optional.

ENGLISH
4
HOW TO FILL WITH WATER
The appliance is equipped with an
automatic filling system, and may be
filled with water while the heater is
under pressure.
ATTENTION!
Do not use distilled or deminerali-
zed water. It could cause the unit to
malfunction.
HOW TO WORK THE HEATER
Insert the plug into the mains socket.
Press the start button .
The warning light switches on.
This shows that the appliance is
working.
Press the button to use the iron.
The iron can be used without the
steam heater, for no-steam ironing.
The warning light switches on to
indicate that the iron is operating in
the economy mode.
Wait a few minutes until the warning
light switches off. Steam is now
available for cleaning or ironing.
NB: while the appliance is in use, the
warning light will switch on and
off several times; this warning light
may be ignored while the appliance is
being used.
An electronic bell will ring to warn
that there is no water in the heater.
The warning light indicates that
the cold water reservoir is empty.
The appliance has an economy mode
which is activated automatically when
steam is not used for a few minutes.
The ironing is normally done in the
economy mode.
M = Pressure gauge
This indicates the pressure inside the
steam generator
Each time the appliance is used, a few
drops of water may come out when
the start button is pressed for the
first time.
This is quite normal and is due to
condensate which forms when the
tube is still cold.
The same thing may happen after an
interval of any great length.
ENGLISH
5
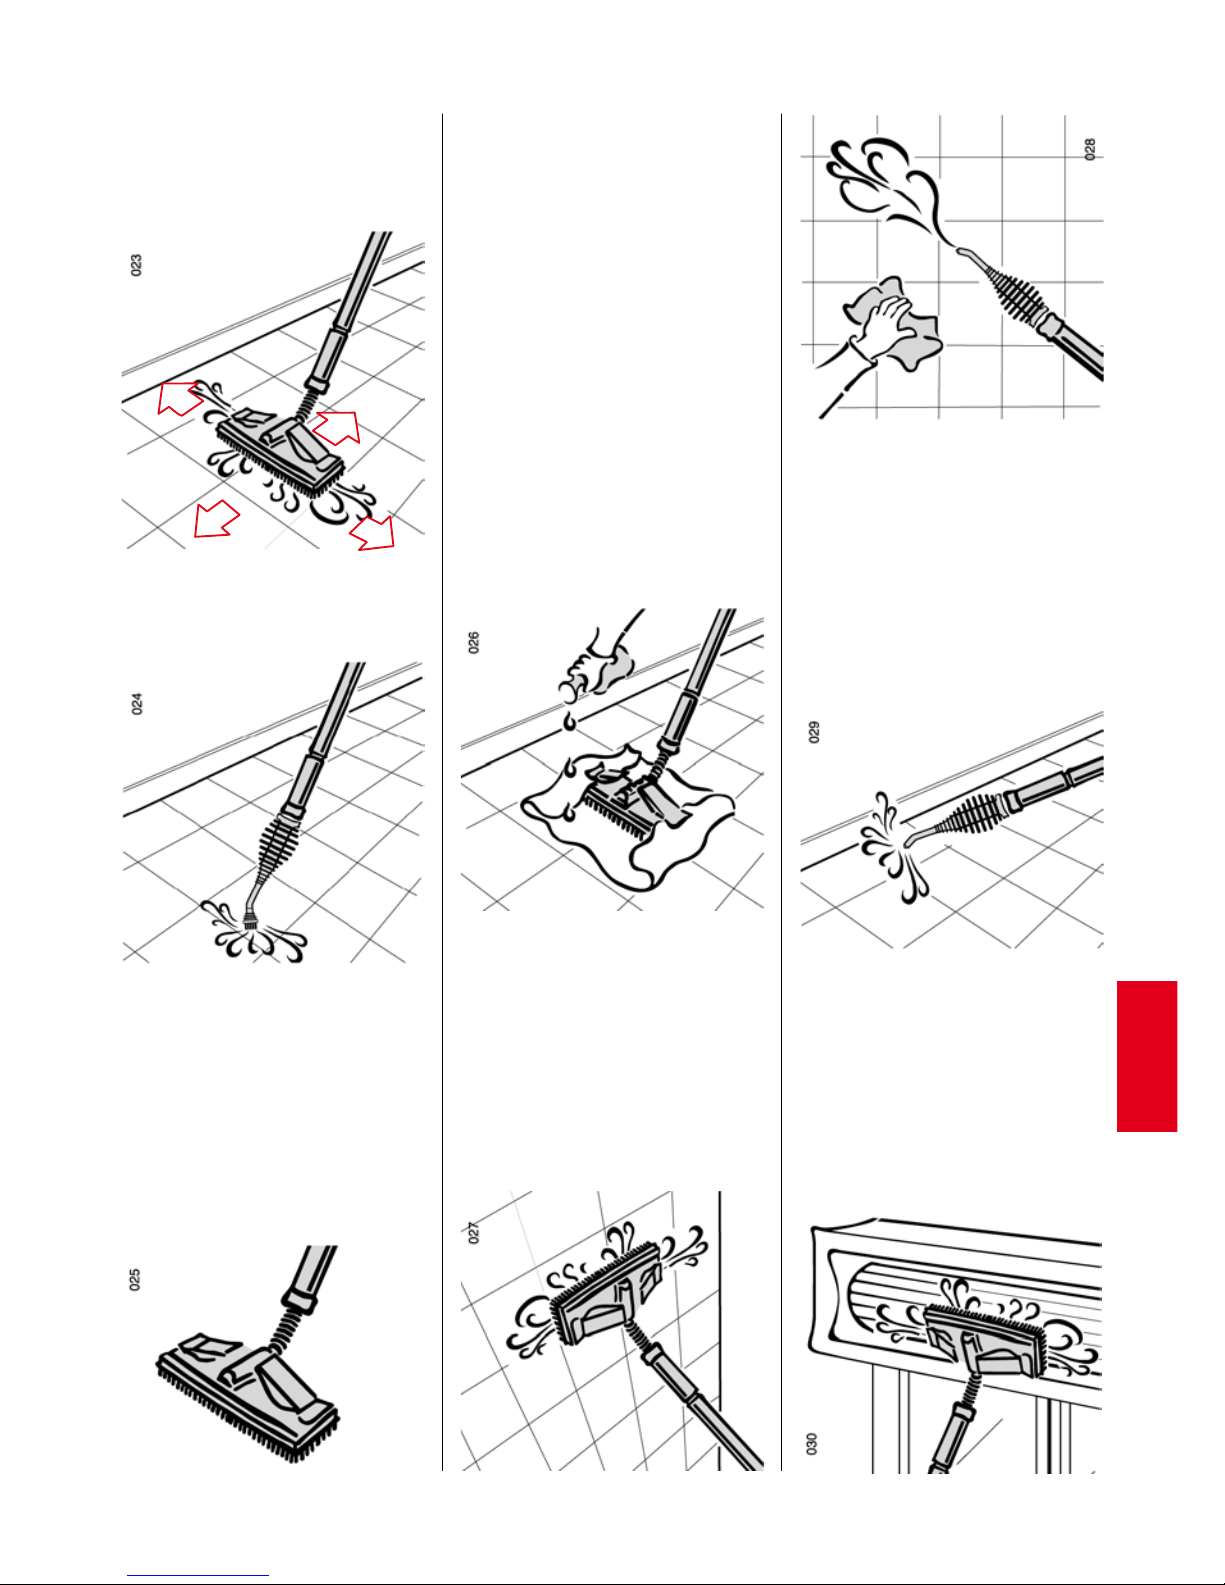
STEAM CLEANING
CLEANING BETWEEN FLOOR
TILES
To clean the spaces between the floor
tiles use the large brush as shown in
the diagram.
Use the meddlar as shown in the
diagram for a more energetic cleaning
action.
Wipe away the dissolved dirt with a
dry cloth.
The large brush can be used with a
cloth.
Use the spring clamps to fasten the
cloth on either side.
Use as an ordinary brush: the steam
will dissolve the dirt which will
remain on the cloth.
The brush handle can be articulated
so that it will turn 90° to the right and
to the left.
WAX REMOVAL
Remove floor wax by rubbing the
brush sideways and backwards and
forwards. Use a cloth to remove resi-
dual wax. The floor will be completely
clean.
HOW TO APPLY WAX
Put a layer of wax on the cloth and
apply it by using steam together with
a mechanical action.
The wax will be more fluid and will be
distributed more evenly.
WALL TILES
The large brush can be used with or
without the extensions to clean tiles.
The large brush is suitable for
cleaning walls.
Together with the nozzle use a dry
cloth to remove any dirt from the
walls.
CRACKS
Clean the cracks between the skirting-
board and the floor.
In this way the cracks will be disin-
fected and any insects or parasites
eliminated.
BLINDS
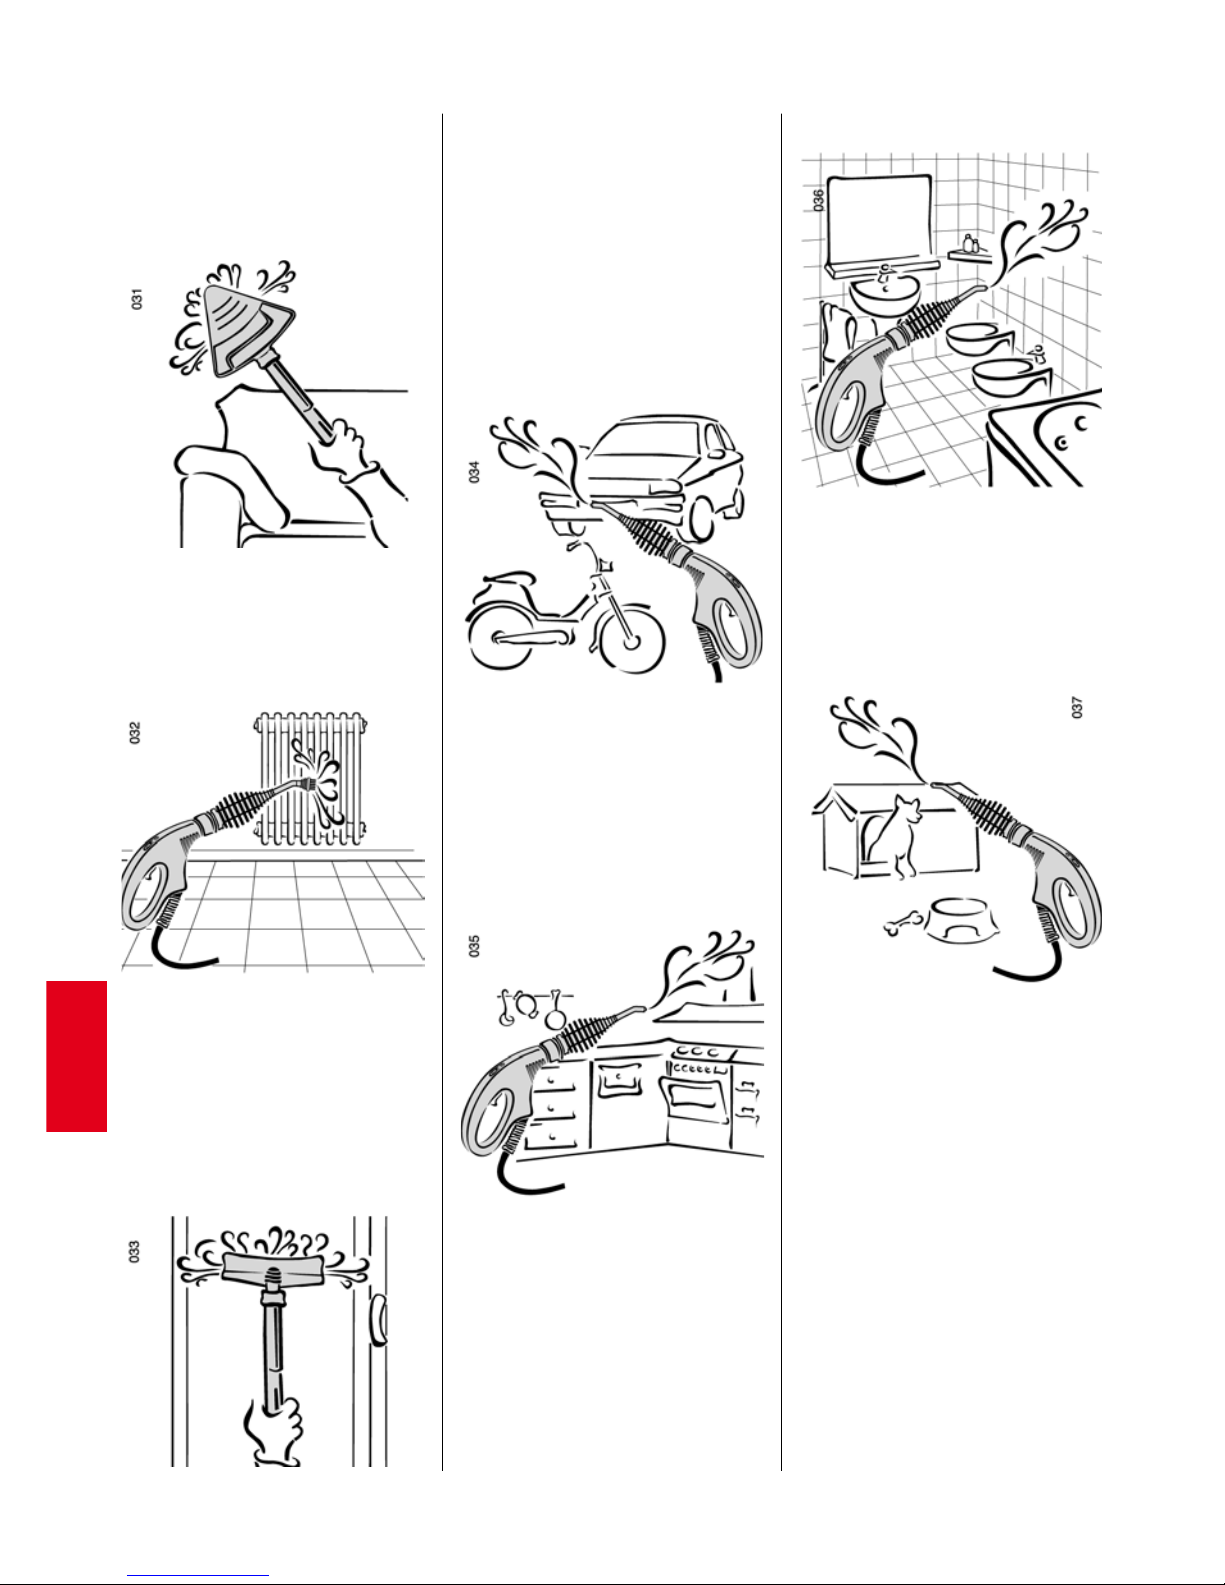
ENGLISH
6
Use the large brush on the extension
to clean blinds.
FABRIC
Use the small brush with the absor-
bent hood to clean sofas, armchairs,
cushions and mattresses.
RADIATORS
Use the meddlar to clean the radiator
elements.
Place a dry cloth under the radiator to
catch any dirt.
WINDOWS
A combination of steam and the
mechanical action of the spatula
ensures that the window cleaning ac-
cessory will give you perfectly clean
windows, glass and mirrors.
Place a dry cloth underneath to catch
any dirt.
CARS AND MOTORBIKES
Use the steam to remove grease and
dirt from the engine, wheels and
mudguards as well as to clean and
disinfect the internal car upholstery.
KITCHEN
Use the steam to clean and disinfect
the kitchen and electrical appliances
such as the oven, fridge etc.
Grease and dirt can be removed from
the oven and the gas rings.
NB: electrical appliances must be
unplugged from the mains during
steam cleaning.
BATHROOM
Use the steam to clean and disinfect
the bathroom: floor, walls, fittings etc.
WHERE ANIMALS LIVE
Use the steam to clean and disinfect
all the places where domestic
animals, such as dogs, cats, birds
etc. live.
Use the steam to disinfect corners,
food bowls and bird cages.
Do not spray the animal directly.
ENGLISH
7
MANTEINANCE
A certain amount of deposit will form
inside the heater according to how
much it is used and how hard the
water is.
HOW TO REMOVE DEPOSIT
FROM THE HEATER
Check that no accessory is connected
to the steam generator. Unscrew the
metal cap on top of the heater unit.
Pour 1/2 a glass of white wine vinegar
into the empty heater and screw on
DISPOSAL INSTRUCTIONS AND ENVIRONMETAL STANDARDS
the cap. Make sure that there is water
in the cold water reservoir.
Switch on the heater until the correct
temperature has been reached.
Switch off the appliance and wait until
the internal pressure has subsided.
Unscrew the metal cap again, empty
the heater and rinse thoroughly with
clean water.
Close by screwing on the metal cap.
Do not empty the steam through the
iron or the nozzle.
HOW TO REMOVE DEPOSIT
FROM THE COLD WATER
RESERVOIR
The cold water reservoir is controlled
by sensors, which may not work
properly when there is calcium
build-up. Therefore occasionally it is
necessary to pour 1/2 glass of white
vinegar in the cold water reservoir,
and then to spray a generous amount
of steam into the reservoir using the
steam nozzle. Following this opera-
tion, rinse well with water.
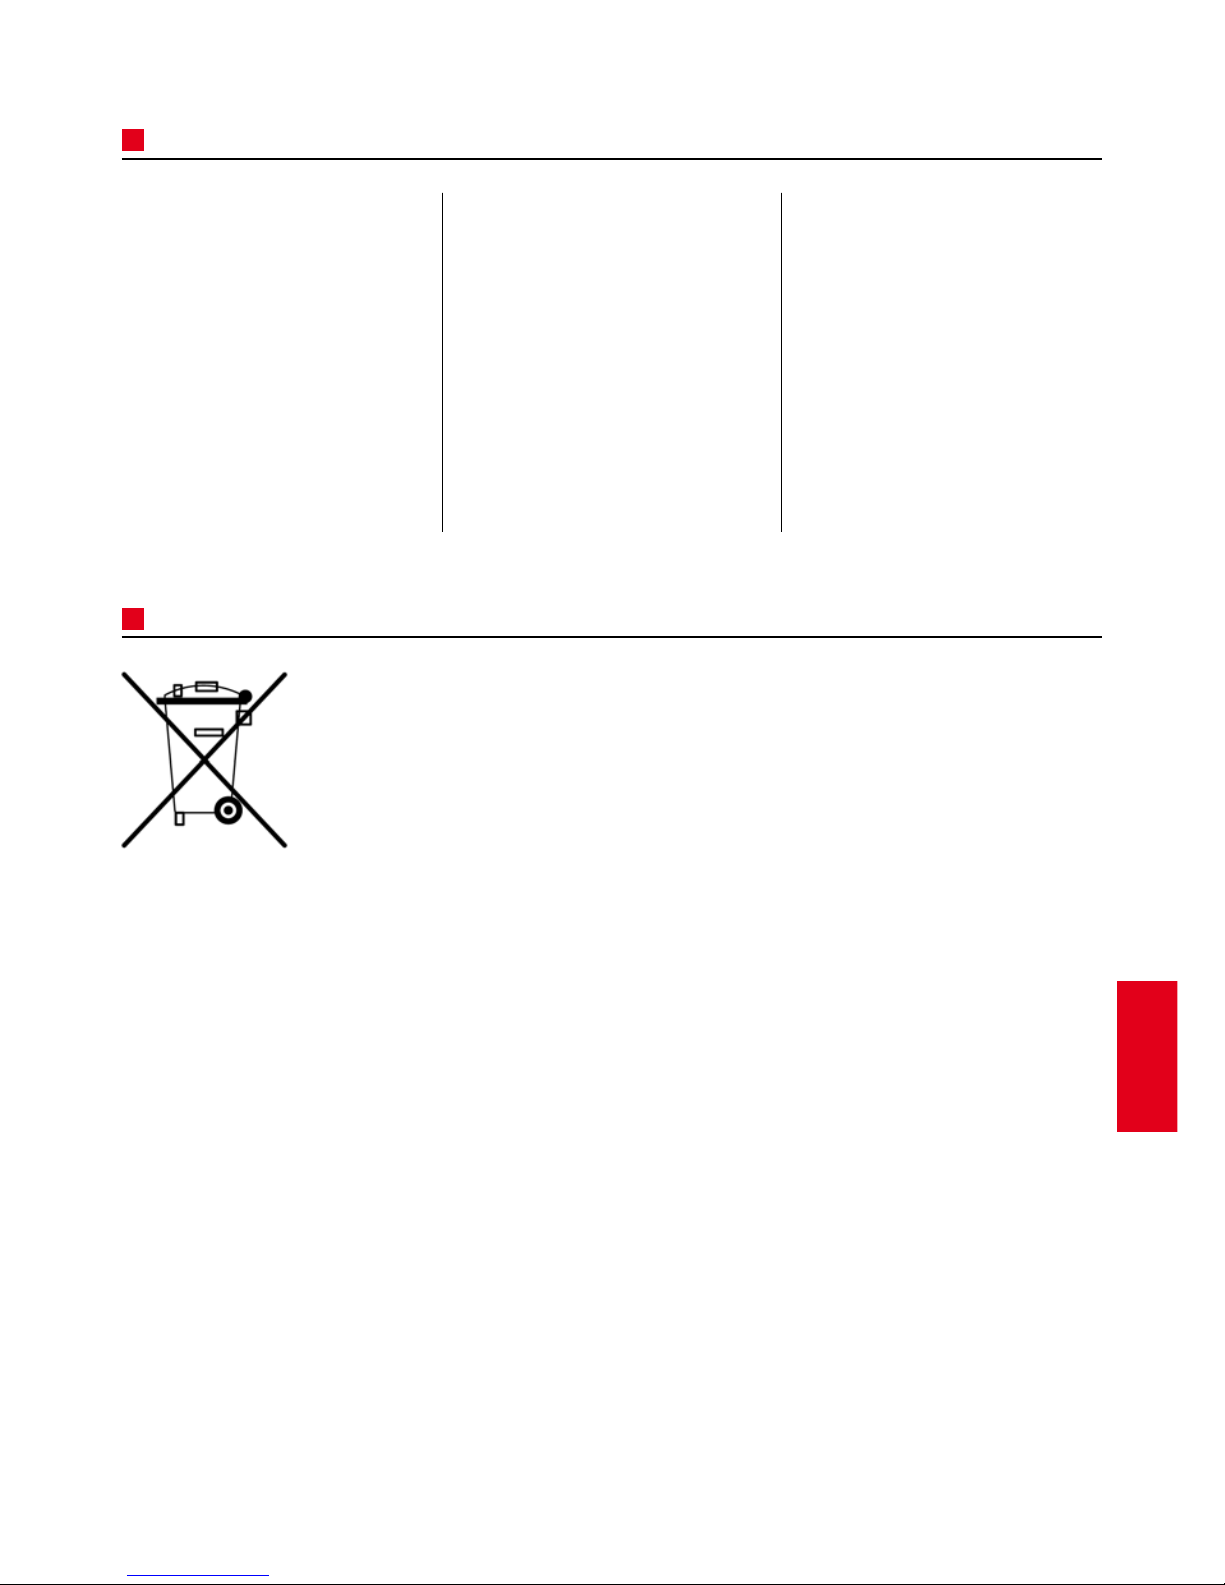
Dispose of packaging and used filters in accordance with current standards. Follow the instruc-
tions for any material recycling (segregated collection) in your area. The symbol of a crossed out
basket on the device specifies that the product should be disposed of separately from domestic
waste at the end of its useful life.
The user is responsible for taking device to an appropriate collection device to an appropriate
collection point. Suitable segregated collection for ensuing recycling, treatment and environmen-
tally compatible disposal helps prevent potentially negative effects on the environment and on
health and favors recycling of the product’s materials. For more detailed information on available
collection systems, consult your local waste disposal service or the shop where the shop where the
product was purchased.
The technical data and information given in this handbook are not binding. The manufacturer reserves the right to carry out
any necessary modifications without prior notice or replacement.
For service questions, contact Ladybug at 1-800-997-6584.
For sales inquiries, contact Sylvane at 1-800-934-9194 or visit
www.sylvane.com.
Table of contents


