manuals.online logo
Brands
  1. Home
  2. •
  3. Brands
  4. •
  5. TELECO AUTOMATION
  6. •
  7. Receiver
  8. •
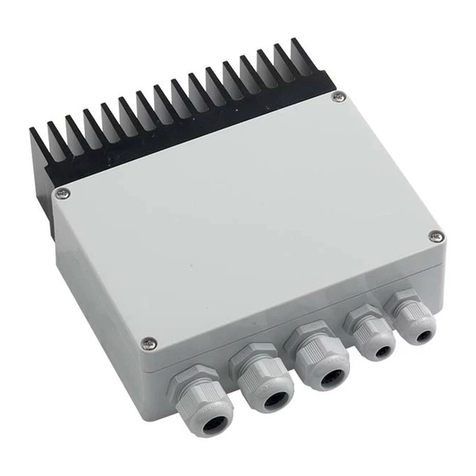
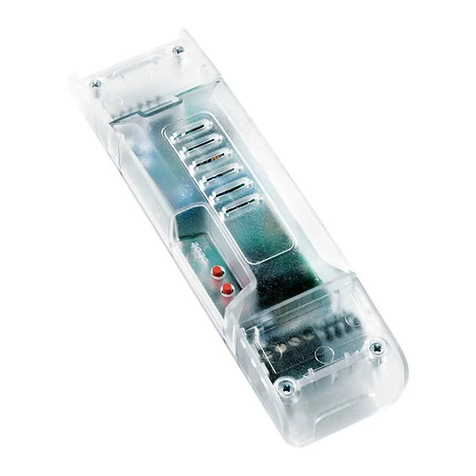
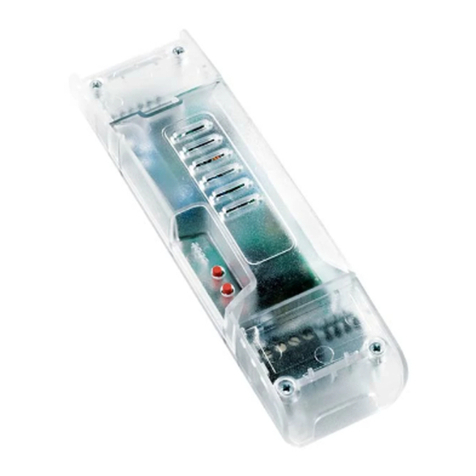
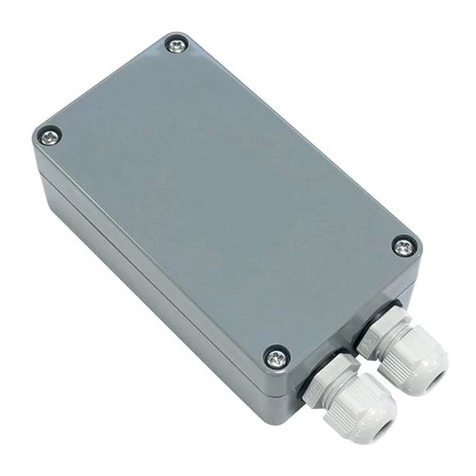
  9. TELECO AUTOMATION TVHET868A07 User manual

TELECO AUTOMATION TVHET868A07 User manual

TVHET868A07 (6.8KW - 868.3Mhz)
TVHET916A07 (6.8KW - 916Mhz)
IT - RICEVITORE 110/277VAC CON FUNZIONE DIMMER 0-100% PER RISCALDATORI DI TIPO INFRAROSSO E
RESISTIVO FINO A 6800W. INGRESSO PULSANTE MANUALE. CONTROLLABILE DA SENSORI DI MOVIMENTO
WIRELESS O FILARI (PIR). CONTROLLO AUTOMATICO DELLA TEMPERATURA DELL’AMBIENTE. “SOFT START”:
PARTENZA GRADUALE PER PRESERVARE LA VITA DEI RISCALDATORI AD INFRAROSSI. GRADO DI PROTEZIONE
IP54.
EN  110/277VAC RECEIVER WITH 0100% DIMMER FUNCTION FOR INFRARED OR RESISTIVE HEATERS UP TO
6800W. PUSHBUTTON INPUT FOR MANUAL CONTROLS. CONTROLLED BY WIRED OR WIRELESS MOVEMENT
SENSORS PIR. AUTOMATIC ROOM TEMPERATURE CONTROL. “SOFT START”: EXTENDING THE LIFETIME OF THE
INFRARED HEATERS IP54 RATING.
FR - RÉCEPTEUR SANS FIL 110/277VAC AVEC FONCTION VARIATION 0-100% POUR APPAREILS DE CHAUFFAGE
RÉSISTIFS ET INFRAROUGES JUSQU’À 6800W. ENTRÉE POUR BOUTON-POUSSOIR. CONTRÔLABLE AVEC UN
DÉTECTEUR DE MOUVEMENT SANS FIL OU FILAIRE. CONTRÔLE AUTOMATIQUE DE LA PIÈCE VIA UNE SONDE
DE TEMPÉRATURE FILAIRE. “SOFT START” : ALLUMAGE PROGRESSIF POUR PRÉSERVER LA DURÉE DE VIE DES
CHAUFFAGES INFRAROUGES. DEGRÉ DE PROTECTION IP54.
DE  110/277VAC DRAHTLOSER EMPFÄNGER MIT 0100% DIMMFUNKTION FÜR INFRAROTUND
WIDERSTANDHEIZGERÄTE BIS ZU 6800W. EINGANG MANUELLER TASTER. STEUERUNG MITTELS VERKABELTEM
ODER DRAHTLOSEM BEWEGUNGSSENSOR. AUTOMATISCHE STEUERUNG DER RAUMTEMPERATUR . “SOFT
START”: VERLÄNGERUNG DER LEBENSDAUER VON INFRAROTHEIZUNGEN. SCHUTZART: IP54.
IT - Codice prodotto EN - Product code FR - Code du produit DE - Artikelnummer
LISTED
LISTED
0
12
24
36
48
60
72
84
96
108
120
132
144
156
168
180
192
204
216
CAMERA-READY LOGOTYPE OF THE UL LISTING MARK FOR CANADA AND THE U.S.
These Marks are registered by Underwriters Laboratories Inc.
ULUS LISTED
C
ULUS LISTED
C
ULUS LISTED
CULUS LISTED
C
ULUS
C
LISTED
C
US
UL
ULU
S
C
LISTED
ULUS
C
LISTED
ULUS
C
LISTED
The minimum height of the registered trademark symbol shall be 3/64 of
an inch. When the overall diameter of the UL Mark is less than 3/8 of an inch,
the trademark symbol may be omitted if it is not legible to the naked eye.
Please note:
Not all of these elements should be used together with the same UL Mark.
The word “LISTED” would only be used once — either to the right of or
below the UL Mark (as shown).
The font for all letter forms is Helvetica Condensed Black, except for
the trademark symbol , which is Helvetica Condensed Medium.
No other fonts are acceptable.
RELATIVE DESIGN & PROPORTIONS OF THE UL LISTING MARK FOR CANADA AND THE U.S.
KEY TO DIMENSIONS
UL Mark
A
B
C
D
E
F
G
H
8 units
13 units
14 units
15 units
17 units
20 units
24 units
29 units
“C” and “US”
“LISTED”
P
Q
R
T
34 units
56 units
75 units
201 units
I
J
K
L
M
N
0
30 units
35 units
59 units
85 units
87 units
176 units
216 units
N
P P R
J F C F
A
F G J
M
O
Q
K
G
B
D
H
E
I
F
P
P
T
I
P
T
L
200-195S 10M/8/98
UL60950-1
TELECO AUTOMATION SRL
Via dell’Artigianato, 16 - 31014 Colle Umberto (TV) ITALY
TELEPHONE: +39.0438.388511 - www.telecoautomation.com
DOC.: T743.02
TVHETXXXA07 DATE: 30/10/20
This document is the property of Teleco Automation Srl, which reserves all reproduction and copyrights
IT - INDICE EN  INDEX FR - INDEX DE  INHALT
1. Collegamenti e regolazioni p. 3 - 6
1.1 Schemi di cablaggio tipici
1.2 Congurazione del valore minimo di carico
1.3 Attivazione/disattivazione memoria dell’ultimo valore di carico
2. Dispositivi di comando wireless p. 7 - 10
2.1 Memorizzazione codici radio
2.2 Cancellazione codici radio
2.3 Modica dei valori di preimpostati di un trasmettitore 7/42 canali
2.4 Memorizzazione remota di ulteriori codici radio
2.5 Cancellazione remota di un codice radio
3. Approfondimenti p. 11 - 12
3.1 Controllo automatico della temperatura dell’ambiente
3.2 Uso del sensore di movimento (PIR)
3.3 Ingresso pulsante opzionale con indicatore LED
Avvertenze p. 13 - 14
Speciche tecniche p. 15
IT
1. Connections and adjustments p. 3 - 6
1.1 Typical wiring diagrams
1.2 Conguration of the minimum level of load
1.3 Activation/deactivation of the memory of the last load value
2. Wireless command devices p. 7 - 10
2.1 Radio codes memorization
2.2 Radio codes deletion
2.3 Modication of the preset values of a 7/42 channel transmitter
2.4 Remote memorization of other radio codes
2.5 Remote deletion of a radio code
3. Further details p. 11 - 12
3.1 Automatic room temperature control
3.2 Using the movement sensor (PIR)
3.3 Optional push-button input with LED indicator
Warnings p. 13 - 14
Technical specications p. 15
EN
1. Branchements et réglages p. 3 - 6
1.1 Schémas de câblage types
1.2 Conguration du niveau le plus bas de la charge
1.3 Activation/désactivation de la mémoire de la dernière valeur de charge
2. Dispositifs de commande sans l p. 7 - 10
2.1 Mémorisation des codes radio
2.2 Suppression des codes radio
2.3 Modication des valeurs préréglées d’un émetteur 7/42 canaux
2.4 Mémorisation à distance d’autres codes radio
2.5 Suppression à distance d’un code radio
3. Approfondissements p. 11 - 12
3.1 Contrôle automatique de la température de la pièce
3.2 Utilisation du détecteur de mouvement (PIR)
3.3 Entrée pour bouton-poussoir en option avec indicateur LED
Avertissements p. 13 - 14
Spécications techniques p. 15
FR
1. Anschlüsse und Einstellungen S. 3 - 6
1.1 Typische Verdrahtungspläne
1.2 Einstellung des Minimalwerts der Last
1.3 Aktivierung/ Deaktivierung Speicherung letzter Wert der Last Intensität
2. Drahtlose Steuerungsgeräte S. 7 - 10
2.1 Speicherung Funkcodes
2.2 Löschung von Funkcodes
2.3 Änderung der voreingestellten Werte eines 7/42-Kanal Senders
2.4 Fern-Speicherung weiterer Funkcodes
2.5 Fern-Löschung eines Funkcodes
3. Erläuterungen S. 11 - 12
3.1 Automatische Steuerung der Raumtemperatur
3.2 Verwendung des Bewegungssensor (PIR)
3.3 Optional Eingang Taster mit LED-Anzeige
Warnhinweise S. 13 - 14
Technische Daten S. 15
DE
3
IT - Fusibile
EN - Fuse
FR - Fusible
DE - Sicherung
IT - Ingresso pulsante manuale / PIR
EN - Input for manual push-button / PIR
FR - Entrée pour bouton-poussoir / PIR
DE - Eingang manueller Taster / PIR
IT - Tasti di programmazione
EN - Programming buttons
FR - Boutons de programmation
DE - Programmierungstasten
IT - Alimentazione
EN - Power supply
FR - Alimentation
DE - Stromversorgung
IT - Uscita
EN - Output
FR - Sortie
DE - Ausgang
IT - Ingresso sonda di temperatura
EN - Input for temperature probe
FR - Entrée pour sonde de température
DE - Eingang Temperatursensor
IT - Regolazione temperatura
EN - Temperature adjustment
FR - Ajustement de température
DE - Temperaturregelung
DIP2 ► OFF
OFF
DIP2 ► ON
ON
DIP1 ► OFF
15 min
DIP1 ► ON
30 min
IT - Congurazione del tipo di carico EN - Conguration of the load type
FR - Conguration du type de charge DE - Kongurierung der Lastart
DIP3 ► OFF
Resistivo
Resistive
Resistif
Widerstandlast
DIP3 ► ON
Induttivo (infrarosso)
Inductive (infrared)
Inductif (infrarouges)
Induktiv (infrarot)
IT - Se impostato su “infrarosso” (DIP3 in ON) alla ricezione di un comando il dispositivo attiva
il carico in modo graduale (“soft start”), per prolungare la vita del riscaldatore.
EN - If Infrared Heater is selected (DIP3 in ON position), upon a command is received, the
device activates the load with a “soft start”, for extending the lifetime of the heater.
FR - Si “infrarouge” est sélectionné (DIP3 sur ON), lors de la réception d’une commande
d’allumage, la fonction “soft start” est activée pour prolonger la durée de vie du chauffage.
DE - Wenn Infrarotheizungen ausgewählt sind (DIP3 in Position EIN) und ein Befehl empfangen
wird, startet das Gerät im „Soft Modus“ um die Lebensdauer des Heizers zu verlängern.
IT - COLLEGAMENTI E REGOLAZIONI EN  CONNECTIONS AND ADJUSTMENTS FR - BRANCHEMENTS ET RÉGLAGES DE  ANSCHLÜSSE UND EINSTELLUNGEN
IT - Ingresso pulsante opzionale con indicatore LED (p.12)
EN - Optional push-button input with LED indicator (p.12)
FR - Entrée pour bouton-poussoir en option avec
indicateur LED (page 12)
DE - Optional Eingang Taster mit LED-Anzeige (S.12)
IT - Abilitazione PIR
EN - PIR enabling
FR - Activation du PIR
DE - PIR Aktivierung
IT - Durata accensione da PIR
EN - Duration of turn-on by PIR
FR - Durée fonctionnement par PIR
DE - Einschaltdauer über PIR
ON/OFF
(EIN/AUS)
< 1 s
DIMMER
ꜛ ꜜ
> 1 s
T1
T2 = PIR (ON @ 100%)
1
AREA
AREA
4
AREA
AREA
IT EN FR DE
1ALIMENTAZIONE 110/277Vac (FASE) 110/277Vac POWER SUPPLY (LIVE) ALIMENTATION 110/277Vac (PHASE) 110/277Vac STROMVERSORGUNG (PHASE)
2ALIMENTAZIONE 110/277Vac (NEUTRO) 110/277Vac POWER SUPPLY (NEUTRAL) ALIMENTATION 110/277Vac (NEUTRE) 110/277Vac STROMVERSORGUNG (NEUTRAL)
3ALIMENTAZIONE 110/277Vac (TERRA) 110/277Vac POWER SUPPLY (GROUND) ALIMENTATION 110/277Vac (TERRE) 110/277Vac STROMVERSORGUNG (MASSE)
4TERRA (USCITA 1a) GROUND (OUTPUT 1a) TERRE (SORTIE 1a) MASSE (AUSGANG 1a)
5TERRA (USCITA 1b) GROUND (OUTPUT 1b) TERRE (SORTIE 1b) MASSE (AUSGANG 1b)
6USCITA 1a (NEUTRO) OUTPUT 1a (NEUTRAL) SORTIE 1a (NEUTRE) AUSGANG 1a (NEUTRAL)
7USCITA 1b (NEUTRO) OUTPUT 1b (NEUTRAL) SORTIE 1b (NEUTRE) AUSGANG 1b (NEUTRAL)
8USCITA 1b (FASE) OUTPUT 1b (LIVE) SORTIE 1b (PHASE) AUSGANG 1b (PHASE)
9USCITA 1a (FASE) OUTPUT 1a (LIVE) SORTIE 1a (PHASE) AUSGANG 1a (PHASE)
M5-T1 INGRESSO PULSANTE (N.A.) PUSHBUTTON INPUT (N.O.) ENTRÉE POUR BOUTON-POUSSOIR (N.O) EINGANG MANUELLER TASTER (Schließer)
M5-T2 INGRESSO PIR (N.A.) PIR INPUT (N.O.) ENTRÉE POUR PIR (N.O) EINGANG PIR (Schließer)
M5-COM COMUNE INGRESSI INPUTS COMMON COMMUN ENTRÉES GEMEINSAMER ANSCHLUSS
NTC INGRESSO SONDA DI TEMPERATURA TEMPERATURE PROBE INPUT ENTRÉE POUR SONDE DE TEMPÉRATURE EINGANG TEMPERATURSENSOR
M4-LED+ USCITA INDICATORE LED (+) LED INDICATOR OUTPUT (+) SORTIE INDICATEUR LED (+) LED-ANZEIGE AUSGANG (+)
M4-LED- USCITA INDICATORE LED (-) LED INDICATOR OUTPUT (-) SORTIE INDICATEUR LED (-) LED-ANZEIGE AUSGANG (-)
M4-T4 INGRESSO PULSANTE (N.A.) PUSHBUTTON INPUT (N.O.) ENTRÉE POUR BOUTON-POUSSOIR (N.O) EINGANG MANUELLER TASTER (Schließer)
L1, L2 LED DI INPUT INPUT LED ENTRÉE LED EINGANG LED
L3 LED DI RICEZIONE RADIO RECEIVER LED RÉCEPTEUR LED EMPFÄNGER LED
LED ERROR ACCESO = SOVRACCARICO ON = OVERLOAD ALLUMÉ = SURCHARGE AN = ÜBERLASTUNG
LAMPEGGIANTE = SURRISCALDAMENTO FLASHING = OVERHEATING FEU CLIGNOTANT = SURCHAUFFE BLINKEND = ÜBERHITZUNG
LED BAR LIVELLO DI USCITA OUTPUT LEVEL NIVEAU DE SORTIE AUSGANGSWERT
TR1 REGOLAZIONE DELLA TEMPERATURA TEMPERATURE ADJUSTMENT AJUSTEMENT DE TEMPÉRATURE TEMPERATURREGELUNG
P1-P2-P3 TASTI DI PROGRAMMAZIONE PROGRAMMING BUTTONS BOUTONS DE PROGRAMMATION PROGRAMMIERUNGSTASTEN
LED
BAR
L1 L2
DIP
SWITCH
P1 P2 P3
LED
ERROR
L3
Non operare nelle zone ad alto voltaggio della
scheda quando il prodotto è alimentato.
Do not operate in the high voltage area of the
electronic board, when it is supplied.
Ne pas intervenir sur les composants à haute
tension du produit lorsqu’il est alimenté.
Arbeiten Sie nicht in unmittelbarer Nähe des
Hochspannungsbereichs wenn das Produkt an
den Stromkreis angeschlossen ist.
TR1
IT - COLLEGAMENTI E REGOLAZIONI EN  CONNECTIONS AND ADJUSTMENTS FR - BRANCHEMENTS ET RÉGLAGES DE  ANSCHLÜSSE UND EINSTELLUNGEN
1
5
≤ 3.0KW (110Vac)
≤ 6.8KW (240Vac)
≤ 6.8KW (277Vac)
N
Gnd
L
110-277Vac IN
Sezione Section
Section Abschnitt
≥ 2.5 mm
N
Gnd
L
Sezione Section
Section Abschnitt
≥ 4 mm
N
Gnd
L
N
Gnd
L
Sezione Section
Section Abschnitt
≥ 1.5 mm
≤ 1.5KW (110Vac)
≤ 3.4KW (240Vac)
≤ 3.4KW (277Vac)
110-277Vac IN
N
Gnd
L
Sezione Section
Section Abschnitt
≥ 4 mm
IT - SCHEMI DI CABLAGGIO TIPICI EN  TYPICAL WIRING DIAGRAMS
FR  SCHÉMAS DE CÂBLAGE TYPES DE - TYPISCHE VERDRAHTUNGSPLÄNE
1.11.1
N
L
N
L
NGnd
L
N
L
Sezione Section
Section Abschnitt
≥ 4 mm
110-277Vac IN
Sezione Section
Section Abschnitt
≥ 1.5 mm
*
NL
Sezione Section Section Abschnitt ≥ 0.75 mm
≤ 770W (110Vac)
≤ 1.7KW (247Vac)
≤ 1.7KW (277Vac)
Gnd
NGnd
L
N
LGnd
Sezione Section Section Abschnitt ≥ 0.75 mm
Gnd
Gnd
Gnd
*
* IT - Utilizzare terminali di collegamento idonei secondo le attuali normative sulla sicurezza elettrica. EN - Use suitable junction
terminals complying with the standard of electrical installations. FR - Utiliser des terminaux de branchement aptes à garantir une
isolation conforme aux normes de sécurité électrique. DE - Für den Anschluss sind geeignete Materialien zu verwenden, die eine
Isolierung entsprechend den geltenden elektrischen Sicherheitsbestimmungen gewährleisten.
≤ 1.5KW (110Vac)
≤ 3.4KW (240Vac)
≤ 3.4KW (277Vac)
≤ 770W (110Vac)
≤ 1.7KW (247Vac)
≤ 1.7KW (277Vac)
≤ 770W (110Vac)
≤ 1.7KW (247Vac)
≤ 1.7KW (277Vac)
≤ 770W (110Vac)
≤ 1.7KW (247Vac)
≤ 1.7KW (277Vac)
Alimentazione
Power Supply
Alimentation
Stromversorgung
Alimentazione
Power Supply
Alimentation
Stromversorgung
Alimentazione
Power Supply
Alimentation
Stromversorgung
6
IT - ATTIVAZIONE/DISATTIVAZIONE MEMORIA DELL’ULTIMO VALORE DI CARICO
EN  ACTIVATION/DEACTIVATION OF THE MEMORY OF THE LAST LOAD VALUE
FR - ACTIVATION/DÉSACTIVATION DE LA MÉMOIRE DE LA DERNIÈRE VALEUR DE CHARGE
DE  AKTIVIERUNG/ DEAKTIVIERUNG SPEICHERUNG LETZTER WERT DER LAST INTENSITÄT
1.3
*IT - Il buzzer emette un bip ad ogni pressione. EN - The buzzer will make a beep each press. FR - L’avertisseur sonore émet un bip à chaque appui. DE - Das Gerät quittiert jeden Druck mit einem Ton.
IT - CONFIGURAZIONE DEL VALORE MINIMO DI CARICO (RISCALDATORI RESISTIVI, DIP3 = OFF)
EN  CONFIGURATION OF THE MINIMUM LEVEL OF LOAD RESISTIVE HEATERS, DIP3 = OFF
FR - CONFIGURATION DU NIVEAU LE PLUS BAS DE LA CHARGE (APPAREILS DE CHAUFFAGE RÉSISTIFS, DIP3 = OFF)
DE  EINSTELLUNG DES MINIMALWERTS DER LAST WIDERSTANDSHEIZUNGEN, DIP3 = AUS
1.2
OK
P2
+
P1
IT - Regolare il livello minimo desiderato. Premere i tasti P1 e P2 e tenere premuto per 10 s.
EN - Adjust the desired minimum level. Press the buttons P1 and P2 and keep pressed for 10 s.
FR - Réglez la valeur minimum souhaitée. Appuyer sur les boutons P1 et P2 et maintenir appuyé pendant 10 s.
DE - Regeln Sie die Helligkeit auf den gewünschten Wert. P1 und P2 und 10 S lang gedrückt halten.
...
P3P1
P2P1
CONFIGURATO
CONFIGURED
CONFIGURÉ
KONFIGURIERT
VALORE DI FABBRICA
DEFAULT VALUE
VALEUR PRÉDÉFINIE
STANDARDWERT
tenere premuto
keep it pressed
maintenir appuyé
gedrückt halten
( 10 s)
Attivazione
Activation
Activation
Aktivierung
Disattivazione
Deactivation
Désactivation
Deaktivierung
IT - Premere i tasti P1 e P3 contemporaneamente.
EN - Press the buttons P1 and P3 at the same time.
FR - Appuyer en même temps sur le boutons P1 et P3.
DE - Drücken Sie gleichzeitig die Tasten P1 und P3.
P3
+
P1
=
=
ultimo valore
last value
dernière valeur
letzter Wert
ON (EIN)
100%
ON (EIN)
7
IT - Trasmettitore 7/42 canali
EN - 7/42 channels transmitter
FR - Emetteur à 7/42 canaux
DE - 7/42-Kanal Sender
OFF
(AUS)
100%
75%
50%
Min.
DIM +
DIM -
CH1
CH2
CH3
CH4
CH5
CH6
CH7
OFF
(AUS)
100%
75%
50%
Min.
DIM +
DIM -
CH1
CH2
CH3
CH4
CH5
CH6
CH7
ON/OFF
(EIN/AUS)
DIM +
DIM -
CH5
CH6
CH7
IT - Trasmettitore 3/6/18 canali
EN - 3/6/18 channels transmitter
FR - Emetteur à 3/6/18 canaux
DE - 3/6/18-Kanal Sender
IT - Trasmettitore 4/24 canali
EN - 4/24 channels transmitter
FR - Emetteur à 4/24 canaux
DE - 4/24-Kanal Sender
OFF
(AUS)
CH1
CH2
CH3
CH4
ON/OFF
(EIN/AUS)
DIM +
DIM -
CH5
CH6
CH7
100%
75%
50%
OFF
(AUS)
CH1
CH2
CH3
CH4
Teleco TVTXSxxxx02
Teleco TVTXLxxxR02x
IT - Sensore di movimento (PIR)
EN - Motion sensor (PIR)
FR - Détecteur de mouvements (PIR)
DE - Bewegungsmelder (PIR)
IT - DISPOSITIVI DI COMANDO WIRELESS EN  WIRELESS COMMAND DEVICES
FR  DISPOSITIFS DE COMMANDE SANS FIL DE - DRAHTLOSE STEUERUNGSGERÄTE
1.12
100%
75%
50%
IT - Canale singolo di comando: funzione ON, OFF oppure ON/OFF/DIM
EN - Single command channel: function ON, OFF or ON/OFF/DIM
FR - Canal individuel de commande: fonction ON, OFF ou ON/OFF/DIM
DE - Einzel- Kanal für Befehle: Funktion EIN, AUS oder EIN/AUS/DIM
8
IT - MEMORIZZAZIONE CODICI RADIO EN  RADIO CODES MEMORIZATION
FR  MÉMORISATION DES CODES RADIO DE - EINLERNUNG SENDEKANÄLE
*IT - Il buzzer emette un bip ad ogni pressione. EN - The buzzer will make a beep each press. FR - L’avertisseur sonore émet un bip à chaque appui. DE - Das Gerät quittiert jeden Druck mit einem Ton.
1.12.1
IT - TIPO DI MEMORIZZAZIONE
EN - TYPE OF MEMORIZATION
FR - TYPE DE MÉMORISATION
DE - EINLERNUNGSART
P1
IT - Trasmettitore 7/42 canali
EN - 7/42 channels transmitter
FR - Emetteur à 7/42 canaux
DE - 7/42-Kanal Sender
*
x1
IT - Premere il tasto del
trasmettitore relativo al codice da
memorizzare.
EN - Press the button of the
transmitter relative to the code to
memorize.
FR - Appuyer sur le bouton de
l’émetteur concernant le code à
mémoriser.
DE - Drücken Sie die Sendertaste
die auf den zu speichernden
Code bezogen ist.
IT - Trasmettitore 4/24 canali
EN - 4/24 channels transmitter
FR - Emetteur à 4/24 canaux
DE - 4/24-Kanal Sender
*
x2
IT - 1 tasto:
EN - 1 button:
FR - 1 bouton:
DE - 1 Taste:
*
x3
IT - Trasmettitore 3/6/18 canali
EN - 3/6/18 channels transmitter
FR - Emetteur à 3/6/18 canaux
DE - 3/6/18-Kanal Sender
*
x4
IT - 1 tasto con funzione ON
EN - 1 button with function ON
FR - 1 bouton avec fonction ON
DE - 1 Taste mit Funktion EIN
*
x5
IT - 1 tasto con funzione OFF
EN - 1 button with function OFF
FR - 1 bouton avec fonction OFF
DE - 1 Taste mit Funktion AUS
*
x6
IT - Sensore di movimento (PIR)
EN - Motion sensor (PIR)
FR - Détecteur de mouvements (PIR)
DE - Bewegungsmelder (PIR)
*
x7
...
suono intermittente
intermittent sound
son intermittent
intermittierender Ton
tenere premuto
keep it pressed
maintenir appuyé
gedrückt halten
suono continuo
continuous sound
son continu
Dauerton
P1
ON/OFF
(EIN/AUS)
< 1 s
DIMMER
ꜛ ꜜ
> 1 s
9
*IT - Il buzzer emette un bip ad ogni pressione. EN - The buzzer will make a beep each press. FR - L’avertisseur sonore émet un bip à chaque appui. DE - Das Gerät quittiert jeden Druck mit einem Ton.
2.2 IT - CANCELLAZIONE CODICI RADIO EN  RADIO CODES DELETION
FR  SUPPRESSION DES CODES RADIO DE - LÖSCHUNG VON SENDEKANÄLEN
IT - TIPO DI CANCELLAZIONE
EN - TYPE OF DELETION
FR - TYPE DE SUPPRESSION
DE - LÖSCHUNGSART
P2
IT - Singolo codice radio
EN - Single radio code
FR - Un seul code radio
DE - Einzelner Sendekanal
*
x1
IT - Premere il tasto del trasmettitore relativo al codice da cancellare.
EN - Press the button of the transmitter relative to the code to delete.
FR - Appuyer sur le bouton de l’émetteur concernant le code à supprimer.
DE - Drücken Sie die Sendertaste die auf den zu löschenden Code bezogen ist.
IT - Tutti i codici radio
EN - All the radio codes
FR - Tous les codes radio
DE - Alle Sendekanäle
*
x2
...
tenere premuto
keep it pressed
maintenir appuyé
gedrückt halten
suono continuo
continuous sound
son continu
Dauerton
suono intermittente intermittent sound
son intermittent intermittierender Ton
(10 s)
IT - Se un trasmettitore con valori modicati viene usato nella memorizzazione remota (2.4), il trasmettitore aggiunto avrà gli stessi valori modicati. EN - If any transmitter with modied values is used in the
remote memorization (2.4), the added transmitter will have the same modied values. FR - Si un émetteur avec valeurs modiées est utilisé dans la mémorisation via radio (2.4), l’émetteur ajouté aura les
mêmes valeurs modiées. DE - Wenn ein Sender mit geändertem Wert für die Fern- Einlernung (2.4) verwendet wird, wird der Sender dieselben geänderten Werte haben.
IT - MODIFICA DEI VALORI PREIMPOSTATI DI UN TRASMETTITORE 7/42 CANALI
EN  MODIFICATION OF THE PRESET VALUES OF A 7/42 CHANNEL TRANSMITTER
FR - MODIFICATION DES VALEURS PRÉRÉGLÉES D’UN ÉMETTEUR 7/42 CANAUX
DE  ÄNDERUNG DER VOREINGESTELLTEN WERTE EINES 7/42KANAL SENDERS
2.3
CH1
CH2
CH3
CH4
CH5
CH6
CH7
21 CH1
CH2
CH3
CH4
CH5
CH6
CH7
CH1
CH2
CH3
CH4
CH5
CH6
CH7
3
( 5 s)
suono continuo
continuous sound
son continu
Dauerton
OUT
OFF
OUT
ON
IT - 1. Premere il tasto relativo al valore da modicare (CH1..CH4). 2. Regolare il valore con i tasti CH5 e CH6. 3. Premere e tenere premuto CH7 per 5s.
EN - 1. Press the button relative to the value to modify (CH1..CH4). 2. Adjust the value with buttons CH5 and CH6. 3. Press CH7 and keep it pressed for 5s.
FR - 1. Appuyer sur le bouton concernant la valeur à modier (CH1..CH4). 2. Régler la valeur grâce aux boutons CH5 et CH6. 3. Appuyer et maintenir appuyé CH7 pour 5s.
DE - 1. Drücken Sie die Taste bezüglich des zu ändernden Werts (CH1..CH4). 2. Stellen Sie den Wert mit den Tasten CH5 und CH6 ein. 3. CH7 drücken und halten Sie 5S. lang gedrückt.
P2
10
IT - Premere il tasto P3 del trasmettitore memorizzato. Premere il tasto relativo ad un codice memorizzato. Premere il tasto relativo
al nuovo codice. EN - Press the button P3 of the memorized transmitter. Press the button relative to a memorized code. Press
the button relative to the new code. FR - Appuyer sur le bouton P3 de l’émetteur mémorisé. Appuyer sur le bouton concernant un
code mémorisé. Appuyer sur le bouton concernant le nouveau code. DE - Drücken Sie die Taste P3 des gespeicherten Senders.
Drücken Sie die auf den gespeicherten Code bezogene Taste. Drücken Sie die auf den neuen Code bezogene Taste.
IT - MEMORIZZAZIONE REMOTA DI ULTERIORI CODICI RADIO EN  REMOTE MEMORIZATION OF FURTHER RADIO CODES
FR  MÉMORISATION À DISTANCE D’AUTRES CODES RADIO DE - FERN- SPEICHERUNG VON WEITEREN SENDEKANÄLEN
2.4
1 s< 5 s
suono continuo
continuous sound
son continu
Dauerton
suono intermittente
intermittent sound
son intermittent
intermittierender Ton
...
memorizzato
memorized
mémorisé
gespeichert
< 5 s
suono continuo
continuous sound
son continu
Dauerton
nuovo
new
nouveau
neu
IT - Il tasto P3 si trova all’interno del trasmettitore.
Il codice radio aggiunto avrà le stesse funzioni del
codice usato per l’inserimento. La procedura è
compatibile con qualsiasi tipo di trasmettitore.
EN - P3 button is located inside the transmitter. The
added radio code will have the same functions of the
code used for the memorization. This procedure is
compatible with any type of transmitter.
FR - Le bouton P3 se trouve à l’intérieur de l’émetteur.
Le code radio ajouté aura les mêmes fonctions que
le code utilisé pour la mémorisation. La procédure
est compatible avec n’importe quel type d’émetteur.
DE - Die Taste P3 bendet sich im Inneren des
Senders. Der hinzugefügte Sendekanal wird
dieselben Funktionen des Codes haben welcher für
die Einlernung verwendet wurde. Die Prozedur kann
mit allen Arten von Sendern durchgeführt werden.
IT - CANCELLAZIONE REMOTA DI UN CODICE RADIO EN  REMOTE DELETION OF A RADIO CODE
FR  SUPPRESSION À DISTANCE D’UN CODE RADIO DE - FERN- LÖSCHUNG EINES SENDEKANALS
2.5
IT - Il tasto P3 si trova all’interno del trasmettitore.
EN - P3 button is located inside the transmitter.
FR - Le bouton P3 se trouve à l’intérieur de
l’émetteur. DE - Die Taste P3 bendet sich im
Inneren des Senders.
IT - Premere tre volte il tasto P3 del trasmettitore memorizzato. Premere il tasto relativo al codice da cancellare.
EN - Press three times the button P3 of the memorized transmitter. Press the button relative to the code to delete.
FR - Appuyer trois fois sur le bouton P3 de l’émetteur mémorisé. Appuyer sur le bouton concernant le code à supprimer.
DE - Drücken Sie drei mal die Taste P3 des gespeicherten Senders. Drücken Sie die auf den zu löschenden Code bezogene Taste.
x 3
1 s
suono continuo
continuous sound
son continu
Dauerton
suono intermittente
intermittent sound
son intermittent
intermittierender Ton
...
P3
memorizzato
memorized
mémorisé
gespeichert
< 5 s
suono continuo
continuous sound
son continu
Dauerton
P3
memorizzato
memorized
mémorisé
gespeichert
11
IT - CONTROLLO AUTOMATICO DELLA TEMPERATURA DELL’AMBIENTE EN  AUTOMATIC ROOM TEMPERATURE CONTROL
FR  CONTRÔLE AUTOMATIQUE DE LA TEMPÉRATURE DE LA PIÈCE DE - AUTOMATISCHE STEUERUNG DER RAUMTEMPERATUR
3.1
MIN. MAX.
DISABILITATO
DISABLED
DÉSACTIVÉ
DEAKTIVIERT 2.4° 7° 14° 19° 25° 30°
Esempi - Examples - Exemples - Beispiele
IT - Per attivare la funzione di controllo automatico della temperatura, ruotare il trimmer in senso orario. La funzione è attivabile solo
se la sonda di misurazione è collegata alla scheda. All’attivazione la scheda emette un bip. Quando la funzione di controllo è attivata
e la temperatura dell’ambiente supera la soglia impostata, il carico viene spento e la centrale ignora i successivi comandi radio,
segnalandoli con dei bip. Quando la temperatura scende sotto la soglia impostata, la centrale accende il carico al valore che aveva
prima dello spegnimento. Per disattivare la funzione, ruotare il trimmer in senso antiorario no alla posizione minima.
EN - To activate the automatic temperature control function, turn the trimmer clockwise. The function can be activated only if the
temperature probe is connected to the unit. At the activation the control unit sounds one beep. When the function is activated and the
room temperature exceed the set temperature, the control unit turns the load o󰀨 and ignores the next radio commands, indicating this
condition with beeps. When the temperature is lower than the set threshold, the control unit turns the load on at the value it had before
the swithcing o󰀨. To deactivate the function, turn the trimmer counter-clockwise, up to the minimum position.
FR - Pour activer la fonction de contrôle automatique de la température, tourner le potentiomètre dans le sens horaire. La fonction ne peut être activée uniquement si une
sonde de température est connectée à la centrale. Lors de l’activation, la centrale émet un bip. Quand la fonction est activée et que la température de la pièce dépasse la
température de consigne, la centrale coupe le chau󰀨age et ignore les prochaines commandes radio, en le signalant par des bips. Lorsque la température de la pièce est
inférieure à la température de consigne, la centrale allume le chau󰀨age à la valeur précédente. Pour désactuver la fonction, tourner le potentiomètre dans le sens anti-
horaire, jusqu’à la butée.
DE - Um die automatische Steuerung der Temperatur zu aktivieren, drehen Sie den Trimmer im Uhrzeigersinn. Die Funktion ist nur aktiv wenn der Temperaturfühler an der
Einheit angeschlossen ist. Bei der Aktivierung gibt die Einheit einen Ton aus. Wenn die Steuerungsfunktion aktiviert ist und die Raumtemperatur über die programmierte
Temperatur hinausteigt schaltet sich der Dimmer aus und die Einheit ignoriert die darau󰀨olgenden Funkbefehle und bestätigt dies mit Tönen. Wenn die Raumtemperatur
unter die programmierte Temperatur sinkt werden die Einstellungen vor dem Abschalten wieder hergestellt. Um die Temperatursteuerung zu deaktivieren, drehen Sie den
Trimmer gegen den Uhrzeigersinn auf die Position Min.
CH1
CH2
CH3
CH4
CH5
CH6
CH7
IT - Per escludere temporaneamente il controllo automatico della temperatura, tenere premuto per più di 5 secondi uno dei
primi 4 tasti di un trasmettitore a 7 canali.
EN - To temporarily bypass the automatic temperature control keep pressed one of the rst 4 buttons of a 7 channel transmitter
for more than 5 seconds.
FR - Pour désactiver temporairement le contrôle automatique de la température, maintenir appuyé pendant plus de 5s l’un
des 4 premiers boutons d’un émetteur 7 canaux.
DE - Um die Temperatursteuerung vorrübergehend zu umgehen, halten Sie einen der ersten 4 Taster länger als 5 Sekunden
lang gedrückt (nur mit 7-Kanal Sendern).
> 5 s
12
IT - USO DEL SENSORE DI MOVIMENTO (PIR) EN  USING THE MOVEMENT SENSOR PIR
FR  UTILISATION DU DÉTECTEUR DE MOUVEMENT PIR DE - VERWENDUNG DES BEWEGUNGSSENSOR (PIR)
3.2
IT - INGRESSO PULSANTE OPZIONALE CON INDICATORE LED EN  OPTIONAL PUSHBUTTON INPUT WITH LED INDICATOR
FR  ENTRÉE POUR BOUTONPOUSSOIR EN OPTION AVEC INDICATEUR LED DE - OPTIONAL EINGANG TASTER MIT LED-ANZEIGE
3.3
Teleco TVTXSxx
Teleco TVTXLR02x
IT - Il sensore di movimento (PIR) Teleco TVTXSxx ed il trasmettitore Teleco TVTXLR02x per sensori di movimento standard, trasmettono su 2 canali
radio, che possono essere assegnati a comandi di ON e OFF usando le procedure al par. 2.1. In questa applicazione le impostazioni dei DIP relativi al
PIR vengono ignorate. Inoltre è possibile assegnare ai 2 canali di TVTXSxx e TVTXLR02x i valori di potenza pre-impostati (100% = movimento; 66% =
nessun movimento) che corrispondono ai tasti CH1 e CH2 di un trasmettitore 7 canali (vedere par. 2.1). Qualora i valori pre-impostati del trasmettitore
7 canali usato per memorizzare il PIR fossero stati modicati, essi verranno copiati al posto dei livelli standard di default (vedere par. 2.4).
EN - The movement sensor (PIR) Teleco TVTXSxx and the transmitter Teleco TVTXLR02x for standard movement sensors transmit on 2 radio
channels, which can be assigned to separate commands ON and OFF using the procedure at par. 2.1. In this application the dip switch for PIR settings
will have no e󰀨ect. In addition, it’s possible to assign the 2 channels of TVTXSxx and TVTXLR02x to the preset values of power (100% = recognized
movement; 66% = NO movement) which are CH1 and CH2 of a 7 channels transmitter (see the par. 2.1). In case the levels of the 7 channels transmitter
used for the procedure have been modied, they will be copied in PIR instead of default preset values (see the par 2.4).
FR - Le détecteur de mouvement (PIR) Teleco TVTXSxx et l’émetteur Teleco TVTXLR02x pour détecteurs de mouvement tiers émettent sur 2 canaux
radio, chacun pouvant être associé à des commandes séparées ON et OFF en suivant la procédure du §2.1. Dans ce mode, le switch de paramétrage
du PIR n’a aucun e󰀨et. De plus, il est possible d’assigner les 2 canaux du TVTXSxx et du TVTXLR02x à des valeurs de puissance préréglées (ex:
100%=mouvement détecté, 66%=pas de mouvement) correspondant aux canaux CH1 et CH2 d’un émetteur 7 canaux (voir §2.1). Dans le cas où
les niveaux de puissance d’un émetteur 7 canaux ont été modiés, ils seront utilisés en mode PIR en lieu et place des valeurs par défaut (voir §2.4).
DE - Der Bewegungsmelder (PIR) Teleco TVTXSxx und der Sender Teleco TVTXLR02x, senden auf zwei Radiokanälen, welche verschiedene Befehle
EIN und AUS zugeordnet werden können indem man die Prozedur unter Paragraph 2.1 befolgt. In dieser Applikation werden die PIR Dip-Schalter
Einstellungen ignoriert. Es ist zusätzlich möglich die zwei Kanäle der Artikel TVTXSxx und TVTXLR02x den voreingestellten Werten zuzuordnen
(100% = Bewegung; 66% = KEINE Bewegung) welche den Tasten CH1 und CH2 eines 7-Kanal Senders entsprechen (siehe Paragraph 2.1). Im Falle
von geänderten Werten des 7-Kanal Senders welcher für die Prozedur verwendet wird, werden diese Werte anstelle der voreingestellten Werte in den
PIR kopiert (siehe Paragraph 2.4).
IT - Il terminale M4 permette di connettere un ulteriore ingresso in bassa tensione (con le stesse funzioni di T1)
per un pulsante di comando sul coperchio (opzionale). Nello stesso terminale si trova un’uscita per un LED di stato,
da installare anch’esso nel coperchio della scatola. Il Led emetterà una serie di lampeggi, in relazione al carico:
EN - The terminal M4 allows to connect an additional safety low voltage contact (same functions as T1) for the
command push-button in the box cover (optional). In the same terminal there’s an output for connection of a status
LED, to be placed in the box cover as well. The LED will emit as many ashes as the congured output level:
FR - Le bornier M4 permet de connecter un contact basse tension (fonctions identiques à T1) relié à un bouton
poussoir sur le capot (en option). Sur le même bornier existe une sortie pour le raccordement d’une LED d’état, à
positionner sur le capot. La LED clignotera autant de fois que la puissance sélectionnée (voir tableau ci-contre).
DE - An Klemme M4 ist es möglich einen zusätzlichen Sicherheits- Kleinspannungskontakt anzuschließen (selbe
Funktion wie T1) für eine Steuerungstaste auf dem Gehäusedeckel (optional). An derselben Klemme bendet sich
ein Ausgang für den Anschluss einer Status- LED, welche ebenfalls auf dem Gehäusedeckel installiert wird. Die
LED wird je nach konguriertem Wert blinken:
OFF 0%
1 25%
2 33%
3 50%
4 66%
5 80%
ON 100%
13
IT - AVVERTENZE EN  WARNING
IMPORTANTE! LEGGERE ATTENTAMENTE IL PRESENTE MANUALE
PRIMA DI INSTALLARE O METTERE IN SERVIZIO IL PRODOTTO.
CONSERVARE LE ISTRUZIONI PER FUTURA CONSULTAZIONE.
INSTALLAZIONE DEL PRODOTTO
Il prodotto in oggetto deve essere installato, messo in servizio e controllato periodicamente solo da personale
tecnico qualicato nel rispetto delle normative vigenti riguardanti le apparecchiature elettriche. L’installazione
non conforme, l’errata regolazione o l’alterazione del prodotto possono essere causa di incendio, shock elettrico
e lesioni personali anche gravi. Il produttore declina qualsiasi responsabilità in caso di danni derivanti da errata
installazione o utilizzo non conforme del dispositivo.
LUOGO E MODALITÀ MONTAGGIO
Il prodotto deve essere montato seguendo scrupolosamente le seguenti indicazioni: deve essere ssato su
supercie che non si danneggi a causa di alte temperature; deve essere posizionato in ambiente su󰀩cientemente
aerato. NON può essere chiuso ermeticamente; deve essere posto in verticale, con i pressacavo verso il basso;
i cavi di collegamento devono essere protetti da collisioni accidentali, utilizzando canaline o tubi di raccordo;
non coprire il prodotto; non utilizzare o conservare materiali inammabili in prossimità dell’apparecchio.
CONNESSIONI ELETTRICHE
Tutti i collegamenti devono essere previsti per un’alimentazione generale monofase 110/277Vac ed il relativo
collegamento di Terra. Per la disconnessione dalla rete utilizzare un interruttore onnipolare (32A) con un’apertura
dei contatti di almeno 3,5 mm. Predisporre tutti i dispositivi di sicurezza necessari ed utilizzare materiali di
collegamento idonei secondo le attuali normative sulla sicurezza elettrica. Tenere sicamente separati i li con
tensione 110/277Vac da quelli di segnale. I cavi di collegamento devono avere una sezione adeguata al carico
applicato e avere una caratteristica nominale di temperatura T di 90°C. La seguente tabella riporta (in modo
approssimativo) i valori di resistenza e corrente massima di un cavo elettrico di rame, in funzione della sua sezione:
Sezione (mm2) R (ohm/Km) Corrente max. (A)
1 19.5 5
1.5 13.3 10
2.5 7.98 16
4 4.95 26
6 3.30 32
Un dispositivo di disconnessione facilmente (In=32A) accessibile deve essere incorporato nel cablaggio
dell’installazione dell’edicio.
Attenzione: se il cavo di alimentazione è danneggiato, esso deve essere sostituito da persona qualicata, in
modo da prevenire ogni rischio.
INFORMAZIONI DI SICUREZZA
L’apparecchio non è destinato ad essere usato da persone (bambini compresi) le cui capacità siche, sensoriali o
mentali siano ridotte, oppure non opportunamente informate sulle caratteristiche del prodotto e dei possibili pericoli
che esso può causare. I bambini devono essere sorvegliati per sincerarsi che non giochino con l’apparecchio. Non
toccare la scheda con le mani bagnate, oggetti metallici o inammabili. Non operare nelle zone ad alto voltaggio
della scheda, quando il prodotto è alimentato. Non toccare il dissipatore, no a 15 minuti dopo lo spegnimento.
Utilizzare l’apparecchiatura solo con carichi che garantiscano un funzionamento prolungato in completa sicurezza.
La ricezione radio del dispositivo può essere disturbata se si hanno nell’ambiente emissioni elettromagnetiche
provenienti da altre apparecchiature che trasmettono sulla stessa frequenza oppure se il dispositivo viene
schermato da parti metalliche.
SMALTIMENTO DEL PRODOTTO
Alla ne dalla vita utile, l’apparecchio non deve essere smaltito come riuto domestico, ma conferito in un centro di raccolta
riuti elettrici ed elettronici. L’utente è l’unico responsabile dello smaltimento dell’apparecchio a norma di legge, alla ne
della vita utile del medesimo. L’inadempienza è punibile ai sensi della legge applicabile in materia di smaltimento dei riuti.
Con la presente TelecoAutomation s.r.l. dichiara che il prodotto è conforme ai requisiti essenziali, ed alle altre disposizioni
pertinenti, stabilite dalla direttiva 1999/5/CE. La dichiarazione di conformità può essere consultata sul sito: www.
telecoautomation.com/ce. Nell’ottica di un continuo sviluppo dei propri prodotti, il produttore si riserva il
diritto di apportare modiche a dati tecnici e prestazioni senza preavviso.
IMPORTANT! READ CAREFULLY THIS INSTRUCTIONS
BEFORE INSTALLING AND COMMISSIONING THE PRODUCT.
SAVE THESE INSTRUCTIONS FOR FUTURE REFERENCE.
PRODUCT INSTALLATION
The product at issue must be installed, commissioned and maintained only by licensed and authorised people,
respecting the laws concerning the electrical installations. Not conforming installations, wrong adjustments or
product alterations may cause re, electric shock, or personal injuries. The manufacturer is not responsible for
any damage due to wrong installation or improper use.
MOUNTING LOCATION AND MODALITY
The product must be mounted applying the following indications carefully: it must be xed on surfaces which
cannot be damaged by the high temperature; it must be placed in a well ventilated location; it cannot be
hermetically closed; it must be xed vertically, with cable glands downward; connection cables must be protected
against any accidental impacts, using proper pipes; do not cover the product; do not use or store ammable
materials close to the product.
ELECTRICAL CONNECTIONS
All the connections must be rated for a single-phase 110/277Vac power supply, with the relative Earth connection.
For the disconnection from the power line, use an all-pole switch (32A) with contacts having a dimension of at
least 3,5mm. Arrange all the necessary safety devices and use only materials complying with the standard
of electrical installations. Signal and power voltage wiring (110/277Vac) must be separated one from the other.
The cable must have a section properly rated according to the load connected and a nominal temperature
range (T) up to 90°C. The following table reports (roughly) the resistance values and the maximum current of
a copper wire, according to its length:
Section (mm2) R (ohm/Km) Max. current (A)
1 19.5 5
1.5 13.3 10
2.5 7.98 16
4 4.95 26
6 3.30 32
A readily accessible disconnect device (In=32A) shall be incorporated in the building installation wiring.
Attention: If any cable is damaged, it must be immediately replaced by a qualied person in order to avoid
any hazard.
SAFETY INFORMATION
This appliance is not intended for use by people (including children) with reduced physical, sensory or mental
capabilities, or not properly informed about the product’s characteristics or the possible hazards it can cause.
Children should be carefully supervised when they are in the area of the product. Do not touch the electronic board
with wet hands, any metallic or ammable objects. Do not operate in the high voltage area of the electronic board,
when it is supplied. Do not touch the heatsink, for at least 15 minutes after the switching o󰀨 of the product. Use
the product only in combination with devices which can guarantee a safe extended time functioning. The radio
signal reception of the device could be disturbed by the presence of electrical disturbances being transmitted
by other appliances working on the same frequency or if the product is somehow shielded by metal parts..
PRODUCT DISPOSAL
At the end of this product’s useful life, it must not be disposed of as domestic waste, but must be taken to a
collection centre for waste electrical and electronic equipment. It is the user’s responsibility to dispose of this
appliance through the appropriate channels at the end of its useful life. Failure to do so may incur the penalties
established by laws governing waste disposal.
Hereby Teleco automation s.r.l. declares that the product complies with the essential requirements and other
relevant provisions, established by the Directive 1999/5/EC. The declaration of conformity can be consulted on
the web site: www.telecoautomation.com/ce. In the view of a constant development of their products, the
manufacturer reserves the right for changing technical data and features without prior notice.
14
FR - AVERTISSEMENTS DE  ACHTUNG
IMPORTANT ! LISEZ ATTENTIVEMENT CE MANUEL AVANT
D’INSTALLER OU DE METTRE EN FONCTION L’APPAREIL.
CONSERVEZ LES NOTICES POUR TOUTE CONSULTATION FUTURE.
INSTALLATION DU PRODUIT
Le produit en objet doit être installé, mis en service et vérié périodiquement seulement par des techniciens
qualiés, conformément aux normes en vigueur pour les appareillages électriques. Une installation non conforme,
un mauvais réglage ou une altération inadéquate du produit pourraient entraîner des incendies, chocs électriques
et blessures graves. Le fabricant décline toute responsabilité en cas de dommages qui pourraient survenir à
cause d’une mauvaise installation ou d’une utilisation non conforme du produit.
LIEU ET MODALITÉ D’INSTALLATION
Le produit doit être installé en suivant exactement les indications suivantes : il doit être installé sur une
surface qui ne peut pas s’endommager en raison de températures élevées ; il doit être positionné dans un lieu
su󰀩samment aéré ; il NE PEUT PAS être enfermé hermétiquement ; il doit être positionné en xant le boîtier
verticalement avec les passe-câbles vers le bas; les câbles de connexion doivent être protégés contre les
collisions accidentelles en utilisant des conduits ou des tuyaux de raccordement ; ne pas couvrir le produit ; ne
pas utiliser ou placer des substances/matériaux inammables à proximité du produit.
BRANCHEMENTS ÉLECTRIQUES
Tous les branchements doivent être prévus pour une alimentation générale en monophasé 110V/277Vac et pour le
raccordement de terre. Pour la déconnexion du réseau, utiliser un interrupteur omnipolaire (32A) avec une ouverture des
contacts de minimum 3,5 mm. Installer tous les dispositifs de sécurité requis et utiliser des matériaux de branchement
aptes à garantir une isolation conforme aux normes de sécurité électrique. Maintenir physiquement éloignés les câbles
110V/277Vac des câbles basse tension. Les câbles de connexion doivent avoir une section adéquate à la charge appliquée
et doivent avoir une caractéristique nominale de température T de 90°C. Le tableau ci-dessous montre ( approximativement
) les valeurs de résistance et de courant maximal d’un câble électrique de cuivre en fonction de sa section :
Section (mm2) R (ohm/Km) Courant max. (A)
1 19.5 5
1.5 13.3 10
2.5 7.98 16
4 4.95 26
6 3.30 32
Un dispositif de déconnexion (In=32A) facilement accessible doit être incorporé dans le câblage de l’installation du
bâtiment. Attention : si le câble d’alimentation est endommagé, il doit être remplacé seulement par le constructeur
ou par son service technique ou par du personnel qualié an de prévenir tous risques.
AVERTISSEMENTS DE SÉCURITÉ
Cet appareil n’est pas destiné à être utilisé par des personnes (y compris des enfants) à capacité physique, sensorielle
ou mentale réduite, ou qui ne soient pas correctement informés sur les caractéristiques du produit et sur les possibles
dangers qu’il pourrait causer. Surveiller les enfants an d’être sûr qu’ils ne jouent pas avec l’appareil. Ne pas toucher
l’appareil avec les mains mouillées, avec des objets métalliques ou inammables. Ne pas intervenir sur les composants
à haute tension du produit lorsqu’il est alimenté. Ne pas toucher le dissipateur pendant 15mins mini après arrêt. Utiliser
l’appareillage seulement avec des charges dont le fonctionnement ne constitue pas un danger si elles restent activées
en permanence. La réception radio du dispositif peut être a󰀨ectée si dans l’environnement il y a des perturbations
radioélectriques créées par d’autres appareils émettant sur la même bande de fréquence ou si l’appareil se trouve
dans un boîtier avec parties métalliques.
ÉLIMINATION DU PRODUIT
À la n de la durée de vie utile de ce produit, il ne doit pas être éliminé comme tout autre déchet domestique. En e󰀨et,
il doit être déposé dans un centre de collecte des déchets d’équipements électriques et électroniques. Il est de la
responsabilité de l’utilisateur de se débarrasser de cet appareil par les voies appropriées à la n de sa vie utile. Ne pas
respecter cette consigne peut vous soumettre à des sanctions établies par les lois régissant l’élimination des déchets.
La Société Teleco Automation s.r.l. déclare que le produit est conforme aux conditions essentielles, et aux autres
dispositions applicables, établies par la directive 1999/5/CE. La déclaration de conformité peut être consultée sur le site
internet www.telecoautomation.com/ce. Dans l’optique d’un développement continu de ses produits, le constructeur
se réserve le droit d’apporter sans préavis des modications aux données techniques et aux prestations.
WICHTIG! BITTE LESEN SIE DIESE ANLEITUNG SORGFÄLTIG VOR
DER INSTALLATION ODER INBETRIEBNAHME DES GERÄTS.
BETRIEBSANLEITUNG FÜR ZUKÜNFTIGE VERWENDUNG AUFBEWAHREN.
INSTALLATION DES PRODUKTS
Das Produkt darf nur von qualiziertem technischen Personal unter Einhaltung der geltenden Gesetze bezüglich
elektrischer Geräte installiert, in Betrieb gesetzt und regelmäßig gewartet werden. Eine unsachgemäße Installation,
Einstellung oder Modikation des Produkts kann zu Brandfällen, elektrischem Schock und schweren Verletzungen
führen. Der Hersteller haftet nicht für Schäden, die durch unsachgemäßer Installierung und Gebrauch verursacht werden.
MONTAGE
Das Produkt muss streng nach den folgenden Angaben angebracht werden: es muss auf eine hitzebeständige
Oberäche befestigt werden; es muss in einem gut belüftetem Raum installiert werden. Es darf NICHT hermetisch
verschlossen werden; es muss vertikal mit den Kabeldurchführungen nach unten befestigt werden.; dieAnschlusskabel
müssen vor Stößen geschützt werden indem geeignete Rohre verwendet werden; das Gerät darf nicht bedeckt
werden; leicht entammbares Material darf nicht in unmittelbarer Nähe des Geräts verwendet oder gelagert werden.
ELEKTRISCHE ANSCHLÜSSE
Alle Verbindungen müssen auf einphasigen Wechselstrom mit 110/277Vac und dem jeweiligen Masseanschluss
ausgelegt sein. Für die Abtrennung vom Netz ist ein allpoliger Schalter (32A) mit einer Kontaktö󰀨nung von
mindestens 3,5 mm zu verwenden. Für den Anschluss sind geeignete Materialien zu verwenden, die eine
Isolierung entsprechend den geltenden elektrischen Sicherheitsbestimmungen gewährleisten. Halten Sie
die 110/277Vac Kabel getrennt von den Signalkabeln. Der Querschnitt der Verbindungskabel muss für die
entsprechende Last geeignet dimensioniert sein und eine nominale Eigenschaft der Temperatur T von 90°C
haben. Die folgende Tabelle zeigt (annähernd) die typischen Werte des maximalen Widerstands pro Km und
der maximale tolerierbarer Strom eines Kupferkabels, je nach dessen Querschnitt:
Querschnitt (mm2) R (ohm/Km) Max. Strom (A)
1 19.5 5
1.5 13.3 10
2.5 7.98 16
4 4.95 26
6 3.30 32
Eine leicht zugängliche Netztrenneinrichtung (In=32A) muss in die Gebäudeinstallationsverdrahtung eingebaut
werden. Achtung: Falls das Stromkabel beschädigt sein sollte, muss es vom Hersteller oder von technischem
Personal oder einer qualizierten Person ersetzt werden um Risiken zu vermeiden.
SICHERHEITSINFORMATIONEN
Dieses Gerät ist nicht bestimmt zur Nutzung von Personen (einschließlich Kindern) mit eingeschränkten
körperlichen, sensorischen bzw. geistigen Fähigkeiten, mangelnder Erfahrung bzw. fehlendem Wissen. Kinder
müssen beaufsichtigt werden, um sicher zu gehen, dass sie nicht mit dem Gerät spielen. Berühren Sie das Gerät
nicht mit feuchten Händen, metallischen oder entammbaren Gegenständen. Arbeiten Sie nicht in unmittelbarer
Nähe des Hochspannungsbereich wenn das Produkt an den Stromkreis angeschlossen ist. Warten Sie 15
Minuten nach dem Abschalten bevor Sie den Kühlkörper berühren. Verwenden Sie das Gerät nur mit Lasten
die einen kontinuierlichen Betrieb in kompletter Sicherheit garantieren. Der Funkempfang des Geräts kann
durch Funkstörungen durch andere Geräte in der Umgebung, die auf der gleichen Frequenz senden oder durch
Abdeckung oder Abschirmung des Geräts durch Metallteile beeinträchtigt werden.
ENTSORGUNG DES GERÄTS
Nach dem Ablauf der Nutzungszeit des Gerätes darf es nicht ohne Weiteres im Hausmüll entsorgt werden,
sondern muss zu einer entsprechenden Entsorgungsstelle für elektronische Geräte gebracht werden. Es unterliegt
der Verantwortung des Endverbrauchers, dieses Gerät nach dem Ablauf der Nutzungszeit entsprechend zu
entsorgen. Falls dies nicht befolgt wird, kann dies zu Strafen führen, die im Entsorgungsgesetz festgelegt sind.
Hiermit erklärt Teleco Automation s.r.l., dass das Produkt denAnforderungen und den einschlägigen Bestimmungen
der Richtlinie 1999/5/CE entspricht. Die Konformitätserklärung kann im Internet unter www.telecoautomation.
com/ce eingesehen werden. Im Zuge einer kontinuierlichen Weiterentwicklung der Produkte behält sich
der Hersteller das Recht vor technische Daten und Funktionen ohne vorherige Ankündigung zu ändern.
IT - SPECIFICHE TECNICHE EN  TECHNICAL SPECIFICATIONS
FR  SPÉCIFICATIONS TECHNIQUES DE - TECHNISCHE DATEN
Alimentazione - Power supply - Alimentation - Stromversorgung 110/277Vac 50/60Hz (29A. max)
Potenza massima uscita - Max. output power
Puissance maximale de sortie - Max. Ausgänge Leistung
6800W@277Vac (25A.)
6800W@240Vac (28.5A.)
3080W@110Vac (28A.)
Temperatura di funzionamento - Operating temperature range
Température de fonctionnement - Umgebungstemperatur im Betrieb -20°C ÷ +30°C
Fusibile - Fuse - Fusible - Sicherung 32A (FWC, 10x38mm)
IT - I cavi di collegamento devono avere una sezione adeguata al carico massimo applicato in uscita, e ai dispositivi supplementari
collegati agli ingressi. EN - The connection cables must have a section suitable to the maximum load applied to the output, and to the
additional devices connected to the input. FR - Les câbles de connexion doivent avoir une section appropriée à la charge maximale
appliquée en sortie et aux dispositifs supplémentaires connectés aux entrées. DE - Die Verbindungskabel müssen einen Durchschnitt
haben der angemessen ist für die maximale Ausgangslast und für die weiteren Geräte die an den Eingängen angeschlossen sind.
Grado di protezione - Protection rating - Degré de protection - Schutzart IP54
Frequenza ricezione - Reception frequency
Fréquence de réception - Empfangsfrequenz
868.3 MHz (TVHET868A07)
916 MHz (TVHET916A07)
Capacità memoria radio (trasmettitori) - Radio memory capability (transmitters)
Capacité mémoire radio (émetteurs) - Speicherbare Sender 42
200
188
119
150
15
75
Ø4.2
195
TELECO AUTOMATION S.R.L.
ITALY
Tel. +39.0438.388511
info@telecoautomation.com
TELECO AUTOMATION FRANCE
FRANCE
Tel. +33.(0)472.145080
info@telecofrance.com
TELECO AUTOMATION GMBH
GERMANY
Tel. +49.(0)8122.9563024
info.[email protected]
TELECO AUTOMATION OCEANIA PTY LTD
AUSTRALIA
Tel. +61.(07)5502.7801
info@telecoautomation.com.au
This document is the property of Teleco Automation Srl, which reserves all reproduction and copyrights
TELECO AUTOMATION BENELUX SPRL
BELGIUM
Tel. +32.(0)67561967
info@telecoautomation.be

This manual suits for next models

1

Other TELECO AUTOMATION Receiver manuals

TELECO AUTOMATION TVHET A06 Series User manual

TELECO AUTOMATION

TELECO AUTOMATION TVHET A06 Series User manual

TELECO AUTOMATION TVVTL868A01 User manual

TELECO AUTOMATION

TELECO AUTOMATION TVVTL868A01 User manual

TELECO AUTOMATION TVSTRD868NT24 User manual

TELECO AUTOMATION

TELECO AUTOMATION TVSTRD868NT24 User manual

TELECO AUTOMATION TVRGBDU868NT24 User manual

TELECO AUTOMATION

TELECO AUTOMATION TVRGBDU868NT24 User manual

TELECO AUTOMATION TVRGBDSY868A01 User manual

TELECO AUTOMATION

TELECO AUTOMATION TVRGBDSY868A01 User manual

TELECO AUTOMATION TRRCL868A60 User manual

TELECO AUTOMATION

TELECO AUTOMATION TRRCL868A60 User manual

TELECO AUTOMATION TVDLC868A01 User manual

TELECO AUTOMATION

TELECO AUTOMATION TVDLC868A01 User manual

TELECO AUTOMATION TVHET868A02 User manual

TELECO AUTOMATION

TELECO AUTOMATION TVHET868A02 User manual

TELECO AUTOMATION TVDLC868A01 User manual

TELECO AUTOMATION

TELECO AUTOMATION TVDLC868A01 User manual

TELECO AUTOMATION TVLSTRD868SI24G User manual

TELECO AUTOMATION

TELECO AUTOMATION TVLSTRD868SI24G User manual

TELECO AUTOMATION TVHET868B01 User manual

TELECO AUTOMATION

TELECO AUTOMATION TVHET868B01 User manual

TELECO AUTOMATION TVPRS868A01 User manual

TELECO AUTOMATION

TELECO AUTOMATION TVPRS868A01 User manual

TELECO AUTOMATION TVRGBDU868NT24 User manual

TELECO AUTOMATION

TELECO AUTOMATION TVRGBDU868NT24 User manual

TELECO AUTOMATION TVRCD868A01 User manual

TELECO AUTOMATION

TELECO AUTOMATION TVRCD868A01 User manual

TELECO AUTOMATION TVLink RS868 User manual

TELECO AUTOMATION

TELECO AUTOMATION TVLink RS868 User manual

TELECO AUTOMATION TVHET868A01 User manual

TELECO AUTOMATION

TELECO AUTOMATION TVHET868A01 User manual

TELECO AUTOMATION TRPRD868G01T User manual

TELECO AUTOMATION

TELECO AUTOMATION TRPRD868G01T User manual

TELECO AUTOMATION TVRRL868GS02 User manual

TELECO AUTOMATION

TELECO AUTOMATION TVRRL868GS02 User manual

TELECO AUTOMATION T474.02 User manual

TELECO AUTOMATION

TELECO AUTOMATION T474.02 User manual

TELECO AUTOMATION TVSTRD868SI24G User manual

TELECO AUTOMATION

TELECO AUTOMATION TVSTRD868SI24G User manual

TELECO AUTOMATION TVPRS868A04B User manual

TELECO AUTOMATION

TELECO AUTOMATION TVPRS868A04B User manual

Popular Receiver manuals by other brands

TV Star T7200 CX HD user manual

TV Star

TV Star T7200 CX HD user manual

Yamaha RX-A1030 owner's manual

Yamaha

Yamaha RX-A1030 owner's manual

Avenview VGA-C5-16 Specifications

Avenview

Avenview VGA-C5-16 Specifications

AirMobi iReceiver user manual

AirMobi

AirMobi iReceiver user manual

AEI Security & Communications DG258 igiSender HQ2 User instructions

AEI Security & Communications

AEI Security & Communications DG258 igiSender HQ2 User instructions

Widex SCOLA FLEX-i User instructions

Widex

Widex SCOLA FLEX-i User instructions

Sony STR-DG710 Quick setup guide

Sony

Sony STR-DG710 Quick setup guide

Sony HCD-MX700Ni Service manual

Sony

Sony HCD-MX700Ni Service manual

Zephyr SDRstick HF1 SDR user manual

Zephyr

Zephyr SDRstick HF1 SDR user manual

resi-linx RL-BT120 installation manual

resi-linx

resi-linx RL-BT120 installation manual

Denon AVR-1404/484 operating instructions

Denon

Denon AVR-1404/484 operating instructions

Velleman VMM004 user manual

Velleman

Velleman VMM004 user manual

Shure GLXD4 user manual

Shure

Shure GLXD4 user manual

Denon AVR-588 Connection guide

Denon

Denon AVR-588 Connection guide

Lightspeed 880iR user manual

Lightspeed

Lightspeed 880iR user manual

JVC KD-DV4200 - DVD Player With Radio instructions

JVC

JVC KD-DV4200 - DVD Player With Radio instructions

FDS TBox-Radio user manual

FDS

FDS TBox-Radio user manual

Williams Sound T2 863 operating instructions

Williams Sound

Williams Sound T2 863 operating instructions

manuals.online logo
manuals.online logoBrands
  • About & Mission
  • Contact us
  • Privacy Policy
  • Terms and Conditions

Copyright 2025 Manuals.Online. All Rights Reserved.