manuals.online logo
Brands
  1. Home
  2. •
  3. Brands
  4. •
  5. TELECO AUTOMATION
  6. •
  7. Receiver
  8. •
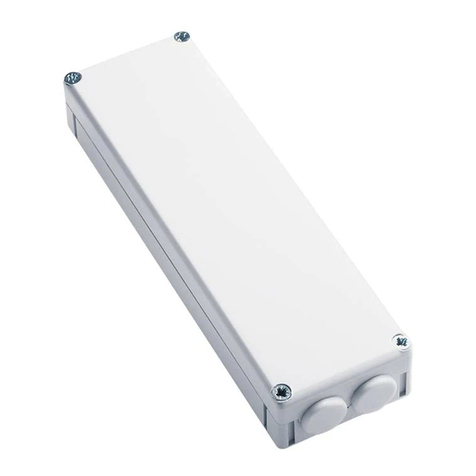
  9. TELECO AUTOMATION TVPRS868A04B User manual

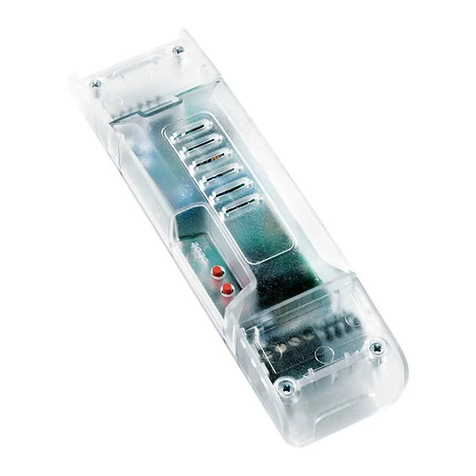
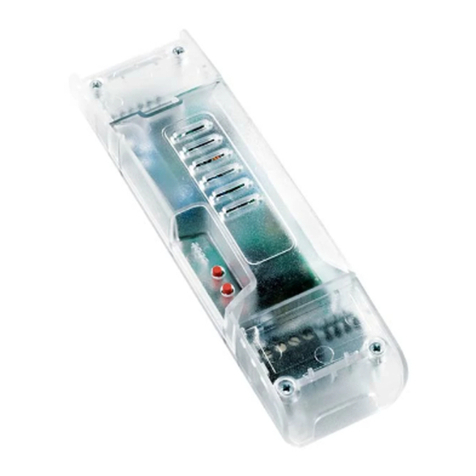
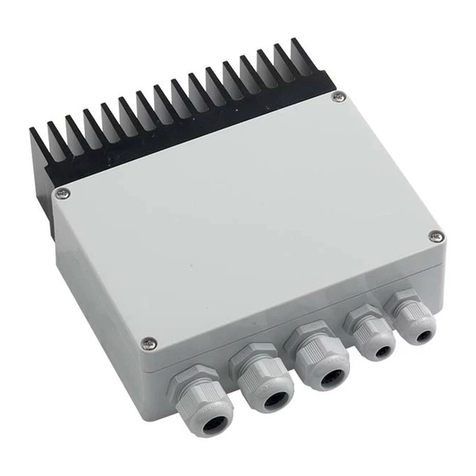
TELECO AUTOMATION TVPRS868A04B User manual

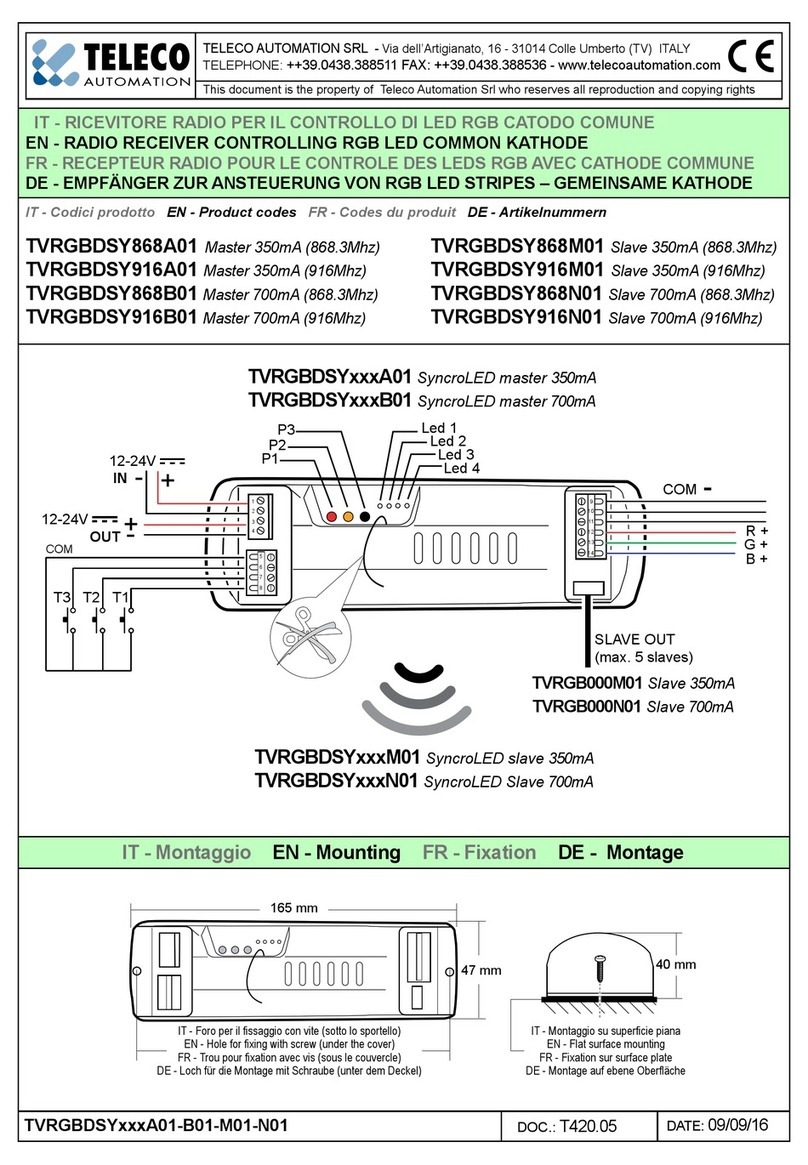
TELECO AUTOMATION SRL - Via dell’Artigianato, 16 - 31014 Colle Umberto (TV) ITALY
TELEPHONE: ++39.0438.388511 FAX: ++39.0438.388536 - www.telecoautomation.com
This document is the property of Teleco Automation Srl who reserves all reproduction and copying rights
TVPRS868A04B (868.3Mhz)
TVPRS916A04B (916Mhz)
IT - RICEVITORE RADIO PER IL CONTROLLO DI UN MOTORE 230Vac, CON FINECORSA
INTEGRATO E POTENZA MASSIMA 350W
EN - RADIO RECEIVER CONTROLLING A 230Vac MOTOR, WITH INTEGRATED LIMIT SWITCH
AND MAXIMUM POWER 350W
FR – RÉCEPTEUR RADIO POUR LA COMMANDE D’UN MOTEUR 230Vac, AVEC FIN DE
COURSE INTÉGRÉE ET PUISSANCE MAXIMALE DE 350W
DE - FUNKEMPFÄNGER ZUR STEUERUNG EINES 230Vac-MOTORS MIT INTEGRIERTER
ARRETIERUNG UND MAXIMALLEISTUNG VON 350 W
IT - Codice prodotto
EN - Product code
FR - Code du produit
DE - Artikelnummer
DOC.: T639.01
TVPRSxxxA04B DATE: 17/03/15
M
2
IT - Il prodotto deve essere posto in verticale, con i pressacavo verso
il basso. Il prodotto garantisce una protezione IP54 se correttamente
assemblato.
EN - The product must be xed vertically, with cable glands downward.
The product guarantees IP54 rating if properly assembled.
FR - Le produit il doit être positionné en xant le boîtier verticalement
avec les passe-câbles vers le bas. Le produit garantit un indice de
protection IP54 à condition qu’il ait été assemblé correctement.
DE - Das Produkt muss vertikal mit den Kabeldurchführungen nach
unten befestigt werden. Das Produkt gewährleistet den Schutzgrad
IP54, wenn es korrekt zusammengebaut wurde.
IT - Montaggio e collegamenti EN - Mounting and wirings FR - Fixation et connexion DE - Montage und Anschlüsse
115 mm
65 mm
25 mm
15 mm
M
1 2
3 4 5
P2
IT - Antenna
EN - Aerial
FR - Antenne
DE - Antenne
1
2
3
4
5
P2
230Vac FASE - 230Vac LIVE - 230Vac PHASE - 230Vac PHASE
230Vac NEUTRO - 230Vac NEUTRAL - 230Vac NEUTRE - 230Vac NEUTRAL
DISCESA MOTORE - MOTOR DOWN - DESCENTE MOTEUR - MOTOR AB
SALITA MOTORE - MOTOR UP - MONTÉE MOTEUR - MOTOR AUF
COMUNE MOTORE - MOTOR COMMON
COMMUN MOTEUR - GEMEINSAN ANSCHLUSS MOTOR
TASTO DI PROGRAMMAZIONE - PROGRAMMING BUTTON
BOUTON DE PROGRAMMATION - PROGRAMMIERUNGSTASTE
M
Thermoplastic ABS
IT - Materiale non adatto all’esposizione diretta dei raggi UV
EN - Not suitable for direct UV exposure
FR - Pas d’exposition directe aux UV
DE - Nicht geeignet für direkte Aussetzung von UV-Strahlung
3
IT - Trasmettitore 2 canali
EN - 2 channels transmitter
FR - Émetteur à 2 canaux
DE - 2-Kanal Sender
IT - Dispositivi di comando senza li EN - Wireless command devices
FR - Dispositifs de commande sans l DE - Drahtlose Steuerungsgeräte
(STOP)(STOP)
STOP
IT - Trasmettitore 3 canali
EN - 3 channels transmitter
FR - Émetteur à 3 canaux
DE - 3-Kanal Sender
(STOP)
(STOP)
(STOP)
(STOP)
STOP
IT - Trasmettitore 7 canali
EN - 7 channels transmitter
FR - Émetteur à 7 canaux
DE - 7-Kanal Sender
IT - Trasmettitore sensori vento/sole/pioggia
EN - Wind/sun/rain sensors transmitter
FR - Émetteur avec capteurs de vent/
luminosité/pluie
DE - Sender mit Wind/Sonne/Regen-Sensoren
IT - Trasmettitore crepuscolare
EN - Dusk/dawn transmitter
FR - Émetteur avec capteur
crépusculaire
DE - Dämmerungssender
IT - Trasmettitore con sensore luce integrato
EN - Transmitter with integrated light sensor
FR - Émetteur avec capteur de lumière intégré
DE - Sender mit integriertem Lichtsensor
TVANLUXxxxSWR Eos
Green Mouse
Screen
IT - Note sulla memorizzazione. La memorizzazione dei dispositivi di comando
wireless può essere effettuata con due distinte procedure:
• 1.1 (p.4) se è possibile accedere al tasto di programmazione P2.
• 2.1 (p.5) se NON è possibile accedere al tasto di programmazione.
ATTENZIONE: durante la memorizzazione del PRIMO codice radio, il tasto
premuto determina il senso di rotazione del motore. Se al termine della procedura
il motore non viene comandato come descritto a anco, cancellare il codice radio e
ripetere la memorizzazione premendo l’altro tasto della coppia. Una volta effettuata
l’associazione si potrà premere qualsiasi tasto per memorizzare i codici successivi.
EN - Notes about memorization. The memorization of wireless command
devices can be executed by means of two procedures:
• 1.1 (p.4) if it is possible to access to the programming button P2.
• 2.1 (p.5) if it is NOT possible to access to the programming button P2.
ATTENTION: during the memorization of the FIRST radio code, the pressed button
denes the direction of the motor. If at the end of the procedure the motor is not
responding as shown on the left, delete the radio code and repeat the memorization
pressing the other button of the pair. Once the association is correctly made, it will be
possible to press any button in the further radio code memorizations.
FR - Remarque sur la mémorisation. La mémorisation des dispositifs de commande
sans l peut s’effectuer de deux façons différentes:
• 1.1 (p. 4) s’il est possible d’accéder au bouton de programmation P2.
• 2.1 (p. 5) s’il n’est PAS possible d’accéder au bouton de programmation.
ATTENTION: pendant la mémorisation du PREMIER code radio, le bouton appuyé
détermine le sens de rotation du moteur. Si à la conclusion du processus, le moteur
n’est pas commandé comme illustré ci-contre, supprimer le code radio et répéter
la mémorisation en appuyant sur l’autre bouton de la paire. Une fois l’association
faite, il est possible d’appuyer sur un bouton quelconque pour mémoriser les codes
suivants.
DE - Hinweise zum Speicherverfahren. Die Speicherung drahtloser
Steuervorrichtungen kann mit zwei verschiedenen Verfahren durchgeführt werden:
• 1.1 (S. 4), wenn man auf die Programmiertaste P2 zugreifen kann.
• 2.1 (S. 5), wenn es NICHT möglich ist, auf die Programmiertaste P2 zugreifen.
ACHTUNG:Während der Speicherung des ERSTEN Funkcodes bestimmt die Taste,
die gedrückt wird die Drehrichtung des Motors. Wenn am Ende des Verfahrens der
Motor nicht aktiviert ist, wie daneben beschrieben, löschen Sie den Funkcode und
wiederholen Sie den Speicherungsvorgang durch Drücken der anderen Taste des
Tastenpaares. Nachdem diese Verbindung hergestellt wurde, kann eine beliebige
Taste verwendet werden, um die folgenden Codes einzugeben.
IT - Prodotti correlati EN - Correlated products
FR - Produits connexes DE - Ergänzende Produkte
4
IT - Cancellazione codici radio con il tasto P2 EN - Radio codes deletion with P2 button
FR - Suppression des codes radio avec le bouton P2 DE - Löschung Sendekanäle mit P2 Taste
IT - Premere P2 due volte e tenere premuto. Premere il tasto del trasmettitore relativo al codice da cancellare.
EN - Press P2 twice and keep it pressed. Press the button of the transmitter relative to the code to delete.
FR - Appuyer P2 deux fois et le maintenir appuyé. Appuyer sur le bouton de l’émetteur concernant le code à supprimer.
DE - P2 zwei mal drücken und gedrückt halten. Drücken Sie die Sendertaste die auf den zu löschenden Code bezogen ist.
IT - Premere P2 tre volte e tenere premuto 10s.
EN - Press P2 three times and keep it pressed 10s.
FR - Appuyer P2 trois fois et le maintenir appuyé 10s.
DE - P2 zwei mal drücken und 10S. gedrückt halten.
1.2
IT - Cancellazione di tutti i codici radio con il tasto P2 EN - Deletion of all the radio codes with P2 button
FR - Suppression de tous les codes radio avec le bouton P2 DE - Löschung aller Sendekanäle mit P2 Taste
1.3
IT - Memorizzazione codici radio con il tasto P2 EN - Radio codes memorization with P2 button
FR - Mémorisation des codes radio avec le bouton P2 DE - Einlernung Sendekanäle mit P2 Taste
1.1
IT - Premere P2 e tenere premuto. Premere il tasto del trasmettitore relativo al codice da memorizzare.
EN - Press P2 and keep it pressed. Press the button of the transmitter relative to the code to memorize.
FR - Appuyer P2 et le maintenir appuyé. Appuyer sur le bouton de l’émetteur concernant le code à mémoriser.
DE - P2 drücken und halten Sie gedrückt. Drücken Sie die Sendertaste die auf den zu speichernden Code bezogen ist.
P2
P2
P2
P2 suono continuo
continuous sound
son continu
Dauerton ...
( )
...
P2
( )
P2
< 1 s.
...
P2
( 10 s.)
P2
< 1 s.
P2 P2
< 1 s.
5
IT - ATTENZIONE: procedura possibile solo se la memoria è vuota. Se presenti più ricevitori, alimentarne uno solo per volta.
EN - ATTENTION: the procedure is possible only if the memory is empty. If more receivers are present, supply just one at a time.
FR - ATTENTION: procédé exécutable seulement si la mémoire est vide. S’il y a plusieurs récepteurs, les alimenter un à la fois.
DE - ACHTUNG: Dieses Verfahren ist nur bei leerem Speicher möglich. Fall es mehrere Empfänger gibt, soll nur jeweils einer von diesen versorgt werden.
IT - Memorizzazione remota del primo codice radio EN - Remote memorization of the rst radio code
FR - Mémorisation à distance du premier code radio DE - Fernspeicherung des ersten Funkcodes
2.1
P3
P3
P3
IT - Il tasto P3 si trova all’interno del trasmettitore.
EN - P3 button is located inside the transmitter.
FR - Le bouton P3 se trouve à l’intérieur de l’émetteur.
DE - Die Taste P3 bendet sich im Inneren des Senders.
IT - Premere il tasto P3 del trasmettitore. Premere il tasto relativo al nuovo
codice. EN - Press the button P3 of the transmitter. Press the button relative
to the new code. FR - Appuyer sur le bouton P3 de l’émetteur. Appuyer sur
le bouton concernant le nouveau code. DE - Drücken Sie die Taste P3 des
Senders. Drücken Sie die auf den neuen Code bezogene Taste.
P3
suono intermittente
intermittent sound
son intermittent
intermittierender Ton
...
< 5 s.
suono continuo
continuous sound
son continu
Dauerton
nuovo
new
nouveau
neu
6
IT - Premere il tasto P3 del trasmettitore memorizzato. Premere il tasto relativo ad un codice memorizzato. Premere il tasto relativo
al nuovo codice. EN - Press the button P3 of the memorized transmitter. Press the button relative to a memorized code. Press
the button relative to the new code. FR - Appuyer sur le bouton P3 de l’émetteur mémorisé. Appuyer sur le bouton concernant un
code mémorisé. Appuyer sur le bouton concernant le nouveau code. DE - Drücken Sie die Taste P3 des gespeicherten Senders.
Drücken Sie die auf den gespeicherten Code bezogene Taste. Drücken Sie die auf den neuen Code bezogene Taste.
IT - Memorizzazione remota di ulteriori codici radio EN - Remote memorization of further radio codes
FR - Mémorisation à distance d’autres codes radio DE - Fern- Speicherung von weiteren Sendekanälen
2.2
1 s.< 5 s.
suono continuo
continuous sound
son continu
Dauerton
suono intermittente
intermittent sound
son intermittent
intermittierender Ton
...
P3
memorizzato
memorized
mémorisé
gespeichert
memorizzato
memorized
mémorisé
gespeichert
< 5 s.
suono continuo
continuous sound
son continu
Dauerton
nuovo
new
nouveau
neu
IT - Il tasto P3 si trova all’interno del trasmettitore.
Il codice radio aggiunto avrà le stesse funzioni del
codice usato per l’inserimento. La procedura è
compatibile con qualsiasi tipo di trasmettitore.
EN - P3 button is located inside the transmitter. The
added radio code will have the same functions of the
code used for the memorization. This procedure is
compatible with any type of transmitter.
FR - Le bouton P3 se trouve à l’intérieur de l’émetteur.
Le code radio ajouté aura les mêmes fonctions que
le code utilisé pour la mémorisation. La procédure
est compatible avec n’importe quel type d’émetteur.
DE - Die Taste P3 bendet sich im Inneren des
Senders. Der hinzugefügte Sendekanal wird
dieselben Funktionen des Codes haben welcher für
die Einlernung verwendet wurde. Die Prozedur kann
mit allen Arten von Sendern durchgeführt werden.
IT - Cancellazione remota di un codice radio EN - Remote deletion of a radio code
FR - Suppression à distance d’un code radio DE - Fern- Löschung eines Sendekanals
2.3
IT - Il tasto P3 si trova all’interno del trasmettitore.
EN - P3 button is located inside the transmitter.
FR - Le bouton P3 se trouve à l’intérieur de
l’émetteur. DE - Die Taste P3 bendet sich im
Inneren des Senders.
IT - Premere tre volte il tasto P3 del trasmettitore memorizzato. Premere il tasto relativo al codice da cancellare.
EN - Press three times the button P3 of the memorized transmitter. Press the button relative to the code to delete.
FR - Appuyer trois fois sur le bouton P3 de l’émetteur mémorisé. Appuyer sur le bouton concernant le code à supprimer.
DE - Drücken Sie drei mal die Taste P3 des gespeicherten Senders. Drücken Sie die auf den zu löschenden Code bezogene Taste.
x 3
1 s.
suono continuo
continuous sound
son continu
Dauerton
suono intermittente
intermittent sound
son intermittent
intermittierender Ton
...
P3
memorizzato
memorized
mémorisé
gespeichert
< 5 s.
7
IT - Avvertenze EN - Warning FR - Avertissements DE - Achtung
IT - Il prodotto in oggetto deve essere installato solo da personale tecnico qualicato nel rispetto delle normative vigenti. Tutti i collegamenti devono essere previsti per un’alimentazione generale in
monofase di 230Vac. Per la disconnessione dalla rete utilizzare un interruttore onnipolare con un’apertura dei contatti di almeno 3,5 mm. E’ necessario utilizzare materiali di collegamento idonei a garantire
un isolamento secondo le attuali normative sulla sicurezza elettrica. Il ricevitore esegue solo comandi di movimentazione, tutti i dispositivi di sicurezza necessari all’installazione vanno predisposti a parte.
La ricezione radio del dispositivo può essere disturbata: se si hanno nell’ambiente disturbi radioelettrici provenienti da altre apparecchiature che trasmettono sulla stessa frequenza; se il prodotto viene
coperto da parti in metallo; se il lo dell’antenna è danneggiato o viene posizionato insieme ai li dell’alimentazione. - Con la presente Teleco Automation s.r.l. dichiara che il prodotto è conforme ai requisiti
essenziali, ed alle altre disposizioni pertinenti, stabilite dalla direttiva 1999/5/CE. La dichiarazione di conformità può essere consultata sul sito: www.telecoautomation.com/ce
EN - The product at issue must be installed only by qualied technical personnel respecting the laws concerning the electrical installations. All the connections must be rated for a single-phase
230Vac power supply. For the disconnection from the power line, use an all-pole switch with contacts having a dimension of at least 3,5mm. Only suitable materials for the connections must be used
to guarantee insulation that complies with current standards on the subject of electrical safety. The receiver only carries out movement commands and all safety devices required by the system must
be arranged separately. The device’s signal reception could be disturbed: if there are any interferences generated by other appliances working on the same frequency in the same area; if the product
is covered by metal parts, if the wire of the aerial is damaged or placed together with the power supply wires. - Hereby Teleco automation s.r.l. declares that the product complies with the essential
requirements and other relevant provisions, established by the Directive 1999/5/EC. The declaration of conformity can be consulted on the web site: www.telecoautomation.com/ce
FR - Le produit en objet doit être installé seulement par des techniciens qualiés, conformément aux normes en vigueur. Tous les branchements doivent être prévus pour une alimentation générale en monophasé
230 Vac. Pour la déconnexion du réseau, utiliser un interrupteur omnipolaire avec une ouverture des contacts de min. 3,5 mm. Il est nécessaire d’utiliser un matériel de branchement apte à garantir une isolation
conforme aux normes de sécurité en vigueur. Le récepteur effectue seulement des commandes de mouvement, tous les dispositifs de sécurité éventuellement requis doivent être installés à part. La réception radio
du dispositif peut être perturbée: si dans l’environnement il y a des perturbations radioélectriques créées par d’autres appareils qui transmettent sur la même bande de fréquence, si l’appareil se trouve dans un
boîtier avec parties métalliques; si le câble de l’antenne a été endommagé ou s’il est positionné avec les ls de l’alimentation. - La Société Teleco Automation s.r.l. déclare que le produit est conforme aux conditions
essentielles, et aux autres dispositions applicables, établies par la directive 1999/5/CE. La déclaration de conformité peut être consultée sur le site internet www.telecoautomation.com/ce
DE - Das beschriebene Gerät darf nur von technisch qualizierten Personen gemäß allen gültigen Richtlinien und Normen installiert werden. Alle Verbindungen sind für einphasigen Wechselstrom 230V auszulegen.
Zur Netztrennung ist ein allpoliger Abschalter mit einer Schaltöffnung von mindestens 3,5mm vorzusehen. Für alle Verbindungen darf nur geeignetes Material verwendet werden das den Normen und Richtlinien
gemäß eine ausreichende Isolierung gewährt. Der Empfänger führt nur Bewegungsbefehle aus. Alle für das System notwendigen Sicherheitseinrichtungen sind separat vorzusehen. Die Empfangseigenschaften
können durch verschiedene Faktoren beeinträchtigt werden: Elektrische Störungen ausgesendet durch andere Geräte die in der Umgebung auf der gleichen Frequenz senden; Installation des Geräts in
metallischen Behältern; bei beschädigtem Antennenkabel oder wenn dieser mit den Stromkabeln platziert wird. - Teleco Automation erklärt hiermit dass das Produkt den grundlegenden Anforderungen und den
anderen zugehörigen Vorschriften entspricht, welche mit der Richtlinie 1999/5/CE festgesetzt sind. Die Konformitätserklärung kann auf der Internetseite www.telecoautomation.com/ce abgefragt werden.
IT - Memorizzazione di Green Mouse Screen EN - Memorization of Green Mouse Screen
FR - Mémorisation du Green Mouse Screen DE - Einlernung der Green Mouse Screen
3
IT - Vedere le istruzioni del prodotto
per dettagli; EN - See the product’s
instructions for details; FR - Voir
les notices du produit pour plus
d’informations; DE - Siehe Anleitung
des Produkts für Details.
Premere P2 e tenere premuto; premere contemporaneamente i tasti 2e3di Green Mouse.
Press P2 and keep it pressed; press at the same time the buttons 2 and 3 of Green Mouse.
Appuyer P2 et le maintenir appuyé; appuyer en même temps sur le boutons 2 et 3 du Green Mouse.
Drücken und halten Sie P2 gedrückt; Drücken Sie gleichzeitig die Tasten 2 und 3 der Green Mouse.
IT - Premere P2 e tenere premuto; premere il tasto 2o 3di Green Mouse.
EN - Press P2 and keep it pressed; press the button 2or 3of Green Mouse.
FR - Appuyer P2 et le maintenir appuyé; appuyer sur le bouton 2ou 3du Green Mouse.
DE - Drücken und halten Sie P2 gedrückt; Drücken Sie die Taste 2oder 3der Green Mouse.
1 2
P2 suono continuo
continuous sound
son continu
Dauerton ...
( )
2
3
P2 suono continuo
continuous sound
son continu
Dauerton ...
( )
2
3
Alimentazione - Power supply - Alimentation - Stromversorgung 230Vac
Potenza massima uscita - Max. output power
Puissance maximale de sortie - Max. Ausgänge Leistung 350W
Temperatura di funzionamento - Operating temperature range
Température de fonctionnement - Umgebungstemperatur im Betrieb -20° - +50°C
Tempo lavoro - Working time - Temps de travail - Arbeitszeit 90 s.
Grado di protezione - Protection rating - Degré de protection - Schutzart IP54
Frequenza ricezione - Reception frequency
Fréquence de réception - Empfangsfrequenz
868.3 MHz (TVPRS868A04B)
916 MHz (TVPRS916A04B)
Capacità memoria radio (trasmettitori) - Radio memory capability (transmitters)
Capacité mémoire radio (émetteurs) - Speicherbare Sender 42
Dimensioni (mm) - Dimensions (mm) - Dimensions (mm) - Abmessungen (mm) 115 x 65 x 40
Teleco Automation S.r.l.
Italy
Tel. +39.0438.388511
Fax +39.0438.388536
[email protected]
Teleco Automation France
France
Tel. +33.(0)472.145080
Fax +33.(0)472.140503
[email protected]
Teleco Automation GmbH
Germany
Tel. +49.(0)8122.9563024
Fax +49.(0)8122.9563026
[email protected]
www.telecoautomation.com
IT - Nell’ottica di un continuo sviluppo dei propri prodotti, il produttore si riserva il diritto di apportare modiche a dati tecnici e prestazioni senza preavviso.
EN - In the view of a constant development of their products, the manufacturer reserves the right for changing technical data and features without prior notice.
FR - Dans l’optique d’un développement continu de ses produits, le constructeur se réserve le droit d’apporter sans préavis des modications aux données techniques et aux prestations.
DE - Im Zuge einer kontinuierlichen Weiterentwicklung der Produkte behält sich der Hersteller das Recht vor technische Daten und Funktionen ohne vorherige Ankündigung zu ändern.
IT - Speciche tecniche EN - Technical specications
FR - Spécications techniques DE - Technische Daten

This manual suits for next models

1

Other TELECO AUTOMATION Receiver manuals

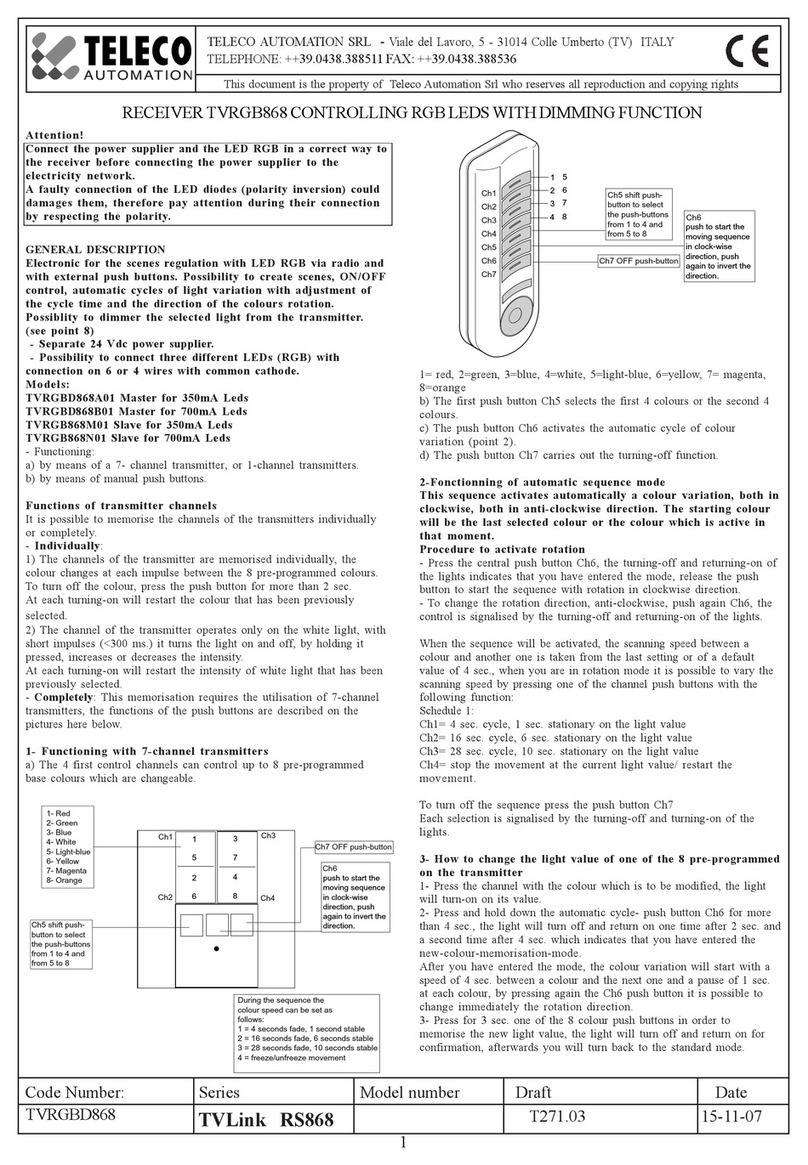
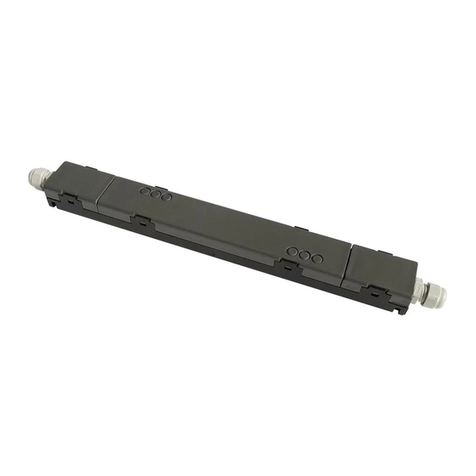
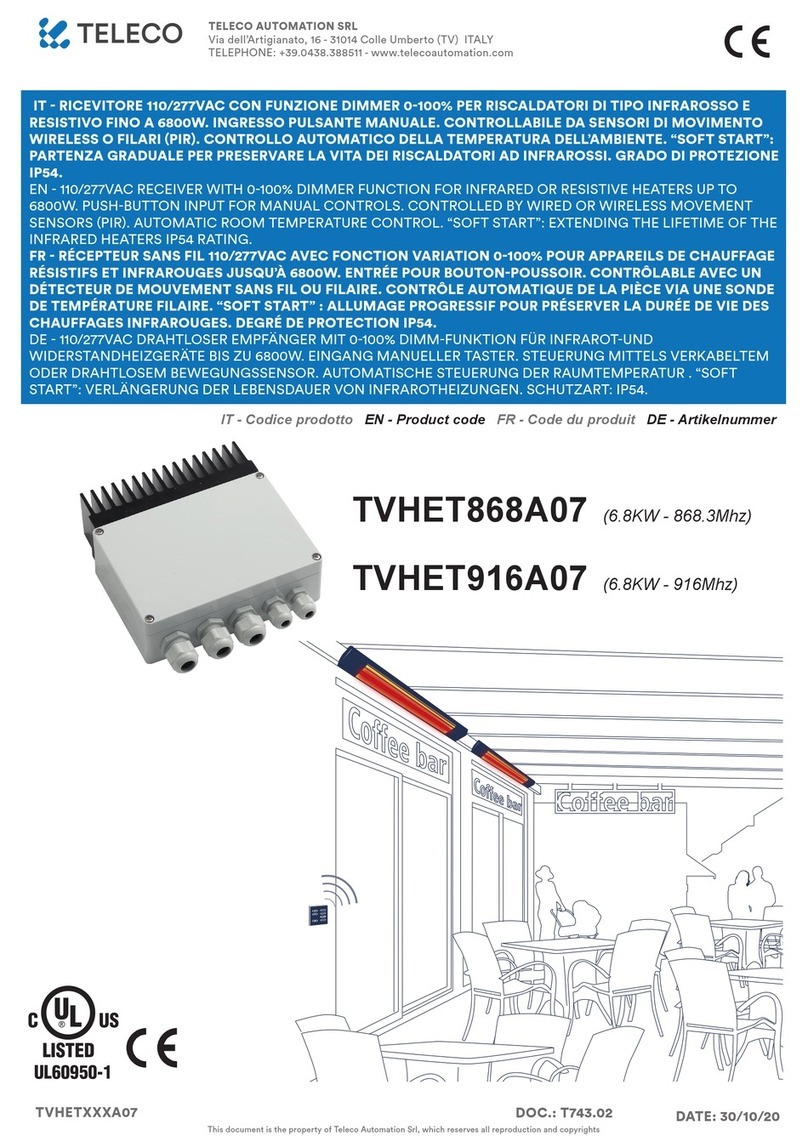
TELECO AUTOMATION TVHET868A07 User manual

TELECO AUTOMATION

TELECO AUTOMATION TVHET868A07 User manual

TELECO AUTOMATION TVRCD868A01 User manual

TELECO AUTOMATION

TELECO AUTOMATION TVRCD868A01 User manual

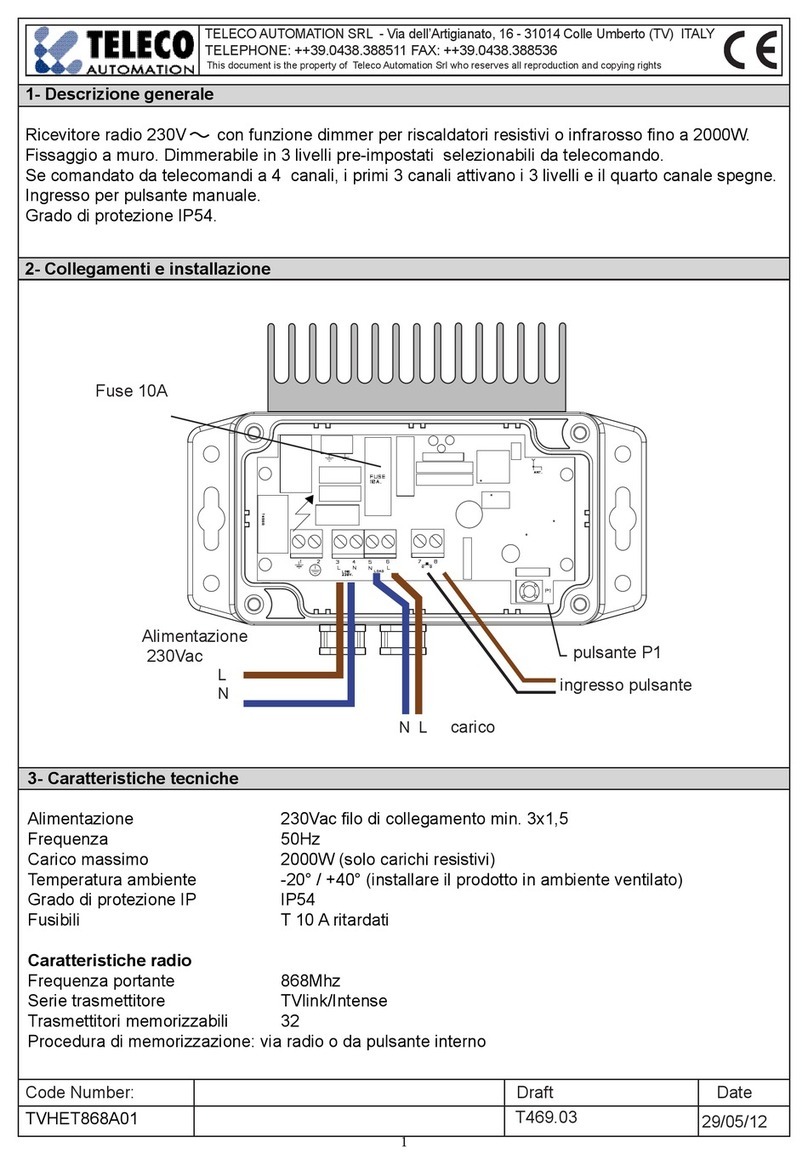
TELECO AUTOMATION TVHET868A01 User manual

TELECO AUTOMATION

TELECO AUTOMATION TVHET868A01 User manual

TELECO AUTOMATION TVHET868B01 User manual

TELECO AUTOMATION

TELECO AUTOMATION TVHET868B01 User manual

TELECO AUTOMATION TVPRS868A01 User manual

TELECO AUTOMATION

TELECO AUTOMATION TVPRS868A01 User manual

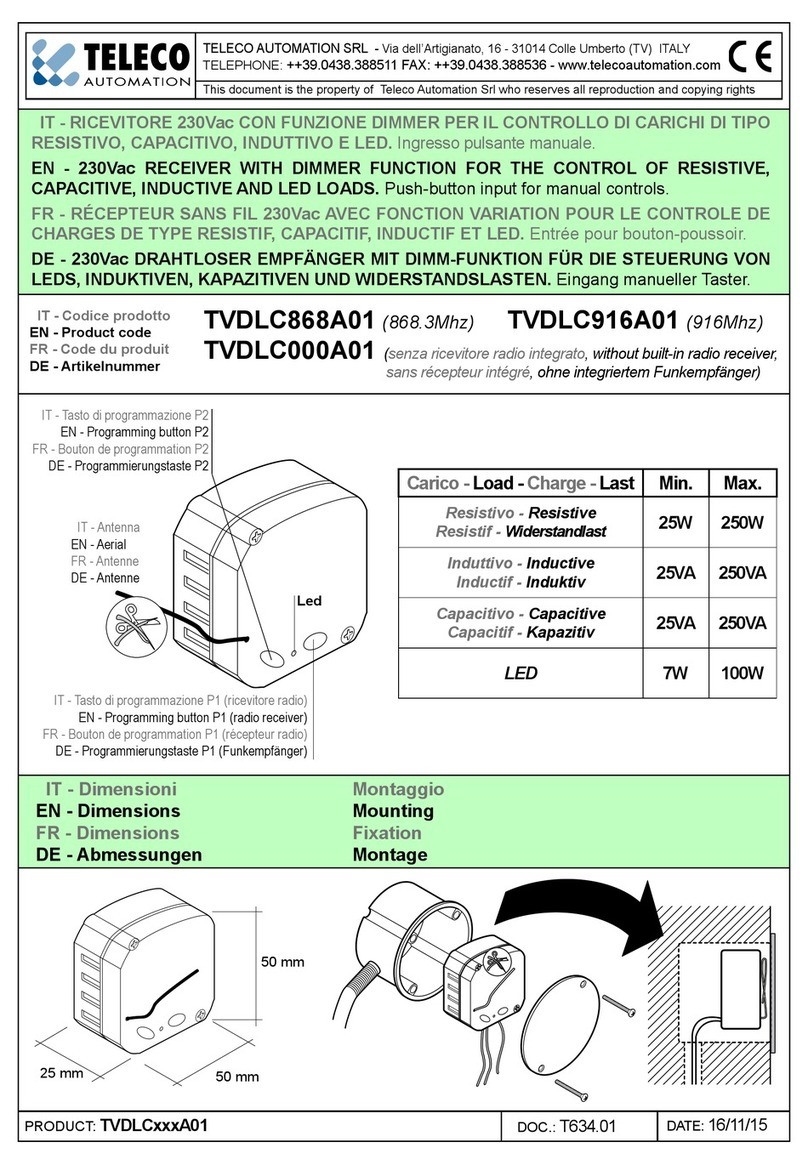
TELECO AUTOMATION TVDLC868A01 User manual

TELECO AUTOMATION

TELECO AUTOMATION TVDLC868A01 User manual

TELECO AUTOMATION TVRGBDSY868A01 User manual

TELECO AUTOMATION

TELECO AUTOMATION TVRGBDSY868A01 User manual

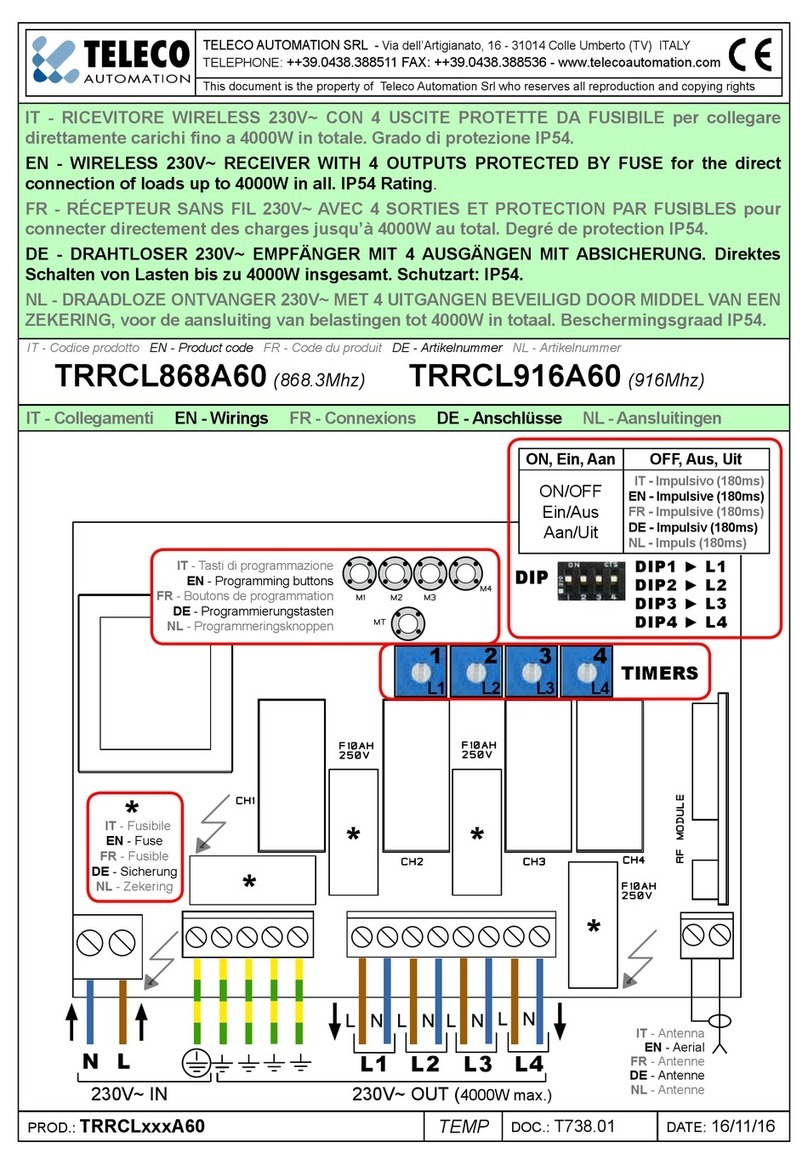
TELECO AUTOMATION TRRCL868A60 User manual

TELECO AUTOMATION

TELECO AUTOMATION TRRCL868A60 User manual

TELECO AUTOMATION TRPRD868G01T User manual

TELECO AUTOMATION

TELECO AUTOMATION TRPRD868G01T User manual

TELECO AUTOMATION TVLSTRD868SI24G User manual

TELECO AUTOMATION

TELECO AUTOMATION TVLSTRD868SI24G User manual

TELECO AUTOMATION TVLink RS868 User manual

TELECO AUTOMATION

TELECO AUTOMATION TVLink RS868 User manual

TELECO AUTOMATION TVSTRD868NT24 User manual

TELECO AUTOMATION

TELECO AUTOMATION TVSTRD868NT24 User manual

TELECO AUTOMATION TVRGBDU868NT24 User manual

TELECO AUTOMATION

TELECO AUTOMATION TVRGBDU868NT24 User manual

TELECO AUTOMATION TVRRL868GS02 User manual

TELECO AUTOMATION

TELECO AUTOMATION TVRRL868GS02 User manual

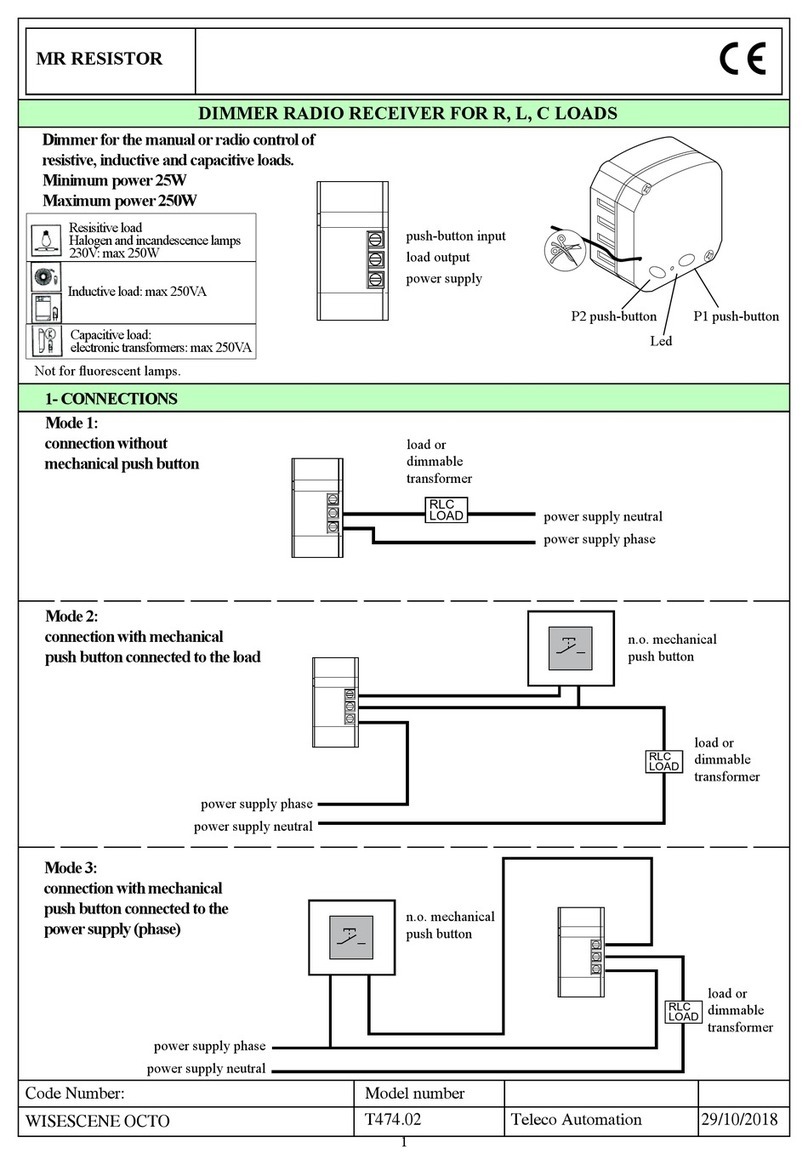
TELECO AUTOMATION T474.02 User manual

TELECO AUTOMATION

TELECO AUTOMATION T474.02 User manual

TELECO AUTOMATION TVHET868A02 User manual

TELECO AUTOMATION

TELECO AUTOMATION TVHET868A02 User manual

TELECO AUTOMATION TVRGBDU868NT24 User manual

TELECO AUTOMATION

TELECO AUTOMATION TVRGBDU868NT24 User manual

TELECO AUTOMATION TVDLC868A01 User manual

TELECO AUTOMATION

TELECO AUTOMATION TVDLC868A01 User manual

TELECO AUTOMATION TVVTL868A01 User manual

TELECO AUTOMATION

TELECO AUTOMATION TVVTL868A01 User manual

TELECO AUTOMATION TVSTRD868SI24G User manual

TELECO AUTOMATION

TELECO AUTOMATION TVSTRD868SI24G User manual

TELECO AUTOMATION TVHET A06 Series User manual

TELECO AUTOMATION

TELECO AUTOMATION TVHET A06 Series User manual

Popular Receiver manuals by other brands

Magnum MD 208 instruction manual

Magnum

Magnum MD 208 instruction manual

JRC JUE-95LT - instruction manual

JRC

JRC JUE-95LT - instruction manual

Freeview DHD 4000 owner's manual

Freeview

Freeview DHD 4000 owner's manual

adapt DR201 owner's manual

adapt

adapt DR201 owner's manual

RCA DCD302RA owner's manual

RCA

RCA DCD302RA owner's manual

Lectronics UCR411A instruction manual

Lectronics

Lectronics UCR411A instruction manual

CEBEK TL-22 quick start guide

CEBEK

CEBEK TL-22 quick start guide

Topfield TRF-2200 User reference

Topfield

Topfield TRF-2200 User reference

DRAKE R-4C instruction manual

DRAKE

DRAKE R-4C instruction manual

Sennheiser BFR 1051 Instructions for use

Sennheiser

Sennheiser BFR 1051 Instructions for use

Spektrum SPM9745 manual

Spektrum

Spektrum SPM9745 manual

Manhattan Plaza HD S2 quick start guide

Manhattan

Manhattan Plaza HD S2 quick start guide

Harman Kardon AVR 5550 owner's manual

Harman Kardon

Harman Kardon AVR 5550 owner's manual

Beyerdynamic RP-T quick start guide

Beyerdynamic

Beyerdynamic RP-T quick start guide

TechniSat DiGYBOXX T4 VA operating manual

TechniSat

TechniSat DiGYBOXX T4 VA operating manual

Furuno FA-40 Operator's manual

Furuno

Furuno FA-40 Operator's manual

Motorola DSR-470 Program guide

Motorola

Motorola DSR-470 Program guide

Xantech 490-85 KITRP install guide

Xantech

Xantech 490-85 KITRP install guide

manuals.online logo
manuals.online logoBrands
  • About & Mission
  • Contact us
  • Privacy Policy
  • Terms and Conditions

Copyright 2025 Manuals.Online. All Rights Reserved.