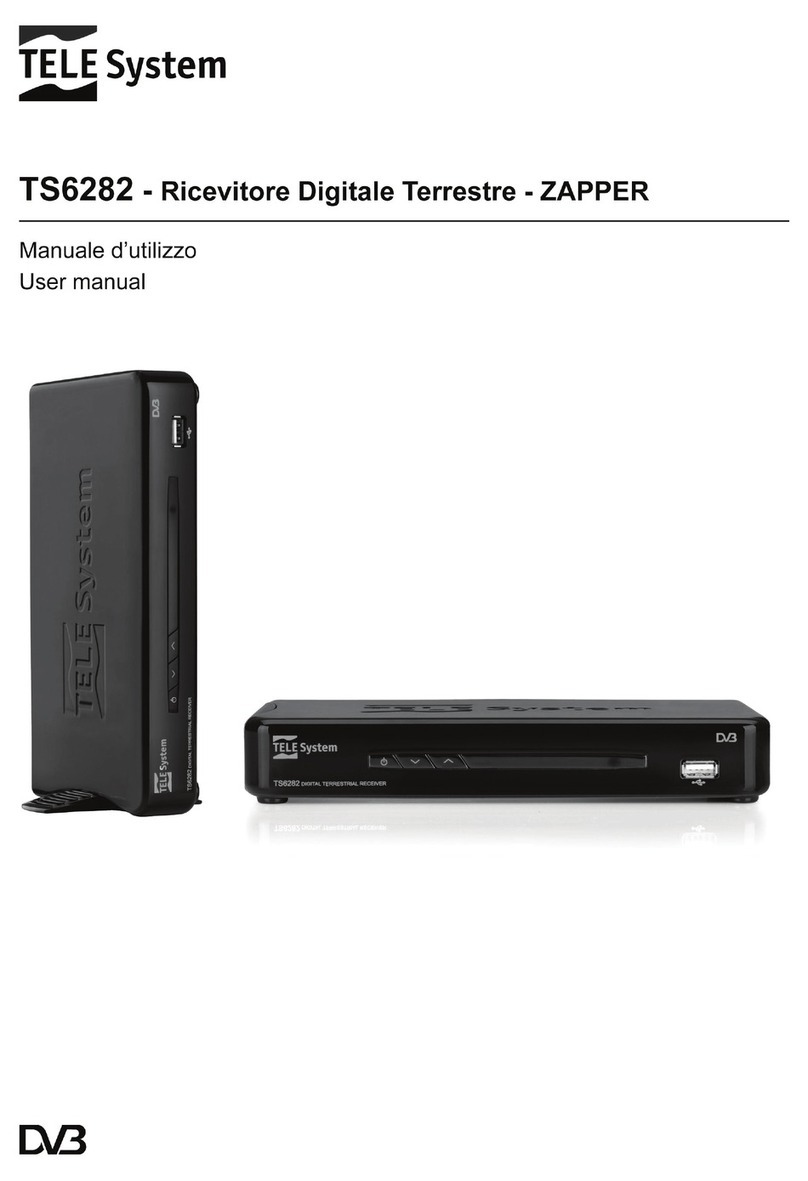
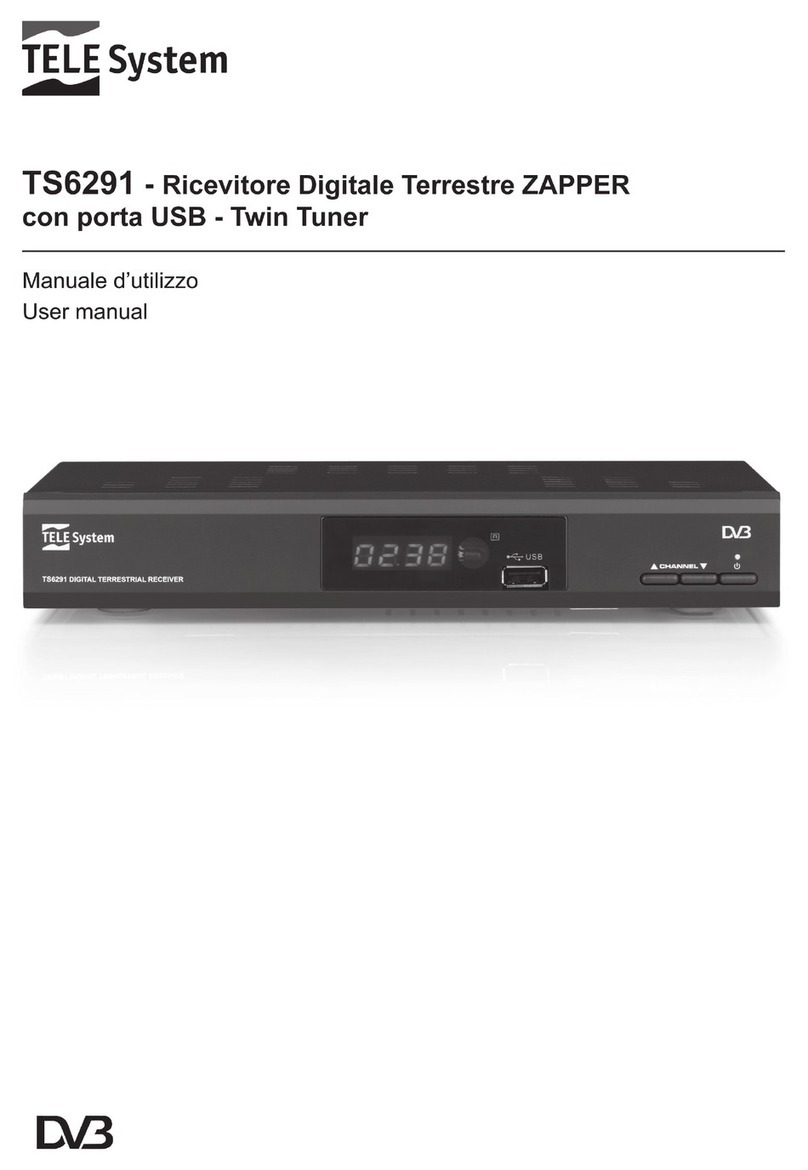
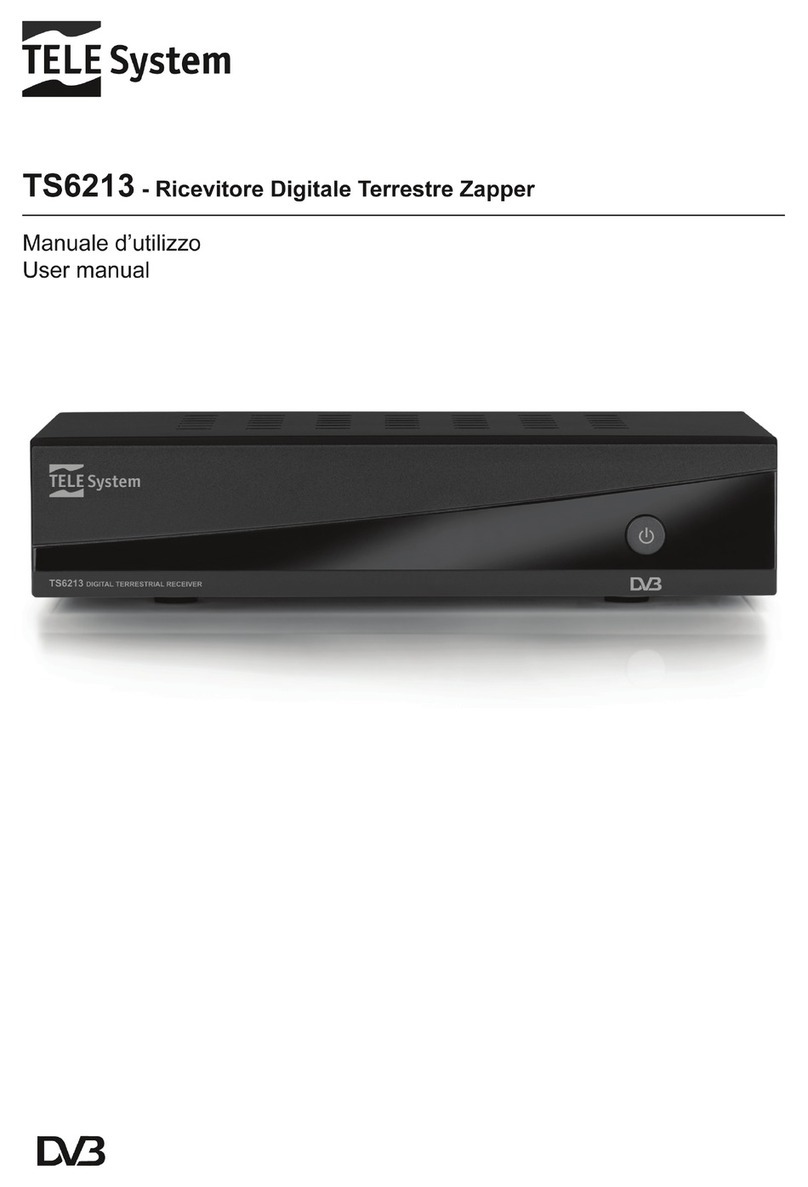
Telesystem TS6810 T2 STEALTH User manual


English
NOTE
: Due to upgrades or errors, the contents of this manual may not accurately match the actual product.
Dear Guest,
Thank you for choosing the digital terrestrial receiver T
TELE System
model
TS6810 T2 STEALTH
.
This guide provides information on the operation of the equipment, connections, commands, and care of the device,
through which you can deepen your understanding of your new receiver.
To make consultation easier, the manual has been divided into several sections:
1. The first section regards the installation of the receiver, connecting your receiver to other devices and functions of
the remote control.
2. The second section deals with the ease of use. In this area, you will find the key information necessary for everyday
use.
3. The third section is dedicated to an advanced use, customizations, and more complex features.
WARNING
The use of the receiver, ableit simple, requires knowledge of the basic information contiained in this guide. Therefore,
carefully read this manual in order to use this device in an optimal way, avoiding problems or malfunctions.

Index
1Installation Section ....................................................................................................................................................................................1
1.1Safety and disposal standards .....................................................................................................................................................1
1.2Product description and connections ..........................................................................................................................................2
1.3Remote control.............................................................................................................................................................................3
1.3.1Batteries............................................................................................................................................................................3
1.3.2Buttons and functions on the remote control ..................................................................................................................3
1.3.3Programming TV buttons..................................................................................................................................................4
1.3.3.1Changing TV codes........................................................................................................................................................4
1.3.3.2Manual TV code search.................................................................................................................................................4
1.3.4Use of the remote control.................................................................................................................................................4
1.4First installation of the receiver ..................................................................................................................................................5
2Section for simplified use ..........................................................................................................................................................................6
2.1Quick TV/Radio channel selection ...............................................................................................................................................6
2.2Channel information banner........................................................................................................................................................6
2.3Electronic Program Guide (EPG) .................................................................................................................................................6
2.4Teletext function...........................................................................................................................................................................6
2.5Audio and subtitle options............................................................................................................................................................7
2.6USB Functions..............................................................................................................................................................................7
2.6.1Use and warnings..............................................................................................................................................................7
2.6.1.1Connection ....................................................................................................................................................................7
2.6.1.2Disc removal .................................................................................................................................................................7
2.6.2Personal Video recording (PVR)........................................................................................................................................7
2.6.2.1Selecting a disc for recording.......................................................................................................................................7
2.6.2.2Configuring the recorder ..............................................................................................................................................7
2.6.2.3Timeshift .......................................................................................................................................................................8
2.6.2.4Recording TV programs ................................................................................................................................................8
2.6.2.5Play recorded content...................................................................................................................................................8
2.6.3USB Multimedia Player.....................................................................................................................................................8
2.7Timer setting ................................................................................................................................................................................8
3Section for advanced use ...........................................................................................................................................................................9
3.1Media Player menu ......................................................................................................................................................................9
3.2Change Channel menu.................................................................................................................................................................9
3.2.1TV/Radio channel list ........................................................................................................................................................9
3.2.2Delete All.........................................................................................................................................................................10
3.3Installation menu .......................................................................................................................................................................10
3.3.1Channel Scan ..................................................................................................................................................................10
3.3.2Automatic search ............................................................................................................................................................10
3.3.3Autoscan in Standby........................................................................................................................................................10
3.4System Setup menu ...................................................................................................................................................................10
3.4.1Language.........................................................................................................................................................................10
3.4.2TV System........................................................................................................................................................................10
3.4.3Local Time Setting ..........................................................................................................................................................11
3.4.4Timer setting ...................................................................................................................................................................11
3.4.5Parental Lock ..................................................................................................................................................................11
3.4.6Favorite............................................................................................................................................................................11
3.4.7Audio Description Setting ...............................................................................................................................................11
3.4.8PVR Memory information................................................................................................................................................12
3.4.9Other................................................................................................................................................................................12
3.4.9.1Channel Play Type.......................................................................................................................................................12
3.4.9.2Auto Standby ...............................................................................................................................................................12
3.4.9.3Power Saving in Standby.............................................................................................................................................12
3.5Tools menu.................................................................................................................................................................................12
3.5.1Information......................................................................................................................................................................12
3.5.2Factory Setting (reset) ....................................................................................................................................................12
3.5.3Upgrade by USB ..............................................................................................................................................................12
3.5.4Remove USB device safely..............................................................................................................................................12
4Menu map.................................................................................................................................................................................................13
5Troubleshooting guide .............................................................................................................................................................................14
6Technical characteristics.........................................................................................................................................................................15
A.TV.................................................................................................................................................................................................................i
English
TS6810 T2 STEALTH
1
1Installation Section
1.1 Safety and disposal standards
For a safe use of the appliance and for your own safety, please read the following recommendation concerning the safety
measures.
POWER SUPPLY
xUse the supplied power supply unit and connect the device exclusively to a 230V~ 50Hz mains socket.
xDo not remove the cover. Voltages higher than the power source may be present inside the unit and may endanger your safety.
High tension is present even when the appliance is in standby mode, and before working on the receiver you must disconnect it
from the mains. Non-authorized removal will void the warranty!
POWER CORD
xBefore installing the unit, check that the power wire is intact paying particular attention to the point where it enters the power
outlet and the point where it comes out of the receiver. If the cable is damaged, do not plug it into the device and contact a local
service center.
xInstall the power cord so as not to crush it with objects placed on top or next to it. Also avoid positioning the cord near areas where
it could be accidentally stepped on, torn, or otherwise damaged.
xIf the cable is damaged in any way, carefully disconnect the receiver from the power supply and contact a specialist or a Service
Centre for repair.
LIQUIDS
xKeep the product away from any kind of liquid. Do not place objects filled with fluids such as vases, humidifiers and the likes on the
device which should not be installed in places where it may come in contact with sprays or drops of water or in environments with
high humidity where condensation may occur.
xShould the receiver accidentally come in contact with any liquid, immediately remove the plug from the socket. DO NOT TOUCH the
device with your hands before it has been disconnected.
SMALL ITEMS
xKeep coins or other small items away from the receiver. Objects that fall within the device, through the slits or air vents, may
cause serious damage.
CLEANING
xPrior to cleaning, disconnect the device from the power outlet.
xTo clean the outside of the receiver, use a soft, dry, or slightly moistened cloth. Avoid using chemicals or solvents.
VENTILATION
xWherever the device is installed, make sure there is good air circulation to ensure sufficient heat dissipation and to avoid
overheating.
xA minimum distance of 10cm from both sides and a distance of 15 cm above the device should be provided in order to allow proper
ventilation.
xThe air vents must be kept clear from any obstructions such as newspapers, tablecloths, upholstery fabrics, etc.Avoid placing the
receivernear heatsources(radiators, stoves, etc.) oron top of otherheat-producing equipment (VCRs, audio amplifiers, etc.).
xAvoid installing the receive near heat sources (radiators, stoves, etc.) or over other devices that produce heat (amplifiers,
videorecorders, etc.)
ATTENTION
xKeep this product out of reach of children.
xThe packaging plastic bags can be dangerous. To avoid suffocation, keep the bags out of the reach of children.
xDo not expose the receiver or the remote control to direct sunlight.
xThe appliance must be placed on a solid, secure base.
xConnect the device to the power supply only after completing the installation.
DISPOSAL
xThe crossed out trash bin symbol indicates that this product cannot be dispersed into the environment or thrown in the
town’s mixed municipal waste. Those who do not respect this are liable to punishment according to local legislation.
xA proper disposal of the appliance enables you to avoid potential damage to the environment and human health, as
well as to facilitate the recycling of components and materials contained in it, saving energy and resources.
xThe manufacturer provides a system for recovery (RAEE or REEE) of the product which is collected separately and provides
treatment systems using equipment in accordance with current provisions.
xTake the unusable product (and any accessories, including the battery) to a recycling center authorized to handle electrical and
electronic equipment waste, as it cannot be pooled with other waste. Alternatively, you can return the used or obsolete device to a
distributor while replacing it with a new equivalent product or, as for all home appliances smaller than 25cm, you can leave the
device free of charge with a distributor.

TELE System
2
1.2 Product description and connections
1.
DC 5V
Input power supply 5V 1.5A, to connect the included power supply which in turn is connected to a 230V~
50Hz power socket. Power on/off button in standby.
2.
HDMI
Audio-video output HDMI 1.4a for high definition, dedicated to connecting a display with HDMI interface.
NOTE
xThe video resolution is set by the factory to 1080i 50Hz.
xEnsure that the display connected TV supports the video resolution setting on the receiver.
3.
RF OUT
Antenna loop output for connecting another device with a digital TV tuner (optional).
WARNING
The antenna loop is always enabled when the receive is in opertate mode. Instead, when the receiver is in standby
mode to save energy (paragraph 3.4.9.3), the RF pass-through output is not active.
4.
ANT IN
Antenna signal input.
5.
IR
External sensor/receiver (supplied) infrared (IR) for the remote control with LED display operating status
(GREEN) and standby (RED).
NOTE
xInsert the plug of the IR sensor in the receiver by pressing it gently as far as it will go.
xPosition the IR sensor in front of the TV screen and take care not to place obstacles between the IR receiver and
the remote control so that they can communicate correctly.
6.
USB A
/U
USB B
USB connectors, housings A e B to read personal media (video, pictures, music) and videotaping by
integrated digital terrestrial tuner where permitted by the transmission. The memories will be identified with the
following names:
x
Disc A:
disc connected to the lower USB port (housing 6A)
x
Disc B
: disc connected to the upper USB port (housing 6B)
WARNINGS
xCompatible with USB storage devices formatted with the file system FAT32.
xWe cannot guarantee compatibility with all USB memory devices on the market.
xWe recommend using USB HDD with external power supply, since the receiver cannot ensure proper power
supply via the USB port. This will avoid possible damage to the storage device.

English
TS6810 T2 STEALTH
3
1.3 Remote control
Knowledge of how to use the remote control is the basis for the use of the receiver and for an easy navigation through
the various functions and menus.
1.3.1 Batteries
Information and warnings
Replace and insert batteries before the first use of the product or when the remote does not properly respond to
keystrokes. Compatible batteries: 2 x AAA, 1.5V.
To prevent aleakage of corrosive liquid from damaging the remote control, we recommend that you remove the batteries
when the device will not be used for a long period of time.
Do not use different types of batteries or new and used batteries together.
Inserting and removing
Once you open the battery cover on the back of the remote control, insert 2 AAA batteries respecting the correct polarity
as indicated inside the battery compartment. Then close the door.
Remove the used batteries, which must be disposed of separately from domestic waste by taking them to any point of
sale or waste collection, then repeat the same procedure for inserting them.
1.3.2 Buttons and functions on the remote control
1. S
SOURCE
Selection of audio-video source for the television.
(1)
2.
LED
LED indicator of remote control operation.
3.
q
(On/Standby) Turns on/puts the receiver in Stand-by mode.
4.
TV
Function enabling the television.
(1)
5.
STB
Enabling the command of the decoder (Set Top Box - STB).
6.
FAV
Recall favorite channels list.
7.
TV/RAD
Change between TV and Radio channels on the receiver.
8. 3(STOP), 2d (PLAY/PAUSE), 5(REW), 6(FWD), 4(REC), 7(PREV), 8(NEXT)
Function buttons on the videorecorder (Personal Video Recorder - PVR) and
Media Player.
9.
MUTE
Audio mute.
10.
RED
, G
GREEN
, Y
YELLOW
, B
BLUE
(Colored buttons) Are used in the menus to
activate specific functions.
11.
MENU
Main Menu.
12.
INFO
Channel Info screen displays.
(2)
13. , , , (Cursor Arrows) Menu navigation.
14.
OK
Confirm actions/changes key or quick recall of channels list.
15.
EXIT
Exits from the menu or from other information displayed on the screen.
16.
BACK
Back to the previous channel.
17.
VOL+
/V
VOL-
Adjust volume level.
18.
EPG
Electronic program guide (Electronic Program Guide - EPG).
(2)
19.
TTX
Teletext.
(2)
20.
CH+
/C
CH-
next/previous channel.
21.
0÷9
(Alphanumeric keys) Changing channels or entering alphanumeric values
in menus.
22.
AUDIO
Selecting audio tracks available..
(2)
23.
SUB
Choice of available subtitles.
(2)
(1)
in order to be able to control your TV, the TV must be programmed as
described in this manual (section 1.3.3).
(2)
the program information, subtitle, teletext and additional audio tracks are
provided by the broadcaster channel; this data may be incomplete or absent.

TELE System
4
1.3.3 Programming TV buttons
1.3.3.1 Changing TV codes
Default TV codes are in the list attached to these instructions (see A
Appendix A
). First identify the brand of the TV you
want to control, then follow the steps listed below:
1. turn on the TV you want to control.
2. hold the T
TV
for about 2 seconds until the L
LED
indicator on the remote control turns on.
3. enter the 3 digit code that corresponds to the brand of your TV to be controlled using the number keys 0
0
÷9
9
.
4. If the code entered is valid, the L
LED
will turn off. Otherwise, in case of wrong code, it will Flash a few times before
going off and, if so, the program will exit (restart from point 1).
5. verify that the TV responds properly when buttons are pressed on the remote, at least in respect to basic functions. If
not, repeat the TV key programming using another code, among those on the list dedicated to the brand of your TV
(resume from point 2).
If your brand is not in the list or none of the default codes allows you to control your TV, try to identify or define an
appropriate program by following the method described below.
1.3.3.2 Manual TV code search
1. turn on the TV you want to control.
2. point the remote control at the IR sensor of the TV and keep it pointed during the whole procedure.
3. hold the T
TV
for about 2 seconds until the indicator L
LED
on the remote control turns on.
4. Press sequentially one of the following keys: q, C
CH+
, C
CH-
.
5. as soon as the TV respondS appropriately to the command off or changing the channel (in line with the button
pressed), press O
OK
to store the code. The L
LED
then turns off.
Verify that the TV responds properly to other remote control keys, at least within the limits of basic functions. If not,
continue the search for an appropriate code by repeating the procedure (resume from point 2).
1.3.4 Use of the remote control
After programming the remote to control the TV set (see section 1.3.3), it will work like the original remote control of the
same TV at least limited to basic functions such as turning on and off, adjusting the sound volume and changing
channels.
To control the decoder or TV, perform a single short press on the corresponding function keys S
STB
(decoder) or T
TV
(television) and point the remote control at the IR sensor of the device concerned. At each infrared command, L
LED
indicator on the remote control will light up.

English
TS6810 T2 STEALTH
5
1.4 First installation of the receiver
Once the receiver has been connected (para. 1.2) and the adapter to the mains socket has been plugged in, the receiver
will automatically start up. If this does not happen, turn on the device using the appropriate button
q
on the remote
control. A simple wizard screen will then be displayed for the first installation.
NOTE
The installation wizard is presented not only at the first time installation, but also after a reset of the receiver (section
3.5.2).
Proceed according to the following guidelines:
Language
Choose the
Language
of the menu displayed on the screen (OSD-On Screen Display) with the arrow keys . Then
move to the next parameter by pressing the arrow button .
Region
Set the
Region
of installation using the arrow keys and continue with the arrow key .
WARNING
Wrong Country setting may result in a partial or even a failure to identify and store channels.
Video Resolution
Set the video resolution of HDMI digital audio and video output with the arrow keys . Continue by pressing .
NOTE
If the screen connected via HDMI displays problems, connect the receiver via SCART to set a compatible resolution value.
Aspect Mode
Choose the aspect ratio of the screen/TV connected to the receiver, either
16:9
or
4:3
, and how images with different
formats will be presented on the screen:
1.
16:9 Full
: For 16:9 screens. Images broadcasted in 4:3 will be adapted to the entire screen.
2.
16:9 PillarBox:
For 16:9 screens. When images are broadcasted in 4:3, two black bars on the sides will be added so
that the original image is not distorted.
3.
4:3
LetterBox: For 4:3 screens. When images are broadcasted in 16:9, the receive will apply two black bars above
and below to fill the screen without distorting the original image.
4.
4:3
PanScan: For 4:3 screens. When images are broadcasted in 16:9, they are adapted proportionally in hight of the
screen, cutting the side portions.
Continue by pressing the arrow .
LCN
Logical channel sorting function (Logical Channel Numbering-LCN). If enabled, during channel scan, the receiver will
store the channels and automatically assigns to them a position in the list according to the numbering requested by each
broadcasters of these channels.
NOTE
In the event that two or more channels require the same number LCN, the receiver will autonomously assignment the
position of these conflicting channels in the channel list, which in any case be varied at a later date via the menu E
Edit
channel
> T
TV/Radio Channel List
(section 3.2.1)
Setting a Password
Define a four digit numerical password (PIN) for parental control (see also section 3.4.5). Enter the chosen PIN number
in the
New Password
field with the numeric buttons on the remote control, then reinsert it in the
Confirm Passord
field
to confirm it. Continue by pression the arrow key .
Channel Scan
Press the O
OK
button and
OK
that appears on the screen to begin the automatic channel scan and wait until the automatic
channel search ends.
Channel viewing
Once the above steps are completed and therefore the Setup is complete, you can immediately take advantage of digital
terrestrial channels available.
NOTE
xSome channels may not be visible because they subject to encryption or they are not compatible with this receiver.
xDuring the life of the receiver, the canals could become obsolete or change the transmission parameters. We
recommend you update or reinstall the channel list on a regular basis (section 3.3).

TELE System
6
2Section for simplified use
WARNING
Before reading this chapter you should have carefully read the previous chapter.
To simplify the use of the receiver and the management of several digital channels, there are some Windows and menus
accessible by pressing a single button on the remote control (see section 1.3.2). They are meant for frequent use and
their functions are essential for a quick interaction with the receiver.
For advanced use of the device, its settings and customizations, please refer to Chapter 3.
2.1 Quick TV/Radio channel selection
To change the channel, proceed in one of the following ways:
1. Press the buttons C
CH+
/C
CH-
on the remote control to skip to the next/previous channel.
2. Enter the desired channel number directly with the digit keys
0÷9
on the remote control.
3. Press T
TV/RAD
on the remote control to switch between TV and radio channels of the receiver.
4. Alternatively, for a convenient way to manage the large number of TV and radio channels that digital terrestrial
broadcasting offers, use the quick channel list accessible while watching programs by pressing O
OK
on the remote,
then:
xPress / to scroll through the list of one channel at a time, or press the C
CH+
/C
CH-
buttons to quickly browse
the list one page at a time.
xPress O
OK
on channel chosen to tune in to it.
For an advanced management of channel list, in particular for the construction of a favorite channels list, refer to
paragraph 3.2.1.
2.2 Channel information banner
Each time you change channels or you press the I
INFO
button, for a few seconds an information window will appear at
the bottom of the screen. This is known as the channel information banner and the information that may be presented in
this banner, when transmitted by the broadcaster, are:
1. The channel number.
2. The channel name.
3. The current time and date.
4. The title of the current and following program.
5. Optional data which may be present such as subtitles (
SubT
icon), teletext (
TTX
icon), EPG information (
EPG
icon).
NOTE
If the broadcaster does not transmit any of the above information, it will not appear on the channel banner.
Also, when the info banner of channel is active, pressing I
INFO
will display technical information on the current channel.
2.3 Electronic Program Guide (EPG)
Some digital TV channels broadcast, in addition to special audio-video data of the viewed program, but also information
about the program viewed and, in some cases, even the channel’s daily or weekly program schedules.
To consult the EPG of the tuned channel, press the E
EPG
button on the remote, sequentially:
xUse the /arrow keys to select a channel or aprogram.
xUse the /to move among the various events programmed on the chosen channel.
xPress the R
RED
(
Time
) button and then the /arrows and O
OK
to quickly navigate among the programs of a
channel.
xIn corrispondance with an event, press the O
OK
button to consult additional information available.
xUse the G
GREEN
(
Timer
) button to book the viewing or recording of the selected event. The booked timers will
be viewable from the menu S
System Setup
> T
Timer Setting
(section 2.7).
xUse the E
EXIT
button to leave the EPG.
WARNING
The EPG information is optional data transmitted by broadcasters. Therefore, failure to display all or some of the
information is not a symptom of a malfunctioning of the receiver.
2.4 Teletext function
If the viewed channel has Teletext data:
xUse the T
TEXT
to start it.
xUse the numeric keys 0
0
÷9
9
to enter a page number and the arrow keys /to go to any subpage.
xPress the T
TEXT
button again or E
Exit
to leave it.

English
TS6810 T2 STEALTH
7
2.5 Audio and subtitle options
If the current channel is broadcasted in more than one language and/or contains subtitles, the user can select the audio
track and/or the subtitles. Perform the following steps:
xPress the A
AUDIO
button or S
SUB
on the remote control.
xSelect the audio track or the destre subtitles using the arrow keys /.
xPress the O
OK
button to confirm.
In addition, near an audio track, the arrows /help you manage the distribution of audio channels
(
Stereo
/
Mono
/
Left
/
Right
), an operation recommended only for advanced users.
2.6 USB Functions
The device's USB ports are dedicated mainly to connecting external storage devices with USB 2.0 interface in order to
record digital terrestrial channels from the built in tuner or to stream personal media.
2.6.1 Use and warnings
Before using a USB mass storage device, like a hard-drive (Hard Disc drive-HDD) or a flash memory/Flash drive, follow
the important rules and warnings below.
2.6.1.1 Connection
The USB device must be formatted in FAT32 and, to take advantage of the video recording function (see section 2.6.2), it
must have a capacity of free memory suited to the required needs.
At the first connection of a USB memory device or after any formatting of the same, the receiver will create a folder
named A
ALIDVRS2
that will be used as an archive of recordings.
Since the receiver has two USB ports, the memories will be identified with the following names:
x
Disc A:
disc connected to the lower USB (housing 6A, see paragraph 1.2).
x
Disc B
: disc connected to the upper USB port (housing 6B, see paragraph 1.2).
WARNINGS
xIt is recommended to use hard drives with external power supply, as the only USB port of the receiver cannot
guarantee a proper power supply: risk of disc corruption and/or receiver!
xThe receiver is only compatible with USB storage devices formatted with FAT32 File System.
xWe do not guarantee compatibility with all USB memory devices on the market.
2.6.1.2 Disc removal
To safely remove the memory in order to avoid damaging files or the devices involved, we recommend disconnecting
USB memory only through the dedicated section of the menu T
Tools
> R
Remove USB device safely
.
WARNING
Never disconnect the USB device during media playback, recording, formatting or when there is a timed event recording:
risk of irreversible damage to the devices involved!
2.6.2 Personal Video recording (PVR)
Before proceeding with the use of a USB mass storage device, like a hard-drive (Hard Disc drive -HDD) or a flash
memory/Flash drive, follow the important rules and warnings in paragraph. 2.6.1.
2.6.2.1 Selecting a disc for recording
If you are using both USB ports, the receiver will enable the PVR function only on one of the connected memories,
namely the first memory detected by the receiver. In the event of removal/replacement/new connection of one or both
the USBs and, in any case, after every restart of the receiver, you should ensure that the enabling of the desired PVR
memory has been made. In any case, you can change the configuration by using the "Configure PVR" (see section
2.6.2.2).
NOTE
xThe speed with which the connected memory devices are detected depends on the tecnica characteristics of the
each memory device.
xYou cannot enable the PVR function on both the USB flash drives.
2.6.2.2 Configuring the recorder
Once connected and the USB memory has been recognized, enter the menu S
System Setup
> P
PVR Storage Information
and press B
BLUE
(
DVR Set
) to configure the recorder
DVR Type
parameter:
1.
Timeshift
: only Timeshift (paragraph 2.6.2.3).
2.
Record
: only recording (paragraph 2.6.2.4).

TELE System
8
3.
REC & TMS
: recording and Timeshift.
NOTE
Recording is only permitted for TV channels transmitted in without encryptions and not for encrypted TV or radio
channels.
2.6.2.3 Timeshift
Timeshift is tasked to temporarily record a TV program from the moment the user tunes into the program until the
channel is switched, then the TV automatically switches to temporarily record the new channel. This way, by pressing the
2d (PLAY/PAUSE) button, the user can pause and then resume watching the time-shifteded TV program. Next, use the 3
(STOP) button to return to a live viewing.
2.6.2.4 Recording TV programs
NOTES
xThe receiver is equipped with a single TV tuner, so while a recording is in progress, it will also allow you to view a
different channel, provided that the latter is broadcasted on the same frequency of the channel being recorded.
xUp to two contemporary recordings on two channels broadcast on the same frequency are allowed.
xBroadcasters may decide to ban recording for issues related to copyright protection.
Instant recording
Tune in to the desired channel and press 4(REC) to start recording it manually. The default recording time is set at two
hours, but, if you press the 4(REC) button, you can change this by entering the desired recording time using the remote
(hours and minutes in hh: mm). To stop recording press the button early 3(STOP) and confirm.
Scheduled recording
You can schedule multiple timer recording manually (or for viewing) by accessing the menu S
System Setup
> T
Timer
Setting
(section 2.7). Alternatively, in the presence of EPG information about the program, then set the recording in the
EPG
menu (section 2.3).
2.6.2.5 Play recorded content
Recorded files are collected in the folder named A
ALIDVRS2
USB memory dedicated to saving recordings and can be
retrieved by accessing the menu M
Media Player
> P
PVR
.
Pressing O
OK
on a recording, it will be played back. When reading, use the 2d (PLAY/PAUSE) button to pause/resume
watching, 5/ 6(REW/FWD) to rewind/fast forward and 3(STOP) to stop playback.
2.6.3 USB Multimedia Player
Media Player function, commonly called Media Player, allows you to:
1. play MPEG2/MPEG4 content,
2. Listen to MP3 music,
3. View JPEG images,
4. from an external storage connected through USB port.
Before using a USB mass storage device, such as a hard-drive (Hard Disc drive -HDD) or a flash memory/Flash drive,
follow the important rules and warnings in paragraph 2.6.1.
Access the M
Media Player
menu, choose the corresponding submenu that corresponds to the type of media to be played
between V
Video
, M
Music
and I
Image
, navigate through available folders with the arrow /keys and press O
OK
. Position
yourself on the file you want to select using the arrow keys /and press O
OK
to start playback. When playing video and
music, if the file type supports it, use the 2d (PLAY/PAUSE) button to pause/resume, 5/6keys (REW/FWD) to
rewind/fast forward and 7/8 (PREV/NEXT) to skip to the previous/next file in the list.
2.7 Timer setting
To manually program the timer for the recording or viewing of one or more events that are not broadcasted
contemporarily, tune in to the desired channel and enter the S
System Setup
> T
Timer Setting
menu. Choose the timer
number, add or change with the arrow keys /and O
OK
, then define the following parameters:
1.
Timer Mode
: the timer repetition rate (
Once
/
Daily
/
Weekly
).
2.
Timer Service
: Type of timer, either merely viewing (
Channel
) or record (
Record
).
NOTE
Recording is only permitted for TV channels transmitted in without encryptions and not for encrypted TV or radio
channels.
3.
Channel
: The channel you are interested in seeing or recording.
4.
Start Date
: The timer start date (in
day
/
month
/
Year format
).
5.
Start time
: Timer start time (in
hh
:
mm format
).

English
TS6810 T2 STEALTH
9
6.
Duration
: Timer duration.
Save data entered/changed by pressing the O
OK
button on the screen
Save
(or click
Cancel
to stop inserting/changing the
timer).
3Section for advanced use
WARNINGS
Changing some parameters of the menu may impair the correct functioning of the receiver itself. Therefore, carefully
read through this section of the manual before proceeding with any adjustments.
To avoid tampering, some functions are protected by a security code directly defined by the user during first installation
(see paragraph 1.4).
During normal TV program vision, by pressing M
MENU
on the remote control, the m
main Menu
will appear on the screen,
where the following submenus can be found:
1.
Media Player
2.
Edit Channel
3.
Installation
4.
System Setup
5.
Tools
GENERAL RULES FOR NAVIGATION
To navigate through the various menu use:
xThe arrow keys ,,, to select menus, menu items, and options.
xThe O
OK
button to open a selection/a submenu or confirm a choice.
xThe keys 0
0
÷9
9
to insert an alphanumeric value.
xThe E
EXIT
button, in general, allows you to leave a menu or return to the preceding the current window.
Also refer to any indications given in the various menus, specifying how to implement a function via a button on the
remote control.
3.1 Media Player menu
This menu is dedicated to personal media playback via USB. Refer to the section in this manual concerning USB
functions (section 2.6).
3.2 Change Channel menu
3.2.1 TV/Radio channel list
Menu for editing the channel list.
Favorite Channels List
To create a favorite channels list, press the F
FAV
button, select the desired channel in the list, press O
OK
and select
favorite list to which you want to add the channel, then press O
OK
to confirm and E
EXIT
. Repeat for the other channels to
add to the Favorites list, and then press E
EXIT
to exit and save the changes.
While in viewing mode, to call up one of the created favorite lists, use the F
FAV
key. Alternatively, while in the channel list,
use the arrow keys / on the remote control to change channel group.
Channel Lock
To protect a channel manually, resulting in a viewing access via entry of a user-defined system PIN entry before
installation (section 1.4), press the R
RED
(
Lock
), highlight the channel from the list, press O
OK
and enter your PIN. Press
EXIT
to exit and save the changes.
Skipping Channels
You can mark one or more channels to be skipped during channel changing with the buttons C
CH +
/C
CH-
on the remote
control. Press the G
GREEN
button (
Skip
), highlight the channel from the list and press O
OK
. Press E
EXIT
to exit and save the
changes.
Moving Channels
To move a channel, press the Y
YELLOW
button (
Move
), select the channel you want to move from the list and press O
OK
. At
this point, the channel move function behavior changes depending on if the LCN mode (section 1.4) is active or not. In
particular, if LCN is active will prompt the user to enter the position number, and, if taken, the positions of the two
channels in question will be exchanged. Instead, if the LCN is off, you must move the selected channel with the arrow
keys /and press O
OK
to release it and place it in the chosen location. Press E
EXIT
to exit and save the changes.

TELE System
10
Rename Channels
To rename a channel, press the B
BLUE
button (
Edit
) and then the G
GREEN
button (
Edit
), then type in the new name
through the alpha-numeric keys on the remote control and the functions available on screen on the input window. Then
press the Y
YELLOW
(
OK
) to confirm. Press E
EXIT
to exit and save the changes.
Delete Channels
To remove a channel from the list, press the B
BLUE
button (
Edit
), then again the B
BLUE
button (
Delete
), highlight the
channel from the list and press O
OK
. Press E
EXIT
to exit and save the changes.
NOTE
The deleted cleared will be reloaded on the list following an update channels or a reinstallation of the entire channel list
(section. 3.3).
3.2.2 Delete All
Utility to delete all channels.
3.3 Installation menu
During the first installation an automatic channel scan of the available channels is performed. Periodically, upon
activation of new television and radio services or modifications by broadcasters, we suggested that you reinstall or
update the channel list of the receiver.
3.3.1 Channel Scan
Manual scan function on a single frequency. Select the channel/frequency (item
Channel No.
), then press O
OK
on S
Search
to execute the search.
3.3.2 Automatic search
Channel scan function on all available frequencies:
1.
Country:
Definition of the country in which the receiver will be installed.
WARNING
The incorrect setting of the C
Country
may result in a partial or even a failure to identify and save channels.
2.
FTA Only
: possible restrictions of scanning only for broadcast in the clear/free (Yes) or (No).
3.
Search
: Press O
OK
on this menu item to reinstall the whole channel list.
WARNING
When you do this, previous channel list will be cleared.
3.3.3 Autoscan in Standby
Function dedicated to the configuration of the automatic channel list Update during standby mode. It can be
enabled/disabled using the parameter
Autoscan in Standby
(
On
/
Off
) and also programmed by entering with the number
buttons 0
0÷9
on the remote control at a new time (
hh
:
mm
) at the
Autoscan in Standby Time
parameter.
3.4 System Setup menu
3.4.1 Language
The following items are available:
1.
Language
: language of the menu shown on the screen (On Screen Display - OSD).
2.
First Audio
: Main audio language for the TV programs.
3.
Second Audio
: Secondary audio language for TV programs, to be used in the absence of the main one.
4.
Subtitle language
: language subtitles for TV shows.
NOTE
The proper functioning of the receiver in relation to the above audio and subtitle preferences is conditioned by the
presence of this information which is transmitted at the discretion of the broadcasters of the channel you are tuned in to.
3.4.2 TV System
This menu has the following audio and video settings to be adjusted in accordance with the characteristics of the
audio/video devices plugged into the receiver:
1.
Video resolution
: setting of the video resolution of the HDMI digital audio and video output.

English
TS6810 T2 STEALTH
11
WARNING
If the screen is connected via HDMI display problems, connect the receiver via SCART to set a compatible resolution
value.
2.
Aspect mode
: aspect ratio of the screen/TV connected to the receiver, eiter
16:9
or
4:3
, and how the images with a
different format from the screen will be displayed:
a.
16:9 Full
: For 16:9 screens. The images transmitted in 4:3 will be adapted to the whole screen.
b.
16:9 PillarBox: For
16:9 screens. The receiver will apply two black bars to the left and right sides of an
image broadcasted in 4:3 to fill the screen without distorting the original image.
c.
4:3 LetterBox
: For 4:3 screens. The receiver will apply two black bars above and below images transmitted
in 16:9 to fill the screen without distorting the original image.
d.
4:3 Pan&Scan
: For 4:3 screens. Images transmitted in 16:9 is adjusted in proportion to the height of the
screen by cutting off the side portions.
3.4.3 Local Time Setting
Adjusting the time on the receiver’s clock. The following controls are offered:
1.
Country
: select the country in which the receiver is installed to automatically synchronize the time (recommended)
in accordance with the information transmitted by terrestrial digital channels.
2.
GMT offset
: manually adjust the time offset relative to the global benchmark of Greenwich (Greenwich Mean Time-
GMT).
NOTE
Date and time are automatically synchronized on the receiver by means of the information transmitted by the channel
being viewed.
3.4.4 Timer setting
Programming and/or registration viewing timer menu. Refer to paragraph 2.7 Timer.
3.4.5 Parental Lock
The P
Parental Lock
menu allows you to control access to channels after entering the four-digit numeric password
defined by the user, also called Personal Identification Number (PIN).
NOTES AND WARNINGS
xThis menu is always protected with PIN.
xThe PIN code is originally defined by the user at the first installation of the device (see section 1.4).
xIf you have forgotten your password, you will need to return the receiver to its original state of its first installation
from the menu F
Factory Setting
(see section 3.5.2).
Turn on this menu to change or disable the parental control level. It performs a check on the vision of various sensitive
events. When the channel you are tuned in to transmits an event with security information for a viewing public at or
above an age level defined by the
Rating Lock
value set in the menu, the receiver will block the channel. You will then
see, on the screen, a request to unblock viewing of the channel by entering the PIN code.
This menu also allows you to change your password. To do so, first enter the PIN you chose in the field
New Password
using the number buttons on the remote control, then
reinsert it in
Confirm Password
to confirm it.
3.4.6 Favorite
Menu to rename favorite channel groups (see also paragraph 3.2.1).
3.4.7 Audio Description Setting
The Audio Description (AD) gives to visually impaired users accessibility to video contents, through a narration of the
video scene in addition to the main audio of the program. This kind of service is achievable in two different ways. In the
first one, so called “broadcaster-mixed” mode, the broadcaster transmits a unique audio track which contains both
audios, the main one and the video description: in this case, user has to simply select the involved audio track with
AUDIO key of remote control. Instead, in the second way, so called “receiver-mixed” mode, the audio description is
transmitted as a single additional track, like the main audio: in this case, the mix of the two audio tracks is demanded to
receiver device. To do so, the user has to activate the
AD Service
in the menu S
System Setup
> A
Audio Description
Setting
and eventually regulates the
AD Volume Offset
which represents the level between the video description and
the main audio.

TELE System
12
3.4.8 PVR Memory information
Technical consultation and configuration menu of the USB storage device when connected to the receiver. Provides
information about space available, as well as:
1.
YELLOW
button (
Format
): Utility to format the USB memory to FAT32 format.
WARNING
Formatting the memory will lose all data/files contained in it.
2.
BLU
button (
DVR Set
): USB memory configuration for recording and/or Timeshift. Refer to paragraph 2.6.2.1.
3.4.9 Other
3.4.9.1 Channel Play Type
Channel change mode using the C
CH+
/C
CH-
buttons between: all channels (
All
), only free channels (
Clear
) or only the
encrypted channels (
Encrypted
).
3.4.9.2 Auto Standby
The receiver is equipped with automatic shut-off function for energy saving. After three hours in operating mode without
any action by the user, the receiver will automatically go into standby mode. This function is factory preset and can be
deactivated through the menu item
Auto Standby
(
On
/
Off
).
3.4.9.3 Power Saving in Standby
The receiver is equipped even with a system to save energy during Standby mode. This function is factory preset. Also, it
can be disabled through the menu parameter
Power Saving in Stanby
(
On
/
Off
) in order to keep always active the RF
OUT (the antenna loop).
3.5 Tools menu
3.5.1 Information
Lists system information of the receiver, in particular the software version in use.
3.5.2 Factory Setting (reset)
The original factory restore function of the receiver is commonly called Reset. To reset, go to
Factory Setting
menu,
then confirm by pressing the O
OK
button on the screen
Yes
.
WARNING
When you do this, you will lose all user customizations and all channels loaded. The latest software version installed will
be preserved.
3.5.3 Upgrade by USB
The receiver software is upgradeable via USB port from this menu, after inserting a USB stick containing the image
appropriate software that the manufacturer will, at its discretion, provide when necessary.
WARNING
During a software update, do not interact with the receiver and never turn off the mains: there is a risk of permanent
damage to the receiver!
3.5.4 Remove USB device safely
Utilities for the safe removal of a USB storage device connected to the receiver. Refer to paragraph 2.6.1.2.

English
TS6810 T2 STEALTH
13
4Menu map
The menu is structured as follows:
Main menu
-- Media Player
---- PVR
---- Video
---- Music
---- Images
-- Edit Channel
---- TV Channel List
---- Radio Channel List
---- Delete All
--Installation
---- Channel Scan
---- Auto Scan
---- Autoscan in Standby
-- System Setup
---- Language
---- TV System
---- Local Time Setting
---- Timer Setting
---- Parental Lock
---- Favorite
---- Audio Description Setting
---- PVR Storage Information
---- Other
-- Tools
---- Information
---- Factory Setting
---- Upgrade By USB
---- Remove USB device safely
NOTE
For navigating through the menus, use the arrow keys, OK, MENU, EXIT and numeric (0
0
÷9
9
) on the remote control. Follow
also the possible indications on each dialog box.

TELE System
14
5Troubleshooting guide
SYMPTOM POSSIBLE CAUSE REMEDY
The LED on the external IR sensor will
not turn on.
The receiver is disconnected from the
mains power supply. Check that the receiver is plugged in.
The power supply is plugged in but it
doesn't work anyway.
Make sure the power supply is working.
ATTENTION
: risk of electric shock!
The external IR sensor is not connected
or is not inserted properly.
Insert the plug of the IR sensor in the
receiver by pressing it gently up as far as
it will go.
Lack of signal.
Antenna cable not connected to the
receiver. Connect the antenna wire to the receiver.
Damaged antenna system.
Verify the integrity of your system
(antenna, coaxial cable, signal distribution
devices, etc.). It is advisable to have
qualified personnel verify the installation.
The tuned channel is not broadcasting or
is obsolete.
Change channels and/or upgrade or
reinstall the channel list (para. 3.3).
Absence of sound and/or images.
Audio volume low or mute. Increase the level of audio volume of the
receiver and the TV.
The receiver is in standby. Switch the receiver on.
TV is turned off or positioned on the
wrong channel.
Turn on the TV screen and/or place it on
the correct audio-video channel.
HDMI cable is not connected to your TV
or is damaged. Restore the audio-video connection.
The receiver's HDMI resolution is not
compatible with the resolution of the
connected screen.
Try connecting another screen/TV via
HDMI.
You are trying to view an outdated or
incompatible encoded channel.
Change channels and/or upgrade or
reinstall the channel list (para. 3.3).
The remote control does not work.
The external IR sensor is not entered or
it is not connected properly.
Insert the plug of the IR sensor in the
receiver by pressing it gently up as far as
it will go.
IR sensor and remote control are unable
to communicate with each other.
Remove any obstructions and point the
remote control at the IR sensor.
The remote control is in the wrong mode. Press the STB to gain control of the
receiver.
Batteries not inserted or exhausted. Insert the batteries or replace them.
Batteries inserted with incorrect polarity.
Insert the batteries in the correct
direction. Follow the signs inside the
battery compartment.
The remote fell and some components
are damaged.
Contact your dealer to purchase a new
remote control.
The adjustments made in the menu
are not saved.
No confirmation after changing the
settings.
After each edit, press the appropriate
button to confirm/save.
The program information is not
displayed.
The program concerned does not
transmit information about the event.
The receiver clock is not set correctly. Adjust the receiver clock (para. 3.4.3).
The timer does not start or function
properly.
The broadcaster transmits incorrect data
and/or date.
The receiver's clock is set incorrectly. Adjust the receiver clock (para. 3.4.3).
The receiver does not respond to the
action buttons.
The receiver is temporarily blocked. Disconnect the receiver power supply and
reconnect it after a few seconds.
Current channel sends inappropriate
data that are blocking the receiver.
Disconnect the antenna cable, restart the
receiver, switch channels, then reconnect
the antenna.
Problems with the remote. See relevant suggestions listed in this
table.
The table continues on next page ...

English
TS6810 T2 STEALTH
15
SYMPTOM POSSIBLE CAUSE REMEDY
The USB memory is not recognized.
USB memory is not formatted properly. Formatting with FAT32 File System.
USB memory is not compatible. Try another USB memory.
The sole USB port is not sufficient to
power the memory.
Use any external power supply for the
disc.
You cannot record.
The broadcaster does not allow
recording.
Not enough memory. Free up disc space intended for recording.
The receiver switches off
automatically. Energy saving function is activated. See paragraph 3.4.9.2.
You forgot your PIN. Perform a reset (para. 3.5.2).
WARNING
In general, in the event of abnormal behavior of the receiver, a complete system reboot or factory reset through reset
(section. 3.5.2) can help you solve your problem.
6Technical characteristics
Product type Digital terrestrial receiver zapper HD DVB-T/DVB-T2 H.265
Input/output frequencies VHF: 174÷230MHz
UHF: 470÷862MHz
Video Decoding MPEG-2, MPEG-4 H.264
/
H.265
Audio decoding
(1)
MPEG Layer I & II, AAC+ (HE-AAC v1), Dolby Digital, Dolby Digital Plus
Menu languages ENG, ITA, FRA, DEU, POL, RUS, SPA, CES
OSD menu
Teletext
Subtitles
Electronic program guide (EPG)
Video aspect ratio 16:9, 4:3
Antenna power -
RF Modulator -
Integrated modem (RJ-11) -
Ethernet interface (RJ-45) -
Digital Audio Output (S
/
PDIF) -
SCART Output -
HDMI Output
(2)
x1, HDMI v1.4a
Resolution/video Upscaling up to 1080p (50Hz)
USB Port x2, anteriore, USB v2.0
5V , 500mA Max (in total, for both ports)
Automatic channels update
Software update Manual via USB
Recording (PVR) Via USB (FAT32)
Timeshift Via USB (FAT32)
Media playback Via USB (FAT 32)
Factory reset function
Favorite channels list
Timer Setting
Auto-off (power saving)
Power supply Direct: 5V , 1.5A
Included power supply In: 100÷240V~ 50/60Hz, 0.5A Max Out: 5V , 1.5A
Consumption Operational: 10W Max Actual Standby <0,5W
Temperature While working: 0÷40°C Storage: -20÷70°C
Dimensions 118 x 81.5 x 23 mm
(1)
Manufactured under license from Dolby Laboratories. Dolby and the double-D symbol are trademarks of Dolby Laboratories..
(2)
The terms HDMI and High-Definition Multimedia Interface HDMI and the HDMI logo are trademarks or registered trademarks
of HDMI Licensing, LLC in the United States and other countries.

Table of contents
Other Telesystem Receiver manuals

Telesystem
Telesystem TS6211DT User manual

Telesystem
Telesystem ts3002 User manual

Telesystem
Telesystem TS6291 User manual

Telesystem
Telesystem TS6282 User manual

Telesystem
Telesystem TS6213 User manual

Telesystem
Telesystem STEALTH TS6807 User manual

Telesystem
Telesystem TS6208 User manual

Telesystem
Telesystem TS6800 T2HEVC User manual

Telesystem
Telesystem TS3.1 F User manual

Telesystem
Telesystem TS6201DT User manual