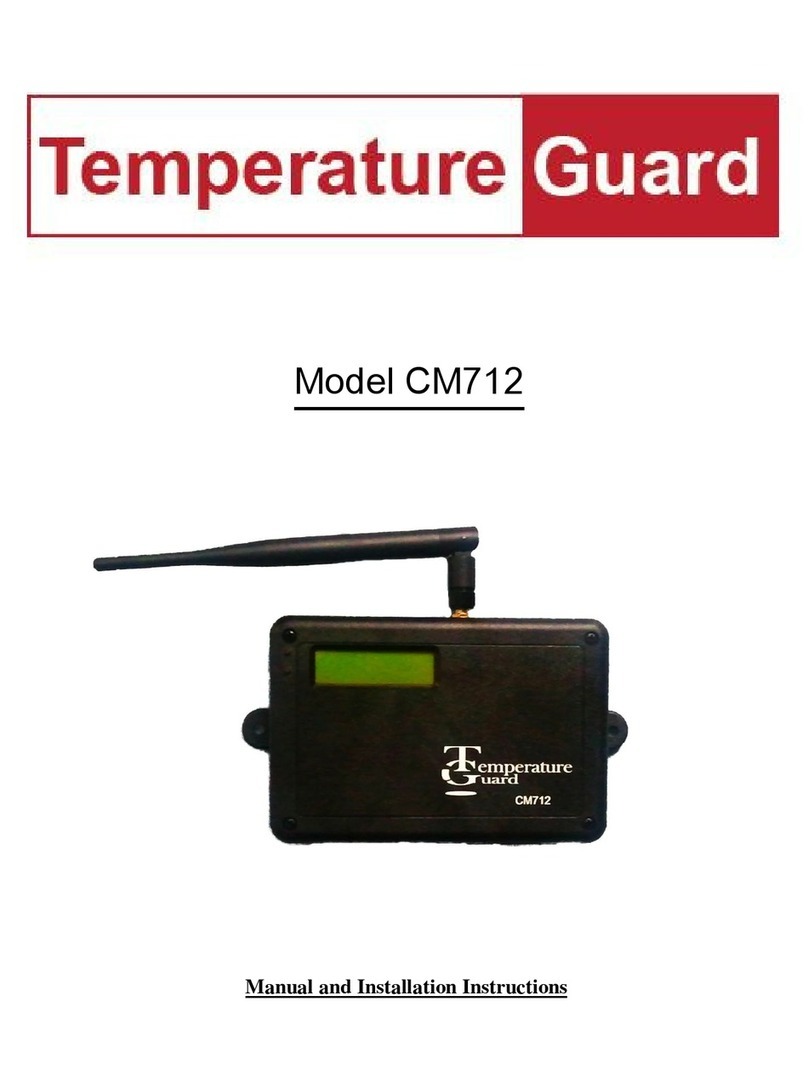
Temperature Guard VM500-3 User manual

Temperature Guard
Models VM500-3 & VM500-3HT
Operating Manual and Installation Instructions

2
Index Page
Temperature Guard Description 3
Programming Overview 3
Programming Temperature Limits 4
Programming Humidity Limits 5
Recording a Personal Identification Message 7
Programming the Number of Rings 8
FCC PART 68 INFORMATION 14
Warranty Information 15
Programming Your PIN Number 8
Enabling / Disabling the Temperature and Power 8
Notes 9
Frequently Asked Questions 10
Troubleshooting Problems 12
Some Helpful TIPS 13
Programming Telephone Numbers 6
Programming Pager Numbers 6
Adding a delay to access outside phone line 7
Setting Temperature Readings to Fahrenheit or 4

Temperature Guard Description
The Temperature Guard monitors temperature and power wherever it is located, and dials the pro-
grammed emergency phone numbers if the temperature goes out of programmed limits or if the power
goes out for more than five minutes.
Please wait until the Temperature Guard stops speaking before pressing a button. During the Main
Menu and Program Menu, you may enter your selection at any time between options.
Programming Overview
Programming the Temperature Guard is accomplished over the phone and only has to be done once,
unless it is necessary to make a change. Before programming, do the following:
1. Connect a phone line, plug in the power pack to an outlet, and connect the power jack.
Use of a phone and power line surge suppressor is required.
Use of a DSL filter is required if there is DSL service in your home.
Turn the unit on by moving the power switch from the position labeled 0 to the position labeled 1.
2. From another phone line dial the number where the Temperature Guard is located. The Tempera-
ture Guard will pick up after the first ring.
3. The Temperature Guard prompts for the 4-digit PIN number. Enter the factory default PIN num-
ber, 0000.
4. You will hear the Main Menu options. You may enter your selection at any time.
5. To access the Program Menu press 3 at the Main Menu.
6. See Program Menu Directions on page 5
**Temperature Guard will record the highest and lowest readings that the Temperature Guard has taken
until reset.
The Main Menu options are:
3
Main Menu
Option Function
1 Status
2 Programming Limits
3 Go to Program Menu
9 Reset Highs and Lows (Not Spoken)**
0 Hang Up

Setting Temperature Readings to Fahrenheit or Celsius (Option *)
The Temperature Guard can report the temperature in Fahrenheit (default) or Celsius. To switch to
Celsius, perform the steps below. (Please note switching from Fahrenheit to Celsius does not change
the temperature limits you set. )
1 From the Program Menu, press *
2 You will hear the current setting. Default is “C off”, the temperature is being output in degrees
Fahrenheit.
3 You will hear “Press one to change.”
4 Press 1 if you wish to change the Temperature Readout Mode and have the temperature output in
Celsius.
5 You will hear the new setting, “C on”.
6 You will be automatically returned to the Program Menu
Programming Temperature Limits
Model VM500-3
1 From the Main Menu, press 2 to Set Limits
2 You will hear the current low limit (i.e. “Lower limit is 45°”)
3 You will hear “Press 1 to change”
4 Press 1to make a change or any other button to skip to step 8
5 You will hear “Enter number then press pound”
6 Enter the temperature (Valid limits are 35°to 125°F), then press the pound sign.
7 You will hear the value you just entered (i.e. 45°)
8 You will hear the current upper limit (i.e. “Upper limit is 85°")
9 You will hear “Press 1 to change”
10 Press 1to make a change or any other button to return to the Main Menu
11 You will hear “Enter number then press pound”
12 Enter the temperature (Valid limits are 35°to 125°F), then press the pound sign.
13 You will hear the value you just entered (i.e. 95°)
14 You will be returned to the Main Menu
Model VM500-3HT ONLY
1 From the Main Menu, press 2 to Set Limits
2 You will hear "Press 1 for temperature or 2 for humidity"
3 Press 1 for temperature
4 Proceed to step 2 above
4

5
Programming Humidity Limits
Model VM500-3HT Only
1 From the Main Menu, press 2 to Set Limits
2 You will hear "Press 1 for temperature or 2 for humidity"
3 Press 2 for humidity
4 You will hear the current low limit (i.e. “Lower limit is 0%”)
5 You will hear “Press 1 to change”
6 Press 1 to make a change or any other button to skip to step 10
7 You will hear “Enter number then press pound”
8 Enter the value (Valid limits are 00% to 99% RH), then press the pound sign.
9 You will hear the value you just entered (i.e. 25%)
10 You will hear the current upper limit (i.e. “Upper limit is 85 %”)
11 You will hear “Press 1 to change”
12 Press 1 to make a change or press any other button to return to the Main Menu
13 You will hear “Enter number then press pound”
14 Enter the value (Valid limits are 00% to 99% RH), then press the pound sign.
15 You will hear the value you just entered (i.e. 70%)
16 You will be returned to the Main Menu.
Program Menu
Option Function
1 Program Primary Telephone Number
2 Program Secondary Telephone Number
3 Program Third Telephone Number
4 Program Fourth Telephone Number
5 Program Local ID Number For Pagers
6 Record Personal Message
7 Program Number of Rings
0 Exit (return to Main Menu)
8 Change PIN Number
9 Activate Status Message on Call-in
* Change Temperature Mode from F°to C°
NOT SPOKEN
NOT SPOKEN

Programming Telephone Numbers (Option 1-4)
The Temperature Guard will call each programmed phone number until someone enters the PIN num-
ber. If the Temperature Guard reaches an answering machine, it will leave the personal identification
message, and then the alarm condition, but will continue calling.
First Time Phone Number Programming:
1 From the Program Menu, Select 1for the primary number, 2for the secondary number, 3for the
third number , or 4for the fourth number .
2 You will hear “Enter number then press pound.
3 Enter the full phone number (1 + area code if necessary) followed by the pound sign.
4 You will hear the number you just entered.
5 You will be automatically returned to the Program Menu.
To Change a Phone Number:
1 Select the phone number from the Program Menu
2 You will hear the telephone number
3 You will hear “Press one to change”
4 Press 1to make a change or any other button to return to the Program Menu
5 You will hear “Enter number then press pound
6 Enter the full phone number (1 + area code if necessary) followed by the pound sign.
7 You will hear the telephone number you just entered.
8 You will be automatically returned to the Program Menu
To Delete a Phone Number:
1. Select the appropriate number from the Program Menu
2. You will hear the telephone number you selected
3. You will hear “Press one to change”
4. Press 1 to make a change
5. You will hear “Enter number then press pound”
6. Enter just the pound sign.
7. The phone number will be erased and you will be automatically returned to the Program Menu
Programming Pager Numbers
The Temperature Guard can call voice or pager numbers. Pager numbers are programmed by pro-
gramming a * as the first digit of a telephone number.
1 From the Program Menu, Select 1for the primary number, 2for the secondary number, 3for the
third number, or 4for the fourth number.
2 You will hear “Enter number then press pound”
3 Enter * (the star key) then enter the full pager number (1 + area code if necessary) followed by the
pound sign.
4 You will hear “star” and then the telephone number you just entered.
5. You will be automatically returned to the Program Menu
6

Programming a Local ID Number For Pagers (Option 5)
The local identification number is printed on the display of a pager when the Temperature Guard calls a
pager number. This number can be up to 20 digits long.
1 From the Program Menu, press 5for the local ID
2 If this is the first time setup, go to step 6
3 You will hear the programmed number
4 You will hear “Press one to change”
5 Press 1if you wish to make a change or press any other button to return to the Program Menu
6 You will hear “Enter number, then press pound”
7 Enter the number, followed by the pound sign.
8 You will hear the number you just entered.
9 You will be automatically returned to the Program Menu
Adding a delay to access outside phone line
If an extra time delay between digits of a phone number is required, enter * to provide a two second delay.
For example: If a 9 were required to connect with an outside line, and a delay is needed after the 9 and be-
fore the number is dialed, program the phone number as follows: 9 * 5 5 5 1 2 3 4 #
The Temperature Guard will dial 9, wait 2 seconds and then dial the rest of the phone number.
Recording a Personal Identification Message (Option 6)
When the Temperature Guard calls out, it will first play the recorded personal identification message. The
message is 10 seconds in length.
1 From the Program Menu, press 6
2 If this is the first time recording a message, you will not hear anything. Go to step 4
3 You will hear the recorded message
4 You will hear “Press one to change”
5 Press 1if you wish to make a change or press any other button to return to the Program Menu
6 If you press 1you will hear a tone
7 Begin speaking after the tone. The Temperature Guard will record for 10 seconds. After 10 seconds
you will hear a beep.
8 You will hear the message you recorded.
9 You will be automatically returned to the Program Menu
7

Programming the Number of Rings (Option 7)
The Temperature Guard answers the telephone line after the programmed number of rings. Valid num-
bers of rings are 1 – 25.
1 From the Program Menu, press 7to set the number of rings
2 You will hear the programmed number of rings
3 You will hear “Press one to change.”
4 Press 1if you wish to make a change or press any other button to return to the Program Menu
5 You will hear “Enter number then press pound”
6 Enter the number of rings, then press the pound sign.
7 You will hear the number of rings you entered
8 You will be automatically returned to the Program Menu
Programming Your PIN Number (Option 8)
The Temperature Guard has a programmable 4-digit PIN number (0000-9999) to access the program
menu, and to stop the Temperature Guard from making emergency phone calls. The PIN number must
be 4 digits and must not include a # sign.
Record your pin number below in this manual and on your Temperature Guard.
My PIN Number is _____________
1 From the Program Menu, press 8to change the PIN number
2 You will hear the PIN number (factory default is 0000)
3 You will hear “Press one to change.”
4 Press 1 if you wish to make a change or press any other button to return to the Program Menu
5 You will hear “Enter number”
6 Enter a four digit number (do not put a # (pound sign) anywhere in your pin number)
7 You will hear the PIN number you just entered
8 You will be automatically returned to the Program Menu
Enabling / Disabling the Temperature and Power Status Message (Option 9)
From the factory, the Temperature Guard prompts the caller for the PIN number before allowing the
caller to hear the current temperature and power status. This prevents anyone from learning that the
home is unoccupied. To have the Temperature Guard report the temperature and power without enter-
ing the PIN, perform the steps below.
1 From the Program Menu, press 9
2 You will hear the current setting. Default is “off”, the status message will not be broadcast before the
PIN has been entered.
3 You will hear “Press one to change.”
4 Press 1 if you wish to activate the Status Message before PIN
5 You will hear the new setting. “On” will cause the Temperature Guard to broadcast the Status Mes-
sage Before PIN Entry.
6 You will be automatically returned to the Program Menu
8
8

Notes
9

10
10
Frequently Asked Questions
Understanding How the Temperature Guard Works
Where Should I Locate the Temperature Guard?
The Temperature Guard measures temperature and power wherever it is located. If the Temperature
Guard is being used to protect against freezing temperatures, locate it in an area where the temperature
will drop the fastest, if the heating system fails, such as a room with a northern exposure or numerous
windows.
If the Temperature Guard is being used to protect equipment against overheating in case air conditioning
fails, locate the Temperature Guard close to the equipment and close to the ceiling where heat will build
up quickest.
Once the location is chosen, connect the phone line and power. Turn on the power switch (the light next
to the phone line will start blinking at a rate proportional to the temperature). Follow the instructions in the
Programming section.
When does the Temperature Guard call?
The Temperature Guard will call immediately when there is a temperature alarm.
The Temperature Guard will call after the power has been out for 5 minutes
During an emergency, all phone numbers are called. If the PIN number is not entered, the Temperature
Guard will wait 20 minutes and then begin calling all phone numbers again.
What happens when the Temperature Guard calls?
1 The Temperature Guard will play the personal identification message, followed by the cause of the
alarm.
2 The Temperature Guard will ask for the PIN number
3 Once the PIN number has been entered, the Temperature Guard will not call again because the cur-
rent alarm condition has been acknowledged.
4 The Temperature Guard will repeat the alarm messages one time if the PIN is not entered.
What happens if the PIN is not entered at any of the numbers the Temperature Guard is
programmed to call?
The Temperature Guard will wait 20 minutes and call all programmed telephone numbers again.
The Temperature Guard will continue to call all programmed numbers every 20 minutes as long as there
is an alarm and the PIN has not been entered during an alarm call or during a status check call-in.
What happens if I call the Temperature Guard while an alarm condition exists?
1 If the Status Message Before PIN Entry is Active, you will hear either “Warning, the temperature is XX”
or “Warning, the power is out”, otherwise you will just hear “Enter your PIN number”
2 If the PIN number is entered, the Temperature Guard will stop making emergency phone calls.
3 If the PIN number is not entered, the Temperature Guard continues dialing the emergency phone
numbers.

What happens when the Temperature Guard calls a pager?
The Temperature Guard will print the Local Identification number The Temperature Guard will print the
temperature.
The Temperature Guard will then print the power status. 1 for power on and 0 for power off.
Example, if you saw 12340751 on the pager's display, 1234 is the user ID, 075 indicates a temperature
of 75 degrees, and the last 1 indicates power is on.
The Temperature Guard will continue to call the pager and any other programmed phone numbers until
either:
• The alarm condition goes away OR
• The Temperature Guard is called and the PIN number is entered
• The Temperature Guard calls a voice number and contacts a person who enters the PIN number.
How do I connect the Temperature Guard to a phone line which has a fax or answering
machine connected to it?
Program the Temperature Guard to answer after one more ring than the other device on the line. This
allows the other device to always answer first.
To call and access the Temperature Guard
1 Dial the phone number
2 Hang up one ring before the other device answers.
3 Wait no longer than 30 seconds, then dial the number again.
4 The Temperature Guard will answer.
Example: An answering or fax machine on the same line as the Temperature Guard and is set to an-
swer after 4 rings.
Program the Temperature Guard to answer after 5 rings.
To access the Temperature Guard, dial the number, let it ring three times, then hang up. Wait 15 sec-
onds and call again. After two rings, the Temperature Guard will answer.
How do I read the temperature from the blinking light?
Wait for the light located next to the phone line to be on for approximately 2 seconds.
Count the number of blinks until the light is off for 1 second. This number of blinks is the 10’s digit of the
temperature.
Now count the number of blinks until the light is again off for 1 second. This is the 1’s digit of the tem-
perature.
The temperature is calculated by: (multiply the number of blinks counted in step 2 by ten and then add
the number of blinks counted in step 3. For example, if the number of blinks counted in step 2 is seven
and the number of blinks counted in step 3 is two, then the temperature is (7 x 10) + 2 = 72 degrees.
Where is my 20 / 30 Hour extended battery?
If your unit has been ordered with an extended battery, it is installed inside the Temperature Guard at
the factory.
11 11

How long does it take to charge the battery?
Batteries are trickle charged and can take up to a week to reach full capacity. The battery is charging
whenever the Temperature Guard is powered on.
If I have DSL, do I need a DSL filter?
Yes, you must have a DSL filter between the phone line and Temperature Guard.
Troubleshooting Problems with the Temperature Guard
The Temperature Guard doesn’t answer the phone
1 Verify that the phone line is working.
2 Connect a phone to the line and cable intended for the Temperature Guard.
3 Pick up the phone and verify that there is a dial tone.
4 Using another phone line (cell phone or alternate location) call the number and verify
that the phone rings.
5 Re-connect the Temperature Guard.
6 Check that the phone line is plugged in securely.
7 Verify that the Temperature Guard is powered up and the status light is blinking.
8 Call the number again. The Temperature Guard will stop blinking its light while the
phone is ringing.
If the blinking light does not stop and continues blinking, the Temperature Guard is not
“hearing” the phone ringing.
• This may be caused by phone line quality issues such as DSL on the phone line
without use of a DSL filter
• This may be caused by using the device on a digital phone system through your
cable company or other non-standard telephone system which our system may not
be compatible with. Your telephone service provider may be able to assist you by
adjusting their hardware. There are no settings on the Temperature Guard to ad-
just.
The Temperature Guard Says “Goodbye” after I enter my PIN
If the Temperature Guard says “Goodbye” and does not ask you to enter the PIN again, it
has not “heard” you enter the complete PIN.
This is caused by:
Short or quiet “touch tones” being generated by the phone used to call the Tem-
perature Guard.
Try holding the button down longer and verify you hear a tone for at least 1/2 a second.
This may not be possible with cell phones. Though, many cell phones have a “DTMF
(touch tone) Setting” that can be set to Short or Long. Setting this value to Long will fix
the problem in most cases. Poor signal quality can also cause this problem.
How can I verify that the Temperature Guard will call all the phone numbers?
To verify that the Temperature Guard will call all of the programmed phone numbers, per-
12

form the following test.
1 Use another phone line and call the Temperature Guard.
2 When asked to enter the pin number, enter “#999“ (including the “pound” sign).
3 Hang up after the Temperature Guard says “Goodbye”
The Temperature Guard will call all of the programmed telephone numbers.
Do not enter the PIN during this process or the unit will stop calling out.
Troubleshooting Tip #1
You can listen in to verify communication by waiting 10 seconds after hearing “Goodbye”
and listening in on a phone on the same line.
What do I do if the Temperature Guard doesn’t call my phone numbers?
Verify that the numbers are programmed correctly. Telephone numbers must be pro-
grammed exactly as they would be dialed from a telephone on the same line. (Including 1 +
area code, if necessary)
Verify that a DSL filter is in place if there is DSL service on your telephone line.
Verify that you have “touch tone” service.
Verify that you have long distance service if calling a long distance number.
See Troubleshooting Tip #1 above, listen for messages from the phone company during
the test call.
If you have a digital phone line through your cable company or other non-standard tele-
phone system (Vonage, VoIP), our system may not be compatible with it. Your telephone
service provider may be able to assist you by adjusting their hardware. There are no set-
tings on the Temperature Guard to adjust.
Some Helpful TIPS
• If the Temperature Guard is having trouble receiving your programming entries, try
holding the button for a longer amount of time.
• Include all necessary digits for phone numbers. Long distance numbers must include 1
and the area code. Do not turn off your long distance service if you are going away for
an extended period of time and you expect the Temperature Guard to call a long dis-
tance number.
• Do not place the unit in direct sunlight as this will effect the temperature and humidity
readings.
• Do not place the unit near heating or cooling sources if you wish to monitor the average
temperature of a room.
• Placing the unit on the floor will cause the Temperature Guard to sense a temperature
that is lower then the actual ambient temperature.
• To monitor the power status of specific devices; connect the Temperature Guard’s
power plug into the same power source as the device you wish to Temperature Guard.
It is possible for an isolated power outlet to lose power.
Technical Support Contact
support@temperatureguard.com
13

FCC PART 68 INFORMATION
This equipment complies with Part 68 of the F Rules. The F Part 68 Label is located
on the bottom of the unit. This label contains the F Registration Number and Ringer
Equivalence Number (REN) for this equipment. If requested, this information must be
provided to your telephone company.
The REN is useful to determine the quantity of devices you may
connect to your telephone line and still have all of those device
ring when your telephone number is called. In most, but not all
areas, the sum of the RENs of all devices connected to one line
should not exceed five (5.0). To be certain of the number of de-
vices you may connect to your line, as determined by the REN,
you should contact your local telephone company to determine the
maximum REN for your calling area.
onnection to the telephone network should be made by using standard modular tele-
phone jacks, type RJ11. The plug and/or jacks used must comply with F Part 68 rules.
If this telephone equipment causes harm to the telephone network, the telephone company
will notify you in advance that temporary discontinuance of service may be required. But if
advance notice isn't practical, the telephone company will notify the customer as soon as
possible. Also, you will be advised of your right to file a complaint with the F if you
believe it is necessary.
The telephone company may make changes in it's facilities, equipment, opera-
tions or procedures that could affect the proper functioning of your equipment. If they do,
you will be notified in advance in order for you to make necessary modifications to main-
tain uninterrupted service.
This equipment may not be used on coin service provided by the telephone
company. onnection to party lines is subject to tariffs.
If trouble is experienced with this unit, for repair or warranty information, please
contact customer service at the address listed below. If the equipment is causing harm to
the network, the telephone company may request that you disconnect the equipment until
the problem is resolved.
DO NOT DISASSEMBLE THIS EQUIPMENT. It does not contain any user
serviceable components.
Attn.: USTOMER SERVI E DEPT.
Microtechnologies, Inc.
123 Whiting St. Unit 1A
Plainville, T 06062
14

Limited Warranty:
1. Warrantor: Dealer, Distributor, Retailer, and Manufacturer
2. Warranty and Remedy
We believe that this is a high quality product. Although we test all products for proper function-
ality, we cannot guaranty that there will never be a defective unit, or that a unit will function on
every phone line and all communication equipment in existence. For this reason, it must be clear
that the Warrantors are not insuring your premises or guaranteeing that there ill not be
damage to your person or property if you use this Product. If this warranty is unacceptable
please return the unused Product for a full refund.
One Year Limited Warranty - Microtechnologies, Inc. warrants its products to be free from de-
fects in material and workmanship under normal use for one year, and is not responsible for con-
sequential damage or installation costs of any nature. In event that the Product does not con-
form to this Warranty at any time during the period of one year from original purchase date, War-
rantor will repair the defect and return it to you at no charge. Important: The Warranty is
limited to replacement of the Product ONLY. Secondly, because every phone line differs, we
strongly encourage you to test this Product in its actual application. This should include a full
test, involving the Product actually dialing to its designated location and someone verifying the
proper response.
This warranty shall terminate and be of no further effect at the time the Product is 1) damaged by
extraneous causes such as fire, water, lightning, etc. or not maintained as reasonable and neces-
sary: 2) modified: 3) improperly installed: 4) repaired by someone other than the Warrantor: 5)
used in a manner or purpose for which the Product was not intended.
No Use as Critical Component. Products sold by Microtechnologies, Inc. are not authorized
for use in any manner as a component of a life support device or system, whose failure to per-
form can be reasonably expected to cause the failure of the life support device or system, or to
affect its safety or effectiveness.
WARRANTORS' OBLIGATION UNDER THIS WARRANTY IS LIMITED TO RE-
PAIR OR REPLACEMENT OF THE PRODUCT ONLY. THIS WARRANTY DOES
NOT COVER PAYMENT OR PROVIDE FOR THE REIMBURSEMENT OF PAY-
MENT FOR INCIDENTAL OR CONSEQUENTIAL DAMAGES.
It must be clear that the Warrantors are not insuring your premises or guaranteeing that
there ill not be damage to your person or property if you use this Product. The Warran-
tors shall not be liable under any circumstances for damage to your person or property or some
other person or that person's property by reason of the sale or use of this Product, or its failure to
operate in the manner in which it is designed. The Warrantor's liability, if any, shall be limited to
the original cost of the Product only. Use of this Product is at your own risk.
3. Procedures for obtaining performance for Warranty:
In the event that the Product does not conform to this Warranty, the Product should be shipped
or delivered freight prepaid to a Warrantor with evidence of original purchase. If in any way you
are not comfortable with the product or its Limited Warranty, we encourage you to return it un-
used for a full refund.
15

Temperature Guard
A division of Microtechnologies Incorporated
123 Whiting St. Unit 1A
Plainville, CT 06062
This manual suits for next models
1
Table of contents
Other Temperature Guard Temperature Controllers manuals
Popular Temperature Controllers manuals by other brands

TWO DIMENSIONAL INSTRUMENTS
TWO DIMENSIONAL INSTRUMENTS TV2 quick start guide

Chromalox
Chromalox TEMPERATURE CONTROLLER 1604-7 user manual

Blaupunkt
Blaupunkt TS-S1 Getting started

Pentair
Pentair Digitrace NGC-20-C-E Installation, operation and maintenance instructions

Chino
Chino TP-U0260ES Quick manual

Rehau
Rehau STAR 50 operating instructions