Tempo Fitness ce11 evolve User manual

ELLIPTICAL OWNER’S MANUAL
MANUEL DU PROPRIÉTAIRE DE L’EXERCISEUR ELLIPTIQUE
MANUAL DEL PROPIETARIO DE LA MÁQUINA ELÍPTICA
Read the ELLIPTICAL GUIDE before using this OWNER’S MANUAL.
Lire le GUIDE D’UTILISATION DE L’EXERCISEUR ELLIPTIQUE avant de se servir du présent MANUEL DU PROPRIÉTAIRE.
Lea la GUÍA DEL USUARIO DE LA MÁQUINA ELÍPTICA antes de usar este MANUAL DEL PROPIETARIO.
ce11
ce11-OM-rev2_4.indd 1 8/15/11 2:13 PM

23
IMPORTANT PRECAUTIONS
SAVE THESE INSTRUCTIONS
Read the ELLIPTICAL GUIDE before using this OWNER’S MANUAL. Read all instructions before using this elliptical. When
using an electrical product, basic precautions should always be followed. It is the responsibility of the owner to ensure that all
users of this elliptical are adequately informed of all warnings and precautions. If you have any questions, contact Customer Tech
Support at the number listed on the back panel of this OWNER’S MANUAL.
This elliptical is intended for in-home use only. Do not use this elliptical in any commercial, rental, school or institutional setting.
Failure to comply will void the warranty.
3 ENGLISH
28 FRANÇAIS
54 ESPAÑOL
ce11-OM-rev2_4.indd 2-3 8/15/11 2:13 PM

4 5
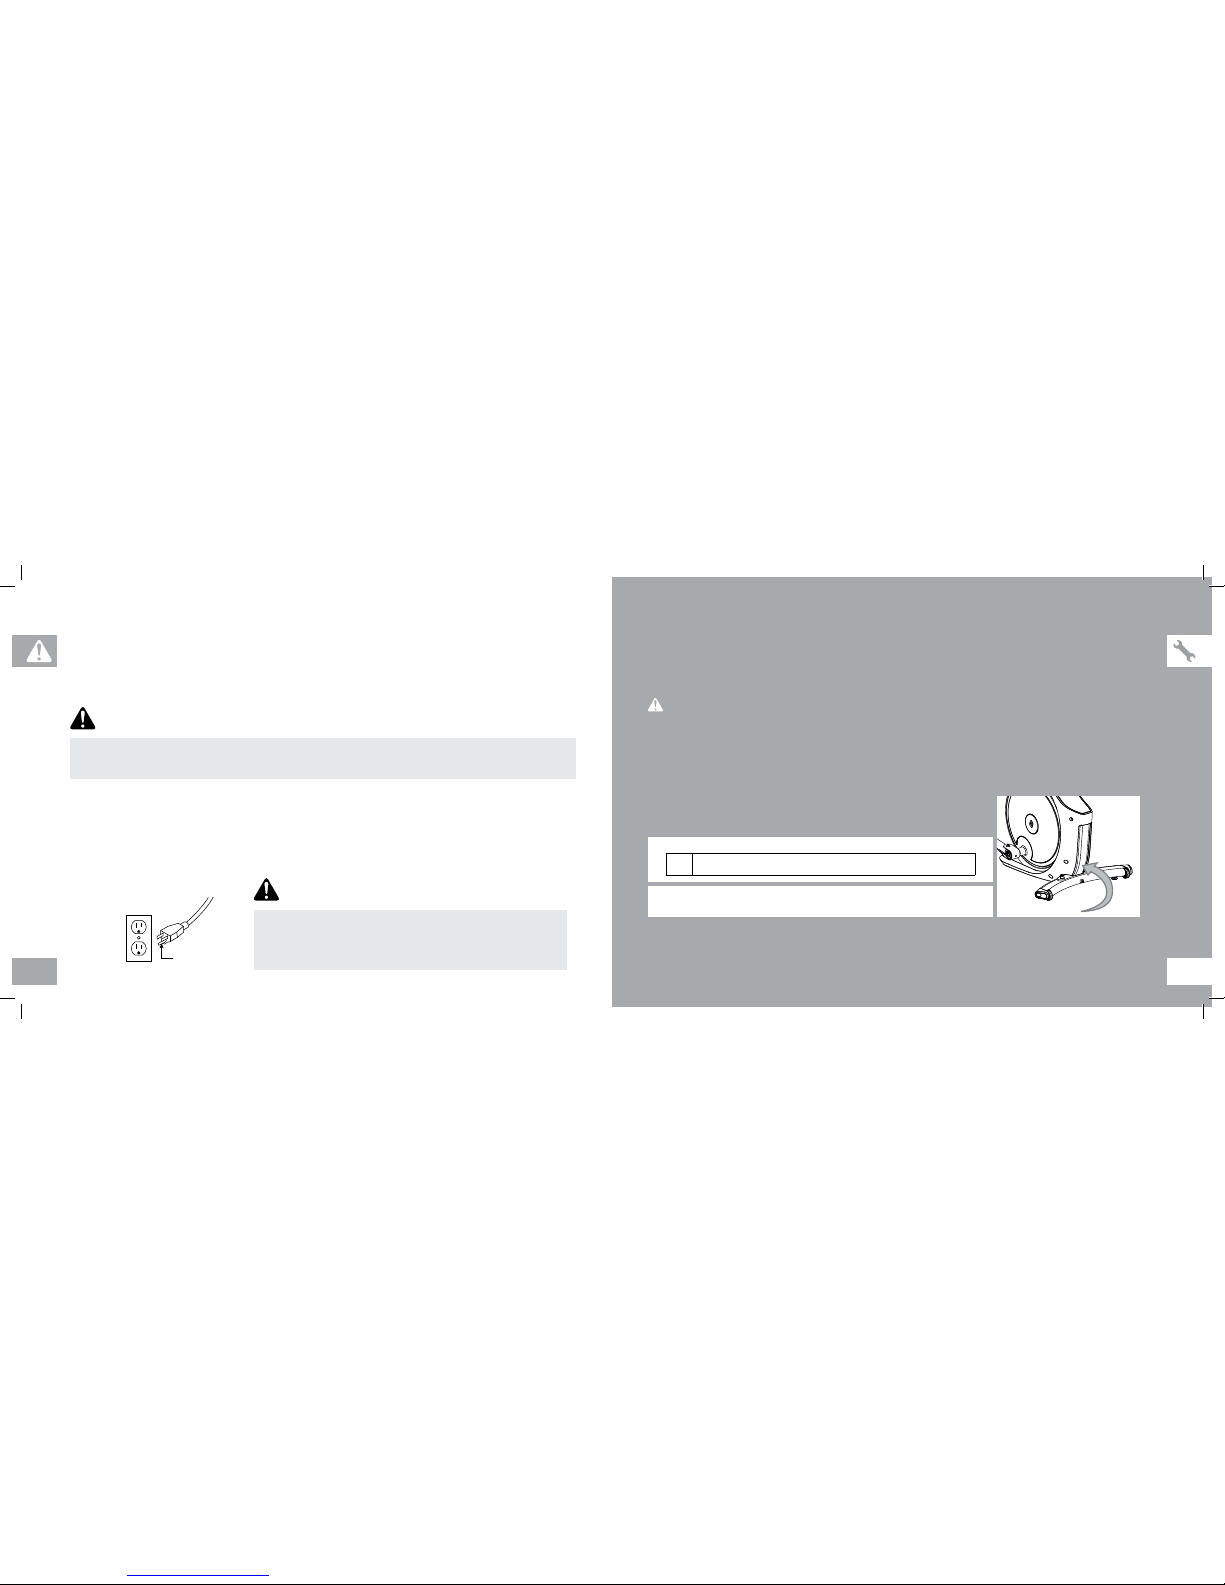
TO REDUCE THE RISK OF ELECTRICAL SHOCK:
Always unplug the elliptical from the electrical outlet immediately after using, before cleaning, performing maintenance and putting on or taking
off parts.
DANGER
TO REDUCE THE RISK OF BURNS, FIRE, ELECTRICAL SHOCK OR INJURY TO PERSONS:
• If you experience any kind of pain, including but not limited to chest pains, nausea, dizziness, or shortness of breath, stop
exercising immediately and consult your physician before continuing.
• When exercising, always maintain a comfortable pace. Do not sprint above 80 RPMs on this machine.
• To maintain balance, it is recommended to keep a grip on the handlebars while exercising, mounting or dismounting the machine.
• Do not turn pedal arms by hand.
• Make sure handlebars are secure before each use.
• Keep the top side of the foot support clean and dry.
• Care should be taken when mounting or dismounting the equipment. Before mounting or dismounting, move the pedal on the
mounting or dismounting side to its lowest position and bring the machine to a complete stop.
• Do not wear clothes that might catch on any part of the elliptical.
• Always wear athletic shoes while using this equipment.
• Do not jump on the elliptical.
• At no time should more than one person be on the elliptical while in operation.
• This elliptical should not be used by persons weighing more than the specified user capacity in the OWNER’S MANUAL
WARRANTY SECTION. Failure to comply will void the warranty.
• This elliptical is intended for in-home use only. Do not use this elliptical in any commercial, rental, school or institutional setting.
Failure to comply will void the warranty.
• Do not use elliptical in any location that is not temperature controlled, including but not limited to garages, porches, pool rooms,
bathrooms, car ports or outdoors. Failure to comply will void the warranty.
• To prevent electrical shock, never drop or insert any object into any opening.
• Connect this exercise product to a properly grounded outlet only.
WARNING
TO REDUCE THE RISK OF BURNS, FIRE, ELECTRICAL SHOCK OR INJURY TO PERSONS:
• Keep power cord away from heated surfaces. Do not carry this unit by its supply cord or use the cord as a handle.
• Do not use other attachments that are not recommended by the manufacturer. Attachments may cause injury.
• Do not operate where aerosol (spray) products are being used or when oxygen is being administered.
• Use the elliptical only as described in the ELLIPTICAL GUIDE and OWNER’S MANUAL.
• Disconnect all power before servicing or moving the equipment. To clean, wipe surfaces down with soap and slightly damp cloth
only; never use solvents. (See MAINTENANCE)
• The elliptical should never be left unattended when plugged in. Unplug from outlet when not in use, and before putting on or
taking off parts.
• Do not operate under blanket or pillow. Excessive heating can occur and cause fire, electric shock, or injury to persons.
• At NO time should pets or children under the age of 13 be closer to the elliptical than 10 feet.
• At NO time should children under the age of 13 use the elliptical.
• Children over the age of 13 or disabled persons should not use the elliptical without adult supervision.
• Never operate the elliptical if it has a damaged cord or plug, if it is not working properly, if it has been dropped or damaged, or
immersed in water. Return the elliptical to a service center for examination and repair.
• To disconnect, turn all controls to the off position, then remove plug from outlet.
• Do not remove the console covers unless instructed by Customer Tech Support. Service should only be done by an authorized
service technician.
It is essential that your elliptical is used only indoors, in a climate-controlled room. If your elliptical has been exposed to colder
temperatures or high moisture climates, it is strongly recommended that the elliptical is warmed up to room temperature before
first time use. Failure to do so may cause premature electronic failure.
WARNING
ce11-OM-rev2_4.indd 4-5 8/15/11 2:13 PM

7
ASSEMBLY
There are several areas during the assembly process to which special attention must be paid. It is very important to follow the
assembly instructions correctly and to make sure all parts are firmly tightened. If the assembly instructions are not followed
correctly, the elliptical could have frame parts that are not tightened and will seem loose and may cause irritating noises. To
prevent damage to the elliptical, the assembly instructions must be reviewed and corrective actions should be taken.
Before proceeding, find your elliptical’s serial number located on a white barcode sticker
on the rear stabilizer tube and enter it in the space provided below.
ENTER YOUR SERIAL NUMBER AND MODEL NAME IN THE BOXES BELOW:
» Refer to the SERIAL NUMBER and MODEL NAME when calling for service.
WARNING
SERIAL NUMBER:
EP
MODEL NAME: TEMPO EVOLVE CE11 ELLIPTICAL
SERIAL NUMBER LOCATION
GROUNDING INSTRUCTIONS
If your elliptical has power incline with a 3-prong plug, you must follow these grounding instructions.
This product must be grounded. If an elliptical should malfunction or break down, grounding provides a path of least resistance for
an electrical current to reduce the risk of electrical shock. This product is equipped with a cord having an equipment-grounding
conductor and a grounding plug. The plug must be inserted into an appropriate outlet that is properly installed and grounded in
accordance with local codes and ordinances.
Connect this exercise product to a properly grounded outlet only.
Never operate product with a damaged cord or plug even if it is working
properly. Never operate any product if it appears damaged, or has been
immersed in water. Contact Customer Tech Support for replacement or repair.
WARNING
DANGER
Improper connection of the equipment-grounding conductor can result in a risk of electric shock. Check with a qualified
electrician or serviceman if you are in doubt as to whether the product is properly grounded. Do not modify the plug provided
with the product. If it will not fit the outlet, have a proper outlet installed by a qualified electrician.
This product is for use on a nominal 110-120 Volt circuit and has a grounding plug that looks like the plug in the illustration. Make
sure that the product is connected to an outlet having the same configuration as the plug. No adapter should be used with this
product.
This product must be used on a dedicated circuit. To determine if you are on a dedicated circuit, shut off the power to that circuit and
observe whether any other devices lose power. If so, move devices to a different circuit. Note: There are usually multiple outlets on
one circuit. This elliptical should be used with a minimum 15-amp circuit.
6
3-POLE
GROUNDED
OUTLET
GROUNDING PIN
ce11-OM-rev2_4.indd 6-7 8/15/11 2:13 PM

8 9
FOOT PADS
FRONT STABILIZER TUBE
CR ANK
FOLDING LATCH
HANDLEBAR
PULSE GRIPS
WARNING
CONSULT A PHYSICIAN PRIOR TO USING ANY
EXERCISE EQUIPMENT. POSSIBILITY OF
SERIOUS INJURY IF EQUIPMENT IS USED
IMPROPERLY. READ INSTRUCTION MANUAL
BEFORE USING. KEEP CHILDREN OFF AND
AWAY FROM THIS EQUIPMENT. FOR
CONSUMER USE ONLY.
AVERTISSEMENT
CONSULTER UN MÉDECIN AVANT D’UTILISER
CET ÉQUIPEMENT. POSSIBILITÉ DE BLESSURES
SÉRIEUSES SI L’ÉQUIPEMENT EST UTILISE DE
MANIÈRE INCORRECTE. AVANT USAGE, LIRE LE
GUIDE D’UTILISATEUR. NE PAS LAISSER CET
ÉQUIPEMENT À LA PORTÉE DES ENFANTS.
POUR USAGE DOMESTIQUE UNIQUEMENT.
PRECAUCIÓN
CONSULTAR CON UN MEDICO ANTES DE USAR ESTE
EQUIPO. POSIBILIDAD DE RESULTAR EN HERIDAS
GRAVES SI EL EQUIPO ESTÁ UTILIZADO
IMPROPIAMENTE. LEER LA GUÍA DE
INSTRUCCIONES ANTES DE USAR.MANTENER
NIÑOS PEQUEÑOS ALEJADOS DE LA MÁQUINA.ESTE
EQUIPO ES SÓLO PARA EL USO DEL CONSUMIDOR.
CONSOLE
REAR STABILIZER TUBE
TRANSPORT WHEELS
POWER CORD SOCKET
MAIN FRAME
PEDAL ARM
FOLDING HANDLE
CONSOLE MAST
FOLDING LOCK LOOP
TOUCH PAD PANEL AND D ISPL AY WINDOW
CAUTION AVERTISSEMENT PRECAUCIÓN
KEEP HANDS AND FEET
AWAY FROM THIS AREA.
GARDER LES MAINS ET LES
PIEDS LOIN DE CETTE REGION.
MANTENGA LAS MANOS Y LOS
PIES LEJOS DE ESTA AREA.
TOOLS INCLUDED:
FScrewdriver
F8 mm L-Wrench
F5 mm T-Wrench
F13/17 mm Flat Wrench
PARTS INCLUDED:
F1 Main Frame
F1 Front Stabilizer Tube
F1 Rear Stabilizer Tube
F1 Console Mast
F2 Handlebars
F2 Pedal Arms
F1 Console
F1 Power Cord
F1 Hardware Kit
UNPACKING
Unpack the product where you will be using it. Place the elliptical carton on a level flat
surface. It is recommended that you place a protective covering on your floor. Never
open the box when it is on its side.
NOTE: During each assembly step, ensure that ALL nuts and bolts are in place and
partially threaded in before completely tightening any ONE bolt.
NOTE: A light application of grease may aid in the installation of hardware. Any grease,
such as lithium bike grease, is recommended.
If you have questions or if
there are any missing parts,
contact Customer Tech
Support. Contact information
is located on the back panel
of this manual.
NEED HELP?
PRE-ASSEMBLY
ce11-OM-rev2_4.indd 8-9 8/15/11 2:13 PM

10 11
ASSEMBLY STEP 1
A Open hardware for step 1.
B Attach the front stabilizer
tube to the main frame
using 2 bolts (a) and 2 flat
washers (b).
C Attach the rear stabilizer
tube to the main frame
using 2 bolts (a) and 2 flat
washers (b).
BOLT (A)
40 mm
Qty: 4
FLAT WASHER (B)
20 mm
Qty: 4
HARDWARE FOR STEP 1 :
BOLTS (A)
MAIN FRAME
FLAT
WASHERS (B)
REAR
STABILIZER
TUBE
FRONT STABILIZER TUBE
ASSEMBLY STEP 2
A Open hardware for step 2.
B Gently rest the console mast on the rubber
landing pad as shown.
C Attach lead wire to console cable. Pull
lead wire through the console mast. After
pulling the lead wire through the mast, the top of
the console cable should be located at the
top of the mast.
D Rotate folding handle counterclockwise until
loose. Place the console mast into the main
frame as shown. Attach the console mast to
the main frame using 1 bolt (d).
E Lift console mast upwards until folding
handle clicks into place and the console
mast is secured in the upright position.
F Rotate folding handle clockwise until tight.
The folding handle may need to be loosened to
engage locking mechanism before tightening.
BOLT (D)
65 mm
Qty: 1
HARDWARE FOR STEP 2 :
MAIN FRAME
BOLT (D)
CONSOLE MAST
LEAD WIRE
CONSOLE CABLE
FOLDING
HANDLE
RUBBER LANDING PAD
NOTE: Feed the console cable into the
bottom of the console mast by hand before
pulling it through using the lead wire. Make
sure the console cable is pulled all the way
through so it will not get pinched when the
console mast is folded.
ce11-OM-rev2_4.indd 10-11 8/15/11 2:13 PM

12 13
ASSEMBLY STEP 3 ASSEMBLY STEP 4
WAVY WASHE R (E)
FLAT WASHER (F)
BOLT (G)
PEDAL ARM
MAIN FRAME
A Open hardware for step 3.
B Slide 1 wavy washer (e) and left pedal
arm onto main frame.
C Attach pedal arm to main frame using 1
flat washer (f) and 1 bolt (g).
D Repeat on other side.
HARDWARE FOR STEP 3 :
BOLT (G)
16 mm
Qty: 2
FLAT WASHER (F)
19 mm
Qty: 2
WAVY WASHER (E)
22.5 mm
Qty: 2
SCREWS (H)
CONSOLE MAST
HANDLEBAR
A Open hardware for step 4.
B Slide left handlebar onto console
mast.
C Attach handlebar to console mast
using 4 screws (h).
D Repeat on other side.
HARDWARE FOR STEP 4 :
SCREW (H)
10 mm
Qty: 8
ce11-OM-rev2_4.indd 12-13 8/15/11 2:13 PM

14 15
ASSEMBLY STEP 5 ASSEMBLY STEP 6
HANDLEBAR
PEDAL ARM
TEFLON WASHERS (J)
BOLT (K)
FLAT WASHER (M)
SPRING WASHER (L)
NUT (N)
BRACKET
A Open hardware for step 5.
B Place teflon washers (J) on both sides of the
handlebar. While holding teflon washers
(J), slide handlebar into the pedal arm
bracket.
C Align bottom of handlebar with the bracket
on pedal arm.
D Secure the joint with 1 bolt (k), 1 flat washer
(m), 1 spring washer (l) and 1 nut (n).
E Repeat on other side.
HARDWARE FOR STEP 5 :
TEFLON
WASHER (J)
28.4 mm
Qty: 4
BOLT (K)
82 mm
Qty: 2
FLAT WASHER (M)
16 mm
Qty: 2
NUT (N)
Qty: 2
SPRING WASHER (L)
13.5 mm
Qty: 2
CONSOLE
CONSOLE CABLE
PRE-ATTACHED
SCREWS
CONSOLE MAST
NOTE: there is no hardware bag for this step. All
hardware is pre-attached.
A Attach the console cable to the open port
in the back of the console.
B Carefully tuck the console cable into
the console mast before attaching
the console. Attach the console to
the console mast using the 4 pre-
attached screws (the screws will have to
be removed from the console first).
YOU ARE FINISHED!
NOTE: Be careful not to pinch any
wires while attaching the console.
ce11-OM-rev2_4.indd 14-15 8/15/11 2:13 PM

16 17
ELLIPTICAL OPERATION
This section explains how to use your elliptical’s console and programming.
The BASIC OPERATION section in the ELLIPTICAL GUIDE has instructions for the following:
• LOCATION OF THE ELLIPTICAL
• POWER/GROUNDING INSTRUCTIONS
• FOOT POSITIONING
• MOVING THE ELLIPTICAL
• LEVELING THE ELLIPTICAL
• POWER/MANUAL INCLINE OPERATION
• USING THE HEART RATE FUNCTION
ce11-OM-rev2_4.indd 16-17 8/15/11 2:13 PM

18 19
CONSOLE OPERATION
Note: There is a thin protective sheet of clear plastic on the overlay of the console that should be removed before use.
Console decal with French translation is included in the assembly box.
A) LED DISPLAY WINDOW: time, distance, RPM, calories, heart rate, speed and resistance level.
B) LED INDICATORS: indicates what workout feedback is currently displayed in the window.
C) PROGRAM LED INDICATORS: indicates what program is selected.
D) GO: press to begin exercising, start your program, or resume exercising after pause.
E) STOP: press to pause/end your workout. Hold for 3 seconds to reset the console.
F) KEYS: used to adjust resistance level and make program selections.
G) ENTER: used to confirm a selection.
H) CHANGE DISPLAY: press to change display feedback during workout.
I) PULSE GRIPS: press your palms to the sensors to display your heart rate.
J) CONSOLE LIFT HANDLE: used to raise or lower the console mast from the folded or unfolded position.
K) READING RACK: holds reading material.
NOTE: An overlay with the French language has been provided with this unit for your convenience. To apply your language
specific overlay peel off the back side of the decal and adhere directly over the existing console overlay.
go
stop
CE11
calories
heart rate
speed
time
distance
rpm quick
start weight
loss healthy
cardio
enter change
display
A
I
B
E
K
C
D
I
J
H
F F
G
ce11-OM-rev2_4.indd 18-19 8/15/11 2:13 PM

20 21
calories
heart rate
speed
time
distance
rpm quick
start weight
loss healthy
cardio
enter change
display
DISPLAY
• TIME: Shown as minutes : seconds. View the time
remaining or the time elapsed in your workout.
• DISTANCE: Shown as miles. Indicates distance
traveled during your workout.
• RPM: Measures the revolutions per minute.
• CALORIES: Total calories burned during your
workout.
• HEART RATE: Shown as BPM (beats per minute).
Used to monitor your heart rate (displayed when
contact is made with both pulse grips).
• SPEED: Shown as MPH. Indicates how fast the
foot pedals are moving.
• LEVEL (L): Shows the current level of resistance.
PROGRAM INFORMATION
QUICK START (MANUAL) - Allows “on the fly” manual resistance level changes.
WEIGHT LOSS - Keeps user in their optimal fat burning zone.
HEALTHY CARDIO - Greater resistance levels multiply your workout options, keep your fitness routine fresh
and varied, and challenge you to new levels for better, faster results!
GETTING STARTED
1) Check to make sure no objects are nearby that will hinder the movement of the elliptical.
2) Plug in the power cord.
A) QUICK START
Simply press the GO key to begin working out. The time will count up from 0:00, the resistance level will
default to level 1. OR...
B) SELECT WEIGHT LOSS OR HEALTHY CARDIO PROGRAM
1) Select Weight Loss or Healthy Cardio using the KEYS. Press ENTER to advance.
2) Set weight using the KEYS. Press ENTER to advance.
3) Set time using the KEYS. Press ENTER to advance.
4) Set level using KEYS.
5) Press GO to begin workout.
FINISHING YOUR WORKOUT
When your workout is complete, the console will beep. Your workout information will stay displayed on the
console for 30 seconds and then reset.
TO RESET THE CONSOLE
Hold STOP key for 3 seconds.
CLEAR CURRENT SELECTION
To clear the current program selection or screen, hold the STOP button for 3 seconds.
ce11-OM-rev2_4.indd 20-21 8/15/11 2:13 PM

22 23
FOLDING AND STORING THE ELLIPTICAL
A Remove the power cord. Rotate the folding handle counter clockwise to unlock the console mast.
B Pull the folding handle upward to release the console mast. Gently lower the console mast by
gripping the console handle.
C While folding the elliptical, make sure the pedal arms are even at the front of the elliptical.
D Lift the elliptical up using the lift handle. To move the elliptical for storage, tilt it back using the lift
handle and roll it using the transport wheels.
NOTE: A gravity-activated hook will come out to secure the console mast when the elliptical is folded in
the upright position.
UNFOLDING THE ELLIPTICAL
E Grab the lift handle and slowly lower the elliptical to the horizontal position.
F Pull the console handle upward until it locks into place.
G Rotate the folding handle clockwise until it is tight.
H Do not ride unit until folding handle is fully tightened.
folding handle
folding handle
console handle
pedal arms
A
B
CTOP VIEW
D
lift handle
transport
wheels
The elliptical may be unstable if not folded properly. To avoid injury, please follow the folding instructions.
WARNING
ce11-OM-rev2_4.indd 22-23 8/15/11 2:13 PM

24 25
LIMITED HOME-USE WARRANTY
ce11-OM-rev2_4.indd 24-25 8/15/11 2:13 PM

26 27
WEIGHT CAPACITY = 275 lbs (125 kilograms).
FRAME • 10 YEARS
Tempo Fitness warrants the frame against defects in
workmanship and materials for a period of 10 years from the
date of the original purchase, so long as the device remains
in the possession of the original owner. (The frame is defined
as the welded metal base of the unit and does not include
any parts that can be removed.)
ELECTRONICS & PARTS • 90 DAYS
Tempo Fitness warrants the electronic components, finish
and all original parts for a period of 90 days from the date of
the original purchase, so long as the device remains in the
possession of the original owner.
LABOR • 90 DAYS
Tempo Fitness shall cover the labor cost for the repair of the
device for a period of 90 days from the date of the original
purchase, so long as the device remains in the possession of
the original owner.
EXCLUSIONS AND LIMITATIONS
Who IS covered:
• The original owner and is not transferable.
What IS covered:
• Repair or replacement of a defective motor, electronic
component, or defective part and is the sole remedy of the
warranty.
What IS NOT covered:
• Normal wear and tear, improper assembly or maintenance,
or installation of parts or accessories not originally
intended or compatible with the equipment as sold.
• Damage or failure due to accident, abuse, corrosion,
discoloration of paint or plastic, neglect, theft, vandalism,
fire, flood, wind, lightning, freezing, or other natural
disasters of any kind, power reduction, fluctuation or failure
from whatever cause, unusual atmospheric conditions,
collision, introduction of foreign objects into the covered
unit, or modifications that are unauthorized or not
recommended by Tempo Fitness.
• Incidental or consequential damages. Tempo Fitness is not
responsible or liable for indirect, special or consequential
damages, economic loss, loss of property, or profits, loss
of enjoyment or use, or other consequential damages of
whatsoever nature in connection with the purchase, use,
repair or maintenance of the equipment. Tempo Fitness
does not provide monetary or other compensation for any
such repairs or replacement parts costs, including but not
SERVICE/RETURNS
• In-home service is available within 150 miles of the nearest
authorized Service Provider (Mileage beyond 150 miles
from an authorized service center is the responsibility of
the consumer).
• All returns must be pre-authorized by Tempo Fitness.
• Tempo Fitness’ obligation under this warranty is limited to
replacing or repairing, at Tempo Fitness’ option, the same
or comparable model.
• Tempo Fitness may request defective components be
returned to Tempo Fitness upon completion of warranty
service using a prepaid return shipping label. If you have
been advised to return parts and did not receive a label,
please contact Customer Tech Support.
• Replacement units, parts and electronic components
reconditioned to as-new condition by Tempo Fitness
or its vendors may sometimes be supplied as warranty
replacement and constitute fulfillment of warranty terms.
• This warranty gives you specific legal rights, and your
rights may vary from state to state.
limited to gym membership fees, work time lost, diagnostic
visits, maintenance visits or transportation.
• Equipment used for commercial purposes or any use other
than a single family or household, unless endorsed by
Tempo Fitness for coverage.
• Equipment owned or operated outside the US and Canada.
• Delivery, assembly, installation, setup for original or
replacement units or labor or other costs associated with
removal or replacement of the covered unit.
• Any attempt to repair this equipment creates a risk of
injury. Tempo Fitness is not responsible or liable for any
damage, loss or liability arising from any personal injury
incurred during the course of, or as a result of any repair or
attempted repair of your fitness equipment by other than an
authorized service technician. All repairs attempted by you
on your fitness equipment are undertaken AT YOUR OWN
RISK and Tempo Fitness shall have no liability for any injury
to the person or property arising from such repairs.
• If you are out of the manufacturer’s warranty but have
an extended warranty, refer to your extended warranty
contract for contact information regarding requests for
extended warranty service or repair.
ce11-OM-rev2_4.indd 26-27 8/15/11 2:13 PM

28 29
PRÉCAUTIONS IMPORTANTES
CONSERVER CES INSTRUCTIONS
Lire le GUIDE D’UTILISATION DE L’EXERCISEUR ELLIPTIQUE avant de se servir du présent MANUEL DU PROPRIÉTAIRE.
Lire toutes les instructions avant d’utiliser cet exerciseur elliptique. Des précautions de base doivent toujours être prises lors
de l’utilisation d’un appareil électrique. Il incombe au propriétaire de s’assurer que tous les utilisateurs de l’exerciseur elliptique
sont adéquatement informés de tous les avertissements et de toutes les précautions. Pour toute question, communiquer avec le
service de soutien technique à la clientèle au numéro indiqué au verso du présent MANUEL DU PROPRIÉTAIRE.
Cet exerciseur elliptique est destiné à un usage à domicile uniquement. Ne pas utiliser cet exerciseur elliptique dans
un environnement commercial, de location, scolaire ou institutionnel. Le non-respect de cette consigne peut être cause
d’annulation de la garantie
FRANÇAIS
ce11-OM-rev2_4.indd 28-29 8/15/11 2:13 PM

30 31
• Garder le cordon d’alimentation à l’écart des surfaces chauffées. Ne pas transporter l’appareil en le tenant par son cordon
d’alimentation ou se servir du cordon comme d’une poignée.
• Sous peine de blessures, ne pas utiliser d’accessoire non recommandé par le fabricant. L’usage des accessoires peut causer
des blessures.
• Ne pas faire fonctionner l’appareil près d’un endroit où l’on pulvérise des produits en aérosol ou l’on administre de l’oxygène.
• N’utiliser l’exerciseur elliptique que conformément au directives énoncées dans le GUIDE D’UTILISATION DE L’EXERCISEUR
ELLIPTIQUE et dans le MANUEL DU PROPRIÉTAIRE.
• Mettre l’appareil hors tension avant de l’entretenir ou de le déplacer. Pour le nettoyer, en essuyer les surfaces avec du savon et un
chiffon légèrement humide ; ne jamais utiliser de solvants. (Voir ENTRETIEN).
• Ne jamais laisser l’exerciseur elliptique sans surveillance lorsqu’il est branché. Le débrancher lorsqu’on ne l’utilise pas et avant d’y
poser des pièces ou de les en déposer.
• Sous peine de le faire surchauffer, ce qui pourrait causer un incendie, une décharge électrique ou des blessures, ne pas utiliser
l’appareil sous une couverture ou un oreiller.
• Tenir les enfants de moins de 13 ans de même que les animaux familiers à au moins 3 m (10 pi) de l’exerciseur elliptique
EN TOUT TEMPS.
• Les enfants de moins de 13 ans ne doivent JAMAIS utiliser l’exerciseur elliptique.
•
Les enfants de plus de 13 ans ou les personnes handicapées peuvent utiliser l’exerciseur elliptique sous la surveillance d’un adulte.
• Ne jamais utiliser l’appareil si le cordon (ou la fiche) est endommagé, s’il ne fonctionne pas correctement, s’il est endommagé ou
s’il est tombé dans l’eau. Renvoyer l’appareil à un centre d’entretien pour examen et réparation.
• Pour arrêter l’appareil, mettre toutes les commandes à «OFF» et le débrancher de la prise électrique.
• Sauf avis contraire du service de soutien technique à la clientèle, ne pas enlever les couvercles de console. Ce travail ne doit être
exécuté que par un technicien agréé.
Il est essentiel de n’utiliser l’exerciseur elliptique qu’à l’intérieur, dans une pièce climatisée. Si l’exerciseur elliptique a été exposé
à des températures basses ou à un climat très humide, il est fortement recommandé de le laisser réchauffer à la température
ambiante avant de l’utiliser pour la première fois, pour éviter une défaillance électronique prématurée.
POUR RÉDUIRE LE RISQUE DE BRÛLURES, D’INCENDIE, DE DÉCHARGE ÉLECTRIQUE
OU DE BLESSURE :
AVERTISSEMENT
• En cas de douleur, quelle qu’elle soit, et notamment de
douleurs thoraciques, de nausée, de vertiges ou de manque
de souffle, arrêter immédiatement l’exercice et consulter un
médecin avant de reprendre.
• Pendant les exercices, toujours maintenir un rythme
confortable. Ne pas dépasser 80 tr/min avec cet appareil.
• Pour garder l’équilibre, il est recommandé de tenir les
poignées d’exercice pendant les exercices, lorsqu’on monte
sur l’appareil ou qu’on en descend.
• Ne pas actionner les leviers de pédale à la main.
• S’assurer chaque fois que les poigné d’exercice sont bien
fixés avant d’utiliser l’appareil.
• Garder propre et sèche la face supérieure du repose-pied.
• Prendre des précautions lors du montage ou du démontage
de l’appareil. Avant de monter sur l’exerciseur ou d’en
descendre, il faut mettre en position la plus basse la pédale
du côté ou l’on monte ou descend, et arrêter complètement
l’appareil.
• Ne pas porter de vêtement qui pourrait se prendre dans une
des pièces de l’exerciseur elliptique.
• Toujours porter des chaussures de sport lors de l’utilisation de
cet équipement.
• Ne pas sauter sur l’exerciseur elliptique.
• L’exerciseur elliptique ne doit jamais porter plus d’une
personne lorsqu’il est en fonctionnement.
• L’exerciseur elliptique ne doit pas être utilisé par des
personnes dont le poids est supérieur à celui spécifié à la
SECTION GARANTIE du MANUEL DU PROPRIÉTAIRE.
Le non-respect de cette consigne peut être cause d’annulation
de la garantie.
• L’exerciseur elliptique est destiné à un usage à domicile
uniquement. Ne pas utiliser cet exerciseur elliptique dans
un environnement commercial, de location, scolaire ou
institutionnel. Le non-respect de cette consigne peut être
cause d’annulation de la garantie.
• Ne pas utiliser l’exerciseur elliptique dans les lieux où la
température n’est pas régulée, tels notamment que garages,
vérandas, salles de piscine, salles de bains, abris à voitures ou
à l’extérieur. Le non-respect de cette consigne peut être cause
d’annulation de la garantie.
• Pour éviter toute décharge électrique, ne jamais laisser tomber
ni introduire un objet quelconque dans l’une des ouvertures de
l’appareil.
• Ne connecter cet appareil d’exercice qu’à une prise
correctement mise à la terre.
POUR RÉDUIRE LE RISQUE DE DÉCHARGE ÉLECTRIQUE :
Toujours débrancher l’exerciseur elliptique de la prise de courant immédiatement après l’avoir utilisé, avant de le nettoyer et de
procéder à l’entretien, et avant d’y poser des pièces ou de les en déposer.
DANGER
POUR RÉDUIRE LE RISQUE DE BRÛLURES, D’INCENDIE, DE DÉCHARGE ÉLECTRIQUE
OU DE BLESSURE :
AVERTISSEMENT
ce11-OM-rev2_4.indd 30-31 8/15/11 2:13 PM

33
INSTRUCTIONS DE MISE À LA TERRE
Si l’exerciseur elliptique comporte un dispositif mécanique de réglage de l’inclinaison avec fiche à 3 broches, il faut
suivre les présentes instructions de mise à la terre.
Cet appareil doit être mis à la terre. En cas de dysfonctionnement ou de défaillance de l’exerciseur elliptique, la mise à la terre
assure un trajet de résistance moindre pour le courant électrique et réduit le risque de décharge électrique. Cet appareil est équipé
d’un cordon comportant un conducteur et une fiche de mise à la terre. La fiche doit être branchée à une prise murale appropriée,
correctement installée et mise à la terre conformément aux codes et règlements locaux.
Ne brancher cet appareil d’exercice qu’à une prise correctement mise à la terre.
Ne jamais faire fonctionner le produit dont un des cordons ou une des fiches est
endommagé(e), même s’ils fonctionnent correctement. Ne jamais faire fonctionner
un produit qui semble endommagé ou a été plongé dans l’eau. Communiquer avec
le service de soutien technique à la clientèle pour le faire remplacer ou réparer.
AVERTISSEMENT
DANGER
Un branchement incorrect du conducteur de mise à la terre de l’appareil peut entraîner une décharge électrique. Vérifier auprès
d’un électricien ou d’un technicien compétent en cas de doute sur la mise à la terre de l’appareil. Ne pas altérer la fiche fournie
avec l’appareil. Si elle ne s’adapte pas à la prise murale, faire poser une prise murale appropriée par un électricien compétent.
Cet appareil est conçu pour être utilisé avec une alimentation secteur de 110 V à 120 V et sa fiche de terre ressemble à la fiche
illustrée. Veiller à ce que l’appareil soit branché à une prise compatible avec sa fiche. N’utiliser aucun adaptateur.
Cet appareil doit être alimenté par un circuit particulier. Pour déterminer si c’est bien le cas, couper l’alimentation et voir si un ou
d’autres appareils s’éteignent. Si oui, brancher ces appareils à un autre circuit. Remarque : Un même circuit comporte habituellement
plusieurs prises. Cet exerciseur elliptique doit être alimenté en courant d’au moins 15 A.
PRISE MURALE
À 3 FICHES
ET MISE À
LA TERRE BROCHE DE TERRE
ASSEMBLAGE
Le processus de l’assemblage comporte certaines étapes au cours desquelles il faut faire particulièrement attention. Il importe
de suivre les instructions d’assemblage à la lettre et de s’assurer que toutes les pièces sont bien serrées. Si on ne suit pas
correctement les instructions d’assemblage, certaines parties du cadre de l’exerciseur elliptique pourraient être mal serrées et
bouger et elles pourraient causer des bruits irritants. Pour éviter les dommages à l’exerciseur elliptique, relire les instructions
d’assemblage et prendre les mesures correctives qui s’imposent.
Avant de continuer, rechercher le numéro de série de l’exerciseur elliptique qui figure sur
un autocollant de code à barres blanc, sur le tube de stabilisation arrière, et l’inscrire dans
l’espace réservé ci-dessous.
INSCRIRE LE NUMÉRO DE SÉRIE ET LE MODÈLE DANS LES CASES CI-DESSOUS :
» Indiquer le NUMÉRO DE SÉRIE et le NOM DU MODÈLE lors de tout appel de service.
NUMÉRO DE SÉRIE :
EP
NOM DU MODÈLE :
EXERCISEUR ELLIPTIQUE TEMPO EVOLVE CE11
AVERTISSEMENT
EMPLACEMENT DU NUMÉRO DE SÉRIE
32
ce11-OM-rev2_4.indd 32-33 8/15/11 2:13 PM

34 35
PATINS
TUBE DE STABILISATION AVANT
MANIVELLE
LOQUET
POIGNÉE D’E XERCICE
POIGNÉES DU
CARDIO-FRÉQUENCEMÈTRE
WARNING
CONSULT A PHYSICIAN PRIOR TO USING ANY
EXERCISE EQUIPMENT. POSSIBILITY OF
SERIOUS INJURY IF EQUIPMENT IS USED
IMPROPERLY. READ INSTRUCTION MANUAL
BEFORE USING. KEEP CHILDREN OFF AND
AWAY FROM THIS EQUIPMENT. FOR
CONSUMER USE ONLY.
AVERTISSEMENT
CONSULTER UN MÉDECIN AVANT D’UTILISER
CET ÉQUIPEMENT. POSSIBILITÉ DE BLESSURES
SÉRIEUSES SI L’ÉQUIPEMENT EST UTILISE DE
MANIÈRE INCORRECTE. AVANT USAGE, LIRE LE
GUIDE D’UTILISATEUR. NE PAS LAISSER CET
ÉQUIPEMENT À LA PORTÉE DES ENFANTS.
POUR USAGE DOMESTIQUE UNIQUEMENT.
PRECAUCIÓN
CONSULTAR CON UN MEDICO ANTES DE USAR ESTE
EQUIPO. POSIBILIDAD DE RESULTAR EN HERIDAS
GRAVES SI EL EQUIPO ESTÁ UTILIZADO
IMPROPIAMENTE. LEER LA GUÍA DE
INSTRUCCIONES ANTES DE USAR.MANTENER
NIÑOS PEQUEÑOS ALEJADOS DE LA MÁQUINA.ESTE
EQUIPO ES SÓLO PARA EL USO DEL CONSUMIDOR.
CONSOLE
TUBE DE STABILISATION ARRIÈRE
ROULETTES DE TR ANSP ORT
PRISE FEMELLE DE
CORDON D’ALIMENTATION
BÂTI
LEVIER DE PÉDALE
POIGNÉE POUR REPLIER
L’EXERCISEUR ELLIPTIQUE
MONTANT DE CONSOLE
ANNEAU DE BLOCAG E
CL AVIER TACTILE ET
FENÊTRE D’AFFICHAGE
CAUTION AVERTISSEMENT PRECAUCIÓN
KEEP HANDS AND FEET
AWAY FROM THIS AREA.
GARDER LES MAINS ET LES
PIEDS LOIN DE CETTE REGION.
MANTENGA LAS MANOS Y LOS
PIES LEJOS DE ESTA AREA.
OUTILS INCLUS :
FTournevis
FClé à manche en L, de 8 mm
FClé à manche en T, de 5 mm
F Clé plate de 13 mm/17 mm
PIÈCES INCLUSES :
F1 bâti
F1 tube de stabilisation avant
F1 tube de stabilisation arrière
F1 montant de console
F2 poignées d’exercice
F2 leviers de pédale
F1 console
F1 cordon d’alimentation
F1 kit de visserie
DÉBALLAGE
Déballer l’appareil là où il sera mis en service. Poser l’emballage de l’exerciseur
elliptique sur une surface plane. Il est conseillé de placer une toile de protection
sur le sol. Ne jamais ouvrir l’emballage d’expédition s’il repose sur le flanc.
REMARQUE : S’assurer à chaque étape de l’assemblage que TOUTES les vis
et TOUS les écrous sont bien en place et partiellement serrés avant de les serrer
à fond.
REMARQUE : Une légère application de graisse peut faciliter l’installation de la
visserie. Toute graisse, comme la graisse au lithium pour vélos est recommandée.
PRÉ-ASSEMBLAGE
En cas de questions ou s’il
manque des pièces, s’adresser
au service de soutien technique
à la clientèle. Les informations
pour communiquer avec ce
service figurent au verso du
présent manuel.
BESOIN D’AIDE ?
ce11-OM-rev2_4.indd 34-35 8/15/11 2:13 PM

36 37
ÉTAPE 1 DE L’ASSEMBLAGE
A Ouvrir le matériels pour
l’étape 1.
B Fixer le tube de
stabilisation avant au
bÂti avec 2 boulons (a) et 2
rondelles plates (b).
C Fixer le tube de
stabilisation arriÈre au
bÂti avec 2 boulons (a) et 2
rondelles plates (b).
BOULON (A)
40 mm
Quantité : 4
RONDELLE
PLATE (B)
20 mm
Quantité : 4
MATÉRIELS POUR L’ÉTAPE 1 :
BOULONS (A)
BÂTI
RONDELLES
PLATES (B)
TUBE DE
STABILISATION
ARRIÈRE
TUBE DE STABILISATION AVANT
ÉTAPE 2 DE L’ASSEMBLAGE
A Ouvrir le matériels pour l’étape 2.
B Placer délicatement le
montant de console
sur la
plate-forme en caoutchouc
tel que montré.
C Branchez le fil de guidage au cÂble de la
console. Passer le fil de guidage dans le
montant de console. Cela fait, le bout du cÂble
de la console doit se trouver en haut du montant.
D Faire tourner la poignée pour replier
l’eXerciseur elliptiQue en sens contraire jusqu’à
ce qu’elle soit desserré. Placer le montant de console
dans le cadre principal (voir schéma). Fixer le
montant de console au bÂti avec 1 boulon
(d).
E Lever le montant de console vers le haut jusqu’à
ce que la poignée pour replier l’eXerciseur
elliptiQue s’enclenche en place et que le montant
de console soit bien fixé en position verticale.
F Faire tourner la poignée pour replier
l’eXerciseur elliptiQue en sens horaire jusqu’à
ce qu’elle soit serrée. Avant de faire le serrage, veuiller
vérifier la poignée à plier, car elle peut avoir besoin d’être
lâchée pour facilliter le méchanisme de vérouillage.
BOULON (D)
65 mm
Quantité : 1
MATÉRIELS POUR L’ÉTAPE 2 :
BOULON (D)
BÂTI
MONTANT DE
CONSOLE
POIGNÉE
POUR REPLIER
L’EXERCISEUR
ELLIPTIQUE
CÂBLE DE LA
CONSOLE
FIL DE
GUIDAGE
PLATE-FORME EN CAOUTCHOUC REMARQUE: Introduire manuellement le fil de
la console à travers le vide se trouvant en bas
du montant pour le tirer vers le haut tout en se
servant du fil de guide. Veuiller s’assurer que le fil
de la console est complètement tiré pour qu’il ne
soit pas pincé quand le montant est plié.
ce11-OM-rev2_4.indd 36-37 8/15/11 2:13 PM

38 39
ÉTAPE 3 DE L’ASSEMBLAGE
BÂTI
RONDELLE PLATE (F)
BOULON (G)
LEVIER DE PÉDALE
RONDELLE ONDULÉE (E)
A Ouvrir le matériels pour l’étape 3.
B Glisser 1 rondelle ondelée (e) et le levier
de pédale gauche sur le bÂti.
C Fixer le levier de pédale au bÂti avec
1 rondelle plate (f) et 1 boulon (g).
D Répéter de l’autre côté.
MATÉRIELS POUR L’ÉTAPE 3 :
BOULON (G)
16 mm
Quantité : 2
RONDELLE
PLATE (F)
19 mm
Quantité : 2
RONDELLE
ONDULÉE (E)
22.5 mm
Quantité : 2
ÉTAPE 4 DE L’ASSEMBLAGE
VIS (H)
MONTANT DE CONSOLE
LEVIER D’EXERCICE
A Ouvrir le matériels pour l’étape 4.
B Glisser le levier d’eXercice gauche sur le
montant de console.
C Fixer le levier d’eXercice au montant
de console avec 4 vis (h).
D Répéter de l’autre côté.
MATÉRIELS POUR L’ÉTAPE 4 :
VIS (H)
10 mm
Quantité : 8
ce11-OM-rev2_4.indd 38-39 8/15/11 2:13 PM
Table of contents
Languages:
Other Tempo Fitness Elliptical Trainer manuals
Popular Elliptical Trainer manuals by other brands

Kettler
Kettler SITUS XT manual

Pro-Form
Pro-Form 720 Zle Elliptical Manual do utilizador

Life Fitness
Life Fitness CSX Club Series Operation manual

Pro-Form
Pro-Form 545 Ekg Elliptical Bedienungsanleitung

Pro-Form
Pro-Form 485 P Elliptical Bedienungsanleitung

Pro-Form
Pro-Form 420 Zle Elliptical Bedienungsanleitung