TESTO 868 User manual

testo 868 - Thermal Imager
Instruction manual
Short
instructions
Instruction
manual
Thermography
pocket guide
V
ideos

Contents
Contents
1Safety and disposal.............................................................................. 3
1.1 About this document..............................................................................3
1.2 Security ..................................................................................................3
1.3 Disposal .................................................................................................4
2Technical data ..................................................................................... 5
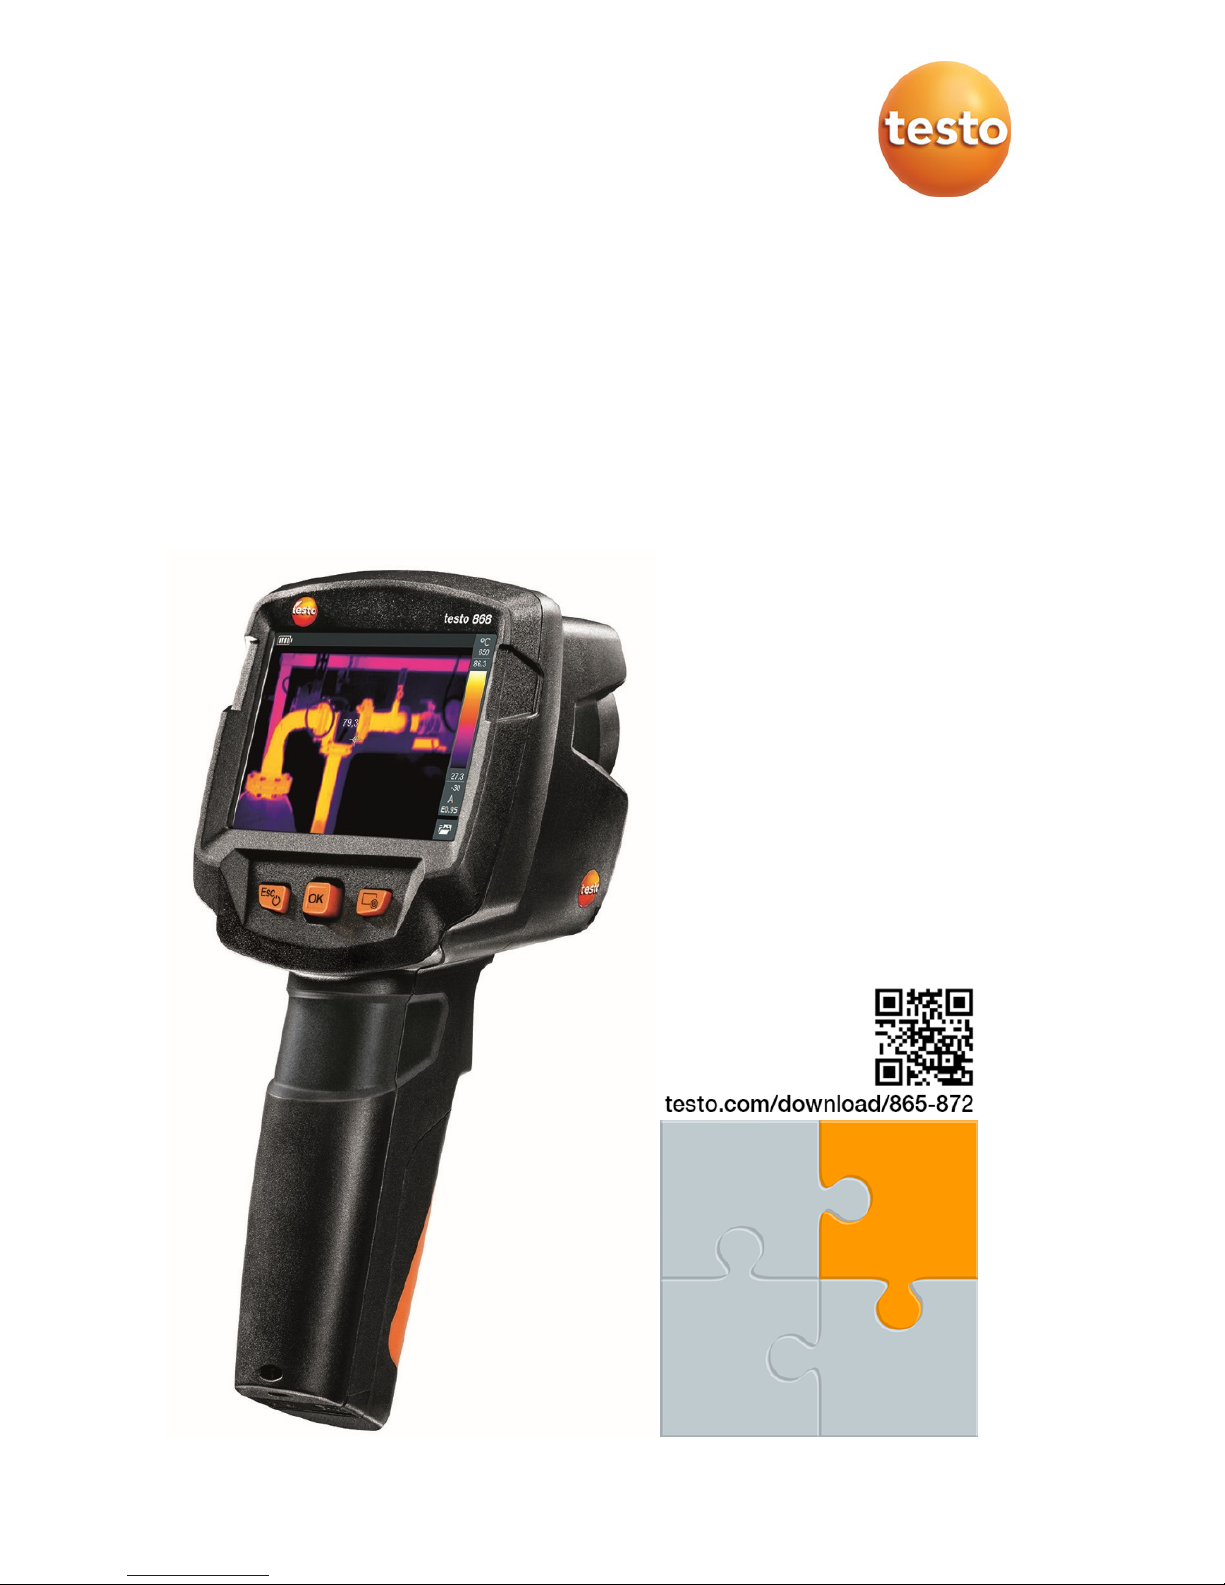
3Description of the instrument ............................................................... 8
3.1 Use.........................................................................................................8
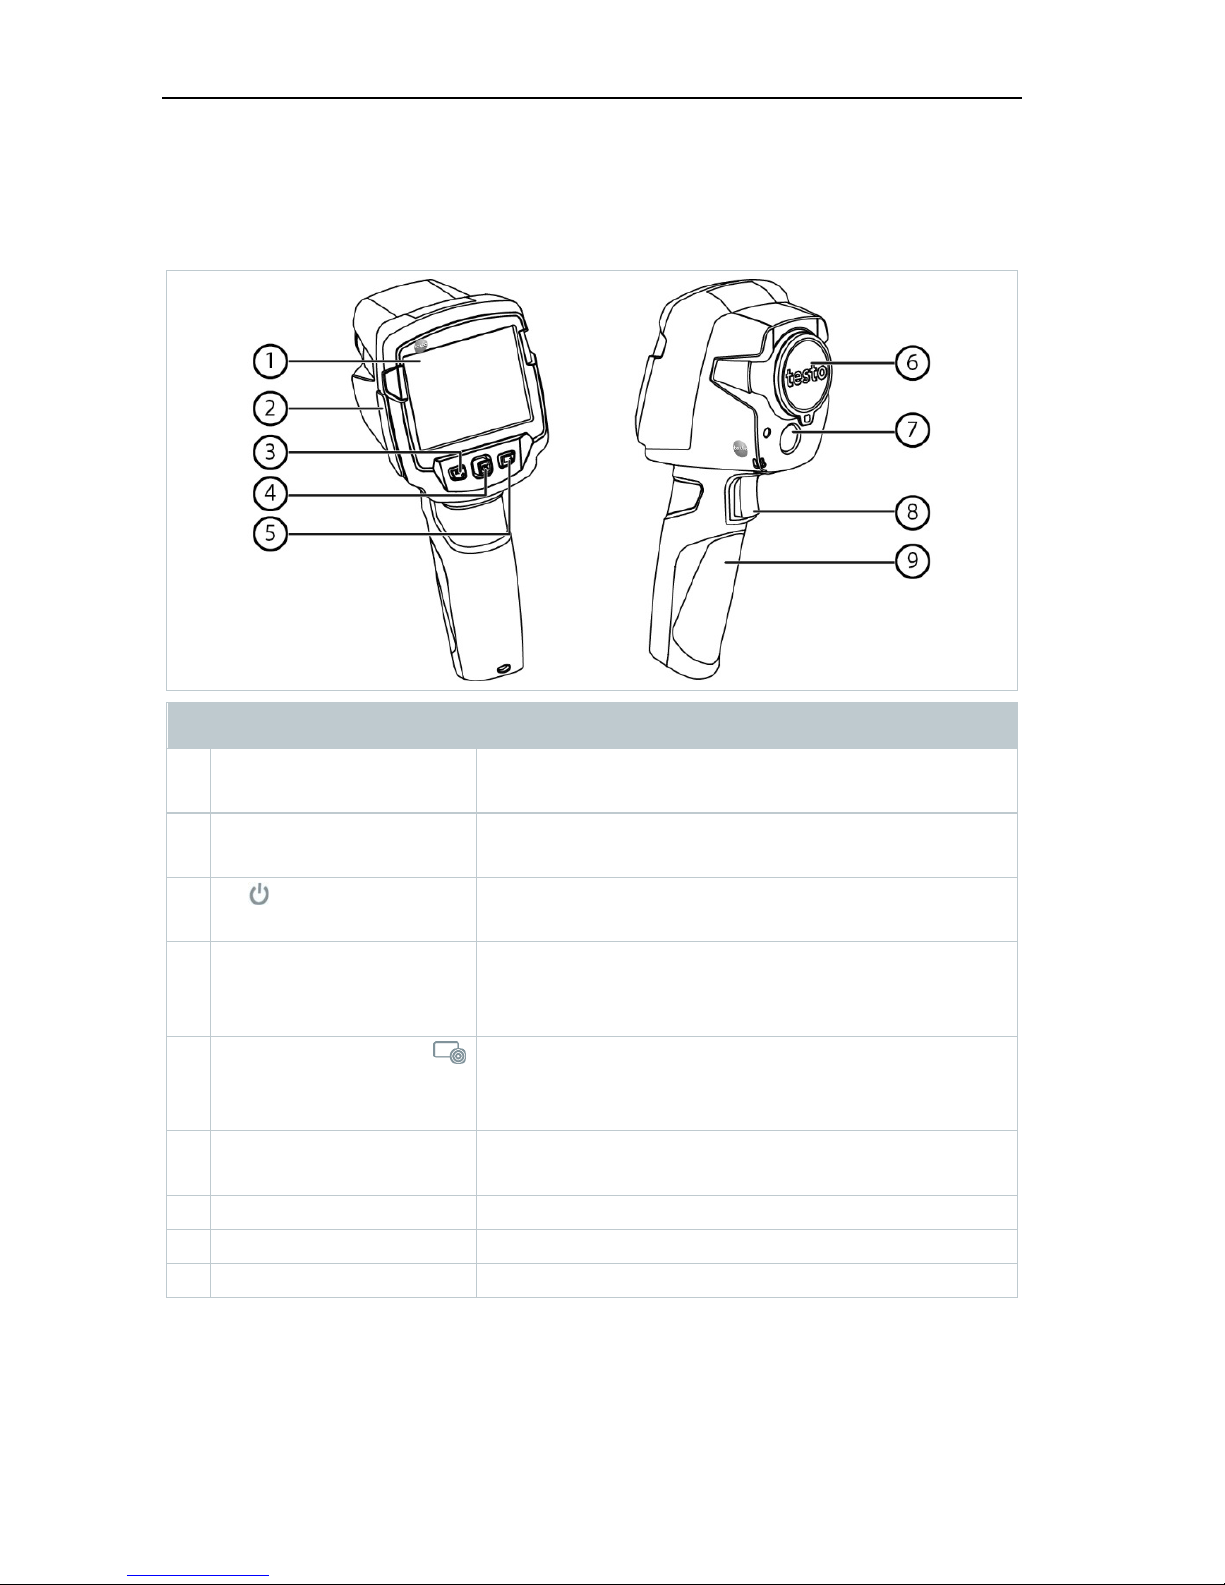
3.1 Instrument / operating elements overview .............................................9
3.1 Displays overview.................................................................................10
3.2 Power supply .......................................................................................11
4Operation........................................................................................... 12
4.1 Commissioning ....................................................................................12
4.2 Switching instrument on and off ..........................................................12
4.3 Getting to know the menu....................................................................13
4.4 Quick select button ..............................................................................14
5WLAN connection - using the App ..................................................... 16
5.1 Activating/disabling the connection .....................................................16
5.1.1 Establishing a connection......................................................16
5.1.2 Select display ........................................................................17
6Performing the measurement ............................................................. 18
6.1 Saving an image...................................................................................18
6.2 Setting measuring functions ................................................................19
6.3 Image gallery........................................................................................20
6.4 Setting the scale ..................................................................................23
6.5 Setting emissivity and reflected temperature.......................................25
6.5.1 Selecting the emissivity .........................................................26
6.5.2 Customizing the emissivity ....................................................26
6.5.3 Setting the RTC .....................................................................27
6.5.4 Setting ε-Assist......................................................................27
6.6 Selecting the colour palette .................................................................28
6.7 Image type ...........................................................................................28
6.8 Activating the differential temperature .................................................28
6.9 Configuration........................................................................................29
6.9.1 Settings .................................................................................29

Contents
6.9.2 SuperResolution ................................................................... 30
6.9.3 Save JPEG function .............................................................. 31
6.9.4 Connectivity .......................................................................... 31
6.9.5 Ambient conditions ............................................................... 32
6.9.6 Info........................................................................................ 32
6.9.7 Fullscreen mode ................................................................... 32
6.9.8 Reset options........................................................................ 33
7Maintenance ...................................................................................... 34
7.1 Charging the rechargeable battery...................................................... 34
7.2 Changing the rechargeable battery ..................................................... 35
7.3 Cleaning the instrument....................................................................... 37
7.4 Firmware Update................................................................................. 37
7.4.1 Update with IRSoft................................................................ 38
7.4.1.1 Prepare the Camera............................................. 38
7.4.1.2 Execute Update.................................................... 38
7.4.2 Update with the camera........................................................ 39
7.4.2.1 Prepare camera ................................................... 39
7.4.2.2 Execute Update.................................................... 39
8Tips and assistance ........................................................................... 40
8.1 Questions and answers ....................................................................... 40
8.2 Accessories and spare parts ............................................................... 40
9Authorisations and certification.......................................................... 41

1 Safety and disposal
3
1Safety and disposal
1.1 About this document
∑The instruction manual is an integral part of the instrument.
∑Keep this documentation to hand so that you can refer to it when
necessary.
∑Always use the complete original instruction manual.
∑Please read this instruction manual through carefully and familiarize yourself
with the product before putting it to use.
∑Hand this instruction manual on to any subsequent users of the product.
∑Pay particular attention to the safety instructions and warning advice in
order to prevent injury and damage to the product.
1.2 Security
General safety instructions
∑Only operate the product properly, for its intended purpose, and within the
parameters specified in the technical data.
∑Do not apply any force.
∑Do not operate the instrument if there are signs of damage on the housing,
mains unit or connected cables.
∑Dangers may also arise from objects to be measured or the measuring
environment. Always comply with the locally valid safety regulations when
carrying out measurements.
∑Do not store the product together with solvents.
∑Do not use any desiccants.
∑Only perform maintenance and repair work on this instrument that is
described in this documentation. Follow the prescribed steps exactly when
doing the work.
∑Use only original spare parts from Testo.
∑During operation, this instrument must not be pointed at the sun or other
intensive sources of radiation (e.g. objects with temperatures exceeding
650 °C). This can lead to serious damage to the detector. The manufacturer
does not provide any warranty for any such damage to the microbolometer
detector.

1Safety and disposal
4
Batteries
∑Improper use of batteries may cause the batteries to be destroyed, or lead
to injury due to current surges, fire or escaping chemicals.
∑Only use the batteries supplied in accordance with the instructions in the
instruction manual.
∑Do not short-circuit the batteries.
∑Do not take the batteries apart and do not modify them.
∑Do not expose the batteries to heavy impacts, water, fire or temperatures in
excess of 60 °C.
∑Do not store the batteries in the proximity of metal objects.
∑In the event of contact with battery acid: rinse affected areas thoroughly
with water, and if necessary consult a doctor.
∑Do not use any leaky or damaged batteries.
∑Only charge the rechargeable battery in the instrument or in the
recommended charging station.
∑Immediately stop the charging process if this is not completed in the given
time.
∑Take the rechargeable battery out of the instrument immediately if it is not
functioning properly or if it shows signs of superheating. Rechargeable
battery may be hot!
∑When not in use for a long period of time, take the rechargeable battery out
of the instrument to prevent exhaustive discharge.
Warnings
Always pay attention to any information denoted by the following warnings.
Implement the precautionary measures specified!
Display Explanation
WARNING
Indicates possible serious injury.
CAUTION
Indicates possible minor injury.
ATTENTION
Indicates possible damage to equipment.
1.3 Disposal
∑Dispose of faulty rechargeable batteries and spent batteries in accordance
with the valid legal specifications.

2 Technical data
5
∑At the end of its useful life, deliver the product to the separate collection
point for electric and electronic devices (observe local regulations) or return
the product to Testo for disposal.
2Technical data
Infrared image output
Feature Values
Infrared resolution 160 x 120
Thermal sensitivity (NETD) 100 mK
Field of view (FOV) / min.
focusing distance
31° x 23° / <0.5 m
Geometric resolution (IFOV) 3.4 mrad
SuperResolution 320 x 240 pixels / 2.1 mrad
IR image refresh rate 9 Hz
Focus Fixed focus
Spectral range 7.5 - 14 μm
Visual image output
Feature Values
Image size / min. focusing
distance
Min. 3.1 MP / 0.5 m
Image presentation
Feature Values
Display 8.9 cm (3.5") TFT, QVGA (320 x 240 pixels)
Display options ∑Infrared image
∑Real image
Interface ∑WLAN
∑USB 2.0 micro B
Colour palettes 4 options:
∑Iron
∑Rainbow HC
∑Cold-hot
∑Grey

2Technical data
6
Measurement
Feature Values
Measuring range -30 to 650 °C
Accuracy ∑-30 to -21°C ± 3 °C
∑-20 to +650°C ±2 °C / ± 2%
Emissivity/reflected
temperature adjustment
0.01 to 1/manual
-Assist Automatic emission value and RTC detection
Measurement functions ∑Single point measurement
∑Coldspot
∑Hotspot
∑Differential temperature
∑ScaleAssist
∑IFOV warner
Digital camera
Feature Values
Digital camera Yes
Fullscreen mode Yes
File format .jpg
Video streaming ∑USB
∑WLAN via the App
Image storage
Feature Values
File format ∑.jpg
∑.bmt
∑Option of exporting in
.bmt
.jpg
.png
.csv
.xls
Memory capacity Internal mass storage 2.8 GB,
> 2000 images (without SuperResolution)
Power supply

2 Technical data
7
Feature Values
Battery type Li-Ion rechargeable battery 2500 mAh / 3.7 V
Operating time 4.0 h @ 20 °C
Charging option In instrument/in charging station (optional)
Charging time approx. 5 h via mains unit
approx. 8 h via a PC's USB interface
USB Interface 5V 1.0A
* means direct current
Ambient conditions
Feature Values
Operating temperature -15 to 50 °C
Storage temperature -30 to 60 °C
Humidity 20 - 80 %RH, not condensing
Physical features
Feature Values
Weight 510 g (including battery)
Dimensions 219 x 96 x 95 mm
Housing PC/ABS
Protection class (IEC 60529) IP 54
Vibration (IEC 60068-2-6) 2 G
Standards, tests
Feature Values
EMC 2014/30/EU
RED 2014/53/EU
You can find the EU declaration of conformity on the Testo homepage
www.testo.com under the product-specific downloads.

3Description of the instrument
8
3Description of the instrument
3.1 Use
The testo 868 is a handy, robust thermal imager. You can use it to undertake
the non-contact measurement and display of surface temperature distribution.
Areas of application
∑Building inspection: Energy efficiency rating of buildings (heating,
ventilation, air-conditioning trade, building engineers, engineering firms,
experts)
∑Production monitoring / quality assurance: monitoring of production
processes
∑Preventive maintenance / servicing: Electrical and mechanical inspection of
systems and machines

3 Description of the instrument
9
3.1 Instrument / operating elements
overview
Element Function
1 Display Displays infrared and real images, menus and
functions
2 Interface terminal Contains micro USB interface for power supply
and connection to the computer
3 - key
- Esc key
- Switch camera on and off
- Cancel action
4 - OK key
- Joystick
- Open menu, select function, confirm setting
- Navigate within the menu, highlight function,
select colour palette
5 Quick select button Opens the function assigned to the quick select
button; the icon for the selected function is
displayed bottom right
6 Infrared camera lens;
protective cap
Takes infrared images; protects the lens
7 Digital camera Takes real images
8 Trigger Saves the displayed image
9 Battery compartment Contains the rechargeable battery

3Description of the instrument
10
3.1 Displays overview
Element Function
1 Status bar In the status bar, values are displayed
depending on the setting.
2
Battery capacity / charge status:
: Battery operation, capacity 75-100%
: Battery operation, capacity 50-75%
: Battery operation, capacity 25-50%
: Battery operation, capacity 10-25%
: Battery operation, capacity 0-10%
: Mains operation, battery is charging
3 Image display IR image or real image display
4 °C or °F Unit set for reading and scale displays
5 Scale - Temperature unit
- Grey characters: measuring range
- White characters: temperature margin of the
image displayed, showing the
minimum/maximum reading (with automatic
scale adjustment) or the selected
minimum/maximum display value (with
manual scale adjustment)

3 Description of the instrument
11
Element Function
6 A, M or S A - automatic scale adjustment
M - manual scale adjustment
S - ScaleAssist is enabled
7 E ... Emissivity set
3.2 Power supply
The power is supplied to the instrument via a replaceable rechargeable battery
or the mains unit provided (battery must be inserted).
With an attached mains unit, power is supplied automatically via the mains unit
and the rechargeable battery is charged (only at ambient temperatures from 0
to 40°C).
If the instrument is switched off when connected to a PC via the USB interface,
the rechargeable battery is charged via the USB interface.
It is also possible to charge the battery using a charging station (accessory).
The instrument is equipped with a buffer battery to maintain the system data
during an interruption in the power supply (e.g. when the battery is changed).

4Operation
12
4Operation
4.1 Commissioning
Please read the testo 868 1st steps commissioning instructions supplied
(0970 8652).
4.2 Switching instrument on and off
Switching on the camera
1 - Remove protective cap from the
lens.
2 - Press .
The camera starts.
The start screen appears on the
display.
The camera carries out automatic zeroing approx. every 60 seconds in
order to guarantee measuring accuracy. A "click" is heard when this
happens. The image freezes briefly when this occurs. Zeroing is
carried out more frequently during the camera warm-up period (takes
approx. 90 seconds).
During the warm-up period no measuring accuracy is guaranteed. The
image can already be used for indication purposes and saved.
Switching off the camera
1 - Press and hold down until the
progress bar is complete.
The display goes off.

4 Operation
13
The camera is switched off.
4.3 Getting to know the menu
1 - Press OK to open the menu.
2 - Move the joystick down/up to
highlight a function (orange border).
3 - Press OK to select the function.
3.1 - Move the joystick to the right to open the submenu (marked with >).
- Return to the main menu:
oMove the joystick to the left or
oMove the joystick to the menu bar and press OK.

4Operation
14
4.4 Quick select button
The quick select button is another navigation option that you can use to call up
certain functions simply at the touch of a button.
Quick select menu items
Menu item Function
Image gallery Opens an overview of saved images.
Scale: This function is only
available if the Image type is
set to infrared)
Set scale limits.
Emissivity: This function is
only available if the Image type
is set to infrared)
Set emissivity (E) and reflected temperature
(RTC).
Palette Toggles the palette selection.
Adjustment: This function is
only available if the Image type
is set to infrared)
Carries out manual zeroing.
Image type Alternately switches the image display
between infrared and real image.
Changing assignment
1 - Move the joystick to the right.
The Configure key selection menu
appears.
The activated function is marked with
a dot ( ).
2 - Move the joystick up/down until the
orange box appears around the
required menu item.
- Press OK
The quick select button is assigned
to the selected menu item.

4 Operation
15
The icon for the selected function is
displayed bottom right.
Using the quick select button
1 - Press .
The function assigned to the quick
select button is carried out.

5WLAN connection - using the App
16
5WLAN connection - using the App
5.1 Activating/disabling the connection
To connect via WLAN, you need a tablet or smartphone with the testo
Thermography App already installed on it.
You can get the App from the App Store for iOS devices or from the
Play Store for Android devices.
Compatibility:
Requires iOS 8.3 or later/Android 4.3 or later
1 - Open Menu.
2 - Move the joystick down and select Configuration.
- Press OK or move the joystick to the right.
3 - Move the joystick down and select Connectivity.
- Press OK or move the joystick to the right.
4 - Select WLAN and press OK to activate (a tick appears when WLAN
is activated).
While WiFi is activated, the image gallery cannot be accessed.
Explanation of WLAN icons
Icon Function
App is connected
No connection to the App
5.1.1 Establishing a connection
- WLAN is activated in the thermal imager.
1 - Smartphone/tablet -> Settings -> WLAN settings -> camera is
shown with serial number and can be selected.

5 WLAN connection - using the App
17
2 - Press Connect.
The WLAN connection to the thermal imager is established.
5.1.2 Select display
Second display
- The thermal imager is connected via WLAN.
1 - Selection -> 2nd display
The display on the thermal imager is shown on your mobile end
device.
Remote
- The thermal imager is connected via WLAN.
1 - Selection -> Remote
The display on the thermal imager is shown on your mobile end
device. The thermal imager can be controlled and settings made via
the mobile terminal device.
Gallery
- The thermal imager is connected via WLAN.
1 - Selection -> Gallery
The saved images are displayed and can be managed.

6Performing the measurement
18
6Performing the measurement
CAUTION
High thermal radiation (e.g. due to sun, fire, furnaces)
Detector may be damaged!
- Do not point the camera at objects with temperatures > 650 °C.
Ideal framework conditions
∑Building thermography, investigating the building shell:
Considerable temperature difference between inside and outside required
(ideal: ≥ 15 °C / ≥ 27 °F).
∑Consistent weather conditions, no intensive sunlight, no precipitation, no
strong wind.
∑To ensure maximum accuracy, the camera requires an adjustment time of
10 minutes after it is switched on.
Important camera settings
∑Emissivity and reflected temperature must be set correctly in order to
precisely determine the temperature. Subsequent adjustment is possible via
the PC software, if required.
∑When auto-scaling is activated, the colour scale is continuously adjusted to
the min./max. values of the current measurement image. This means that
the colour assigned to a specific temperature is changing constantly! To be
able to compare multiple images based on the assigned colour, scaling
must be set manually to fixed values, or must be subsequently adjusted to
uniform values using the PC software.
6.1 Saving an image
1 - Press Trigger.
The image is automatically saved.
Regardless of the image type set, an
infrared image is saved with an
attached real image.
If a higher resolution is required: in the menu under Configuration ->
select SuperResolution for four times as many readings.

6 Performing the measurement
19
6.2 Setting measuring functions
1 - Open the Measurement submenu.
The submenu with measurement functions opens:
∑Pixel mark:
oSingle point measurement: the temperature measuring
point in the centre of the image is marked with white
crosshairs and the value is displayed.
oColdspot,Hotspot: the lowest or highest temperature
measuring point is marked with blue or red crosshairs and
the value is displayed.
∑Measurement range: choose between two temperature
ranges.
∑Differential temperature: identifies the difference between two
temperatures.
∑IFOV: the IFOV warner shows what can be measured
accurately from a specific distance.
2 - Move the joystick up/down to select the required function and
then press OK.
Other manuals for 868
1
This manual suits for next models
1
Table of contents
Other TESTO Laboratory Equipment manuals
Popular Laboratory Equipment manuals by other brands

Elmi
Elmi DRS-12 user manual

Yamato
Yamato DN411I quick start guide

Air Science
Air Science UV-BOX UVB-15 User's operation manual

Thermo Scientific
Thermo Scientific Harris MBF-700 Installation and operation manual

IKA
IKA KS 4000 i control operating instructions

VERDER
VERDER Carbolite Gero HT 5/220 Installation, operation and maintenance instructions