TFA Dostmann AIRCO2NTROL COACH User manual
Bedienungsanleitung
Instruction manual
Mode d’emploi
Instrucciones de uso
Gebruiksaanwijzing
Istruzioni per l'uso
Kat. Nr. 31.5009
RoHS
TFA_No. 31.5009_Anleitung 06.11.2018 16:57 Uhr Seite 1

3
Fig. 1 Fig. 2
A 2
2
A 5A 4A 3
A 1
B 1
B 2
C 1
TFA_No. 31.5009_Anleitung 06.11.2018 16:57 Uhr Seite 2

Fig. 3 C 2 C 2
45
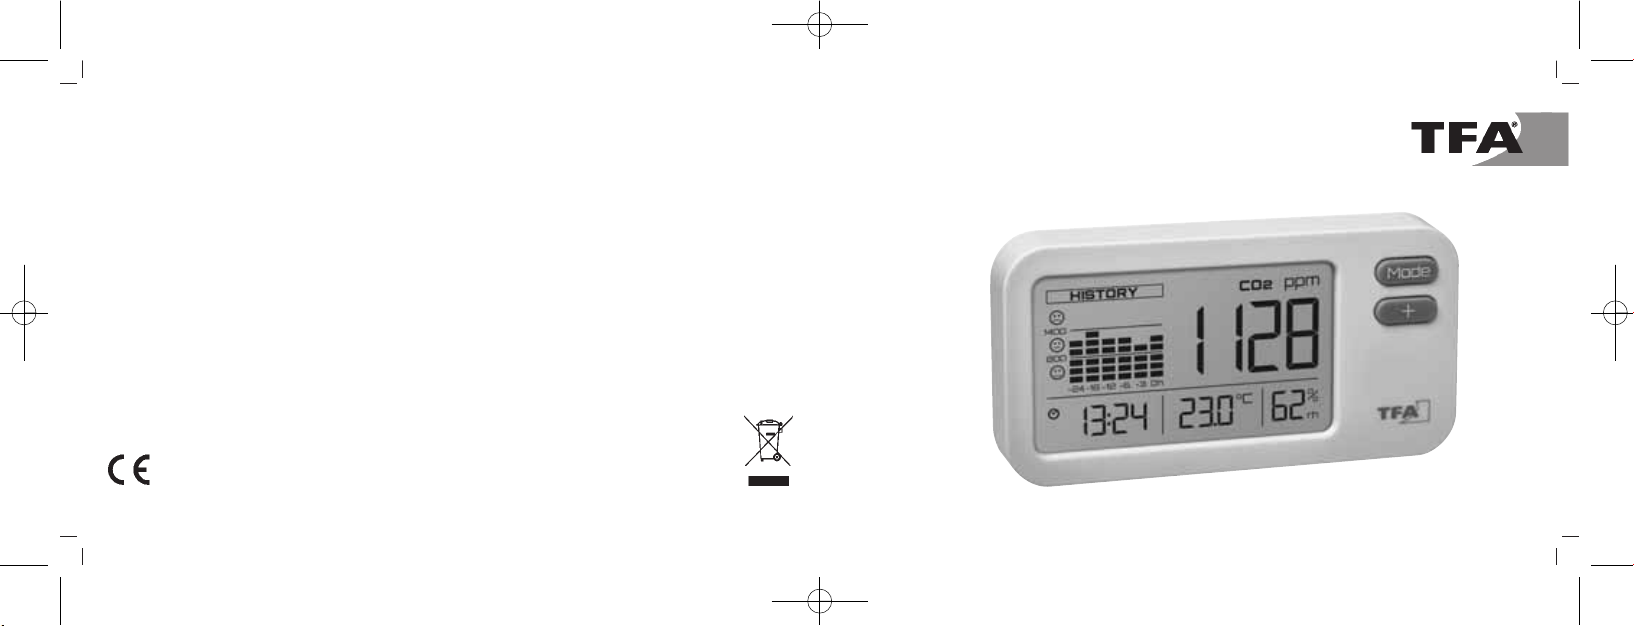
AIRCO2NTROL COACH – CO2Monitor
Vielen Dank, dass Sie sich für dieses Gerät aus dem Hause TFA entschieden haben.
1. Bevor Sie mit dem Gerät arbeiten
•Lesen Sie sich bitte die Bedienungsanleitung genau durch.
So werden Sie mit Ihrem neuen Gerät vertraut, lernen alle Funktionen und Bestandteile kennen, erfahren
wichtige Details für die Inbetriebnahme und den Umgang mit dem Gerät und erhalten Tipps für den Stö-
rungsfall.
•Durch die Beachtung der Bedienungsanleitung vermeiden Sie auch Beschädigungen des Gerätes und
die Gefährdung Ihrer gesetzlichen Mängelrechte durch Fehlgebrauch.
•Für Schäden, die aus Nichtbeachtung dieser Bedienungsanleitung verursacht werden, übernehmen
wir keine Haftung. Ebenso haften wir nicht für inkorrekte Messwerte und Folgen, die sich aus solchen
ergeben können.
•Beachten Sie besonders die Sicherheitshinweise!
•Bewahren Sie diese Bedienungsanleitung gut auf!
2. Lieferumfang
•CO
2Monitor
• USB-Kabel
• Bedienungsanleitung
TFA_No. 31.5009_Anleitung 06.11.2018 16:57 Uhr Seite 3

76
AIRCO2NTROL COACH – CO2Monitor
AIRCO2NTROL COACH – CO2Monitor
• Das Gerät und das USB Kabel dürfen nicht mit Wasser oder Feuchtigkeit in Kontakt kommen. Nur für den
Betrieb in trockenen Innenräumen geeignet.
• Benutzen Sie das Gerät nicht, wenn Gehäuse oder USB Kabel beschädigt sind.
• Betreiben Sie das Gerät außerhalb der Reichweite von Personen (auch Kindern), die mögliche Gefahren
im Umgang mit elektrischen Geräten nicht richtig einschätzen können.
• Unterbrechen Sie die Stromversorgung, wenn eine Störung auftritt oder das Gerät für längere Zeit nicht
benutzt wird.
• Verlegen Sie das USB Kabel so, dass es nicht mit scharfkantigen oder heißen Gegenständen in Berüh-
rung kommt.
Wichtige Hinweise zur Produktsicherheit!
• Setzen Sie das Gerät keinen extremen Temperaturen, Vibrationen und Erschütterungen aus.
• Um Beschädigungen der Elektronik zu vermeiden, entfernen Sie nicht den Schutzdeckel und stecken Sie
keine spitzen Gegenstände durch die Lüftungsschlitze.
3. Einsatzbereich und alle Vorteile Ihres neuen Gerätes auf einen Blick
• Zur Überwachung der CO2-Konzentration in Gebäuden, in denen sich Personen aufhalten, z.B. Schulen,
Büros, öffentliche Einrichtungen
• Anzeige der aktuellen CO2-Konzentration und Vergangenheitswerte der letzten 24 Std.
• Multifunktionale Displaybeleuchtung in mehreren Farben
• Mit Anzeige der Uhrzeit, Temperatur und Luftfeuchtigkeit
• Micro-USB-Anschluss (5V) zur Stromversorgung über PC oder Netzteil
4. Zu Ihrer Sicherheit
• Das Produkt ist ausschließlich für den oben beschriebenen Einsatzbereich geeignet. Verwenden Sie das
Produkt nicht anders, als in dieser Anleitung dargestellt wird.
• Das eigenmächtige Reparieren, Umbauen oder Verändern des Gerätes ist nicht gestattet.
Vorsicht!
Lebensgefahr durch Stromschlag!
• Schließen Sie das Gerät über das USB-Kabel nur an eine geeignete USB-Spannungsquelle wie Computer,
USB-Netzteil an (DC 5V, ≥300mA).
TFA_No. 31.5009_Anleitung 06.11.2018 16:57 Uhr Seite 4

98
AIRCO2NTROL COACH – CO2Monitor
AIRCO2NTROL COACH – CO2Monitor
5.3 Gehäuse (Fig. 2+3)
C 1: Micro-USB-Anschluss
C 2: Aufhängeösen
6. Inbetriebnahme
• Stecken Sie das mitgelieferte USB-Kabel mit dem Micro-USB-Stecker in die vorgesehene Öffnung am
Gerät. Schließen Sie das USB-Kabel an eine geeignete USB-Spannungsquelle an.
• Bei erfolgreichem Anschluss erscheint im Display kurz „Auto”, dann „- - - -”. Die Hintergrundbeleuch-
tung schaltet sich ein.
• Die schwarzen Balken verschwinden nacheinander.
• Das Gerät ist jetzt betriebsbereit.
• Auf dem Display erscheinen die aktuellen Messungen von: CO2Konzentration, Temperatur, Luftfeuchtig-
keit.
• Die Uhrzeit muss im Einstellmodus auf die aktuelle Zeit eingestellt werden.
7. Einstellungen
7.1 Auswahl der multifunktionalen Displaybeleuchtung
• Das Gerät verfügt über eine multifunktionale Displaybeleuchtung in mehreren Farben. Je nach Einstel-
lung dient die Beleuchtungsfarbe zur Bewertung und Interpretation der aktuellen CO2Messwerte.
EMC/RFI
• Schützen Sie das Gerät vor elektromagnetischer Strahlung (z.B. Induktionsheizungen, Mikrowellen) und
statischer Elektrizität. Die Messung kann durch eine elektromagnetische Feldstärke im Hochfrequenz-
Bereich von ca. 3 V pro Meter gestört werden. Die Funktionsfähigkeit ist dadurch nicht dauerhaft beein-
trächtigt.
5. Bestandteile
5.1 Display (Fig. 1)
A 1: CO2Anzeige
A 2: CO2Vergangenheitswerte der letzten 24 Stunden
A 3: Uhrzeit
A 4: Temperatur
A 5: Luftfeuchtigkeit
5.2 Tasten (Fig. 1)
B 1: MODE Taste
B 2: + Taste
TFA_No. 31.5009_Anleitung 06.11.2018 16:57 Uhr Seite 5

1110
AIRCO2NTROL COACH – CO2Monitor
AIRCO2NTROL COACH – CO2Monitor
7.2 Einstellmodus
• Halten Sie die MODE Taste für drei Sekunden gedrückt. SEL COL erscheint und Sie können mit der + Taste
die Farbe der Displaybeleuchtung für den Modus „on” einstellen.
1 = WEISS
2 = HELLBLAU
3 = DUNKELBLAU
4 = VIOLETT
5 = ROT
6 = GELB
7 = GRÜN
• Bestätigen Sie mit der MODE Taste.
• „AL” erscheint und die Voreinstellung 1400 ppm.
• Stellen Sie mit der + Taste in 100er-Schritten die gewünschte Alarmgrenze (400 bis 3000 ppm) für den
Modus „AL” ein.
• Bestätigen Sie mit der MODE Taste.
• Auf dem Display erscheint die Uhrzeit. Die Stundenanzeige blinkt.
• Stellen Sie mit der + Taste die Stunden ein.
• Drücken Sie nochmals die MODE Taste und stellen Sie auf gleiche Weise die Minuten ein.
• Wählen Sie mit der MODE Taste die gewünschte Einstellung aus.
• Um die Eingabe zu bestätigen, warten Sie kurz, bis die Anzeige wieder in den Normalmodus zurückkehrt.
• Vier verschiedene Einstellungen stehen zur Verfügung:
7.1.1 „Auto” (Voreinstellung)
In diesem Modus wechselt die Farbe der Displaybeleuchtung automatisch in Abhängigkeit vom aktuel-
len CO2-Messwert in sanften Übergängen durch die 3 Farbnuancen.
Grün: Optimale Luftqualität: Die CO2Konzentration liegt unter 800 ppm.
Gelb: Mittlere Luftqualität: Die CO2Konzentration liegt zwischen 800 ppm und 1400 ppm.
Rot: Schlechte Luftqualität: Die CO2Konzentration liegt über 1400 ppm.
7.1.2 „AL”
In diesem Modus aktiviert sich die rote Displaybeleuchtung als optisches Signal im Alarmfall, wenn
der Grenzwert (Voreinstellung >1400 ppm) überschritten wurde.
Im Einstellmodus können Sie den Alarmwert einstellen.
7.1.3 „on"
In diesem Modus können Sie die Farbe der Displaybeleuchtung individuell festlegen.
Wählen Sie im Einstellmodus zwischen 7 Farben.
7.1.4 „OFF”
In diesem Modus ist die Displaybeleuchtung ausgeschaltet.
TFA_No. 31.5009_Anleitung 06.11.2018 16:57 Uhr Seite 6
1312
AIRCO2NTROL COACH – CO2Monitor
AIRCO2NTROL COACH – CO2Monitor
9. Pflege und Wartung
• Reinigen Sie das Gerät mit einem weichen, leicht feuchten Tuch. Keine Scheuer- oder Lösungsmittel ver-
wenden! Vor Feuchtigkeit schützen.
• Bewahren Sie Ihr Gerät an einem trockenen Platz auf.
10. Fehlerbeseitigung
Problem Fehlerbeseitigung
Keine Anzeige ➜Gerät mit USB-Kabel an eine geeignete Spannungsquelle anschließen
Unkorrekte Anzeige ➜Gerät neu in Betrieb nehmen
Anzeige 9999 ➜Systemfehler
Gerät neu in Betrieb nehmen
11. Entsorgung
Dieses Produkt wurde unter Verwendung hochwertiger Materialien und Bestandteile hergestellt, die recycelt
und wiederverwendet werden können.
• Bestätigen Sie mit der MODE Taste.
• „ECO L” erscheint und die Voreinstellung OFF. Ist die Funktion ECO LIGHT aktiviert, schaltet sich von 22:00
bis 06:00 Uhr eine schwächere Beleuchtung an. Dafür muss die aktuelle Uhrzeit eingestellt sein. Mit der +
Taste können Sie die Funktion aktivieren (ON) oder deaktivieren (OFF).
• Bestätigen Sie die Eingabe mit der MODE Taste, um in den Normalmodus zurückzukehren.
• Wird 20 Sekunden lang keine Taste betätigt, wird der Einstellmodus automatisch verlassen.
8. Anzeigebereich HISTORY
• Die Grafik zeigt die gemessenen CO2-Werte der letzten 24 Stunden übersichtlich an.
• Der Balken auf Position „0 h” entspricht immer dem aktuellen CO2-Messwert (Aktualisierung des Bal-
ken erfolgt zusammen mit dem Messwert alle 10 Sekunden).
• Der Balken „- 3” entspricht dem CO2-Durchschnittswert der letzten 3 Stunden.
• Der Balken „- 6” entspricht dem CO2-Durchschnittswert für den Zeitraum vor 3 - 6 Stunden.
• Der Balken „- 12” entspricht dem CO2-Durchschnittswert für den Zeitraum vor 6 - 12 Stunden.
• Der Balken „- 18” entspricht dem CO2-Durchschnittswert für den Zeitraum vor 12 - 18 Stunden.
• Der Balken „- 24” entspricht dem CO2-Durchschnittswert für den Zeitraum vor 18 - 24 Stunden.
• Die Durchschnittswerte der Balken „- 3” bis „- 24” werden alle 10 Minuten neu berechnet und aktuali-
siert.
TFA_No. 31.5009_Anleitung 06.11.2018 16:57 Uhr Seite 7
1514
AIRCO2NTROL COACH – CO2Monitor
AIRCO2NTROL COACH – CO2Monitor
Aufwärmzeit ca. 10 Sekunden
Messmethode Dual Beam NDIR (Nicht-Dispersive-Infrarot Technologie)
Temperatur
Messbereich 0 °C…50°C
Auflösung 0,1 °C
Genauigkeit ±1,0°C
Luftfeuchtigkeit
Messbereich 1 bis 95 % rH
Auflösung 1% rH
Genauigkeit ±3% Punkte rH (von 35 bis 75 % rH)
Betriebstemperatur 0°C…50°C
Lagertemperatur -20°C…60°C
Größe 105 x 32 x 55 mm
Gewicht 86 g (nur das Gerät)
Dieses Gerät ist entsprechend der EU-Richtlinie über die Entsorgung von Elektro- und Elektro-
nik-Altgeräten (WEEE) gekennzeichnet.
Dieses Produkt darf nicht mit dem Hausmüll entsorgt werden. Der Nutzer ist verpflichtet, das
Altgerät zur umweltgerechten Entsorgung bei einer ausgewiesenen Annahmestelle für die Ent-
sorgung von Elektro- und Elektronikgeräten abzugeben.
12. Technische Daten
Spannungsversorgung DC 5V, ≥300mA (USB)
USB-Kabel inklusive
CO2
Messbereich 0 …9999 ppm
Auflösung 1 ppm
Genauigkeit ±7% oder ±100 ppm von 0 … 3000 ppm (der größere Wert gilt),
±10% bei > 3000 ppm
Aktualisierungsintervall 10 Sekunden
TFA_No. 31.5009_Anleitung 06.11.2018 16:57 Uhr Seite 8

1716
AIRCO2NTROL COACH – CO2Monitor
AIRCO2NTROL COACH – CO2Monitor
Thank you for choosing this instrument from TFA.
1. Before you use this product
•Please make sure you read the instruction manual carefully.
This information will help you to familiarize yourself with your new device, to learn all of its functions
and parts, to find out important details about its first use and how to operate it and to get advice in the
event of a malfunction.
•Following and respecting the instructions in your manual will prevent damage to your instrument and
loss of your statutory rights arising from defects due to incorrect use.
•We shall not be liable for any damage occurring as a result of non following of these instructions.
Likewise, we take no responsibility for any incorrect readings or for any consequences resulting from
them.
•Please take particular note of the safety advice!
•Please keep this instruction manual safe for future reference.
2. Delivery contents
•CO
2Monitor
• USB cable
• Instruction manual
Diese Anleitung oder Auszüge daraus dürfen nur mit Zustimmung von TFA Dostmann veröffentlicht werden. Die techni-
schen Daten entsprechen dem Stand bei Drucklegung und können ohne vorherige Benachrichtigung geändert werden.
Die neuesten technischen Daten und Informationen zu Ihrem Produkt finden Sie auf unserer Homepage unter Eingabe der
Artikel-Nummer in das Suchfeld.
www.tfa-dostmann.de
E-Mail: [email protected]
TFA Dostmann GmbH & Co.KG, Zum Ottersberg 12, D-97877 Wertheim, Deutschland 11/18
TFA_No. 31.5009_Anleitung 06.11.2018 16:57 Uhr Seite 9

1918
AIRCO2NTROL COACH – CO2Monitor
AIRCO2NTROL COACH – CO2Monitor
• The device and the USB cable must not come into contact with water or moisture. Only suitable for
indoor use.
• Do not use the device if the housing or the USB cable are damaged.
• Operate the device out of reach of persons (including children) who cannot fully appreciate the potential
risks of handling electrical equipment.
• Unplug the device if any fault occurs or if the device is not used for a long period of time.
• Route the USB cable lead so that it does not come into contact with sharp-edged or hot objects.
Important information on product safety!
• Do not expose the device to extreme temperatures, vibrations or shocks.
• To avoid damage to the electronics, do not remove the protective cover or insert sharp object through
the ventilation slots.
EMC/RFI
• Protect the unit from EMI (Electro Magnetic Interference) from induction heaters, microwave ovens and
Electro Static Discharge. Readings may be affected if the unit is operated within a radio frequency elec-
tromagnetic field strength of approximately 3 volts per meter. The performance of the instrument will not
be permanently affected.
3. Range of application and all the benefits of your new instrument at a glance
• For monitoring the CO2concentration in buildings, where people are present, eg: schools, offices, public
facilities
• Indication of actual CO2concentration and history value of the last 24 hours
• Multi-function display illumination in different colours
• Indication of time, temperature and humidity
• Micro USB port (5V) to power via PC or power adapter
4. For your safety
• This product is exclusively intended for the range of application described above. It should only be used
as described within these instructions.
• Unauthorized repairs, alterations or changes to the product are prohibited.
Caution!
Risk of electrocution!
• Connect the device via the USB cable only to a suitable USB power source such as a computer, USB
power adapter (DC 5V ≥300mA).
TFA_No. 31.5009_Anleitung 06.11.2018 16:57 Uhr Seite 10

2120
AIRCO2NTROL COACH – CO2Monitor
AIRCO2NTROL COACH – CO2Monitor
• “Auto” is displayed shortly after a successful connection, then “- - - -"” The backlight turns on.
• The black bars disappear one by one.
• The device is ready for use.
• The actual measurements will appear on the display: CO2 concentration, temperature, humidity.
• The clock must be set to the current time in setting mode.
7. Settings
7.1 Selection of the multi-function display illumination
• The device has a multi-function display illumination in different colours. Depending on the setting, the
illumination colour is used to evaluate and interpret the current CO2measured values.
• You can select your respective setting by pressing the MODE button.
• Wait some seconds until the display returns to normal mode to confirm the setting.
• The following four settings are available:
7.1.1 „Auto” (default)
In this mode, the display colour changes automatically in smooth transitions between the 3 colour
shades, depending on the current reading of the CO2levels.
Green: Optimal air quality: The CO2concentration is below 800 ppm.
Yellow: Medium air quality: The CO2concentration is between 800 ppm and 1400 ppm.
Red: Poor air quality: The CO2concentration is over 1400 ppm.
5. Elements
5.1 Display (Fig. 1)
A 1: CO2indication
A 2: CO2history of the last 24 hours
A 3: Time
A 4: Temperature
A 5: Humidity
5.2 Buttons (Fig. 1)
B 1: MODE button
B 2: + button
5.3 Housing (Fig. 2+3)
C 1: Micro USB port
C 2: Mounting holes
6. Getting started
• Insert the supplied USB cable with the micro USB plug into the provided opening on the device. Connect
the device via the USB cable only to a suitable USB power source.
TFA_No. 31.5009_Anleitung 06.11.2018 16:57 Uhr Seite 11
2322
AIRCO2NTROL COACH – CO2Monitor
AIRCO2NTROL COACH – CO2Monitor
7 = GREEN
• Confirm with the MODE button.
• “AL” appears and the default setting is 1400 ppm.
• Use the + button to set the desired alarm limit (400 to 3000 ppm) in increments of 100 for the “AL” mode
• Confirm with the MODE button.
• The time appears on the display. The hour digits flash.
• Press the + button to adjust the hours.
• Press the MODE button again and set minutes in the same way.
• Confirm with the MODE button.
• “ECO L” appears and the default setting is OFF. If the ECO LIGHT function is activated, the light is dimmed
between 22:00 and 6:00. Please set the actual time to use this function.
• Press the + button to activate (ON) or deactivate (OFF) the function.
• Confirm the setting with the MODE button to return to normal mode.
• The device will automatically quit the setting mode if no button is pressed for 20 seconds.
8. Display section HISTORY
• The graph shows the measured CO2 values of the last 24 hours clearly.
• The bar on the position “0 h” always corresponds to the current measured value of the CO2 level (the
bar is updated every 10 seconds, together with the measured value).
7.1.2 „AL”
In this mode, the red display illumination is activated as an optical signal in the event of an alarm
when the limit value (default> 1400 ppm) has been exceeded.
You can set the alarm limit value in setting mode.
7.1.3 „on"
In this mode, you can set the display illumination to a single colour.
Choose between 7 colours in setting mode.
7.1.4 „OFF”
The backlight is off in this mode.
7.2 Setting mode
• Press and hold the MODE button for 3 seconds. SEL COL appears and you can use the + button to select
the display illumination colour for the "on" mode.
1 = WHITE
2 = LIGHT BLUE
3 = DARK BLUE
4 = PURPLE
5 = RED
6 = YELLOW
TFA_No. 31.5009_Anleitung 06.11.2018 16:57 Uhr Seite 12

2524
AIRCO2NTROL COACH – CO2Monitor
AIRCO2NTROL COACH – CO2Monitor
Incorrect indication ➜Restart the device
Display 9999 ➜System error
Restart the device
11. Waste disposal
This product has been manufactured using high-grade materials and components which can be recycled
and reused.
This product is labelled in accordance with the EU Waste Electrical and Electronic Equipment
Directive (WEEE).
Please do not dispose of this product in ordinary household waste. As a consumer, you are
required to take end-of-life devices to a designated collection point for the disposal of electri-
cal and electronic equipment, in order to ensure environmentally-compatible disposal.
12. Specifications
Power consumption DC 5V, ≥300mA (USB)
USB cable included
• The bar “- 3” corresponds to the average of the CO2 levels of the last 3 hours.
• The bar “- 6” corresponds to the average value of the CO2 levels for the period between 3 to 6 hours.
• The bar “- 12” corresponds to the average value of the CO2 levels for the period between 6 to
12 hours.
• The bar “- 18” corresponds to the average value of the CO2 levels for the period between 12 to
18 hours.
• The bar “- 24” corresponds to the average value of the CO2 levels for the period between 18 to
24 hours.
• The average values of bars “- 3” to “- 24” are recalculated and updated every 10 minutes.
9. Care and maintenance
• Clean the device with a soft dry cloth. Do not use solvents or scouring agents. Protect it from moisture.
• Keep the device in a dry place.
10. Troubleshooting
Problem Solution
No display ➜Connect the device with the micro USB cable to a suitable power source
TFA_No. 31.5009_Anleitung 06.11.2018 16:57 Uhr Seite 13

2726
AIRCO2NTROL COACH – CO2Monitor
AIRCO2NTROL COACH – CO2Monitor
Operating temperature 0 °C … 50 °C
Storage range -20 °C … 60 °C
Dimensions 105 x 32 x 55 mm
Weight 86 g (device only)
No part of this manual may be reproduced without written consent of TFA Dostmann. The technical data are correct at the
time of going to print and may change without prior notice. The latest technical data and information about this product
can be found in our homepage by simply entering the product number in the search box.
www.tfa-dostmann.de
E-Mail: [email protected]
TFA Dostmann GmbH & Co.KG, Zum Ottersberg 12, D-97877 Wertheim, Germany 11/18
CO2
Measuring range 0 …9999 ppm
Resolution 1 ppm
Accuracy ±7 % or ±100 ppm at 0…3000 ppm (whichever is greater)
±10 % at > 3000 ppm
Update interval 10 seconds
Warm-up time approx. 10 seconds
Method Non-Dispersive-Infrared Technology (NDIR)
Temperature
Measuring range 0 °C … 50 °C
Resolution 0.1°C
Accuracy ± 1.0°C
Humidity
Measuring range 1% to 95% rH
Resolution 1% RH
Accuracy ±3 % rH (at 35…75 % rH)
TFA_No. 31.5009_Anleitung 06.11.2018 16:57 Uhr Seite 14

2928
AIRCO2NTROL COACH – Moniteur CO2
AIRCO2NTROL COACH – Moniteur CO2
3. Aperçu du domaine d'utilisation et de tous les avantages de votre nouvel appareil
• Pour surveiller la concentration de CO2dans les bâtiments où les gens sont présents, par exemple dans
les écoles, dans les bureaux ou bien encore dans les établissements publics
• Affichage de la concentration de CO2actuelle et historique des dernières 24 heures
• Éclairage d’écran multifonctionnel en plusieurs couleurs
• Affichage de l'heure, de la température et de l'humidité
• Port micro-USB (5 V) pour alimentation en courant par l’intermédiaire de l’ordinateur ou du bloc secteur
4. Pour votre sécurité
• Le produit est destiné uniquement à l'utilisation décrite ci-dessus. N'utilisez jamais l’appareil à d'autres
fins que celles décrites dans le présent mode d'emploi.
• Vous ne devez en aucun cas réparer, démonter ou modifier l'appareil par vous-même.
Attention !
Danger de choc électrique !
• Branchez l’appareil par son câble USB uniquement à une source d'alimentation adaptée comme ordina-
teur, adaptateur secteur USB (DC 5V, ≥300mA).
Nous vous remercions d'avoir choisi l'appareil de la société TFA.
1. Avant d'utiliser votre appareil
•Veuillez lire attentivement le mode d'emploi.
Vous vous familiariserez ainsi avec votre nouvel appareil, vous découvrirez toutes les fonctions et tous
les éléments qui le composent, vous noterez les détails importants relatifs à sa mise en service et vous
lirez quelques conseils en cas de dysfonctionnement.
•En respectant ce mode d'emploi, vous éviterez d'endommager votre appareil et de perdre vos droits
légaux en cas de défaut si celui-ci résulte d’une utilisation non-conforme.
•Nous n'assumons aucune responsabilité pour des dommages qui auraient été causés par le non-res-
pect du présent mode d'emploi. De même, nous n’assumons aucune responsabilité pour des relevés
incorrects et les conséquences qu’ils pourraient engendrer.
•Suivez bien toutes les consignes de sécurité !
•Conservez soigneusement le mode d'emploi !
2. Contenu de la livraison
• Moniteur CO2
• Câble USB
• Mode d'emploi
TFA_No. 31.5009_Anleitung 06.11.2018 16:57 Uhr Seite 15

3130
AIRCO2NTROL COACH – Moniteur CO2
AIRCO2NTROL COACH – Moniteur CO2
5. Composants
5.1 Affichage (Fig. 1)
A 1 : Indication de CO2
A 2 : Indication historique de CO2des dernières 24 heures
A 3 : Horloge
A 4 : Température
A 5 : Humidité
5.2 Touches (Fig. 1)
B 1 : Touche MODE
B 2 : Touche +
5.3 Boîtier (Fig. 2+3)
C 1 : Prise micro-USB
C 2 : Œillets de suspension
6. Mise en service
• Branchez le câble USB compris en enfonçant la prise micro-USB dans l’ouverture prévue à cet effet.
Branchez l’appareil par son câble USB à une source d'alimentation USB adaptée.
• L'appareil et le câble USB secteur ne doivent pas entrer en contact avec de l'eau ou de l'humidité. Ils ne
peuvent être utilisés que dans des locaux secs.
• N'utilisez pas l'appareil si le boîtier ou le câble USB sont endommagés.
• Utilisez le produit hors de la portée de personnes (enfants compris) inaptes à évaluer les risques possi-
bles liés au maniement d'appareils électriques.
• Débranchez l'appareil de la source d’électricité en cas de défaut ou si l'appareil n'est pas utilisé pendant
une longue période.
• Placez le câble USB qu'il n'entre pas en contact avec des objets tranchants ou brûlants.
Conseils importants de sécurité du produit !
• Évitez d’exposer l’appareil à des températures extrêmes, à des vibrations ou à des chocs.
• Pour éviter d'endommager les composants électroniques, ne retirez pas le capot de protection et n’insé-
rez pas d’objets pointus dans les fentes de ventilation.
EMC/RFI
• Protégez l'appareil contre les rayons électroniques (par ex. chauffages à induction, micro-ondes. La
mesure peut être faussée par un champ électromagnétique de haute fréquence d’une intensité d’env. 3V
par mètre. Le fonctionnement ne sera cependant pas endommagé durablement.
TFA_No. 31.5009_Anleitung 06.11.2018 16:57 Uhr Seite 16

3332
AIRCO2NTROL COACH – Moniteur CO2
AIRCO2NTROL COACH – Moniteur CO2
7.1.2 „AL”
Dans ce mode, la couleur d’écran rouge est activée comme signal optique en cas d’alarme si la valeur
limite (par défaut >1400 ppm) est dépassée.
En mode de réglage, vous pouvez régler la valeur limite.
7.1.3 „on"
Dans ce mode, la couleur de l’écran est celle que vous avez choisi individuellement.
Choisissez en mode de réglage une couleur parmi les 7.
7.1.4 „OFF”
L’éclairage d’écran est éteint dans ce mode.
7.2 Mode de réglage
• Maintenez la touche MODE appuyée pendant trois secondes. SEL COL apparaît et vous pouvez sélectionner
la couleur de l’écran en mode « on » avec la touche +
1 = BLANC
2 = BLEU CLAIR
3 = BLEU FONCÉ
4 = VIOLET
5 = ROUGE
• Après le branchement, l’écran affiche brièvement « Auto » depuis « - - - - ». L’éclairage de fond est activé.
• Les barres noires disparaissent progressivement.
• Votre appareil est maintenant prêt à fonctionner.
• Sur l'écran apparaissent la concentration de CO2actuelles, la température et l'humidité.
• L’heure doit être réglée sur l’heure actuelle en mode de réglage.
7. Réglages
7.1 Sélection de l'éclairage d’écran multifonctionnel
• L’appareil est équipé d’un éclairage d’écran multifonctionnel en plusieurs couleurs. Selon la configura-
tion, la couleur de l’écran sert à juger et interpréter les valeurs de CO2actuelles.
• Réglez l'ajustage désiré avec la touche MODE.
• Pour confirmer le réglage, patientez quelques secondes jusqu’à ce que l’affichage repasse en mode normal.
• Vous pouvez choisir parmi quatre réglages différents :
7.1.1 „Auto” (défaut)
Dans ce mode, la couleur de l’écran passe automatiquement et progressivement par les 3 nuances de
couleurs en fonction de la valeur CO2mesurée.
Verde : Qualité d'air optimale : La concentration de CO2se trouve en dessous de 800 ppm.
Jaune : Qualité d'air moyenne : La concentration de CO2se trouve entre 800 ppm et 1400 ppm.
Rouge : Qualité d'air mauvaise : La concentration de CO2est supérieure à 1400 ppm.
TFA_No. 31.5009_Anleitung 06.11.2018 16:57 Uhr Seite 17

3534
AIRCO2NTROL COACH – Moniteur CO2
AIRCO2NTROL COACH – Moniteur CO2
8. Affichage HISTORY
• Le graphique montre les valeurs de CO2mesurées dans les 24 dernières heures d’une façon très claire.
• La barre « 0 h » indique toujours la valeur de CO2mesurée actuellement (la barre est actualisée avec
la valeur mesurée toutes les 10 secondes).
• La barre « - 3 » indique la valeur moyenne de CO2des 3 dernières heures.
• La barre « - 6 » indique la valeur moyenne de CO2pendant les 3ème à 6ème dernières heures.
• La barre « - 12 » indique la valeur moyenne de CO2pendant les 6ème à 12ème dernières heures.
• La barre « - 18 » indique la valeur moyenne de CO2pendant les 12ème à 18ème dernières heures.
• La barre « - 24 » indique la valeur moyenne de CO2pendant les 18ème à 24ème dernières heures.
• Les valeurs moyennes des barres « - 3 » à « - 24 » sont recalculées et actualisées toutes les 10 minutes.
9. Entretien et maintenance
• Pour le nettoyage de votre appareil, utilisez un chiffon doux et humide. N’utilisez pas de solvants ou
d'agents abrasifs ! Protégez-le contre l'humidité.
• Conservez votre appareil dans un endroit sec.
6 = JAUNE
7 = VERT
• Validez au moyen de la touche MODE.
• « AL » est affiché ainsi que le réglage par défaut 1400 ppm.
• Réglez avec la touche + la limite d’alarme souhaitée pour le mode « AL » (400 à 3000 ppm) par écarts de
100.
• Validez au moyen de la touche MODE.
• L'heure actuelle apparaît sur l’écran. L'affichage de l'heure clignote.
• Réglez l'heure avec la touche +
• Appuyez encore une fois sur la touche MODE et procédez de la même manière pour le paramétrage des
minutes.
• Validez au moyen de la touche MODE.
• « ECO L » est affiché ainsi que le réglage par défaut OFF. Si l'ajustement ECO LIGHT est activé, un éclairage
faible s'éteindra entre 22 et 6:00 heures. L'heure actuelle doit déjà être réglée.
• Appuyez sur la touche + pour activer (ON) ou désactiver (OFF) l'ajustement.
• Validez le réglage au moyen de la touche MODE afin de retourner au mode normal.
• L'appareil quitte automatiquement le mode de réglage si aucune touche n’est pressée pendant 20 secon-
des.
TFA_No. 31.5009_Anleitung 06.11.2018 16:57 Uhr Seite 18

3736
AIRCO2NTROL COACH – Moniteur CO2
AIRCO2NTROL COACH – Moniteur CO2
12. Caractéristiques techniques
Alimentation DC 5V, ≥300mA (USB)
Câble USB inclus
CO2
Plage de mesure 0 …9999 ppm
Résolution 1 ppm
Précision ±7 % ou ±100 ppm à 0 … 3000 ppm (étant la valeur la plus grande)
±10% à > 3000 ppm
Intervalle de mise à jour 10 secondes
Temps de préchauffage env. 10 secondes
Méthode de mesure NDIR (technologie infrarouge non dispersive)
Température
Plage de mesure 0 °C … 50 °C
Résolution 0,1°C
Précision ±1,0°C
10. Dépannage
Problème Solution
Aucun affichage ➜Connectez avec le câble micro-USB à une source d'alimentation adaptée
Affichage incorrect ➜Recommencer la mise en service de l'appareil
Affichage 9999 ➜Erreur système
Recommencer la mise en service de l'appareil
11. Traitement des déchets
Ce produit a été fabriqué avec des matériaux de haute qualité qui peuvent être recyclés et réutilisés.
Cet appareil est conforme aux normes de l'UE relatives au traitement des déchets électriques
et électroniques (WEEE).
L'appareil usagé ne doit pas être jeté dans les ordures ménagères. L’utilisateur s’engage, pour
le respect de l’environnement, à déposer l’appareil usagé dans un centre de traitement agréé
pour les déchets électriques et électroniques.
TFA_No. 31.5009_Anleitung 06.11.2018 16:57 Uhr Seite 19

3938
AIRCO2NTROL COACH – Moniteur CO2
AIRCO2NTROL COACH – Moniteur CO2
La reproduction, même partielle, du présent mode d'emploi est strictement interdite sans l'accord explicite de TFA Dost-
mann. Les caractéristiques techniques de ce produit ont été actualisées au moment de l'impression et peuvent être modi-
fiées sans avis préalable. Les dernières données techniques et les informations concernant votre produit peuvent être
consultées en entrant le numéro de l'article sur notre site Internet :
www.tfa-dostmann.de
TFA Dostmann GmbH & Co.KG, Zum Ottersberg 12, D-97877 Wertheim, Allemagne 11/18
Humidité
Plage de mesure 1% à 95% rH
Résolution 1% rH
Précision ±3% rH (de 35 à 75 % rH)
Température de travail de 0 °C à 50 °C
Température de stockage de -20 °C à 60 °C
Dimensions du boîtier 105 x 32 x 55 mm
Poids 86 g (appareil seulement)
TFA_No. 31.5009_Anleitung 06.11.2018 16:57 Uhr Seite 20
Table of contents
Languages:
Other TFA Dostmann Measuring Instrument manuals


Popular Measuring Instrument manuals by other brands


Storch
Storch CrossLine operating manual

Schäfer
Schäfer iQdata RMS 222 quick start guide

Group3
Group3 DTM-133 user manual

micro-trak
micro-trak Shaft-Trak Installation and operation instructions

Hanna Instruments
Hanna Instruments HI97728 instruction manual

ACS contsys
ACS contsys Sonicont USN4SP Technical manual


