manuals.online logo
Brands
  1. Home
  2. •
  3. Brands
  4. •
  5. THERM PRO
  6. •
  7. Thermometer
  8. •
  9. THERM PRO TP-15H User manual

THERM PRO TP-15H User manual

20191021 EN
Model No.: TP-15H
DIGITAL INSTANT READ THERMOMETER
INSTRUCTION MANUAL
Product Features and Specification
1. Display: Displays the temperature measured by the probe instantly
2. Super Fast Temperature Probe: Insert temperature probe into meat to
receive internal meat temperature within 4 seconds
3. IPX6 Grade Waterproof: can be washed under running water without fear
4 Backlight for easy reading temperature.
5 Calibration Feature: allows users to re-calibrate the thermometer.
6 Auto-Off: Turns off automatically if 10 minutes no use.
7 Built-in Magnet for Easy Storage.
8 Food Grade Stainless Steel Probe: Length: 5.4 inch (136 mm).
9 Temperature range: -58 °F ~ 572°F (-50 °C ~ 300 °C). If the temperature is
below -58 °F (-50 °C) or above 572 °F (300 °C), LL. L or HH.H will show on
the display
.
10 Resolution: 0.1 °C/°F.
11 Temperature Accuracy: ±0.9°F (±0.5°C) in range between 32 to 212°F (0
to 100°C)
.
12 Power supply: 1*AAA 1.5V.
Buttons
1. / Button: Press once to turn ON/OFF the unit. Press and hold for 3
seconds to select which temperature unit to display.
°C/°F
2. LOCK/CAL Button: Press once to lock the current temperature display. Press it
again to unlock the temperature display. Press and hold it for 5 seconds to
calibrate the unit.
3. Light Button: Press once to turn ON/OFF the backlight.
Before first use
1. Make sure the battery is installed in the unit. If not, please insert or replace
battery: Insert one 1*AAA battery in correct polarity (+) and (-) as indicated.
Please make sure the battery cover is tightened securely.
2 Clean stainless tip: wash tip with warm soapy sponge or cloth, then rinse and
dry.
.
PLEASE READ AND FOLLOW ALL INSTRUCTIONS.
3 The thermometer is now ready to use..
To measure food temperature
1. Press /°C/°F button to turn on the thermometer.
-2- -3-
2. Press and hold the
unit: °C or °F. Please note that the temperature unit will remain the last
selection when you turn on the thermometer next time.
/°C/°F button for 3 seconds to select the temperature
3. Insert the tip of probe into food being cooked. The thermometer will start to
measure the internal food temperature.
4 Press the LIGHT button to turn on the backlight, It will automatically turn off
after 15 seconds.
.
5 Wait until temperature reading stabilizes on display..
6 Press the LOCK/CAL button to lock the current temperature..
Temperature Probe
Display /°C/°F Button
LOCK/CAL Button Light Button
Battery Compartment
Built-in Magnet
7. Press
comes with auto-off feature: it will automatically turn off if no button is pushed
in 10 minutes.
/°C/°F button to turn off the thermometer. This thermometer also
Calibration
The thermometer comes with a Calibration feature. In most cases, the
thermometer was calibrated precisely at our manufacturing facility, and
generally you do NOT need to calibrate the thermometer. However, after a long
period of use and you believe that the temperature reading displayed by the
thermometer is not accurate, you may follow the process below to re-calibrate
the thermometer:
1. Use distilled or purified water to make ice cubes in your refrigerator;
2. Get a thermal insulated bottle. If you don’t have one, use a beaker or a regular
cup;
3. Fill the bottle with ice cubes (no less than 70% of the volume), then top off with
cold distilled or purified water (no greater than 30% of the volume);
4. Stir the mixture and let it sit for 10 minutes to allow the ice and water to reach
its temperature equilibration;
5. Turn on the thermometer and hold the LOCK/CAL button for 5 seconds to enter
Calibration mode. CAL will begin flashing for a few seconds and then the
current temperature reading will begin to flash which means the thermometer
is in Calibration mode;
6. Immerse the probe in the ice/water mixture and make sure not to touch the
sides of the container. Wait till the temperature reading drops to its lowest
value, which should be around 32°F or 0°C. If the temperature of the ice/water
mixture is not within 28°F to 36°F (or -2°C to +2°C), the calibration can’t be
continued: you will need to follow the above steps to re-make the ice/water
mixture;
7. Hold the LOCK/CAL button for 3 seconds to confirm the calibration and exit
the Calibration mode.
Note:
The Calibration mode will only last for 15 seconds. If you’re unable to finish the
calibration within 15 seconds, the thermometer will automatically exit
Calibration mode.
Undo-Calibration
If you want to undo the calibration and go back to the default calibration setting,
please follow the below steps:
1. Turn on the thermometer and hold the LOCK/CAL button for 5 seconds to enter
Calibration mode;
2. When you see temperature reading begins flashing, press and hold the Light
button for 3 seconds. The temperature reading will stop flashing and the
calibration is set to the default setting.
Helpful hints
When measuring multiple or different foods and meats, it may be desirable to
cool the probe by rinsing the tip with cold water between readings.
It is recommended that you wipe the probe tip clean between readings. This is
especially important when taking readings from different foods and meats.
The thermometer is designed for temporary, hand held use. Do not use in an
oven. Do not leave inserted in extremely hot foods or liquids (anything over
572°F) for more than 1 minute.
-4- -5-
Always take your reading in the thickest available portion of meat. Thin
portions of meat are difficult to measure because they tend to cook through
fast. Avoid touching bone. If the tip touches the bone or heavy fat area of the
meat, or if the tip is not deep enough, take a second reading to ensure
accuracy.
Not intended for use by persons ages 12 or under.
Care of your thermometer
Do not touch the stainless portion of the thermometer during or right after
measuring temperatures since it will be hot.
Do not leave exposed to extreme high or low temperatures as this will damage
electronic parts and plastics.
Do not leave the thermometer inserted in food during cooking.
-6-
Limited one-year warranty
ThermoPro warrants this product to be free of defects in parts, materials and
workmanship for a period of one year, from date of purchase.
Should any repairs or servicing under this warranty be required, contact Customer
Service by phone or email for instructions on how to pack and ship the product to
ThermoPro.
This warranty gives you specific legal rights and you may also have other rights
which vary from state to state.
Customer service
Telephone: 1-877-515-7797(USA & Canada only)
Email: service@buythermopro.com
Hours: Weekdays 8:00 AM - 8:00 PM EST(USA & Canada only)
Our website: www.buythermopro.com
Remove battery if stored for more than four months.
Keep unit away from children. The unit or parts of the unit might be a choking
hazard.
Dispose of the unit legally and recycle when possible.
Do not remove any screws.
Do not dispose this unit in a fire. IT MAY EXPLODE.
Do not immerse the unit in water.
Do not subject the unit to excessive force, shock, dust, temperature or humidity.
Disposal
You can help protect the environment! Please remember to respect the local
regulations. Hand in the non-working electrical equipment to an appropriate
waste disposal center.
Other THERM PRO Thermometer manuals

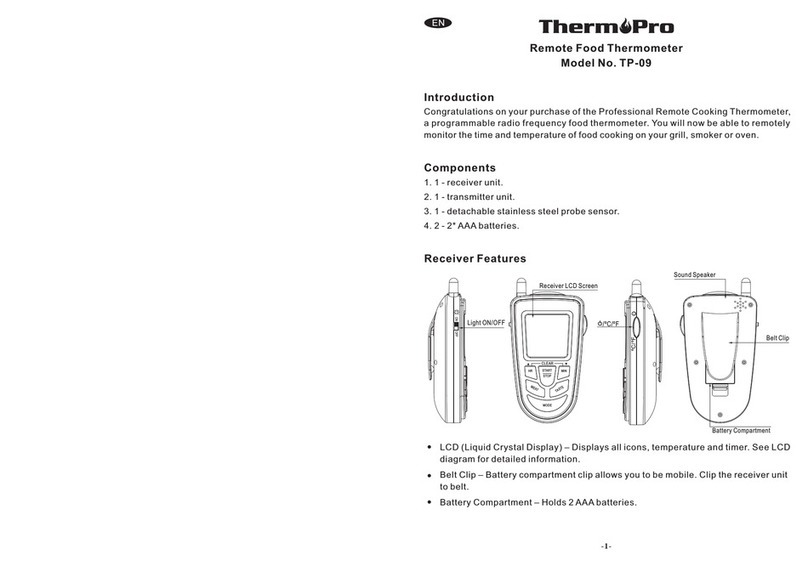
THERM PRO TP-16 User manual

THERM PRO

THERM PRO TP-16 User manual

THERM PRO TP-17H User manual

THERM PRO

THERM PRO TP-17H User manual

THERM PRO TP359 User manual

THERM PRO

THERM PRO TP359 User manual

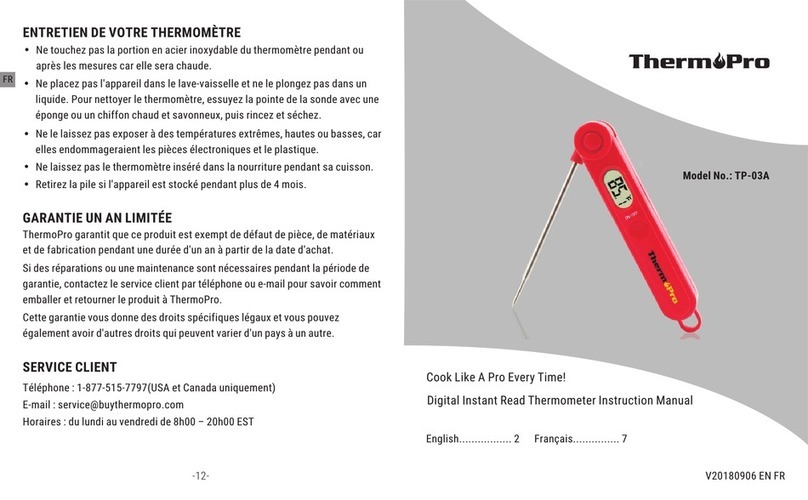
THERM PRO TP-03A User manual

THERM PRO

THERM PRO TP-03A User manual

THERM PRO TP-17 User manual

THERM PRO

THERM PRO TP-17 User manual

THERM PRO TP-09 User manual

THERM PRO

THERM PRO TP-09 User manual

THERM PRO TP-02 User manual

THERM PRO

THERM PRO TP-02 User manual

THERM PRO TP-04 User manual

THERM PRO

THERM PRO TP-04 User manual

THERM PRO TP-22 User manual

THERM PRO

THERM PRO TP-22 User manual

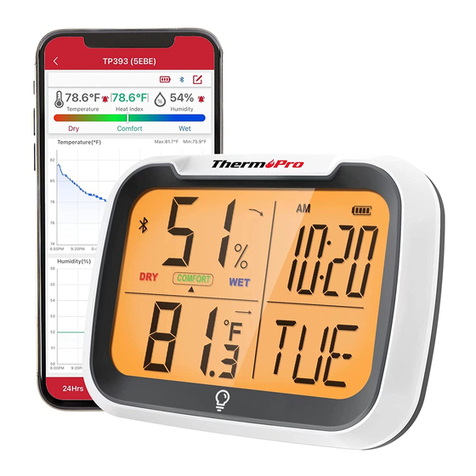
THERM PRO TP393 User manual

THERM PRO

THERM PRO TP393 User manual

THERM PRO TP-07S User manual

THERM PRO

THERM PRO TP-07S User manual

THERM PRO TP-30 User manual

THERM PRO

THERM PRO TP-30 User manual

Popular Thermometer manuals by other brands

Char-Broil 4885637 user manual

Char-Broil

Char-Broil 4885637 user manual

Continental Underfloor therM2 instructions

Continental Underfloor

Continental Underfloor therM2 instructions

Terraillon NON-CONTACT INFRARED THERMOMETER instruction manual

Terraillon

Terraillon NON-CONTACT INFRARED THERMOMETER instruction manual

TESTO 230 instruction manual

TESTO

TESTO 230 instruction manual

Velleman DTP5 user manual

Velleman

Velleman DTP5 user manual

Oregon Scientific BHGR618 user manual

Oregon Scientific

Oregon Scientific BHGR618 user manual

Gima 25564 user manual

Gima

Gima 25564 user manual

iHealth PT3SBT user manual

iHealth

iHealth PT3SBT user manual

Microlife IFR 100 manual

Microlife

Microlife IFR 100 manual

Microlife NC 400 manual

Microlife

Microlife NC 400 manual

TFA 30.1065 Series instruction manual

TFA

TFA 30.1065 Series instruction manual

Radio Shack MTR661 user manual

Radio Shack

Radio Shack MTR661 user manual

Omega DX 6635 instruction manual

Omega

Omega DX 6635 instruction manual

ACU-RITE 616 instruction manual

ACU-RITE

ACU-RITE 616 instruction manual

Extech Instruments RH490 user guide

Extech Instruments

Extech Instruments RH490 user guide

ACU-RITE 603 instruction manual

ACU-RITE

ACU-RITE 603 instruction manual

Maverick REDI CHECK SMOKER ET-73 instruction manual

Maverick

Maverick REDI CHECK SMOKER ET-73 instruction manual

TaiDoc TD-1261 operation instruction

TaiDoc

TaiDoc TD-1261 operation instruction

manuals.online logo
manuals.online logoBrands
  • About & Mission
  • Contact us
  • Privacy Policy
  • Terms and Conditions

Copyright 2025 Manuals.Online. All Rights Reserved.