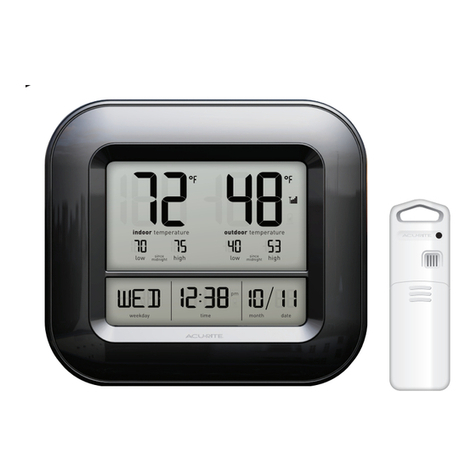
ACU-RITE 01031W User manual

Y
□
53
°
Chaney Customer Care
877-221-1252
Mon-Fri 8:00 a.m. to 4:30 p.m. CST
010131W INST 101410
°F °F
,2
I ue7
•
l□75
reless ermometer
model #01031W
Instruction Manual

Introduction
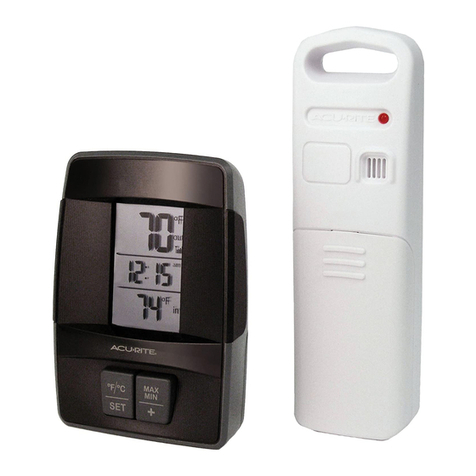
The Acurite® Thermometer with wireless outdoor sensor collects
outside weather data and sends it wirelessly to the Display Unit
via a low-power radio frequency. Thisthermometer has been
designed to be easy to install and use.
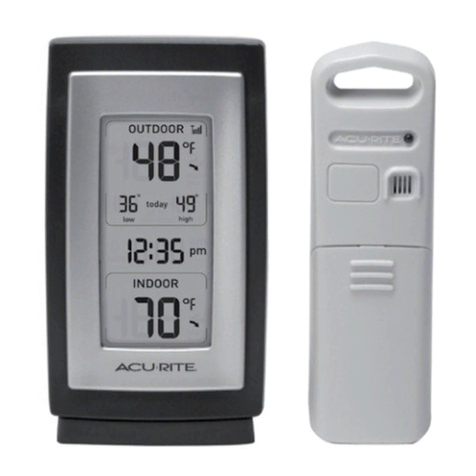
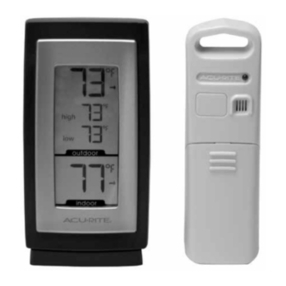
The sleek display unit houses a liquid crystal display (LCD)which
will calculate and display all the weather data received from the
wireless sensor outside. The display unit features a temperature
sensor for measuring indoor temperature. The Display Unit is
powered with two "AA" alkaline batteries (not included).
The wireless outdoor sensor is completely wireless and contains a
sensor for measuring outdoor temperature. The wireless outdoor
sensor is powered with two "AA" alkaline or lithium batteries (not
included).
Please read through this manual to learn more about the Acurite®
Thermometer. Keep this manual for future reference.
Parts Listmodel #01031 W
1. Display Unit
2. Wireless outdoor sensor
Overview
DisplayFeatures
current current
indoor outdoor
temperature temperature
, OF OF
I li11I
indoor temperature outdoor temperature
l
□
75
~□
53
today's today's
records: records:
indoor outdoor
temperature temperature
WE] 12=3Bpm
I
□/
11
weekday time month date
Self-Setting
atomic clocl<&
calendar
PRODUCT Sea evwordo m# (!!)
REGISTRATION ..•. lJ1 • CONTAC-,-US•
To receive product updates Product Documentation
and information, Frequently Asked Questions
(FAQ)
Log on to Troubleshooting
www.chaneyinstrument.com
1

SETUP
BatteryChoice& TemperatureRange
Extended periods of cold temperatures ( below -4°F / -20°C ) can cause
alkaline batteries to function improperly. This will cause the outdoor
wireless sensor to stop transmitting temperature readings. Use lithium
batteries in these low temperature conditions to ensure continued
operation for wireless sensors placed outdoors.
B~ff~~~" tt•W#i·H• (700C)158°F I
ALKALINE
BATTERIES
PLEASEDISPOSEOFOLDORDEFECTIVEBATTERIESINAN ENVIRONMENTALLY
SAFEWAYANDINACCORDANCEWITHYOURLOCALLAWSANDREGULATIONS.
BATTERY Clean contacts priortobattery RemovebattteriesfromSAFETY: thebattery andalsothoseofthedevice installation.
equipmentwhichisnottobeusedforanextendedperidoflime.Followthepolarity(+/·)diagraminthebatterycompartment.Promptlyremovedead
batteriesfromthedevice. ofused properly. ofthesame typeasrecommended DODispose batteries Onlybatteries orequivalent aretobeused. NOT
incinerateusedbatteries.DONOTdisposeofbatteriesinfire.asbatteriesmayexplodeorleak.DONOTmixoldandnewbatteriesortypesofbatteries
use batteries. NOT non-rechargeable DO short-circuit(alkaline/standard).DONOT rechargeable DO recharge batteries. NOT thesupplyterminals.
InstallingBatteries-WirelessSensor
Removethe battery
compartment cover.
Install 2 fresh "AA"
batteries as shown here.
BATTERIESMUST BE
INSTALLEDFOR THE
SENSOR TO OPERATE
InstallingBatteries- DisplayUnit
Removethe battery
compartment cover.
Install 2 fresh "AA"
batteries as shown
here.
2
SETUP
Aboutthe SelfSettingAtomicClock
A clock is considered atomic if it has an accuracy of one second in a
million years. Consumer clocks are considered atomic if they attain this
accuracy by receiving a signal from an atomic clock. In North
America, the National Institute of Standards and Technologies
operates an atomic clock in Colorado which transmits the time codes
via the radio station WWVB. The Acurite clock you have purchased
includes a built-in receiver which picks up the signal from the WWVB
station. For the best possible reception, place the display unit with the
back side facing Colorado. NOTE: Due to solar radiation in the
atmosphere, the atomic clock signal is weaker during the day. Most
synchronization with the WWVB atomic clock signal happens at night
when there is less interference.
DisplayUnit: BasicSetup
Press the "SET" button to enter into set mode. The time zone (next to
the clock display) will begin blinking.
To adjust the currently selected (flashing) preference item, press the
"..." or "...,." buttons.
To save your adjustments, press the "SET" button again to move on to
adjusting the next preference. The preference set order is as follows:
TIME ZONE ( PST MST CST ESTAST HASTAKST)
DST (Daylight Saving Time ON or OFF)
CLOCK HOUR
CLOCK MINUTE
CALENDARMONTH
CALENDAR DATE
CALENDARYEAR
You will automatically exit SETMODE if no entries are changed for 30
seconds. You may enter basic setup mode again at any time by
pressing the "SET" button.
TO SELECTEITHER°FOR °C TEMPERATUREUNITS:
Press the " ..." button while in normal display mode (NOT in "SET"
mode).
3

- -
Placement
Now that setup is complete, you must choose a location to place the
wireless sensor and the dis(?lay unit. The wireless sensor MUST be
placed less than 165feet (50 meters) away from the display unit.
Thiswireless forecaster uses radio frequency for communication, which
is susceptible to interference from other electronic devices and large
metallic items or thick walls. Always place both units at least 3 feet (.91
m) away from a.e.pliances ( TV, microwave, radios, etc. ) or obiects that
may interfere w1tlithe wireless communication ( large metal surfaces,
thick stone walls, etc. ). --'o''....
; I \'
AT
ILEASTI )}}) {{((
~
3feet
1.91ml
APART ~,
[165 feet maximum]
[50meters]
~,,. Placementof DisplayUnit
Place the display unit in a dry area free of dirt and dust. To
help ensure an accurate indoor temperature measurement, be
sure to place the display unit out of direct sunlight, and away
from any heat sources or vents in your home. There are 2
placement options for the display unit. You may hang the
display unit on a wall using the integrated hang hole.
Alternatively, you may place the display unit on a table top or
other flat surface using the integrated fold-out table top
display stand.
Placementof Sensor
The wireless sensor MUST BEPLACEDOUTDOORS to observe
outdoor temperatures. The wireless sensor must be placed less
than 165feet (50 meters) from the display unit. The wireless
sensor is water resistant and is designed tor general outdoor
use. However, to extend the life of tne product, place the
wireless sensor in an area protected from direct weather
elements. To ensure an accurate outdoor temperature
measurement, be sure the wireless sensor is placed out of
direct sunlight and away from any heat sources.
There are 2 placement options for the wireless sensor. You may
hang it using one of the two integrated hang holes, or use
string (not included) to hang it from a suitaole location like a
well covered tree branch.
4
TROUBLESHOOTING
Problem PossibleSolution
Bad
WirelessSensor
Reception
TiIll no bars
Relocate the display unit and/or the wireless
sensor. Both units must be within 165 feet (50
meters) from each other. Make sure both
units are placed at least 3 feet (.91 m) from
other electronic appliances and devices that
may interfere with the wireless
communication (such as TV's, microwaves,
computers etc). NOTE: It may take up to 20
minutes for the display unit to re-synchronize
with the sensor when batteries are replaced.
Use lithiumbatteries in sensor when
temperature is below -4°F (-20°C).
Bad
Atomic Clock
Reception
no bars
Too~~
Rotate the wireless sensor 90° on its mounting
point. Make sure the main unit and wireless
sensor are placed at least 3 feet (.91 m) from
other electronic appliances and devices that
may interfere with the wireless communication
(such as TV's, microwaves, computers etc).
Large metallic surfaces will interfere with the
atomic clock signal.
DisplayUnit
ScreenNotWorking
Batteries may need replacing
Check that batteries are correctly installed
5

SPECIFICATIONS
ProductFacts
Batteries: 4 x "AN' (not included)
LithiumBatteriesRecommendedbelow-4°F
MeasurementRanges
Outdoor Temperature: -40°Fto 158°F
-40°Cto 70°C
Indoor Temperature: 32°Fto 122°F
0°Cto 50°C
WirelessRange: 165ft/ 50m MAX
Dependingonhomeconstructionmaterials
For best accuracy & performance, place
the wireless sensor in a location protected
from direct sunlight and precipitation.
MADEINCHINA HECHOENCHINA
LimitedOneYearWarranty
Instructions& WarrantyEnclosed
CustomerCare:
877-221-1252
www.chaneyinstrument.com
Patent numbers: 5,978,738; 6,076,044; 6,597,990
ACURITE®isaregisteredtrademarkoftheChaneyInstrumentCo.
LakeGeneva,WI
Please DO NOT return product to the retail store.
For technical assistance and product return information, please call
Customer Care: 877-221-1252 Mon.- Fri.8:00A.M.to 4:30 P.M.[CST]
www.chaneyinstrument.com
Searc,.,keYNOrdor m#
. ..•. t.am.n u-; • CON1ACTUS..,.
PRODUCT ~
REGISTRATION
To receive product updates Product Documentation
and information, FrequentlyAskedQuestions
(FAQ)
Log on to Troubleshooting
.. .. . .
www.chaneyinstrument.com
~
-
--~
6 7
Table of contents
Other ACU-RITE Thermometer manuals

ACU-RITE
ACU-RITE 754 User manual

ACU-RITE
ACU-RITE 00891W3 User manual

ACU-RITE
ACU-RITE 603 User manual

ACU-RITE
ACU-RITE 00411 User manual

ACU-RITE
ACU-RITE 888 User manual

ACU-RITE
ACU-RITE 02042 User manual

ACU-RITE
ACU-RITE 425 User manual

ACU-RITE
ACU-RITE 00826 User manual

ACU-RITE
ACU-RITE 00986A2 User manual

ACU-RITE
ACU-RITE 00592W2 User manual

ACU-RITE
ACU-RITE 02084 User manual

ACU-RITE
ACU-RITE 01136 User manual

ACU-RITE
ACU-RITE 01185 User manual

ACU-RITE
ACU-RITE 612 User manual

ACU-RITE
ACU-RITE 01128HD User manual

ACU-RITE
ACU-RITE 01135 User manual

ACU-RITE
ACU-RITE 00891A2 User manual

ACU-RITE
ACU-RITE 02097 User manual

ACU-RITE
ACU-RITE 00529W User manual

ACU-RITE
ACU-RITE 305 User manual