manuals.online logo
Brands
  1. Home
  2. •
  3. Brands
  4. •
  5. Thermos
  6. •
  7. Grill
  8. •
  9. Thermos EXPRESS 06401314 User manual

Thermos EXPRESS 06401314 User manual

Owner's anuai
Assembly,Operation, Use and Care
®
E press
MODEL 06401314
If you smell gas:
1. Shut off gas to the appliance.
2. Extinguish any open flame.
3. Open lid.
4. ifodor continues, keep away from the appliance
and immediatelycall your gas supplier or your
fire department.
Failure to follow these instructionscould result in
fire or explosionwhich could cause property
damage, personal injuryor death.
1. Do not store or use gasoline or other
flammable liquids or vapors in the vicinity of
this or any other appliance.
2. An LP cylinder not connected for use shall not
be stored in the vicinity of this or any other
appliance.
INSTALLER/ASSEMBLER:Leavethese instructionswith
consumer.
CONSUMER:Keep this manual for future reference.
This manual contains important information necessary
for the proper assembly and safe use of the appliance.
Readand follow all warnings and instructionsbefore
assembling and using the appliance.
Follow all warnings and instructionswhen using the
appliance.
Keep this manual for future reference
Combustion by-products produced when using this
_roduct containchemicals known to the State of
California to cause cancer, birth defects, or other
reproductive harm.
cAuTioN
Some parts may contain sharp edges -- especially as
noted in the manual! Wear protective gloves if
necessary.
06401314. 80008895.08-08-07
Safety Symbols
Thesymbolsandboxesshownbelowexplainwhateachheading
means.Readandfollowall ofthemessagesfoundthroughoutthe
manual.
DANGER: Indicates an imminently hazardous
situation which, if not avoided, will result in death or
serious injury.
WARNING: Indicates a potentially hazardous
situation which, if not avoided, could result in death
or serious injury.CAUTION
CAUTION: Indicates a potentially hazardous
situation or unsafe practice which, if not avoided,
may result in minor or moderate injury.
CAUT o.
•Keep the fuel supply hose away from any heated
surfaces.
•For residential use only. Not intended for commercial use
•Do not leave appliance unattended. Keep children and
pets away from appliance at all times.
Installation Safety Precautions
* Use grill, as purchased, only with LP (propane) gas and the
regulator/valve assembly supplied.
Grill installation must conformwith localcodes, or in their
absence of local codes,with the National Fuel Gas Code,
ANSI Z223.1/NFPA 54, Storage and Handling of Liquefied
Petroleum Gasses, ANSI /NFPA 58.
•Grill is not for use in or on recreational vehicles and/or boats.
All electrical accessories (such as rotisserie) must be
electrically grounded in accordance with local codes, or
National Electrical Code, ANSI /NFPA 70. Keep any
electrical cords and/or fuel supply hoses away from any hot
surfaces.
Call Grill Service Center for Help and Parts
• If you need assistance with your product or warranty parts call
1-800-232-3398. Hours of Service Center Operation are
8:00 A.M. To 6:00 P.M.EST Monday- Friday.
• Toorder non-warranty replacement parts or accessories
pleasevisit us on the web at www.charbroil.com or call
1-800-232-3398 and one of our friendly and knowledgeable
agents will be glad to assist you.
This grill is safety certified for use in the United States only. Do
not modifyfor use in any other location. Modification will result
in a safety hazard.
Keep the fuel supply hose away from any heated
surfaces.
• Do not leave appliance unattended. Keep children and
pets away from appliance at all times.
Important: Fillout Warranty information below
Warranty Information
ModelNumber
Serial Number
Seeratinglabelongrillforserialnumber.
Date Purchased
2,06401314
ForYourSafety ...................................... 2
Grill Service Center................................... 2
Product Record Information ............................ 2
Installation Safety Precautions .......................... 2
Safety Symbols...................................... 2
Tableof Contents .................................... 3
Use and Care ..................................... 4-7
Parts List........................................... 8
Parts Diagram....................................... 9
Assembly ....................................... 10-14
Storing and Transporting....................................... 15
Troubleshooting.................................. 16-17
Warranty ................................... 18
Registration Card ................................... 19
Donot attempt to repair or alter the
hose/valve/regulatorfor any "assumed" defect. Any
modification to this assembly will void your warranty
and create the risk of a gas leak and fire. Use only
authorized replacement parts supplied by
manufacturer.
06401314 o3
il i,
For Safe Use of Your Grill and to Avoid Serious
Injury:
• Do not let childrenoperate or play near grill.
• Keep grill area clear and free from materialsthat burn (i.e.
gasoline, propane, or any other flammable liquid or gas).
• Do not block holes in bottom or back of grill.
• Check burner flames regularly.
• Never use regulator from this grill with any other LP
appliance.
• When cooking, the appliance must be on a level surface in
an area clear of combustible material.
• Use grill only in well-ventilated space. NEVER use in
enclosed space such as carport, garage, porch, covered
patio, or under an overhead structure of any kind.
• Do not use charcoal or ceramic briquets in a gas grill.
(Unless briquets are supplied with your grill.)
• This appliance is notintended for and should neverbe used
as a heater.
• Use grill at least3 ft. from any wall or surface. Maintain
10 ft. clearance to objects that can catchfire or sources of
ignition such as pilot lights on water heaters, live electrical
J
•Apartment Dwellers:
Checkwith management to learn the requirements and fire
codes for using an LP gas grill in your apartment complex.
If allowed, use outside on the ground floor with a three (3)
foot clearance from walls or rails. Do not use on or under
balconies.
• NEVER attempt to light burner with lid closed. A
buildup of non-ignited gas inside aclosedgrill is
hazardous.
• Never operate grill with LP cylinder out of correct
position specified in assembly instructions.
LP (Liquefied Petroleum Gas)
•Isnontoxic, odorless and colorless when produced. For Your
Safety, LP gas has been given an odor (similar to rotten
cabbage) so that it can be smelled.
• LP gas is highly flammable and may ignite unexpectedly
when mixed with air.
Propane Cylinder Use (1 lb. Disposable)
• Use only cylinder marked "Propane Fuel".
• Cylinder must be constructed and marked in accordance with
the specifications for LP-gas cylinders of the U.S. Department
of Transportation (DOT) or the National Standard of Canada,
CAN/CSA-B339, Cylinders, Spheres and Tubes for the
Transportation of Dangerous Goods.
• Size should be 4"diameter, 8"height, or 3"diameter, 10"
height.
• Save cylinder cap and reinstall when not in use.
• Cylinder supply system must be arranged for vapor
withdrawal. Gas cylinder must be upright in use.
Leak Testing (1 lb. Disposable)
• During leak test, keep grill away from open flames or sparks
and do not smoke. Grill must be leaktested outdoors inawell
ventilated area.
• Leaktest must be repeated each time gas cylinder is replaced
or after storage.
Materials needed include clean paint brushand 50/50 soap and
water solution. Use mild soap and water. Do not use
household cleaning agents. Damage to components can
result.
1. Be sure control knob on regulator is in "OFF" position.
2. Brushsoapy solution onto connection between gas cylinder
and regulator at (A).
Ifgrowing bubblesappear, there is a leak. Retighten
connection and repeatsteps 1 and 2.
AIf you cannot stop a leak, remove gas
cylinder from regulator and checkfor
damaged threads, dirt and debris on
regulator and gas cylinder.Also check to
see if anything isobstructing flow of gas at
regulator and gas cylinder openings.
Remove any obstruction that may be
found and repeat leak test. If threads are
damaged on either regulator or gas
cylinder, replace. Order new parts by
giving the serial, model numberand name
of items needed to the Grill Service Center
at 1-800-232-3398.
4,06401314
• NEVER store a spare cylinder under or near the
appliance or in an enclosed area.
• Never fill a cylinder beyond 80% full.
• An overfilled or improperly stored cyclinder is a hazard
due to possible gas release from the safety relief valve.
This could cause an intense fire with risk of property
damage, serious injury or death.
• If you see, smell or hear gas escaping, immediately get
away from the LP cylindedappliance and call your fire
department.
CAUTION
If ignitiondoes NOToccur in5seconds, turnthe
burner controls OFF,wait 5 minutes and repeat the
lighting procedure.If the burner does not ignite with
the valve open, gaswill continue to flow out of the
burner and could accidently ignitewith risk of injury.
Match Lighting
1. Attach matchto match lightingstick, light match.
2. Insertlit matchthrough grate and next to burner.Turn gas on
for appropriate burner. Repeat for other burner.
Safety Tips
The use of alcohol, prescription or nonprescription drugs
may impair the consumer's ability to properlyassemble or
safely operate the appliance.
When grill is not in use, disconnect 1 lb. cylinder.
Never move grill while in operation or still hot. Allow the
appliance to coolbefore moving or storing.
Use only tools supplied or plastic tools.
Maximum load for side shelves is 10 Ibs.
The regulator may make a humming or whistling noise
during operation. This will not affect safety or useof grill.
If you have a grill problem see the Troubleshooting Section.
Light burners. Check to make sure they are lit, close the lid
and warm up grillon highfor 20 minutes. Curing of paint
and parts will producean odor only on first lighting.
Grill is not to be used as a heater.
Match
lighting
stick
Ignitor Lighting
Do not lean over grill while lighting.
1. Open lid during lighting. Make sure LP cylinder is properly
connected to regulator.
2. Turn LEFT knobto i,_.
3. Turn rotary ignitor knob_l:(up to 5 times) to light. Be sure
burner lights and stays lit.
4. If ignition does NOToccur in 5 seconds, turn the burner
controls OFF,wait 5 minutes and repeatthe lighting
procedure.
5. Toignite RIGHT burner,turn right knob toi,_and repeat
steps 3-4.
6. If IGNITOR does notwork, follow match lighting instructions.
Turn controls OFF and disconnect cylinderwhen not
in use.
Before Your First Cookout.
Leak test your grill Light burners, checkto make sure they are
lit, close the lid and warm up grill on HIGHfor 10 minutes. Curing
of paint and parts will produce an odor only on first lighting.
Turning Grill Off
• Turnknobs to OFF position. Make sure knobs pop up. If it
does not, discontinue use and order new part.
•Disconnect 1 lb. Cylinder.
Hose Check
• Beforeeach use, check to see if
hoses are cut, worn or kinked.
Replace damaged hoses before
using grill. Use only
valve/hose/regulator specified by
manufacturer. Normal
Hose Kinked
Hose
06401314 •5
CAUTION
Putting out grease fires by dosing the lid is not
possibJe. GriJJsare weJJventiJated for safety
reasons,
Do not use water ona grease fire. PersonaJinjury
may result, ifagreasefire develops,turn knobs
and LP cylinder off.
Do not leavegriJlunattendedwhile preheating or
burning off food residueon Hi. if griJJhas not been
regularlycleaned, agreasefire canoccur that may
damagethe product.
Burner Flame Check
Light burner.Make sure burner stays
lit while rotating the control knob
from HIGHto LOW. Always check
flame prior to each use.
Cleaning The Burner Assembly
1. Turn gas off at control knobs and LP cylinder.
2. Remove cooking grids and vaporizer tents.
3. Remove pal nuts on burners. Unscrew electrode and move
to the side to remove burner. NOTE: Do not pull electrode
out.
4, Under grill remove grease tray.Clean with soap and water.
5. Wipe ceramic electrode with rubbing alcohol and cloth.
6. Clean burners exterior with soap and water. Lay burnerson
flat surface, insert garden hose (preferably with nozzle), into
burner tubes forcing water through tubes. Make sure water
comes out of every porthole. Open clogged portholes with a
thin wire. Shake out excess water and examine porthole.
Dueto normalwear and corrosion some portholes may
become enlarged, if so replace burner.If any horizontal
cracks appear from porthole to porthole or large holes(other
than portholes) are found replace burner.
7. If grill isto be stored, coat burners lightlywith cooking oil.
Wrap in protective cover to keep insects out. If not storing
use following steps.
VERY IMPORTANT: Burner tubes must engage valve
openings as shown (A).
8. Reattach burnersand electrodes.
9. Reposition cooking grids and vaporizer tents. Place clean
grease tray into grill bottom.
10. Beforecooking again on grill,
perform a "Leak Test"and
"BurnerFlame Check".
Valve
CAUTION
NATURAL HAZARD ,, SPIDERS
FACT: Sometimes spiders and other small insects climb
into the burner tubes attached to the burners. The
spiders spin webs, build nests and lay eggs. The
webs or nests can be very sma , but they .....
are very' stron9 and can block the flow : : _:_ f_-_
of gas C ean burners pror to use after _"::_:_:_::_::::,,J
storin 9, at the beginnin 9 of grilling season _::_: ::::":::
or after a period of one month not being used.
Spider guards are on the air intakes in an effort to
reduce this problem, but it will not eliminate it! An
obstruction can result in a "flashback" (a fire in the
burner tubes). The grill may still light, but the obstruction
does not allow full gas flow to the burners.
IF YOU EXPERIENCE THE FOLLOWING:
1. Smell gas.
2. Burner(s) will not light.
3. A small yellow flame from burner (should be blue).
4. Fire coming from around or behind control knob.
STOP!
Immediately turn off gas at LP cylinder!
SOLUTION:
Wait for grill to cool. ,,
Follow the "Cleaning the Bumer Assembly instructions.
Clean burners often. Use a 12 pipe cleaner to clean out
the burner tubes. You may also force a stream of water
from a hose nozzle through burner tubes to clean them.
General Grill Cleaning
•Do not mistake brown or black accumulation of grease and
smoke for paint. Interiorsof gas grills are not painted at the
factory (and should never be painted).Apply a strong solution
of detergent and water or use a grill cleaner with scrub brush
on insides of grill lid and bottom. Rinse and allow to
completely air dry.Do not apply a caustic grill/oven cleaner
to painted surfaces.
•Side Shelves: Wash with warm soapy water and wipe dry.
Donot use citrisol, abrasive cleaners, degreasers or a
concentrated grill cleaner on plastic side shelves. Damage to
and failure ofshelves can result.
Non-Stick Cooking Surface: Turn grill off before cleaning.
While still warm, pour a cup ofwater over cooking surface to
loosen grease and food particles and to speed cool-down.
Wipe cooking surfacewith a paper towel or sponge. Once
completely cool, cooking surface can be removed and washed
with warm soapy water or placed in dishwasher.
6 . 06401314
Burnertubescorrectly
engagedin valves
Storing Your Grill
•Clean cooking surface and grease container.
•When LP cylinder isconnected to grill, store outdoors in well-
ventilated space and out of reach of children.
•Cover grill ifstored outdoors.
•Store grill indoors ONLYif LP cylinder isturned offand
disconnected, removed from grill and stored outdoors in well-
ventilated space and out of reach of children.
•Leak test the grill after removing from storage and follow
Cleaning BurnerAssembly instructions before starting grill.
•Keep grill area clear and free from materials that burner (i.e.
gasoline, propane or other flammable liquid or gas).
•Do notblock holes in bottomor back of grill.
Non-Stick Cooking Surface Use and Care.
• Use only plastic tools.
•Do not cut food on surface.
•Do not put pots or panson surface.
•Do notleave lid down for more than 10 minuteswithout food
on the grill. Non-stick surface may be damaged.
CAUTION
When cooking on non-stick griddle, keep burner
set on low and keep lid open.
How To Tell If Meat Is Grilled Thoroughly
•Meat and poultry cooked on a grill often browns very fast on the
outside. Use a meat thermometer to be sure food has reached
a safe internaltemperature, and cut into food to check for
visual signs of doneness.
• Whole poultry should reach 180° F; breasts, 170° F.Juices
should run clear andflesh should not be pink.
• Hamburgers madeof any ground meat or poultry should reach
160° F,and be brown in the middlewith no pinkjuices. Beef,
veal and lamb steaks, roasts and chops can be cooked to 145°
F.All cuts of pork should reach 160° F.
• NEVER partially grill meat or poultry and finish cooking later.
Cook food completely to destroy harmful bacteria.
• When reheating takeout foods or fully cooked meats like hot
dogs, grill to 165° F,or until steaming hot.
Food Safety
Foodsafety is a very important part of enjoying the outdoor
cooking experience. Tokeep food safe from harmful bacteria,
follow these four basic steps:
Clean: Wash hands, utensils, and surfaces with hot soapy water
beforeand after handling raw meat and poultry.
Separate: Separate raw meats and poultry from ready-to-eat
foods to avoid cross contamination. Use a clean platter and
utensilswhen removing cooked foods.
Cook: Cook meat and poultry thoroughly to kill bacteria. Use a
thermometer to ensure proper internal food temperatures.
Chill: Refrigerate prepared foods and leftovers promptly.
Formore information call: USDA Meat and Poultry Hotline at
1-800-535-4555 In Washington, DC (202) 720-3333, 10:00 am-
4:00 pm EST
06401314 •7
A 55710316 LOGO PLATE, THERMOS, GRILL-2-GO 1
B 80008883 LIDASSEMBLY 1
C 80008857 HANDLE LIGHTASSEMBLY 1
D 55710317 LID HANDLE 1
E 55710318 COOKING GRATE, SET OF 2 1
F 80008892 VAPORIZER BAR 2
G 55710310 BURNER, TUBULAR, STAINLESS 2
H 80008862 BOTTOM CASTING 1
I 80001812 MATCH HOLDERAND CHAIN ASSEMBLY 1
J 55710314 VALVE /MANIFOLD ASSEMBLY 1
K 80008868 HEAT SHIELD, CONTROL PANEL 1
L 80008855 LEFT SIDE SHELF ASSEMBLY 1
M 80008854 RIGHTSIDE SHELF ASSEMBLY 1
N 55710313 PANEL, CONTROL 1
O 55710312 SIDE HANDLE, LOWER CASTING 2
P 80008860 HOSE /REGULATORASSEMBLY, F/1 POUND TANK 1
Q 80001826 KNOB, CONTROL 2
R 80005457 KNOB, ROTARY IGNITOR 1
S 55710311 IGNITIONKIT 1
T 80008858 GREASE TRAYASSEMBLY 1
U 55710315 LEG ASSEMBLY 2
V 80008893 HUBCAP, LEG 4
W 80005477 SPACER, BOTTOM CASTING 2
... 80008895 ASSEMBLYMANUAL 1
... 80008894 PARTS BAG 1
CertifiedGrillPartsAndAccessories®,Char-BroilandDesign®,Char-Broil(Gas GrillBriquettes)®,Char-Diamonds®,CookingZoneandDesign®,DiamondFlame®,Executive
Chef®,Faststart®,FlareFighter®,FlavorMaster®,GasGrillSilouetteand Design®,H20 Smoker®,LavaFlame¢, MasterFlame¢,MasterFlamePrecisionCookingSystem@,
PowerSpark®,Quantum®,PrecisionFlameand Design®,Sierra®andTruFlame®areregisteredTrademarksof theW.C.BradleyCompany.Thermos®isa registeredtrademarkofthe
ThermosCompanyanditsaffiliates,
ArtisanCollectiionbyChar-BroilT_'_,C3and DesignT_'_,Char-Broiland DesignT_'_,Flame DesignTM, FlavorTentsTM, Grill2GO TM, Grillin'Stick T_'4,Keeperof theFlameTM, Keepersof the
FlameTM, NaturalGripTM, OutdoorCookingCollectionand DesignT_',PatioBistroT_'_,PrecisionFlameT_',Pro-CheckT_',QuickSetGrillsandDesignTM, SmokerTentsT_'_,TheBigEasyT_'LThe
MinuteGrillTM ,TheEdgeTM, TheTuscanCollectionT_',and TheUrbanGrillT_'areTrademarksoftheW.C.BradleyCompany.UniversalGrill Partsand DesignT_'is atrademarkofthe
ThermosCompanyanditsaffiliates.
Protectedunderoneor moreofthefollowingU.S.Patents:4,598,692;4,624,240;4,747,391;4,817,583;4,924,846;4,989,579;5,003,960;5,076,256;5,076,257;5,090,398;
5,109,834;5,224,676;5,277,106;5,421,319;5,441,226;5,452,707;5,458,309;5,566,606;5,579,755;5,582,094;5,613,486;5,649,475;5,706,797;5,711,663;5,765,543;5,931,149;
5,996,573;6,095,132;6,135,104;6,173,644;6,279,566;6,397,731;6,418,923;6,439,222;6,523,461;6,792,936;6,935,327;D282,619;D339,714;D341,292;D343,337;D358,059;
D361,466;D364,535;D372,637;D373,701;D377,735;D383,035;D397,910;D405,643;D405,643;D406,005;D406,009;D413,043;D413,229;D414,982;D415,388;D416,164;
D416,441;D417,587;D422,516;D423,274;D423,876;D428,303;D435,396;D463,004;D438,059;D438,060;D438,427;D439,110;D442,505;D443,179;D443,354;D447,384;
D447,385;D447,909;D448,610;D448,614;D448,615;D448,616;D448,975;D449,492;D451,759;D456,202S;D460,313;D461,359;D477,501andD504,048.Canada:87743;87744;
92607;92608and 1,316,424.OtherPatentsPending.
© 2006W.C.BradleyCo.,All RightsReserved.
8,06401314
W
R
O
06401314 • 9
1)
2)
3)
Lay bottom casting assembly upright on level ground. Best to place on top of protective
mat or cardboard to reduce scratching.
Insert each leg assembly onto bottom casting assembly. Assure cutouts on leg pivot
engages over threaded tabs on bottom casting assembly.
Attach each leg assembly using (2) #10-24x3" screws.
Leg
Assemblies Threaded Tabs
#10 x 3"
Screw
Qty: 4
#10-24x3"
Screws
Bottom Casting
Assembly
1) Open legs and set grill upright standing on legs. Note: Legs
will lock into slot on side handles.
2) Secure (4) caps over legs locking area.
Side Handle
Slots
10 , 06401314
1) Attach handle to grill lid using (4) #10-24 x 3/8" screws.
Use ONLYhand drivenscrewdriver. 113onotover tighten
Handle
/
#10-24 x 3/8"
Screw
Qty: 4
#10-24 x 3/8"
Screw
Grill Lid
1) Attach grill lid to grill bottom using (2) hitch pins and (2) cotter pins.
Hitch Pin
Qty: 2
Cotter Pin
Qty: 2
Cotter Pin
Grill Bottom
Grill Lid
Hinge Pin
06401314 • 11
1) Remove (2) battery covers from handle light by loosening (2) screws.
2) Insert (4) AA batteries (NOT INCLUDED), 2 per battery compartment as indicated on
handle light.
3) Replace covers and secure screws that were loosened earlier.
AA Batteries
Handle Light
Battery Cover
1)
2)
Insert hook end on handle light into right side of handle, push down on other side to lock
handle light in place.
To remove handle light, slide release button on left side of handle light, pull handle light
up.
Handle Light
Handle Light Handle Light
Handle
Handle'
XHandle Light
Button
12 o 06401314
1)
2)
Attach (2) control knobs and (1) rotary ignition knob by aligning holes with control panel as
shown.
Remove (4) clear protectors from shelf supports.
Control Knob
Qty: 2
Rotary Ignitor Knob
Qty: 1
Clear Pr(,tectors
Control Knob
Control Knob
Rotary Ignitor
Knob
Control Knob
Rotary Ignitor
Knob
1) Open grill lid, unfold side shelves.
2) Remove (2) cooking grates from grill.
3) Install (2) vaporizer bars by inserting round end of vaporizer bar inside front hole of grill.
Rest rear end of vaporizer bar over support rib on back side of grill.
4) Replace cooking grates. Note: Maximum shelf load should not exceed 10 Ibs.
Cooking Grates
Va Bar Front of Grill
ht Side
Shelf
Left Side
Shelf
Back side
of Grill
06401314 •13
1) Close grill lid.
2) Insert hose regulator support wires into holes provided in end of left side-shelf.
3) Remove yellow cap from gas inlet located bottom rear side of grill.
4) Bring hose connector to the rear of grill.
5) Pull back outer ring of hose connector and push connector onto back of gas inlet.
Release outer ring. Ring should connect and lock hose in place.
NOTE: Perform leak test as described in Care & Use section before operation.
Remove
Yellow Cap
Hose Regulator
Support Wires \
Note:
Hose
Outer Ring
Left Side Shelf
If using a longer 1 pound cylinder make sure left side shelf hangs over tables
edge.
14 ' 06401314
NOTE: Allow grill to cool down to room temperature before handling.
1) Remove regulator hose assembly.
2) Fold side shelves into bottom casting, and close lid.
3) Fold both legs inward towards center underneath bottom casting.
4) Using match holder located at rear of grill, secure legs together by inserting loop ends of
match holder over leg notch located on each leg.
Legs fold
Inward
Match Holder
Leg Notches
06401314 •15
EMERGENCIES:
Gasleakingfrom
cracked/cut/burned
hose.
, Damagedhose. , Turnoffgasatsource.Replacedamagedvalve/hose/regulator.
SeeLeakTestandConnectingRegulatorToTheLPCylinder.
Gasleakingfrom LP , Mechanicalfailuredueto rustingor , ReplaceLPcylinder.
cylinder, mishandling.
Gasleakingfrom LP , Failureofcylindervalvefrom , Turnoffgasvalves.ReturnLPcylindertogassupplier.
cylindervalve, mishandlingor mechanicalfailure.
Gasleakingbetween , Improperinstallation,connectionnot , Turnoffgasvalves.Removeregulatorfromcylinderandvisually
LPcylinderand tight,failureofrubberseal. inspectrubbersealfordamage.SeeLeakTestandConnecting
regulatorconnection. RegulatorToTheLPCylinder.
Firecomingthrough
controlpanel. , Firein burnertubesectionof burnerdue
toblockage. , Turnoffgasvalves.Leavelidopento allowflamestodiedown.
Afterfire isoutandgrilliscold,removeburnerand inspectfor
spidernestsorrust.SeeNaturalHazardandCleaningTheBurner
Assemblypages.
i!ii!iim ,fa0as,eakcannotbestopp
Greasefireor
continuousexcessive
flamesabovecooking
surface
Burner(s)willnot light
usingignitor.
Continued on next
16 . 06401314
GASISSUES:
, Toomuchgreasebuildupinburnerarea.
,Tryingtolightwrongburner.
°Burnernotengagedwithcontrolvalve.
, Obstructionin burner.
, Nogasflow.
ELECTRICALISSUES:
, Electrodecrackedor broken;"sparksat
_d,or a fire occursdue to gasleakage, call the fire departmer
, Turnoffgasvalves.Leavelid opentoallowflamestodiedown.
Aftercooling,cleanfoodparticlesandexcessgreasefrominside
fireboxarea,greasecupfpan/tray,andothersurfaces.
, Seeinstructionson controlpanelandin Useand Caremanual.
, Makesurevalvesarepositionedinsideofburnertubeswithclips
attached(iffeatured).
, Ensureburnertubesare notobstructedwithspiderwebsor other
matter.Seecleaningsectionof UseandCaremanual.
, MakesureLPcylinderisnotempty.If LPcylinderisnotempty,
referto"Suddendropin gasflow."
, Replaceelectrode(s).
crack."
, Electrodetipnotinproperposition.
° Wireand/orelectrodecoveredwith
cookingresidue.
, Wiresare looseor disconnected.
• Wiresareshorting(sparking)between
ignitorandelectrode.
, Tipofelectrodeshouldbe pointingtowardportholein burner.The
distanceshouldbe1f8"to 3f16".Adjustif necessary.
, Cleanwireand/orelectrodewithrubbingalcoholandcleanswab.
, Reconnectwiresor replaceelectrode/wireassembly.
, Replaceignitorwire.
Burner(s)willnotlight
usingignitor.
Troubleshooting(continued)
ROTARYIGNITION:
, Rotaryknobrotateswithoutclicking.
, Sparkingbetweenignitorandelectrode. • Replaceknob.
• Inspectwireinsulationandproperconnection.Replacewiresif
insulationisbroken.
Burner(s)willnot
matchlight.
Flamesblowout.
Flare-up.
Persistentgreasefire.
Flashback...
(firein burnertube(s).
Burnerdoesnotcarry
flamearoundtoother
side.
• See"GAS ISSUES:"onpreviouspage.
• Matchwillnotreach.
Impropermethodof match-lighting.
• Highorgustingwinds.
• Lowon LPgas.
, Greasebuildup.
• Excessivefatin meat.
• Excessivecookingtemperature.
• Greasetrappedbyfoodbuilduparound
burnersystem.
• Burnerand/orburnertubesare blocked.
• Greasebuildupin ports
• Usepapermatch,long-stemmatch(fireplacematch)or match
holder(wheresupplied).
• See"Match-Lighting"sectionof UseandCaremanual.
• Turnfrontofgrilltofacewindor increaseflameheight.
• Replace/refillLPcylinder.
• Cleanburnersand insideofgrill/firebox.
• Trimfat frommeatbeforegrilling.
• Adjust(lower)temperatureaccordingly.
• Turnoffgasvalves.Leavelidinpositionandletfireburnout.After
grillcools,removeandcleanallparts.
• Turnoffgasvalves.Cleanburnerand/orburnertubes.Seeburner
cleaningsectionofUseandCaremanual.
• Cleanportsofburner.
06401314 • 17
Manufacturerwarrantstotheoriginalconsumer-purchaseronlythatthisproductshallbefreefromdefectsinworkmanshipand materialsafter
correctassemblyandundernormalandreasonablehomeusefortheperiodsindicatedbelowbeginningonthedateofpurchase.
Themanufacturerreservestherighttorequirethatdefectivepartsbereturned,postageandorfreightpre-paid,bytheconsumer,forreviewand
examination. 90 DaysLIMITEDwarranty
Uponconsumersupplyingproofofpurchaseasprovidedherein,Manufacturerwill repairorreplacethepartslistedbelowwhichareproven
defectiveduringtheapplicablewarrantyperiod.Partsrequiredtocompletesuchrepairor replacementshallbefreeofchargetoyouexceptfor
shippingcosts.Theoriginal consumer-purchaserwill beresponsiblefor all shipping charges of parts replacedunderthe terms of this
limited warranty.
Thislimitedwarrantyisapplicableinthe UnitedStatesandCanadaonly,isonlyavailabletotheoriginalowneroftheproductandis not
transferable.Manufacturerrequiresreasonableproofofyourdateofpurchase.Therefore,youshouldretainyoursalesslipor invoiceandregister
yournewproductimmediately.Defectiveor missingpartssubjecttothis limitedwarrantywillnotbereplacedwithoutregistrationor proofof purchase.
Registeronlineat http:ttwww.charbroil.comor completeandreturnviamailtheProductRegistrationCardlocatedonthelastpageoftheUse& Care
manualincludedwiththis productandretainyoursalesreceiptforproofof purchase.
ThislimitedwarrantyappliestothefunctionalityoftheproductONLYanddoesnotcovercosmeticissuessuchasscratches,dents,corrosions
or discoloringbyheat,abrasiveandchemicalcleanersor anytoolsusedintheassemblyor installationoftheappliance,surfacerust,or the
discolorationofstainlesssteelsurfaces.
Thislimitedwarrantywillnotreimburseyouforthecostofanyinconvenience,food,personalinjuryorpropertydamage.
If anoriginalreplacementpartisnotavailable,a comparablereplacementpartwillbesent.Youwillbe responsibleforall shippingchargesof
partsreplacedunderthetermsofthis limitedwarranty.
ITEMSMANUFACTURERWILL NOTPAYFOR:
1. Servicecallstoyourhome.
2. Repairswhenyourproductisusedforotherthannormal,single-familyhouseholdor residentialuse.
3. Damageresultingfromaccident,alteration,misuse,abuse,fire,flood,actsofGod,improperinstallation,installationnotinaccordancewith
electricalorplumbingcodes,or useof productsnotapprovedbythemanufacturer.
4. Anyfoodlossdueto productfailures.
5. Replacementpartsor repairlaborcostsforunitsoperatedoutsidetheUnitedStatesor Canada.
6. Pickupanddeliveryof yourproduct.
7. Repairsto partsor systemsresultingfromunauthorizedmodificationsmadeto theproduct.
8. Theremovaland/orreinstallationofyourproduct.
9. Shippingcost,standardorexpedited,forwarrantyandreplacementparts.
DISCLAIMEROFIMPLIEDWARRANTIES;LIMITATIONOFREMEDIES
Repairor replacementofdefectpartsisyourexclusiveremedyunderthetermsofthislimitedwarranty.Manufacturerwillnotberesponsiblefor
anyconsequentialor incidentaldamagesarisingfromthebreachof eitherthis limitedwarrantyor anyapplicablewarranty,orforfailureor damage
resultingfromactsofGod,impropercareandmaintenance,greasefire,accident,alteration,replacementof partsbyanyoneotherthan
Manufacturer,misuse,transportation,commercialuse,abuse,hostileenvironments(inclementweather,actsofnature,animaltampering),improper
installationor installationnotinaccordancewithlocalcodesor printedmanufacturerinstructions.
THISLIMITEDWARRANTYISTHESOLEEXPRESSWARRANTYGIVENBYTHEMANUFACTURER.NOPRODUCTPERFORMANCE
SPECIFICATIONORDESCRIPTIONWHEREVERAPPEARINGISWARRANTEDBY MANUFACTUREREXCEPTTOTHEEXTENTSETFORTH
INTHISLIMITEDWARRANTY.ANYIMPLIEDWARRANTYPROTECTIONARISINGUNDERTHELAWSOFANYSTATE,INCLUDINGIMPLIED
WARRANTYOFMERCHANTABILITYORFITNESSFORA PARTICULARPURPOSEORUSE,ISHEREBYLIMITEDIN DURATIONTOTHE
DURATIONOFTHISLIMITEDWARRANTY.
Neitherdealersnor the retail establishmentselling this product has anyauthority to make_ additional warranties or to promise
remediesin addition to or inconsistentwith those stated above.
Manufacturer'smaximumliability,inanyevent,shallnotexceedthedocumentedpurchasepriceoftheproductpaidbytheoriginalconsumer.
This warranty only applies to units purchasedfrom an authorized retailerand or re-seller.
NOTE:Somestatesdonotallowanexclusionorlimitationofincidentalorconsequentialdamages,sosomeoftheabovelimitationsor
exclusionsmaynotapplyto you.Thislimitedwarrantygivesyouspecificlegalrightsassetforherein.Youmayalsohaveotherrightswhichvary
fromstatetostate.InthestateofCaliforniaonly,ifrefinishingor replacementoftheproductisnotcommerciallypracticable,theretailersellingthis
productor theManufacturerwillrefundthepurchasepricepaidfortheproduct,lesstheamountdirectlyattributableto usebytheoriginalconsumer-
purchaserpriortodiscoveryofthenonconformity.Inaddition,inthestateofCaliforniaonly,youmaytaketheproducttotheretailestablishment
sellingthisproductinordertoobtainperformanceunderthislimitedwarranty.
If youwish to obtain performanceof any obligation under this limited warranty, youshould write to:
Char-BroilConsumerRelations
R O.Box 1240
Columbus, GA31902-1240
Consumerreturnswillnotbeacceptedunlessa validReturnAuthorizationisfirstacquiredbycalling1-800-232-3398.andthenclearlymarked
on theoutsideofthepackageandthepackageis shippedfreighttpostagepre-paidtotheaddressabove.
18 , 06401314
Pleaseregisteryour rillonlineat:
(if you registeronline, you do not need to send in this registration card.)
PLEASEFiLLOUTTHiSCARDANDRETURNiTWITHIN10DAYSOFPURCHASE.FAILURETORETURNMAYAFFECTYOURWARRANTYCOVERAGE.
LLENEESTATARJETAYDEVUI_LVALADENTRODELOS10DiASDELACOMPRA.S!NOLADEVUELVE,PUEDEVERSEAFECTADASUCOBERTURADEGARANT/A.
VEUILLEZCOMPLETERCETTECARTEETLA RETOURNERBANSLES10JOURSSUNANTL'ACNAT.
LACOUVERTUREDEVOTREGARANTIEPOURRAITENETREAFFECTEESIVOUSNELEFAITESPAS.
3
4
First Name/Nombre/Pr_nom Initial/inicial/InitiaieLastName/Apeliido/Nomdefamilie
IIIIIIIIIIIIIIII L_J IIIIIIIIIIIIIIIIIIIIII
Address(number and street)/Birecci6n (n_mero y caiie)/Adresse (numero et rue) AptNumber/N-°deapart./N-Qd'appt,
IIII IIIIIIIIIIIIIIIIIIIIIIII IIIIII
City/CiudadHille State/Estado/Provinee ZipCode/C6digozip/Codepostal
IIIIIIIIIIIIIIIIIIIIIIII L_J__J IIIIII
E=mailAddress/Direcci6ndecorreoelectr6nice/Adresse_Jectroeiqee
If you voluntarily provide us with your email address, you give us permission to use your email address to send you offers that may interest you,
Si nee informa voluntariamente su direecidn de correo etectrdnico, nos da permiso para usado a fin de enviade ofertas que pueden interesarle,
Si vous choisissez de nous fournir votre adresse 61ectrenique, vous nous donnez la permission de t'utiliser pour vous faire part d'offres speciates susceptiblee
de vous interesse_:
II
(Example: your name@your host.cem) (Ejemplo: su nombre@su host.cam) (Exemple : votre nom@votre hdte.com)
PhoneNumber/Nlimerotelef6nico/Nurn_rode t_16phone 6Bateof Purchase/Fechade sompra/Datede rachat
__J__L_JL_J.___J._JIIIII L_J._JL___L__JIIIII
IMPORTANT!/ilMPORTANTE!/IMPORTANT!
Write Serial Number and Model Number in spaces below.
Escriba en los espacios de abajo el n6mero de serie y e! n6mero
de modelo.
Inscrivez le num6ro de s6rie et le num6ro de meddle dans los
espaces ci-dessous.
7 StoreNarne/Nornbredela tienda/Norndu magasin
IIII III IIIII IIIIII
8PurchasePfice/Preciode cornpra/Prixd'achat
sl I I I I .go
5Your Gender/Su sexo/Sexe: 1. } MaleiMasculino/Masculin 2._ Female/Femenino/Feminin
Which product are your registering?
i,Qu_ producto est_ registrando?
Quel preduit enregistrez-veus?
1.[] Gas GriiVParriiia de gas/
Gril au gaz
2.[] Electric Grill/Parrilla electrica!
Gril 61ectrique
3._ Smoker/Ahumadora/Fumoir
4.il Charcoal GfilVParrilla de carb6n/
Barbecue au charbon
5.}Charcoal SmokedAhumadora de
carb6n/Fumoir au charbon
6.I Outdoor Fireplace/Hogar para
exteriores/Foyer exterieur
7._ Cooker/Fryer /CocinaJfreidora /
CuiseuriFriteuse
8._ Other/Otro/Autre
Mail to:
Product Registration Dept.
PO BOX 1240
Columbus, Georgia 31902=1240
10 Which of these sources influenced your decision to buy this product? (check aH that apply)
i.Cu_l de estas funnies infiaonci6 asudecisi6n de cumprar este producto? (Marque tedas las
que currespandan)
Parmi ins _l_rnents ci-dessnas qu'est-ce qui ainfluenc6 votre d_cision d'acheter ce produit?
(Cochez teas ins _16ments s'appliquant)
1. _ Magazine/newspaper advertisement /Propaganda en revista/pefi6dico /
Publicite dans un magazine ou dans un journal
2.L ; Television commerciai/Comercial televisivo/Publicit_ & la t_i_vision
3. _ GriiJ was assembied/ParriJia ensambJadaJLe gril 6tait d6j& assembJ6
4.L; In-store dispJay/Exhibidor en la tiendaiPromotion sur JeJieu de vente
5. _ Store circuiar/CircuJar de Ja tienda/Prospectus de magasin
6.[] Brand name/Marco/Marque
7,E Product style/Estilo del producto/Style du produit
8.[ Price/value /Precio/valor /Rapport pdx/valeur
9. _ Product quality/Calidad del producto/Qualit_ du produit
10._ Friend/Relative recommendation /Recomendaci6n de amigo o pafiente /
Recommandation d'un(e) ami(e)/parent(e)
11. Salesperson recommendation/Recomendacidn del vendedor/
Recommandation d'un(e) prOpose(e) & la vente
12. _ Grill size[Tamafio de la parrilla/Taille du gril
13. _ Product warranty/Garantfa del producto/Garantie du produit
14. _ Store demonstration/Demostracidn en la tienda/D_monstration en magasin
15. iJ Point of purchaseiPunto de compra/Lieu de vente
16. I Other/Otras/Autre:
Thank you for completing this questionnaire. Your answers will help us and other companies reach you with offers that
may interest you. If you prefer not to receive these offers, please check here _.
Gracias per completar este cuestionario. Sus respuestas has ayudaran, a nosotros y a otras compafifas, a Ilegar a
ustedes con ofertas que puedan resultarles de interes. Si prefiere no recibir estas ofertas, per favor marque aquf
Merci d'avoir bien voulu remplir ce questionnaire. Vos reponses nous aideront et aideront d'autres compagnies &vous
communiquer des offres speciales susceptibles de vous interesser. Si vous preferez ne pas recevoir d'informations
concernant cos offres speciales, veuillez cocher ici _.
06401314 •19
Should you encounter a problem with our product
CALL US FIRST
Do not return this product to the store,
WE CAN HELP
GRILL SERVICE CENTER
1-800=232-3398
HOURS 8AM-6PM EST Mon-Fri
Please ensure your warranty registration is complete,
Grilling Safety Checklist
[] Read and understandowners manual.Checktubes for spiderwebs.
[] Ensure valvesare correctly installed in burnertubes,
[] Always ensure control knobs are in OFF positionand regulatoris
attachedto tank BEFOREopening tank valveto avoid lowflames.
[] Perform leaktest regularly'.
Thank Youfor Your Purchase!
Char-Broil,LLC• Columbus,GA31902, Printedin China

Other manuals for EXPRESS 06401314

1

Other Thermos Grill manuals

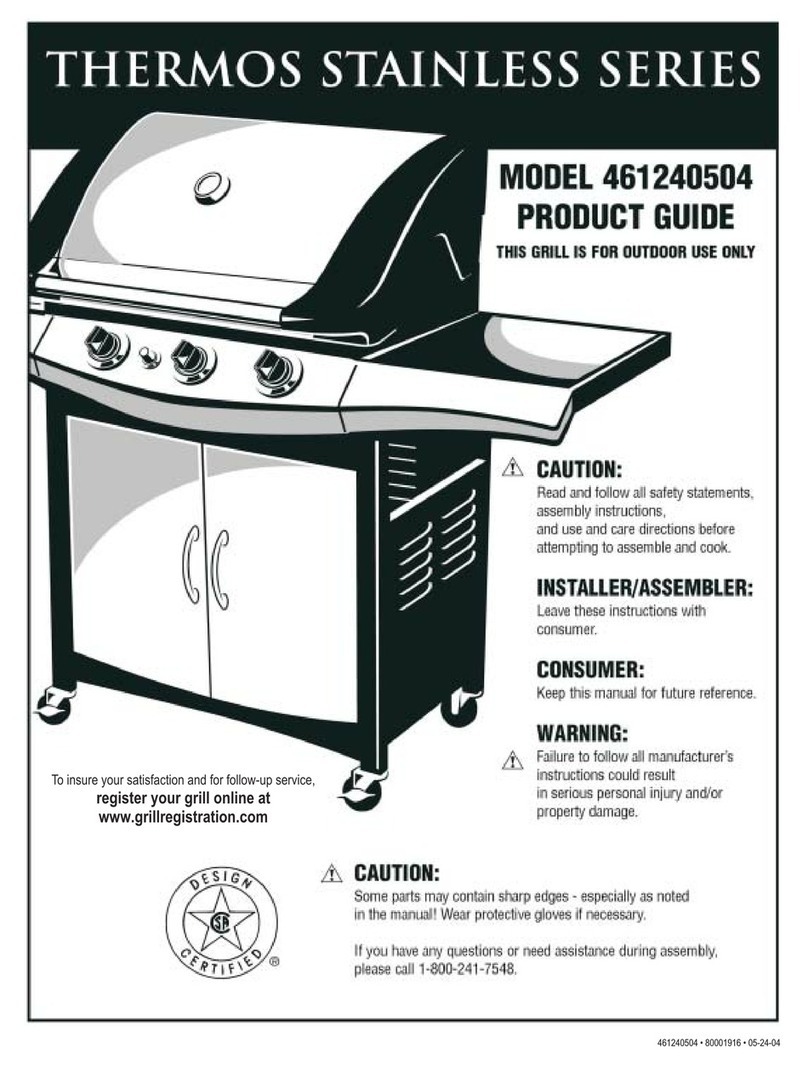
Thermos 461320508 User manual

Thermos

Thermos 461320508 User manual

Thermos 461240504 User manual

Thermos

Thermos 461240504 User manual

Thermos 461410707 User manual

Thermos

Thermos 461410707 User manual

Thermos 461111803 User manual

Thermos

Thermos 461111803 User manual

Thermos 461611514 C-21G0 User manual

Thermos

Thermos 461611514 C-21G0 User manual

Thermos 461271108 User manual

Thermos

Thermos 461271108 User manual

Thermos Thermos T420 User manual

Thermos

Thermos Thermos T420 User manual

Thermos 461630510 User manual

Thermos

Thermos 461630510 User manual

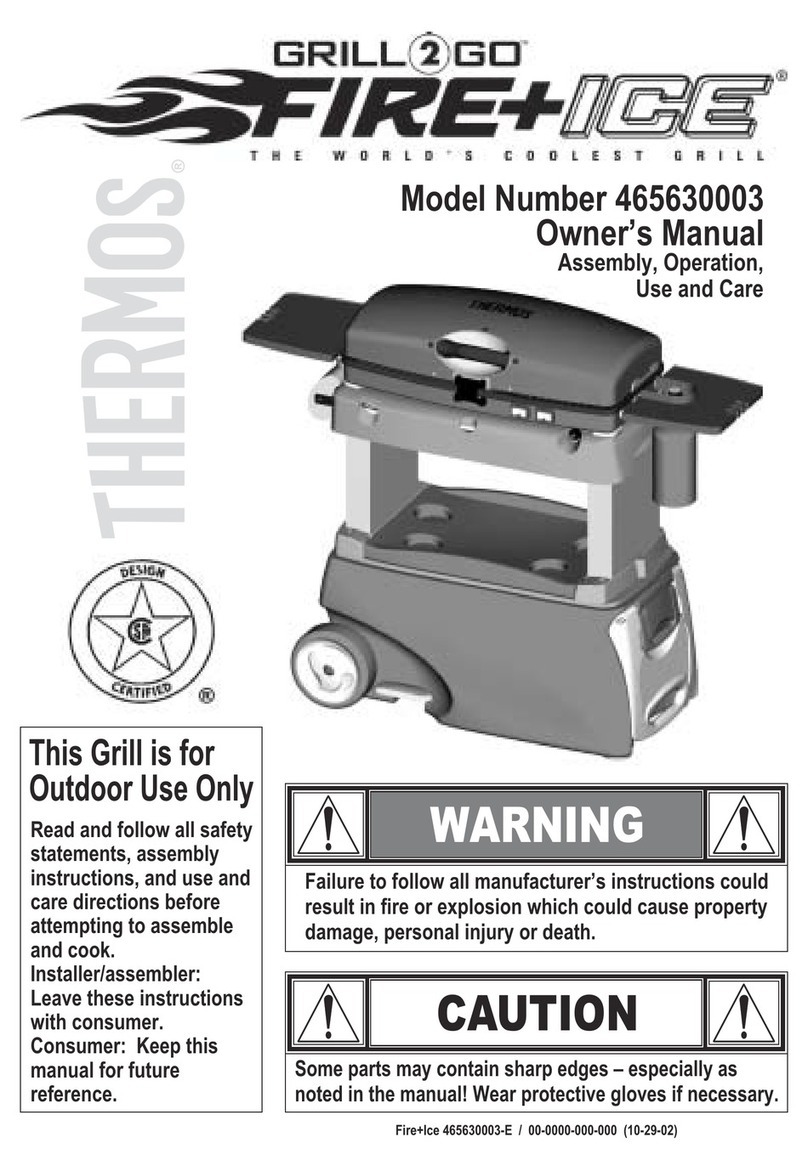
Thermos 465630003 User manual

Thermos

Thermos 465630003 User manual

Thermos 06401369 User manual

Thermos

Thermos 06401369 User manual

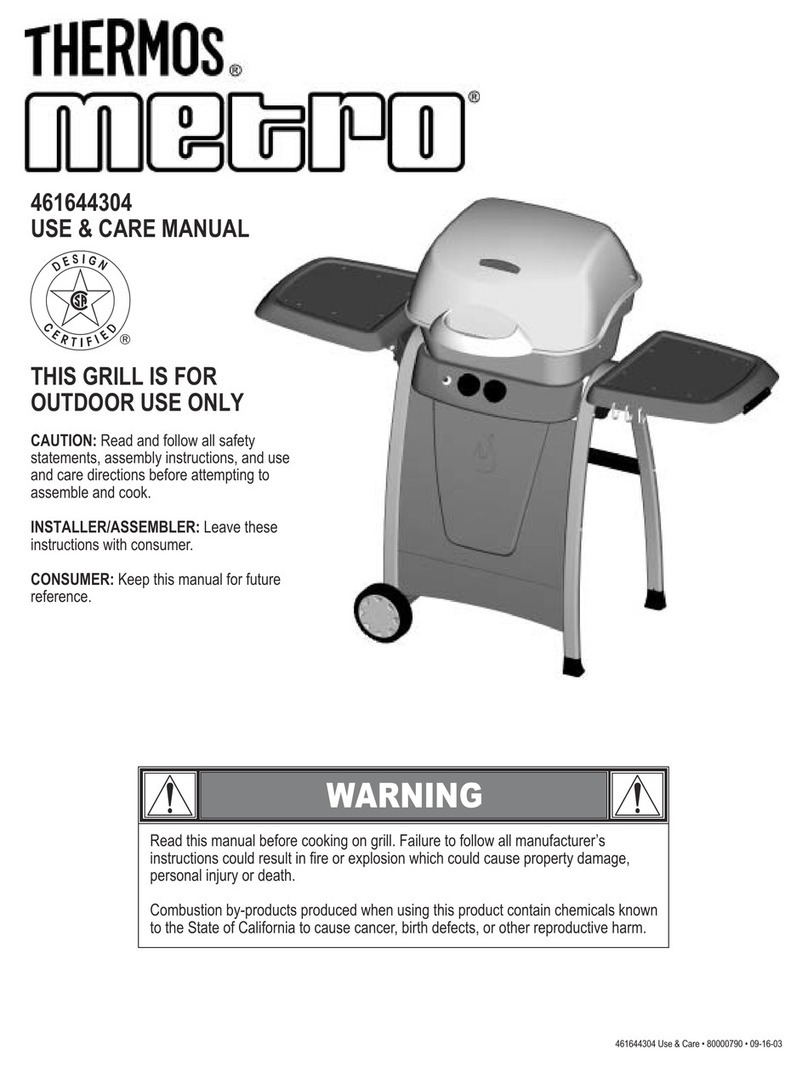
Thermos 461644304 User manual

Thermos

Thermos 461644304 User manual

Thermos 14302006 User manual

Thermos

Thermos 14302006 User manual

Thermos 461669906 User manual

Thermos

Thermos 461669906 User manual

Thermos GRILL2GO Advantage 07401407 User manual

Thermos

Thermos GRILL2GO Advantage 07401407 User manual

Thermos 4611118 User manual

Thermos

Thermos 4611118 User manual

Thermos 461411107 User manual

Thermos

Thermos 461411107 User manual

Thermos 461410708 User manual

Thermos

Thermos 461410708 User manual

Thermos 461632208 User manual

Thermos

Thermos 461632208 User manual

Thermos 461630509 User manual

Thermos

Thermos 461630509 User manual

Thermos Premium 461246804 User manual

Thermos

Thermos Premium 461246804 User manual

Thermos 461230404 User manual

Thermos

Thermos 461230404 User manual

Thermos The Big Easy Quickset Traditional LP Gas... Installation instructions

Thermos

Thermos The Big Easy Quickset Traditional LP Gas... Installation instructions

Thermos 461674519 User manual

Thermos

Thermos 461674519 User manual

Thermos 461252705 User manual

Thermos

Thermos 461252705 User manual

Popular Grill manuals by other brands

Ziegler & Brown ZGIGK operating instructions

Ziegler & Brown

Ziegler & Brown ZGIGK operating instructions

Strend Pro VALENCIA instruction manual

Strend Pro

Strend Pro VALENCIA instruction manual

Tecnoinox GD8FG7 manual

Tecnoinox

Tecnoinox GD8FG7 manual

Klarstein DR. BEEF II manual

Klarstein

Klarstein DR. BEEF II manual

Esschert Design Fancy Flames FF444 manual

Esschert Design

Esschert Design Fancy Flames FF444 manual

Nouvel 403925 Instructions for use

Nouvel

Nouvel 403925 Instructions for use

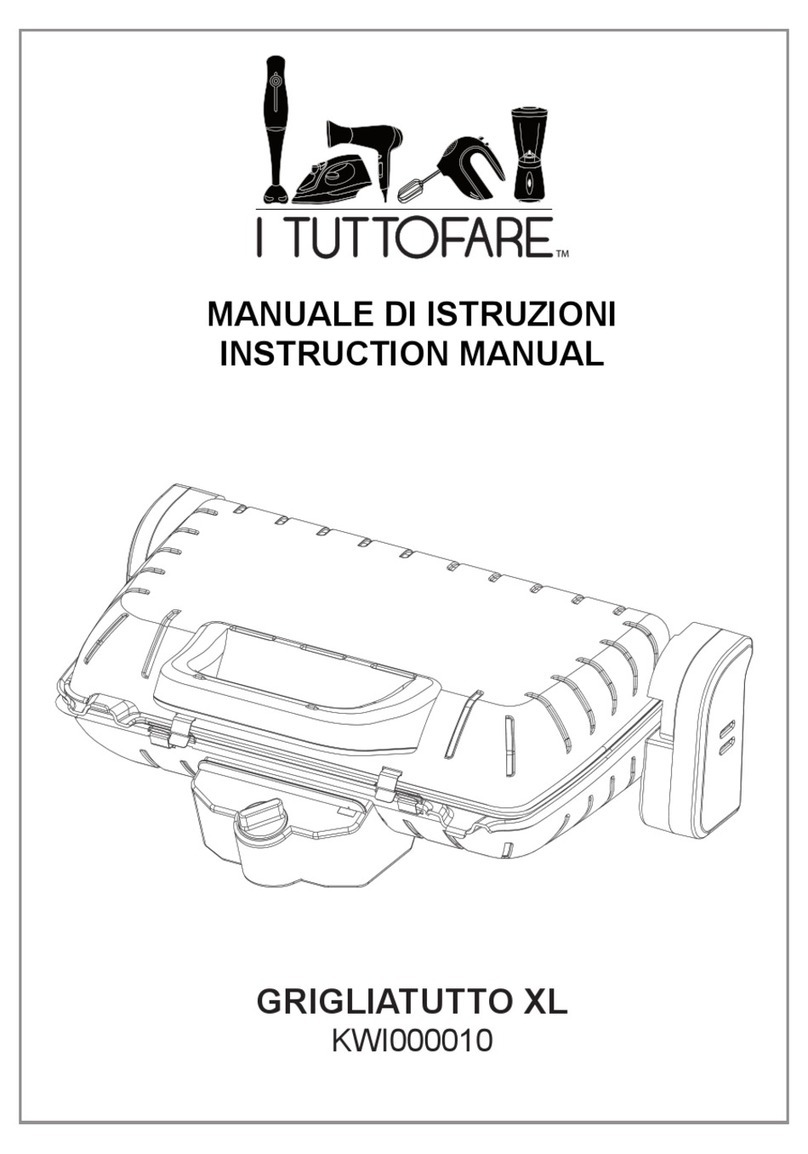
I TUTTOFARE GRIGLIATUTTO TOP KWI000010 instruction manual

I TUTTOFARE

I TUTTOFARE GRIGLIATUTTO TOP KWI000010 instruction manual

Fiesta EZL24025-B401 Assembly manual

Fiesta

Fiesta EZL24025-B401 Assembly manual

Lacor JOIN Instructions for use and maintenance

Lacor

Lacor JOIN Instructions for use and maintenance

KitchenAid 720-0826 Installation Instructions and Use & Care Guide

KitchenAid

KitchenAid 720-0826 Installation Instructions and Use & Care Guide

Coleman 9993 Series Assembly manual

Coleman

Coleman 9993 Series Assembly manual

Chefman RJ23-SG manual

Chefman

Chefman RJ23-SG manual

Clatronic ST/WA 3170 instruction manual

Clatronic

Clatronic ST/WA 3170 instruction manual

CombiSteel 7478.0110 instruction manual

CombiSteel

CombiSteel 7478.0110 instruction manual

TEFAL Largo Leaflet

TEFAL

TEFAL Largo Leaflet

Redmond RBQ-0252-E user manual

Redmond

Redmond RBQ-0252-E user manual

Clas Ohlson BQ1703XL-SWGF manual

Clas Ohlson

Clas Ohlson BQ1703XL-SWGF manual

Char-Broil 463620410 Product guide

Char-Broil

Char-Broil 463620410 Product guide

manuals.online logo
manuals.online logoBrands
  • About & Mission
  • Contact us
  • Privacy Policy
  • Terms and Conditions

Copyright 2025 Manuals.Online. All Rights Reserved.