Thermrup HS614 User manual

1
DE Ferninfrarot Beheizbarer Schal
GB Far Infrared Heating Scarf
FR Écharpe chauffante infrarouge lointain
Gebrauchsanweisung
InstructionManual
Modell: HS614
Bitte sorgfältig lesen!
Please read carefully!
Lisez attentivement s'il vous plaît!

2
Deutsch
Inhalt
1. Wichtige Anweisungen………………………………………………………..2
2. Lieferumfang ..........................................................................3
3. Produkteigenschaften………………………………………………………….3
4. Anwendung………………………………………………………………………….3
5. Reinigung und Pflege……………………………………………….………... 4
6. Hinweis zu Entsorgung………………………………………………………...5
7. Technische Daten.…………………………………………………………………5
8. Garantie……………………………………………………………………………….5
1. Wichtige Anweisungen
•Ein Nichtbeachten der nachfolgenden Hinweise kann Personen- oder
Sachschaden verursachen.
•Verwenden Sie den beheizbaren Schal nicht bei Kindern, behinderten oder
schlafenden Personen sowie bei Menschen, die hitzeunempfindlich sind und
nicht auf Überhitzung reagieren können.
•Kinder dürfen nicht mit dem Schal spielen.
• Dieser Schal darf nur in Verbindung mit dem auf dem Etikett angegebenen
Akku betrieben werden.
• Nicht das Kabel ziehen, drehen oder scharf knicken.
• Verwenden Sie zum Aufladen des Akkus ausschließlich des mitgelieferten
Ladegeräts.
• Wenn der Schal über mehrere Stunden benutzt wird, empfehlen wir die
niedrigste Temperaturstufe einzustellen, um eine Überhitzung des erwärmten
Körperteils zu vermeiden.
• Wenn Sie den Schal nicht täglich benutzen, dann trennen Sie den Schal von
dem Akku.
**** Beenden Sie die Benutzung, wenn der Schal unangenehm heiß wird!

3
2. Lieferumfang
•1 x Schal
•1 x Akku
•1 x Ladegerät
•1 x Gebrauchsanweisung
3. Produkteigenschaften
Der Thermrup Ferninfrarot Beheizbare Schal für In- und Outdoor-Anwendungen
bietet tiefe Wärme durch Ferninfrarot-Technologie und ermöglicht gleichzeitig eine
gute Bewegungsfreiheit. Der Schal ist einfach anzulegen, bequem und sicher. Er
verfügt über drei einstellbare Temperaturstufen, die individuell angepasst werden
können. Das spezielle Gummi-Heizelement zeichnet sich durch eine große Heizfläche
und eine gleichmäßige Wärmeverteilung aus. Der Schal kann in der Waschmaschine
gereinigt werden.
4. Anwendung
4.1 Aufladungen des Akkus
•Vor der ersten Benutzung und nach längerer
Nichtbenutzung laden Sie den Akku für ca. 4 Stunden auf,
um sicherzustellen, dass er vollständig geladen ist.
•Um den Akku aufzuladen, verbinden Sie das Ladegerätskabel mit dem Akku und
stecken Sie es in eine Steckdose. Während des Ladevorgangs leuchtet die LED auf
dem Ladegerät rot. Sobald der Akku vollständig geladen ist, leuchtet die LED grün.
Sie können dann das Ladegerät von der Steckdose und vom Akku trennen.
*** Wenn Sie den Heizschal längere Zeit nicht benutzen, empfehlen wir Ihnen,
den Akku alle 6 Monate ausreichend aufzuladen, um sicherzustellen, dass er
ordnungsgemäß funktioniert.
Rechter Teil Linker Teil
Regler
Akku-Tasche

4
4.2 Betrieb
•Platzieren Sie den Schal nun um Ihren Nacken. Führen Sie
den linken Teil des Schals durch den rechten Teil hindurch.
•Ziehen Sie das Kabel von der Akku-Tasche. Verbinden Sie
das Kabel mit dem Akku.
•Setzt Sie den Akku in die Akku-Tasche ein.
•Halten Sie die Power-Taste des Reglers für ca. 2 Sekunden gedrückt, um die
Heizfunktion einzuschalten. Drücken Sie anschließend die Power-Taste kurz (ggf.
mehrmals), um die gewünschte Temperaturstufe (Stufe 1-2-3, Rot-Grün-Blau)
einzustellen.
•Die erste Stufe ist die wärmste Stufe (LED-Anzeige leuchtet rot).
•Die zweite Stufe ist die mittlere Stufe (LED-Anzeige leuchtet grün).
•Die dritte Stufe ist die niedrigste Stufe (LED-Anzeige leuchtet
blau).
•Die vier T-LEDs zeigen außerdem die verbleibende Akkukapazität an (abhängig
von der Helligkeit der T-LEDs).
•Nach 30 Sekunden wechselt der Powerbutton in den Stromsparmodus, und die
LED-Anzeige wird dunkler, aber die Heizfunktion bleibt aktiv. Drücken Sie die
Power-Taste erneut kurz, um den Stromsparmodus zu verlassen und wie zuvor
die gewünschte Stufe einzustellen.
•Halten Sie die Power-Taste ca. 2 Sekunden gedrückt, um bei Bedarf die
Heizfunktion auszuschalten.
*** Beenden Sie die Benutzung, wenn Sie Hautrötungen bemerken! Übermäßige
Hitze kann zu Verbrennungen führen.
5. Reinigung und Pflege
•Vor jeder Reinigung, trennen Sie den Akku vom dem Schal.
•Verwenden Sie nie aggressive Reinigungsmittel oder starke Bürsten.
•Der Schal kann in der Waschmaschine bis 45°C in einem Waschsack oder
mitgelieferte Waschbeutel gewaschen werden.
•Der Schal darf nicht in einem Trockner getrocknet oder gebügelt werden.
Rückseite

5
6. Hinweise zur Entsorgung
Dieses Gerät darf nicht zusammen mit dem Hausmüll entsorgt werden. Jeder
Verbraucher ist verpflichtet, alle elektrischen oder elektronischen Geräte,
egal, ob sie Schadstoffe enthalten oder nicht, bei einer Sammelstelle seiner
Stadt oder im Handel abzugeben, damit sie einer umweltschonenden
Entsorgung zugeführt werden können. Wenden Sie sich hinsichtlich der
Entsorgung an Ihre Kommunalbehörde oder Ihren Händler.
7. Technische Daten
Modell : HS614
Stromversorgung
Heizschal : 3,7V ; max. 5W
Netzteil: Eingang : 100-240V ~ 50/60Hz
Ausgang : 5V ; 2A
Akku : Li-Po 3,7V; 2600mAh
Abmessungen : ca. 99x13cm
Gewicht : ca. 215g
8. Garantie
Wir bieten eine Garantie von 2 Jahren ab dem Kaufdatum für Material-
und
Herstellungsfehler des Produkts an.
Die Garantie gilt nicht in folgenden Fällen:
•Bei Schäden, die durch unsachgemäße Bedienung verursacht wurden.
•Für Verschleißteile.
•Bei Schäden, die auf eigenes Verschulden des Kunden zurückzuführen sind.
•Sobald das Gerät von einer nicht autorisierten Werkstatt geöffnet wurde.
Um einen Garantiefall innerhalb der Garantiezeit geltend zu machen, muss der Kunde
den Kaufnachweis erbringen.
Bei Reklamationen wenden Sie sich bitte an unseren Kundenservice unter f
olgender
Kontaktmöglichkeit:
Weitere Wärmeprodukte und Zubehör finden Sie in unserem Online Shop:
www.thermrup.de

6
English
Contents
1. Important instructions…………………………………………….…………….6
2. Package contents… ...................................................................7
3. Product features…………………………………………………….…………..…7
4. Operation………………………………………………………………...……………7
5. Cleaning and maintenance……………………………….……..………......8
6. Disposal ………………………………………………………………..………….…..8
7. Technical Data………………..……………………….…………………….………9
8. Warranty………………………………………………….………..……….…………9
1. Important instructions
•Failure to observe the following information can cause personal injury or
property damage.
•Do not use the heating scarf on children, disabled people, people who are sleeping
or people who are insensitive to heat and who cannot react to overheating.
•Children are not allowed to play with the device.
•This heating scarf may only be operated in connection with the battery specified
on the label.
•Do not pull, twist or sharply kink the cable.
•Only use the charger supplied to charge the battery.
•If the heating scarf is used for several hours, we recommend that you set the
temperature to the lowest possible level in order to avoid overheating of the
heated body part.
•If you do not use the heating scarf every day, pull the connection plug of the
heating scarf out of the battery.
•Stop using if the scarf becomes uncomfortably hot.

7
2. Package Contents
•1 x heating scarf
•1 x charger
•1 x Battery
•1 x instruction manual
3. Product features
The Thermrup far infrared heating scarf for indoor and outdoor use, offers deep
warmth with far infrared for the waist with good freedom of movement. It's easy
to put on, comfortable and safe. It has 3 adjustable temperature levels. The
special rubber heating element has a large heating surface and even heat
distribution. The heating scarf is machine washable.
4. Operation
4.1 Charging the battery
•Before using it for the first time or after a long period of non-
use, the battery must be fully charged for at least 4 hours.
•To charge the batteries, connect the charger cable to the
battery and to a socket. During the charging process, the LED
on the charger lights up red. When the battery is fully charged, the LED on the
charger lights up green. You can then disconnect the charger from the mains
and from the battery.
*** If you will not use the heating scarf for a long time, charge the battery
sufficiently every 6 months to ensure that it functions properly.
4.2 Battery operation
Now place the heating scarf on your shoulders. Pull the left
part into the right part. Fasten the buttons behind the right
part.
Right Part Left Part
Regler
Battery Bag

8
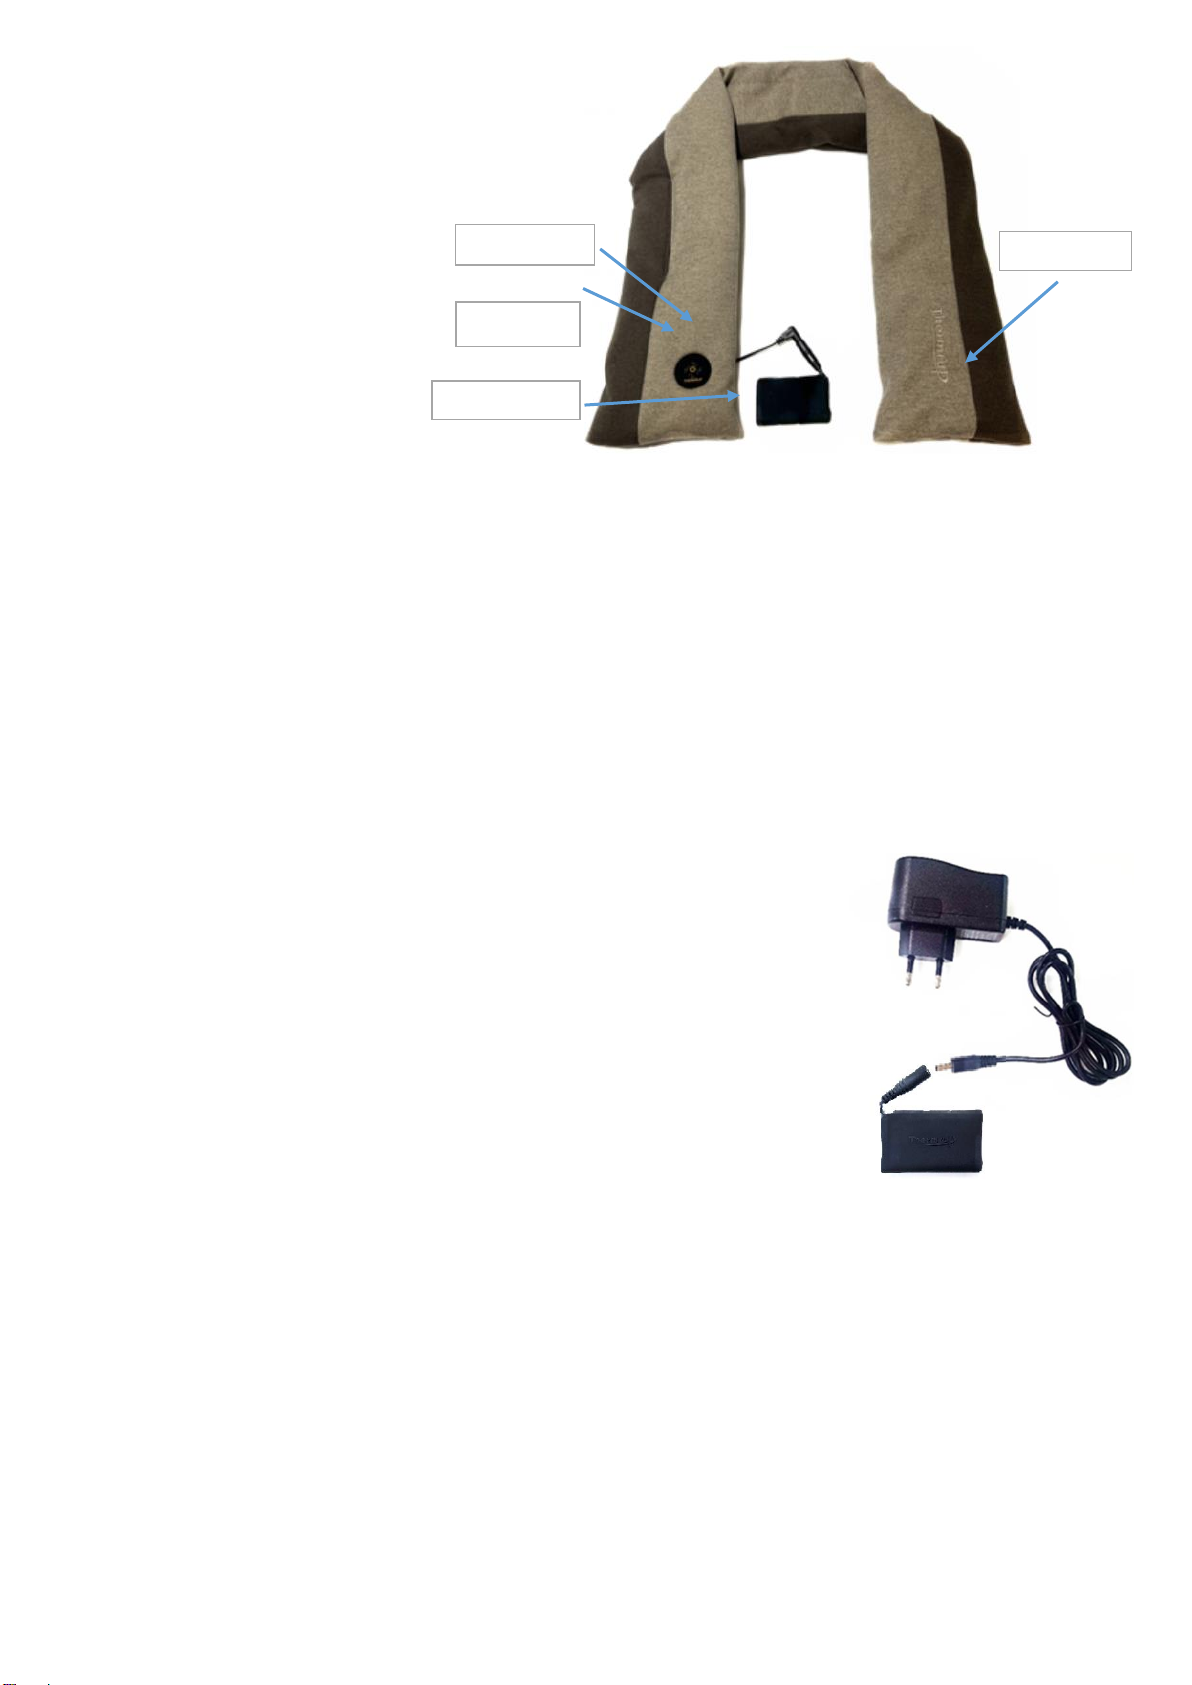
•Pull the cable from the battery bag. Connect the cable to the battery.
•Place the battery in the battery bag.
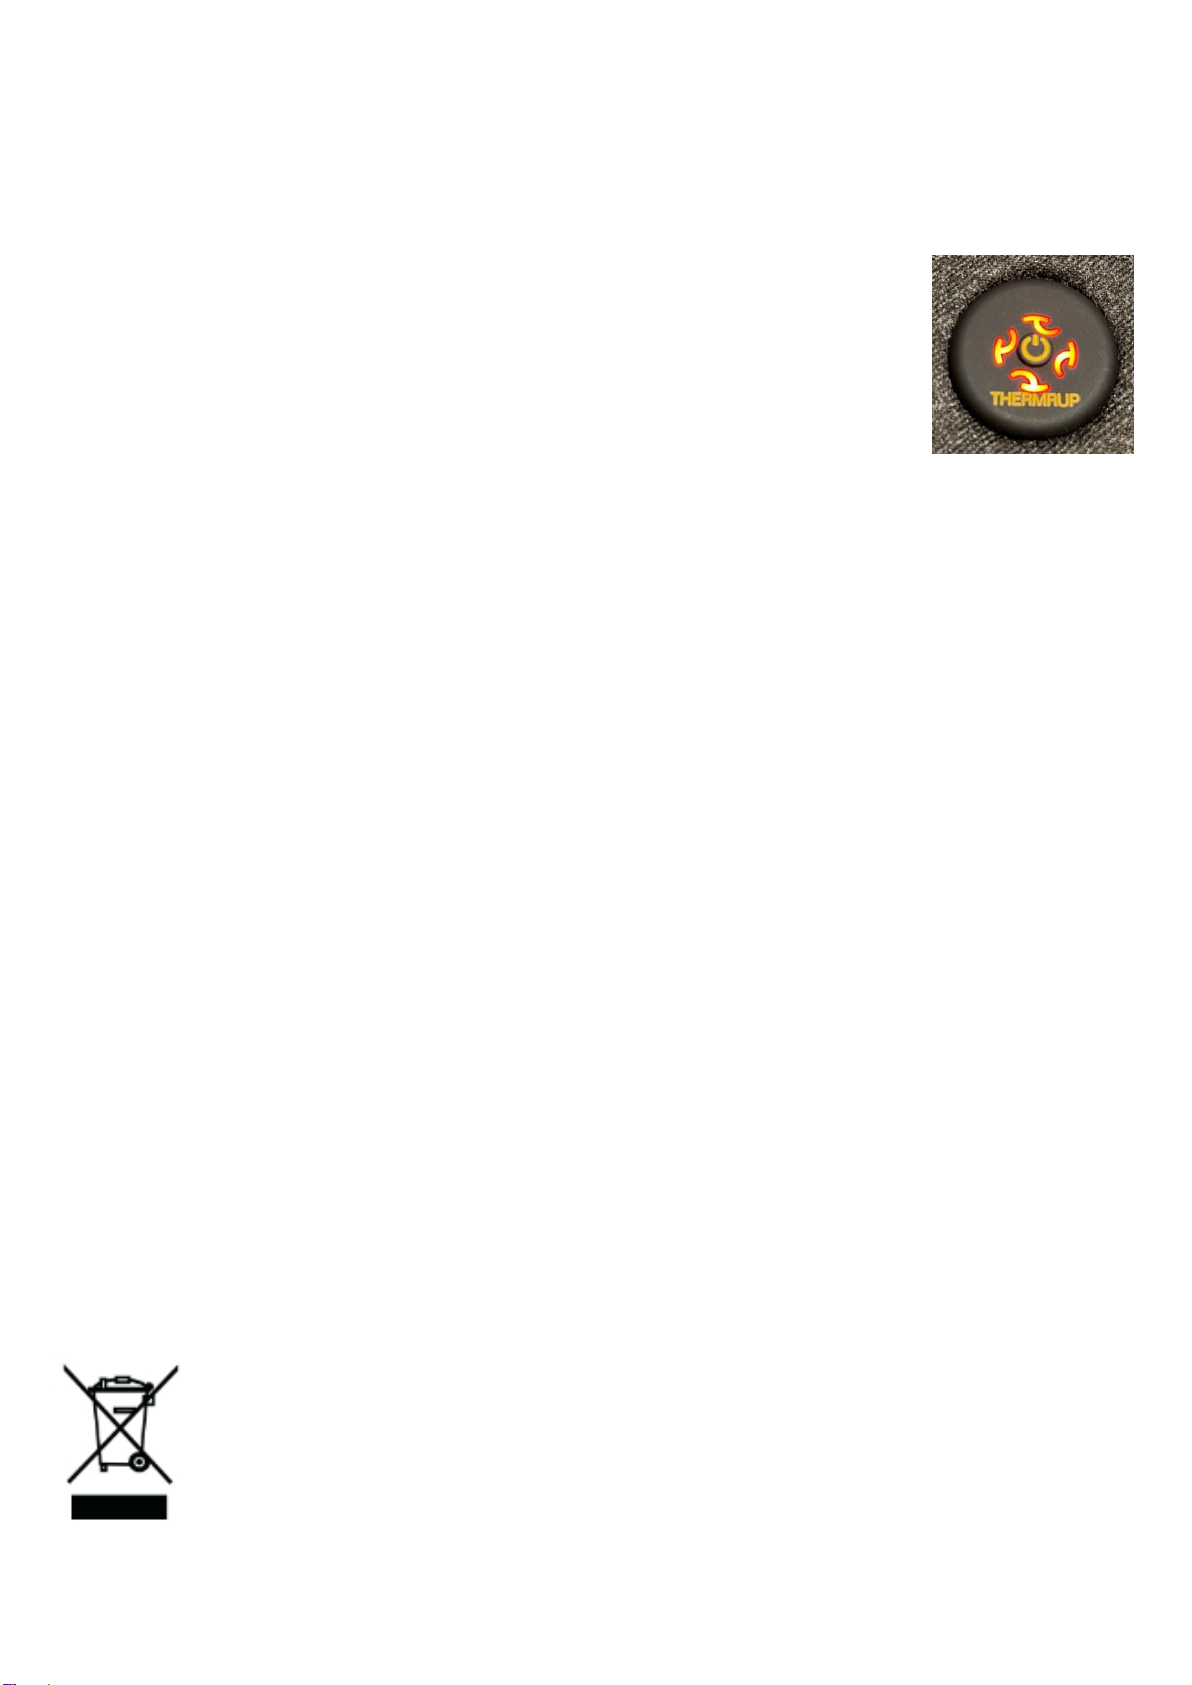
•Press the on / off switch for approx. 2 seconds to switch on the heating function.
Then press the On / Off button briefly (repeatedly if necessary) to set the desired
temperature level (level 1-2-3, red -green -blue).
The 1st level is the warmest level, the LED display lights up red.
The 2nd level is the middle level, the LED display lights up green.
The 3rd level is the lower level, the LED display lights up blue.
•The four T-LED shows the remaining capacity of the battery.
•After 30 seconds, the power button will go into power-saving mode and the LED
indicator will darken, but the heating function will continue. If you desire a
different temperature level during use, briefly press the power button again to
unlock it from power-saving mode. You can then set your desired level as
described above.
•Press the on / off switch for approx. 2 seconds to switch off the heating function.
** Stop using it if you see redness on your skin. Excessive heat can cause burns!
5. Cleaning and maintenance
•Before cleaning, disconnect the heating scarf from the battery or power supply.
•Never use aggressive cleaning agents or strong brushes.
•The heating scarf can be washed in the washing machine up to 45 ° C in a
washing bag or supplied washing bag.
•The heating scarf should not be dried or ironed in a dryer.
6. Disposal
This product must not be disposed together with the domestic waste. All users
are obliged to hand in all electrical or electronic devices, regardless of whether
or not they contain toxic substances, at a municipal or commercial collection
point so that they can be disposed of in an environmentally acceptable manner.
Consult your municipal authority or your dealer for information about disposal.

9
7. Technical data
Model : HS614
Power supply
Heating scarf : 3.7V; Max. 5W
Power supply Input : 100-240V ~ 50 / 60Hz
Output : 5V; 2A
Battery : Li-Po 3.7V; 2600mAh
Dimensions : approx. 99x13 cm
Weight : approx. 215g
8. Warranty
We provide a 2-year warranty from the date of purchase for material and
manufacturing defects of the product.
The warranty does not apply:
oIn the case of damage caused by improper use.
oFor wear parts.
oCustomer's own fault.
oOnce the unit has been opened by an unauthorized workshop.
For the assertion of a warranty within the guarantee period, the customer must
prove the purchase.
In case of complaints please contact our service under the following contact:
Zewox GmbH
Oststr.159
47057Duisburg
Germany
www.thermrup.com

10
Contenu
1. Consignes importantes………………………………………………………..10
2. Contenu de la livraison ..............................................................................11
3. Caractéristiques du produit…………………………………………..……….11
4. Candidature……………………………………………………………..………11
5. Nettoyage et entretien………………………………………………….………12
6. Informations sur l'élimination………………………………………………..…13
7. Spécifications.………………………………………………………………..…13
8. Garantie………………………………………………………………………….13
1. Consignes importantes
•Le non-respect des instructions suivantes peut entraîner des blessures
corporelles ou des dommages matériels.
•N'utilisez pas l'écharpe chauffante sur des enfants, des personnes
handicapées ou endormies, ou des personnes insensibles à la chaleur et ne
pouvant pas réagir à une surchauffe.
•Les enfants ne sont pas autorisés à jouer avec le foulard.
•Ce foulard est conçu pour être utilisé uniquement avec la batterie spécifiée
sur l'étiquette.
•Ne tirez pas, ne tordez pas et ne pliez pas brusquement le cordon.
•Utilisez uniquement le chargeur fourni pour charger la batterie.
•Si l'écharpe est utilisée pendant plusieurs heures, nous vous
recommandons de régler le niveau de température le plus bas pour éviter
la surchauffe de la partie du corps chauffée.
•Si vous n'utilisez pas le foulard tous les jours, débranchez le foulard de la
batterie.
**** Arrêtez d'utiliser si l'écharpe devient trop chaude !
Français
Français

11
2. Contenu de la livraison
•1 écharpe
•1 batterie
•1 chargeur
•1 manuel d'instructions
3. Caractéristiques du produit
L'écharpe chauffante infrarouge lointain Thermrup pour une utilisation
intérieure et extérieure offre une chaleur profonde grâce à la technologie
infrarouge lointain tout en permettant une bonne liberté de mouvement.
L'écharpe est facile à mettre, confortable et sûre. Il dispose de trois niveaux
de température réglables qui peuvent être ajustés individuellement. L'élément
chauffant en caoutchouc spécial se caractérise par une grande surface de
chauffe et une répartition uniforme de la chaleur. L'écharpe peut être nettoyée
à la machine à laver
4. Application
4.1 Recharge de la batterie
•Avant la première utilisation et après une longue période
de non-utilisation, chargez la batterie pendant environ 4
heures pour vous assurer qu'elle est complètement
chargée.
• Pour charger la batterie, connectez le câble du chargeur à la batterie et branchez-
le sur une prise électrique. Pendant la charge, la LED du chargeur s'allume en rouge.
Dès que la batterie est complètement chargée, la LED s'allume en vert. Vous pouvez
ensuite débrancher le chargeur de la prise et de la batterie.
*** Si vous n'utilisez pas le coussin chauffant pendant une longue période, nous
vous recommandons de charger suffisamment la batterie tous les 6 mois pour
garantir son bon fonctionnement.
Rechter Teil Linker Teil
Regler
Akku-Tasche

12
4.2 Betrieb
• Placez maintenant le foulard autour de votre cou. Passez
la partie gauche de l'écharpe à travers la partie droite.
•Retirez le câble du sac de batterie. Connectez le câble à la
batterie.
•Insérez la batterie dans la pochette de la batterie.
•Appuyez sur le bouton d'alimentation du contrôleur et maintenez-le enfoncé
pendant environ 2 secondes pour activer la fonction de chauffage. Appuyez
ensuite brièvement (plusieurs fois si nécessaire) sur le bouton power pour régler
le niveau de température souhaité (niveau 1-2-3, rouge-vert-bleu).
•Le premier niveau est le niveau le plus chaud (le voyant LED s'allume en
rouge).
•Le deuxième étage est l'étage intermédiaire (le voyant LED s'allume en vert).
•Le troisième niveau est le niveau le plus bas (le voyant LED s'allume en bleu).
•Les quatre T-LED indiquent également la capacité restante de la batterie (en
fonction de la luminosité des T-LED).
•Après 30 secondes, le bouton d'alimentation passe en mode
d'économie d'énergie et l'affichage LED s'assombrit, mais la
fonction de chauffage reste active. Appuyez à nouveau
brièvement sur le bouton d'alimentation pour quitter le mode
d'économie d'énergie et régler le niveau souhaité comme avant.
• Appuyez sur le bouton d'alimentation et maintenez-le enfoncé pendant environ 2
secondes pour désactiver la fonction de chauffage si nécessaire.
*** Arrêtez l'utilisation si vous remarquez une rougeur de la peau ! Une chaleur
excessive peut provoquer des brûlures.
5. Nettoyage et entretien
•Avant chaque nettoyage, déconnectez la batterie du foulard.
•N'utilisez jamais de produits de nettoyage agressifs ou de brosses fortes.
•L'écharpe peut être lavée en machine jusqu'à 45°C dans un sac à linge ou le
sac à linge fourni.
•L'écharpe ne doit pas être séchée au sèche-linge ni repassée.

13
6. Instructions d'élimination
Cet appareil ne doit pas être jeté avec les ordures ménagères. Chaque
consommateur est tenu de remettre tous les appareils électriques ou
électroniques, qu'ils contiennent ou non des substances nocives, à un point
de collecte de leur ville ou dans des magasins afin qu'ils puissent être
éliminés de manière écologique. Pour l'élimination, contactez votre autorité
locale ou votre revendeur.
7. Spécifications techniques
Modèle : HS614
source de courant
Commutateur de chauffage : 3,7 V ; 5W maximum
Alimentation : Entrée : 100-240V ~ 50/60Hz
Sortie : 5V ; 2A
Batterie : Li-Po 3,7 V ; 2600mAh
Dimensions : environ 99x13cm
Poids : environ 215g
8. Garantie
Nous offrons une garantie de 2 ans à compter de la date d'achat contre les défauts
de matériaux et de fabrication du produit.
La garantie ne s'applique pas dans les cas suivants :
• En cas de dommages causés par une mauvaise utilisation.
• Pour les pièces d'usure.
• En cas de dommage imputable à la faute du client.
• Dès que l'appareil a été ouvert par un atelier non agréé.
Pour faire une demande de garantie pendant la période de garantie, le client doit
fournir une preuve d'achat.
Si vous avez des réclamations, veuillez contacter notre service client en utilisant
l'option de contact suivante :
www.thermrup.de
Other manuals for HS614
1
Table of contents
Languages:
Other Thermrup Heating Pad manuals
Popular Heating Pad manuals by other brands

Tornado
Tornado THP0402G instruction manual

Silvercrest
Silvercrest SWUB 85 C2 Operation and safety notes

botti
botti OB09201 instruction manual

Chattanooga
Chattanooga Theratherm CH143HC05-L instruction manual

oneConcept
oneConcept Magic-Carpet DX 10031671 manual

Pure-Fit Spa
Pure-Fit Spa VM723A Usage and maintenance instructions