thomann Varytec NerveStrobe HP User manual

Colors NerveStrobe HP
Stroboscope
User Manual

Thomann GmbH
Hans-Thomann-Straße 1
96138 Burgebrach
Germany
Telephone: +49 (0) 9546 9223-0
Internet: www.thomann.de
06.07.2022, ID: 473877

Table of contents
1 General information.............................................................................................................. 5
1.1 Further information........................................................................................................ 5
1.2 Notational conventions................................................................................................. 5
1.3 Symbols and signal words........................................................................................... 6
2 Safety instructions................................................................................................................. 7
3 Features....................................................................................................................................... 9
4 Installation.............................................................................................................................. 10
5 Starting up............................................................................................................................... 11
6 Connections and operating elements........................................................................ 12
7 Operating................................................................................................................................. 14
7.1 Starting the device....................................................................................................... 14
7.2 Navigating the menu................................................................................................... 14
7.3 Operating on the unit.................................................................................................. 14
7.3.1 Setting the DMX address........................................................................................ 14
7.3.2 Setting the DMX mode............................................................................................ 15
7.3.3 ‘Automatic mode’...................................................................................................... 15
7.3.4 Operating mode ‘Sound control’......................................................................... 15
7.3.5 Master / slave mode................................................................................................. 16
7.3.6 Setting colour macro................................................................................................ 16
7.3.7 Setting dimmer and strobe eect for CW LEDs (WhiteBar)........................ 16
7.3.8 Setting an individual mixed colour..................................................................... 17
7.3.9 Rotating the Display................................................................................................. 17
7.3.10 Display lighting........................................................................................................ 17
7.3.11 Behaviour on DMX control failure.................................................................... 17
7.3.12 Dimmer curve........................................................................................................... 18
7.3.13 Key lock....................................................................................................................... 18
7.3.14 Resetting the device to factory defaults......................................................... 18
7.3.15 PWM (pulse width modulation)......................................................................... 19
7.3.16 Firmware version display..................................................................................... 19
7.3.17 Operating hours display....................................................................................... 19
7.3.18 LED temperature display...................................................................................... 19
7.4 Menu overview.............................................................................................................. 20
7.5 Functions in 3-channel mode................................................................................... 21
7.6 Functions in 6-channel mode................................................................................... 22
7.7 Functions in 12-channel mode................................................................................ 24
7.8 Functions in 16-channel mode................................................................................ 26
7.9 Functions in 56-channel mode................................................................................ 29
7.10 Functions in 68-channel mode.............................................................................. 32
8 Technical specications.................................................................................................... 35
9 Plug and connection assignment................................................................................. 36
10 Troubleshooting................................................................................................................... 37
11 Cleaning.................................................................................................................................... 38
12 Protecting the environment........................................................................................... 39
Table of contents
Colors NerveStrobe HP 3
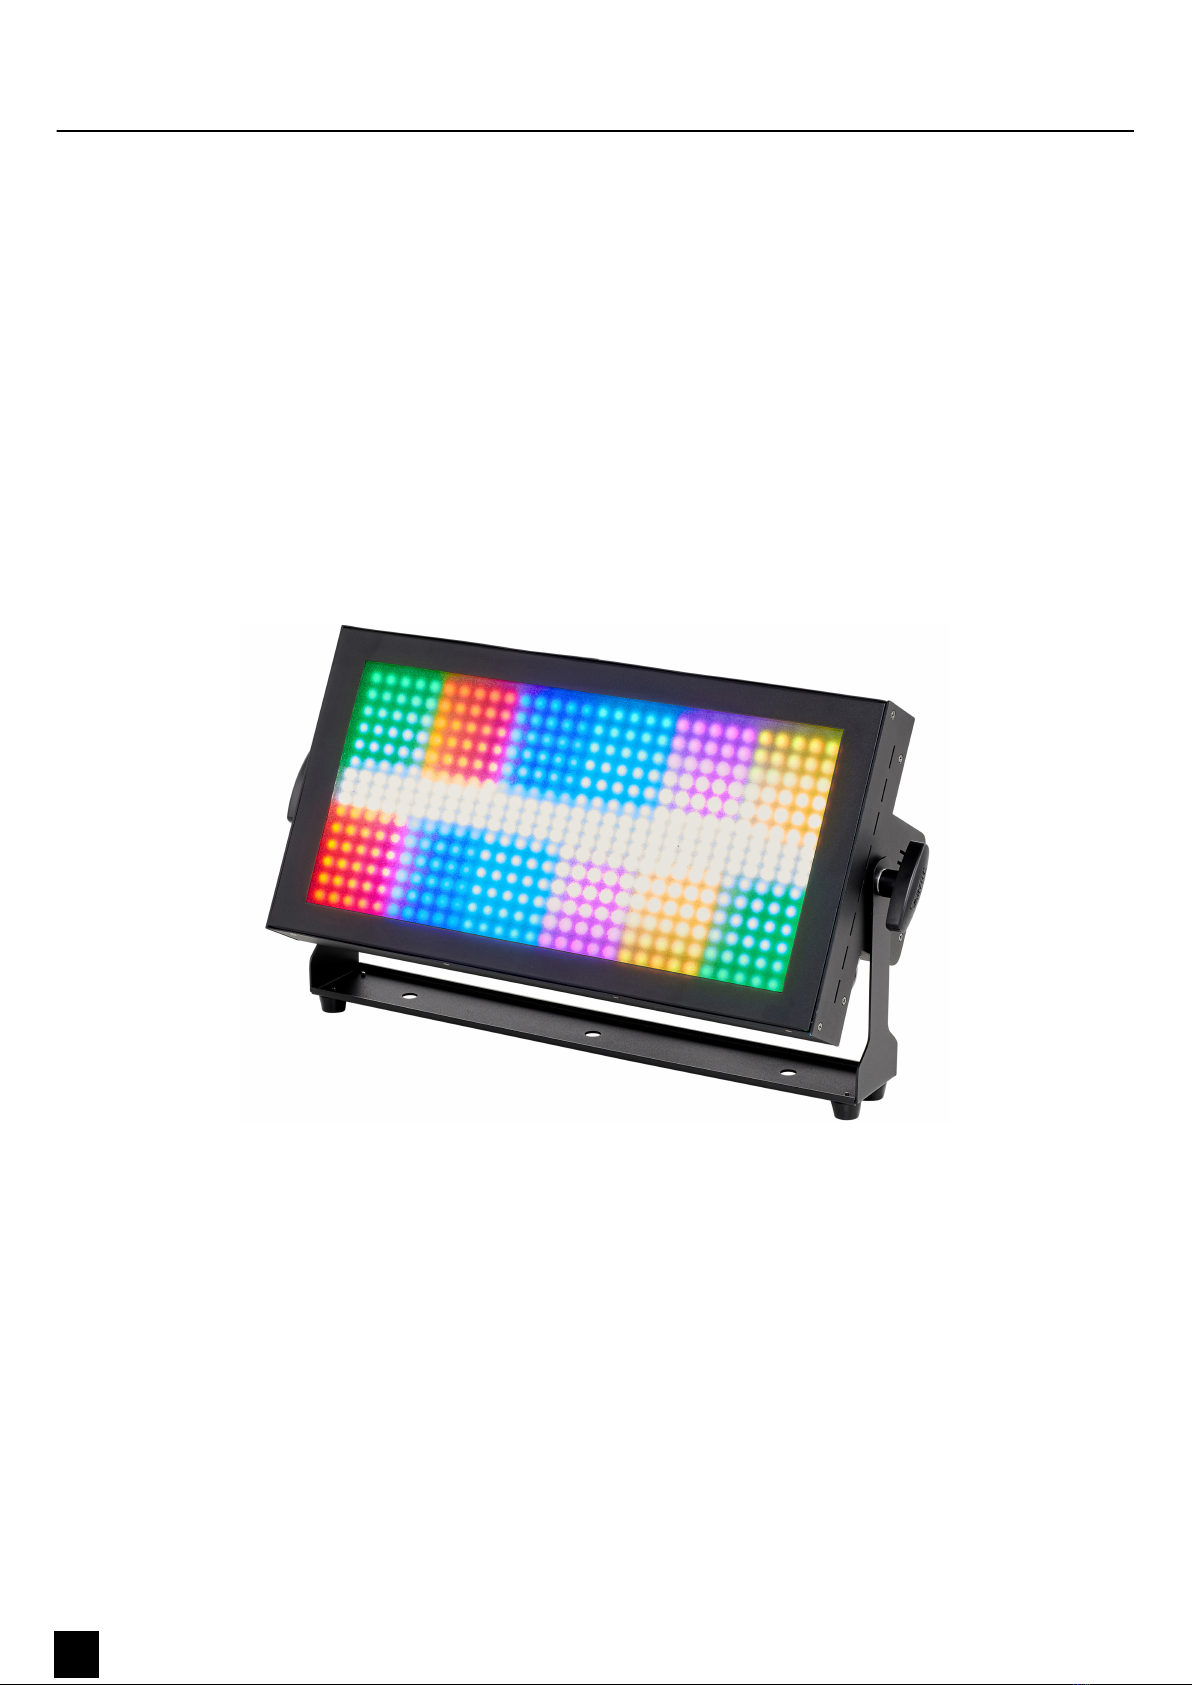
Stroboscope

4Colors NerveStrobe HP
Stroboscope

1 General information
This user manual contains important information on the safe operation of the device.
Read and follow all safety notes and all instructions. Save this manual for future refer‐
ence. Make sure that it is available to all persons using this device. If you sell the
device to another user, be sure that they also receive this manual.
Our products and user manuals are subject to a process of continuous development.
We therefore reserve the right to make changes without notice. Please refer to the
latest version of the user manual which is ready for download under
www.thomann.de.
1.1 Further information
On our website (www.thomann.de) you will nd lots of further information and
details on the following points:
Download This manual is also available as PDF le for you to download.
Keyword search Use the search function in the electronic version to nd the
topics of interest for you quickly.
Online guides Our online guides provide detailed information on technical
basics and terms.
Personal
consultation
For personal consultation please contact our
technical hotline.
Service If you have any problems with the device the
customer service will gladly assist you.
1.2 Notational conventions
This manual uses the following notational conventions:
The letterings for connectors and controls are marked by square brackets and italics.
Examples: [VOLUME] control, [Mono] button.
Texts and values displayed on the device are marked by quotation marks and italics.
Examples: ‘24ch’ , ‘OFF’ .
The individual steps of an instruction are numbered consecutively. The result of a
step is indented and highlighted by an arrow.
Example:
1. Switch on the device.
2. Press [Auto].
ðAutomatic operation is started.
3. Switch o the device.
Letterings
Displays
Instructions
General information
Colors NerveStrobe HP 5
Stroboscope

1.3 Symbols and signal words
In this section you will nd an overview of the meaning of symbols and signal words
that are used in this manual.
Signal word Meaning
DANGER! This combination of symbol and signal word indicates
an immediate dangerous situation that will result in
death or serious injury if it is not avoided.
WARNING! This combination of symbol and signal word indicates
a possible dangerous situation that can result in death
or serious injury if it is not avoided.
NOTICE! This combination of symbol and signal word indicates
a possible dangerous situation that can result in mate‐
rial and environmental damage if it is not avoided.
Warning signs Type of danger
Warning – high-voltage.
Warning – dangerous optical radiation.
Warning – suspended load.
Warning – danger zone.
General information
6Colors NerveStrobe HP
Stroboscope

2 Safety instructions
This device is intended for use as an electronic lighting eect by means of LED tech‐
nology. The device is designed for professional use only and is not suitable for use in
households. Use the device only as described in this user manual. Any other use or
use under other operating conditions is considered to be improper and may result in
personal injury or property damage. No liability will be assumed for damages
resulting from improper use.
This device may be used only by persons with sucient physical, sensorial, and intel‐
lectual abilities and having corresponding knowledge and experience. Other persons
may use this device only if they are supervised or instructed by a person who is
responsible for their safety.
Extend the operating life of the device by regular breaks and by avoiding
frequent switching on and o. The device is not suitable for continuous
operation.
Safety
DANGER!
Danger for children
Ensure that plastic bags, packaging, etc. are disposed of properly and are not within reach of babies and young children. Choking
hazard! Ensure that children do not detach any small parts (e.g. knobs or the like) from the unit. They could swallow the pieces
and choke! Never let children unattended use electrical devices.
DANGER!
Electric shock caused by high voltages inside
Within the device there are areas where high voltages may be present. Never remove any covers. There are no user-serviceable
parts inside. Do not use the device if covers, protectors or optical components are missing or damaged.
DANGER!
Electric shock caused by short-circuit
Always use proper ready-made insulated mains cabling (power cord) with a protective contact plug. Do not modify the mains
cable or the plug. Failure to do so could result in electric shock/death or re. If in doubt, seek advice from a registered electrician.
WARNING!
Eye damage caused by high light intensity
Never look directly into the light source.
WARNING!
Risk of epileptic shock
Strobe lighting can trigger seizures in photosensitive epilepsy. Sensitive persons should avoid looking at strobe lights.
NOTICE!
Risk of re
Do not block areas of ventilation. Do not install the device near any direct heat source. Keep the device away from naked ames.
NOTICE!
Operating conditions
This device has been designed for indoor use only. To prevent damage, never expose the device to any liquid or moisture. Avoid
direct sunlight, heavy dirt, and strong vibrations. Only operate the device within the ambient conditions specied in the chapter
‘Technical specications’ of this user manual. Avoid heavy temperature uctuations and do not switch the device on immediately
after it was exposed to temperature uctuations (for example after transport at low outside temperatures). Dust and dirt inside
can damage the unit. When operated in harmful ambient conditions (dust, smoke, nicotine, fog, etc.), the unit should be main‐
tained by qualied service personnel at regular intervals to prevent overheating and other malfunction.
Intended use
Safety instructions
Colors NerveStrobe HP 7
Stroboscope

NOTICE!
Power supply
Before connecting the device, ensure that the input voltage (AC outlet) matches the voltage rating of the device and that the AC
outlet is protected by a residual current circuit breaker. Failure to do so could result in damage to the device and possibly injure
the user. Unplug the device before electrical storms occur and when it is unused for long periods of time to reduce the risk of
electric shock or re.
NOTICE!
Fire hazard due to exceedance of the maximum current
The device can power other devices of identical construction. The current consumption of all other devices connected in series
must not exceed the values indicated in the technical specications. Otherwise you risk injuries and irreparable damages to the
device. Only connect so many identical devices that the maximum current consumption is not exceeded. Ensure the sucient
dimensioning (wire cross section) of the power cables used for all devices connected in series.
NOTICE!
Possible damage due to installation of a wrong fuse
The use of dierent types of fuses can cause serious damage to the unit. Fire hazard! Only fuses of the same type may be used.
NOTICE!
Possible staining
The plasticiser contained in the rubber feet of this product may possibly react with the coating of your surface and after some
time cause permanent dark stains. In case of doubt, do not put the rubber feet directly on the surface and use a suitable underlay
if necessary, i.e. felt pads or similar.
NOTICE!
Risk of overheating
The distance between light output and the illuminated surface must be more than 1.5 m (19.7in). Provide sucient ventilation.
The ambient temperature must always be below 40 °C (104 °F).
Safety instructions
8Colors NerveStrobe HP
Stroboscope

3 Features
n2-in-1 LED stroboscope and wash light
n90 × CW LEDs for bright and dynamic strobe, blinder and blinder eects
n360 × RGB LEDs for wash eects and colourful accents in the background
nUp to 12 individually controllable segments with the RGBW LEDs
nSoft frost lter for a unique look
nControl via DMX and via buttons and display on the unit
nOperating modes:
– Master/Slave
– Sound control via built-in microphone
– Auto operation
– DMX
n14 built-in chase programmes in automatic mode and sound control
nFlash rate: 20 Hz
nSwivelling mounting bracket
For technological reasons, the light output of LEDs decreases over their lifetime. This
eect increases with higher operating temperature. You can extend the service life of
the illuminants by providing adequate ventilation and operating the LEDs with the
lowest possible brightness.
Features
Colors NerveStrobe HP 9
Stroboscope

4 Installation
Unpack and check carefully there is no transportation damage before using the unit.
Keep the equipment packaging. To fully protect the product against vibration, dust
and moisture during transportation or storage use the original packaging or your
own packaging material suitable for transport or storage, respectively.
WARNING!
Risk of injury caused by falling objects
Make sure that the installation complies with the standards and rules
that apply in your country. Always secure the device with a secondary
safety attachment, such as a safety cable or a safety chain.
NOTICE!
Risk of overheating
The distance between light output and the illuminated surface must be
more than 1.5 m (19.7in).
Provide sucient ventilation.
The ambient temperature must always be below 40 °C (104 °F).
NOTICE!
Possible data transmission errors
For error-free operation make use of dedicated DMX cables and do not
use ordinary microphone cables.
Never connect the DMX input or output to audio devices such as mixers
or ampliers.
You can install the unit in hanging or standing position. When in use, the device must
always be attached to a solid surface or an approved truss. Use the openings pro‐
vided on the two-piece bracket for attaching.
Always work from a stable platform whenever installing, moving or servicing the
unit. In doing so, the area underneath the unit must be cordoned o.
The safety cable must be attached to the safety eyelet.
Please note that this device must not be connected to a dimmer.
Mounting options
Installation
10 Colors NerveStrobe HP
Stroboscope

5 Starting up
Create all connections while the device is o. Use the shortest possible high-quality
cables for all connections. Take care when running the cables to prevent tripping
hazards.
Connect the DMX input of the device to the DMX output of a DMX controller or
another DMX device. Connect the output of the rst DMX device to the input of the
second one, and so on to form a daisy chain. Always ensure that the output of the
last DMX device in the daisy chain is terminated with a resistor (110 Ω, ¼W).
When you congure a group of devices in master/slave mode, the rst unit will con‐
trol the other units for an automatic, sound-activated, synchronized show. This func‐
tion is ideal when you want to start a show immediately. Connect the DMX output of
the master device to the DMX input of the rst slave device. Then connect the DMX
output of the rst slave device to the DMX input of the second slave device and so
on.
Connections in DMX mode
Connections in master/slave mode
Starting up
Colors NerveStrobe HP 11
Stroboscope

6 Connections and operating elements
$
%
#
1 Hanging bracket/oor stand.
2 Locking screws for the bracket for hanging or placement
3 CW LEDs (WhiteBar)
4 RGBW LEDs (1 of 12 LED segments in 16, 56 and 68 channel DMX mode)
Front panel
Connections and operating elements
12 Colors NerveStrobe HP
Stroboscope

POWER IN POWER OUT F2AL250V
100-240V~50/60Hz Power Consumption: 250W
DMX IN DMX OUT DMX IN DMX OUT
& ' * + , -( )
.
5[POWER IN]
Lockable input socket (Power Twist) for powering the device
6[POWER OUT]
Lockable output socket (Power Twist) for powering further devices
7[F2AL250V]
Fuse
8 Safety eye for attaching the safety cable
9[DMX IN]
DMX input, 3-pin
10 [DMX OUT]
DMX output, 3-pin
11 [DMX IN]
DMX input, 5-pin
12 [DMX OUT]
DMX output, 5-pin
13 Display
Activates the main menu and toggles between menu items
Increases the displayed value by one
Decreases the displayed value by one
Selects an option of the respective operating mode
Rear side and connection panel
Connections and operating elements
Colors NerveStrobe HP 13
Stroboscope

7 Operating
7.1 Starting the device
1. Connect the device to the power supply to start operation.
2. The display shows the start screen with the last set operating parameters. The
device is operational.
7.2 Navigating the menu
1. Press to activate the main menu.
2. Press or to select a submenu.
3. To activate the respectively shown menu item, press .
4. Press or to change the respectively indicated value.
5. Press to apply the displayed value.
6. Press to return to the parent menu level.
The set values are retained even when the device is disconnected from the mains
power supply.
7.3 Operating on the unit
7.3.1 Setting the DMX address
1. Press to activate the main menu.
2. Press or repeatedly until the display shows ‘DMX Address’ . Conrm with .
3. Use or to select a DMX address in the range of ‘001’ …‘512’ . Conrm with
.
This setting is only relevant when the device is controlled via DMX. Make sure that
this number matches the conguration of your DMX controller. The following table
shows the highest possible DMX address for the various DMX modes.
Mode Display Highest possible DMX address
3-channel ‘3CH’ 510
6-channel ‘6CH’ 507
12-channel ‘12CH’ 501
16-channel ‘16CH’ 497
56-channel ‘56CH’ 457
68-channel ‘68CH’ 445
The RGBW LEDs are divided into 12 segments in 16, 56 and 68 channel DMX modes.
Operating
14 Colors NerveStrobe HP
Stroboscope

7.3.2 Setting the DMX mode
1. Press to activate the main menu.
2. Press or repeatedly until the display shows ‘DMX Mode’ . Conrm with .
3. Use or to select the desired DMX mode ( ‘3CH’ , ‘6CH’ , ‘12CH’ , ‘16CH’ ,
‘56CH’ or ‘68CH’ ). Conrm with .
This setting is only relevant when the device is controlled via DMX.
7.3.3 ‘Automatic mode’
Auto mode can only be activated when the unit is operating in stand alone mode or
as master in a master / slave combination. This setting is only relevant if the device is
not controlled via DMX. 14 dierent show programmes are available in automatic
mode. Congure the sequence speed and the dimmer intensity of the automatic
mode.
1. Press to activate the main menu.
2. Press or repeatedly until the display shows ‘Stand Alone’ . Conrm with .
3. Press or repeatedly until the display shows ‘Auto’ . Conrm with .
4. Use or to select the desired show programme ( ‘Program 1’ …
‘Program 14’ ). Conrm with .
5. Press or to select the desired submenu or the desired value.
The following sub menus are available:
Menu level 4 Menu level 5 Description
‘Dimmer’ ‘000…255’ Dimmer intensity
‘Speed’ ‘000…255’ Running speed from slow to fast
6. Press to accept the selection.
7.3.4 Operating mode ‘Sound control’
Sound control mode can only be activated when the unit is operating in stand alone
mode or as master in a master / slave combination. This setting is only relevant if the
device is not controlled via DMX. In this operating mode, the device responds to
acoustic pulses which are recorded by the integrated microphone. Congure the
dimmer intensity and microphone sensitivity of the sound control.
1. Press to activate the main menu.
2. Press or repeatedly until the display shows ‘Stand Alone’ . Conrm with .
3. Press or repeatedly until the display shows ‘Sound’ . Conrm with .
4. Use or to select the desired show programme ( ‘Program 1’ …
‘Program 14’ ). Conrm with .
Operating
Colors NerveStrobe HP 15
Stroboscope

5. Press or to select the desired submenu or the desired value.
The following sub menus are available:
Menu level 4 Menu level 5 Description
‘Dimmer’ ‘000…255’ Dimmer intensity
‘Mic Sens’ ‘00…99’ Microphone sensitivity from low to high
6. Press to accept the selection.
7.3.5 Master / slave mode
To use a device as the master device, select the auto mode, activate the sound con‐
trol or the manual control. Connect the slave devices to the DMX output of the
master device and select the DMX mode.
7.3.6 Setting colour macro
1. Press to activate the main menu.
2. Press or repeatedly until the display shows ‘Stand Alone’ . Conrm with .
3. Press or repeatedly until the display shows ‘WashMacro’ . Conrm with .
4. Use or to select one of the 15 colour macros ( ‘Red’ …‘Cold White’ ) or turn
the colour o ( ‘Color O’). Conrm with .
5. Press or to select the desired value for the intensity of the colour macro.
The following colour macros are available:
‘Color O’ ‘Yellow’ ‘Blue’ ‘Pink’
‘Red’ ‘Green’ ‘Lavender’ ‘Warm White’
‘Amber’ ‘Turquoise’ ‘Mauve’ ‘White’
‘Yellow warm’ ‘Cyan’ ‘Magenta’ ‘Cold White’
6. Press to accept the selection.
7.3.7 Setting dimmer and strobe eect for CW LEDs (WhiteBar)
1. Press to activate the main menu.
2. Press or repeatedly until the display shows ‘Stand Alone’ . Conrm with .
3. Press or repeatedly until the display shows ‘WhiteBar’ . Conrm with .
4. Press or to select the desired submenu or the desired value.
The following sub menus are available:
Menu level 3 Menu level 4 Description
‘Dimmer’ ‘000…255’ Dimmer intensity
‘Strobe’ ‘AC 0 … 30Hz’ Strobe eect frequency from slow to fast
5. Press to accept the selection.
Operating
16 Colors NerveStrobe HP
Stroboscope

7.3.8 Setting an individual mixed colour
1. Press to activate the main menu.
2. Press or repeatedly until the display shows ‘Stand Alone’ . Conrm with .
3. Press or repeatedly until the display shows ‘Manual’ . Conrm with .
4. Press or to select the desired submenu or the desired value.
The following sub menus are available:
Menu level 3 Menu level 4 Description
‘Dimmer’ ‘000…255’ Dimmer intensity
‘Strobe’ ‘AC 0 … 30Hz’ Strobe eect frequency from slow to fast
‘Red’ ‘000…255’ Intensity red from 0 % to 100 %
‘Green’ ‘000…255’ Intensity green from 0 % to 100 %
‘Blue’ ‘000…255’ Intensity blue from 0 % to 100 %
‘White’ ‘000…255’ Intensity white from 0 % to 100 %
‘WhiteBar’ ‘000…255’ Intensity WhiteBar from 0 % to 100 %
5. Press to accept the selection.
7.3.9 Rotating the Display
1. Press to activate the main menu.
2. Press or repeatedly until the display shows ‘Settings’ . Conrm with .
3. Press or repeatedly until the display shows ‘Display Reverse’ . Conrm with
.
4. Use or to choose between ‘On’ (display rotated by 180°) or ‘O’(display
not rotated).
5. Press to accept the selection.
7.3.10 Display lighting
1. Press to activate the main menu.
2. Press or repeatedly until the display shows ‘Settings’ . Conrm with .
3. Press or repeatedly until the display shows ‘Display Backlight’ . Conrm
with .
4. Use or to choose between ‘On’ (display permanently on) or ‘O’(display
turns o after a few seconds in case of inactivity).
5. Press to accept the selection.
7.3.11 Behaviour on DMX control failure
1. Press to activate the main menu.
2. Press or repeatedly until the display shows ‘Settings’ . Conrm with .
3. Press or repeatedly until the display shows ‘DMX Fail’ . Conrm with .
Operating
Colors NerveStrobe HP 17
Stroboscope

4. Use or to choose between ‘Hold’ (last DMX value is held), ‘Blackout’ (spot‐
light is switched o) or ‘ManualMode’ (emergency lighting is turned on) to
make the setting to be used if the DMX control fails.
5. Press to accept the selection.
7.3.12 Dimmer curve
1. Press to activate the main menu.
2. Press or repeatedly until the display shows ‘Settings’ . Conrm with .
3. Press or repeatedly until the display shows ‘Dimmer Curve’ . Conrm with
.
4. Use or to select the desired dimmer curve.
Display Meaning
‘Linear’ Linear course
‘Exponential’ Exponential course
(Square curve with a at prole at the beginning and a
steep prole at the end)
‘Logarithmic’ Logarithmic course
(Inverted quadratic curve with a steep course at the
beginning and a at course at the end)
‘S Curve’ S-curve shaped course
(Non-linear curve with a distinctive at course at the
beginning and end)
5. Press to accept the selection.
7.3.13 Key lock
1. Press to activate the main menu.
2. Press or repeatedly until the display shows ‘Settings’ . Conrm with .
3. Press or repeatedly until the display shows ‘AutoLock’ . Conrm with .
4. Use or to choose between ‘On’ (keylock on) and ‘O’(keylock o).
5. Press to accept the selection.
6. Simultaneously press and for 5 seconds if you want to activate the input
while the keylock is activated.
7.3.14 Resetting the device to factory defaults
1. Press to activate the main menu.
2. Press or repeatedly until the display shows ‘Settings’ . Conrm with .
3. Press or repeatedly until the display shows ‘Factory Reset’ .
ðThe display shows the message ‘Reset Now’ .
4. Press to reset the device to factory default setting.
Operating
18 Colors NerveStrobe HP
Stroboscope

7.3.15 PWM (pulse width modulation)
1. Press to activate the main menu.
2. Press or repeatedly until the display shows ‘Settings’ . Conrm with .
3. Press or repeatedly until the display shows ‘PWM Rate’ . Conrm with
4. Use or to choose between ‘3000Hz’ , ‘6000Hz’ , ‘12kHz’ or ‘25kHz’ .
5. Press to accept the selection.
7.3.16 Firmware version display
1. Press to activate the main menu.
2. Press or repeatedly until the display shows ‘System Info’ . Conrm with .
3. Press or repeatedly until the display shows ‘Firmware’ . Conrm with
ðThe current rmware version is displayed.
7.3.17 Operating hours display
1. Press to activate the main menu.
2. Press or repeatedly until the display shows ‘System Info’ . Conrm with .
3. Press or repeatedly until the display shows ‘Hours’ . Conrm with
ðThe operation hours of the device are displayed.
7.3.18 LED temperature display
1. Press to activate the main menu.
2. Press or repeatedly until the display shows ‘System Info’ . Conrm with .
3. Press or repeatedly until the display shows ‘Temp’ . Conrm with
ðThe current temperature of the LEDs is displayed.
Operating
Colors NerveStrobe HP 19
Stroboscope

7.4 Menu overview
DMX Address
001
512
DMX Mode
3CH
6CH
12CH
16CH
56CH
68CH
Stand Alone
Auto
Dimmer 000 - 255
Speed 000 - 100
WashMacro
Color O
Red
Amber
Yellow
Turquoise
Blue
Mauve
Pink
White
Manual
Dimmer 000 - 255
Strobe 0 - 30
Red 000 - 255
Green 000 - 255
Blue 000 - 255
White 000 - 255
WhiteBar 000 - 255
WhiteBar
Dimmer 000 - 255
Strobe 0 - 30
Program 1
Program 14
Sound
Dimmer 000 - 255
Mic Sens 00 - 99
Program 1
Program 14
Yellow warm
Green
Cyan
Lavender
Magenta
Warm White
Cold White
DMX Fail
Hold
Blackout
ManualMode PWM Rate
Linear
Exponential
Logarithmic
S-Curve
Dimmer Curve
On
O
Display Reverse
On
O
Display Backlight
On
O
AutoLock
Factory Reset
System Info
Firmware
Hours
Temp
Settings
3000Hz
6000Hz
12kHz
25kHz
Operating
20 Colors NerveStrobe HP
Stroboscope
Table of contents
Other thomann Test Equipment manuals
Popular Test Equipment manuals by other brands

Rohde & Schwarz
Rohde & Schwarz R&S RTM3000 user manual

PT
PT W89731 owner's manual

marposs
marposs Testar Quick Read quick start guide

SIGLENT TECHNOLOGIES
SIGLENT TECHNOLOGIES SDS2000X-E Series user manual

Indemnis
Indemnis Nexus M200 PRS Operation guide

PCB Piezotronics
PCB Piezotronics 682A02 Installation and operating manual