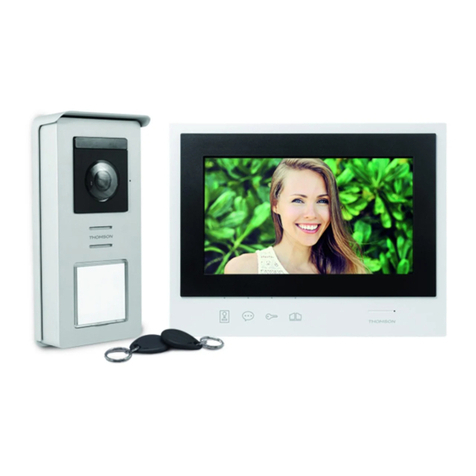
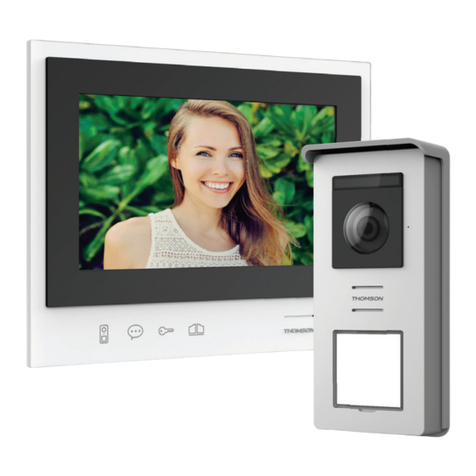
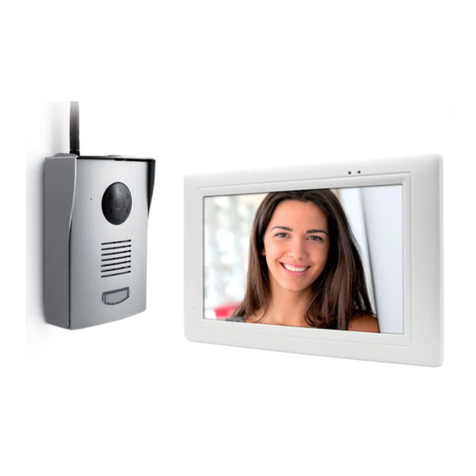
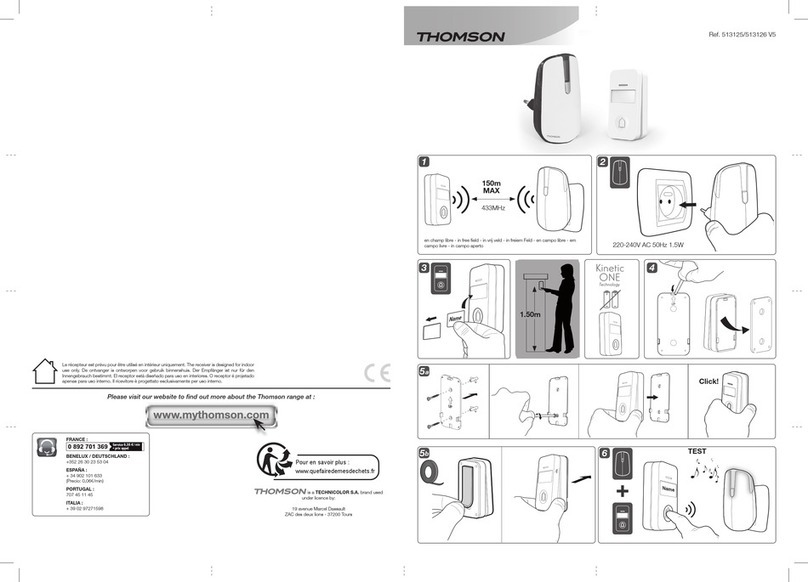
THOMSON IZZY-768W2 User manual

Easy to install - 2 wires
0UZ[HSSH[PVUMHJPSLMPSZ
Picture memory feature
4tTVYPZH[PVUKLZ]PZP[L\YZ
Safe installation
0UZ[HSSH[PVUZtJ\YPZtL
Innovation
EN IZZY-768W2
Colour video intercom - 18 cm
ref. 512268
www.thomsonsecurity.eu
Picture memo
ry
featur
ry featurry
e
featurefeatur
4tTVYPZH[PVUKLZ]PZP[L\Y
Z
4tTVYPZH[PVUKLZ]PZP[L\YZ4tTVYPZH[PVUKLZ]PZP[L\Y
Safe installatio
n
0UZ[HSSH[PVUZtJ\YPZt
L
V1

WIRELESS COLOUR VIDEO INTERCOM WITH
OPTIONAL VIDEO SURVEILLANCE
CONTENTS
A - SAFETY INSTRUCTIONS 04
1 - OPERATING PRECAUTIONS 04
2 - MAINTENANCE AND CLEANING 04
3 - RECYCLING 04
B - PRODUCT DESCRIPTION 05
1 - KIT CONTENTS 05
2 - MONITOR 06
3 - EXTERIOR PANEL 07
4 - MAINS ADAPTER 07
5 - INSTALLATION CD 07
C - INSTALLATION 08
1 - POWER FOR THE EXTERIOR PANEL 08
2 - INSTALLATION OF THE EXTERIOR PANEL 11
3 - INSTALLATION OF THE MONITOR 12
D - CONFIGURATION 13
1 - OVERVIEW 13
2 - SETTINGS AND FUNCTIONS ACCESSIBLE ON THE MONITOR 13
3 - CAMERA SETTINGS 13
4 - MANAGING THE ALARM AND THE MONITOR VOLUME 13
5 - SETTINGS FOR RECORDINGS 14
6 - PLAYING A VIDEO FILE 14
7 - DELETING A VIDEO FILE 14
8 - ‘MEMORY CARD FORMATTING’ MENU 14
9 - MOVEMENT DETECTION ALARM 15
10 - CHANNEL SCAN 15
11 - ‘SYSTEM SETTINGS’ MENU 15
11.1 - Time and date settings 15
11.2 - Video format 15
11.3 - Energy-saver mode 16

11.4 - Period of inactivity 16
11.5 - Languages 16
E - OPERATION 17
1 - HOW IT WORKS 17
2 - SCREEN SYMBOLS 17
3 - BUTTONS AND FUNCTIONS 18
F - FAQ 19
G - ADD-ON PRODUCTS 21
1 - WIRELESS COLOUR CAMERA 512167 21
H - TECHNICAL AND LEGAL INFORMATION 22
1 - GENERAL CHARACTERISTICS 22
2 - FUNCTIONAL CHARACTERISTICS 22
3 - WARRANTY 23
4 - HELP AND SUGGESTIONS 23
5 - PRODUCT RETURNS/AFTER SALES SERVICE 23
6 - DECLARATION OF CONFORMITY 23
WIRELESS COLOUR VIDEO INTERCOM WITH OP-
TIONAL VIDEO SURVEILLANCE
3EN

WIRELESS COLOUR VIDEO INTERCOM WITH OP-
TIONAL VIDEO SURVEILLANCE
EN 4
A - SAFETY INSTRUCTIONS
1 - OPERATING PRECAUTIONS
• Do not install the monitor in locations with
high humidity and/or extreme temperatures, or
where there is a risk that the equipment might
rust or be exposed to dust.
• Do not install the monitor in cold locations
or locations subject to large temperature
fluctuations.
• The exterior panel must not be exposed to
direct sunlight, rain or high humidity. Preferred
locations are porches or covered areas.
• The exterior panel must not be installed where
the lens filter may be vulnerable to scratching
or dirt.
• Do not daisy-chain extension cords and/or
multi-socket adapters.
• Do not install near acidic chemicals, ammonia
or sources of toxic gases.
• Do not install in explosive environments or
near volatile or inflammable products.
• Never put objects containing water on top of
the device.
• Never cover the device.
• The monitor and mains adapter must only be
used indoors.
2 - MAINTENANCE AND CLEANING
• Always unplug the product from the mains
before carrying out any maintenance.
• Never use abrasive or corrosive substances to
clean the products.
• Use a soft, slightly damp cloth.
• Never use an aerosol to spray the product as
this may damage the internal workings.
3 - RECYCLING
Disposing of used batteries in household
waste is strictly forbidden. Batteries/
accumulators containing harmful
substances are marked with symbols
(shown opposite) which indicate that it is forbidden
to discard them in the household waste. The
corresponding heavy metals are referred to as
follows:
Cd= cadmium, Hg= mercury, Pb= lead.
You can dispose of these used batteries/
accumulators at local waste treatment centres
(centres for sorting recyclable materials), which are
required to accept them. Keep batteries / button
cells / accumulators out of reach of children and
store them in a safe place not accessible to them.
They could be swallowed by children or pets. Risk
of death! In the event that a battery is swallowed,
consult a doctor or go to A&E immediately. Never
short-circuit the batteries, and do not burn or
recharge them as they may explode!
This logo indicates that electrical and
electronic waste must not be disposed of
with household waste. They are likely to
contain hazardous substances which are
dangerous to both health and the
environment. Return the equipment to your local
distributor or use the recycling collection service
provided by your local council.
Pour en savoir plus :
www.quefairedemesdechets.fr
WIRELESS COLOUR VIDEO INTERCOM WITH OP-
TIONAL VIDEO SURVEILLANCE
5EN
B - PRODUCT DESCRIPTION
1 - CONTENTS OF THE KIT
1 Monitor
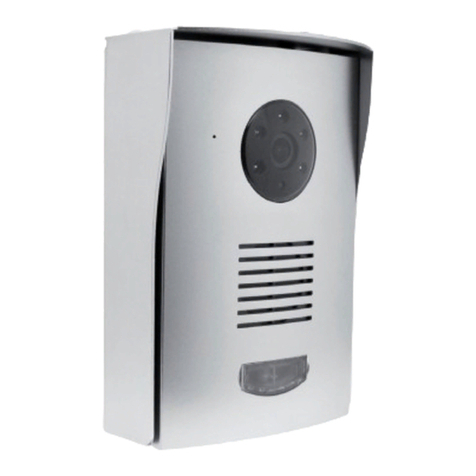
2 Exterior panel and protective shield
3 5V DC 1A mains adapter
4 12V DC 1A mains adapter
5 Aerial cable bracket
6 Aerial
7 Exterior panel mains power cord for the 12V
DC adapter
8 Electric strike plate power wire / Dry contact
for a gate motor
9 Installation CD with software for playing video files
10
Wall plugs for mounting the exterior panel and the
monitor
11 Screw for mounting the exterior panel and the
monitor
12 Screw for securely mounting the exterior panel
to its protective shield
13 Triangular screwdriver for the shield attachment
screw
/
1x 1
4x 1
11 x 6
10 x 6 12 x 2
2x 1 3x 1
9x 1
7x 1 8x 2
13 x 1
5x 1 6x 1

WIRELESS COLOUR VIDEO INTERCOM WITH OP-
TIONAL VIDEO SURVEILLANCE
EN 6
B - PRODUCT DESCRIPTION
2 - MONITOR
Front view
Rear view
1 Battery charge indicator
2 Wireless signal indicator
3 LCD touchscreen
4 On/off button (hold 2 seconds)
5 Fold-down aerial
6 Micro SD memory card slot (card not included)
7 Mini USB port for connecting to a computer
8Reset button
9 AV output
10 5V power input
11 Holes for wall mounting
12 Foldable stand
/
1
2
4
6
7
8
9
10
11
12
5
3

WIRELESS COLOUR VIDEO INTERCOM WITH OP-
TIONAL VIDEO SURVEILLANCE
7EN
B - PRODUCT DESCRIPTION
3 - EXTERIOR PANEL 4 - MAINS ADAPTERS
• A 230V AC 50 Hz/5V DC 1A mains adapter
for powering the monitor is included in the kit.
• A 230V AC 50 Hz/12V DC 1A mains adapter
for powering the exterior panel is included in
the kit if you want to power an electric strike
plate and have access to surveillance mode
(the video can be viewed without a call from
outside).
Do not use other power supplies as they could cause
irreparable damage to the device and invalidate the
warranty.
5 - INSTALLATION CD
The CD provided allows you to view on a computer
video footage recorded on a memory card (not
included) in the monitor.
1 Infrared light for night vision
2 Camera lens
3 Loudspeaker
4 Microphone
5 Call button + name plate
6 Pairing button
7 Battery compartment
8 Connection terminals
Front view
5
2
1
3
4
6 7 8
Rear view

WIRELESS COLOUR VIDEO INTERCOM WITH OP-
TIONAL VIDEO SURVEILLANCE
EN 8
C - INSTALLATION
1 - POWER FOR THE EXTERIOR PANEL
With batteries
• Open the battery compartment on the back
of the exterior panel and insert six 1.5V LR6
batteries (not included).
With mains adapter
• It is also possible to power the exterior panel
with the 12V DC 1A mains adapter (provided)
and the red and black power cord. In this
case, no batteries should be inserted.
LOCK

WIRELESS COLOUR VIDEO INTERCOM WITH OP-
TIONAL VIDEO SURVEILLANCE
9EN
C - INSTALLATION
Install an electric strike plate
• If your exterior panel is powered with the 12V/1A mains adapter provided, you can remotely unlock a
12V DC electric strike plate or electric lock.
To connect your strike plate or lock, follow the diagrams below according to your model of exterior panel.
LOCK
12V/1A mains
adapter
12V DC power connection
for an electric strike plate or
electric lock
Model A
LOCK
12V/1A mains
adapter
12V DC power connection
for an electric strike plate or
electric lock
Model B

WIRELESS COLOUR VIDEO INTERCOM WITH OP-
TIONAL VIDEO SURVEILLANCE
EN 10
C - INSTALLATION
Control a gate motor
• Your exterior panel can either be powered with the 12V mains adapter provided or with batteries. You
can remotely open a motorised gate.
To connect your gate motor, follow the diagrams below according to your model of exterior panel.
Model A
LOCK
12V/1A mains
adapter
(optional)
Or
Dry contact for opening a
motorised gate (example:
entry with key-operated
switch)
Dry contact for opening a
motorised gate (example:
entry with key-operated
switch)
LOCK
Model B
LOCK
Or
Dry contact for opening a
motorised gate (example:
entry with key-operated
switch)
Dry contact for opening a
motorised gate (example:
entry with key-operated
switch)
LOCK
12V/1A mains
adapter
(optional)

WIRELESS COLOUR VIDEO INTERCOM WITH OP-
TIONAL VIDEO SURVEILLANCE
11 EN
C - INSTALLATION
2 - INSTALLATION OF THE EXTERIOR PANEL
• Attach the shield for the exterior panel to your
chosen outdoor location using the appropriate
screws and wall plugs (the screws and plugs
supplied are suitable for walls made of solid
material).
• After installing the batteries and/or connecting
the wires for the exterior panel, place it in its
shield. Then, screw the exterior panel to the
shield with the screws provided.
120mm
50mm
ø7mm

WIRELESS COLOUR VIDEO INTERCOM WITH OP-
TIONAL VIDEO SURVEILLANCE
EN 12
C - INSTALLATION
• Install the cable for the aerial if there is
significant interference in the installed location.
3 - INSTALLATION OF THE MONITOR
Important: The monitor must only be powered
by the 5V DC/1A mains adapter (included). This
adapter recharges the internal battery of the monitor
for up to 3 hours of battery life.
On a flat surface
• Fold out the stand on the back of the monitor.
Wall mounting
• Attach the monitor to the wall using the
appropriate screws and wall plugs (the screws
and plugs included are suitable for walls made
of solid material).
ø7mm
100mm

WIRELESS COLOUR VIDEO INTERCOM WITH OP-
TIONAL VIDEO SURVEILLANCE
13 EN
D - CONFIGURATION
1 - OVERVIEW
The Thomson colour touch screen video intercom
is a high-end video intercom that allows you to see
your visitors, communicate with them, and manage
access to your property. It provides a doorbell for
visitors to announce their presence, allows you to
see visitors and talk with them, and lets you open
an electric strike plate or motorised gate if you wish
(not included).
The included exterior panel is designed to stand up
to harsh weather and attaches to the surface of a
pillar or property wall/fence. Its aluminium shield and
the protection that it provides ensure that operation
of the device is stable and long-lasting.
The exterior panel features infrared LEDs for night
vision, which are controlled by a dusk-to-dawn
sensor enabling black and white images of your
visitors to be produced even in complete darkness.
The monitor records a short video of your visitor on
a memory card (not included) each time the doorbell
is pressed on the exterior panel.
The use of wireless technology allows you to install
this device in place of an existing wired doorbell, for
example, without altering the existing installation.
You can add up to 3 additional wireless cameras (not
included, ref. 512167) for internal or external usage.
The cameras start recording when movement
is detected in the view of one of the cameras.
Recording can also be controlled manually.
2 - MAIN MENU
To access the main menu, press the icon on
the monitor.
1
5
2
6
3
7
4
8
1 Camera settings
2 Recording settings
3 Files (ordered by date and time slot)
4 System settings
5 Managing the alarm and monitor volume
6 Zoom
7 Camera scan
8 Protection of memory card formatting
3 - CAMERA SETTINGS
This menu enables you to activate or deactivate
channels, pair additional cameras (not included, ref.
512167), and adjust the brightness of the cameras.
If you only have one exterior panel, deactivate
channel 2 (active by default).
Your product has a total of 4 channels and your
exterior panel is set to channel 1 by default.
You can therefore add an additional 3 cameras for
video surveillance.
Once your chosen channel is activated, begin
pairing by pressing the button.
Warning: once this button lights up blue, you have
30 seconds to press briefly on the pairing button:
• Of the exterior panel, which is under the
battery compartment
• Of the camera, which is on the power cord
(camera not included, ref. 512167)
4 - MANAGING THE ALARM AND THE
MONITOR VOLUME
To get to the menu for activating the alarm and
managing the volume of the monitor, click on the
following icon:
The menu that appears includes the following items:
: Alarm activation
: Manage the ringtone volume of the monitor
: Manage the communication volume of the
monitor

WIRELESS COLOUR VIDEO INTERCOM WITH OP-
TIONAL VIDEO SURVEILLANCE
EN 14
D - CONFIGURATION
5 - SETTINGS FOR RECORDINGS
Important: to be able to record
videos, the monitor must be equipped with a
Micro SD memory card (not included).
To play videos recorded on
the memory card with your computer, software
is included in the product box.
The configure the different recording modes, use
the following buttons:
The day is broken up into time slots.
For each slot, 3 modes are available:
M: Recording starts when movement is detected;
available with external cameras (ref. 512167)
S: Recording goes for 1 hour (during the time slot).
X: Recording only starts when someone rings the
doorbell on the exterior panel.
To switch modes, press the desired
time slot.
Information on a video recording:
Minimum duration: 15 sec.
Maximum duration: 60 sec.
6 - PLAYING A VIDEO FILE
To play a video, simply press the icon of the video.
When the video plays, a menu bar will open:
143 75
2 6 8
1 Reduce the menu bar
2 Number of channel displayed
3 Rewind
4 Play/Pause
5 Fast-forward
6 Progress bar
7 Multi-channel display (depending on availability)
8 Leave play mode / Return to files
7 - DELETING A VIDEO FILE
To delete a video, simply press the icon of the
video for 3 seconds.
• A notification will appear:
Deletes the video
Takes you out of the menu
8 - ‘MEMORY CARD FORMATTING’ MENU
To be able to format the memory card, on the
main menu, the icon must be set to ON
as shown below:
• If necessary, press the icon to go from OFF to
ON.
Once formatting is authorised, go to the
REC menu:
• Press the icon: ‘Card + eraser’

WIRELESS COLOUR VIDEO INTERCOM WITH OP-
TIONAL VIDEO SURVEILLANCE
15 EN
D - CONFIGURATION
9 - MOVEMENT DETECTION ALARM
The menus below are useful only if
you have an external camera. (ref. 512167)
Your monitor will emit short beeps when
movement is detected if:
• The icon on the lower left of the main menu is
set to ON.
• The time slot is set to M:
The level of sensitivity for detection of
movement can be adjusted using the icons
below:
LV3=High sensitivity
LV2=Medium sensitivity
LV1=Low sensitivity
If you want to turn off movement detection
for a portion of the image recorded by the camera, it
is possible to mask zones:
All boxes in bright blue will not detect
movement.
10 - CHANNEL SCAN
The mode for scanning the different active channels
can be accessed directly from the main menu
with this button:
11 - ‘SYSTEM SETTINGS’ MENU
1
2
3
4
5
1 Time and date settings
2 Video format
3 Energy saver
4 Period of inactivity
5 Languages
11.1 - Time and date settings
With the + and - buttons, change the date or time.
11.2 - Video format
You can choose between PAL or NTSC video
format. In Europe, it is recommended that you use
the PAL video format.

WIRELESS COLOUR VIDEO INTERCOM WITH OP-
TIONAL VIDEO SURVEILLANCE
EN 16
D - CONFIGURATION
11.3 - Energy-saver mode
Energy-saver mode turns off the screen
after 5 or 10 minutes.
1 5 minutes
2 10 minutes
3 Never
1 2 3
11.4 - Period of inactivity
After 2 minutes of inactivity, the monitor goes
to ‘sleep’ and activates one of these four
modes:
1 Display in quad mode after 2 min.
2 Display the exterior panel camera after 2min.
3 Scan activated channels with 5-sec. intervals
4 Scan activated channels with 10-sec. intervals
1 2 3 4
Note: To activate or deactivate the different
channels:
11.5 - Languages
3 languages are available for this monitor

WIRELESS COLOUR VIDEO INTERCOM WITH OP-
TIONAL VIDEO SURVEILLANCE
17 ENEN
E - OPERATION
1 - HOW IT WORKS
The exterior panel can either be powered by 6 LR06 batteries or by a 12V mains adapter, included, which
will allow you to:
• Open an electric strike plate (not included).
• Use surveillance mode so that video can be viewed without someone ringing the doorbell.
• Pressing the name plate on the exterior panel makes the monitor ring 3 times.
• After the 3 rings, you can talk to your visitor using the button.
Note:
You must keep pressing the button for the visitor to hear you. You must let go of
the button to hear your visitor’s response.
• Let go of this button to hear your visitor’s response.
• The conversation will automatically cut off after 60 seconds if the exterior panel is battery powered.
2 - SCREEN SYMBOLS
/
12V adapter
(optional)
Electric strike
plate (optional)
Gate motor (optional)
5V DC
Signal quality indicator: according to distance between the exterior panel and the
monitor.
Battery indicator
Bottom of the screen for the monitor
Top of the screen for the exterior panel
1Full-screen mode.
Quad mode: All active channels are visible.
Scan mode: The monitor performs a scan of all active channels.
2 X Zoom x2

WIRELESS COLOUR VIDEO INTERCOM WITH OP-
TIONAL VIDEO SURVEILLANCE
EN 18
E - OPERATION
3 - BUTTONS AND FUNCTIONS
Press the button to display the icons below:
Tap to change channels. As seen here, only channel 1 is available.
Press and hold this button to speak and let it go to hear the response from your
visitor.
Use to activate the electric strike plate – available only if the exterior panel is
powered by the 12V mains adapter (included).
Use to activate the gate connected to the dry contact of the exterior panel.
Available with the exterior panel powered by battery or by the mains adapter.
Use to raise or lower the communication volume.
Use to record a video or stop recording in process.
Display mode: Use to change channels and display all 4 channels
simultaneously.
Use to access the main menu.
Volume indicator.
Video recording indicator.
/
1
2
- Flashing green: Pairing mode
- Solid green: Signal reception OK
- Solid orange: Charging
- Solid red: Charge OK
- Flashing red: Low battery

WIRELESS COLOUR VIDEO INTERCOM WITH OP-
TIONAL VIDEO SURVEILLANCE
19 ENEN
F - FAQ
If your problem is not covered below, please contact our technical support service.
Symptoms Possible causes Solutions
The system does not turn on
The adapter is not connected to
the mains/to the monitor (DC IN
on the right side of the monitor).
Check that all power supply
cables are correctly connected.
The monitor's battery is not
charged.
Plug in the mains adaptor to the
monitor.
Memory card not detected
(message ‘SD ERR’)
Memory card not detected or
defective
• Verify that the card is properly
inserted and formatted
• Replace the card
• Verify that the memory card is
compatible
Cannot communicate with
audio/video
Date and hour incorrect on
recordings or live viewing
Power supply not connected
Date and time not set.
Date and time reset after
prolonged loss of power to the
monitor.
Check that the monitor and
exterior panel are properly
connected to their power supplies
Not paired Pair the exterior panel with the
monitor.
Too far away, interference, or too
many obstacles between the
camera and the monitor.
Move and/or bring the monitor
closer to the exterior panel.
Set the time
No recording during a call from
the exterior panel
No memory card in the monitor. • Verify that the card is properly
inserted and formatted
• Replace the card
No recording during a call from
the exterior panel
No memory card in the monitor. • Verify that the card is properly
inserted and formatted
• Replace the card
No recording when movement
is detected by an additional
camera
(ref. 512167)
Recording deactivated.
Sensitivity improperly set.
Set recording to M and the right
time slot
Activate/correct the sensitivity
setting for movement detection
Unwanted alarm when
movement is detected
The alarm is activated on the
monitor.
Go to the main menu, access the
alarm settings using the following
buttons: This icon must be set
to OFF.

WIRELESS COLOUR VIDEO INTERCOM WITH OP-
TIONAL VIDEO SURVEILLANCE
EN 20
F - FAQ
Symptoms Possible causes Solutions
You can’t control the electric
strike plate and/or gate
The exterior panel is powered
by battery instead of the 12V/1A
mains adapter.
Modify installation and use the
provided 12V/1A adaptor.
The strike plate or gate control
are not properly connected.
Check the wiring.
The electric strike plate never
opens the door
The installed strike plate does not
meet the specifications given in
this guide (12V, 500 mA max.)
• Change the wiring
• Change the wires
• Change the model of strike plate
The screen does not display the
image from the exterior panel
when the screen is turned on
The exterior panel is powered
by battery instead of the 12V/1A
mains adaptor
Modify installation and use the
provided 12V/1A mains adaptor
Other manuals for IZZY-768W2
1
This manual suits for next models
1
Table of contents
Other THOMSON Intercom System manuals

THOMSON
THOMSON IZZY-768W2 User manual

THOMSON
THOMSON 513133 User manual

THOMSON
THOMSON 512269 User manual

THOMSON
THOMSON 513125 User manual

THOMSON
THOMSON 512166 User manual

THOMSON
THOMSON 513127 User manual

THOMSON
THOMSON SMART 762 User manual

THOMSON
THOMSON 512190 User manual

THOMSON
THOMSON 513128 User manual

THOMSON
THOMSON 513133 User manual