Thule Infant Sling User manual

Thule Infant Sling
Instructions
D
51100933

251100933 - D
Parts DescriPtion
GeneraL WarninG
These instructions contain many WARNINGS. Read and
understand all of the WARNINGS. Failure to assemble and
use this Thule child carrier correctly may lead to serious
personal injury or death to you or your passenger.
• This kit contains hardware for installing the Thule Infant
Sling into a variety of Thule child carriers including older
models. If you are installing the Thule Infant Sling into an
older model Thule child carrier, visit www.thule.com to
download the correct instructions. Incorrectly installing
the Thule Infant Sling into any Thule child carrier could
result in serious injury or death.
• Do not operate a Thule child carrier without reading
and understanding this manual.
• Follow the instructions that came with your Thule child
carrier for proper child placement and seatbelts.
Crotch Strap
Waist Belt
Seat
Frame
Bar
Shoulder
Straps
Shoulder
Buckles
Padded
Shoulder
Harness
• Never leave your child unattended in the child carrier.
• OnlyparktheThulechildcarrieronatsurfacesand
secure it with the parking brake.
• The Thule Infant Sling cannot be used with the Thule
Baby Supporter.
• Only use this product with children who cannot sit
unaided between the age 1 - 10 months old, who
weigh less than 22lb / 10kg, and are shorter than
29½in / 75cm.
• Consult your pediatrician before using the Thule Infant
Sling for activities besides strolling.
.
Head
Straps
Foot
Bar
Foot
Straps
Shoulder
Straps
Padded
Shoulder
Harness
Crotch Strap
Crotch Strap Extension
Waist
Belt
Shoulder
Buckles
(Chariot CX/Cougar/
Cheetah)

51100933 - D 3
CTS CROSS-COUNTRY SKI KIT
1.1 instaLLinG the MetaL D-rinGs
The following instructions only apply for single occupant
child carriers.
A. Remove the bolts from the accessory mounts on
the Thule child carrier.
B. Replace the bolts through the metal D-rings into
the accessory mounts. Make sure the D-rings are
pointing inwards once installed. (See image 1)
1
1.2 instaLLinG the Foot Bar
The following instructions only apply for double occupant
child carriers.
A. Remove the bolts from the accessory mounts on
the Thule child carrier.
B. Position both ends of the foot bar over the
accessory mounts.
C. Replace the bolts through the metal washer and the
ends of the foot bar into the accessory mounts.
(See image 2)
2
WARNING
Regularly check to make sure the D-rings/
foot bar are securely attached to the
accessory mounts.

451100933 - D
CTS CROSS-COUNTRY SKI KIT
1.3 securinG the toP oF the
thuLe inFant sLinG
A. Remove the padded shoulder harness by unbuckling
the shoulder straps and crotch strap.
B. Unbuckle the waist belt.
C. Partially fold the Thule child carrier.
D. Place the Thule Infant Sling inside the child
compartment. Make sure the head straps are pointing
towards the seat frame bar and the crotch support is to
the outside.
E. Loop both of the head straps up over the seat frame bar
and back into the buckles on the top of the Thule Infant
Sling. (See image 1)
F. Unfold the Thule child carrier.
G. Tighten the head straps evenly until the Thule Infant
Sling is positioned at your preferred height. WARNING
Check the head straps before every journey to
be sure that they are securely attached to the
Thule child carrier and have not loosened off.
21
NOTICE
The seat frame bar is not accessible on all
child carriers. For these Thule child carriers,
loop the head straps around back frame
instead. (See image 2)
Some Thule child carriers are equipped with
straps on the seat back. Use these straps
instead of the head straps to secure the top
of the Thule Infant Sling.

51100933 - D 5
1.4 securinG the BottoM oF the
thuLe inFant sLinG
A. For a double Thule child carrier, loop the foot straps
around the foot bar and back into the buckles on the
bottom of the infant sling. (See image 1)
B. For a single Thule child carrier, thread the foot straps
through the D-rings and back into the buckles on the
bottom of the infant sling. (See Image 2)
C. Tighten the foot straps evenly until the middle of the
infant sling is sagging approximately 2.5cm (1in).
WARNING
Check to make sure the Thule Infant Sling
has been properly attached with the waist
buckles, head and foot straps before
releasing the parking brake and using your
Thule child carrier.
2
1NOTICE
For use on double occupant child carriers in
the middle position; buckle outermost waist
belt straps to the waist buckles.

651100933 - D
1.5 securinG the center oF the thuLe
inFant sLinG
A. Buckle both of the waist buckles onto the ends of the
waist belt. (See image 1)
B. Tighten the waist belt straps evenly until the Thule Infant
Sling is tightly secured with a slight bow in the middle.
1.6 securinG the center oF the thuLe
inFant sLinG (cX/couGar/cheetah)
A. Attach the center of the Thule Infant Sling by clipping
the D-rings. (See Image 2)
WARNING
Check to make sure the Thule Infant Sling
has been properly attached with the center
attachments, head and foot straps before
releasing the parking brake and using your
Thule child carrier.
1 2
NOTICE
For use on double occupant Thule child carriers
in the middle position; buckle outermost waist
belt straps to the waist buckles.

51100933 - D 7
1.7 PreParinG the PaDDeD shouLDer
harness anD crotch straP
A. Engage the parking brake.
B. Adjust the padded shoulder harness according to
the instructions for your child carrier.
C. Place your child in the secured Thule Infant Sling
positioned comfortably over the crotch support.
D. Determine which of the shoulder slots are in line with
the top of your child's shoulders. (See image 1)
E. Remove your child from the Thule child carrier.
F. Feed the shoulder straps down through the shoulder
slots in line with the top of your child's shoulders.
G. Buckle both of the shoulder straps back into the
buckles on the vertical web straps. (See image 2)
H. Slide the shoulder buckles to the same height as the
shoulder straps.
I. Feed the crotch strap up through the crotch slot and
insert the crotch strap through the loop on the back
of the crotch support. (See image 3)
2
1 3
WARNING
Do not use the Thule Infant Sling with your
child if their shoulders are above the uppermost
shoulder slots in the Thule Infant Sling.
Ensure that the harness has been properly
prepared for the child being secured by it.
NOTICE
For use with child carriers equipped with
padded crotch straps, tuck the crotch
support down through the crotch slot and
use the padded crotch strap without the
crotch support.

851100933 - D
1.8 PreParinG the PaDDeD shouLDer
harness anD crotch straP
(cX/couGar/cheetah)
A. Engage the parking brake.
B. Adjust the padded shoulder harness according to
the instructions for your child carrier.
C. Place your child in the secured Thule Infant Sling
positioned comfortably over the crotch support.
D. Determine which of the shoulder slots are in line with
the top of your child's shoulders.
E. Remove your child from the Thule child carrier.
F. Feed the shoulder straps down through the shoulder
slots in line with the top of your child's shoulders.
G. Buckle both of the shoulder straps back into the
buckles on the vertical web straps. (See Image 1)
H. Slide the shoulder buckles to the same height as the
shoulder straps.
I. Feed the crotch strap through the crotch slot and
extend the crotch strap using the crotch strap
extension. (See Image 2)
1 2
WARNING
Do not use the Thule Infant Sling with your
child if their shoulders are above the uppermost
shoulder slots in the Thule Infant Sling.
Ensure that the harness has been properly
prepared for the child being secured by it.

51100933 - D 9
WARNING
Check the harness and waist belt before every
use to make sure they are in good condition.
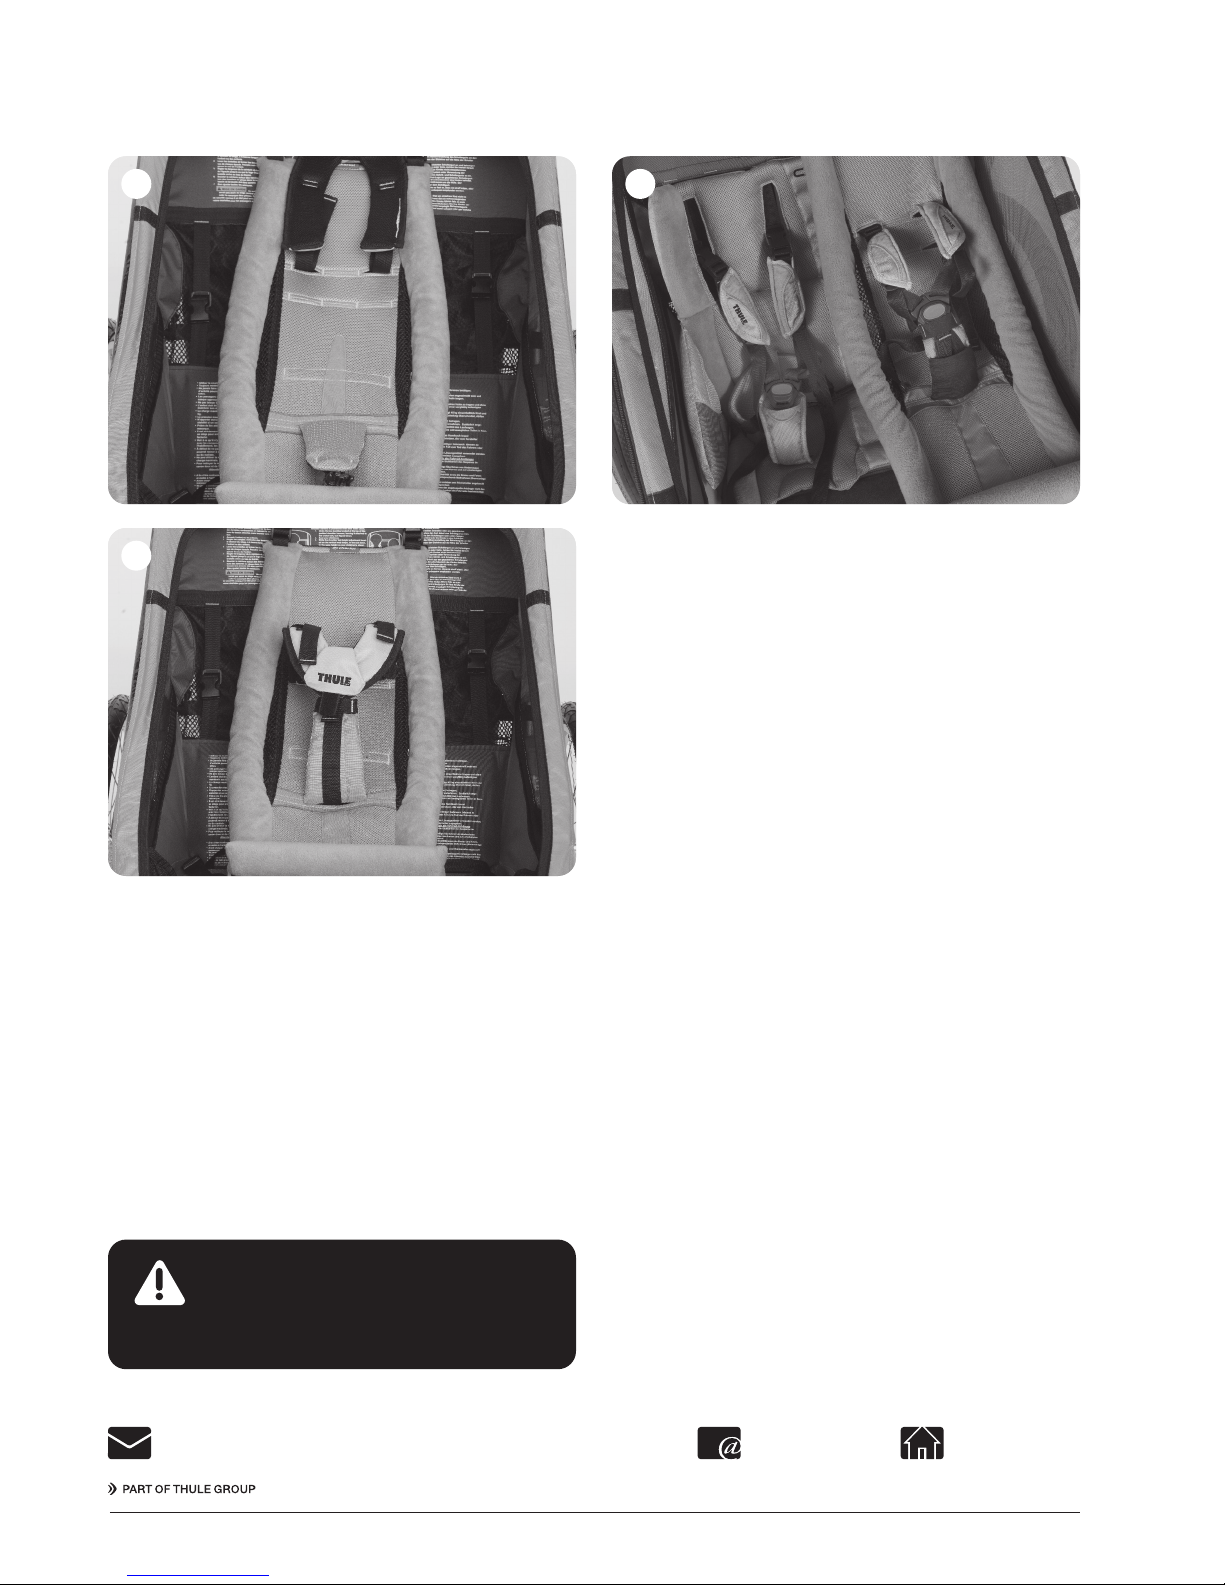
1.9 seatinG Your chiLD
A. Engage the parking brake.
B. Loosen all of the belt adjustments on the shoulder
harness and crotch strap.
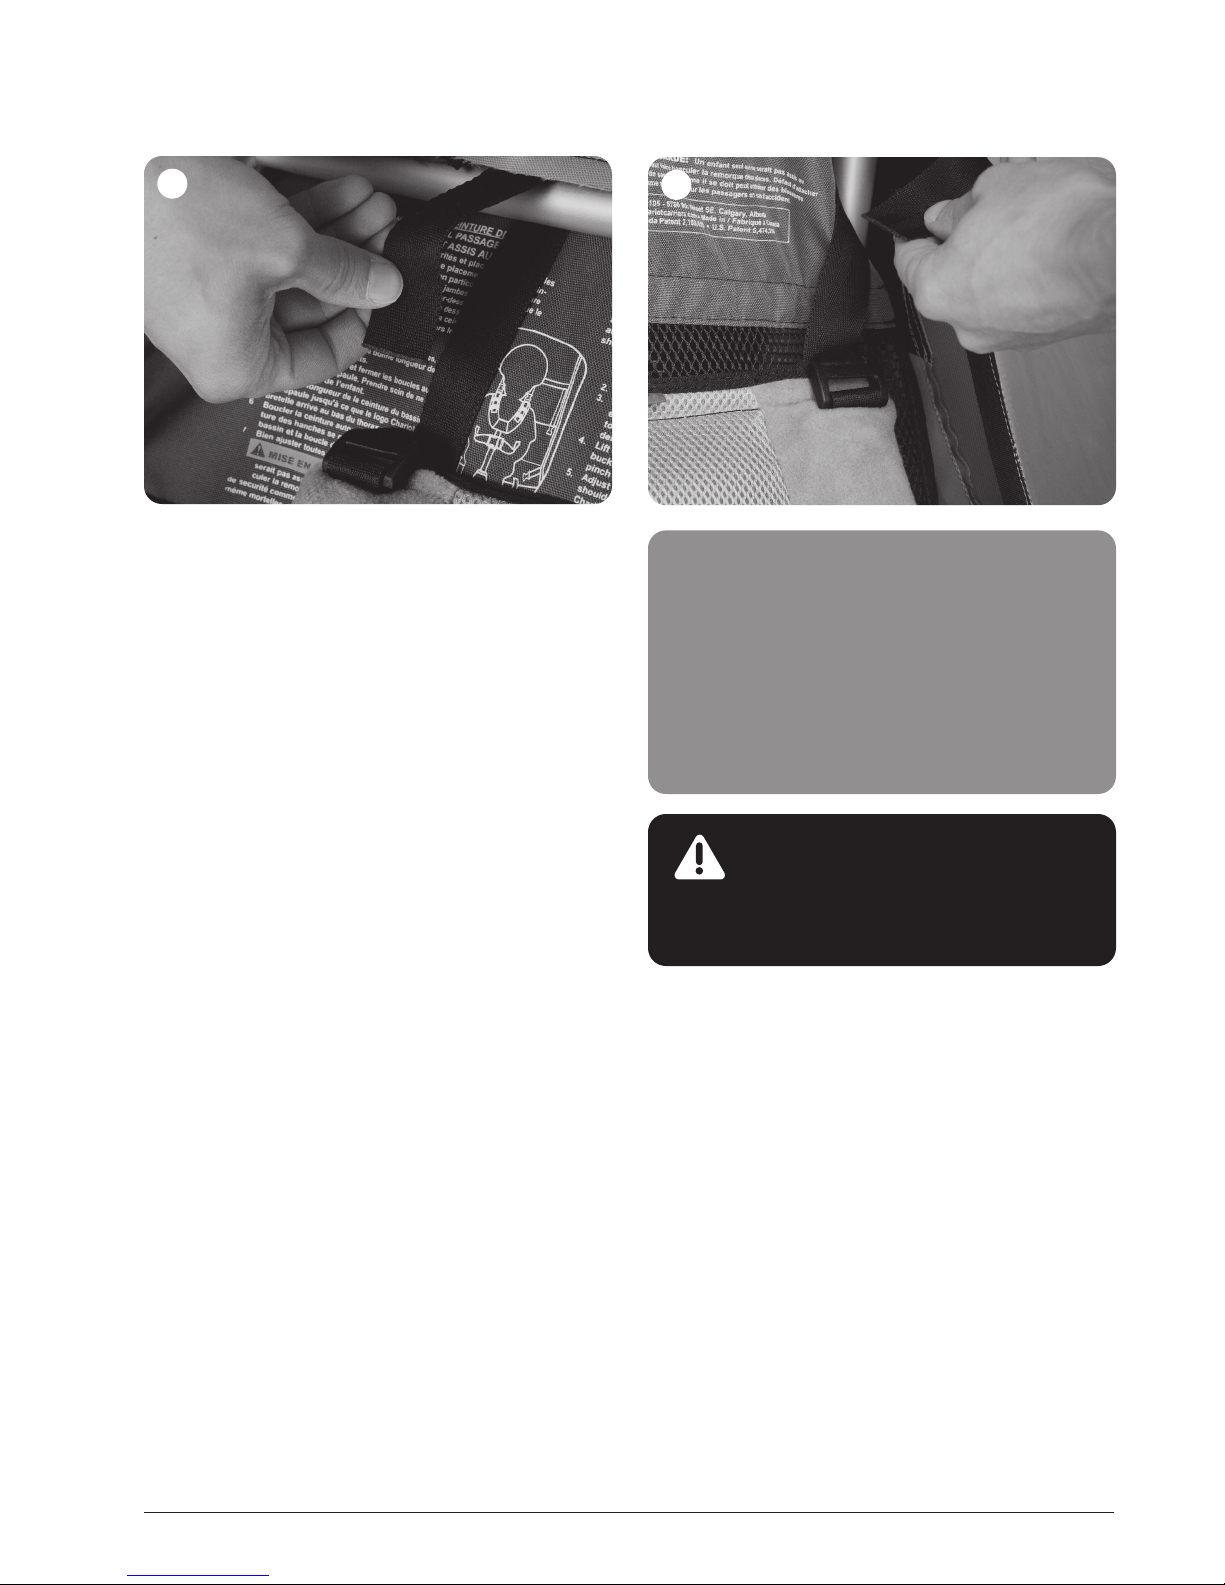
C. Unbuckle the crotch strap from the shoulder harness.
(See image 1)
D. With the padded shoulder harness up, seat your child.
E. Bring the padded shoulder harness down over your
child's head and buckle it into the crotch strap.
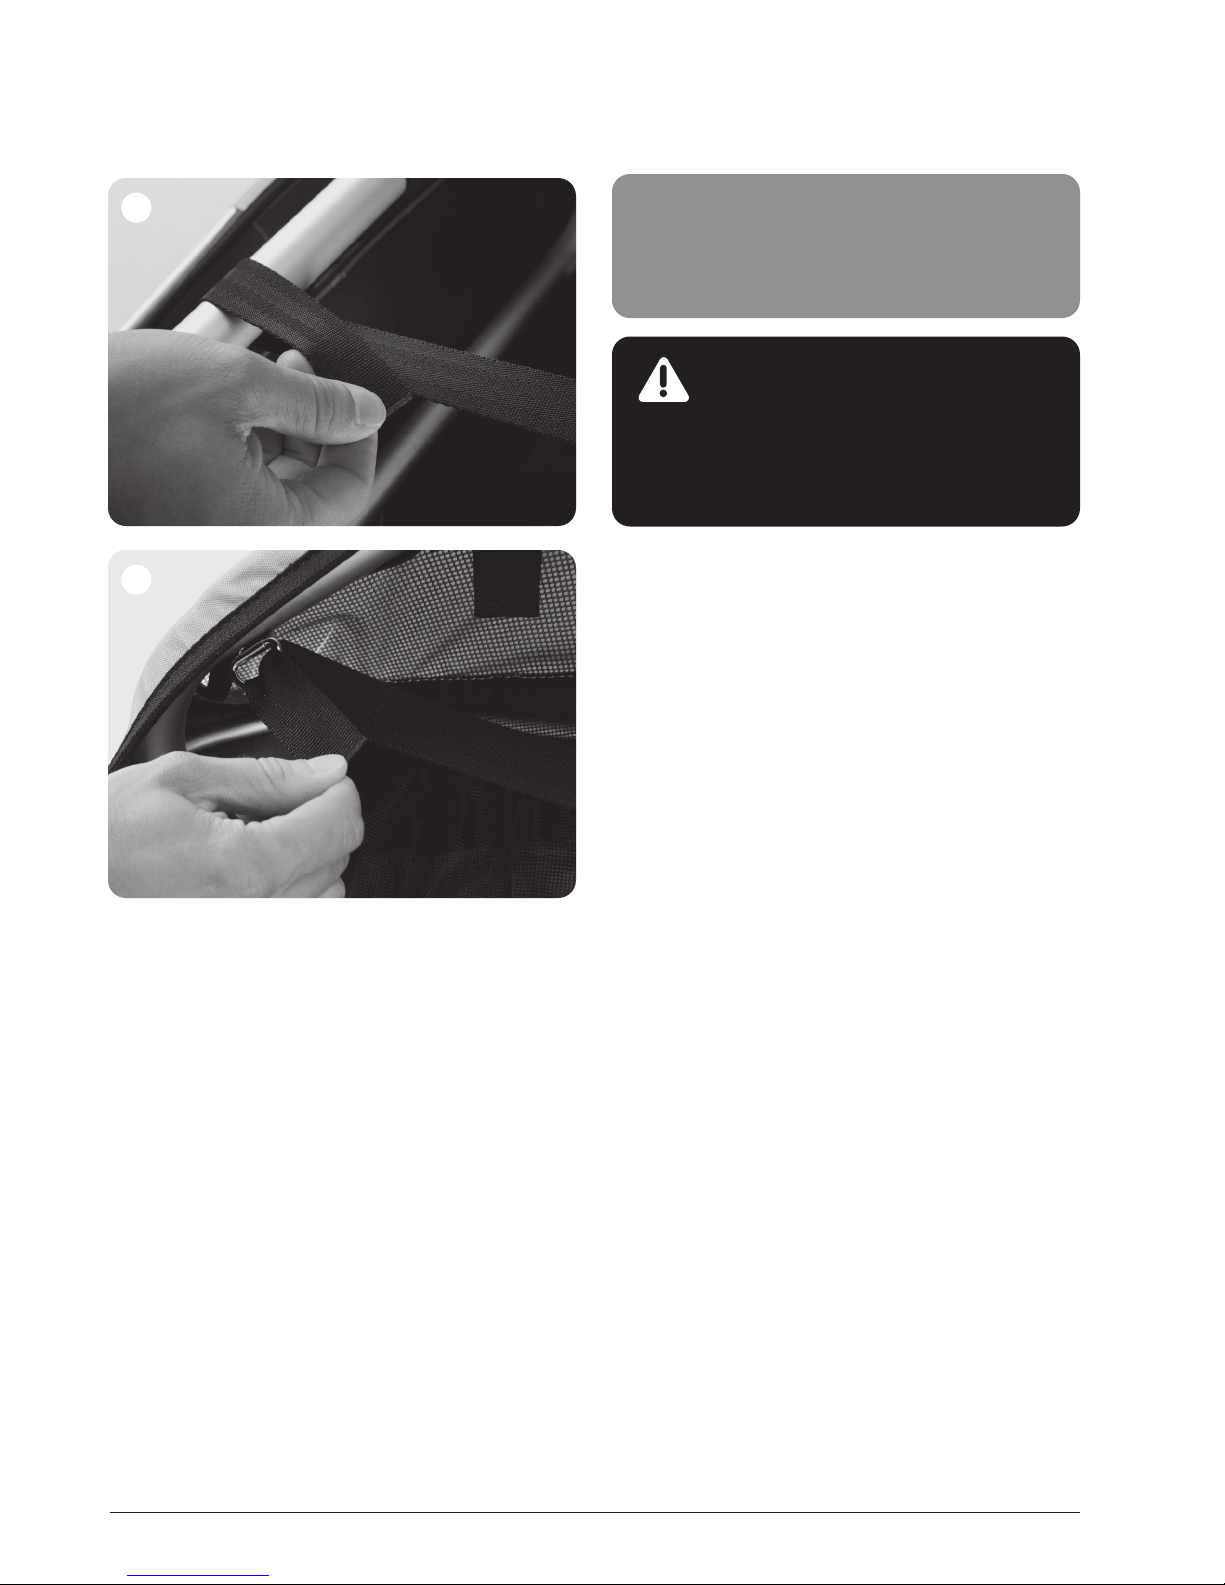
F. Adjust the system using the crotch strap and shoulder
length adjustments until the Thule logo located on the
shoulder harness is positioned over their lower chest.
(See image 2)
G. Snugly tighten all belts.
1.10 seatinG Your chiLD
(cX/couGar/cheetah)
A. Engage the parking brake.
B. Loosen all of the belt adjustments.
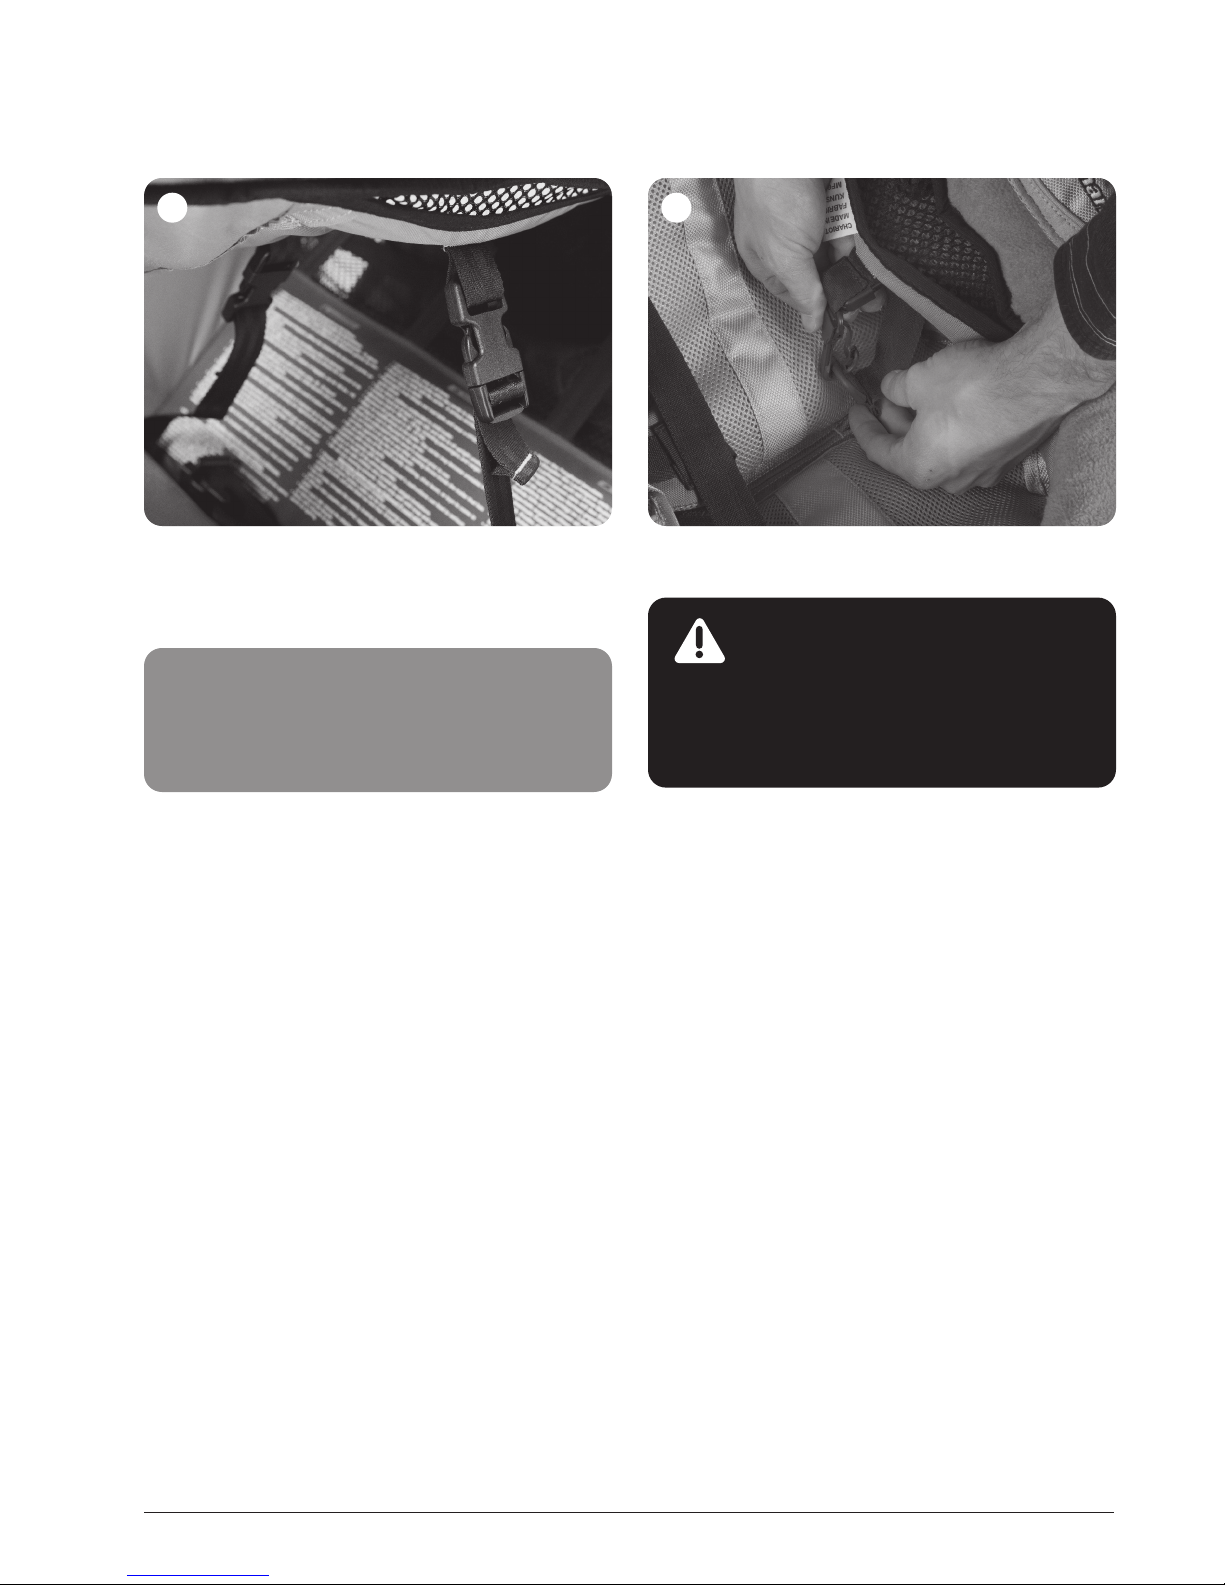
C. Undo the crotch strap buckle on the shoulder harness
by pressing the red release button.
D. Seat your child.
E. Lift up the crotch strap and connect the two shoulder
strap buckles together and then insert them together
into the crotch buckle. (See Image 1)
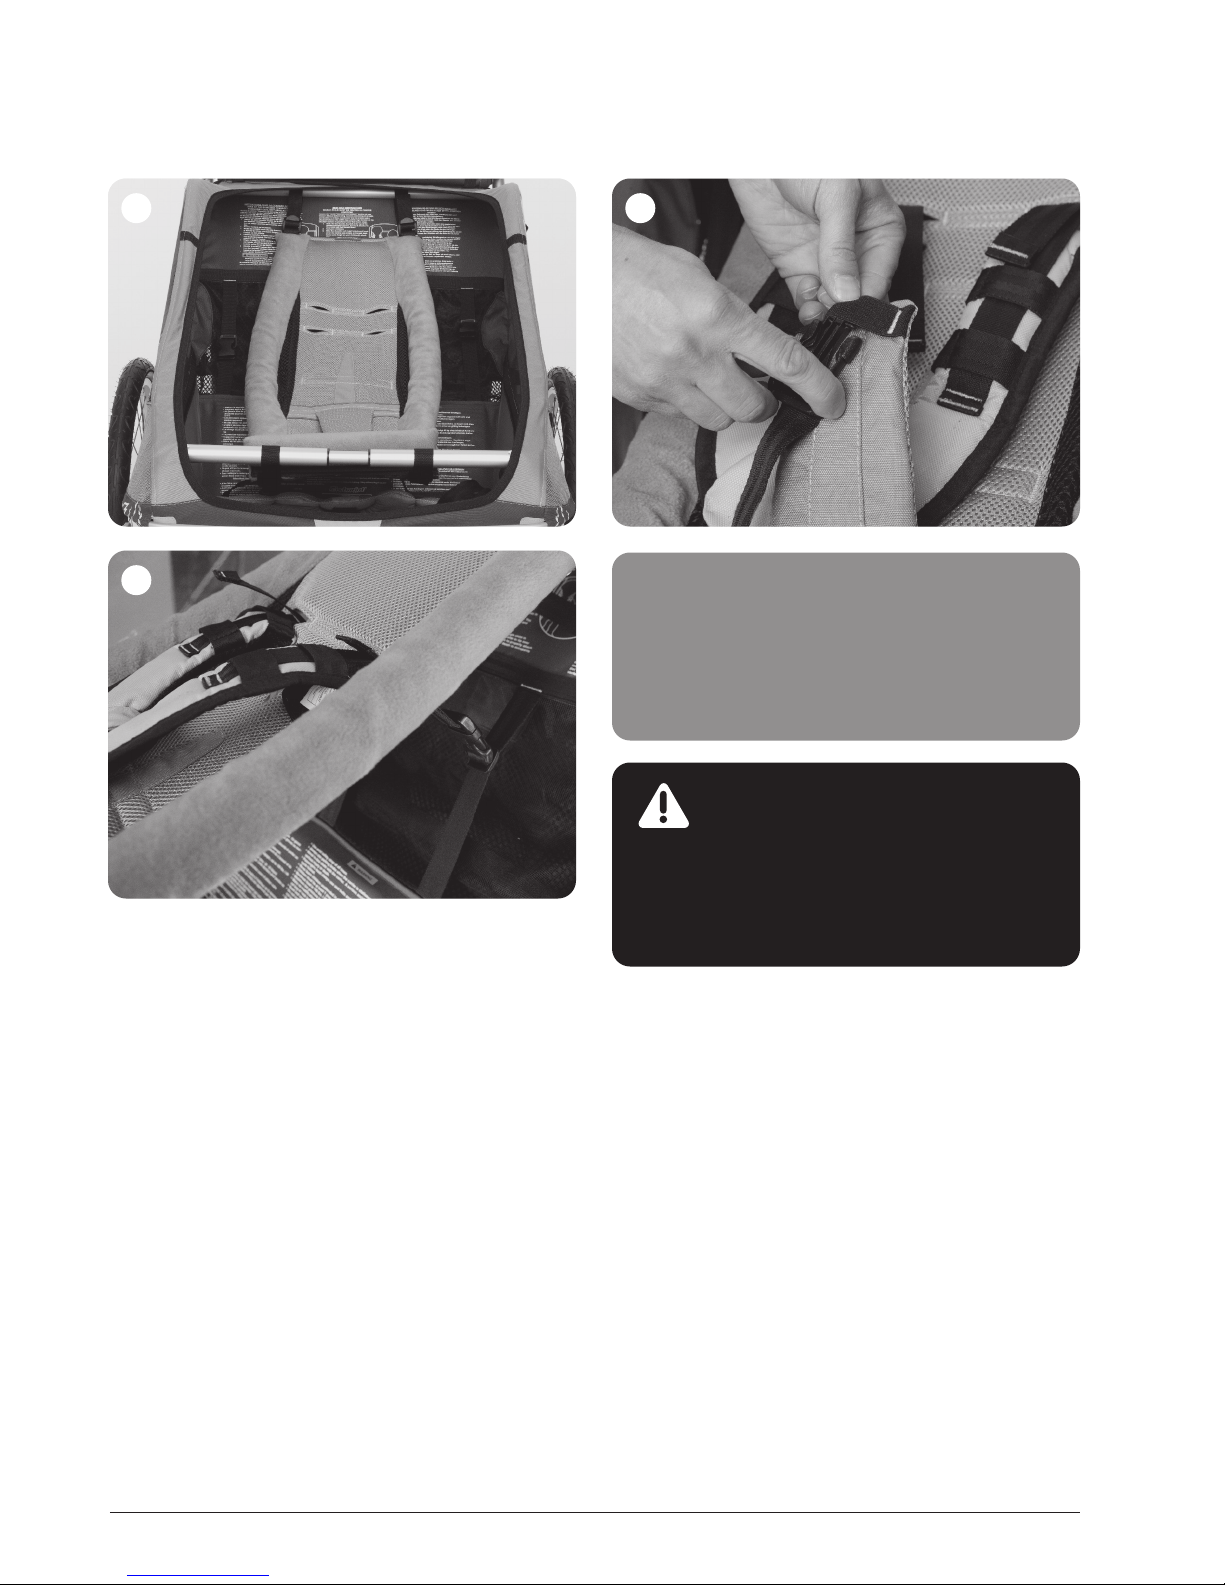
F. Adjust the harness system using the shoulder length
adjustments until the crotch strap buckle is positioned
above the child's lower chest.
G. Snugly tighten the two shoulder straps by pulling
downward on the shoulder strap loose ends. Ensure
that there is no looseness in the harness system at the
child's waist and shoulders. Ensure the shoulder pads
are positioned on top of the child's shoulders and next
to their neck.
2
1 3
Thule Child Transport Systems Ltd.
105 - 5760 9th Street SE Calgary, AB T2H 1Z9 Canada www.thule.com
info@thule.com
Table of contents
Other Thule Baby Carrier manuals