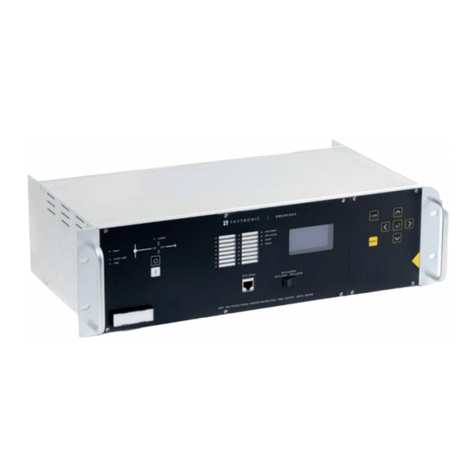
Thytronic NVA100X User manual

NVA100X - Getting started - 01 - 2018
—Packaging
ProNext devices must be stored within the required temperature limits; the relative humidity should
not cause condensation or formation of frost.
It is recommended that the devices are stored in their packaging; in the case of long storage, especial-
ly in extreme climatic conditions, it is recommended that the device is supplied with power for
some hours before the commissioning, in order to bring the circuits to the rating conditions and to
stabilize the operation of the components.
—Contents
• Getting started
• Test report
• Screws
—Technical support
Full documentation is available on the www.thytronic.it website; for information and purchase of licen-
ses for oscillographic recording function please contact THYTRONIC.
TABLE OF CONTENTS
Packaging ...................................................................................................................................................................................................................1
Contents .....................................................................................................................................................................................................................1
Technical support......................................................................................................................................................................................................1
INSTALLATION 2
Mounting.....................................................................................................................................................................................................................2
Flush mounting...........................................................................................................................................................................................................2
I/O diagram .................................................................................................................................................................................................................4
Electrical connections..............................................................................................................................................................................................5
Output relays ..............................................................................................................................................................................................................6
Binary Inputs ..............................................................................................................................................................................................................6
Ethernet Ports ............................................................................................................................................................................................................7
Local Port....................................................................................................................................................................................................................7
RS485 port...................................................................................................................................................................................................................8
PROGRAMMING AND SETTINGS 9
MMI Password management..................................................................................................................................................................................9
MMI (Man Machine Interface).............................................................................................................................................................................11
Reading variables (READ)......................................................................................................................................................................................11
Setting modifying (SET) ..........................................................................................................................................................................................12
TEST...........................................................................................................................................................................................................................13
COMMUNICATION ..................................................................................................................................................................................................13
Circuit breaker commands.....................................................................................................................................................................................13
MMI menu structure...............................................................................................................................................................................................14
NVA100X#P2J00TE0
In5A
UAUX 110-230 Vac/dc
100V
100V
IEn
UEn
Un
1A 1A
5A 1A
5A
Flush mounting
Inductive CTs-VTs
ThySensor inputs versions
Rack mounting with
MAR support
20 kV
UNP
630 A
NVA100X#P2000TE2
Inp
UAUX 110-230 Vac/dc
IEn 1A 1A 5A
GETTING STARTED
NOTE This document does not replace the instruction manual.
Some functions described may be not available in all NVA100X models.
NVA100X
THE COMPREHENSIVE SOLUTION FOR FEEDERS AND UTILITIES PROTECTION

2NVA100X - Getting started - 01 - 2018
INSTALLATION
MOUNTING
—Flush mounting
The fixed case, fitted with special fastening brackets, is mounted on the front of electric control board,
previously drilled as indicated in the drawing. In case of side-by-side mounting of several relays the
minimum drilling distance is determined by the front dimensions indicated in the overall dimensions
drawing, increased by 3 mm, to ensure an adequate tolerance and gasket space between adjacent
relays. The depth dimension, as indicated in the drawing, must be increased by as much as needed to
allow room for the wiring.
DRILLING TEMPLATE
SIDE VIEW
RACK MOUNTING
FRONT VIEW REAR VIEW
177
252
225 20
210 ±0.3
164.4
158.0 ±0.3
189
94.5
N.4 holes ø 4.2
N.4 holes ø 4.2
156
164.4
177
207
189
215
10
9
A
B
IN2D IN1C OC1E OC2F
NVA100X#JA2MM00
In5A
UAUX 110-230 Vac/dc
100V
100V
IEn
UEn
Un
1A 1A
5A 1A
5A
177 (4U)
101.6
482.6
465

3
NVA100X - Getting started - 01 - 2018
• Remove the two vertical frames for access the holes for the fi xing screws; the frames are snapped.
• Insert the device into the slot.
• Fit the device to the panel with four screws..
• Replace the vertical frames.

4NVA100X - Getting started - 01 - 2018
I/O DIAGRAM
Note [1]
two redundant ports with hw-sw switching selectable from TX (RJ45) + FX
(optical fiber), TX + TX or FX + FX. A version with two simultaneously active
Ethernet FX ports with RSTP protocol is available.
Note [2]
A version with 10 indipendent input is available.
UL1
UL2
UL3
UE
VOLTAGE INPUTS
9
10
7
8
5
6
3
4
BLOCK IN
3
4
1
IL1
IL2
IL3
IE
CURRENT INPUTS
2
3
4
5
6
7
8
Local Ethernet
X
1
2
BLOCK OUT
BLOUT-
BLOUT+
RS485
5
6
A+
B-
X
UAUX
1≅
2
B1
B
A
IN1C [2]
11
12
13
14
15
16
17
18
19
20
BINARY INPUTS
1IN1-1
IN1-2
IN1-3
IN1-4
IN1-5
IN1-6
IN1-7
IN1-8
IN1-9
IN1-10
IN1-11
IN1-12
IN1-13
IN1-14
IN1-15
IN1-16
2
3
4
5
6
7
8
9
10
OUTPUT RELAYS
1
3
2
18
20
19
9
10
11
12
13
14
OC1E
KC1-1
4
6
5
KC1-2
7
8
KC1-3
KC1-4
KC1-5
KC1-6
15
17
16
KC1-7
KC1-8
1
3
2
18
20
19
9
10
11
12
13
14
OC2F
KC2-1
4
6
5
KC2-2
7
8
KC2-3
KC2-4
KC2-5
KC2-6
15
17
16
KC2-7
KC2-8
IN2D
11
12
13
14
15
16
17
18
19
20
BINARY INPUTS
1IN2-1
IN2-2
IN2-3
IN2-4
IN2-5
IN2-6
IN2-7
IN2-8
IN2-9
IN2-10
IN2-11
IN2-12
IN2-13
IN2-14
IN2-15
IN2-16
2
3
4
5
6
7
8
9
10
NVA100X
4-20 mA
Mis.1
+
-
3
1
2
# / ∩
4
Mis.2
+
-
7
5
6
# / ∩
8
Mis.3
+
-10
9
# / ∩
Mis.4
+
-
13
11
12
# / ∩
14
Mis.5
+
-
17
15
16
# / ∩
18
Mis.6
+
-19
20
# / ∩
OPTIONS
TA-TV ThySensor
TX [1]
TX [1]
FX [1]
FX [1]
ETHERNET
Pt100
1
2
3
PT1
MPT1
T1
4
5
6
PT2
GND2
GND3
GND4
GND5
GND6
GND7
GND8
GND1
MPT2
T2
7
8
9
PT3
MPT3
T3
10
11
12
PT4
MPT4
T4
13
14
15
PT5
MPT5
T5
16
17
18
PT6
MPT6
T6
19
20
21
PT7
MPT7
T7
22
23
24
PT8
MPT8
T8
ThySensor INPUTS
IL1-UL1
IL2-UL2
IL3-UL3
P1
P2
UE
B5
B6
IE
B9
B10
UAUX
B1 ≅
B2
IRIG-B
AM IRIG-B IN
IRIG-B/1PPS IN
1PPS OUT
IRIG-B OUT

5
NVA100X - Getting started - 01 - 2018
ELECTRICAL CONNECTIONS
Electrical connections should be made by referring to the connection diagram;
CT-VT input versions
For the A1...A8 and B1...B10 , screw terminals with following characteristics are available:
• Nominal cross section: 0.2 to 4 mm2(AWG 24...10) for single conductor
0.2 to 1.5 mm2for two conductors with same cross section
• Tightening torque: 0.5-0.6 Nm
• Stripping length: 7 mm
For the IN1C-1...16, IN2D-1...16, OC1E-1...16 and OC2F-1...16 connections, screw terminals
with following characteristics are available:
• Nominal cross section: 0.14 to 2.5 mm2(AWG 26...16) for single conductor
da 0.14 to 0.75 mm2for two conductors with same cross section
• Tightening torque: 0.5-0.6 Nm
• Stripping length: 8 mm
For the X1...X6 (RS485 and blocks) connections, screw terminals with following characteristics are
available:
• Nominal cross section: 0.2 to 2.5 mm2(AWG 24...12) for single conductor
0.2 to 1.5 mm2for two conductors with same cross section
• Tightening torque: 0.5-0.6 Nm
• Stripping length: 10 mm
A protective ground connection is required, which must be connected to the suitable screw with a
separate lead of at least 4 mm2.
Amperometric inputs
In case of replacement of the relay or checks on the amperometric circuits is essential to provide
appropriate support to achieve the secondary circuit shorting. For security reasons it is advisable to
operate in the absence of line current.
When making the current connections, attention must be paid to not exceeding the performance of
the line current transformers. To be exact, the total load, constituted by the NA80 protective relay,
any other protective relays or measuring instruments and the resistance of the connections, must
not exceed the line CT performance.
In particular, consumption of the relay input circuit must not exceed 0.2 VA while the load (expressed
in VA) constituted by the conductors is given by:
0.018 × L × In2/ S where:
L the overall length, expressed in m, of the two conductors in relation to each phase;
Innominal current of the line CT expressed in A;
S cross sectional area of the current conductors expressed in mm2.
Devices must be installed by qualified personnel only.
No liability is accepted from Thytronic due to improper use.
CAUTION
If the secondary of a CT carrying primary current is open circuited, a high voltage can be developed
across the CT terminals.
CAUTION
Voltage inputs
Auxiliary power supply
Amperometric inputs
X1...X4 Block2
X5, X6 RS485
10
9
A
B
IN2D IN1C OC1E OC2F
Ground connection screw
Binary inputs
Output relays
NVA100X#JA2MM00
I
n5A
U
AUX
110-230 Vac/dc
100V
100V
I
En
U
En
U
n
1A
1A
5A
1A
5A

6NVA100X - Getting started - 01 - 2018
ThySensor inputs
(NVA100X#P)
The inputs current and voltage connections are made through pre-wired L1, L2 and L3 RJ45 plug.
For the A1, A2 and U1, U2 screw terminals with following characteristics are available:
• Nominal cross section: 0.2 to 4 mm2(AWG 24...10) for single conductor
0.2 to 1.5 mm2for two conductors with same cross section
• Tightening torque: 0.5-0.6 Nm
• Stripping length: 7 mm
For the IN1C-1...16, IN2D-1...16, OC1E-1...16 and OC2F-1...16 connections, screw terminals with fol-
lowing characteristics are available:
• Nominal cross section: 0.14 to 2.5 mm2(AWG 26...16) for single flexible conductor
0.14 to 0.75 mm2for two conductors with same cross section
• Tightening torque: 0.5-0.6 Nm
• Stripping length: 8 mm
For the X1...X6 (RS485 and blocks) connections, screw terminals with following characteristics are
available:
• Nominal cross section: 0.2 to 2.5 mm2(AWG 24...12) for single flexible conductor
0.2 to 1.5 mm2for two conductors with same cross section
• Tightening torque: 0.5-0.6 Nm
• Stripping length: 10 mm.
—Output relays
The device may be confi gured with:
• Two boards with eight command relays KC1-1...KC1-8 and KC2-1...KC2-8 (SPDT, tipo C e SPST-
NO,type A)
• One board with eight command relays KC1-1...KC1-8 and one boardwith with sixteen signalling relay
KS1-1...KS1-16 (SPST-NO, type A with four commons)
It is advisable to verify that the technical characteristic of the contacts be suitable for the applied load
(about current, nominal voltage, make and break current , etc..).
All contacts are shown in de-energized state for standard reference.
—Binary Inputs
The input circuits are voltage-free; activation requires the application of a power source, preferably
the same auxiliary voltage present in the switchboard.
The inputs are dimensioned for a wide range of operation and does not require any hw and / or sw
Voltage and amperometric
inputs from ThySensor
Residual voltage
input
Binary inputs
Output relays
L1
B
L2
L3
IN2D IN1C OC1E OC2F
Auxiliary power supply 1
2
5
6
Residual current
input
9
10
X1...X4 Block2
X5, X6 RS485
Ground screw
10
9

7
NVA100X - Getting started - 01 - 2018
programming.
AUX-IN external modules allow the thresholds setting for the binary inputs activation.
The digital inputs switching threshold can be set during installation so that the command voltage is
comparable to the supply voltage.
The inputs are immune to transitory interferences, however the following recommendation must be
considered in high disturbed environments:
• Position input wiring away from high energy sources.
• Set a debounce timer (tON and/or tOFF) to alloy the transient to decay.
• Use shielded cables with ground connection on only one end (preferably at the relay side.
—Ethernet Ports
Pro_NX relays are supplied with two Ethernet ports with TX (RJ45) or FX (fi ber optic) connection, and
ModBus / TCP or IEC 61850 protocol.
The following options are available:
A) TX + FX ports [1]
B) TX + TX ports [1]
C) FX + FX ports [1]
D) FX + FX + RSTP [2]
Connections to TX ports (RJ45) must be made with shielded cable FTP Cat.5e category or higher.
The link must be enabled by means ThySetter sw and local connection:
• Set the IP address (Host IP address and IP net mask) n order that the NVA100X and PC parame-
ters are matched.
• Set to OFF parameters Autonegotiation on relay.
Parameters are inside the Communication \ Ethernet submenu. Dopo aver eseguito le modifiche, af-
finché le nuove impostazioni relative alla comunicazione Ethernet siano attive, è necessario togliere
l’alimentazione ausiliaria e successivamente rialimentare il relè.
—Local Port
A cross cable must be used for connection between computer and local port.
Nota 1 The TX (RJ45) and FX (fi bra ottica) Ethernet port are multiplexed (single IP address). Under normal conditions, the primary port is active, while the
secondary port is activated in the event of failure of the primary port or by means of hw-sw switching command.
Note 2 Two simultaneously active Ethernet ports with RSTP protocol
ethernet-wiring.ai
4
6
5
2
1
3
x
NETWORK
3V3
TX
TX
LINK2
LINK1
4
6
5
2
1
3
x
NETWORK
3V3
FX
TX
LINK2
LINK1
4
6
5
2
1
3
x
NETWORK
3V3
FX
LINK2
LINK1
Var. A) Var. B) Var. C)-D)
Ingressi logici
+UAUX
-UAUX
ABIN1C IN2D
BINARY INPUTS
1
IN1-1
IN1-2
IN1-3
IN1-4
2
3
4
5
BINARY INPUTS
1
IN2-1
IN2-2
IN2-3
IN2-4
2
3
4
5

8NVA100X - Getting started - 01 - 2018
When used the local port takes priority over the Ethernet port.
—RS485 port
RS485 communication circuit connections must be made using screened twisted pair cable observing
the polarities; screening must only be connected to a single end.
It is recommended to terminate the line at the extremities of the same; this must be performed on the
RS485 line control unit and on the ProNext device placed at the furthest point
serial1-sch.ai
Connector RJ45
RS485
120 Ω
120 Ω
SUPERVISION UNIT
A+
B-
X5
X6
NVA100X
UAUX
≅
ETH-1
ETH-2
ETHERNET
1 - DTR
2 - GND
3 - RX
4 - TX
RS232
RS485
A+
B- X5
X6
NVA100X
UAUX
≅
ETH-1
ETH-2
ETHERNET
1 - DTR
2 - GND
3 - RX
4 - TX
RS232
RS485
A+
B-
4
6
5
2
1
3
x
NETWORK
3V3
FX
TX
LINK2
LINK1
RS485
B-
A+

9
NVA100X - Getting started - 01 - 2018
PROGRAMMING AND SETTINGS
All relay programming and adjustment operations may be performed through
• MMI (keyboard and display)
• a Personal Computer with the aid of the ThySetter software
—MMI Password management
Preamble
For security purpose, is possible to password-protect modification to the settings of relays by mean of
the MMI (keyboard and display).
Is possible to select:
• OFF - modification of the settings by means of MMI (keyboard and display) are permanently disabled,
• ON - modification of the settings by means of MMI (keyboard and display) are permanently enabled,
• By Password - modification of the settings by means of MMI (keyboard and display) are enabled only after typing of password.
Default setting is ON (modification enabled). Setting can be changed using Thysetter only on level 1 (
menu (Preference / Session Level).
ThySetter
Setting Parameter Setting Enable is in menù Set / MMI.
Note: to make any changes with Thysetter you need to start change settings, change the setting and end change settings.
MMI
If the By password mode is selected a new menu PASSWORD is inserted at the top of the display
menu. Press the key ENTER PASSWORD message is displayed followed by Password
not ok >>; press the key you can enter the personal password with the usual procedure (de-
fault password is 0000):
• Press the (Enter) button for a few seconds; the modification in progress status is highlighted by
flashing of the START and TRIP LEDs and by appearance of the pointer on the bottom
• Change the parameters by means the or moving to the next character with .
• Press the (Enter) button; the cursor and the LED TRIP turn off (the LED START keeps flashing)
• Press the (Enter) button for a few seconds; new message appears: Confirm settings?
• Answer to the message ENTER: YES to confirm changes or RESET: NO to abort.
• After entering the current password correctly, the message ENTER PASSWORD and PAS-
SWORD OK >> appears on display.
If password is correct, from this moment is possible to change settings.
After some minutes of inactivity, reported by turning off the display backlight, Dopo alcuni minuti di
inattività, segnalati dallo spegnimento della retroilluminazione del display, possibility of modification is
disabled and therefore it is necessary to re-enter the password.
If you continue navigating the menus without entering the password, you can view all settings, but it
WARNING For safety reasons, a change of the rated values (Set \ Base menu) parameters become active
only after an hw reset

10 NVA100X - Getting started - 01 - 2018
is impossible to make any modification (keeping pressed for some seconds the key (Enter) modi-
fication procedure is disabled (LED START, TRIP and curson under the parameters to be modified).
Changing password
After correct insertion of password is displayed this message: ENTER PASSWORD and
PASSWORD OK >>; pressing the key is shown the message CHANGE PASSWORD
>> and pressing button you access the relative menu where you can enter the new password.
Lost password
To change password current one must be entered. If the password is lost, neither the password nor
any parameter from MMI can be changed and the changes can only be made by ThySetter.
To enable modification from MMI without password is needed to disable password lock connecting a
PC with Thysetter setting ON parameter Parameters setting enable available in menu Set / MMI.
If password is lost and password lock must be enabled, device database must be reset using the com-
mand Set default setting available in the menu Command \ Default setting. (double click on Default
Setting, click on Set default setting, right click --> Send Command).
Note:
The command Set default settings restores the factory settings, all user- defined
adjustments are cleared.
Be carefully to enter the correct parameter !
The device serial number should be set to avoid IP address conflicts for devices con-
nected to the Ethernet network.

11
NVA100X - Getting started - 01 - 2018
MMI (MAN MACHINE INTERFACE)
On the front panel there are eight buttons which allow the user to perform all the settings, reading and
modification operations.[1]
The adjustment of the settings and the operation mode of the output relays must be performed while
the unit is electrically powered. All preset values are permanently stored in the nonvolatile memory.
The buttons take the following operations:
- (Up) move the cursor upwards to the preceding menu options
- (Down) move the cursor downwards to the subsequent menu options
- (Left) move the cursor upwards to the preceding menu options
- (Right) move the cursor downwards to the subsequent menu options
- (Enter) access to the selected menu with the option of modifying any given parameter
- (Reset) abort the current changes and/or accessing the previous menu
- Circuit breaker Open command
- Circuit breaker Close command
At power-up, the display shows the text:
“THYTRONIC
PRO-NVA100X-VM00-a
date and time: (01/01/2000 00:00”
The ON green Led points out the auxiliary power supply voltage (permanent lighted) and possible
faults (blink lighted).
The display backlight is automatically activated when any key switch is set.
By means of the (Up) or (Down) buttons, it is possible to cyclically browse through the menu
options: READ, SET, COMMUNICATION, TEST
Having identifi ed the sub-menu of interest, it is possible to gain access by using the (Right) button
and then analogously, run through the relevant options by using the (Up) or (Down) buttons.
The full menu tree and some examples are showed in the following pages (numerical values and
settings are pointed out as examples and does not agree with real situations).
—Reading variables (READ)
All data (measure, settings, parameters, etc...) can be displayed; they are arranged in functional
group submenus::
“SELF TEST >>”
“SERIAL NUMBER >>”
“INFO >>”
“MEASURES >>”
“ACTIVE PROFILE >>”
“PROTECTIONS >>”
“PLC >>”
“CIRCUIT BREAKER SUPERVISION >>”
“DELAYED INPUTS IN1-1...IN1-16 >>”
“INTERNAL STATES >>”
“RELAYS KC1-1...KC1-8 >>”
“PARTIAL COUNTERS >>”
“TOTAL COUNTERS >>”
“SELF-TEST >>”
“PILOT WIRE DIAGNOSTIC >>”
“SELECTIVE BLOCK BLOCK2 >>”
“INTERNAL ELECTIVE BLOCK BLOCK4 >>”
“FAULT RECORDING >>”
“EVENTS RECORDING >>”
Note 1 LSetting changes are enabled when the Enabling setting by MMI parameter is set
OPEN CB
CLOSE CB
Label_LED
LEDs
Input 1 board LEDs
L1-1...L1-8 user
programmable
Input 1 MMI board
LEDs L1-1...L1-8
user programmable
ON e Diagnostic
Start
Trip

12 NVA100X - Getting started - 01 - 2018
—Setting modifying (SET)
For safety reason is sometime required that modification of settings using MMI (keyboard and display)
is disabled; in this way only qualified personell can modify settings using software Thysetter.
All changes in the setting parameters are carried out through MMI only if the Enable setting by MMI
parameter is ON. (ENABLE SETTING BY MMI submenu inside the SET menu).
To effect a change, having identified the parameter intended for change, the following procedure must
be performed:
• Select the parameter going through the menus by means the , and keys
• Press the (Enter); button for a few seconds; the modification in progress status is highlighted by
flashing of the START and TRIP LEDs and by appearance of the pointer on the bottom.
• Move the cursor over the parameter intended for change using the (Enter) button,.
• Change the parameters by means the (increment) or (decrement) buttons.
• Press the (Enter) button to move the cursor over the last parameter in the display.
• Press the (Enter) button once again; the cursor and the LED TRIP turn off (the LED START keeps
flashing).
• Press the (Enter) button for a few seconds; new message appears: “Conrm settings?”
• Answer to the message ENTER: YES to confi rm changes or RESET: NO to abort.
The end of the START LED blinking points out the end of procedure; the changes become right now
active.
The abort command may be used to abandon changes (prior to use of the ENTER: YES); the same
effect is achieved by removing the auxiliary power supply to the relay.
As example, to set the operating mode of the KC1-1 output relay as ENERGIZED, LATCHED, the following
procedure must be issued:
• Select menu Set “SET >>”by mean of the button (Down).
• Press the (Right) button to enter; the following submenu title is displayed: “BASE >>”
• Scroll menus by means (Down) button
“INPUT SEQUENCE >>”
“POLARITY >>”
“LINE >>”
“ENABLE VECTOR JUMP >>”
“INPUTS IN1-1...IN1-16 >>”
“RELAYS KC1-1...KC1-8 >>”
“LEDs ON MMI >>”
“LEDs LED1-1...LED1-8 >>”
“SELF-TEST RELAY >>”
“MMI >>”
“AUTO-RECLOSE 79 >>”
“PROFILE SELECTION >>”
“PROFILE A >>”
“PROFILE B >>”
“PLC >>”
“CIRCUIT BREAKER SUPERVISION 52 >>”
“VT SUPERVISION 74VT >>”
“CT SUPERVISION 74CT >>”
“FAULT LOCATOR FL >>”
“REMOTE TRIPPING >>”
“PILOT WIRE DIAGNOSTIC >>”
“DEMAND MEASURES >>”
• Select the Set menu “RELAYS KC1-1...KC1-8 >>”, the “KC1-1 relay Setpoints >>”
is displayed.
• Press the (Right) button to enter; the following messages are displayed:
“Logic DE-ENERGIZED Mode NO LATCHED”
• Press the (Enter) button for a few seconds; the modification in progress status is highlighted by
the both START and TRIP flashing.
• Move the cursor over the parameter intended for change using the (Enter), button, (in our case
on the message “Logic DE-ENERGIZED”,
• Change the parameters by means the o “Logic ENERGIZED”,
• Premere il pulsante (Enter) momentaneamente per posizionare il cursore in corrispondenza del-
l’ultimo parametro visualizzato sul display, “Mode NO LATCHED”,
• Modificare il parametro mediante i pulsanti (increment) or (decrement) buttons, “Mode LA-
TCHED”,
• Press the (Enter) button once again; the cursor and the LED TRIP turn off (the LED START keeps
flashing),
• Press the (Enter) button for a few seconds; new message appears: “Conrm settings?”
• Answer to the message ENTER: YES to confirm changes or RESET: NO to abord
The end of the LED START blinking points out the end of procedure.

13
NVA100X - Getting started - 01 - 2018
—TEST
The operational tests with command of the selected output relays may be activated.
By means of (Up) or (Down) buttons it is possible to browse the main menu till the “ “TEST”
message; to enter you must press the (Right) button. [1] The display message “Test state:
OFF” shows the test state (OFF or test in progress).
By means of (Down) button is possible to browse menu to select:
• Stop test
• Start test
• Test KC1-1
• Test KC1-2
• Test KC1-3
• Test K...
As example, to start the test of KC1-1, the following procedure must be issued::
• Select the Start test menu “Start test? >>”.
• Press the (Right) button to start; the test in progress status is highlighted by activation of all LEDs.
• Come back by pressing the (Left) .
• SelecttherelaytobetestedKC1-1bymeans or
untilthemessage“Test KC1-1? >> isdisplayed.
• Press the (Right) button to start the test on KC1-1.
• To terminate the test, it is necessary to select the “Stop test? >>” message and press the
(Right). button to end the test. In any case the test will be automatically terminated after a delay of
one minute.
—COMMUNICATION
Inside the COMMUNICATION menu it is possible to read/modify the setting data of the RS485 Protocol
and Ethernet parameters. Since newer versions Ip Address can be modified only in Commands \ Set
Params \ Set not resettable parameter.
By means of (Up) or (Down) buttons it is possible to browse the main menu till the “RS485
Protocol >>”, “Ethernet Local Parameters >>” or“Ethernet Remote
Parameters >>”; to enter you must press the (Right) button.
As example, to select the address 12 for the ModBus protocol, the following procedure must be issued:
• Select the Communication menu“COMMUNICATION >>”.
• By means (Down) button select the “RS485 Protocol >>”.
• Press the (Right) button to enter; the following message is displayed:
“Protocol MODBUS”
“Address 1”
“9600 baud”
• Start the procedure to effect a change explained in the Setting modifying (SET) paragraph
• Press the (Enter); button for a few seconds; the modifi cation in progress status is highlighted by
the both START and TRIP flashing.
• Move the cursor over the parameter intended for change using the (Enter), button, (in the exam-
ple on the 1 address),
• Change the parameters by means the (increment) button (up to 12 address),
• Press the (Enter) button to move the cursor over the last parameter in the display.
• Press the (Enter) button once again; the cursor and the LED TRIP turn off (the LED START keeps
flashing),
• Press the (Enter) button for a few seconds; new message appears: “Conrm settings?”
• Answer to the message ENTER: YES to confirm changes or RESET: NO to abort.
The end of the LED blinking points out the end of procedure.
—Circuit breaker commands
By means of the (open) and (close) keys, the circuit breaker commands may be issued.
The committed output relays must be enabled inside the Circuit Breaker supervision \
LEDs-relays allocation menu.
Note 1 Instantly all the relays are switched in rest state, including relays programmed as “normally energized”

14 NVA100X - Getting started - 01 - 2018
MMI MENU STRUCTURE
READ
NVA100X_menuread1.ai
Profile A
ACTIVE PROFILE >>
PROCEED READ MENU’
State N.Open OFF
State SumI OFF
State SumI^2t OFF
State tbreak OFF
SumIL1 0 In
SumIL2 0 In
SumIL3 0 In
SumIL1^2t 0 In^2s
SumIL2^2t 0 In^2s
SumIL3^2t 0 In^2s
CIRCUIT BREAKER
SUPERVISION >>
CB COMMANDS >>
CB POSITION >>
CB DIAGNOSTIC >>
CB-OPEN Cmd OFF
CB-CLOSE Cmd OFF
CB state ?
Binary IN1-1 OFF
Binary IN1-2 OFF
Binary IN1-3 OFF
..................
Binary IN1-16 OFF
DELAYED INPUTS
IN1-1...IN1-16 >>
VIN01 Status OFF
VIN01 Timeout ON
VIN02 Status OFF
VIN02 Timeout ON
..................
VIN032 Status OFF
VIN032 Timeout ON
VIN >>
VOUT01: OFF
VOUT02: OFF
VOUT03: OFF
..................
VOUT16: OFF
VOUT >>
INFO >>
Code NVA100X-VM00-a
Ver.sw 1.00
DSP fw Rel 1.00
SERIAL NUMBER >> Serial number
237
IEC61850 >> Code NVA100X-VM00-a
Sw Release 1.30
SELF TEST >>
Protection
ON SERVICE
Global self-test
OK
System OK
Data-base:
boot OK
run-time OK
DAta BUS:
heavy OK
minor OK
DSP:
..................
MODULES >>
MMI board ON
SING1 board ON
SING2 board OFF
SRC1 board ON
------------------
<< No Yes >>
Disable
27-27V1-37?
DISABLE 27-37
FUNCTIONS
BY OPERATOR >>
PROTECTIONS >> SEE NEXT PAGES
THYTRONIC
PRO-NVA100X-VM00-a
DATE: 19/06/2013
TIME: 17:29:59
PLC >>
PLC State 1: 0
PLC State 2: 0
PLC State x: 0
..................
PLC State 32: 0
User SW name: xxx
Ver.:
DATE: 01/08/2007
PLC state: OFF
PLC version: 01.40
Error: none
Warning: none
PLC States >>
CLOCK ADJUST >>
HOUR: 14
MINUTE: 25
SECONDS: 0
<< Confirm >>
DAY: 11
MONTH: 7
YEAR: 2013
<< Confirm >>
START
SYNCHRO CHECK >>
Start Synchro check?
<<No Yes>>
MEASURES >>
IL1 0.000 In
IL2 0.000 In
IL3 0.000 In
IE 0.000 IEn
UL1 0.000 En
UL2 0.000 En
UL3 0.000 En
UL4 0.000 Un4
UE 0.000 UEn
U12 0.000 Un
U23 0.000 Un
U31 0.000 Un
UEC 0.000 UECn
ILmax 0.000 In
ILmin 0.000 In
IL 0.000 In
ULmax 0.000 En
UL 0.000 Un
U 0.000 Un
PhiL1 0 deg
PhiL2 0 deg
PhiL3 0 deg
Alpha1 0 deg
Alpha2 0 deg
Alpha3 0 deg
PhiE 0 deg
PhiEC 0 deg
DTheta 0 DThetaB
I1 0.000 In
I2 0.000 In
I2/I1 0.000 In
U1 0.000 En
U2 0.000 En
U/f 0.000 Un/fn
P 0.000 Pn
Q 0.000 Qn
S 0.000 An
CosPhi 1.000
PL1 0.000 Pn
QL1 0.000 Qn
CosPhiL1 1.000
PL2 0.000 Pn
QL2 0.000 Qn
CosPhiL2 1.000
PL3 0.000 Pn
QL3 0.000 Qn
CosPhiL3 1.000
IL1-2nd 0.000 In
IL2-2nd 0.000 In
IL3-2nd 0.000 In
IL1-3rd 0.000 In
IL2-3rd 0.000 In
IL3-3rd 0.000 In
IE-3rd 0.000 IEn
UE-3rd 0.000 UEn
IL1-4th 0.000 In
IL2-4th 0.000 In
IL3-4th 0.000 In
IL1-5th 0.000 In
IL2-5th 0.000 In
IL3-5th 0.000 In
f 0.000 Hz
fUL1 0.000 Hz
fUL4 0.000 Hz
DV 0.000 Un4
DF 99.99 Hz
PhiL14 0 deg
df/dt 0.000 Hz/s
IL1FIX 0.000 In
IL2FIX 0.000 In
IL3FIX 0.000 In
PFIX 0.000 Pn
QFIX 0.000 Qn
IL1ROL 0.000 In
IL1ROL 0.000 In
IL2ROL 0.000 In
IL3ROL 0.000 In
PROL 0.000 Pn
QROL 0.000 Qn
IL1MAX 0.000 In
IL2MAX 0.000 In
IL3MAX 0.000 In
PMAX 0.000 Pn
QMAX 0.000 Qn
IL1MIN 0.000 In
IL2MIN 0.000 In
IL3MIN 0.000 In
PMIN 0.000 Pn
QMIN 0.000 Qn
EA+ 0 kWh
EA- 0 kWh
EQ+ 0 kvarh
EQ- 0 kvarh
EA 0 kWh
EQ 0 kvarh
INTERNAL STATES
>>
LEDs reset OFF
Prof. switch OFF
Block1: OFF
Block2 Generic OFF
Block2 50 OFF
Block2 50N OFF
TCS1 OFF
TCS2 OFF
Ext.trip BF OFF
Remote trip OFF
Fault trig OFF
52a OFF
52b OFF
CB OPEN Cmd OFF
CB CLOSE Cmd OFF
CB Monitor OFF
79 Enable OFF
79 Block OFF
79 Ext. OFF
Reset Demand OFF
Reset Energy OFF
Reset count. OFF
Thermal image init
OFF
74VT ext. OFF
MCB VT OPEN OFF
TCP >>
MULTICAST >>
SERVER >>
RPC >>
CLIENT01: OFF
CLIENT02: OFF
CLIENT03: OFF
..................
CLIENT08: OFF
CLIENT01: OFF
CLIENT02: OFF
CLIENT03: OFF
..................
CLIENT08: OFF
CON. TCP: 0
CON. MCAST: 0
NOTA I menù illustrano tutte le funzioni di protezione
Le funzioni effettivamente presenti dipendono dalla versione di NVA100X-x (x = B, V, P, G o C)

15
NVA100X - Getting started - 01 - 2018
NVA100X_menuread1a.ai
PROTECTIONS
27 >>
Start U< OFF
Trip U< OFF
BLK1 U< OFF
Start U<< OFF
Trip U<< OFF
BLK1 U<< OFF
27V1 >>
Start U1< OFF
Trip U1< OFF
BLK1 U1< OFF
37 >>
Start I< OFF
Trip I< OFF
BLK1 I< OFF
37P >>
Start P1< OFF
Trip P1< OFF
BLK1 P1< OFF
Start P2< OFF
Trip P2< OFF
BLK1 P1< OFF
Start IE> OFF
Trip IE> OFF
CLP IE> OFF
BLK1 IE> OFF
BLK2IN IE> OFF
BLK4IN IE> OFF
Start IE>> OFF
Trip IE>> OFF
CLP IE>> OFF
BLK1 IE>> OFF
BLK2IN IE>> OFF
BLK4IN IE>> OFF
Start IE>>> OFF
Trip IE>>> OFF
CLP IE>>> OFF
BLK1 IE>>> OFF
BLK2IN IE>>> OFF
BLK4IN IE>>> OFF
50N/51N-87NHIZ >>
Start IEC> OFF
Trip IEC> OFF
CLP IEC> OFF
BLK1 IEC> OFF
BLK2IN IEC> OFF
BLK4IN IEC> OFF
Start IEC>> OFF
Trip IEC>> OFF
CLP IEC>> OFF
BLK1 IEC>> OFF
BLK2IN IEC>> OFF
BLK4IN IEC>> OFF
Start IEC>>> OFF
Trip IEC>>> OFF
CLP IEC>>> OFF
BLK1 IEC>>> OFF
BLK2IN IEC>>> OFF
BLK4IN IEC>>> OFF
50N(C)/51N(C) >>
37Q >>
Start P1< OFF
Trip P1< OFF
BLK1 P1< OFF
Start P2< OFF
Trip P2< OFF
BLK1 P1< OFF
32P >>
Start P1> OFF
Trip P1> OFF
BLK1 P1> OFF
Start P2> OFF
Trip P2> OFF
BLK1 P2> OFF
32Q >>
Start Q1> OFF
Trip Q1> OFF
BLK1 Q1> OFF
Start Q2> OFF
Trip Q2> OFF
BLK1 Q2> OFF
49MG >>
Alarm DThAL OFF
BLK1 DThAL OFF
BLK2IN DThAL OFF
Trip DTh> OFF
BLK1 DTh> OFF
BLK2IN DTh> OFF
Alarm DThAL1 OFF
BLK1 DThAL1 OFF
BLK2IN DThAL1 OFF
BLK4IN DThAL1 OFF
Alarm DThAL2 OFF
BLK1 DThAL2 OFF
BLK2IN DThAL2 OFF
BLK2IN DThAL2 OFF
BLK4IN DThAL2 OFF
Trip DTh> OFF
BLK1 DTh> OFF
BLK2IN DTh> OFF
BLK4IN DTh> OFF
CLP DTh OFF
49LT >>
79 >>
ActiveMode 79 OFF
Run 79 OFF
CycleState 79 Rest
Residual-time 79
0 s
LastEvent 79
No events
EnableState 79 OFF
Start(U/f)AL OFF
Trip (U/f)AL OFF
BLK1 (U/f)AL OFF
Start(U/f)> OFF
Trip (U/f)> OFF
BLK1 (U/f)> OFF
Start(U/f)>> OFF
Trip (U/f)>> OFF
BLK1 (U/f)>> OFF
24 >>
Synchro Avv OFF
Synchro ControlOFF
Synchro Trip OFF
Synchro diagnostic
State V1-SYNC OFF
State V4-SYNC OFF
State f1-RANGE OFF
State f4-RANGE OFF
State V1>SYNC OFF
State V4>SYNC OFF
State V1<SYNC OFF
State V4<SYNC OFF
State df-net OFF
State df-SYNC OFF
State dphi-SYNCOFF
25 >>
I2/I1 >>
Start I21> OFF
Trip I21> OFF
BLK1 I21> OFF
CLP I21> OFF
46M >>
Start I2> OFF
Trip I2> OFF
CLP I2> OFF
BLK1 I2> OFF
BLK2IN I2> OFF
Start I2>> OFF
Trip I2>> OFF
CLP I2>> OFF
BLK1 I2>> OFF
BLK2IN I2>> OFF
Start I> OFF
Trip I> OFF
CLP I> OFF
BLK1 I> OFF
BLK2IN I> OFF
BLK4IN I> OFF
Start I>> OFF
Trip I>> OFF
CLP I>> OFF
BLK1 I>> OFF
BLK2IN I>> OFF
BLK4IN I>> OFF
Start I>>> OFF
Trip I>>> OFF
CLP I>>> OFF
BLK1 I>>> OFF
BLK2IN I>>> OFF
BLK4IN I>>> OFF
50/51 >>
PROCEED READ MENU’
Start I2AL> OFF
Trip I2AL> OFF
BLK1 I2AL> OFF
Start I2>> OFF
Trip I2>> OFF
BLK1 I2>> OFF
46G >>
47 >>
Start US1< OFF
Start US> OFF
Trip 47 OFF
BLK1 47 OFF
55 >>
Start CPhi1< OFF
Trip CPhi1< OFF
BLK1 CPhi1< OFF
Start CPhi2< OFF
Trip CPhi2< OFF
BLK1 CPhi2< OFF
46LT >>
Start I2> OFF
Trip I2> OFF
CLP I2> OFF
BLK1 I2> OFF
BLK2IN I2> OFF
Start I2>> OFF
Trip I2>> OFF
CLP I2>> OFF
BLK1 I2>> OFF
BLK2IN I2>> OFF

16 NVA100X - Getting started - 01 - 2018
NVA100X_menuread1b.ai
PROTECTIONS
74VT >>
Block 74VT OFF
Alarm 74VT OFF
BLK1 74VT OFF
74CT >>
Start I* OFF
Trip S< OFF
BLK1 S< OFF
59 >>
Start IED> OFF
Trip IED> OFF
CLP IED> OFF
BLK1 IED> OFF
BLK2IN IED> OFF
BLK4IN IED> OFF
Start IED>> OFF
Trip IED>> OFF
CLP IED>> OFF
BLK1 IED>> OFF
BLK2IN IED>> OFF
BLK4IN IED>> OFF
Start IED>>> OFF
Trip IED>>> OFF
CLP IED>>> OFF
BLK1 IED>>> OFF
BLK2IN IED>>> OFF
BLK4IN IED>>> OFF
Start IED>>>> OFF
Trip IED>>>> OFF
CLP IED>>>> OFF
BLK1 IED>>>> OFF
BLK2IN IED>>>> OFF
BLK4IN IED>>>> OFF
67N >>
BF >>
Trip Int/Ext OFF
Start IBF> OFF
Start IEBF> OFF
Start BF OFF
Trip BF OFF
BLK1 BF OFF
74VTint67 State
OFF
74VText67 State
OFF
Start IPD> OFF
Trip IPD> OFF
CLP IPD> OFF
BLK1 IPD> OFF
BLK2IN IPD> OFF
BLK4IN IPD> OFF
Start IPD>> OFF
Trip IPD>> OFF
CLP IPD>> OFF
BLK1 IPD>> OFF
BLK2IN IPD>> OFF
BLK4IN IPD>> OFF
Start IPD>>> OFF
Trip IPD>>> OFF
CLP IPD>>> OFF
BLK1 IPD>>> OFF
BLK2IN IPD>>> OFF
BLK4IN IPD>>> OFF
Start IPD>>>> OFF
Trip IPD>>>> OFF
CLP IPD>>>> OFF
BLK1 IPD>>>> OFF
BLK2IN IPD>>>> OFF
BLK4IN IPD>>>> OFF
67 >>
Start U> OFF
Trip U> OFF
BLK1 U> OFF
Start U>> OFF
Trip U>> OFF
BLK1 U>> OFF
59N >>
Start UE> OFF
Trip UE> OFF
BLK1 UE> OFF
Start UE>> OFF
Trip UE>> OFF
BLK1 UE>> OFF
VECTOR JUMP >>
Start dphi> OFF
Trip dphi> OFF
BLK1 dphi> OFF
Enphi state OFF
Start 74TCS OFF
Trip 74TCS OFF
BLK1 74TCS OFF
Start I2ndh> OFF
2ndh-REST >>
74TCS >>
59V2 >> Start U2> OFF
Trip U2> OFF
BLK1 U2> OFF
66 >>
Trip 66 OFF
BLK1 66 OFF
ATST 0 s
ANST 0
AtIN 0 s
81O >>
Start f> OFF
Trip f> OFF
BLK1 f> OFF
Start f>> OFF
Trip f>> OFF
BLK1 f>> OFF
81U >>
Start f< OFF
Trip f< OFF
BLK1 f< OFF
Start f<< OFF
Trip f<< OFF
BLK1 f<< OFF
Start f<<< OFF
Trip f<<< OFF
BLK1 f<<< OFF
Start f<<<< OFF
Trip f<<<< OFF
BLK1 f<<<< OFF
81R >>
Start df> OFF
Trip df> OFF
BLK1 df> OFF
Start df>> OFF
Trip df>> OFF
BLK1 df>> OFF
Start df>>> OFF
Trip df>>> OFF
BLK1 df>>> OFF
Start df>>>> OFF
Trip df>>>> OFF
BLK1 df>>>> OFF
PROCEED READ MENU’
PREVIOUS READ MENU’

17
NVA100X - Getting started - 01 - 2018
READ
PREVIOUS READ MENU’
PROCEED READ MENU’
PARTIAL COUNTERS SEE NEXT PAGES
TOTAL COUNTERS SEE NEXT PAGES
NVA100X_menuread2.ai
NVA100X_menuread1.ai
KC1-1 relay OFF
KC1-1 coil OK
KC1-2 relay OFF
KC1-2 coil OK
KC1-3 relay OFF
KC1-3 coil OK
KC1-4 relay OFF
KC1-4 coil OK
KC1-5 relay OFF
KC1-5 coil OK
KC1-6 relay OFF
KC1-6 coil OK
KC1-7 relay OFF
KC1-7 coil OK
KC1-8 relay OFF
KC1-8 coil OK
RELAYS
KC1-1...KC1-8
Fault 0
(last) >>
Fault 1
>>
Fault ...
>>
Fault 10
>>
FAULTS RECORDING
>>
PILOT WIRE
DIAGNOSTIC >>
BreakedBLIN1 OFF
ShortedBLIN1 OFF BLOCK2IN-IPh OFF
BLOCK2IN-IE OFF
tb timeout OFF
Fault 0 Cause: -
Operating phase: -
Date:
Time:
IL1r: 0.000 In
IL2r: 0.000 In
IL3r: 0.000 In
UL1r: 0.000 Un
UL2r: 0.000 Un
UL3r: 0.000 Un
U12r: 0.000 Un
U23r: 0.000 Un
U31r: 0.000 Un
IEr: 0.000 IEn
IECr: 0.000 IEn
UEr: 0.000 UEn
UECr: 0.000 UECn
PhiL1r: 0 deg
PhiL2r: 0 deg
PhiL3r: 0 deg
Alpha1r: 0 deg
Alpha2r: 0 deg
Alpha3r: 0 deg
PhiEr: 0 deg
PhiECr: 0 deg
DTheta-r: :
0.000 DThetaB
U1r: 0.000 En
U2r: 0.000 En
U/fr: 0.000 Un/fn
Pr: 0.000 Pn
Qr: 0.000 Qn
CosPhir: 0.000
fr: 0.000 fn
dfr: 0.000 Hz/s
dphir: 0 deg
Binary inputs
IN1-16...IN1-1:
0000000000000000
IN2-16...IN2-1:
0000000000000000
Relay
KC1-8...KC1-1:
00000000
KC2-8...KC2-1:
00000000
ST-IPh-BLK2 OFF
ST-IE-BLK2 OFF
BLK2OUT-IPh OFF
BLK2OUT-IE OFF
BLK2OUT-IPh/IE OFF
SELECTIVE BLOCK
BLOCK2
BLOCK2 INPUT >>
BLOCK2 OUTPUT >>
INTERNAL
SELECTIVE BLOCK
BLOCK4 >>
ST-IPh-BLK4 OFF
ST-IE-BLK4 OFF
BLK4OUT OFF
Event 0 (last)
Power up
17/06/2013
06:48:27:254
Event 1
Settings
18/06/2013
06:48:27:254
Event 2
Power down
18/06/2013
08:00:27:137
Event ...
Settings
18/06/2013
06:48:27:254
Event 299
Settings
18/06/2013
06:48:27:254
EVENTS RECORDING
>>

18 NVA100X - Getting started - 01 - 2018
ParStU<cnt 0
ParTrU<cnt 0
ParBk1U<cnt 0
ParStU<<cnt 0
ParRtU<<cnt 0
ParBk1U<<cnt 0
ParStI>cnt 0
ParTrI>cnt 0
ParBk1I>cnt 0
ParBk2I>cnt 0
ParStI>>cnt 0
ParTrI>>cnt 0
ParBk1I>>cnt 0
ParBk2I>>cnt 0
ParStI>>>cnt 0
ParTrI>>>cnt 0
ParBk1I>>>cnt 0
ParBk2I>>>cnt 0
ParSt-P1>cnt 0
ParTr-P1>cnt 0
ParBk1-P1>cnt 0
ParSt-P2>cnt 0
ParRt-P2>cnt 0
ParBk1-P2>cnt 0
ParSt-P1<cnt 0
ParTr-P1<cnt 0
ParBk1-P1<cnt 0
ParSt-P2<cnt 0
ParRt-P2<cnt 0
ParBk1-P2<cnt 0
ParSt-Q1<cnt 0
ParTr-Q1<cnt 0
ParBk1-Q1<cnt 0
ParSt-Q2<cnt 0
ParRt-Q2<cnt 0
ParBk1-Q2<cnt 0
ParSt-Q1>cnt 0
ParTr-Q1>cnt 0
ParBk1-Q1>cnt 0
ParSt-Q2>cnt 0
ParRt-Q2>cnt 0
ParBk1-Q2>cnt 0
ParStU1<cnt 0
ParTrU1<cnt 0
ParBk1U1<cnt 0
ParSt(U/f)ALcnt 0
ParTr(U/f)ALcnt 0
ParBk1(U/f)ALcnt 0
ParSt(U/f)>cnt 0
ParTr(U/f)>cnt 0
ParBk1(U/f)>cnt 0
ParSt(U/f)>>cnt 0
ParTr(U/f)>>cnt 0
ParBk1(U/f)>>cnt 0
79 Counters >>
24 Counters >>
ParRR79cnt 0
ParSR79cnt 0
ParDR79cnt 0
ParFR79Pcnt 0
ParFR79Ecnt 0
25 Counters >>
27 Counters >>
32P Counters >>
32Q Counters >>
27V1 Counters >>
ParTr-47cnt 0
ParBk1-47cnt 0
47 Counters >>
ParStI<cnt 0
ParTrI<cnt 0
ParBk1I<cnt 0
37 Counters >>
37P Counters >>
37Q Counters >>
ParTr25cnt 0
ParStUE>cnt 0
ParTrUE>cnt 0
ParBk1UE>cnt 0
ParStUE>>cnt 0
ParRtUE>>cnt 0
ParBk1UE>>cnt 0
49MG Counters >>
55 Counters >>
67 Counters >>
67N Counters >>
81O Counters >>
81U Counters >>
CB Counters >>
74TCS Counters >>
74VT Counters >>
74CT Counters >>
BF Counters >>
50/51 Counters >>
ParStU>cnt 0
ParTrU>cnt 0
ParBk1U>cnt 0
ParStU>>cnt 0
ParRtU>>cnt 0
ParBk1U>>cnt 0
59 Counters >>
59N Counters >>
50N/51N Counters >>
51V Counters >>
40 Counters >>
49LT Counters >>
ParAlDthAL1cnt 0
ParBk1DthAL1cnt 0
ParBk2DthAL1cnt 0
ParAlDthAL2cnt 0
ParBk1DthAL2cnt 0
ParBk2DthAL2cnt 0
ParTrDth>cnt 0
ParBk1Dth>cnt 0
ParBk2Dth>cnt 0
46M Counters >>
ParAlDthAL1cnt 0
ParBk1DthAL1cnt 0
ParBk2DthAL1cnt 0
ParAlDthAL2cnt 0
ParBk1DthAL2cnt 0
ParBk2DthAL2cnt 0
ParTrDth>cnt 0
ParBk1Dth>cnt 0
ParBk2Dth>cnt 0
50N(C)/51N(C
Counters >>
ParStIPD>cnt 0
ParTrIPD>cnt 0
ParBk1IPD>cnt 0
ParBk2IPD>cnt 0
ParStIPD>>cnt 0
ParTrIPD>>cnt 0
ParBk1IPD>>cnt 0
ParBk2IPD>>cnt 0
ParStIPD>>>cnt 0
ParTrIPD>>>cnt 0
ParBk1IPD>>>cnt 0
ParBk2IPD>>>cnt 0
ParStIPD>>>>cnt 0
ParTrIPD>>>>cnt 0
ParBk1IPD>>>>cnt 0
ParBk2IPD>>>>cnt 0
ParStIED>cnt 0
ParTrIED>cnt 0
ParBk1IED>cnt 0
ParBk2IED>cnt 0
ParStIED>>cnt 0
ParTrIED>>cnt 0
ParBk1IED>>cnt 0
ParBk2IED>>cnt 0
ParStIED>>>cnt 0
ParTrIED>>>cnt 0
ParBk1IED>>>cnt 0
ParBk2IED>>>cnt 0
ParStIED>>>>cnt 0
ParTrIED>>>>cnt 0
ParBk1IED>>>>cnt 0
ParBk2IED>>>>cnt 0
ParBk1-74CTcnt 0
ParTr74CTcnt 0
ParStBFcnt 0
ParTrTrcnt 0
ParBk1BFcnt 0
2ndh-REST
Counters >> ParStI2ndh>cnt 0
N.OpenCBcnt 0
ParBk1-74VTcnt 0
ParTr74VTcnt 0
ParBk1-74TCScnt 0
ParTr74TCScnt 0
I2/I1 Counters >>
ParStI21>cnt 0
ParTrI21>cnt 0
ParBk121>cnt 0
46LT Counters >>
ParStI2>cnt 0
ParTrI2>cnt 0
ParBk1I2>cnt 0
ParBk2I2>cnt 0
ParStI2>>cnt 0
ParTrI2>>cnt 0
ParBk1I2>>cnt 0
ParBk2I2>>cnt 0
ParStIE>cnt 0
ParTrIE>cnt 0
ParBk1IE>cnt 0
ParBk2IE>cnt 0
ParStIE>>cnt 0
ParTrIE>>cnt 0
ParBk1IE>>cnt 0
ParBk2IE>>cnt 0
ParStIE>>>cnt 0
ParTrIE>>>cnt 0
ParBk1IE>>>cnt 0
ParBk2IE>>>cnt 0
ParStIEC>cnt 0
ParTrIEC>cnt 0
ParBk1IEC>cnt 0
ParBk2IEC>cnt 0
ParStIEC>>cnt 0
ParTrIEC>>cnt 0
ParBk1IEC>>cnt 0
ParBk2IEC>>cnt 0
ParStIEC>>>cnt 0
ParTrIEC>>>cnt 0
ParBk1IEC>>>cnt 0
ParBk2IEC>>>cnt 0
59V2 Counters >> ParStU2>cnt 0
ParTrU2>cnt 0
ParBk1U2>cnt 0
55 Counters >> ParStCPhi<cnt 0
ParTrCPhi<cnt 0
ParBk1CPhi<cnt 0
66 Counters >> ParTr66cnt 0
ParBk1-66cnt 0
ParSt-f>cnt 0
ParTr-f>cnt 0
ParBk1-f>cnt 0
ParSt-f>>cnt 0
ParTr-f>>cnt 0
ParBk1-f>>cnt 0
VECTOR JUMP
Counters >>
ParSt-dpi>cnt 0
ParTr-dpi>cnt 0
ParBk1-dpi>cnt 0 ParSt-f<cnt 0
ParTr-f<cnt 0
ParBk1-f<cnt 0
ParSt-f<<cnt 0
ParTr-f<<cnt 0
ParBk1-f<<cnt 0
ParSt-f<<<cnt 0
ParTr-f<<<cnt 0
ParBk1-f<<<cnt 0
ParSt-f<<<<cnt 0
ParTr-f<<<<cnt 0
ParBk1-f<<<<cnt 0
81R Counters >>
ParSt-df>cnt 0
ParTr-df>cnt 0
ParBk1-df>cnt 0
ParSt-df>>cnt 0
ParTr-df>>cnt 0
ParBk1-df>>cnt 0
ParSt-df>>>cnt 0
ParTr-df>>>cnt 0
ParBk1-df>>>cnt 0
ParSt-df>>>>cnt 0
ParTr-df>>>>cnt 0
ParBk1-df>>>>cnt 0
PARTIAL COUNTERS
NVA100X_menuread3.ai
46G Counters >>
ParStI2AL>cnt 0
ParTrI2AL>cnt 0
ParBk1I2AL>cnt 0
ParStI2>>cnt 0
ParTrI2>>cnt 0
ParBk1I2>>cnt 0
TotStI-I/U>cnt 0
TotTrI-I/U>cnt 0
TotBk1I-I/U>cnt 0
TotBk2I-I/U>cnt 0
TotStI-I/U>>cnt 0
TotTrI-I/U>>cnt 0
TotBk1I-I/U>>cnt 0
TotBk2I-I/U>>cnt 0
ParSt40ALcnt 0
ParTr40ALcnt 0
ParBk140ALcnt 0
ParStXC1XD1cnt 0
ParTrXC1XD1cnt 0
ParBk1XC1XD1cnt 0
ParStXC2XD1cnt 0
ParTrXC2XD1cnt 0
ParBk1XC2XD2cnt 0
TotStI-I/U>cnt 0
TotTrI-I/U>cnt 0
TotBk1I-I/U>cnt 0
TotBk2I-I/U>cnt 0
TotStI-I/U>>cnt 0
TotTrI-I/U>>cnt 0
TotBk1I-I/U>>cnt 0
TotBk2I-I/U>>cnt 0

19 NVA100X - Getting started - 01 - 2018
TOTAL COUNTERS
NVA100X_menuread4.ai
TotStU<cnt 0
TotTrU<cnt 0
TotBk1U<cnt 0
TotStU<<cnt 0
TotRtU<<cnt 0
TotBk1U<<cnt 0
TotStI>cnt 0
TotTrI>cnt 0
TotBk1I>cnt 0
TotBk2I>cnt 0
TotStI>>cnt 0
TotTrI>>cnt 0
TotBk1I>>cnt 0
TotBk2I>>cnt 0
TotStI>>>cnt 0
TotTrI>>>cnt 0
TotBk1I>>>cnt 0
TotBk2I>>>cnt 0
TotSt-P1>cnt 0
TotTr-P1>cnt 0
TotBk1-P1>cnt 0
TotSt-P2>cnt 0
TotRt-P2>cnt 0
TotBk1-P2>cnt 0
TotSt-P1<cnt 0
TotTr-P1<cnt 0
TotBk1-P1<cnt 0
TotSt-P2<cnt 0
TotRt-P2<cnt 0
TotBk1-P2<cnt 0
TotSt-Q1<cnt 0
TotTr-Q1<cnt 0
TotBk1-Q1<cnt 0
TotSt-Q2<cnt 0
TotRt-Q2<cnt 0
TotBk1-Q2<cnt 0
TotSt-Q1>cnt 0
TotTr-Q1>cnt 0
TotBk1-Q1>cnt 0
TotSt-Q2>cnt 0
TotRt-Q2>cnt 0
TotBk1-Q2>cnt 0
TotStU1<cnt 0
TotTrU1<cnt 0
TotBk1U1<cnt 0
TotSt(U/f)ALcnt 0
TotTr(U/f)ALcnt 0
TotBk1(U/f)ALcnt 0
TotSt(U/f)>cnt 0
TotTr(U/f)>cnt 0
TotBk1(U/f)>cnt 0
TotSt(U/f)>>cnt 0
TotTr(U/f)>>cnt 0
TotBk1(U/f)>>cnt 0
79 Counters >>
24 Counters >>
TotRR79cnt 0
TotSR79cnt 0
TotDR79cnt 0
TotFR79Pcnt 0
TotFR79Ecnt 0
25 Counters >>
27 Counters >>
32P Counters >>
32Q Counters >>
27V1 Counters >>
TotTr-47cnt 0
TotBk1-47cnt 0
47 Counters >>
TotStI<cnt 0
TotTrI<cnt 0
TotBk1I<cnt 0
37 Counters >>
37P Counters >>
37Q Counters >>
TotTr25cnt 0
TotStUE>cnt 0
TotTrUE>cnt 0
TotBk1UE>cnt 0
TotStUE>>cnt 0
TotRtUE>>cnt 0
TotBk1UE>>cnt 0
49MG Counters >>
55 Counters >>
67 Counters >>
67N Counters >>
81O Counters >>
81U Counters >>
CB Counters >>
74TCS Counters >>
74VT Counters >>
74CT Counters >>
BF Counters >>
50/51 Counters >>
TotStU>cnt 0
TotTrU>cnt 0
TotBk1U>cnt 0
TotStU>>cnt 0
TotRtU>>cnt 0
TotBk1U>>cnt 0
59 Counters >>
59N Counters >>
50N/51N Counters >>
51V Counters >>
40 Counters >>
49LT Counters >>
TotAlDthAL1cnt 0
TotBk1DthAL1cnt 0
TotBk2DthAL1cnt 0
TotAlDthAL2cnt 0
TotBk1DthAL2cnt 0
TotBk2DthAL2cnt 0
TotTrDth>cnt 0
TotBk1Dth>cnt 0
TotBk2Dth>cnt 0
46M Counters >>
TotAlDthAL1cnt 0
TotBk1DthAL1cnt 0
TotBk2DthAL1cnt 0
TotAlDthAL2cnt 0
TotBk1DthAL2cnt 0
TotBk2DthAL2cnt 0
TotTrDth>cnt 0
TotBk1Dth>cnt 0
TotBk2Dth>cnt 0
50N(C)/51N(C
Counters >>
TotStIPD>cnt 0
TotTrIPD>cnt 0
TotBk1IPD>cnt 0
TotBk2IPD>cnt 0
TotStIPD>>cnt 0
TotTrIPD>>cnt 0
TotBk1IPD>>cnt 0
TotBk2IPD>>cnt 0
TotStIPD>>>cnt 0
TotTrIPD>>>cnt 0
TotBk1IPD>>>cnt 0
TotBk2IPD>>>cnt 0
TotStIPD>>>>cnt 0
TotTrIPD>>>>cnt 0
TotBk1IPD>>>>cnt 0
TotBk2IPD>>>>cnt 0
TotStIED>cnt 0
TotTrIED>cnt 0
TotBk1IED>cnt 0
TotBk2IED>cnt 0
TotStIED>>cnt 0
TotTrIED>>cnt 0
TotBk1IED>>cnt 0
TotBk2IED>>cnt 0
TotStIED>>>cnt 0
TotTrIED>>>cnt 0
TotBk1IED>>>cnt 0
TotBk2IED>>>cnt 0
TotStIED>>>>cnt 0
TotTrIED>>>>cnt 0
TotBk1IED>>>>cnt 0
TotBk2IED>>>>cnt 0
TotBk1-74CTcnt 0
TotTr74CTcnt 0
TotStBFcnt 0
TotTrTrcnt 0
TotBk1BFcnt 0
2ndh-REST
Counters >> TotStI2ndh>cnt 0
N.OpenCBcnt 0
TotBk1-74VTcnt 0
TotTr74VTcnt 0
TotBk1-74TCScnt 0
TotTr74TCScnt 0
I2/I1 Counters >>
TotStI21>cnt 0
TotTrI21>cnt 0
TotBk121>cnt 0
46LT Counters >>
TotStI2>cnt 0
TotTrI2>cnt 0
TotBk1I2>cnt 0
TotBk2I2>cnt 0
TotStI2>>cnt 0
TotTrI2>>cnt 0
TotBk1I2>>cnt 0
TotBk2I2>>cnt 0
TotStIE>cnt 0
TotTrIE>cnt 0
TotBk1IE>cnt 0
TotBk2IE>cnt 0
TotStIE>>cnt 0
TotTrIE>>cnt 0
TotBk1IE>>cnt 0
TotBk2IE>>cnt 0
TotStIE>>>cnt 0
TotTrIE>>>cnt 0
TotBk1IE>>>cnt 0
TotBk2IE>>>cnt 0
TotStIEC>cnt 0
TotTrIEC>cnt 0
TotBk1IEC>cnt 0
TotBk2IEC>cnt 0
TotStIEC>>cnt 0
TotTrIEC>>cnt 0
TotBk1IEC>>cnt 0
TotBk2IEC>>cnt 0
TotStIEC>>>cnt 0
TotTrIEC>>>cnt 0
TotBk1IEC>>>cnt 0
TotBk2IEC>>>cnt 0
59V2 Counters >> TotStU2>cnt 0
TotTrU2>cnt 0
TotBk1U2>cnt 0
55 Counters >> TotStCPhi<cnt 0
TotTrCPhi<cnt 0
TotBk1CPhi<cnt 0
66 Counters >> TotTr66cnt 0
TotBk1-66cnt 0
TotSt-f>cnt 0
TotTr-f>cnt 0
TotBk1-f>cnt 0
TotSt-f>>cnt 0
TotTr-f>>cnt 0
TotBk1-f>>cnt 0
VECTOR JUMP
Counters >>
TotSt-dpi>cnt 0
TotTr-dpi>cnt 0
TotBk1-dpi>cnt 0 TotSt-f<cnt 0
TotTr-f<cnt 0
TotBk1-f<cnt 0
TotSt-f<<cnt 0
TotTr-f<<cnt 0
TotBk1-f<<cnt 0
TotSt-f<<<cnt 0
TotTr-f<<<cnt 0
TotBk1-f<<<cnt 0
TotSt-f<<<<cnt 0
TotTr-f<<<<cnt 0
TotBk1-f<<<<cnt 0
81R Counters >>
TotSt-df>cnt 0
TotTr-df>cnt 0
TotBk1-df>cnt 0
TotSt-df>>cnt 0
TotTr-df>>cnt 0
TotBk1-df>>cnt 0
TotSt-df>>>cnt 0
TotTr-df>>>cnt 0
TotBk1-df>>>cnt 0
TotSt-df>>>>cnt 0
TotTr-df>>>>cnt 0
TotBk1-df>>>>cnt 0
46G Counters >>
TotStI2AL>cnt 0
TotTrI2AL>cnt 0
TotBk1I2AL>cnt 0
TotStI2>>cnt 0
TotTrI2>>cnt 0
TotBk1I2>>cnt 0
TotStI-I/U>cnt 0
TotTrI-I/U>cnt 0
TotBk1I-I/U>cnt 0
TotBk2I-I/U>cnt 0
TotStI-I/U>>cnt 0
TotTrI-I/U>>cnt 0
TotBk1I-I/U>>cnt 0
TotBk2I-I/U>>cnt 0
TotSt40ALcnt 0
TotTr40ALcnt 0
TotBk140ALcnt 0
TotStXC1XD1cnt 0
TotTrXC1XD1cnt 0
TotBk1XC1XD1cnt 0
TotStXC2XD1cnt 0
TotTrXC2XD1cnt 0
TotBk1XC2XD2cnt 0
TotStI-I/U>cnt 0
TotTrI-I/U>cnt 0
TotBk1I-I/U>cnt 0
TotBk2I-I/U>cnt 0
TotStI-I/U>>cnt 0
TotTrI-I/U>>cnt 0
TotBk1I-I/U>>cnt 0
TotBk2I-I/U>>cnt 0

20 NVA100X - Getting started - 01 - 2018
PILOT WIRE
DIAGNOSTIC >>
BreakedBLIN1 OFF
ShortedBLIN1 OFF
INTERNAL
SELECTIVE BLOCK
BLOCK4 >>
ST-IPh-BLK4 OFF
ST-IE-BLK4 OFF
BLK4OUT OFF
BLOCK2IN-IPh OFF
BLOCK2IN-IE OFF
tB timeout OFF ST-IPh-BLK2 OFF
ST-IE-BLK2 OFF
BLK2OUT-IPh OFF
BLK2OUT-IE OFF
BLK2OUT-IPh/IE OFF
SELECTIVE BLOCK
BLOCK2 >>
BLOCK2 INPUT >>
BLOCK2 OUTPUT >>
Fault 0 Cause:
No faults
Operating phase: -
Date:
Time:
IL1r: 0.000 In
IL2r: 0.000 In
IL3r: 0.000 In
UL1r: 0.000 En
UL2r: 0.000 En
UL3r: 0.000 En
U12r: 0.000 Un
U23r: 0.000 Un
U31r: 0.000 Un
IEr: 0.000 IEn
IECr: 0.000 In
UEr: 0.000 UEn
UECr: 0.000 UECn
PhiL1r: 0 deg
PhiL2r: 0 deg
PhiL3r: 0 deg
Alpha1r: 0 deg
Alpha2r: 0 deg
Alpha3r: 0 deg
PhiEr: 0 deg
PhiECr: 0 deg
DTheta-r: DthetaB
U1r: 0.000 En
U2r: 0.000 En
U/fr: 0.000 Un/fn
Pr: 0.000 Pn
Qr: 0.000 Qn
CosPhir: 0.000
fr: 0.000 fn
dfr: 0.000 Hz/s
dphir: 0 deg
Binary Inputs
IN1-16...IN1-1
0000000000000000
Binary Inputs
IN2-16...IN2-1
0000000000000000
Relays
KC1-8...KC1-1
00000000
Relays
KC2-8...KC2-1
00000000
Fault x Cause:
No faults
Operating phase: -
Date:
Time:
IL1r: 0.000 In
IL2r: 0.000 In
IL3r: 0.000 In
UL1r: 0.000 En
UL2r: 0.000 En
UL3r: 0.000 En
U12r: 0.000 Un
U23r: 0.000 Un
U31r: 0.000 Un
IEr: 0.000 IEn
IECr: 0.000 In
UEr: 0.000 UEn
UECr: 0.000 UECn
PhiL1r: 0 deg
PhiL2r: 0 deg
PhiL3r: 0 deg
Alpha1r: 0 deg
Alpha2r: 0 deg
Alpha3r: 0 deg
PhiEr: 0 deg
PhiECr: 0 deg
DTheta-r: DthetaB
U1r: 0.000 En
U2r: 0.000 En
U/fr: 0.000 Un/fn
Pr: 0.000 Pn
Qr: 0.000 Qn
CosPhir: 0.000
fr: 0.000 fn
dfr: 0.000 Hz/s
dphir: 0 deg
Binary Inputs
IN1-16...IN1-1
0000000000000000
Binary Inputs
IN2-16...IN2-1
0000000000000000
Relays
KC1-8...KC1-1
00000000
Relays
KC2-8...KC2-1
00000000
FAULTS RECORDING>>
Fault 0 (last) >>
Fault 1 >>
Fault .... >>
Fault 299 >>
EVENTS RECORDING>>
Event 0 (last):
Power up
21/06/2013
06:50:58:413
Event 1:
Power down
20/06/2013
14:23:38:000
Event 2:
Settings
19/06/2013
06:48:27:584
Event 3:
KC1-2 off
19/06/2013
06:28:52:168
Event 4:
KC1-2 on
19/06/2013
06:28:35:711
Event x:
Power up
xx/xx/xxx
xx:xx:xx:xxx
PROCEED SET MENU’
PREVIOUS READ MENU’
NVA100X_menuread5.ai
Table of contents
Other Thytronic Relay manuals

Thytronic
Thytronic RMT/3 Guide
Thytronic
Thytronic NA10 User manual

Thytronic
Thytronic NV10B User manual
Thytronic
Thytronic RMT/8D Guide

Thytronic
Thytronic Pro-N NVA100X-D User manual

Thytronic
Thytronic NC020 User manual
Thytronic
Thytronic NA30 User manual

Thytronic
Thytronic DTB 49-50 User manual
Thytronic
Thytronic NA20 User manual
Thytronic
Thytronic NA11 User manual
