Tigersecu 302 Series User manual

www.tigersecu.com
Copyright © 2017 TIGERSECU, Inc
5MP Professional HD
Video Security DVR System
User Manual

1
Contents ................................................................................................1
Important Information .................................................................................3
Installation Guide.…................................................................................4
Remote Control.…................................................................................6
Chapter 1. Start-up Wizard .....................................................................7
Chapter 2. Live View Screen ...................................................................8
Status Icons ....................................................................................... ........9
Menu Bar Icons ........................................................................................9
Chapter 3. Main Menu ..............................................................................11
Channel Menu ................................................................................................12
1. LIVE View ................................................................................... .........12
2. Image Setting ...................................................................................12
3. Privacy Mask ....................................................................................13
4. PTZ .....................................................................................................13
Record Menu ................................................................................................13
1. Video and Audio ...............................................................................13
2. Schedule ..........................................................................................14
3. Advance ..........................................................................................14
Playback Menu ..........................................................................................................15
1. Playback ........................................................................................15
2. Backup ..........................................................................................16
Network Menu ......................................................... ..............................16
1. Network ......................................................................................16
2. QR Code ...................................................................................... ........17
3. DDNS ...........................................................................................17
4. Mail .............................................................................................17
Motion Menu ................................................................................................18
1. Motion ........................................................................................18
2. Video Loss ...................................................................................19
HDD Menu ........................................................................……………………20
1. HDD ............................................................................................20
2. USB Flash Drive ...........................................................................20
Configuration Menu ..............................................................................21
1. System .........................................................................................21
Contents

2
2. User .............................................................................................21
3. Time ........................................................................................... 22
Maintain Menu ......................................................................................22
1. Maintenance ............................................................................... 22
2. Import/Expor t .............................................................................23
3. Upgrade ......................................................................................23
4. Log ...................................................................................... .........23
5. Reset Default .............................................................................24
Chapter 4. View DVR remotely on your phone …..............................25
1. Setup ...........................................................................................26
2. Playback and backup on App .......................................................27
Chapter 5. View DVR remotely on your computer ............................29
1. TIGERSECU (CMS) User Guide for Windows Users ......................30
2. TIGERSECU (CMS) User Guide for Mac Users ............................32
Chapter 6. Q&A ………......... ............. ......... .......... .......... ... .......... ..... 34
Contents

3
Thank you for purchasing the TIGERSECU Digital Video Surveillance Recorder.
This User Manual applies to the following models:
TIGERSECU HD 5MP 302 Series [4 and 8 channel models]
TIGERSECU HD 5MP 402 Series [16 channel models]
All countries have specific laws and regulations relating to the use of security
cameras. Before using any camera for any purpose, it is the buyer’s responsibility
to be aware of all applicable laws and regulations that prohibit or limit the use of
cameras and to comply with the applicable laws and regulations.
Operation
1. Ensure the product is assembled correctly and placed in a stable location.
2. Do not operate the DVR if the wires and terminals are exposed to risk of shock.
3. Do not cover the vents on the side or back of the DVR and allow adequate
space for ventilation.
Default Username and Password
The default, all-access user name is “admin”, the default password is 00000000
(eight zeros). To ensure your privacy, we strongly recommend that you reset the
password as soon as possible.
Default Resolution
The default resolution of the DVR is set to 1280x720 which is compatible with most
of the monitors on the market. If your monitor support higher resolution, you may
set the output resolution up to 2560x1920 (5MP).
To change the resolution, go to Main Menu - Configuration - System and change
the output resolution. If the monitor doesn't support the resolution, the system will
automatically change back to the previous resolution.
Contact Us
Thank you for purchasing a TIGERSECU Security product. If you require any
assistance with your new TIGERSECU product, we're here for you. Your TIGERSECU
product is backed by a full two-year warranty and Lifetime Support and we may be
reached by phone, email, or through your Amazon Customer Order Messaging
page.
US Customer Helpline: (323) 315-0396
Office Hours: 9:00 AM –5:00 PM, Monday to Friday PST
Emails are answered within 24 hours, Monday to Friday. If you're phoning outside
of these hours or our lines are busy due to large call volumes, we will respond
within 12 hours, Monday to Friday.
Important Information

4
1. Connect the cameras with the DVR
2. Connect the Network Cable with the DVR (Network cable not included in
the package)
Prepare the DVR, router and network cable. Connect the network cable as above.
3. Connect a display device to the DVR (VGA/HDMI cable not included in the
package)
Installation Guide
A) Prepare the DVR, cameras, 5-way/9-way power splitter, BNC cables and the
power adapter(s). (Do not plug in the power adapter to a power source now.)
B) Connect the cameras using BNC cables to the video in CH1 to CH(x)
connectors.
C) Connect 5-way/9-way power splitter to the power adapter. Then connect
one lead of the splitter to the DC 12V connector on the DVR back panel.
D) Connect the other leads of the splitter to the mating connectors on the
BNC cables routed to the cameras.
D) Connect the other sides of the splitter with the BNC cables.
Connect your DVR to a computer monitor or TV screen as above using a
VGA/HDMI cable.

5
4. Install/Exchange a Hard Drive
Follow the instructions below to install or exchange a hard drive.
A) Use a screwdriver to open the box.
B) Remove the top cover.
C) Compare the hard drive with the mounting holes on the bottom cover.
D) Connect to power and SATA cable to the hard drive while paying
attention to the orientation of the HDD.
E) Carefully place the hard drive to match the mounting holes on the
bottom of box or the side box.
F) Secure HDD to bottom cover with screws from bottom or side.
5. Power on the DVR and monitor
A) Plug the power adapter for the DVR into a power source.
B) Power on the monitor.
C) Connect the mouse to the USB slot on the DVR back panel.
D) You will see TIGERSECU LOGO in a few seconds, then the Live View Screen and
Start-up wizard.
E) The Start-up wizard will guide you through the basic settings.
* You may search “How to install a DVR?” on YouTube for more instructions.
Installation Guide

6
Remote Control
01) POWER: Power on/off the DVR.
02) PIP: Swap PIP screen with main screen.
03) RECORD: Enter the scheduled recording menu.
04) SEARCH: Search recording files.
05) REWIND: Reverse the footage during playback.
Press multiple times to increase the speed of the
reversing.
06) 15) 16) 19) ARROW BUTTON: Moves the
cursor in the appropriate direction when navigating
menus.
07) STEP FORWARD: Play recordings frame by
frame during playback.
08) 1-10+ (numeric key pad): Input numbers, 1-
10+ can be used as quick channel changing in
similar manner to television, and these will work
during either live-viewing mode or playback.
Additionally, the numeric key pad can be used
when inputting any numerical information –most
often, your password.
09) ZOOM: Zoom the picture of selected channel.
10) PTZ: Control PTZ cameras.
11) MUTE: Enable or disable the audio output. This
won't have any effect on recordings. If you've
configured the DVR to record audio, then it will
continue to do so while muted, you won't hear it until
you un-mute it.
12) ESC: Exit Menu.
13) MAIN MENU: One of the primary controls for
navigating through the menus. When in live-viewing
mode, it will enter the main menu. When pressed in
the main menu, it will return the DVR to live-viewing
mode. Finally, when in a submenu, this button will
return you to the main menu.
14) FAST FORWARD: Increase the speed of playback.
Press multiple times to increase the speed of playback
further.
17) ENTER: Use this button to select an option in the
menus, or confirm an entry.
18) PLAY/PAUSE: Play/Pause the recordings during
playback.

7
Chapter 1. Start-up Wizard
To help you get set up quickly, there is a start-up wizard the first time you
log on.
Step 1. Select your Language.
Step 2. Configure basic settings such as the date format, time format, time
zone, the actual date and time (Change Date and Time), and the resolution.
Step 3. Set the Network type and ensure Enable is selected. (DHCP is
recommended.)
Step 4. Format the hard drive. Choose the hard drive and click Format. Wait a
few minutes until complete. (Hard drive may need to be purchased separately.)
Step 5: To finish Start-up Wizard, click OK.
Start-up Wizard

8
Chapter 2. Live View Screen
Live View is where you can watch live feeds from
the cameras.
It displays one or all the channels available to you.
This is useful if you have someone monitoring the
channels in real time or you need to check on a
specific location.

9
Icon
Description
The blue camera icon indicates continuous recording.
The red camera and running person icon indicates event
(motion) recording.
The speaker icon indicates that audio is enabled/disabled
on the corresponding channel.
The magnifying glass icon indicates that you can enlarge
the image.
No Signal indicates the channel has lost the feed from its
camera, which may be caused by a disconnected/damaged
cable, camera, or adapter. It also appears if no camera is
connected to the corresponding channel.
To display the Menu Bar, right-click the mouse on the Live View screen.
Live View Screen: Icons
Status Icons
These icons are used to indicate different camera status.
Check the table below to learn about these icons:
Menu Bar Icons
The Menu Bar at the bottom of the screen is a handy place to change
the view format of the Live View screen.
You can also open the Main Menu, where you configure and manage
many of the DVRs basic and advanced functions.

10
Icon
Description
Display the DVR Main Menu.
Show video from one camera in full screen.
Show multiple screens on the same page.
Show the picture of one channel in the picture of another channel.
Playback the 24 hours of recordings for the chosen day.
Take a snapshot of the screen. (USB flash drive required.)
Setup the record mode (off, continuous-record, scheduled-record).
Shortcut to go to PTZ (Pan, Tilt, Zoom). You can control the PTZ
camera by adjusting the controls for each Channel.
Show information such as Model Number, UID QR code, and
Network Type.
Live View Screen: Icons

11
Chapter 3. Main Menu
From the Main Menu, you can access the
major functions of the DVR including channel
settings, recording settings, playback of
recordings, network settings, motion detection
settings, hard drive settings, configuration for
the system, and maintenance.

12
To go to the Main Menu, click the icon as below.
1. LIVE View
From the Live View page, you may set the channel’s Name and basic Display
information on this page. Check Hide the channel option when you don’t
want to display one or multiple channel(s) from the Live View.
2. Image Setting
In Image Settings page, you can configure settings for video and volume.
(Sound pickup devices are purchased separately and need to be connected to
the DVR.)
Click Copy to copy the setting to other channels. Then, click Apply.
Main Menu
Channel Menu
The Channel Menu is where you setup how to display the video
from the cameras. (This DVR supports PTZ cameras.)

13
3. Privacy Mask
Use Privacy Mask if cameras are mounted at home or in an office that requires
privacy. This function covers or “blurs” some areas of the videos. Drag a
numbered black square from the upper left to cover the area you wish to blur.
Don’t forget to check the Area box to enable the function. Then, click Apply.
4. PTZ
If you have PTZ cameras (not included in the package), basic setup can be
done on this page. Make the desired changes using the drop-down menus.
Don’t forget to check the Enable box.If you want to copy these settings to
other channels, click the Copy button. Select the channels you wish to apply
them to. Click OK. Finally, click Apply.
From the Record Menu, you may setup the video and audio quality and
schedule a recording mode for each day.
1. Video and Audio
In the Video and Audio page, for each channel, there are three Quality levels
Main Menu
Record Menu

14
(High, Medium, Low). This give you some options to choose a suitable
recording quality based on the hard drive’s capacity. A higher Quality level
means higher resolution and consumes larger storage on your hard drive.
2. Schedule
2.Schedule
In the Schedule page, the DVR provides two modes of recording:
•Continuous Record: Records continuously even when nothing is
happening.
•Event (Motion) Record: Record only when motion triggers to record.
Choose the desired recording Type first (Continuous or Event). Then, left click
the mouse on the timetable to choose the time range. Check Enable Schedule.
Finally, click Apply.
3. Advance
In the Advanced page, the Recycle Recording function is enabled by default.
Recycled recording means the newest video continuously replaces the oldest
video. If you disable (uncheck) this function, the DVR will stop recording when
the hard drive is full.
Main Menu

15
1. Playback
①On the Playback page, choose the specific date and time range you want
to playback (Days with recordings are highlighted in blue). Then, click the Play
button . It will lead you to the Playback Page.
②Here’s the playback interface. The Continuous record timeline is marked in
purple. The Event Record timeline is marked in blue.
③Playback Menu. If the playback controls disappear, just move your mouse to
the bottom of the window.
Icon
Description
Show multiple screens on the same page.
Control buttons: Stop, Play, Fast Backward, Fast
Forward, Play frame by frame and slow motion (½ ,
¼ , 1/8 speed).
Previous and Next day.
Video Editing buttons: Enlarge, Snapshot, Cut
start and end, Save and Exit.
Main Menu
Playback Menu
From the Playback Menu, you can easily playback the recordings. You can
also backup the recording to USB flash drive (to view elsewhere or save
space on the hard drive).

16
2. Backup
From the Backup page, you can back up your recordings to an external source
(USB).
NOTE: The USB drive needs to be inserted into the USB slot at the back of the
DVR to back up files.
Choose the channel, time (From/to) range, duration (h/m/s), then click
Calculate. The system will provide an estimated Required Space. After
confirming the Free Space of the USB drive, click Backup. The DVR will start to
backup files (.m4v). Wait until the progress is 100%. Then, you may remove the
USB drive and play the .m4v files on your computer.
Using the Network Menu, you can manually configure network settings for
the DVR.
1. Network
In the Network page, you can set DHCP and Static IP. These two are the most
commonly used network types. Choose DHCP (by default) if you’re new to
computers or DVRs.
DVR also offers network types like PPPoE and 3G.Choose these options only
when necessary. And, if the connection failed, try DHCP again.
Main Menu
Network Menu

17
2. QR Code
Using QR code, you establish a direct connection between your mobile device
and the DVR.
(Port Forwarding not required for remote connections via QR code, highly
recommended.)
Here you will find the UID and QR code and Connecting Status. ON means the
DVR is connecting to the Internet and you may view the DVR on your phone
using the App named TIGERSECU HD Viewer and CMS called TIGERSECU CMS.
For more instruction, please refer to the Chapter 4 and 5.
3. DDNS
(Port forwarding required for login via DDNS, not recommended.)
You use DDNS only when remotely accessing the DVR via DDNS. The supported
DDNS account is: ez-dns.com/ dyndns.org/ noip.com/ SwiftConn.com.
SwiftConn.com is provided by us and each DVR will be assigned a host name
automatically. Leave User and Password empty. Then choose Enable.
For more instruction, please check Chapter 5.
4. Mail (Gmail and Yahoo Mail are supported)
To email notifications, add Sender (Mail from), type in SMTP Server, Port,
User, Password, Recipient (Mail to). (Sender and Receiver can be the same.)
Check Enable.
Main Menu

18
①Trigger Channel: Chosen channel will pop up in full-screen display when
motion detected.
Main Menu
In the Motion Menu, you may set the motion detection features for
each channel. This will save a lot of hard drive space and save you time
reviewing playbacks. NOTE: Motion recording is disabled by default.
Motion Menu
1. Motion
In the Motion page, choose the channel to setup motion detection.
You may change the Sensitivity between 0-100, lowest to highest.
The area covered by white grid will detect and notify you when
motion is triggered. If you don’t want a specific area to be detected,
please “erase” the area by left clicking and dragging the mouse over
the area to exclude.
Click Copy to copy the setting to other channels and then click
Apply.

19
②Linkage Action: Enable Event Record, Buzzer, Notification, Mail. If
you’ve logged in via mobile app (TIGERSECU HD Viewer) and enabled Notify,
click Notification Setup to choose the mobile devices that receive
notifications.
③PTZ Linking: Enable Motion function for PTZ.
If you have PTZ cameras, you may setup PTZ linking on this page.
Main Menu
2. Video Loss
Use Trigger Setting to choose the way you want to be notified when the
video feed fails.
Video Loss trigger settings are the same as Motion settings.
This manual suits for next models
1
Table of contents
Other Tigersecu Security System manuals
Popular Security System manuals by other brands
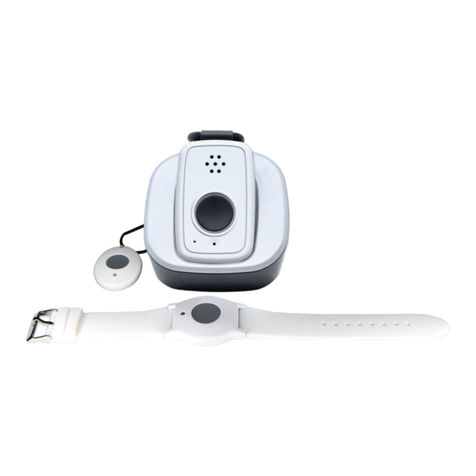
MobileHelp
MobileHelp Mobile On-the-Go System quick start guide
Honeywell
Honeywell SEF8M installation instructions

American Panel
American Panel IC Operation manual
Skil-Care
Skil-Care BedPro Under Mattress Safety Alarm manual
Winland
Winland EnviroAlert EA800-ip quick start guide
Zoeller
Zoeller APak 10-4014 installation instructions
