manuals.online logo
Brands
  1. Home
  2. •
  3. Brands
  4. •
  5. TILLIG BAHN
  6. •
  7. Toy
  8. •
  9. TILLIG BAHN 02624 User manual

TILLIG BAHN 02624 User manual

Güterwagen
www.tillig.com www.facebook.com/tilligbahn 364609 / 06.04.2018
18
Diesellok • Diesel locomotive
Locomotive diesel • Dieselová lokomotiva
Spalinowóz V 75
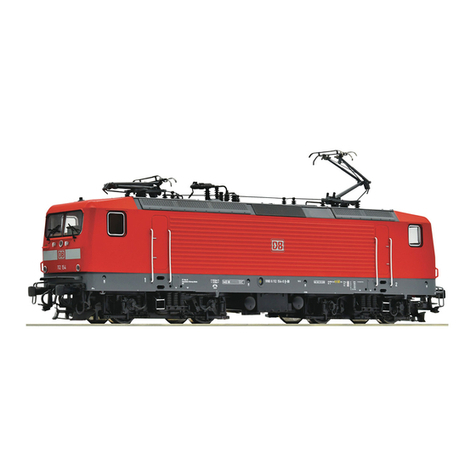
(DE) Das Modell ist eine maßstäbliche Nachbildung der T 435 in authentischer Farbgebung und Dekoration.
Die Stromaufnahme erfolgt von allen Radsätzen. Zwei Radsätze sind mit je einem Haftreifen versehen, derAn-
trieb erfolgt auf allen Radsätzen. An beiden Enden der Lok sind Kurzkupplungskulissen mit Normaufnahmen
nach NEM 355 vorhanden.
Das Modell ist mit einer fahrtrichtungsabhängigen Beleuchtung mit Dreispitzenlicht und Schlusslicht sowie
seitlicher Lokschildbeleuchtung ausgestattet. Eine PluX12-Schnittstelle nach NEM 658 ist für den Einsatz
eines Decoders vorhanden. Der Einbauraum für einen Lautsprecher (maximaler Durchmesser 12 mm) ist
unter dem Motorvorbau vorgesehen. Das Modell ist ausreichend gefettet. Ein Nachölen oder Nachfetten
mit harz- und säurefreiem Fett (Art.-Nr.: 08973) oder Öl ist erst nach einer Betriebszeit von ca. 100 Be-
triebsstunden erforderlich. Zum Abnehmen des Oberteiles sind die im Tank an der Unterseite des Modells
sichtbaren Rastnasen zusammen zu drücken. Der Tank ist nach unten abzuziehen und das Oberteil nach
oben abzunehmen. Vorsicht dabei mit den Geländern an der Lok! Die seitlichen Geländer sind von vorn in
das Führerhaus gesteckt. Bei vorsichtiger Handhabung lösen sie sich beim Abnehmen; beim Aufsetzen sind
sie nach Erreichen der Endlage des Oberteiles vorsichtig in die richtige Position zu stecken. Zurüstteile zur
Komplettierung der Pufferbohle liegen dem Modell bei und können entsprechend des Einsatzes des Modells
angebracht werden.
(GB) The model is a to-scale replica of the T 435 with authentic colouring and decoration. The current is
drawn from all the wheel sets. Two sets of wheels are tted with one traction tyre respectively, all the wheel
sets are driven. Close coupling systems with standard mounting according to NEM 355 are present at both
ends of the locomotive. The model is equipped with lighting that is dependent upon the direction of travel with
three front lights and rear light as well as locomotive sign lighting on the side. A PluX12 interface according to
NEM 658 is present for the use of a decoder. The installation space for a loudspeaker (maximum diameter 12
mm) is provided under the motor stem. Regreasing or lubrication with acid-free and resin-free oil or grease
(Item no. 08973) is only necessary after approx. 100 operating hours.
To remove the upper part, press the side latching lugs visible in the tank together on the underside of the
model. The tank must be pulled off downwards and the upper part lifted off upwards. Be careful with the
railings on the locomotive here! The side railings are plugged into the driver’s cab from the front. When
handled cautiously, they are detached during removal; they must be carefully placed down in the correct
position after the end position of the upper part has been reached. Detailing parts to complete the buffer
beam are included with the model, and can be attached in accordance with the intended use of the model.

8
0-3
0-3
(GB) Not suitable for young people under the age of 14 due to the small parts that can be removed and swallowed and
risk of injury due to function-related sharp corners and edges. When this product comes to the end of its useful life, you may
not dispose of it in the ordinary domestic waste but must take it to your local collection point for recycling electrical and electronic
equipment. If you don’t know the location of your nearest disposal centre please ask your retailer or the local council ofce.
 Tento produkt
nesmí být na konci svého užívání zlikvidován jako běžný domovní odpad, ale musí být zlikvidován např. ve sběrném dvoře. Prosím,
zeptejte se vašeho obchodníka, popř. na svém obecním úřadě o vhodném způsobu likvidace.

 Produkty oznaczone przekreślonym pojemnikiem
po zakończeniu użytkowania nie mogą być usuwane razem z normalnymi odpadami domowymi, lecz muszą być przekazywane do punktu zbie-
rania i recyklingu urządzeń elektrycznych i elektronicznych. Dzięki recyklingowi pomagają Państwo skutecznie chronić środowisko naturalne.
Prosimy zwrócić się do specjalistycznego sklepu lub do odpowiedniego urzędu w Państwa okolicy, aby dowiedzieć się, gdzie jest najbliższy punkt
recyklingu urządzeń elektrycznych i elektronicznych.

blessure en raison de coins et de bords vifs dus au fonctionnement. À la n de sa durée de vie, ne pas éliminer ce produit avec
les déchets ménagers mais le remettre à un point de collecte pour le recyclage d’appareils électriques et électroniques. Veuillez vous
adresser à votre revendeur ou à l’administration communale pour connaître les points d’élimination compétents.
(DE) Nicht geeignet für Kinder unter 14 Jahren wegen abnehmbarer und verschluckbarer Kleinteile und Verletzungs-
gefahr durch funktionsbedingte scharfe Ecken und Kanten. Dieses Produkt darf am Ende seiner Nutzungsdauer nicht über
den normalen Hausmüll entsorgt werden, sondern muss an einem Sammelpunkt für das Recycling von elektrischen und elek-
tronischen Geräten abgegeben werden. Bitte fragen Sie bei Ihrem Händler oder der Gemeindeverwaltung nach der zuständigen
Entsorgungsstelle.
(DE) Technische Änderungen vorbehalten! Bei Reklamationen wenden Sie sich bitte an Ihren Fachhändler.
(GB) Subject to technical changes! Please contact your dealer if you have any complaints.
(FR) Sous réserve de modications techniques! Pour toute réclamation, adressez-vous à votre revendeur.
(CZ) Technické změny vyhrazeny! Při reklamaci se obraťte na svého obchodníka.
(PL) Zastrzega się możliwość zmian technicznych! W przypadku reklamacji prosimy zgłaszać się do specjalistycznego sprzedawcy.

Promenade 1, 01855 Sebnitz
Tel.: +49 (0)35971 / 903-45 •Fax: +49 (0)35971 / 903-19
(DE) Hotline Kundendienst • (GB) Hotline customer service • (FR) Services à la clientèle Hotline
(CZ) Hotline Zákaznické služby • (PL) Biuro Obsługi Klienta: 
(DE) Bitte beachten Sie: Für dieses TILLIG-Produkt gilt der gesetzliche Gewährleistungsanspruch von 24 Monaten ab
Kaufdatum. Dieser Gewährleistungsanspruch erlischt, wenn kundenseitige Eingriffe, Veränderungen, Umbauten usw.
an dem Produkt erfolgen/vorgenommen werden. Bei Fahrzeugen mit eingebauter Schnittstelle, können Gewährleis-
tungsansprüche nur geltend gemacht werden, wenn das betreffende Fahrzeug im Lieferzustand (ohne eingebautem
Digitaldecoder, mit eingestecktem Entstörsatz) an den Fachhändler zurück gegeben wird.
(GB) Please note: This TILLIG product is subject to the statutory warranty entitlement of 24 months from the date of
purchase. This warranty claim expires if the product is interfered with, modied or converted after the point of time of the
customer acquiring ownership. Where vehicles have an integrated interface, claims for warranty can only be asserted if
the vehicle concerned is returned in an as-delivered state (without built-in digital decoder, with plugged-in interference
suppression kit).
(FR) Attention: Pour ce produit TILLIG, le droit de garantie légal de 24 mois à partir de la date d’achat s’applique. Ce
droit de garantie s’éteint si le client procède/a procédé à des interventions, des modications, des transformations, etc.
sur le produit. Pour les véhicules à interface intégrée, les droits de garantie ne peuvent être acceptés que si le véhicule
correspondant est restitué au revendeur dans l’état de livraison (sans décodeur numérique intégré, avec l’antiparasite
installé).
(CZ) Pro tento výrobek TILLIG platí zákonný záruční nárok 21 měsíců od data koupě. Tento záruční nárok
zaniká, pokud byly ze strany zákazníka na výrobku provedeny zásahy, změny, přestavby atd. U vozidel se zabudovaným
rozhraním mohou být záruky uplatněny jen tehdy, když bude předmětné vozidlo vráceno do odborné prodejny v
původním stavu (bez zabudovaného digitálního dekodéru, se zasunutou odrušovací sadou).
(PL)  dla niniejszego produktu TILLIG obowiązuje ustawowe roszczenie gwarancyjne,
wynoszące 24 miesiące od daty zakupu. Roszczenie gwarancyjne wygasa w sytuacji, gdy przeprowadzone zostaną w
produkcie zmiany lub klient dokona przebudowy produktu na własną rękę. W pojazdach z zabudowanym interfejsem,
roszczenia gwarancyjne mogą być podnoszone jedynie, gdy dany pojazd przekazany zostanie przedstawicielowi
handlowemu w stanie, jaki obowiązywał w momencie dostawy (bez zabudowanego dekodera cyfrowego, z osadzonym
zestawem odkłócającym).
Art.-Nr. / Item no. / Réf. / Art.-č. / Nr art.
02624
(DE) Diesellok / (GB) Diesel locomotive / (FR) Locomotive diesel
(CZ) Dieselová lokomotiva / (PL) Spalinowóz „107 018-4 Railsystems RP GmbH”, Ep.VI
E
A
A
B
B
C
D
D
•  ••

7
(FR) Il s’agit de la reproduction à l’échelle de la T 435 avec couleur et décoration authentiques correspon-
dants. Le courant est absorbé par tous les essieux montés. Deux essieux sont pourvus respectivement d’un
bandage adhérant, l’entraînement s’effectue sur tous les essieux. Aux deux extrémités de la locomotive, des
coulisses d’attelage avec logements normalisés selon NEM 355 sont prévues.
Le modèle est équipé d’un éclairage dépendant du sens de la marche avec trois feux avant et un feu arrière
ainsi qu’avec un éclairage de panneau de locomotive latéral. Il existe une interface PluX12 selon NEM 658
pour l’utilisation d’un décodeur. L’espace pour un haut-parleur (diamètre max. 12 mm) est prévu sous l’avan-
cée du moteur.
Le modèle est sufsamment graissé. Un regraissage ou rehuilage avec une huile ou graisse exempte d’acide
et de résine (réf. 08973) n’est nécessaire qu’après env. 100 heures d’exploitation.
Pour enlever la partie supérieure, presser ensemble les taquets de blocage visibles dans le réservoir à la
partie inférieure du modèle. Retirer le réservoir vers le bas et la partie supérieure vers le haut. Attention
aux garde-corps de la locomotive! Les garde-corps latéraux sont xés par devant dans la cabine du con-
ducteur. Lors du retrait, desserrer avec précaution et lors de l’installation, bien les xer avec précaution à la
bonne position une fois la position nale de la partie supérieure atteinte. Des accessoires pour compléter la
traverse porte-tampons sont joints au modèle et peuvent être montés conformément à l’utilisation du modèle.
(CZ) Model je měřítkovou replikou T 435 v autentické barvě a dekoraci. Proud přebírají všechny sady kol. Dvě
sady kol jsou vybaveny protismykovým povrchem, pohon se nachází na všech sadách kol. Na obou koncích
lokomotivy jsou krátké kulisové spojky se normálními úchyty podle NEM 355. Model je vybaven osvětlením
závislým na směru s tříbodovým osvětlením a zadním osvětlením, stejně jako osvětlením štítku lokomotivy.
Pro použití dekodéru je k dispozici rozhraní PluX12 podle NEM 658. Montážní prostor pro reproduktor (ma-
ximální průměr 12 mm) je umístěn pod předstupující částí motoru.
Model je již dostatečně namazán. Domazání tukem nebo olejem bez obsahu kyselin a pryskyřic (Art.-č.
08973) je nutné teprve po cca 100 provozních hodinách.
Pro odstranění horní části, stiskněte spolu západky viditelné v nádrži na spodní straně modelu. Nádrž musí
být vytažena dolů a horní část nahoru.     Boční zábradlí jsme
zepředu vložili do kabiny řidiče. Při opatrné manipulaci se při vyjímání uvolní; při nasazování je třeba je po
dosažení konečné polohy horního dílu opatrně nasadit do správné pozice. Přídavné díly pro kompletaci ná-
razníkového rámu jsou k modelu přiloženy a mohou být instalovány podle použití modelu.
(PL) Model jest wiernym odzwierciedleniem T 435, wykonanym w odpowiedniej skali, posiadającym auten-
tyczną kolorystykę i elementy dekoracyjne. Prąd pobierany jest na wszystkich zestawach kołowych. Dwa
zestawy kołowe wyposażone są każdorazowo w obręcz przyczepnościową; pojazd napędzany jest na wszy-
stkie zestawy kołowe. Na obydwu końcach lokomotywy znajduje się kulisa krótkiego sprzęgu ze wspornikami
znormalizowanymi zgodnie z NEM 355.
Model posiada oświetlenie w postaci trójpunktowego światła czołowego i światła tylnego, działających za-
leżnie od kierunku jazdy, oraz bocznego oświetlenia tablicy lokomotywy. Interfejs PluX12 zgodnie z NEM
658 umożliwia zastosowanie dekodera. Przestrzeń do zabudowy głośnika (maksymalna średnia 12 mm)
przewidziana jest przed przednią komorą silnika.
Model został dostatecznie nasmarowany. Powtórne smarowanie lub oliwienie za pomocą wolnego od żywic i
kwasów oleju lub smaru (nr art. 08973) jest konieczne dopiero po ok. 100 godzinach eksploatacji.
W celu usunięcia górnej części należy docisnąć zaczepy widoczne w zbiorniku od dolnej strony modelu.
Zbiornik należy zdjąć w dół i zdemontować w górę górną część. 
na lokomotywie! Boczne barierki osadzone są od przodu w kabinie maszynisty. W przypadku ostrożnego
postępowania można je zdjąć podczas odłączania elementów; podczas osadzania w momencie osiągnięcia
położenia końcowego górnej części należy docisnąć je w prawidłowym położeniu. Elementy dodatkowe po-
zwalające na skompletowanie buforu dołączone zostały do modelu i mogą być montowane odpowiednio do
zastosowania modelu.

2
A(DE) Griffstange; 2,2 mm
(GB) Handle bar; 2,2 mm
(FR) Barre de maintien; 2,2 mm
(CZ) Madlo; 2,2 mm
(PL) Poręcz; 2,2 mm
C(DE) Kuppelhaken
(GB) Coupling
(FR) Crochet d’attelage hook
(CZ) Hák spřáhla
(PL) Hak cięgłowy
D(DE) Bremsschläuche
(GB) Brake hoses
(FR) Tuyaux de frein
(CZ) Vzduchové hadice
(PL) Przewody hamulcowe
(DE) Zur weiteren Detaillierung liegen einige Griff-
stangen und weitere Zurüstteile bei. Diese sollten mit
einem Tropfen Sekundenkleber xiert werden.
(GB) For further detailing, handle bars and accesso-
ries are included. The parts should be afxed with a
drop of superglue.
(FR) Pour détailler davantage se trouvent avec des
mains courantes et les étapes. Il est conseillé de xer
les accessoires avec une goutte de colle rapide.
(CZ) Pro další detaily lež se zábradlím a schody. Jed-
notlivé díly příslušenství by měly být připevněny kap-
kou sekundového lepidla.
(PL) Aby jeszcze bardziej szczegółowo kłamstwo z
poręczy i schodów. Wyposażenie dodatkowe należy
umocować za pomocą kropli kleju błyskawicznego.
B(DE) Griffstange; 6,6 mm
(GB) Handle bar; 6,6 mm
(FR) Barre de maintien; 6,6 mm
(CZ) Madlo; 6,6 mm
(PL) Poręcz; 6,6 mm
D(DE) Schienenräumer
(Bei Montage des Schienenräumers entfällt der Kupplungskopf und der Kupplungshaken.)
(GB) Rail guard
(When the rail guard is installed, the coupling head and the coupling hook are omitted.)
(FR) Chasse-pierre
(Lors du montage du chasse-pierres, la tête d’attelage et le crochet d’attelage ne sont pas nécessaires).
(CZ) Odhrnovač
(Při montáži nástavce na čištění kolejí jsou spojovací hlava a spojovací hák vynechány).
(PL) Zgarniacz
(Podczas montażu zgarniaka do szyn nie ma głowicy sprzęgu i haka sprzęgającego).
A
A
A
E
D
D
C
36
•  • •  • 
(DE) Das Modell ist für den Einbau eines Decoders vorgesehen. Dazu verfügt das Modell über eine PluX12-Schnittstelle
nach NEM 658. Wir empfehlen die Verwendung eines Decoders von Uhlenbrock (TILLIG Art.-Nr. 66035). Die Schnittstelle
bendet sich unter dem Motorvorbau. Diese wird erreicht, indem das Oberteil des Modells wie oben beschrieben abgenom-
men wird. Die vier Schrauben, die Leiterplatte, oberes Gewicht und Motor in der Position halten, sind zumindest soweit zu
lösen, dass die Stifte des Decoders nach Abziehen des Entstörsatzes in die Buchse gesteckt werden können. Es empehlt
sich, die Steckkontakte des Decoders um ca. 1mm zu kürzen, da in der Leiterplatte für das Durchstecken der Stifte kein
Platz frei gehalten werden konnte. Der Anschluss eines Lautsprechers erfolgt an den beiden Lötpunkten „LP“ oberhalb
des für den Lautsprechereinbau reservierten Bauraumes im Bereich des Kühlers. Die Löcher in der Leiterplatte dienen der
Kabeldurchführung.
-



(GB) The model is designed to accommo-date a decoder. For this purpose the model is equipped with a NEM 658
PluX12-connector. We recommend using the Uhlenbrock decoder (TILLIG Item no. 66035). The interface is located under
the motor stem. This is achieved by removing the top of the model as described above. The four screws, which keep the
circuit board, the upper weight and the motor in position, must at least be detached to the extent that the decoder pins can be
plugged into the socket after removing the interference suppression kit. It is advisable to shorten the plug-in contacts of the
decoder by approx. 1mm, as no space could be left free in the circuit board for the pins to be plugged through. A loudspeaker
is connected at the two soldering points "SP" above the space reserved for the loudspeaker installation in the area of the
cooler. The holes in the circuit board are used for cable routing.
Please check the voltage at your digital controller before putting the locomotive into operation. A digital


result due to this cause are not covered by the warranty.
(FR) Le modèle est prévu pour le montage d’un décodeur. A cet effet, le modèle dispose d’une interface PluX12 selon NEM
658. Nous recommandons l’utilisation d’un décodeur d’Uhlenbrock (Réf. TILLIG 66035). L’interface se trouve sous l’avancée
du moteur. Elle est accessible après démontage de la partie supérieure du modèle comme décrit ci-dessus. Desserrer les
quatre vis, la carte de circuit imprimé, le poids supérieur et le moteur jusqu’à ce que les broches du décodeur puissent être
enchées dans la douille après retrait du kit antiparasite. Il est recommandé de raccourcir les contacts enchables du dé-
codeur d’env. 1 mm car il n’a pas été possible de conserver une place libre dans la carte de circuit imprimé pour introduire
les broches. Le raccordement du haut-parleur s’effectue aux deux points de brasage « LP » au-dessus de l’espace réservé
au montage du haut-parleur dans la zone du radiateur. Les trous dans la carte de circuit imprimé servent au passage des
câbles.
-

              

(CZ) Model je určen pro montáž dekodéru. K tomu účelu je model vybaven rozhraním PluX12 dle NEM 658. Doporučujeme
použití dekodéru irmy Uhlenbrock (TILLIG Art.č. 66035). Rozhraní se nachází pod předstupující částí motoru. Toho lze
dosáhnout odstraněním horní části modelu, jak je popsáno výše. Čtyři šrouby, které drží v pozici desku s plošnými spoji,
horní závaží a motor uvolnit alespoň do té míry, aby mohly být kolíky dekodéru po vytažení odrušovací sady zasunuty do
zdířky. Doručujeme zásuvné kontakty dekodéru zkrátit o cca 1 mm, protože v desce s plošnými spoji nebylo možné ponechat
pro prostrčení kolíků žádné volné místo. Připojení reproduktoru je na obou pájecích místech "LP" nad prostorem vyhrazeným
pro instalaci reproduktoru v oblasti chladiče. Otvory v desce s plošnými spoji slouží protažení kabelů.



(PL) Na modelu prze-widziano montaż dekodera. W tym celu model dysponuje złączem PluX12 zgodnym z NEM 658.
Zalecamy stosowanie dekodera irmy Uhlenbrock (TILLIG nr art. 66035). Interfejs umiejscowiony jest pod przednią komorą
silnika. Dostęp do niej jest możliwy po zdemontowaniu górnej części modelu, zgodnie z podanym opisem. Cztery śruby, które
utrzymują w pozycji płytę obwodów drukowanych, górny ciężar i silnik, należy poluzować na tyle, aby można osadzić trzpie-
nie dekodera w gnieździe, po wyjęciu zestawu odkłócającego. Zaleca się skrócenie styków dekodera o ok. 1 mm, gdyż w
płycie obwodów drukowanych nie zachowano wolnego miejsca dla niniejszych trzpieni. Głośnik należy podłączyć w obydwu
punktach lutowania „LP”, powyżej przestrzeni do zabudowy przeznaczonej na głośnik, w obrębie chłodnicy. Otwory w płytce
obwodów drukowanych przewidziano na przewody.
   
-


!
!
!
!


7
8
12
10
9
13
11
34b
29
28
20 24
25
26 27
21
22
23
16
17
18
19
14
10
9
11
8
14
3
2
1
5
6
5
4
1
15

(DE) Bezeichnung
Schraube (E) DG KB 2,2x18
Leiterplatte, vollst.
Entstörleiterplatte
Gewicht
Kardanwelle
Motor, vollst.
Rahmen, lack.
Puffer, dek.
Kupplungskopf
Kupplungshaken
Kupplungsdeichsel
Feder
Tank, lack.
Zylinderkerbstift Dm 1,0x8
Drehgestell DR, vollst.
Schneckenwelle, mont.
Wellenlager
Stromfeder re., vollst.
Stromfeder li., vollst.
Drehgestell, Teil A
Drehgestell, Teil B
Zahnrad z20/13
Stirnrad z11
Zahnrad z15
Stirnrad z19
Treibradsatz
Treibradsatz mit Haftreifen
Getriebeboden
Drehgestellblende, mont.
Haftreifen (o.Abb.)
Zurüstbeutel (o.Abb.)
(GB) Description
Screw (E) DG KB 2,2x18
Circuit board, complete
Interference suppression circuit board
Weight
Cardan shaft
Motor, complete
Frame, varnish.
Buffer, detached
Coupling head
Clutch hook
Coupler drawbar
Spring
Tank, varnish.
Cylindrical grooved pin Dm 1,0x8
Bogie DR, complete
Worm shaft, mounted
Shaft bearing
Pantograph, right, complete
Pantograph left, complete
Bogie, part A
Bogie, part B
Gear wheel 20/13 teeth
Spur gear z11
Gear wheel 15 teeth
Spur gear z19
Driving wheel set
Driving wheel set with traction tyres
Gear base
Bogie side frame cover, mounted
Traction tyre (without illustr.)
Accessory bags (without illustr.)
(FR) Description
Vis (E) DG KB 2,2x18
Carte de circuits imprimés, complète
Circuit imprimée antiparasite
Poids
Arbre Cardan
Moteur, complète
Châssis, laqué
Tampon, décoré
Tête d’attelage
Crochet d’attelage
Barre d’attelage
Ressort
Citerne, laqué
Broche cylindrique rainuré Dm 1,0x8
Bogie DR, complète
Arbre à vis sans n, montée
Palier d’arbre
Ressort de pantographe, droite, complète
Ressort de pantographe, gauche, complète
Bogie, partie A
Bogie, partie B
Roue dentée, 20d/13d
Roue frontale z11
Roue dentée, 15d
Roue frontale z19
Essieu moteur
Essieu moteur avec bandage adhérant
Fond d’engrenage
Bogie couvercle du cadre latéral, montée
Bandage adhérant (sans illustr.)
Sac d’accessoires (sans illustr.)
1
2
3
4
5
6
7
8
9

11
12
13
14
15
16
17
18
19

21
22
23
24
25
26
27
28
29
54



(PL) Nazwa
Śruba (E) DG KB 2,2x18
Płytka drukowana, kompletny
Płytka przeciwzakłóceniowa
Masa
Wał kardana
Silnik, kompletny
Ostoja, lak.
Zderzak, odznaczony
Główka sprzęgu
Hak sprzęgu
Dyszel sprzęgu
Sprężyna
Bak, lak.
Cylindryczny kołek Dm 1,0x8
Wózek DR, kompletny
Wał ślimakowy, zmontowana
Łożysko wału
Sprężyna prądowa, prawa, kompletny
Sprężyna prądowa, lewa, kompletny
Wózek, część A
Wózek, część B
Koło zębate z20/z13
Koło zębate walcowe z11
Koło zębate z15
Koło zębate walcowe z19
Zestaw kołowy napędowy
Zestaw kołowy napędowy z opaską przyczepną
Podstawa przekładni
Osłona ramy bocznej wózka, zmontowana
Opaski przyczepne (bez rys.)
Woreczek na wyposażenie dodatkowe (bez rys.)
(CZ) Popis
Šroub (E) DG KB 2,2x18
Deska s plošnými spoji, kompletní
Deska tištěného spoje
Hmotnost
Kardan
Motor, kompletní
Rám, lak.
Nárazník, ochoz
Hlava spojky
Spojkový hák
Oj spřáhla
Pružina
Nádrž, lak.
Válcový rýhovaný kolík Dm 1,0x8
Otočný podvozek DR, kompletní
Šnekové šachty, namontovat
Uložení hřídele
Proudová pružina pravá, kompletní
Proudová pružina levá, kompletní
Otočný podvozek, část A
Otočný podvozek, část B
Ozubené kolo z20/z13
Ozubené kolo z11
Ozubené kolo z15
Ozubené kolo z19
Hnací dvojkolí
Kola s ozubeným převodem a s bandáží
Kryt hnacího mechanismu
Obložení bočního rámu podvozku, namontovat
Bandáže (bez zobrazení)
Sáček s příslušenstvím (bez zobrazení)
Die Lok-Betriebsnummern der Artikel wechseln unter Umständen bei Neuproduktion. Ersatzteile
zu den Art.-Nr. tragen die jeweils in der Produktion bendlichen Betriebsnummern. Ersatzteile mit älteren Betriebs-
nummern nur solange Vorrat reicht.
The locomotive operating numbers of the articles can potentially change in the event of new
production runs. Spare parts for the article number bear the operating numbers that are respectively in production.
Spare parts with older operating numbers are only available while stocks last.
 Les numéros d’exploitation de locomotives des articles changent parfois lors d’une nouvelle
production. Les pièces de rechange relatives au n° art. portent respectivement les numéros d’exploitation se trou-
vant en production. Pièces de rechange avec des numéros d’exploitation plus anciens jusqu’à rupture du stock.
(CZ) POZOR! Provozní číslo lokomotivy u tohoto artiklu se může změnit podle okolností nové výroby. Náhradní
díly jsou k dispozici k tomuto kat. číslu, které je právě ve výrobě. Náhradní díly Ke starším typům jsou pouze do té
doby, dokud vystačí skladové zásoby.
 Numery części lokomotywy mogą się zmieniać wraz z nową produkcją modelu. Części zamienne dla
danego numeru artykułu za każdym razem mają numery przyjęte z produkcji. Części zamienne ze starymi numerami
części są dostępne tylko do wyczerpania zapasu.
!
!
393411






























1
2
3
4
5
6
7
8
9

11
12
13
14
15
16
17
18
19

21
22
23
24
25
26
27
28
29
!
!
!

Other TILLIG BAHN Toy manuals

TILLIG BAHN 96119 User manual

TILLIG BAHN

TILLIG BAHN 96119 User manual

TILLIG BAHN 85395 User manual

TILLIG BAHN

TILLIG BAHN 85395 User manual

TILLIG BAHN 16571 User manual

TILLIG BAHN

TILLIG BAHN 16571 User manual

TILLIG BAHN 83380 User manual

TILLIG BAHN

TILLIG BAHN 83380 User manual

TILLIG BAHN 76721 User manual

TILLIG BAHN

TILLIG BAHN 76721 User manual

TILLIG BAHN KARPAT VASUT KFT H-KV Ep. VI 459 021 User manual
TILLIG BAHN

TILLIG BAHN KARPAT VASUT KFT H-KV Ep. VI 459 021 User manual

TILLIG BAHN 01757 User manual

TILLIG BAHN

TILLIG BAHN 01757 User manual

TILLIG BAHN H0-ELITE-IBW User manual

TILLIG BAHN

TILLIG BAHN H0-ELITE-IBW User manual

TILLIG BAHN 78223 User manual

TILLIG BAHN

TILLIG BAHN 78223 User manual

TILLIG BAHN 74910 User manual

TILLIG BAHN

TILLIG BAHN 74910 User manual

TILLIG BAHN 85191 User manual

TILLIG BAHN

TILLIG BAHN 85191 User manual

TILLIG BAHN 83331 User manual

TILLIG BAHN

TILLIG BAHN 83331 User manual

TILLIG BAHN y/B 70 User manual

TILLIG BAHN

TILLIG BAHN y/B 70 User manual

TILLIG BAHN 83531 User manual

TILLIG BAHN

TILLIG BAHN 83531 User manual

TILLIG BAHN 74910 User manual

TILLIG BAHN

TILLIG BAHN 74910 User manual

TILLIG BAHN 13350 User manual

TILLIG BAHN

TILLIG BAHN 13350 User manual

TILLIG BAHN BR 112.1 User manual

TILLIG BAHN

TILLIG BAHN BR 112.1 User manual

TILLIG BAHN ICE User manual

TILLIG BAHN

TILLIG BAHN ICE User manual

TILLIG BAHN H0-ELITE-EKW User manual

TILLIG BAHN

TILLIG BAHN H0-ELITE-EKW User manual

TILLIG BAHN 85193 User manual

TILLIG BAHN

TILLIG BAHN 85193 User manual

TILLIG BAHN BR 112.1 User manual

TILLIG BAHN

TILLIG BAHN BR 112.1 User manual

TILLIG BAHN 85346 User manual

TILLIG BAHN

TILLIG BAHN 85346 User manual

TILLIG BAHN BR 03 User manual

TILLIG BAHN

TILLIG BAHN BR 03 User manual

TILLIG BAHN 83143 User manual

TILLIG BAHN

TILLIG BAHN 83143 User manual

Popular Toy manuals by other brands

Aeromax Screamer 40 ARF Assembly instructions

Aeromax

Aeromax Screamer 40 ARF Assembly instructions

Contixo DB1 user manual

Contixo

Contixo DB1 user manual

Playskool 4-in-1 Busy Center instructions

Playskool

Playskool 4-in-1 Busy Center instructions

marklin 39671 user manual

marklin

marklin 39671 user manual

Walachia 36 manual

Walachia

Walachia 36 manual

Viewpro ROC 4 user manual

Viewpro

Viewpro ROC 4 user manual

VQ Wasp Assembly instructions

VQ

VQ Wasp Assembly instructions

BMI Bobcat manual

BMI

BMI Bobcat manual

Crayola Double-Sided Artist Easel instruction manual

Crayola

Crayola Double-Sided Artist Easel instruction manual

Basher Mini Nitro Circus instruction manual

Basher

Basher Mini Nitro Circus instruction manual

roco 70263 operating manual

roco

roco 70263 operating manual

ENGINO Solar Pro Duo Assembly instruction

ENGINO

ENGINO Solar Pro Duo Assembly instruction

Mattel Barbie DHF06 instructions

Mattel

Mattel Barbie DHF06 instructions

Razor Jr. Twisti owner's manual

Razor Jr.

Razor Jr. Twisti owner's manual

LEGO Technic 42000 Assembly instructions

LEGO

LEGO Technic 42000 Assembly instructions

Mega Bloks NEO MACHINES COMMANDO 6391 Assembly instructions

Mega Bloks

Mega Bloks NEO MACHINES COMMANDO 6391 Assembly instructions

LGB 21671 manual

LGB

LGB 21671 manual

Beyblade Driger G instructions

Beyblade

Beyblade Driger G instructions

manuals.online logo
manuals.online logoBrands
  • About & Mission
  • Contact us
  • Privacy Policy
  • Terms and Conditions

Copyright 2025 Manuals.Online. All Rights Reserved.