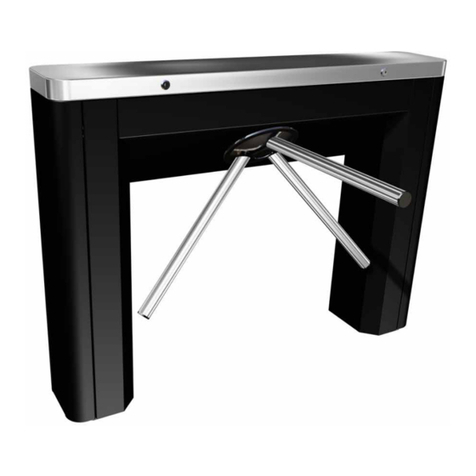
Tiso T3.PKC.XC User manual

«TiSO-PRODUCTION»Company
SERVO-OPERATED
ROTOR TURNSTILE
T3.РKС.XC
OPERATION MANUAL
AUIA.123-05 OM
2013

2 AUIA.123.00.00.00.00-05 OM
CONTENTS
Page
INTRODUCTION…….……………………….……………………….……....….…….
3
1DESCRIPTION AND OPERATION…..…………………………….…...……...............
5
1.1 General Information and Designation…………..……………...…..........….....…
5
1.2 Specifications………………......……………………………...……....……..…..
6
1.3 Configuration and Completeness of Delivery.……….………….……....….........
6
1.4 Design and Operation……………………………….…..….…………………....
7
1.5 Instrumentation, tools and accessories………….…....………………………......
8
1.6 Marking………………………………………………………..…....…................
8
1.7 Packing…………………………………………………………….…....…..........
9
1.8 Description and operation of controller as component of the turnstile..................
9
2 INTENDED USE…………………………….…..……....................................................
16
2.1 Operating limitations…………….…………………..……………......…..….......
16
2.2 Layout and installation…….………………………..…………….….......…........
16
2.3 Preparation for use…………........….....................................................................
17
2.4 Contingency actions……………………….…..…....………………………........
19
3MAINTENANCE…..…………………………….......….…..………………………......
19
3.1 General instructions...............…………………..……………......…..…..............
19
3.2 Safety measures............…………………..…………….............…...…................
19
3.3 Maintenance procedure…….……………........…..........…...................................
19
4 ROUTINE MAINTENANCE………..…………………………………….........……....
20
4.1 General instructions.......................……………..………..……......…..…............
20
4.2 Fault Directory..…………..….........…….....…..…..............................................
20
4.3 Post repair checkout..………………..……........……......…..…..........................
20
5 TRANSPORTATION AND STORAGE ..……………………………......…..……........
20
6 UTILIZATION…………………………………..…….……………………...…..….......
20
7 MANUFACTURER’S WARRANTY AND CONDITIONS OF INTERMEDIATE
MAINTENANCE…………………………………………………………...…...................
21
Appendix АDesign, overall and installation dimensions of the rotor turnstile
T3.РКC.XC
..………...…….……………………………………………...............................
22
Appendix B Control panel and connection diagram..….......………….……….
23
Appendix C Wiring diagram of the turnstile T3.РКC.XC ……..…...…………
25

3 AUIA.123.00.00.00.00-05 OM
INTRODUCTION
This Operation Manual (hereinafter referred to as the OM), combined with datasheet, covers the servo-
operated waist-high rotor turnstile (hereinafter referred to as the turnstile). The Operation Manual
contains information about design, specifications, installation, proper operation and maintenance of the
turnstile.
This Operation Manual is prepared in compliance with the specification requirements ТU
U 31.6-32421280-004:2010.
The turnstile should be serviced only by the qualified staff having the relevant class of permit to work
with electrical facilities with voltage up to 1000V, who carefully studied this Operation Manual,
obtained safety instructions and trained for operation and maintenance of the turnstile.
Reliability and durability of the turnstile operation is provided with observation of modes and
conditions of transportation, storage, installation and operation. So, fulfillment of all requirements
specified in this document is mandatory.
In view of regularly performed works on improvement of the product, its design can be modified
without degradation of parameters and quality of the product.
Depending on the purpose and design features of the turnstile, the following pattern of product
reference designation is accepted:
T3. РКC. XC
waist-high turnstile
rotor with
glass blades
servo-operated turnstile
P
polished stainless steel
S
brushed stainless steel
Example of reference designation of servo-operated rotor turnstile with glass blades and housing from
brushed stainless steel when the turnstile
T3.РКC.SC ТU U 31.6-32421280-004:2010 is ordered.

4 AUIA.123.00.00.00.00-05 OM
WARNINGS TO THE CUSTOMER
ON SAFE OPERATION OF THE TURNSTILE
These warnings are designed for ensuring of safety during operation of the turnstile to prevent
violation of safety characteristics by improper installation or operation. These warnings are aimed at
drawing attention of the customer to safety problems.
GENERAL WARNINGS
Safety measures and requirements specified in this in this OM must be observed:
the turnstile must be connected to ground loop prior to operation;
–the turnstile should be connected to AC network with parameters specified in the paragraph 1.2
«Specifications»;
–inspection, adjustment and repair should be performed only after the turnstile is deenergized.
After purchasing of the turnstile it should be unpacked and its integrity should be checked. In case of
doubt in integrity of the turnstile it should not be used and the customer should refer to the supplier or
to the manufacturer.
Packing accessories (wooden pallet, nails, clips, polyethylene bags, cardboard etc.) as potential sources
of hazard must be removed to unacceptable place prior to proper use of the turnstile.
As electric shock protection device the turnstile is related to 01 protection class according to the GOST
(State Standard) 12.2.007.0-75 and is not intended for operation in explosive and fire-hazardous areas
by the «Rules for design of electrical installations».
Using of the turnstile for unintended purpose, improper installation, nonobservance of conditions of
transportation, storage, installation and operation specified by this OM, may result in damage to
people, animals or property for which the manufacturer is not responsible.

5 AUIA.123.00.00.00.00-05 OM
1 DESCRIPTION AND OPERATION
1.1 General Information and Designation
1.1.1 Name of product: Rotor waist-high turnstile
Climatic version: NF4
1.1.2 The turnstile is designed for pedestrian movement control during tight access control at access
points of industrial enterprises, banks, stadiums, administrative facilities etc. under actuation of control
signals (from magnetic card readers, keypad etc.) of access control system or manually (from manual
control panel).
Traffic flow capacity of the turnstile without personal identification is at least 20 persons per minute.
1.1.3 Dimensions and weight of the turnstile correspond to the values specified in the Table 1. Table 1
Designation of modification
Dimensions, mm
Max. weight, kg
Н
L
W
Т3.РКC.PC
1000
1450
1350
70
Т3.РКC.SC
1.1.4 The parameters defining operation conditions according to GOST 15150-69 and GOST
12997-84 are specified in the Table 2.
Table 2
Operation conditions
For climatic
version
Parameter value
Ambient temperature
NF4
+1°С to + 40°С
Relative humidity
80 % at + 20 ºС
Ambient temperature allowable
pressure
84 to 106,7 kPa
Transportation temperature range
- 40°С to + 50 °С
Storage temperature range
+ 5°С to + 40°С
Group of mechanical application
L3
Altitude above sea level
up to 2000 m
Environment
Explosion-proof, does not contain current-
conducting dust, aggressive gases and
vapours in concentration destroying
isolation and metals, disturbing normal
operation of the equipment installed in
turnstiles
Installation site
In enclosed spaces in the absence of direct
impact of precipitations and solar radiation
Running position
Vertical, deviation from vertical position no
more than 1º to any side is acceptable
1.1.5 Reliability indices:
–mean time to repair (without delivery time of spare parts, tools and accessories) –at most 6
hours;
–mean time to failure –at least 1 500 000 accesses;
–mean service life between overhauls –at least 10 years.
1.2 Specifications
Principal parameters of the turnstile are specified in the Table 3.

6 AUIA.123.00.00.00.00-05 OM
Table 3
Parameter description
Unit measure
Parameter value
Traffic flow capacity in free access mode is at least
man/min.
60
Traffic flow capacity in single access mode is at least
man/min.
20
Max. passageway width
mm
580
Supply voltage:
–AC power supply (primary)
V
Hz
100 240
~ 50/60
–DC power supply (secondary)
В
12
Max. power consumption
V·А
75
Index of protection according to GOST 14254-96
–
IP41
1.3 Configuration and Completeness of Delivery
1.3.1 Turnstile design
1.3.1.1 The rotor turnstile’s design includes the following principal devices and components:
–housing;
–side enclosure;
–central enclosure;
The turnstile’s housing consists of:
–cup;
–clamp with plates;
–disk;
–three glass blades;
–sheathing;
–actuator;
–control box;
The product includes control panel.
Design, overall and installation dimensions of the turnstile are shown in Appendix A.
1.3.1.2 The turnstile modifications are manufactured from the following materials:
–polished stainless steel (reference designation T3.РКC.РC);
–brushed stainless steel (reference designation T3.РКC.SC).
The turnstile’s basic modification is with brushed stainless steel housing (reference designation
T3.РКC.SC).
1.3.2 Completeness of Delivery
For convenience of delivery the turnstile is supplied by the following components.
1) turnstile ready-to-install;
2) side enclosure;
3) central enclosure.
The turnstile is delivered by one package.
Completeness of delivery is specified in the Table 4. Table 4
Product description
Product designation/parameters
Quantity,
piece
Notes
Rotor turnstile
Т3.РОC.________
1 kit
–
Components
Servomotor turnstile
AUIA.123.00.00.00.00-05
1
–
Side enclosure
AUIA.121.02.00.00.05
1
–
Central enclosure
AUIA.121.03.00.00.05
1
–
Additional equipment
Control panel
AUIA.114.02.00.00
1
–

7 AUIA.123.00.00.00.00-05 OM
Mounting kit
Redibolt 92F112A4-0
(12×140 М10)
4
–
Redibolt 92F110A2-0
(10×120 М8)
12
–
Reader rack*:
2
Modification of rack
is defined by the order
–with LED display panel**
AUIA.121.04.00.00.00.01(-06)
–without LED display
panel
AUIA.121.04.00.00.00
Certificate
AUIA.123-05 PS
1
–
Packing
–
1
–
* Optional
** LED display operation on the reader racks AUIA.121.04.00.00.00-01(-06) is described further in
the text with the mark1
1.4 Design and operation
1.4.1 Turnstile design
1.4.1.1 The turnstile housing consists of cup 2 with fixed base plate (see the Figure 1). Three glass
blades, fixed by clip with plates 7, are mounted on top of cup. The blades 1 are radially located at the
angle of 120°. Bottom surface of the turnstile housing is sheeting 3 consisting of two detachable parts.
Control box 4 and drive are located at the bottom of housing. After each turnstile access the blades are
automatically brought to initial position by means of servomotor.
1.4.1.2 Control box 4 is a metal case inserted into cup. Power supply unit and card, on which
controllers with electronic components and connectors for external connections are placed, are fixed
inside control box case.
Control box is designed for the turnstile energizing and latching control.
1.4.1.3 Enclosures and turnstile are installed in such a way that passageway between enclosures will be
locked by turnstile blade.
1.4.1.4 Control panel is made as small desktop device in plastic case designed for setting and
indication of operating modes when the turnstile is operated manually. Control panel and its
connection diagram are shown in the Appendix B.
1.4.2 Principle of operation
1.4.2.1 The turnstile’s operating modes:
1) single access in the direction «A»or «B»;
2) locking;
3) free access in the direction «A»or «B».
Switching of the turnstile operating modes as well as setting of access modes are performed either by
control panel or as part of automated access control system (ACS) (by means of cards, badges etc.).
1.4.2.2 In the initial state, when the turnstile is energized, blades are locked from rotation by drive.
1.4.2.3 After coming of access permission command in the direction «A»or «B»to controller the
green arrow is lit in the appropriate direction1and blades are unlocked. After blade is gently pushed in
the direction of access servomotor is actuated and rotates blades in the appropriate direction.
After the turnstile access blades keep on rotating smoothly forward (turn additionally) gradually
slowing down and when 120 turning angle is reached the blades are locked by electromagnetic brake
of operating mechanism.
More detailed description of the turnstile operating modes is given in the paragraph 1.8
«Description and operation of controller as component of the turnstile».

8 AUIA.123.00.00.00.00-05 OM
1.4.2.4 12V DC power voltage is provided by power supply unit.
1.4.2.5 The turnstile’s wiring diagram is shown in the Appendix C.
1 –glass blades;
5 –Redibolt;
2 –cup with drive;
6 –screws М4х10;
3 –sheeting;
7 –clip with plates
4 –control box;
Figure 1 –Design of the rotor turnstile T3.РKC.ХC
1.5 Instrumentation, tools and accessories
Dedicated tools are required for installation of the turnstile (multi-purpose measurement
instrumentation and installation tools are enough).
1.6 Marking
1.6.1 Marking of turnstiles to be delivered within Ukraine is in Ukrainian language and for export
delivery in English.
Each turnstile is marked as follows:
–name of manufacturer and trade mark;
–each turnstile is equipped with identification plate containing the following data;
–reference designation of turnstile modification;
–index of protection;
–serial number;
–value of voltage, type of current, frequency and current consumption;
–weight, kg;
–marks of conformity to , ;
–date of manufacture;
–inscription «MADE IN UKRAINE».
Marking plate is located inside the turnstile housing.
1.6.2 Marking of transportation packing contains as follows:
1) Information inscriptions:
–turnstile reference designation;
–dimensions of cargo package in centimeters;

9 AUIA.123.00.00.00.00-05 OM
–gross weight in kg;
–net weight in kg;
–volume of package in cubic meters;
2) Handling marks:
–«Fragile. Handle with Care»;
–«Keep dry»;
–«Centre of gravity»;
–«Top».
1.6.3 Shipping documentation is packed with bag from polyethylene film. Marking is applied on insert
from cardboard or paper.
1.7 Packing
1.7.1 The turnstile is delivered ready-to-install.
Types of packing:
–consumer packaging (corrugated cardboard case);
–transportation packaging (cases from wood-fiber board or crates).
The turnstile is fixed from displacement in the middle of transportation package with blocking
lumbers. Cushion pads are placed between the turnstile and lumbers.
1.7.2 Shipping documentation sealed in a bag from polyethylene film is enclosed to the turnstile
packing.
1.8 DESCRIPTIONAND OPERATION OF CONTROLLER AS COMPONENT OF THE
TURNSTILE
1.8.1 Motor controller РСВ.201.01.00.00
The motor controller РСВ.201.01.00.00 is designed to control the motorized turnstile’s motor.
1.8.1.1 The controller is assembled on the (85х70)mm card, on which electronic components and
connectors for external connections are mounted.
13 LED s are mounted on controller card. Their purpose is as follows:
8 LEDs indicate condition of inputs «IN1» «IN8».
«POWER» LED indicates availability of supply voltage 5V.
4 LEDs indicate condition of outputs for connection of motor.
24 terminals are mounted on the card: 2 of them are designed for external connections, the rest are
designed for connection to turnstile units or are standby.
1.8.1.2 Specifications
Specifications of the controller are shown in the Table 5.
Table 5
Parameter description
Parameter value
Number of inputs
8
Number of outputs
8
Type of input
logical
Type of output GRN1, RED1, GRN2, RED2
open collector
Logical «1» voltage
(3,7 5)V
Logical «0» voltage
(0 1,7)V
Peak voltage applied to inputs «IN1»÷« IN8», maximum
15V
Peak voltage switched by outputs «GRN1», «RED1», «GRN2», «RED2»
30V
Peak current switched by outputs «GRN1», «RED1», «GRN2», «RED2»
2А
Peak voltage switched by outputs «-MG1», «-MG2»
50V
Peak current switched by outputs «-MG1», «-MG2»
5A
Peak voltage switched by outputs «MOT1», «MOT2»
27V
Peak current switched by outputs «MOT1», «MOT2»
≤ 4А

10 AUIA.123.00.00.00.00-05 OM
Controller supply voltage
(10 27)V
Consumption current when outputs «MOT1» and «МОТ2» are OFF
≤0,15 А
Climatic modification and placement category of according to
the GOST 15150-69
NF4
Appearance of the controller is shown in the Figure 2.
Figure 2 –Appearance of the controller РСВ.201.01.00.00
1.8.1.3 Description of operation
1.8.1.3.1 The controller operates according to the program fed into the memory of microprocessor. The
turnstile mechanism is controlled depending on commands coming from the controller
РСВ.112.21.20.00, present position of rotor, rotor rotation speed and motor current.
Purpose of controller’s contacts is shown in the Table 6. Table 6
Connector/
contact No
Designati
on
Direction
Description
Signal parameters
and description
X1/1
IN1
ENTRY
Not applicable
1) logical «0» – (0 1,7)V;
2) logical «1» – (3,7 5)V;
3) active level of signal –
logical «0»;
4) voltage on open
input ≤ 5V
X1/2
IN2
ENTRY
Not applicable
X1/3
IN3
ENTRY
Not applicable
X1/4
IN4
ENTRY
Not applicable
X1/5
IN5
ENTRY
To be connected to rotor position
sensor and motor speed sensor
X1/6
IN6
ENTRY
X1/7
IN7
ENTRY
X1/8
IN8
ENTRY
X1/9
GND
«-» of power supply
(common wire)
X1/10
GND
X1/11
GND
X3.1
X3.5
70 mm
60 mm
75 mm
85 mm
O4 mm

11 AUIA.123.00.00.00.00-05 OM
X1/12
+5 V
EXIT
Not applicable
X2/1
GRN1
EXIT
Not applicable
X2/2
RED1
EXIT
Not applicable
X2/3
GRN2
EXIT
Not applicable
X2/4
RED2
EXIT
Not applicable
X2/5
-MG1
EXIT
Not applicable
1) type of output –open
collector;
2) peak voltage on privacy
key –50V;
3) peak current of public
key –5A
X2/6
+MG1
EXIT
Not applicable
X2/7
-MG2
EXIT
Connection of electromagnetic
brake winding
1) type of output –open
collector;
2) peak voltage on privacy
key –50V;
3) peak current of public
key –5A
X2/8
+MG2
EXIT
Connection of electromagnetic
brake winding
(cathode of protective diode)
X2/9
MOT1
EXIT
Connection of motor
1) voltage (10÷27)V;
2) current ≤ 4А
X2/10
MOT2
EXIT
X2/11
GND
«-»of power supply
(common wire)
X2/12
+24V
ENTRY
«+» of power supply
(controller energizing)
1) voltage (10÷27)V;
2) current ≤ 4А
1.8.2 Turnstile controller РСВ.112.21.20.00
The controller РСВ.112.21.20.00 determines behavior of the whole turnstile.
1.8.2.1 Controller is assembled on card (104х68)mm and designed for installation into the turnstile
housing or power supply box.
19 LEDs are mounted on controller card. Their purpose is as follows:
5 LEDs initiate state of inputs for peripheral connections «INP1» ÷ «INP5»;
LED «POWER»initiates availability of power voltage 5V;
LED «OPERATE»initiates operability of microprocessor;
7 LEDs initiate state of outputs for peripheral connections «OUT1» ÷ «OUT7»;
LEDs «SENSOR»initiate state of rotor position sensor;
LEDs «RX» and «TX» initiate respectively reception and transmittance in serial port.
40 connecting terminals are mounted on card, 14 of which are designed for peripheral connections.
The rest of them are standby or designed for connection to the turnstile’s units.
The controller’s appearance is shown in the Figure 3.
1.8.2.2 Technical features
Controller technical features are specified in the Table 7. Table 7
Parameter description
Parameter value
Number of inputs for reception of control commands
5
Number of inputs for connection of rotation sensors
7
Type of inputs
logical
Type of outputs
open collector

12 AUIA.123.00.00.00.00-05 OM
Voltage of logical «1»
(3 5)V
Voltage of logical «0»
(0 2,2)V
Maximum peak voltage supplied to the inputs «INP1»÷«INP5»
15V
Peak voltage switched by transistors of signal outputs
50V
Peak current switched through signal outputs
0,1А
Power supply voltage of controller
(9 15)V
Peak consumption current
0,15А
Number of signal reception and transmission serial ports (RS-485)
1
Climatic version and category of location according to the GOST 15150-69
NF4
Figure 3 –Appearance of the controller РСВ.112.21.20.00
1.8.2.3 Description of operation
The controller РСВ.112.21.20.00 operates according to the program fed into the microprocessor
memory. The turnstile's mechanism motor controller and LED displays1are controlled according to
control commands and status of rotor position sensors based on the logic entered into the program.
Control commands can be transmitted via RS-485 (from control panel) or logical inputs (by closing
and opening of inputs «INP1»÷ «INP5»on «GND»).
Controller (along with the turnstile) can be in the «INITIAL STATE»(closed for access) or in the
following access modes:

13 AUIA.123.00.00.00.00-05 OM
«SINGLE ACCESS IN ONE DIRECTION»;
«FREE ACCESS IN ONE DIRECTION»;
«LOCKING OF ACCESS».
Other operating modes are combinations of various or similar modes in different directions:
Single access in one direction and any mode in opposite direction.
Free access in one direction and any mode in opposite direction.
Locking of access in one direction and any mode in opposite direction.
1.8.2.3.1 «INITIAL STATE»
Controller is in this mode, if there are no commands «OPEN А/В» and the turnstile's rotor is set to the
point 0º.
In this mode rotor is locked by electromagnetic brake: denied red LED is lit in both directions1.
«SINGLE ACCESS IN ONE DIRECTION»
In this mode controller unlocks rotor through solenoid in one direction with possibility of revolving to
120º. It enables the turnstile access of one pedestrian.
Controller is switched to «SINGLE ACCESS IN ONE DIRECTION», if in the «INITIAL STATE»it
receives «OPEN А/В» command (i.e. active level of signal is sent to the input «INP4»or «INP5»). In
this case the turnstile is open within action period of signal. The command can also be sent through
RS-485. Then start of rotor rotation is expected prior to the end of
delay of «WAITING FOR START OF ACCESS».
Sequence of controller operations after reception of «OPEN А/В» command is as follows:
● Delay of «WAITING FOR START OF ACCESS»is initiated (factory setting 5 sec.).
Controller РCВ.201.01.00.00 deenergizes solenoid and rotor is unlocked in the relevant
direction.
LEDs are switched from red to green according to authorized access1.
Then two alternatives of events are possible:
1) first alternative: If within active status of «OPEN A/В» («INP4»/«INP5») or during delay of
«WAITING FOR START OF ACCESS»rotation of rotor is not started, then controller
РCВ.201.01.00.00 is reset to «INITIAL STATE»;
2) second alternative: if in the above mentioned cases rotation of rotor is started, then current is
delivered to motor winding via outputs «MOT1»and OT2»(X2/9 and X2/10) and barrier rods rotate in
the relevant direction. Current, rotation speed and barrier rod position are controlled during rotation:
When rotor rotates to 6º, the output signal «ACCESS A/B IS OCCUPIED»(«OUT5»)
becomes active. Output signal «START OF ACCESS А/В» («OUT1»or «OUT2») becomes
active.
LED display is switched from green to red indicating that access is occupied1.
●When rotor rotates to 54º the output signal «START OF ACCESS А/В» («OUT1»or «OUT2»)
is removed. Delay of «WAITING FOR START OF ACCESS»is reset.
When rotor rotates to 64º, the signal «DETECTION OF ACCESS A/B»(«OUT3» or
«OUT4») appears.
After turnstile access by pedestrian blades continue to rotate smoothly forward (turn
additionally), gradually slowing down, and when the turning angle 120° is reached, barrier
rods are kept in this position by means of servomotor and electromagnetic brake.
When rotor rotates to 120°, the signals «ACCESS А/ВIS OCCUPIED»(«OUT5») and
«DETECTION OF ACCESS A/B»(«OUT3» or «OUT4») are cleared and then availability of
«OPEN А/В» (INP4»or «INP5») command, conforming to the applicable direction, is
checked. If by this moment the command remains active by this moment, controller goes to
«FREE ACCESS»mode.
1.8.2.3.2 «FREE ACCESS IN ONE DIRECTION»
In this mode rotor can easily rotate in direction of free access.
In the «FREE ACCESS»mode green LED of the relevant direction is blinking1.

14 AUIA.123.00.00.00.00-05 OM
Controller is switched to this mode in two cases:
first: when the «OPEN А/В» (input «INP4»or «INP5») command is kept in active status at the
moment of crossing by rotor the point 120º at the termination of «SINGLE ACCESS»;
second: after reception of the «FREE ACCESS»command in the relevant direction through
RS-485.
After controller is switched to «FREE ACCESS»mode, output signals of «OCCUPIED ACCESS»,
«ACCESS DETECTION»of the relevant direction are generated as described in the section 1.8.2.3.1.
Exit of this mode in «INITIAL STATE»is taken place after cancellation of the «OPEN А/В»
command or reception of the «FREE ACCESS CANCELATION»command through RS-485. But it
will take place not instantly and only when rotor reaches one the starting points 0º, 120º or 240º, i.e. if
the free access cancellation arises during the started access it will be completed as free.
1.8.2.3.3 «AUTHORIZATION OF SINGLE ACCESS IN TWO DIRECTIONS»
Since the turnstile having one rotor cannot be rotated in two directions simultaneously, controller can
only issue command to the motor controller РCВ.201.01.00.00 to unlock rotor in two directions and
after access in one of directions is stated, rotation of rotor in opposite direction will be locked by
electromagnetic brake.
Controller is switched to this mode if in the «INITIAL STATUS»it simultaneously acquires «OPEN
A»and «OPEN B»commands. The second signal can also come during the time when the first signal
is already active but rotation of rotor did not start yet.
At the same time:
1) Controller will send the relevant command to the motor controller РCВ.201.01.00.00 to unlock
rotor in both directions.
2) It will switch LEDs in both directions from red to green1.
3) It will initiate two delays of «WAITING FOR START OF ACCESS Аand В» for each access
separately, which are counted from the moment of acquisition of commands.
4) After rotor is revolved to 6º in any side, the opposite direction will be locked and LED is switched
to red1.
Then controller operates as described in the chapter «SINGLE ACCESS IN ONE DIRECTION».
If during active state of the «OPEN A»and «OPEN B»signals or during «WAITING FOR START
OF ACCESS» rotor was not revolved in any side to the angle more than 6º, then controller
РСВ.112.21.20.00 is switched to «INITIAL STATE» and switches the motor controller
РCВ.201.01.00.0 to «INITIAL STATE» by the relevant command.
1.8.2.3.4 «LOCKING OF ACCESS»
Locking function can be activated only by control panel.
After activation of «LOCKING OF ACCESS A or B»the turnstile’s rotor is locked in the appropriate
direction and authorized access commands will be ignored in locked direction.
Locked direction is indicated by blinking red color1.
Controller’s contacts designed for connection of peripherals are shown in the Table 8. Table 8
Connector /
Contact No
Designation
Direction
Description
Signal parameters and
description
ХТ1/1
INP1
ENTRY
Not applicable
1) logical «0»
(0 2,2)V;
2) logical «1»
(3 5)V;
3) active level of signal
(factory setting) –
logical «0»;
4) voltage on open
input < 5V
ХТ1/2
INP2
ENTRY
ХТ1/3
INP3
ENTRY
ХТ1/4
INP4
(«TO BE
OPENED A»)
ENTRY
Command «OPEN FOR
SINGLE/FREE ACCESS»;
free access appears when
entry is kept in active states
after the angle 120ºis
reached rotor
ХТ1/5
INP5
(«TO BE
OPENED B»)
ENTRY
ХТ1/6
GND (common)

15 AUIA.123.00.00.00.00-05 OM
ХТ2/1
GND (common)
ХТ2/2
OUT1
(«START OF
ACCESS А»)
EXIT
Signal is generated by
controller when rotor is
rotated from 6º to 54º in
the appropriate direction
1) type of output –
open collector;
2) peak voltage on
privacy key 55V;
3) peak current of
public key 100mA;
4) resistance of public
key (5 7)Ohm;
5) active level of signal
(factory setting) –
logical «0»
ХТ2/3
OUT2
(«START OF
ACCESS В»)
EXIT
ХТ2/4
OUT3
(«DETECTION
OF ACCESS А»)
EXIT
Signal is generated by
controller when rotor is
rotated from 64º to 120º in
the appropriate direction
ХТ2/5
OUT4
(«DETECTION
OF ACCESS В»)
EXIT
ХТ2/6
OUT5
(«ACCESS IS
OCCUPIED»)
EXIT
Signal is generated by
controller when rotor is
rotated from 6º to 120º in
any direction
ХТ2/7
OUT6
(«ERROR»)
EXIT
Signal is generated by
controller when fault of
behaviour is detected
ХТ2/8
OUT7
EXIT
Not applicable
ХТ3/1
OPTO1
ENTRY
Used for obtaining of
information about turnstile
rotor position
1) logical «0»
(0 2,2)V;
2) logical «1»
(3 5)V;
3) active level of signal
(factory setting) –
logical «0»;
4) voltage on open
input < 5V
ХТ3/2
OPTO2
ENTRY
ХТ3/3
OPTO3
ENTRY
ХТ3/4
SGN1
ENTRY
Not applicable
ХТ3/5
SGN2
ENTRY
ХТ3/6
SGN3
ENTRY
ХТ3/7
SGN4
ENTRY
ХТ3/8
INDAR
EXIT
Used for control of
turnstile LED displays1
1) type of output –
open collector;
2) peak voltage on
privacy key 30V;
3) peak current of
public key 2A;
4) resistance of public
key 0,1Ohm
ХТ3/9
INDAG
EXIT
ХТ3/10
INDBR
EXIT
ХТ3/11
INDBG
EXIT
ХТ3/12
PSW1
(«PANIC»)
EXIT
Not applicable
1) type of output –
open emitter;
2) voltage on output in
ON state 12V;
3) peak current
consumed from the
output 1A;
4) resistance of public
key 0,25Ohm
ХТ3/13
PSW2
(«SENSOR»)
EXIT
Not applicable
ХТ3/14
RSА
Used for data transmission
via serial port
Interface RS-485
ХТ3/15
RSВ
Interface RS-485
ХТ3/16
SH
RS-485 SCREEN

16 AUIA.123.00.00.00.00-05 OM
ХТ4/1
- MGA
EXIT
Not applicable
1) type of output –
open collector;
2) peak voltage on
privacy key 50V;
3) peak current of
public key 9A;
4) resistance of public
key 0,11Ohm
ХТ4/3
- MGB
EXIT
ХТ4/2
+ MGA
Not applicable
ХТ4/4
+ MGB
ХТ5/1
GND (common)
ХТ5/2
GND (common)
ХТ5/3
GND (common)
ХТ5/4
+ 12V
1) power supply
voltage 12V;
2) consumption current
< 150mA
ХТ5/5
+ 12V
ХТ5/6
+ 12V
2 INTENDED USE
2.1 Operation limitations
2.1.1 The turnstile must be used in the environment specified in the p. 1.1.4 of this document subject to
the specifications listed in the section 1.2.
2.1.2 IT IS PROHIBITED:
1) UNINTENDED USE OF THE TURNSTIL (see the section 1 «DESCRIPTION AND
OPERATION»);
2) TO USE THE TURNSTILE UNEARTHED;
3) TO USE HEATING PIPES AND RADIATIONS AS WELL AS PIPES OF CENTRAL
WATER SUPPLY FOR EARTHING;
4) TO REPAIR AND ADJUST WITHOUT DEENERGIZING;
5) TO RELOCATE THE OBJECTS EXCEEDING THE PASSAGEWAY WIDTH THROUGH
THE TURNSTILE ACCESS AREA;
6) TO JERK AND IMPACT ON BLADES OR OTHER PARTS THE PRODUCT, WHICH
MAY CAUSE THEIR MECHANICAL DEFORMATION OR DAMAGE.
2.1.3 It is not allowed to use the turnstile:
–at the presence of mechanical rattle in movable parts of the turnstile;
–when metalwork of the turnstile and its components and accessories are mechanically damaged.
2.1.4 List of special conditions of operation
Mean time of the turnstile access (in single access mode) equals to 3 sec.
The force applied by accessor to barrier rod should not exceed 60Н.
For augmentation of the turnstile’s traffic flow capacity in case of emergency escape door or gate
can be installed near the turnstile.
ATTENTION: MANUFACTURER WARNS OF NECESSITY TO KEEP SEALS OF
THE MANUFACTURER ON THE TURNSTILE’S COMPONENT PARTS!
2.2 Layout and installation
2.2.1 The turnstile and components of delivery kit are delivered to the installation site in the factory
packing. The turnstile should be unpacked only on installation site.
2.2.2 Preparation of the turnstile for installation (dismounting) and commissioning should be
performed according to this OM with mandatory observation of the safety measures specified in p.
2.1 and general electrical safety code.

17 AUIA.123.00.00.00.00-05 OM
2.2.3 The turnstile is installed in the following order:
–inspect the turnstile for integrity, absence of visual damages and defects;
–verify the turnstile’s completeness;
–prepare installation site for mounting of ready-to-install turnstile: surface should be plain, hard and
without defects (corrugations, overlaps etc.);
–protective ducts or conduits should be laid to the center of the turnstile’s rotor and to installation
sites of power supply units and to control sites to pull power and control cables of the turnstile;
–mark the hole drilling places and check the marking according to the Appendix A. For this
purpose it is necessary to install the turnstile rotor and enclosures and make sure that the holes on
flanges match the floor or foundation holes. Modify the marking, if required.
The turnstile should be installed and fixed only after all the turnstile electric connection cables are
pulled. For access to fixation holes (see the Figure 1) it is necessary to remove sheeting, fix the
turnstile by means of Redibolt (anchor with jacket and screw) and make sure that the installed turnstile
is stable;
–earthen the turnstile, connect power cable to the turnstile and control panel according to the wiring
diagram (see the Appendix C).
After the required installation sheeting should be placed back.
2.3 Preparation for use
2.3.1 Commissioning instructions
Prior to energizing of the turnstile:
1) make sure of proper connection and good condition of all connecting cables;
2) clear the area of the turnstile’s blades rotation from foreign particles.
3) check revolving of rotor: rotor with blades should revolve smoothly and after revolving to 120° it
should be locked.
When mains cable of power supply unit is connected to the network the flag rotation is locked. The
turnstile is set in initial state. Flag with blades is locked from rotation in both directions and access
between enclosures is barred by one of the blades.
The turnstile is set in initial state: entry and exit LED displays are red (« ›‹ » is lit) 1.
2.3.2 Required inspections
2.3.2.1 When rotor turnstile is commissioned as part of Access Control System or when it is controlled
by means of control panel (complete with reader racks and LED display panel) it is necessary to
perform inspections specified in the Table 9. During inspections the wiring diagram according to the
Appendix C and the control panel according to theAppendix B should be used. Table 9
Operating Mode
Mode Setting
LED Display1
Functional Check
1 Turnstile is closed
in both directions
(initial state)
–
Red LED display is lit
Make sure that rotor can’t be
rotated in any direction
2 Single access in
one direction
Push the
«SINGLE»access
button to access
in chosen
direction
(«A»or «B»)
Green arrow of single
access is lit in chosen
direction and red LED
display is lit in
opposite direction
Make sure that in case of
gentle push in the direction of
authorized access rotor starts
rotating and stops after rotation
to 120º.
Rotor should not start rotation
independently
3 Single access in
both directions
Push both
«SINGLE»
access buttons to
access in two
directions
(«A»or «B»)
Green arrows of single
access are lit in both
directions
Make sure that in case of
gentle push in the direction of
authorized access rotor starts
rotating and stops after rotation
to 120º.
Rotor should not start rotation

18 AUIA.123.00.00.00.00-05 OM
independently. Repeat the
check for opposite direction
4 Free access in one
direction
Push the «FREE»
access button to
access in the
selected direction
(«A»or «B»)
Green arrow of free
access in chosen
direction is blinking
and red LED display
is lit in opposite
direction
Make sure that at each push in
the direction of free access
rotor rotates to 120º and stops.
Rotor should not start rotation
independently
5 Free access in both
directions
Push both
«FREE»access
buttons to access
in two directions
(«A»or «B»)
Green arrow of
authorized free access
is blinking in chosen
direction and green
arrow is blinking
Make sure that at each push in
any direction rotor rotates to
120º and stops.
Rotor should not start rotation
independently
6 Single access in
one direction and
free access in
opposite direction
Push the
«SINGLE»
access button to
access in the
selected direction
(«A»or «B») and
«FREE»access
button to pass in
opposite direction
Green arrow of
authorized single
access is lit in chosen
direction and green
arrow of authorized
free access is blinking
in opposite direction
Make sure that rotor can be
rotated to120º in the direction
of single access only once and
in the direction of free access
rotor can be rotated many
times. Rotor should not start
rotation independently
7 Single access in
one direction and
locked access in
opposite direction
Push the
«SINGLE»
access button to
access in the
selected direction
(«A»or «B») and
the «LOCK»
button to lock
access in opposite
direction
Green arrow of
authorized single
access is lit in chosen
direction and red LED
display is blinking in
the locked access
direction
Make sure that rotor can be
rotated to120º in the direction
of single access only once and
in the direction of locked
access rotor can’t be switched
neither in «SINGLE»mode
nor in «FREE»mode
8 Free access in one
direction and locked
access in opposite
direction
Push the «FREE»
access button to
access in selected
direction
(«A»or «B») and
the «LOCKING»
button to lock
access in opposite
direction
Green arrow of
authorized free access
is blinking in chosen
direction and red LED
display is blinking in
the locked access
direction
Make sure that rotor can be
rotated to120º in the direction
of free access many times and
in the direction of locked
access rotor can’t be switched
neither in «SINGLE»mode
nor in «FREE»mode
9 Locked access in
one direction
Push the
«LOCKING»
button to lock
access in selected
direction («A»or
«B»)*
Red LED display of
locked access in one
chosen direction is
blinking
Make sure that rotor can’t be
switched to the direction of
locked access neither in
«SINGLE»mode nor in
«FREE»mode
10 Locked access in
both directions
Push both
«LOCKING»
button to lock
access in two
directions
(«A»or «B»)**
Red LED display of
locked access in both
directions is blinking
Make sure that rotor can’t be
switched neither to «SINGLE»
mode nor to «FREE»mode in
any direction

19 AUIA.123.00.00.00.00-05 OM
* In this case other control panel buttons of single and free access in chosen direction are
locked
** In this case all control panel buttons of single and free access in both directions are locked
2.3.2.3 The turnstile is ready for long-term operation.
2.4 Contingency actions
For emergency evacuation of people (in case of fire, acts of God etc.) and providing of free access the
turnstile must be unlocked from control panel by sending the relevant command.
3 MAINTENANCE
3.1 General instructions
3.1.1 Commissioning and subsequent maintenance of the turnstile should be performed only by the
staff to be in charge of the turnstile.
3.1.2 The turnstile can be serviced only by the staff having the relevant electrical safety qualification
level according to the national requirements.
3.1.3 The turnstile can be installed and operated only by the qualified safety instructed staff having the
relevant class of permit to work with electrical facilities with voltage up to 1000V, awaring of this
OM, design and the turnstile’s principle of operation.
3.2 Safety Measures
3.2.1 During maintenance of the turnstile the relevant safety measures, specified in p. 2.1, must be
observed.
IT IS FORBIDDEN TO USE DEFECTIVE APPLIANCES, TOOLS, FUSES,
INSTRUMENTATION SERVICE LIFE OF WHICH EXPIRED. MEASURING DEVICES,
WHICH TERM OF CHECKING HAS ENDED
3.2.2 When instrumentations are prepared for operation it is necessary to comply with the safety
requirements specified in instrumentation instruction manuals.
3.3 Maintenance procedure
3.3.1 Maintenance of the turnstile includes preventive measures which are taken according to
established frequency to maintain the turnstile in operational condition, decreasing of component
wearing and prevention of faults and malfunctions.
3.3.2 Daily and periodic maintenance of the turnstile are recommended.
Normally the daily maintenance is carried out before the beginning of work or during operational
timeout and includes visual inspection of the turnstile's housing, and, if required, mechanical
troubleshooting, elimination of corrosion and pollution from the surface.
IT IS FORBIDDEN TO USE DEFECTIVE APPLIANCES, TOOLS, FUSES,
INSTRUMENTATION SERVICE LIFE OF WHICH EXPIRED. MEASURING DEVICES,
WHICH TERM OF CHECKING HAS ENDED
3.3.3 Periodic maintenance is performed at least twice a year and includes as follows:
–visual inspection of the turnstile's housing, control mechanism and other components for absence
of corrosion, warps and other mechanical defects and pollutions;
–visual inspection of power and connection cables’ condition as well as earthing;
–verification of the turnstile's performance during manual control in the modes specified in the
Table 9 or as part of access control system using cards and badges;
–checking of reliability of tightness of the turnstile's screw joints.

20 AUIA.123.00.00.00.00-05 OM
4 ROUTINE MAINTENANCE
4.1 General instructions
Possible malfunctions of the turnstile are listed in the Table 10 and are remedied by customer. More
complicated malfunctions are remedied by manufacturer’s representative.
ATTENTION: INSPECTION, CLEANING, REPAIR OF THE TURNSTILE’S COMPONENTS
MUST BE PERFORMED ONLYAFTER DEENERGIZING OFTHE TURNSTILE!
4.2 List of possible malfunctions
List of possible malfunctions of the turnstile and their remedies are specified in the Table 10. Table 10
Symptom
Possible cause
Remedy
1 Blades are not brought to
zero position
Lack of voltage on servomotor
12V voltage to be checked
in the circuit of gear motor.
If the voltage is lower than 12V
refer to the point 2 of this table
Electric circuit is broken
Malfunction to be discovered and
remedied
Adjustment of servomotor is
faulted
Servomotor to be adjusted
2 Lack of 12V voltage
Power supply unit is out of
order
Power supply to be replaced
Electric circuit is broken
Malfunction to be discovered and
remedied
4.3 Postrepair checkout
After performance of repair operating capacity of the turnstile is checked by means of control panel
according to the Table 9.
5 TRANSPORTATION AND STORAGE
5.1 It is forbidden to subject the turnstile to jerks and impacts during storage. For lifting and handling
of the turnstile it is necessary to use transportation trolleys. In storage facility there should not be
aggressive gases and vapours causing corrosion. Storage ambient temperature should not be lower
+5 Сand higher +40 Сand relative humidity should not be more than 80% at the tempe-rature 20°С.
5.2 The ready-to-install turnstile is transported in railway or special containers, closed vehicle,
waterborne (in ship’s hold) according to the transportation regulations related to the relevant mode of
transport.
Transportation on open platforms is allowed. In this case the packed turnstile should be covered with
canvas. Ambient temperature during transportation should not be lower -40 Сand higher +50 С.
After transportation or storage of the turnstile at negative temperatures or increased humidity the
turnstile should be kept indoor with normal climatic conditions without original packing within 12
hours before commissioning:
1) ambient temperature: + 15°С to +35°С;
2) relative humidity: 45% to 80 %;
3) atmospheric pressure: 84,0 to 106,7kPa (630-800 mm Hg).
6 UTILIZATION
The turnstile does not contain hazardous materials and special measures are not required for
utilization.
Table of contents
Other Tiso Turnstile manuals
