2
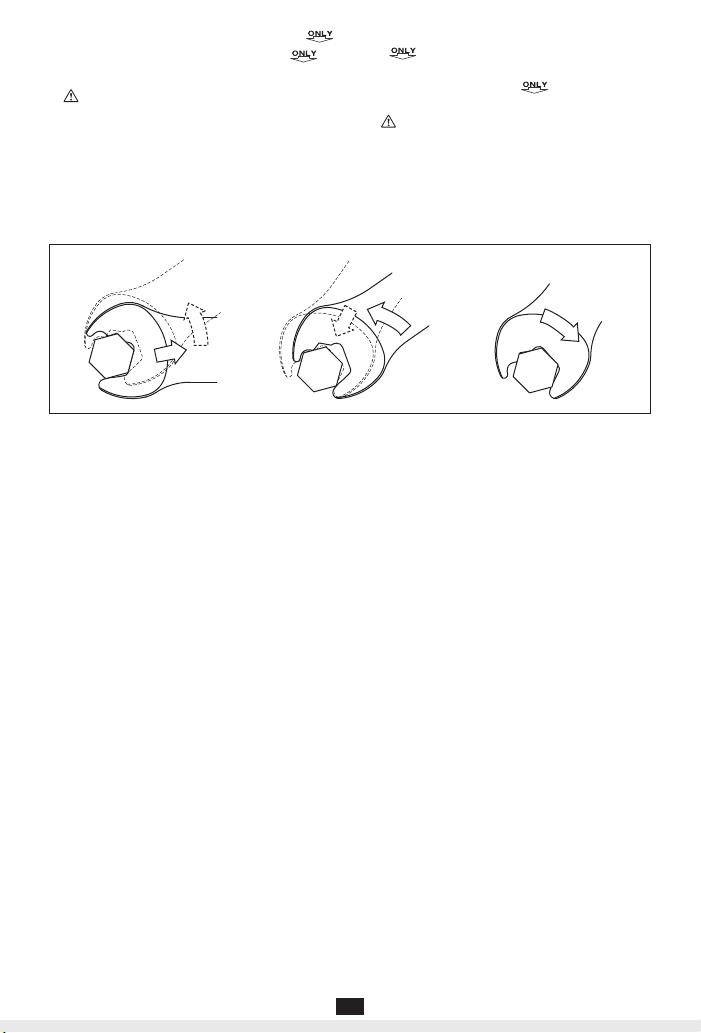
トルクレンチに手力を加えるときは、弾
みをつけたり、体重をかけたり足で踏み
付けない。
破損やボルトからの外れで、事故やけが
の原因になります。
1Don't apply momentum with your own
weight or use a jerking motion, when
you pull the torque wrench.
This will damage the torque wrench and
may cause the wrench to come off of the
bolt. Resulting in an accident or injury.
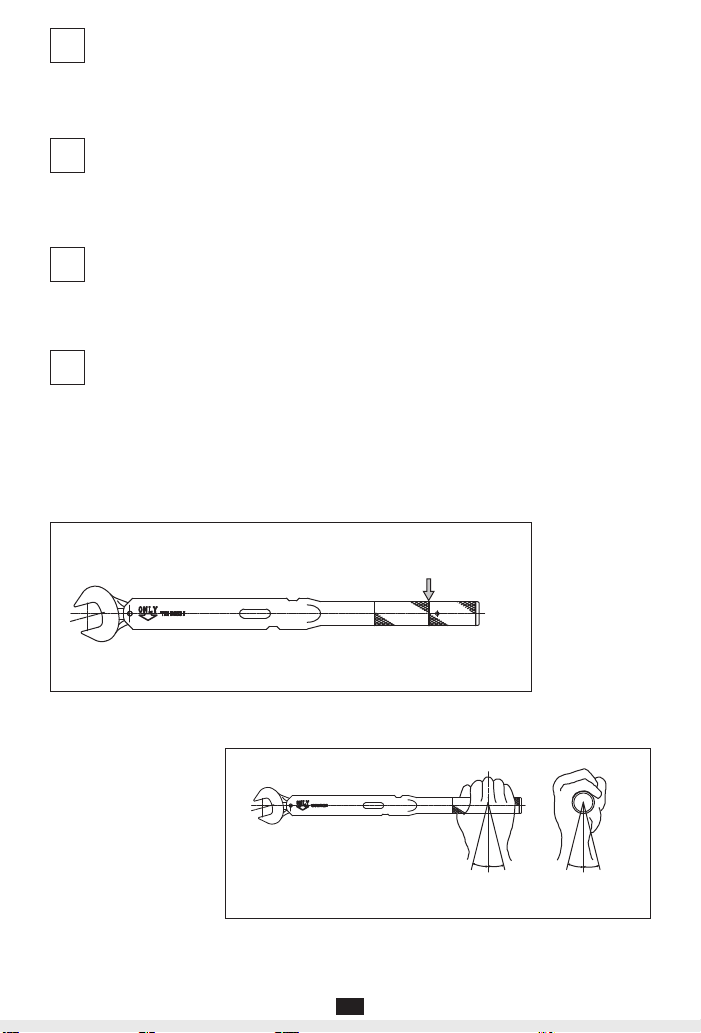
最大トルク以上で使用しない。
破損になる事故やけがの原因になりま
す。
2Don't use the torque wrench beyond
the maximum torque setting.
This will cause damage or injury.
トルクレンチにピンの抜けや目盛板が無
い等、欠品があるものは使用しない。
お買い求めの販売店、又は弊社に問い合
わせ必ず点検や修理をうけてください。
3Don't use the torque wrench if it is
missing a pin or scale plate, etc.
Ask a repair shop or our company to
inspect the torque wrench and repair it
before using.
トルクレンチの改造はしない。
改造により強度不足や精度異常が生じ、
事故やけがの原因になります。
4Don't modify the torque wrench.
Modifications will weaken the torque
wrench. This may cause errors in
accuracy, as well as, cause an accident
or injury.
トルクレンチを落下させたり、強い衝撃
を与えたりしない。
破損や変形を生じ、精度の劣化や耐久性
が低下し、事故やけがの原因になります。
5Don't drop the torque wrench or apply
a strong shock or jolt.
This will cause damage or deformation
as well as decrease the accuracy and
durability, which may cause an accident
or injury.
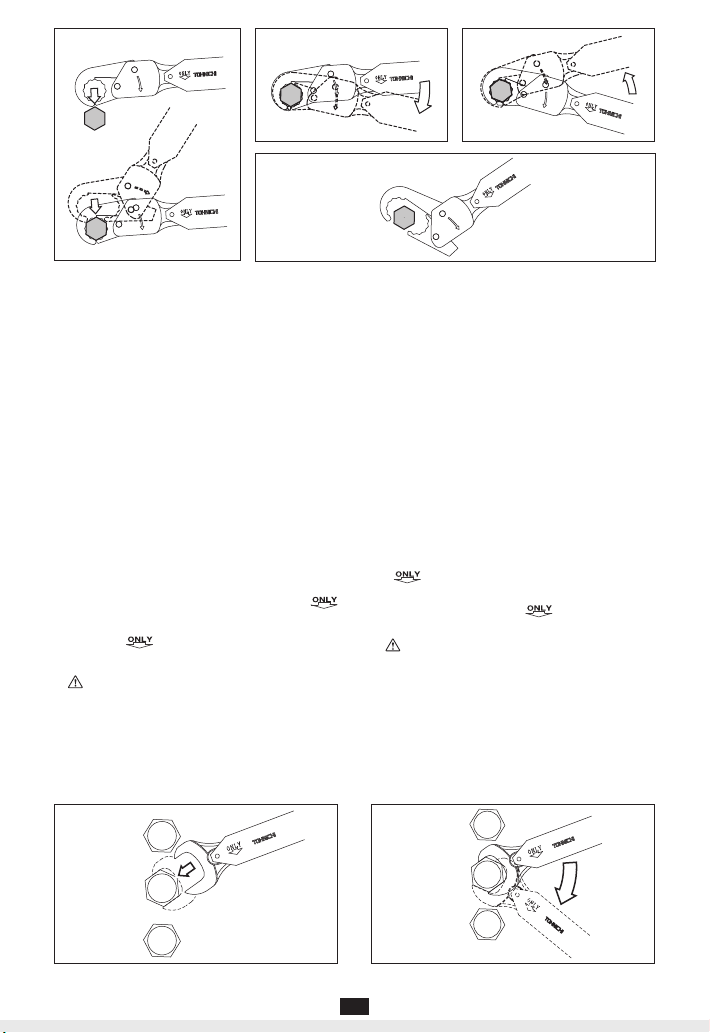
大型のトルクレンチを持って向きを変え
る時は、周囲に気をつける。
事故やけがの原因になります。
6Be aware of your surroundings when
handling a large capacity torque
wrench.
Turning or walking while holding a large
torque wrench may cause accident or
injury, if the user is not alert.
トルクレンチを立てて置かない。
トルクレンチが倒れたり、落ちたりする
ことで事故やけがの原因になります。
7Don't stand the torque wrench on end.
If may fall or drop, and cause an accident
or injury.
トルクレンチの修理部品は東日の指定部
品以外使用しない。
トルクレンチの修理をする場合は、お買
い求めの販売店、又は弊社に問い合わせ、
必ず東日指定部品を使用して下さい。
8Use only parts designated by Tohnichi
for repair of the torque wrench.
Ask the place of purchase or our
company for assistance when you repair,
and use only Tohnich parts.
2注意 Precautions
QRSP・SP2他取説.indd2 2016/01/1410:52:59
単ページPDF作成用取説10P(5丁付)CS5.indd7単ページPDF作成用取説10P(5丁付)CS5.indd7 2016/01/1413:59:252016/01/1413:59:25