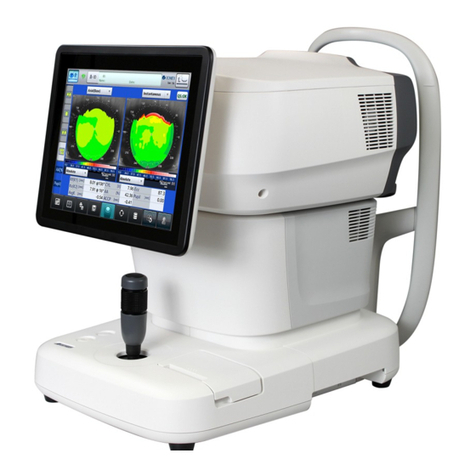
Tomey CASIA2 User manual

686A9090-2F
INSTRUCTION MANUAL
Cornea/Anterior Segment OCT
CASIA2
Read this manual thoroughly before using the instrument
to ensure proper and safe operation.
Contact Tomey Corporation or your local distributor if
you have any questions or you encounter any problems
during operation.
■
Always follow the operation procedures
described in this manual.
■
Keep this manual in a readily accessible
location while operating the instrument.
■
Contact your local distributor if you lose
this manual.


i-1
■
i. Important safety information
■
Do not install this instrument in a
location where explosives or
flammable substances are used or stored. Fire or explosion may occur.
■
Do not remove the cover of the instrument. Otherwise electric shock
may occur.
■
Do not disassemble or modify the instrument.
You may risk direct
exposure to high voltage sections.
■
Disconnect the power cord from all the connected devices before
installing and/or servicing the instrument. Otherwise,
electric shock
may occur.
■
Do not place the attached AC-Adapter directly on the floor when in use.
■
Do not connect a plug-in socket or exte
nsion cord to the attached
AC-Adapter.
■
Use only the specified data terminal for connection of the instrument.
Using another type of data
terminal may result in failure of the
instrument.
■
Do not physically contact with the patient while touching the
connection terminal of this instrument, related monitor or external HDD.
Otherwise electric shock may occur.
■
Do not commence service or maintenance work while the instrument is
being used for a patient.

■
i-2
■
Do not place water or chemicals on the instrument.
Any water or
chemicals entering the instrument may cause electric shock or failure.
■
This instrument is a diagnostic/measuring device specially designed
for ophthalmology. Never use the instrument for other purposes.
■
The terminal for connecting the instrument to external devices is not
isolated from the internal circuit. Inappropriate wiring may damage the
internal circuit. Contact Tomey or your local distributor b
efore using
the instrument connected to another device.
■
When operating this instrum
ent connected to other devices not
described in this document, only use devices that satisfy IEC60601-1 or
equivalent safety requirements or that conform to IEC60950 and whose
power source is insulated with the attached AC-Adapters, in order to
satisfy the safety requirements regarding medical equipment.
■
AC-
Adapters differ between the touch panel LCD monitor and the
external HDD. Connect in correct pairs to prevent failures.

ii-1
■
ii. How to read this manual
Outline
This manual is structured as follows.
1. PRIOR TO USE
Describes safety precautions and important
information to be understood before installing and
using the instrument.
2. NAMES AND FUNCTIONS
Describes names and functions of each section of
the instrument.
3. OPERATION PROCEDURES
Describes information required for installing and
using the instrument.
4. TECHNICAL INFORMATION
Describes useful technical information about the
instrument.
5. INSPECTION AND MAINTENANCE
Describes procedures for replacing consumable
parts, etc. that the user of the instrument should
normally conduct.
6. TROUBLESHOOTING
Describes how to solve problems.
7. CONSUMABLES AND OPTIONAL EQUIPMENT
Describes consumable parts and optional equipment.
8. SPECIFICATIONS
Describes the specifications of the instrument.

■
ii-2
Symbols used in this manual
Sentences accompanied with the symbols below indicate the
following:
■
This is a precaution that, if unheeded, will
result in a hazardous situation where there is
imminent danger of serious injury or death.
■
This is a precaution that, if unheeded, could
result in a hazardous situation where there is a
possibility of serious injury or death.
■
This is a precaution that, if unheeded, may
result in a situation where there is a possibility
of minor or moderate injury or damage to
property.
■
This is an additional instruction which may
contain a special precaution on company
policy related, either directly or indirectly, to
the safety of personnel or to the protection of
property.

iii-1
■
iii. Contents
i. Important safety information ................................................................................... i-1
ii. How to read this manual........................................................................................ ii-1
Outline...............................................................................................................................ii-1
Symbols used in this manual............................................................................................ii-2
iii. Contents............................................................................................................... iii-1
1. PRIOR TO USE.....................................................................................................1-1
1.1 Precautions for operation .......................................................................................... 1-1
1.2 Checking package contents ...................................................................................... 1-6
1.3 Glossary..................................................................................................................... 1-7
1.4 Overview .................................................................................................................... 1-9
2. NAMES AND FUNCTIONS ...................................................................................2-1
2.1 System overview........................................................................................................ 2-1
2.2 Physician's side ......................................................................................................... 2-2
2.3 Patient's side.............................................................................................................. 2-3
2.4 Right........................................................................................................................... 2-4
2.5 System connection diagram ...................................................................................... 2-5
2.6 Screen........................................................................................................................ 2-6
2.6.1 Screen configuration ........................................................................................... 2-6
2.6.2 Common indicators ............................................................................................. 2-7
2.6.3 Measurement screen .......................................................................................... 2-8
2.6.4 Preview screen.................................................................................................... 2-9
2.6.5 Viewer screen.................................................................................................... 2-10
2.6.6 Database screen ............................................................................................... 2-12
2.6.7 Patient list screen.............................................................................................. 2-14
2.6.8 Patient Information screen................................................................................ 2-15
2.6.9 Search Option screen ....................................................................................... 2-16
2.6.10 Report screen.................................................................................................. 2-17
2.6.11 System Setup screen ...................................................................................... 2-18
2.7 Operation of the joystick .......................................................................................... 2-23
2.8 Touch operation ....................................................................................................... 2-24
2.9 Symbols used for marking ....................................................................................... 2-25
3. OPERATION PROCEDURES ...............................................................................3-1
3.1 Safety precautions ..................................................................................................... 3-1

■
iii-2
3.1.1 Precautions for installing the instrument............................................................. 3-1
3.1.2 Precautions for connecting the power cord ........................................................ 3-2
3.1.3 Connecting the power cord and other cables ..................................................... 3-3
3.2 Starting up/shutting down the instrument.................................................................. 3-4
3.3 Measurement............................................................................................................. 3-5
4. TECHNICAL INFORMATION ................................................................................4-1
5. INSPECTION AND MAINTENANCE .....................................................................5-1
5.1 Warranty..................................................................................................................... 5-1
5.2 Operation life.............................................................................................................. 5-4
5.3 Inspection................................................................................................................... 5-4
5.3.1 Calibration checks............................................................................................... 5-4
5.3.2 Results check...................................................................................................... 5-6
5.4 Routine maintenance................................................................................................. 5-7
5.4.1 Forehead pad and chin rest................................................................................ 5-7
5.4.2 Exterior ................................................................................................................ 5-7
5.5 Replacing consumables............................................................................................. 5-9
5.5.1 Fuses................................................................................................................... 5-9
5.5.2 Chin rest paper.................................................................................................... 5-9
5.6 Storing...................................................................................................................... 5-10
5.7 Disposal ................................................................................................................... 5-11
6. TROUBLESHOOTING ..........................................................................................6-1
6.1 Troubleshooting ......................................................................................................... 6-4
6.2 Extracting log data ..................................................................................................... 6-7
7. CONSUMABLES AND OPTIONAL EQUIPMENT..................................................7-1
8. SPECIFICATIONS.................................................................................................8-1
8.1 Specifications............................................................................................................. 8-1
8.1.1 Main unit.............................................................................................................. 8-1
8.1.2 Power source ...................................................................................................... 8-1
8.2 Energy information..................................................................................................... 8-2
8.3 Operating environment .............................................................................................. 8-2
8.4 Classification.............................................................................................................. 8-2

1-1
■
1. PRIOR TO USE
■
Read this manual thoroughly before using this
instrument to ensure proper and safe operation.
■
Always follow the operation procedures
described in this manual.
■
Check that there are no devices that generate a
strong magnetic field near the instrument. A
strong magnetic field may cause noise and affect
measurement.
1.1 Precautions for operation
■
Allow only well-trained operators to use the instrument.
■
Fully examine the measured data for tracing results. In particular, if
the difference between measurement values for the left and right
eyes is significant or any problem is found in the anterior chamber
during preliminary examination, check the tracing and/or reliability
on the check screen. If the measurement result is not conclusive,
review the inspection result by performing measurement again or
performing another inspection.
■
When using data taken by this instrument for diagnosis or
determination of treatment, proceed carefully by taking
measurements multiple times and/or conducting other
examinations.
■
When using the data taken by this instrument to select intraocular
lenses, thoroughly determine the selection by also examining
cataract surgery methods and other inspections. If incorrect
measurement data is used to select intraocular lenses, further
surgery might be required.
■
When using the data taken by this instrument to calculate the
degree of intraocular lenses, use the value of the axial length

■
1-2
measured with the instrument that its measurement accuracy is
guaranteed. If incorrect measurement data is used to calculate the
degree of intraocular lenses, further surgery might be required.
■
When using the data taken by this instrument for refractive
correction surgery, thoroughly determine the selection by also
examining surgery methods and other inspections. Refractive
correction surgery conducted according to incorrect measurements
or analysis results may result in further surgery or severe
complication such as keratoectasia.
■
Precautions when installing the instrument and accessories
-Install the instrument in a location free of water or chemicals. Any water
or chemicals entering the instrument or devices may cause electric
shock or failure.
-Do not install the instrument in a location where chemicals are stored or
gases may occur. Any chemicals or vapor entering the device may result
in fire.
-Check the frequency, voltage, and allowable current (or power
consumption) of the power source. Otherwise, fire or electric shock may
occur.
-Connect the power plug to a grounded 3-pin outlet. Otherwise, a short
circuit due to failure of the instrument may result in electric shock.
-Do not place any heavy object on the power cord or compress the power
cord. Fire or electric shock may occur.
-Fully insert the power plug into the outlet. Faulty contact, allowing any
metal to contact the exposed terminal of the plug, or dust accumulated
on the exposed terminal of the plug may result in fire or electric shock.
-Conduct grounding work correctly. Otherwise, electric shock may occur.
Do not connect a device with data transmission specifications that are
not compatible. Fire or electric shock may occur. Contact Tomey
Corporation or your local distributor before using the instrument.

1-3
■
-Do not hold the head, chin rest, forehead pad, joystick, or cables when
moving the instrument. These components are detachable and the
instrument may drop, resulting in injuries.
-Install the instrument in a location not subject to direct sunlight, high
temperature and humidity, or air containing dust, salt, and/or sulfur.
Otherwise, failure or malfunction may occur.
-Install the instrument in a stable, level location free of vibration or
mechanical impact. Otherwise, measurement cannot be conducted
correctly. Also, the instrument may topple over or fall down, resulting in
fire or serious accident.
-Place the instrument between the patient and physician so that they can
face each other.
-Install the instrument in a location with ample clearance from other
devices to allow smooth inspection.
-Check the frequency, voltage, and allowable current (or power
consumption) of the power source.
-The AC adapter for the touch panel LCD is different from that for the
external HDD. Connect the correct adapter. Incorrect connection may
result in failure of the instrument.
■
Precautions before operation
-Check that the instrument works properly by inspecting switch and
button operations, display, and printing.
-Check that all cables are connected correctly.
-Since simultaneous use of multiple devices can cause misdiagnosis or
result in a hazardous situation, exercise caution when using this
instrument.
-Check the sections that the patient will directly touch.
-Peel off the top sheet of chin rest paper and clean the forehead pad with
a cloth dampened with alcohol before measurement.
-Check that the instrument is correctly grounded.

■
1-4
-Check that the date set in the instrument conforms to the actual
operation date and time.
■
Precautions during operation
-Do not place any container with liquid in it on the device.
Any liquid
entering the instrument may cause electric shock or failure.
-Always check that the device is operating correctly and monitor the
patient to ensure safety.
-If any problem is found concerning either the instrument or patient, take
appropriate action, such as stopping operation, to maintain patient
safety.
-When moving the head and/or chin rest of the measuring unit, pay
attention to the position of the patient's face, hands, and fingers.
Otherwise, movement of the head or chin rest may cause injury.
-Do not allow any person to place their hands or fingers in the clearance
under the head, the space immediately under the chin rest,
measurement window, or moving section. Hands or fingers may be
caught and injured.
-Do not allow the patient to touch the external connection terminal. Do
not lean on the instrument or press on the instrument from the top. The
instrument may topple over, resulting in mechanical failure or injuries.
-Peel off the top sheet of chin paper and clean the forehead pad with a
clean cloth before measuring the next patient.
Clean the forehead pad
and chin rest with a cloth dampened with alcohol as needed.
-If any smoke, offensive odor, or abnormal sound occurs, turn off the
instrument immediately, disconnect the power plug from the outlet, and
contact your local distributor or Tomey Corporation.
■
Precautions after operation
-Hold the plug when disconnecting the power plug from the outlet to
avoid placing excessive force on the cord. Pulling the cord may damage
the inner core wires, resulting in electric shock or fire.

1-5
■
-When disconnecting cords, avoid applying too much force: for example,
do not hold and pull the cord.
-Refer to "5.4 Routine maintenance" and “5.6 Storing” for instructions on
the cleaning and storage of the instrument.
■
If any failure occurs in the instrument, immediately stop operation,
identify the failure in the instrument, and contact your local distributor
for repairs.
-Do not modify the instrument. Doing so may cause electric shock or
failure of the instrument. There is a high-voltage section in the
instrument. Touching this section will result in death or serious injuries.
-Disconnect the power cord from the outlet when replacing fuses.
Otherwise, electric shock may occur, resulting in death or serious
injuries.
-Use the power cord and fuses provided with the instrument or specified
by Tomey to ensure safety. Also, do not use the accessories provided
with the instrument for other equipment.
-Conduct regular inspections of the instrument and components.
-When the instrument is not in use for 1 month or longer, check that the
instrument is operating correctly and safely before restarting operation.
Refer to "5.3 Inspection" in this manual for the relevant procedures.

■
1-6
1.2 Checking package contents
Open the package and check that the required quantity of
the following items is included and confirm they are not
damaged. If any item is missing or damaged, contact your
local distributor as soon as possible.
■
Keep the packing box and cushioning materials
for use when moving or transporting the
instrument.
■
When taking the instrument out of the box, pull
the outer box upward and then remove the
packing materials. Be careful not to lift the
instrument up by directly holding the head, chin
rest, forehead pad, joystick, or cables. The
instrument may be damaged.
●Main unit .................................................................. 1
●Power cord............................................................... 1
●Touch panel LCD monitor........................................ 1
●External HDD........................................................... 1
●Keyboard ................................................................. 1
●USB Mouse.............................................................. 1
●OKULIX dongle........................................................ 1
●Model practice eye .................................................. 1
●Chin rest paper ........................................................ 1
●Pins for chin rest paper............................................ 2
●Dust cover (Main unit) ............................................. 1
●Dust cover (LCD monitor)........................................ 1
●Fuses ....................................................................... 2
●HDMI cable .............................................................. 1
●AC-Adapter (External HDD) .................................... 1
●Power cord (External HDD)..................................... 1
●AC-Adapter (LCD monitor) ...................................... 1
●Power cord (LCD monitor)....................................... 1
●Instruction manual (this document) ......................... 1

1-7
■
1.3 Glossary
[A/B scan] : The number of A-mode scans per image scanned in
B-mode
[A scan] : Scanning to obtain the depth of the patient’s eye by
radiating light into the eye
[B/C scan] : The number of B-mode scanned images per 3D image
data
[B scan] : Scanning to capture tomographic images by repeating
A-mode scanning while scanning positions linearly on the
patient’s eye
[B-scanned image] : A tomographic image captured by B-mode scan
[C-scanned image] : Tomographic image sliced perpendicular to the depth
direction
[Horizontal image] : A tomographic image sliced in a horizontal direction
[Rotation image] : A tomographic image sliced in an optional direction
[SE] : Equivalent spherical degree (Refer to [Equivalent
spherical degree].)
[VD] : Corneal vertex distance (distance between the corneal
vertex and the posterior surface of the lens)
[Vertical image] : A tomographic image sliced in a vertical direction
[Z-Off]
: Function to automatically align the sight in
up/down/right/left directions
Alignment in back/forth (depth) direction is not conducted.
[Auto Alignment] : Function to automatically align the sight in back/forth
(depth) direction. Automatic alignment in
up/down/right/left directions only can also be conducted
by selecting [Z-Off].
[Auto Shot] :Function that automatically starts measurement when the
patient's eyes are within the measuring range
[Shift Average] :Function to reduce random noise by overlapping and
averaging adjacent tomographic images of a 3D image

■
1-8
[Peripheral sight-fixing target] : Optotype to guide the direction of the patient’s sight up,
down, right and left
[Scanning direction] : Direction of B-mode scan
[Adjustment load sight-
fixing
target]
: Optotype to guide the adjustment of the patient’s eye
[Equivalent spherical degree] : Calculated from the refractometer value SPH+CYL/2
[Radial scan] : Scanning method to obtain a 3D image by repeating
B-mode scan in a radial direction
[Raster scan] : Scanning method to obtain a 3D image by repeating
B-mode scan in a horizontal or vertical direction

1-9
■
1.4 Overview
This instrument is a three-dimensional OCT (optical coherence tomography) image
diagnosis unit that captures a three-dimensional image of the anterior section of the
patient’s eye by high-speed scanning without making contact with the eye. This instrument
has the following features.
[Image capture]
3D mode to capture 3D images
2D mode to capture 2D images
Movie mode to capture video
[Measurement]
Capturing while monitoring the front and tomographic images of the patient’s eye
Automatic alignment function to align positions automatically
Auto shot function to start measurement automatically
[Data management]
Save after checking images
Viewer screen only for viewing the data
DB screen only for data management

■
1-10
This page is intentionally left blank.

2-1
■
2. NAMES AND FUNCTIONS
2.1 System overview
(1) Main unit
(2) Touch panel LCD monitor
(3) Keyboard
(4) Mouse
(5) External HDD

■
2-2
2.2 Physician's side
(1) Head
(2) Joystick
(3) Chin rest up/down button
(4) SSD access lamp (blue)
(5) Power lamp (green)
(6) Power switch
(7) Monitor power switch
1
2
3
4
5
6
7
Table of contents
Other Tomey Medical Equipment manuals

Tomey
Tomey H Series User manual
Tomey
Tomey UD-8000 User manual
Tomey
Tomey OA-2000 User manual
Tomey
Tomey TSL-7000Hdigital User manual
Tomey
Tomey AL-2000 User manual

Tomey
Tomey TCP-2000 User manual
Tomey
Tomey SP-100 User manual
Tomey
Tomey TCP-2000P User manual
Tomey
Tomey Z Series User manual
Tomey
Tomey TSL-4000Z User manual
Popular Medical Equipment manuals by other brands
Civco
Civco Astra VR Quick start instructions

Siemens
Siemens MAGNETOM Avanto Operator's manual
Eyecon
Eyecon 9420 instruction manual

Cardinal Health
Cardinal Health CATALYST NPWT Patient User Manual
Hamamatsu Photonics
Hamamatsu Photonics C10819 Series instruction manual
Stryker
Stryker MedSurg Standard 3002 S3 Maintenance manual
