manuals.online logo
Brands
  1. Home
  2. •
  3. Brands
  4. •
  5. Topeak
  6. •
  7. Bicycle Accessories
  8. •
  9. Topeak DYNA DRYBAG User manual

Topeak DYNA DRYBAG User manual

DISASSEMBLY / DEMONTAGE / DÉMONTAGE / DESARMAR / SMONTAGGIO / DEMONTAŻ / /
/ /
1. Never exceed maximum loading capacity of 10 lbs (4.5 kg) when
using DYNA DRYBAG.
2. DYNA DRYBAG is not suitable or intended to be used with
carbon fiber seatposts.
3. When installing clamp band, use rubber pad to avoid damaging
seatpost.
4. Tighten clamp bolt securely to recommended torque (4 Nm or 35
in-lbs) to prevent DYNA DRYBAG from swinging sideways and
damaging seatpost.
1. Überschreite niemals die zulässige Ladeleistung von 4,5kg (10lbs) des
DYNA DRYBAG.
2. Das DYNA DRYBAG wurde nicht für die Verwendung an
Carbon-Sattelstützen konstruiert.
3. Nutze bei der der Montage der Befestigungsschelle die
Gummiunterlage um eine Beschädigung der Sattelstütze zu vermeiden.
4. Zieh die Schraube der Schelle mit dem empfohlenen Drehmoment an,
um ein seitliches Verrutschen oder eine Beschädigung der
Sattelstütze zu vermeiden.
1. Ne jamais dépasser la capacité maximale de charge de 4,5Kg
(10Lbs) de DYNA DRYBAG.
2. DYNA DRYBAG n'est pas prévu et ne convient pas au montage
sur tiges de selle carbone.
3. Lors de l'installation du collier de serrage, utiliser la languette
caoutchouc pour éviter d'endommager la tige de selle.
4. Serrer la vis du collier au couple recommandé (4Nm ou 35 in-lbs)
pour éviter les déplacements latéraux qui risqueraient d’abîmer
la tige de selle
1. Nunca exceder la capacidad máxima de peso (4,5 kg).
2. No utilizar en tijas de carbono.
3. Al instalar la abrazadera utilizar protecciones de goma para no
dañar la tija.
4. Apretar el tornillo de la abrazadera hasta el valor recomendado
(4Nm) para prevenir cualquier movimiento lateral de la bolsa o
cualquier tipo de daño a la tija.
1 Non eccedere mai con la capacità di peso ( max 4,5 kg) quando si usa la
DYNA DRYBAG
2 DYNA DRYBAG non è stata creata per essere usata come un
portapacchi in carbonio
3 Quando si installa il morsetto, utilizzare i cuscinetti in gomma per
evitare danni al reggisella
4 Stringere la vite del morsetto alla massima capacità torica ( 4 Nm) per
evitare danni al reggisella o che il vostro DYNA DRYBAG si sposti da
una parte all'altra.
1. Nigdy nie przekraczaj maksymalnej nośności 10 lbs (4,5 kg) przy
użyciu DYNA DRYBAG.
2. DYNA DRYBAG nie jest przeznaczony do sztyc z włókna węglowego.
3. Instalując obejmę, użyj podkładki gumowej, aby uniknąć uszkodzenia
sztycy.
4. Dokręć śrubę zaciskową do zalecanego momentu obrotowego (4 Nm
lub 35 in-lbs)
aby zapobiec kiwaniu się na boki DYNA DRYBAG i uszkodzeniu
sztycy
NACIŚNIJ
щ྅DYNA DRYBAGҌါ୛݈ĂᅮАᏴፄዋϡ۞ါ
୛Ձ૲Ăтңٵă྅ါ୛Ձ૲Ăኛֶ˭ࢬ۞ᄲځĄ
1. ֹϡώயݡĂ෹࿅׎౵۞࢑ྶࢦณĈ4.5 kgĄ
2. ώயݡዋЪֹϡٺ჆ញჯ۞ါ୛Ą
3. щ྅ါ୛Ձ૲ĂચυֹϡՁ૲ါĂͽ֨ါ୛۞ຫ๋Ą
4. ᖼღᓲකĂኛֶ໰ٙޙᛉ۞ᗆღԮ˧૟Ձ૲ᄃՁ૲ߛቁ၁г׽
ؠдါ୛˯Ăͽ֨ώயݡЯνΠອᕚ҃၆ါ୛ౄјຫ๋Ą
ٵ྅
IMPORTANT NOTES / WICHTIGE HINWEISE / NOTES IMPORTANTES / NOTAS IMPORTANTES / NOTE IMPORTANTI / WAŻNE UWAGI /
/ /
ᛋӘ
Before installing DYNA DRYBAG onto seatpost, select suitable
clamp band to fit seatpost diameter. Disassemble pack and
install the clamp band as shown below.
Vor der Montage des DYNA DRYBAG muss der
Sattelstützenadapter mit dem passenden Durchmesser
montiert werden. Demontiere die Tasche und installiere die
Befestigungsschelle wie unten beschrieben.
Avant d'installer DYNA DRYBAG sur la tige de selle,
sélectionner le collier correspondant au diamètre de la tige de
selle. Retirer le sac et installer le collier comme indiqué
ci-dessous.
Antes de instalar la bolsa DYNA DRYBAG en la tija, seleccionar
la abrazadera que mejor se adapte al diámetro de ésta.
Desmontar la bolsa y colocar la abrazadera como se muestra.
Prima di installare la DYNA DRYBAG al reggisella, selezionare il
diametro del morsetto compatibile con il vostro reggisella.
Togliere la borsa e installare il morsetto elastico come indicato.
Przed montażem DYNA DRYBAG na wspornik siodła, wybierz
odpowiednią obejmę. Rozłóż pakiet i zainstaluj opaskę
zaciskową, jak pokazano poniżej.
2
ø27.2 mm
GB DE FR ES IT PL JP KR CH
USER'S GUIDE
DYNA DRYBAG
DRÜCKEN
APPUYER
APRETAR
PREMERE
4
Tool Required : 4 mm Allen key
Benötigtes Werkzeug: 4 mm Inbusschlüssel
Outils nécessaires: Clé Allen de 4 mm
Herramienta requerida: Llave Allen de 4 mm
Attrezzo necessario: brugola da 4 mm
Wymagane narzędzia: imbus 4mm ֹϡ׍ : 4 mm ֎Գ
GB
DE
FR
ES
IT
PL
JP
KR
CH
Rubber Pad Clamp Band
Holder Bolt ø27.2 mm
(fits ø25.4~27.2 mm
seatposts)
ø31.6 mm
(fits ø27.3~31.6 mm
seatposts)
ø34.9 mm
(fits ø31.7~34.9 mm
seatposts)
ø27,2 mm
(Geeignet für Sattelstützen
von 25,4 mm - 27,2 mm)
ø31,6 mm
(Geeignet für Sattelstützen
von 27,3 mm - 31,6 mm)
ø34,9 mm
(Geeignet für Sattelstützen
von 31,7 mm - 34,9 mm)
Befestigungschellen
-Halterung SchraubeGummiunterlage
ø27,2 mm
(compatible avec diamètre
compris entre 25,4mm et
27,2mm)
ø31,6 mm
(compatible avec diamètre
compris entre 27,3mm et
31,6mm)
ø34,9 mm
(compatible avec diamètre
compris entre 31,7mm et
34,9mm)
Support de
collier Vis
Languette
caoutchouc
ø27,2 mm
(Válido para tijas de 25,4 -
27,2 mm)
Protección
de goma
Abrazadera
tornillo
ø31,6 mm
(Válido para tijas de 27,3 -
31,6 mm)
ø34,9 mm
(Válido para tijas de 31,7 -
34,9)
ø27,2 mm
(compatibile con reggisella
da ø25,4 - 27,2 mm)
Morsetto di
installazione
Vite
ø31,6 mm
(compatibile con reggisella
da ø27,3 - 31,6 mm)
ø34,9 mm
(compatibile con reggisella
da ø31,7 - 34,9)
Ձ૲ါ Ձ૲ߛ ᓲක ø27.2 mm
(ዋϡٺါ୛გ
ø25.4~27.2 mm)
ø31.6 mm
(ዋϡٺါ୛გ
ø27.3~31.6 mm)
ø34.9 mm
(ዋϡٺါ୛გ
ø31.7~34.9 mm)
Fixer 7
Clamp Band
Cuscinetti in
gomma
ø27,2 mm
(ø25.4~27.2 mm wspornika
siodła)
ø31,6 mm
(ø27.3~31.6 mm wspornika
siodła)
ø34,9 mm
(ø31.7~34.9 mm wspornika
siodła)
Podkładka Uchwyt Śruba
PRESET
޷ᑅ
UNLOCK
OTWÓRZ
ENTRIEGELN
DÉVERROUILLER
DESBLOQUEAR
SMONTARE ᗫฟ׽ؠ౐
1
PRESS
INSTALLATION / INSTALACIÓN / INSTALLAZIONE / MONTAŻ / / /
OPTIONAL ACCESSORIES / ACCESSOIRES OPTIONNELS / ACCESORIOS OPCIONALES / ACCESSORI OPZIONALI / OPCJONALNE
AKCESORIA / / /
Art no. TC1017
FIXER 7
Art no. TMS063
REDLITE AURA
Art no. TMS071
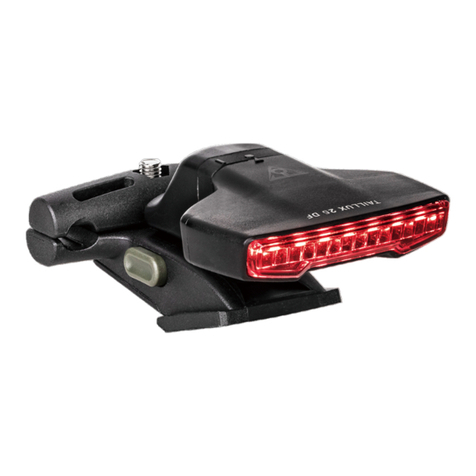
TAIL LUX
Art no. TMS078
REDLITE MINI USB
ᖼღᓲකĄ
CLICK
LOCK
USER'S GUIDE
DYNA DRYBAG
2 Anni di garanzia : solo per difetti di produzione alle parti
meccaniche.
Condizioni di garanzia
Per usufruire della garanzia è necessario essere in possesso
dello scontrino originale di acquisto. In caso il prodotto ci
venga restituito senza lo scontrino la garanzia decorrerà dalla
data di fabbricazione. La garanzia decade qualora il prodotto
venga danneggiato da uso improprio, sovraccarico, modifiche
o utilizzato in maniera diversa da quella descritta nelle
presenti Istruzioni d’uso.
* Le caratteristiche del prodotto possono essere cambiate
senza preavviso.
I prodotti Topeak sono in vendita nei negozi specializzati
per ciclisti. Per ogni richiesta o chiarimento rivolgetevi al
rivenditore Topeak più vicino.
Sito web: www.topeak.com
GARANZIA
2 Jahre Gewährleistung auf alle verbauten Teile, jedoch nur gegen
Herstellermängel.
Gewährleistungsansprüche
Sie benötigen Ihren Originalkaufbeleg um den
Gewährleistungs-Service zu erhalten. Bei Artikel die ohne Kaufbeleg
eingesendet werden, wird davon ausgegangen, dass die
Gewährleistung mit dem Herstellungsdatum beginnt. Alle
Gewährleistungsansprüche werden ungültig, wenn der Artikel auf
Grund eines Unfalls beschädigt oder zweckentfremdet wurde,
Systemänderungen oder andere Veränderungen vorgenommen
wurden oder der Artikel anderweitig verwendet wurde als in
diesem Handbuch beschrieben.
* Änderungen in Design und Eigenschaft bedürfen keiner
vorherigen Ankündigung
Topeak Produkte sind ausschließlich im Fahrradfachhandel
erhältlich. Bitte nehmen Sie Kontakt mit Ihrem nächsten Topeak
Händler auf, um offene Fragen zu klären. Für Kunden in
Deutschland, Tel. 0261-899998-28 Homepage: www.topeak.de
GEWÄHRLEISTUNG
2-year Warranty: All mechanical components against manufacturer
defects only.
Please contact your Topeak dealer with any questions.
For customers in the USA, call: 1-800-250-3068
Website: www.topeak.com
* The specifications and design are subject to change
without notice.
Warranty Claim Requirements
To obtain warranty service, you must have your original sales
receipt. Items returned without a sales receipt will assume
that the warranty begins on the date of manufacture. All
warranties will be void if the product is damaged due to user
crash, abuse, system alteration, modification, or used in any
way not intended as described in this manual.
GARANTÍA
Garantía de 2 años : Todos los componentes mecánicos sólo
contra defectos del fabricante.
Requerimientos para Reclamación de Garantía
Para obtener los servicios de Garantía, tiene que disponer del
justificante de compra original. En los artículos devueltos sin
el justificante, se considerará como fecha de início de la
Garantía la fecha de fabricación. No se considerarán
cubiertos por la Garantía los artículos dañados por golpes,
abuso, alteraciones o uso de otra manera o para otros usos a
los descritos en este Manual.
* Especificaciones y diseño sujetos a cambios sin notificación
previa.
Por favor, contacte con su vendedor Topeak para cualquier
consulta.
For USA customer service call : 1-800-250-3068
www.topeak.com
WARRANTY
Copyright © Topeak, Inc. 2016
Garantie de 2 ans : toutes parties mécaniques contre tout
défaut de fabrication.
Réclamation de la garantie
Pour bénéficier de notre service de garantie, vous devez être
en possession de la facture d'achat originale. Si le produit
nous est retourné sans cette facture d'achat, nous
considérons la date de fabrication comme début de la
garantie. Toute garantie sera considérée comme nulle si le
produit à été endommagé suite à une chute, à un abus, une
surcharge, à un quelconque changement ou modification ou à
une utilisation autre que celle décrite dans ce manuel.
* Les spécifications et l'apparence peuvent être sujettes à
certaines modifications.
Contactez votre revendeur Topeak si vous avez la moindre
question.
For USA customer service cal l : 1-800-250-3068
www.topeak.com
GARANTIE
யݡܲ׽
GWARANCJA
2 lata gwarancji: Na wady fabryczne wszystkich części
mechanicznych.
Warunki korzystania z gwarancji
Aby uzyskać serwis gwarancyjny, należy posiadać oryginalny
dowód zakupu. Gdy produkt reklamowany jest bez paragonu
zakładamy, że gwarancja rozpoczyna sie od daty produkcji.
Wszystkie gwarancje sa nieważne jeśli produkt został
uszkodzony na skutek wypadku, nadużycia, zmiany, modykacji
lub wykorzystywany w jakikolwiek sposób niezgodny z
opisanym w niniejszej instrukcji.
* Specykacja i projekt mogą ulec zmianie bez powiadomienia.
W przypadku jakichkolwiek pytań skontaktuj się
ze sprzedawcą lub importerem Topeak.
ܲ׽ࢋՐ :
Ϧኛܲ׽ഇࢨ۞ڇચĂืᑭ׍ᔉ෴൴ைĂࡶ൑ڱ೩ֻĂ
݋׎ܲ׽ഇࢨ૟ҋᄦౄഇฟؕზĄࡶЯֹϡ۰ຕၢᗼă
ֹϡ༊ăҋҖԼ྅ăՀԼր௚ٕϏ޷໰ᄲځ˯۞ϒቁፆ
үёĂώயݡ૟జЕˢܲ׽ቑಛĄ
Topeakயݡ่ѣдώΦ଱ᝋ۞૞ຽགྷዚથᔉ෴Ăֳѣܲ
׽۞ᝋӀĄ
* ώΦܲ঻யݡఢតՀᝋӀĄ
Topeakயݡ࠹ᙯ۞ྤĂኛࠀྙ Topeak ༊г଱ᝋ۞གྷዚથ
შӬ : www.topeak.com
M-TC2714B-ML 4/16
Tighten the bolt.
Ziehe die Schraube an
Serrer la vis
Apretar tornillo
Stringere la vite.
Dokręć śrubę.
Select suitable clamp band
to fit seatpost diameter.
Wähle die zu deiner
Sattelstütze passende
Klemmschelle .
Sélectionner le collier qui
convient au diamètre de la
tige de selle.
Seleccionar la abrazadera
que mejor se adapte al
diámetro de la tija.
Selezionare il morsetto
compatibile con il diametro
del reggisella.
Wybierz odpowiednią obejmę,
aby dopasować do średnicy
sztycy.
Protección de goma
Cuscinetto in gomma
PodkładkaLanguette caoutchouc
Gummiunterlage
Rubber Pad
Nutze die Gumminunterlage,
um ein Verrutschen der
Befestigunsschelle zu
vermeiden.
Use rubber pad to increase
friction of clamp band on
seatpost.
Utiliser la languette
caoutchouc pour augmenter
la friction entre le collier et
la tige de selle.
Usar protecciones de goma
para aumentar la fricción
entre la abrazadera y la tija.
Utilizzare il morsetto in
gomma per aumentare la
frizione del morsetto del
reggisella.
Użyj podkładki gumowej,
aby zwiększyć tarcie
obejmy na sztycy.
4Nm
Recommended Torque
Empfohlener Drehmoment
couple recommandé
Apriete recomendado
Chiave torica consigliata
ޙᛉԮ˧ࣃ
Logo z przodu
ֹϡՁ૲ါͽᆧΐՁ
૲дါ୛۞ᇝᑡ˧Ą
ᏴፄЪዋ۞ါ୛გՁ૲Ą
Ձ૲ါ 4mm Allen key
Clé Allen de 4mm
Llave Allen de 4 mm
Brugola da 4mm
imbus 4mm
4mm Inbusschlüssel
4 mm ֎Գ
VERRIEGELN
VERROUILLER
BLOQUEAR
CHIUDERE
ZAMKNIJ
љ˯׽ؠ౐
щ྅
ᏴᔉІ

Other Topeak Bicycle Accessories manuals

Topeak DeFender R1 User manual

Topeak

Topeak DeFender R1 User manual

Topeak TT3020B User manual

Topeak

Topeak TT3020B User manual

Topeak PanoComputer Wireless User manual

Topeak

Topeak PanoComputer Wireless User manual

Topeak FlashStand User manual

Topeak

Topeak FlashStand User manual

Topeak CO2 INFLATOR Series User manual

Topeak

Topeak CO2 INFLATOR Series User manual

Topeak TAILLUX 25 DF User manual

Topeak

Topeak TAILLUX 25 DF User manual

Topeak PREPSTAND ZX User manual

Topeak

Topeak PREPSTAND ZX User manual

Topeak Fixer 8 f User manual

Topeak

Topeak Fixer 8 f User manual

Topeak JOURNEY TRAILER TX User manual

Topeak

Topeak JOURNEY TRAILER TX User manual

Topeak Tail Lux User manual

Topeak

Topeak Tail Lux User manual

Topeak WHITELITE HP MEGA 420 User manual

Topeak

Topeak WHITELITE HP MEGA 420 User manual

Topeak PANOCOMP X User manual

Topeak

Topeak PANOCOMP X User manual

Topeak DeFender M1 User manual

Topeak

Topeak DeFender M1 User manual

Topeak PRESTAND X User manual

Topeak

Topeak PRESTAND X User manual

Topeak PREPSTAND eUP PRO User manual

Topeak

Topeak PREPSTAND eUP PRO User manual

Topeak Airbooster Extreme User manual

Topeak

Topeak Airbooster Extreme User manual

Topeak RedLite Aero User manual

Topeak

Topeak RedLite Aero User manual

Topeak NINJA CO2+ User manual

Topeak

Topeak NINJA CO2+ User manual

Topeak WhiteLite HP Beamer User manual

Topeak

Topeak WhiteLite HP Beamer User manual

Topeak RideCase User manual

Topeak

Topeak RideCase User manual

Topeak PrepStation Pro User manual

Topeak

Topeak PrepStation Pro User manual

Topeak D-TORQ WRENCH DX User manual

Topeak

Topeak D-TORQ WRENCH DX User manual

Topeak WHITELITE 800BT User manual

Topeak

Topeak WHITELITE 800BT User manual

Topeak PANORAM V10c User manual

Topeak

Topeak PANORAM V10c User manual

Popular Bicycle Accessories manuals by other brands

Cateye CC-VL200 manual

Cateye

Cateye CC-VL200 manual

Cyrusher LCD-S700 Computer Manual

Cyrusher

Cyrusher LCD-S700 Computer Manual

Bryton Rider quick start guide

Bryton

Bryton Rider quick start guide

Thule 973-24 Fitting instructions

Thule

Thule 973-24 Fitting instructions

DT SWISS F 535 ONE user manual

DT SWISS

DT SWISS F 535 ONE user manual

Ridea SPM2 Series user manual

Ridea

Ridea SPM2 Series user manual

Custom Built eBikes Bafang C965 A instruction manual

Custom Built eBikes

Custom Built eBikes Bafang C965 A instruction manual

Fenix BC05R user manual

Fenix

Fenix BC05R user manual

Ca Go Cover & Carry Bag Assembly instructions

Ca Go

Ca Go Cover & Carry Bag Assembly instructions

SUPER NOVA The Plug manual

SUPER NOVA

SUPER NOVA The Plug manual

monkey lectric M210 Monkey Light installation instructions

monkey lectric

monkey lectric M210 Monkey Light installation instructions

parktool FAG-2 Ouick Installation Guide

parktool

parktool FAG-2 Ouick Installation Guide

foc.us DROPPER POST Information sheet

foc.us

foc.us DROPPER POST Information sheet

eBike B02NU manual

eBike

eBike B02NU manual

SUPER NOVA M99 Mini Series manual

SUPER NOVA

SUPER NOVA M99 Mini Series manual

Let's Go Aero AerBike Assembly and operation

Let's Go Aero

Let's Go Aero AerBike Assembly and operation

xLab TORPEDO VERSA 200 instruction sheet

xLab

xLab TORPEDO VERSA 200 instruction sheet

Bikefitting BF-XY01UCI Assembly and usage guide

Bikefitting

Bikefitting BF-XY01UCI Assembly and usage guide

manuals.online logo
manuals.online logoBrands
  • About & Mission
  • Contact us
  • Privacy Policy
  • Terms and Conditions

Copyright 2025 Manuals.Online. All Rights Reserved.