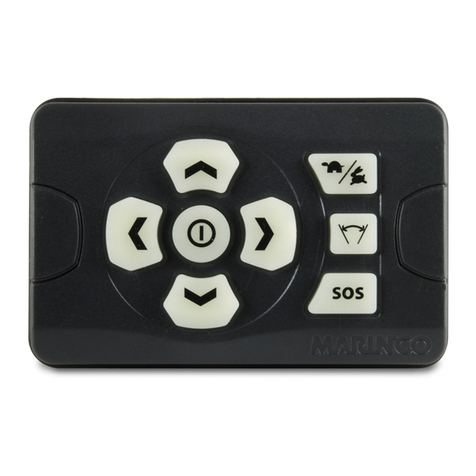
TOPP TS8 User manual

4
16
145
EX
ITEN
EX
1 2 3
8P5921
0.0
06.17
COD. / P/N / CODE
VER. / AUFG.
REV.
6
7
9
8
7
10
11
12
11
8
7
tecnologie del movimento
13
ISTRUZIONI PER L’UTILIZZO / INSTRUCTIONS FOR USE
INSTRUCCIONES PARA EL EMPLEO / GEBRAUCHSANWEISUNGEN
INSTRUCTION POUR L'EMPLOI / INSTRUÇÕES PARA O USO
RADIOCOMANDO SELETTORE / REMOTE CONTROL MODE-SELECTOR/
MANDO A DISTANCIA / FERNBEDIENUNGSEINHEIT/TELECOMMANDE /
RADIOCOMANDO
1) Pulsante 1-2
2) Pulsante 3-4
3) Pulsante 5-6
4) Pulsante 7-8
5) Coperchio batterie
6) Basamento
7) Fori per fissaggio
8) Coperchio basamento
9) Blocco magnete
10) Ganci basamento
11) Viti di fissaggio
12) Magnete
13) Vano magnete
14) Gancio coperchio
15) N.2 Batterie 3V (CR2032)
16) Porta batterie
1) Push-button 1-2
2) Push-button 3-4
3) Push-button 5-6
4) Push-button 7-8
5) Battery cover
6) Basement
7) Fastening holes
8) Basement cover
9) Magnet block
10) Basement hooks
11) Fastening screws
12) Magnet
13) Magnet compartment
14) Cover hook
15) No. 2 3V Batteries (CR2032)
16) Battery holder
1) Pulsador 1-2
2) Pulsador 3-4
3) Pulsador 5-6
4) Pulsador 7-8
5) Tapa baterías
6) Base
7) Agujeros para sujeción
8) Tapa base
9) Bloque imán
10) Ganchos base
11) Tornillos de sujeción
12) Imán
13) Alojamiento imán
14) Gancho tapa
15) N.2 baterías 3V (CR2032)
16) Porta baterías
1) Druckknopf 1-2
2) Druckknopf 3-4
3) Druckknopf 5-6
4) Druckknopf 7-8
5) Batteriefachdeckel
6) Sockel
7) Befestigungslöcher
8) Sockeldeckel
9) Magnetblock
10) Sockelhaken
11) Befestigungsschrauben
12) Magnet
13) Magnetfach
14) Deckelhaken
15) Nr. 2 Batterien 3V (CR2032)
16) Batteriefach
1) Poussoir 1-2
2) Poussoir 3-4
3) Poussoir 5-6
4) Poussoir 7-8
5) Couvercle batteries
6) Embase
7) Trous pour fixation
8) Couvercle embase
9) Bloc aimant
10) Crochets embase
11) Vis de fixation
12) Aimant
13) Casier aimant
14) Crochet couvercle
15) N.2 Batteries 3V (CR2032)
16) Porte batteries
1) Botão 1-2
2) Botão 3-4
3) Botão 5-6
4) Botão 7-8
5) Tampa baterias
6) Base
7) Furos para a fixação
8) Tampa base
9) Bloco magneto
10) Ganchos base
11) Parafusos de fixação
12) Magneto
13) Alojamento do magneto
14) Gancho da tampa
15) 2 Baterias 3V (CR2032)
16) Porta-baterias
Frequenza / Frequency / Frecuencia / Frequenz / Fréquence / Freqüência 433.92 MHz
Alimentazione / Power supply / Alimentación / Stromversorgung / Alimentation / Alimentação 6V
DATI TECNICI / TECHNICAL DATA / DATOS TECNICOS / TECHNISCHE DATEN / DONNEES TECHNIQUES / DADOS TÉCNICOS
Raggio d’azione / Operating range / Rayo de acción / Reichweite / Rayon d'action / Raio de acção
Temperatura di funzionamento / Operating temperature / Temperatura de funcionamiento / Betriebstemperatur / Température de fonctionnement / Temperatura de funcionamento
Pulsanti / Push-buttons / Pulsadores / Druckknöpfe / Poussoirs / Botões
Peso telecomando (senza batterie) / Remote control weight (without batteries) / Peso telemando (sin baterías)
Gewicht Fernbedienungseinheit (ohne Batterien) / Poids télécommande (sans batteries) / Peso do telecomando (sem baterias)
Peso supporto magnetico / Magnetic support weight / Peso soporte magnético / Gewicht magnetische Stütze / Poids support magnétique / Peso do suporte magnético
Paesi di utilizzazione / Countries of use / Países de empleo / Gebrauchsländer / Pays d'emploi / Países de utilização
15 ÷ 20 m
-10°C ÷ 55°C
160 x 53 x 20,3 mm
N.8 (ON-OFF)
67 g
37 g
Dimensioni / Dimensions / Dimensiones / Abmessungen / Dimensions / Dimensões
ITALIANOENGLISH
FUNZIONAMENTO
AVVERTENZE GENERALI
DICHIARAZIONE DI CONFORMITÀ
SOSTITUZIONE DELLE BATTERIE (FIG. 4)
Il telecomando è stato progettato e realizzato
es cl us iv am en te per comandare via radio le
automazioni “Originali TOPP Srl”. È assolutamente
vietato l’uso del telecomando per usi impropri diversi
dalla destinazione d’uso suddetta.
1) Prima di azionare il telecomando l’utilizzatore deve
accertarsi che nelle vicinanze dell’azionamento
comandato a distanza non vi siano persone, animali e
cose la cui incolumità accidentalmente possa essere
compromessa;
2) Solo dopo aver eseguito il punto suddetto e
assicurandosi di trovarsi nel raggio d’azione di 5 ÷ 10
m dall’automazione,l’utilizzatore può azionare il
tel eco mando pre men do i rel ati vi pulsant i
luminosi.Una diminuzione della portata del raggio
d’azione può essere dovuta alle batterie che si stanno
scaricando.
1) Aprire il coperchio batterie (Rif. 5) tirando con
l’unghia o con un utensile idoneo il gancio (Rif. 14);
2) Estrarre con cautela dal telecomando, senza tirare i
fili di collegamento, il porta batterie (Rif. 16);
3) Sfilare le due batterie esauste (Rif. 15) e sostituirle
con quelle nuove: fare attenzione a rispettare la
corretta polarità, evitando di maneggiare le batterie a
mani nude;
4) Inserire nel telecomando il porta batterie;
5) Chiudere correttamente il coperchio accertandosi
che il gancio faccia “clic”;
6) Smaltire le batterie esauste nel rispetto della
legislazione vigente nel paese di utilizzazione.
ATTENZIONE: LE BATTERIE SONO ALTAMENTE
INQUINANTI. È ASSOLUTAMENTE VIETATO
DISPERDERLE NELL’AMBIENTE.
DESTINAZIONE D’USO
• Le presenti istruzioni sono parte integrante del telecomando e devono
essere conservate per futuri riferimenti;
• Il Fabbricante declina ogni responsabilità per danni causati
dall’inosservanza delle norme e avvertenze qui riportate;
• Prima di utilizzare il telecomando è obbligatorio leggere e comprendere
in tutte le parti le presenti istruzioni e le istruzioni per l’uso della
centrale di comando e dei relativi attuatori comandati;
• Tenere il telecomando fuori dalla portata dei bambini e di persone non
autorizzate all’uso. Non lasciarlo mai incustodito;
• È assolutamente vietato l’uso del telecomando in ambienti con
atmosfera potenzialmente esplosiva;
• Vietato aprire e/o manomettere il telecomando.
BASAMENTO / ATTACCO A MURO (FIG. 3)
1) Aprire i ganci del basamento (Rif. 10);
2) Togliere i tappi dai fori di fissaggio (Rif. 7),
appoggiare il basamento al muro e segnare i fori;
3) Con un trapano idoneo fare due fori da Ø 6 mm,
inserire i relativi tasselli e avvitare parzialmente le
viti;
4) Agganciare il basamento alle viti (Rif. 11) e fissarle.
5) Inserire il magnete nell’apposito vano (Rif. 13) e
agganciare il coperchio (Rif. 8) al basamento.
OPERATION
GENERAL WARNINGS
DECLARATION OF CONFORMITY
REPLACEMENT OF THE BATTERIES (FIG. 4)
The remote control was designed and manufactured
exclusively to control by radio the automatic door
systems of “TOPP Srl”. It is strictly forbidden to use the
remote control for improper uses other then the above
mentioned destination of use.
1) Before enabling the remote control, the user must
check that close to the remotely controlled drive there
are no persons, animals and things whose safety may
accidentally be compromised;
2) Only after performing the above mentioned
procedures and making sure to be within the
operating range of 5 ÷ 10 m from the automatic door,
the user can enable the remote control by pressing
the light push-buttons. A reduction of the operating
range can be due to the batteries that run down.
1) Open the battery cover (Ref. 5) pulling the hook
(Ref. 14) with the nail or with a proper tool;
2) Carefully extract the battery holder (Ref. 16) from the
remote control without pulling the connection wires;
3) Remove the two run down batteries (Ref. 15) and
replace them with new ones: pay attention to
observe the correct polarity, avoiding handling the
batteries with bare hands;
4) Insert the battery holder in the remote control;
5) Correctly close the cover making sure that the hook
“clicks”;
6) Dispose the run down batteries in compliance with
the regulations in force in the country of use.
C A U T I O N : B A T T E R I E S A R E H I G H LY
POLLUTING. IT IS STRICTLY FORBIDDEN TO
DISCHARGE THEM IN THE ENVIRONMENT.
DESTINATION OF USE
• These instructions are integral part of the remote control and must be
preserved for future reference;
• The Manufacturer declines all liabilities for damages caused by the
inobservance of the regulations and warnings herein contained;
• Before using the remote control, it is compulsory to read and
understand these instructions in all their parts, as well as the
instructions for use of the main control unit and of the related controlled
actuators;
• Keep the remote control out of reach of children and of people not
authorized to use it. Never leave it unattended;
• It is strictly forbidden to use the remote control in environments with
potentially explosive atmosphere;
• It is forbidden to open and/or to tamper the remote control.
BASEMENT / WALL CONNECTION (FIG. 3)
1) Open the basement hooks (Ref. 10);
2) Remove the plugs from the fastening holes (Ref. 7),
lean the basement to the wall, and mark the holes;
3) With a suitable drill create two 6 mm Ø holes, insert
the related dowels and partially screw the screws;
4) Couple the basement with the screws (Ref. 11) and
tighten these latter.
5) Insert the magnet in the proper compartment
(Ref. 13) and hook the cover (Ref. 8) to the
basement.
IT EN FR
ES DE PT
AT BE DE UK
FI FR IE IT LU NL SEIS PTES NOCH
15
1
2
3
4
5
TS8
TS2
TOPP S.r.l.
Il sottoscritto in nome e per conto di
Topp S.r.l. Via Galvani, 59 36066 (VI) Italia
www.topp.it
dichiara che il prodotto:
TS2-TS8
è in conformità a tutti i requisiti applicabili delle seguenti
direttive CE (incluse tutte le revisioni applicabili):
Radio Equipment Directive (RED) 2014/53/EU
Rohs II Directive 2011/65/EU
e che sono state applicate le seguenti norme
armonizzate:
EN 62479: 2010 ; EN 60950-1:2006 +A11:2009
+A1:2010 +A12:2011+AC:2011+A2:2013
EN 301 489-3:v2.1.1(2017-03)
EN 300 220-2: v3.1.1(2017-02)
La presente dichiarazione di conformità è rilasciata
sotto la responsabilità esclusiva del fabbricante ed è
valida per prodotti costruiti a partire della data sotto
riportata.
13/06/2017 Matteo Cavalcante / Amministratore
ORIGINALE
TOPP S.r.l.
The undersigned, in the name of and behalf
of the following company
www.topp.it
Topp S.r.l. Via Galvani, 59 36066 (VI) Italia
herewith declares that the product:
TS2-TS8
is in conformity with all the relevant provisions of the
following EC directive(s) (including all applicable
amendments):
Radio Equipment Directive (RED) 2014/53/EU
Rohs II Directive 2011/65/EU
and that the following harmonised standards have been
applied:
EN 62479: 2010 ; EN 60950-1:2006 +A11:2009
+A1:2010 +A12:2011+AC:2011+A2:2013
EN 301 489-3:v2.1.1(2017-03)
EN 300 220-2: v3.1.1(2017-02)
This declaration of conformity is issued under the sole
responsibility of the manufacturer and is valid for
products built from the date specified below.
13/06/2017 Matteo Cavalcante / Amministratore
ORIGINAL

La télécommande a été projetée et réalisée
exclusivement pour commander par voie de radio
l'automatisation “Originaux TOPP Srl”.
Il est absolument interdit l'emploi de la télécommande
pour utilisations non autorisées différentes de la susdite
destination pour l'emploi.
DE ES
FR
PT FRANÇAIS ESPAÑOLPORTUGUESE DEUTCH
TOPP S.r.l. - Società a socio unico soggetta a direzione e coordinamento di 2 Plus 3 Holding S.p.a.
via Galvani, 59 - 36066 Sandrigo (VI) Italy
Tel. +39 0444 656700 - Fax +39 0444 656701 - [email protected] - www.topp.it
FUNCIONAMIENTO
ADVERTENCIAS GENERALES
DECLARACION DE CONFORMIDAD
SUSTITUCION DE LAS BATERIAS (FIG. 4)
El mando a distancia ha sido proyectado y realizado
exclusivamente para mandar vía radio de la
automatización “Originales TOPP Srl”. Se prohíbe
absolutamente el uso del telemando para usos
impropios diferentes del arriba mencionado destino de
uso.
1) Antes de accionar el telemando el usuario debe
asegurarse que en las cercanas del accionamiento
mandado a distancia no hayan personas, animales y
cosas cuya salud accidentalmente pueda ser
comprometida;
2)Solamente después de haber realizado los
antedichos puntos y asegurándose de encontrarse
en el rayo de acción de 5 ÷ 10 m desde de la
automatización el usuario puede accionar el mando a
distancia apretando los relativos pulsadores
luminosos.Una disminución de la capacidad del rayo
de acción puede ser debida a las baterías que se
están descargando.
1) Abrir la tapa de baterías (Ref. 5) tirando con la uña o
con un utensilio adecuado el gancho (Ref. 14);
2) Extraer con cuidado desde el telemando, sin tirare
los hilos de conexión, el porta baterías (Ref. 16);
3) Quitar las dos baterías descargadas (Ref. 15) y
sustituirlas con aquellas nuevas: hacer cuidado en el
respectar la correcta polaridad, evitando de manejar
las baterías con las manos nudas;
4) Introducir en el telemando el porta baterías;
5) Cerrar correctamente la tapa asegurándose que el
gancho haga “clic”;
6) Eliminar las baterías acabadas en el respeto de la
legislación en vigor en el país de empleo.
CUIDADO: LAS BATERIAS LLEVAN GRAN
POLUCION. SE PROHIBE ABSOLUTAMENTE DE
ELIMINARLAS EN EL AMBIENTE.
DESTINACION DE USO
• Estas instrucciones son parte integrante del telemando y se deben
guardar para futuras referencias;
• El Fabricante declina toda responsabilidad para daños causados por la
inobservancia de las normas y advertencias aquí indicadas;
• Antes de utilizar el telemando es obligatorio leer y comprender en todas
sus partes estas instrucciones y las instrucciones para el uso de la
central de mando y de los relativos accionadores mandados;
• Guardar el telemando fuera del alcance de los niños y de personas no
autorizadas al uso. No dejarlo sin guardia;
• Se prohíbe absolutamente el uso del telemando en ambientes con
atmósfera potencialmente explosiva;
• Se prohíbe abrir y/o manipular el telemando.
BASE / ENGANCHE AL MURO (FIG. 3)
1) Abrir los ganchos de la base (Ref. 10);
2) Quitar los tapones desde los agujeros de sujeción
(Ref. 7), apoyar la base al muro y marcar los
agujeros;
3) Con un taladro adecuado hacer dos agujeros de Ø 6
mm, introducir las relativas clavijas y atornillar
parcialmente los tornillos;
4) Enganchar la base a los tornillos (Ref. 11) y
sujetarlas.
5) Introducir el imán en el alojamiento adecuado
(Ref. 13) y enganchar la tapa (Ref. 8) a la base.
BETRIEB
ALLGEMEINE HINWEISE
KONFORMITÄTSERKLÄRUNG
AUSWECHSELN DER BATTERIEN (ABB. 4)
Die Fernbedienungseinheit wurde ausschließlich dazu
entworfen und hergestellt, um durch Funkübertragung
die Automatisierung zu steuern. “Originalstellantriebe
TOPP Srl” zu steuern. Es ist streng verboten, die
Fernbedienungseinheit für unsachgemäße Zwecke
anders als die o.e. Gebrauchsbestimmung zu
verwenden.
1) Vor der Inbetriebnahme der Fernbedienungseinheit
muss der Anwender prüfen, dass es in der Nahe des
ferngesteuerten Stellantriebs keine Personen, Tiere
und Dingen gibt, deren Sicherheit zufällig gefährdet
sein könnte;
2) Erst nach den oben beschriebenen Kontrolle und nur
wenn man sich an einer Reichweite von 5 ÷ 10 m von
der Automatisierung befindet, kann der Anwender die
Fernbedienungseinheit betätigen, indem man auf die
dazugehörenden leuchtenden Druckknöpfe drückt.
Eine Verminderung der Reichweite kann von der
Entladung der Batterien verursacht sein.
1) Den Batteriefachdeckel (Bez. 5) öffnen, indem man
den Haken (Bez. 14) mit dem Nagel oder mit einem
zweckmäßigen Werkzeug abzieht;
2) Das Batteriefach (Bez. 16) ganz sorgfältig von der
Fernbedienungseinheit abziehen, ohne dabei die
Verbindungskabel zu ziehen;
3) Die zwei erschöpften Batterien (Bez. 15) entfernen
und sie mit neuen Batterien austauschen: dabei
achten die richtige Polarität zu beachten. Vermeiden,
die Batterien mit nackten Händen zu handhaben;
4) Das Batteriefach in die Fernbedienungseinheit
einführen;
5) Den Deckel richtigerweise schließen und dabei
prüfen, dass der Haken klickt;
6) Die erschöpften Batterien in Übereinstimmung mit
den im Gebrauchsland geltenden Regelungen
entsorgen.
AORSICHT: DIE BATTERIEN SIND SEHR
U M W E LT FE I N D L I CH . E S I S T S TR E N G
V E R B O T E N , S I E I N D I E U M W E LT Z U
VERBREITEN.
GEBRAUCHSBESTIMMUNG
• Die gegenständlichen Anweisungen sind Bestandteil der
Fernbedienungseinheit und sind zum zukünftigen Nachschlagen
aufzubewahren;
• Der Hersteller lehnt jede Haftung für Schäden ab, die von der
Missachtung der hierein angegebenen Vorschriften und Hinweise
verursacht sind;
• Vor dem Gebrauch der Fernbedienungseinheit muss man zwangsmäßig
die gegenständlichen Anweisungen und die Anweisungen zum
Gebrauch der Hauptsteuereinheit und der dazugehörenden
gesteuerten Stellantriebe vollkommen lesen und verstehen;
• Die Fernbedienungseinheit darf nicht in die Hände von Kindern und von
zum Gebrauch nicht autorisierten Leuten gelangen. Die Vorrichtung nie
unbewacht lassen;
• Es ist streng verboten, die Fernbedienungseinheit in Umgebungen mit
potentiell explosiver Atmosphäre zu verwenden;
• Es ist verboten, die Fernbedienungseinheit zu öffnen oder an ihr
missbräuchlich einzugreifen.
SOCKEL / WANDANSCHLUSS (ABB. 3)
FONCTIONNEMENT
AVERTISSEMENTS GENERAUX
DECLARATION DE CONFORMITE’
REMPLACEMENT DES BATTERIES (FIG. 4)
1) Avant d'actionner la télécommande l’utilisateur doit
s'assurer que dans les alentours de l'actionnement
commandé à distance il n'y a pas de personnes,
animaux et choses dont la santé puisse être
compromise par hasard;
2) Seulement après avoir réalisé le point susdit et
s'assurant de se trouver dans le rayon d'action de 5 ÷
10 m de l'automatisation, l'utilisateur peut actionner la
télécommande en appuyant sur les relatifs boutons-
poussoirs lumineux.
Une diminution de la capacité du rayon d'action peut
être due aux batteries en train de se décharger.
1) Ouvrir le couvercle des batteries (Réf. 5) tirant avec
l'ongle ou bien un outil approprié le crochet (Réf. 14);
2) Extraire avec attention depuis la télécommande,
sans tirer les fils de connexion, le porte batteries
(Réf. 16);
3) Enlever les deux batteries déchargées (Réf. 15) et
les remplacer avec celles nouvelles: faire attention à
respecter la correcte polarité, évitant de manipuler
les batteries mains nues;
4) Introduire dans la télécommande le porte batteries;
5) Fermer correctement le couvercle en s'assurant que
le crochet fasse “clic”;
6) Eliminer les batteries déchargées dans le respect de
la législation en vigueur dans le pays d'emploi.
ATTENTION: LES BATTERIES SONT TRES
POLLUANTES. IL EST ABSOLUMENT INTERDIT
DE LES DISPERSER DANS L'ENVIRONNEMENT.
DESTINATION D’EMPLOI
• Ces instructions sont une partie intégrante de la télécommande. Il faut
les conserver pour toute référence future;
• Le Producteur décline toute responsabilité pour dommages causés par
la non observance des normes et avertissements indiqués ici;
• Avant d'utiliser la télécommande il est obligatoire de lire et comprendre
dans toutes ses parties ces instructions et les instructions pour l'emploi
de la centrale de commande et des relatifs actionneurs commandés;
• Il faut conserver la télécommande hors la portée des enfants et des
personnes non autorisées. Ne jamais la laisser sans garde;
• Il est absolument interdit d'utiliser la télécommande dans des
environnements avec une atmosphère potentiellement explosive;
• Il est interdit d'ouvrir et/ou manipuler la télécommande.
EMBASE / ACCROCHAGE AU MUR (FIG. 3)
1) Ouvrir les crochets de l'embase (Réf. 10);
2) Enlever les bouchons depuis les trous de fixation
(Réf. 7), appuyer l'embase au mur et marquer les
trous;
3) Avec une perceuse appropriée faire deux trous de
Ø 6 mm, introduire les relatifs fiches et visser
partiellement les vis;
4) Accrocher l'embase aux vis (Réf. 11) et les fixer.
5) Introduire l'aimant dans le casier approprié (Réf. 13)
et accrocher le couvercle (Réf. 8) à l'embase.
FUNCIONAMENTO
ADVERTÊNCIAS GERAIS
DECLARAÇÃO DE CONFORMIDADE
SUBSTITUIÇÃO DAS BATERIAS (FIG. 4)
O radi ocom ando foi p r ojet ado e real izad o
exclusivamente para comandar via rádio a
automatização “Originais TOPP Srl”.
È absolutamente proibido o uso do telecomando para
usos impróprios diversos da destinação do uso acima
mencionada.
1) Antes de operar o telecomando o utilizador deve
certificar-se que nas proximidades do acionamento
comandado à distância não estejam pessoas,
a n i m a i s e c o i sas d a q ual i n c o l u m i d ade
acidentalmente possa ser comprometida;
2) Só após ter efetuado o ponto anterior e certificando-
se que se encontra num raio de 5 a 10 metros da
automatismo, o utilizador pode acionar o emissor
radiocomando, primindo o botão luminoso.Uma
diminuição da capacidade do raio de acção pode ser
devida às baterias que estão descarregando-se.
1) Abrir a tampa das baterias (Ref. 5) tirando com a
unha ou com uma ferramenta apropriada o gancho
(Ref. 14);
2) Extrair com cautela do telecomando, sem tirar os fios
de ligação, o porta-baterias (Ref. 16);
3) Desfiar as duas baterias exaustas (Ref. 15) e
substituir com as novas: prestar atenção em
respeitar a correta polaridade, evitando de manejar
as baterias com as mãos nuas;
4) Inserir no telecomando o porta-baterias;
5) Fechar corretamente a tampa certificando-se que o
gancho faça um “clic”;
6) Eliminar as baterias exaustas respeitando a
legislação vigente no país de utilização.
ATENÇÃO: AS BATERIAS SÃO ALTAMENTE
POLUINTES. É ABSOLUTAMENTE PROIBIDO
DEITAR-LAS NO AMBIENTE.
DESTINAÇÃO DO USO
• As presentes instruções são parte integrante do telecomando e devem
ser conservadas para referências futuras;
• O Fabricante declina qualquer responsabilidade derivada por danos
causados pela falta de observação às normas e advertências nesta
descritas;
• Antes de utilizar o telecomando é obrigatório ler e compreender em
todas as partes as presentes instruções e as instruções para o uso da
central de comando e dos relativos atuadores comandados;
• Manter o telecomando longe do alcance de crianças e de pessoas não
autorizadas ao uso. Não deixá-lo jamais sem ser vigiado;
• É absolutamente proibido o uso do telecomando em ambientes com
atmosfera potencialmente explosiva;
• Proibido abrir e/ou manejar ao interno do telecomando.
BASE / LIGAÇÃO À MURO (FIG. 3)
1) Abrir os ganchos da base (Ref. 10);
2) Remover as tampas do furo de fixação (Ref. 7),
apoiar a base ao muro e marcar os furos;
3) Com um trépano apropriado fazer 2 furos de Ø 6 mm,
inserir as relativas buchas e atarraxar parcialmente
os parafusos;
4) Enganchar a base aos parafusos (Ref. 11) e fixar-las.
5) Inserir o magneto no próprio alojamento (Ref. 13) e
enganchar a tampa (Ref. 8) à base.
1) Die Haken vom Sockel (Bez. 10) öffnen;
2) Die Stopfen von den Befestigungslöchern (Bez. 7)
entfernen und den Sockel an die Wand lehnen; dann
die Löcher markieren;
3) Mit einer zweckmäßigen Bohrmaschine zwei
Bohrungen mit einem Ø von 6 mm schaffen. Die
dazugehörenden Dübel einführen und die Schrauben
teilweise anschrauben;
4) Den Sockel mit den Schrauben (Bez. 11) kuppeln
und sie befestigen.
5) Den Magnet ins zweckmäßige Fach (Bez. 13)
einführen und den Deckel (Bez. 8) am Sockel
kuppeln.
EX
EX
EX
EX
TOPP S.r.l.
El abajo firmante en nombre y por cuenta de
Topp S.r.l. Via Galvani, 59 36066 (VI) Italia
www.topp.it
declara que el producto denominado:
TS2-TS8
Cumple con todos los requisitos aplicables de las
siguientes directivas CE (incluso todas las revisiones
aplicables):
Radio Equipment Directive (RED) 2014/53/EU
Rohs II Directive 2011/65/EU
y además declara que se han aplicado las siguientes
normas armonizadas:
EN 62479: 2010 ; EN 60950-1:2006 +A11:2009
+A1:2010 +A12:2011+AC:2011+A2:2013
EN 301 489-3:v2.1.1(2017-03)
EN 300 220-2: v3.1.1(2017-02)
Esta declaración de conformidad se expide bajo la
exclusiva responsabilidad del fabricante y es válida
para los productos construidos a partir de la fecha abajo
especificada.
13/06/2017 Matteo Cavalcante / Administrador
ORIGINAL
TOPP S.r.l.
Im Namen und im Auftrag von dem folgenden
Herstellern erklärt der Unterzeichner
Topp S.r.l. Via Galvani, 59 36066 (VI) Italia
erkläre ich, dass die elektrische Vorrichtung tmit der
Bezeichnung:
TS2-TS8
mit den Bedingungen der folgenden Richtlinien
übereinstimmt (einschließlich aller
anwendbaren Änderungen):
Radio Equipment Directive (RED) 2014/53/EU
Rohs II Directive 2011/65/EU
Die folgenden Anforderungen wurden auch angewandt:
EN 62479: 2010 ; EN 60950-1:2006 +A11:2009
+A1:2010 +A12:2011+AC:2011+A2:2013
EN 301 489-3:v2.1.1(2017-03)
EN 300 220-2: v3.1.1(2017-02)
Die vorliegende Erklärung ist unter der alleinigen
Verantwortung des Herstellers ausgestellt und gilt für
Produkte, die ab dem unten angegebenen Datum
hergestellt werden.
13/06/2017 Matteo Cavalcante / Administrator
ORIGINAL
TOPP S.r.l.
Le soussigné, au nome du et pour le compte
du fabricant suivant
Topp S.r.l. Via Galvani, 59 36066 (VI) Italia
www.topp.it
déclare que le produit qui s'appelle:
TS2-TS8
est conforme aux exigences des directives CE (inclus
toutes les modifications applicables):
Radio Equipment Directive (RED) 2014/53/EU
Rohs II Directive 2011/65/EU
et déclare par ailleurs que les normes harmonisées
suivantes ont été appliquées :
EN 62479: 2010 ; EN 60950-1:2006 +A11:2009
+A1:2010 +A12:2011+AC:2011+A2:2013
EN 301 489-3:v2.1.1(2017-03)
EN 300 220-2: v3.1.1(2017-02)
Cette déclaration de conformité est faite sous la
résponsabilité exclusive du fabricant et il est valable
pour les produits fabriqués à partir de la date indiquée
ci-dessous.
13/06/2017 Matteo Cavalcante / Administrator
ORIGINALE
TOPP S.r.l.
Topp S.r.l. Via Galvani, 59 36066 (VI) Italia
www.topp.it
Declara que o aparelho elétrico denominado
TS2-TS8
è conforme às condições das seguintes diretivas:
Radio Equipment Directive (RED) 2014/53/EU
Rohs II Directive 2011/65/EU
e as seguintes normas harmonizadas:
EN 62479: 2010 ; EN 60950-1:2006 +A11:2009
+A1:2010 +A12:2011+AC:2011+A2:2013
EN 301 489-3:v2.1.1(2017-03)
EN 300 220-2: v3.1.1(2017-02)
Esta declaração foi emitida sob a exclusiva
responsabilidade do fabricante.
13/06/2017 Matteo Cavalcante / Administrator
ORIGINAL
This manual suits for next models
1
Table of contents
Other TOPP Remote Control manuals


