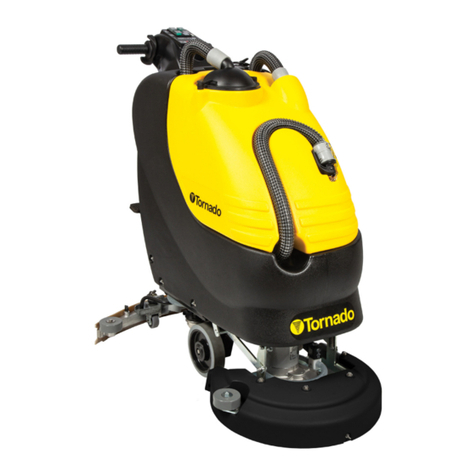
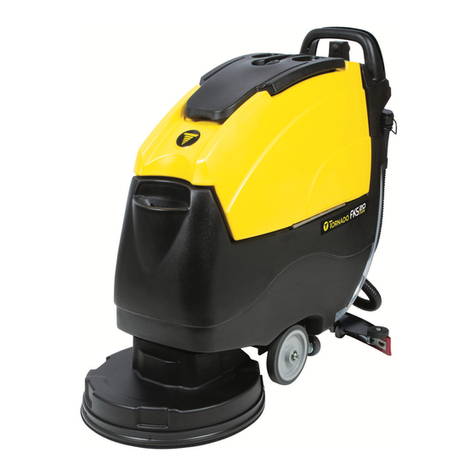
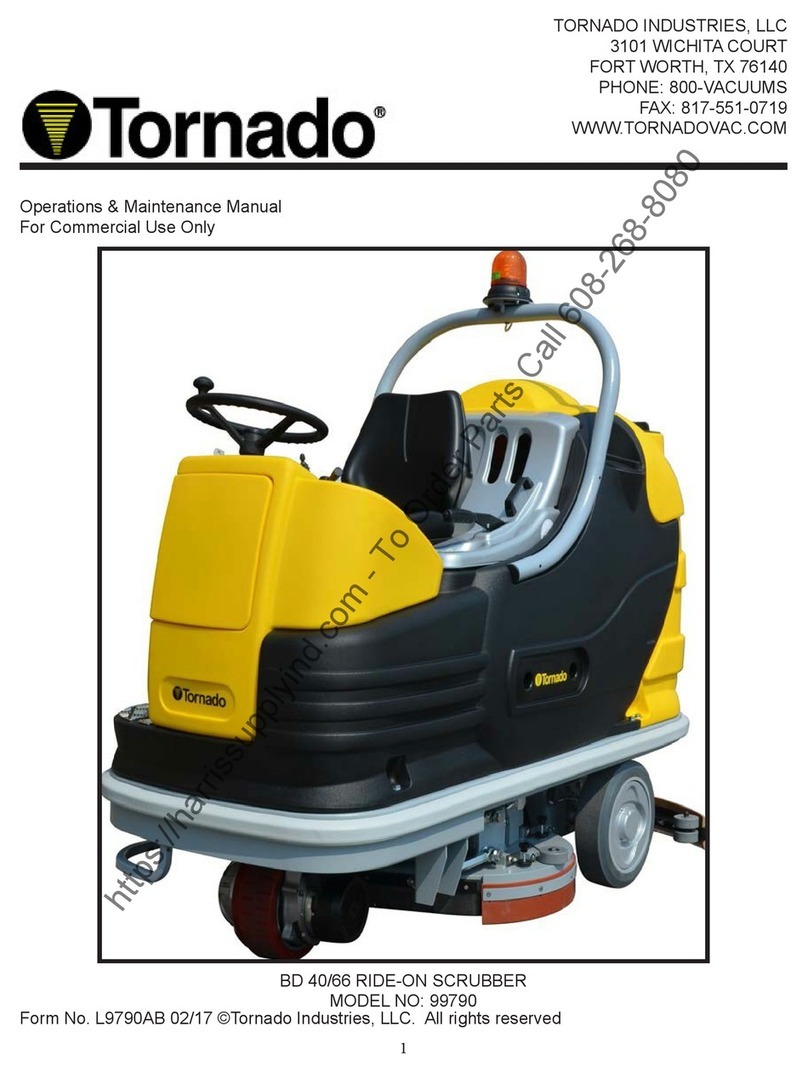
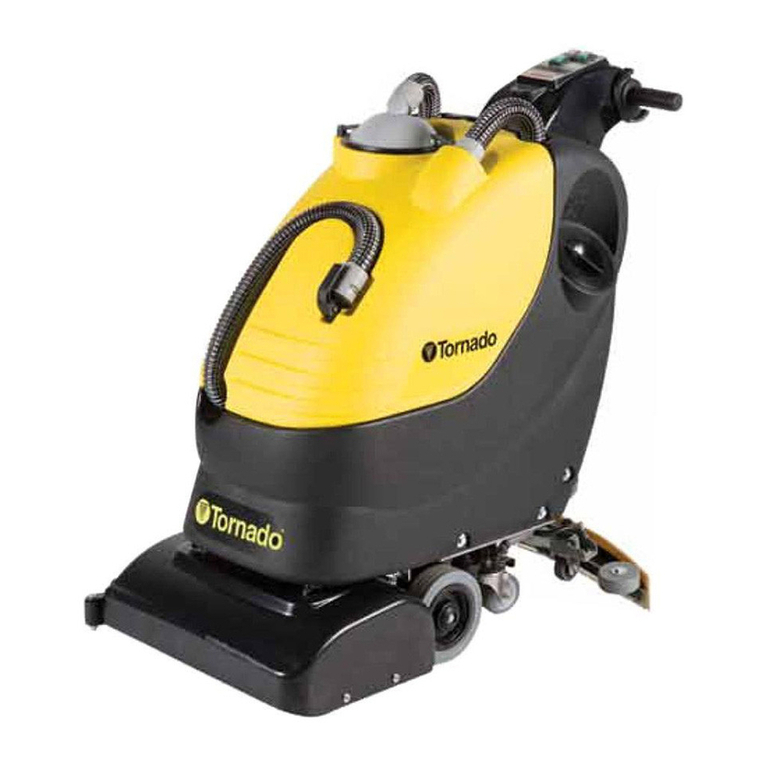
Tornado BR 13/1 Manual

1
TORNADO INDUSTRIES, LLC
333 CHARLES COURT
WEST CHICAGO, IL 60185
(630)-818-1300 FAX (630)-818-1301
WWW.TORNADOVAC.COM
Operations & Maintenance Manual
For Commercial Use Only
Form No. L9735DA 01/13 ©Tornado Industries, LLC. All rights reserved
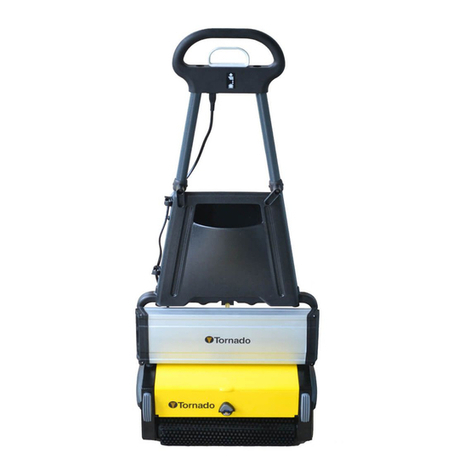
BR 13/1 MULTIWASH
Model No. 99410

2
Table of Contents
Warranty 3
Important Safety Instructions 5
Electrical Connection 6
Machine Parts 9
How it Works 10
Preparing for Use 10
Unpack 10
Assembly 11
Controls 11
Operating the Machine 12
Cleaning the Machine 14
Maintenance 14
Accessories 10
Transport Trolley 15
Side Brush 15
Technical Specication 16
Accessories 16
Brush Selection Guide 16
Warranty Registration 17

3
Long Term Buyer Protection Limited Warranty
10 Years*
Plastic water tanks and Rotationally-molded bodies
2 Years*
Parts on all Tornado cleaning equipment
1 Year*
Labor on all Tornado cleaning equipment
1 Year*
Warranty on batteries, one year prorated
All battery warranties are handled directly by the battery manufacturer, on a one year prorated basis
Tornado Industries, LLC. (Tornado) warrants to the end/user customer that the Tornado product(s) will
be free from defects in material and workmanship for the duration(s) described below. This limited
warranty DOES NOT cover machines and/or components subject to normal wear and tear, damage
that occurs in shipping, failures resulting from modication, accident, unsuitable operating environ-
ment, misuse, abuse, neglect, or improper maintenance by you. For full details, contact your Autho-
rized Tornado Distributor, Service Center, or the Tornado Technical Service Department. Tornado
sales and service representatives are not authorized to waive or alter the terms of this warrant, or to
increase the obligations of Tornado under the warranty.
*Effective January 1, 2013. Terms subject to change without notice
1. Except all Windshears™ Blowers, TV 2, Side and Downdraft, Insulation Blowers, CV 30, CV 38,
CW 50, CW 100, CK14/1, CK 14/1-QD, CK14/1 PRO, SWM 31/9, CK LW13/1, CV 38/48 Dual, PV6,
PV10, and all chargers are warranted for 1 (one) year for both parts and labor.
2. All non-wear item parts purchased after warranty expiration are warranted for 90 days.
3. Warranty starts from the date of sale to the consumer or, at Tornado’s discretion, 6 months after
the dealer purchased the unit from Tornado, whichever comes rst.
4. The EB 30 is warranted for a period of 90 days for both parts and labor.
5. The warranty on engines used on propane powered equipment is limited to motor manufacturer’s
warranty.
6. Ride-on Scrubbers are warranted for 24 months, parts, 6 months labor or 1,000 hours, whichever
occurs rst.
Note: Tornado, The Latest Dirt, Floorkeeper,
Carpetkeeper, Carpetrinser, Carpetrinser/Dryer,
Headmaster, Taskforce, PAC-VAC, T-Lite, Glazer,
Windshear, Max-Vac and Trot-Mop are trademarks
of Tornado Industries
Website: www.tornadovac.com
Phone 1-800-VACUUMS
Fax (630) 818-1301
Address 333 Charles Court Suite 109
West Chicago, IL 60185
Form F2662.©2013. All rights reserved
1-800-VACUUMS 80 Years of Cleaning Innovation A Tacony Company
4
NOTES

5
IMPORTANT SAFETY INSTRUCTIONS
FOR COMMERCIAL USE
WHEN USING AN ELECTRICAL APPLIANCE, BASIC PRECAUTIONS SHOULD
ALWAYS BE FOLLOWED INCLUDING THE FOLLOWING:
READ ALL INSTRUCTIONS BEFORE USING THIS MACHINE
WARNING: TO REDUCE THE RISK OF FIRE, ELECTRIC SHOCK, OR INJURY:
Do not leave machine unattended when plugged in. Unplug from outlet when not in use and before
changing pads or attempting any maintenance or adjustment. If handle switch lever is activated
accidentally, high starting torque will cause machine to move and may cause damage or injury.
To avoid electrical shock, Use indoors only. Do not use outdoors and do not expose to rain.
Do not allow to be used as a toy. Close attention is necessary when used by or near children.
Use only as described in this manual. Use only manufacturer’s recommended attachments.
Do not use with damaged cord or plug. If machine is not working properly, if it was dropped,
damaged, left outdoors, or dropped into water, return it to a service center.
Do not pull or carry by cord, use cord as a handle, close a door on cord, or pull cord around sharp
edges or corners. Do not run machine over cord. Keep cord away from heated surfaces. Do not
unplug by pulling on cord. To unplug, grasp the plug not the cord.
Do not handle plug or machine with wet hands.
Keep hair, loose clothing, ngers, and all parts of body away from openings and moving parts.
Turn off all controls before unplugging.
Connect to a properly grounded outlet only. See Grounding Instructions.
Do not put hands under base - rotating parts could cause injury.
Always keep hands feet and loose tting clothing away from moving parts to prevent possible injuries.
Use care to keep electrical supply cable from contacting moving parts, such as oor brushes or pads.
Risk of explosion: Floor sanding can result in explosive mixture of ne dust and air. Use this
machine only in a well-ventilated area, free from any ame or match.
Do not use machine in areas where ammable and/or explosive vapors or dusts are present.
To avoid res do not use with a ammable or combustible liquid to clean a oor.
Make sure voltage and frequency at the wall receptacle correspond with that indicated on nameplate
before plugging in machine.
Use only a 12 Ga. three-wire extension cable, which have 3-prong grounding type plugs and 3-prong
receptacles that accept the plug of the machine.
.
SAVE THESE INSTRUCTIONS

6
GROUNDING INSTRUCTIONS
This appliance must be grounded. If it should malfunction or breakdown, grounding provides a path of
least resistance for electric current to reduce the risk electric shock. This machine is equipped with a
cord having an equipment -grounding conductor and grounding plug. The plug must be inserted into
an appropriate outlet that is properly installed and grounded in accordance with all local codes and
ordinances.
WARNING: Improper connection of the equipment-grounding conductor can result in a risk of electric
shock. Check with a qualied electrician or service person if you are in doubt as to whether the outlet
is properly grounded. Do not modify the plug provided with the appliance - if it will not t the outlet,
have a proper outlet installed by a qualied electrician.
This appliance is for use on a nominal 120-volt circuit, and has a grounding plug that looks like the
plug illustrated in sketch A. A temporary adapter that looks like the adapter illustrated in sketches B
and C may be used to connect this plug to a 2-pole receptacle as shown in sketch B if a properly
grounded outlet is not available. The temporary adapter should be used only until a qualied
electrician can install a properly grounded outlet (sketch A). The green-colored rigid ear, lug, or
the like extending from the adapter must be connected to a permanent ground such as a properly
grounded outlet box cover. Whenever the adapter is used, it must be held in place by a metal screw.
Note: In Canada, the use of a temporary adapter is not permitted by the Canadian Electrical
Code.
SKETCH A SKETCH B SKETCH C

7
WHEN THE MACHINE IS DELIVERED
Check the carton carefully for signs of rough handling. Remove the machine from the carton and look for concealed damage. If the
machine is damaged, notify the carrier immediately and request an inspection. Be sure to keep the carton, packing inserts, packing
lists, and carrier’s receipt until the inspector has veried your claim.
BEFORE OPERATING THE MACHINE
Read the manual carefully and completely before attempting to operate the unit. This manual has important information for the use and
safe operation of the machine. FAILURE TO ADHERE TO THESE INSTRUCTIONS COULD RESULT IN SERIOUS BODILY INJURY
OF PROPERTY DAMAGE. Keep this manual on le and handy. This machine will assure years of satisfactory service if operated and
maintained according to recommendations in the manual. If additional information is needed, please contact your local distributor or
write to:
TORNADO INDUSTRIES
333 Charles Ct.
West Chicago, IL 60185
1-800-VACUUMS
All information and specications printed in the manual and parts list are current at the time of printing. However, because of Tornado’s
policy of continual product improvement, we reserve the right to make changes at any time without notice.
WARRANTY
To protect your investment, promptly ll out the
required information on the warranty card that
comes with the unit and mail it back to
Tornado Industries
Note: Service repair and warranty work
is not normally handled at the factory.
WARNING
The machine was designed for use on oors as per instructions
and recommendations written in this manual. Any deviation from its proper use or purpose and the consequential
damage that may occur is the sole responsibility of the end user.
GENERAL PRECAUTIONS
• You must be trained in the operation of this machine before use. Please read this manual carefully and obtain operation instructions
from your safety director or your authorized Tornado distributor.
• Always operate this machine with all of the cable removed from the handle. Failure to do so will upset the precision balance of the
machine.
• Do not use the Floor Machine for scarifying or sanding.
• Care should be taken to keep cable away from rotating brush.
• Do not attempt to repair warranted machines. All repairs must be done by a qualied and authorized repair center. Non warranted
repairs will be billed back to the owner of the unit.
• Do not use any replacement parts except those specied in the parts list. Unauthorized parts could cause the unit to malfunction and
will void the warranty.
FAILURE TO COMPLY WITH THE ABOVE WARNING INSTRUCTIONS
WILL VOID THE WARRANTY

8
Introduction
This Tornado oor cleaning machine is designed to be used on smooth, even oors indoors. They can be used on most
oor surfaces including carpet, wood, PVC, rubber and stone.
We are condent the machines will give years of trouble free service, coupled with ease of use and minimum
maintenance.
The following instructions contain important information about the machine and safety advice for the operator.
To save space and to protect the machine during transit, it is supplied with its handle disassembled. Follow the simple
assembly instructions.
Warning: The machine must be fully assembled in accordance with these instructions before connecting to the electric supply.
Important Safety Advice
When using electrical equipment, basic safety precautions should be followed:
• Read all instructions carefully before use.
• The machine must be unpacked and assembled in accordance to the instructions given.
• Keep children and unauthorized persons away from the machine when in use.
• Unplug the machine when not in use.
• Switch off the machine before removing the plug.
• When unplugging the cord, pull the plug and not the cord.
• Keep the power supply cord away from moving parts. Do not run the machine over the cord.
• Do not operate the machine with a damaged supply cord or plug, or after the machine malfunctions or is damaged in
any way. Contact an authorized Service Center for repair or adjustment.
• When cleaning or performing maintenance to the machine, make sure that it is unplugged.
• Regularly inspect the power supply cord. If it is damaged, it needs to be replaced.
• Be careful when using the machine near the top of stairs.
Guidelines for the Operator
• Operators must be fully trained in the use of the machine in accordance with these instructions.
• Operators should be physically able to maneuver, transport and operate the machine.
• Operators should be able to recognize abnormalities in the machine.
• This machine should always be connected to a fully earthed power supply of the right voltage and frequency.
• Let the machine do the work. Grip the handle as lightly as possible.
• Wear suitable footwear to avoid slipping.
• Wear suitable clothing to keep dry and warm.
• Do not smoke when using the machine.
• Do not run the machine dry, as this could damage the oor surface or the machine.
• Do not use excessively foaming or highly corrosive cleaning solutions. If operating on a ooded oor, ensure that
water depth does not exceed 6mm (1/4 inch).
• Do not operate the machine on rough surfaces, explosive atmospheres, slopes, near ammable liquids and where
hazardous dusts are present.
• Only use brushes and accessories per the instruction manual. The use of other brushes and accessories may cause
safety problems.
Electrical Connection
Before connecting the machine to the power supply, check that your supply voltage corresponds with the rating label
on the body of the machine.
Important: If the supply cord is damaged, it must only be replaced by a cord from the manufacturer
or an authorized service agent.

9
1. Top Handle
2. Liquid Discharge Control Handle
3. Solution Tank
4. Bottom Handle
5. Recovery Tank
6. Filter
7. Lid Cap
8. Boot
9. Nozzle
10.Conveyor Drum
11. Brush
12.Pedal
Transporting the Machine
Caution: This machine is heavy. Do not attempt to lift the machine without assistance. Incorrect
lifting techniques may cause injury.
Machine Parts
1
2
3
5
6
9
10
8
11
4
12
7

10
How it Works
1. Cleaning liquid in the solution tank is sprayed to the oor.
The counter rotating brushes scrub the oor and also
throw the dirty water on the conveyor drum. The front
brush does most of the scrubbing and drying. The rear
brush completes the scrubbing and collects the remaining
water off the oor.
2. A blade tted to the recovery tank wipes the drum and
collects the dirty water.
The purpose of these caps is to distinguish between different brushes
when the machine is used in different area. This just helps the operator
easily identify the brushes to avoid cross contamination.
Preparing for Use
Unpack
1. Bottom Handle
2. Machine Body
3. Pump Housing
4. Solution Tank
5. Top handle & Cable Pull
6. Handle LH & RH
7. Brush Shafts (2)
8. Screws & Washers
9. Cable Retainer
10.Power Cord
11. Recovery Tank
12.Hook
13.Knob

11
Assembly
1. Insert the two tubular handles into the bottom handle and secure them using
the knob by tightening lightly. Make sure that the handles are assembled
according to their marked position and the cable holding hooks are pointed
towards the rear.
2. Slide the electric cable retainer into the top portion of RH handle.
3. Fit the top handle over the tubular handles and secure them with washer and
screw (2 sets). Make sure that the label on the top handle is facing the front
of the machine. Now rmly tighten both knobs and screws. Insert the plastic
caps provided to cover the screws in the top handle.
4. Pass the free end of the pull cable through the plastic guide in the RH Handle.
Press and twist clockwise to rmly secure the cable end to the lid pump
housing.
5. Fix the solution tank rmly into the bottom handle by holding the top handle.
6. Rotate the knob to hold the solution tank.
7. The brushes are loosely packed in the machine for transit; therefore the brush
shafts must be tted before operating the machine. Push the shafts through
the brushes from the side of the machine. To remove brushes, push the
brush shaft out from the side of the machine using your ngers and pull it from
the other side.
Controls
Transport/Working Mode Control
Slide the knob to the TOP position (Working Mode) to operate the machine. Slide the knob to the
BOTTOM position (Transport Mode) to move the machine and/or park the machine. The machine will
not turn on in this mode.
Warning: Keeping the knob in the top position and moving the machine will damage the brushes.
On/Off Control
Press the pedal lightly with your foot, then pull back the handle a little to start the
motor. Pulling the handle further without pressing the pedal lowers the machine
and engages the rotating brushes onto the oor. To turn the machine off, return the
handle back to the vertical position.
Brush Pressure Controls
The control is located on the left side of the machine and has 4 positions: MINIMUM pressure when
the knob is all the way down and MAXIMUM pressure when the knob is all the way up. This allows
you to compensate for brush wear and to control the brush pressure.

12
Liquid Discharge Control
By pulling the liquid discharge handle up, the cleaning liquid is sprayed onto the oor
in front of the machine. The ow ceases when the handle is released.
Pull Cable Connect/Disconnect Control
Insert the free end of pull cable into the valve body tted in the cap base switch. Press and twist
clockwise to secure the cable end. Similarly, press and twist counter-clockwise to disconnect the
cable end.
Motor Overload Cut-Out
In the event of the motor getting overloaded due to improper power supply or
unexpected obstruction to the brush or drum rotation, the overload protector trips
and protects the motor from damage. If this happens, identify the cause, correct it
and reset the protector button after a minimum of 30 seconds from the tripping. After
this, you may continue working.
Important: Should the machine fail to operate, contact your dealer.
Operating the Machine
Before the Washing Operation Starts
Warning: Pre-sweep the oor to remove debris before using the
machine.
1. Ensure that the brushes are tted properly.
2. Fill the solution tank with cleaning liquid.
3. Insert the plug into the electrical outlet.

13
Recommended Washing Sequence
1. Start the machine by pressing the foot pedal and pulling the handle back.
2. Move forward while occasionally pulling the solution discharge control
handle. The handle should not be kept pulled constantly. The duration and
frequency of pulling and releasing must be adjusted to the type of oor and
amount of soil. For stone oors, apply very little solution. The spray pattern
can be adjusted by the user. Adjust the spray to prevent solution being dis-
pensed onto areas that have already been cleaned.
3. Release the solution discharge handle approximately 12 inches before the
wall or other obstacle. Continue to move the unit forward up to the wall without
pulling the solution release handle.
4. Pull the machine backwards in the same path, but without pulling the solu-
tion release handle. When you reach the starting point, change the path and
repeat steps 2-4. When you are changing paths, allow some overlap onto the
previously cleaned area. In the case of large halls make a U-turn and move
forward. If quicker drying is required, go over the same area without discharg-
ing any solution.
Warning: Avoid touching the sharp edges of the recovery tank.
Note. The spray pattern is adjusted by using the serrations in the spray noz-
zle and holder. Each serration allows a 4-degree change in the spray pattern.
5. Clean the blades.

14
Cleaning the Machine
Warning: Switch off the machine and unplug the electric supply before
performing any cleaning operations.
1. Move the Transport/Working Mode control to the BOTTOM (Transport)
position to move the brushes off of the oor.
2. Unplug the machine and wrap the supply cord around the hooks on the
handle.
3. Remove the recovery tank, wash thoroughly and ret.
4. To prevent possible clogging of the solution lines in the solution tank,
empty any unused solution from the tank.
5. Remove the brushes by pushing out the brush shafts. Wash the
brushes thoroughly in clean water.
6. Lay the machine on its side and wipe clean the rubberized drum and
machine body with a damp cloth.
7. Reinstall the brushes after washing. It is easier to push the brush shaft
from the right hand side (identied by the electrical cable).
8. Store the machine in a dry indoor area only.
Maintenance
Warning: Before undertaking any maintenance operations or adjustments, switch off the machine
and unplug from the electrical supply.
To get the maximum life of the machine, do the following:
• Supply Cord
Regularly inspect sheath, plug and cord anchorage for damage or loose connection. Replaced if
damaged.
• Brushes
Wash the brushes regularly. Make sure that the machine is in Transport Mode when not in use.
Store additional brushes in a vertical position to avoid bending the bristles. Check for permanent
bending of bristles in a particular direction. This may occur if the machine is operated for several
days without removing the brushes, which is not recommended. If this occurs, reverse the brush
so that the bent bristles are straightened.
• Wiper Blade
If the wiper blade wears out, the water collection performance will decrease. It should be replaced
by an authorized service agent.
• Solution Feed Filter (Pump)
The lter should be periodically cleaned. Use pressurized air/water for cleaning.
• Nozzle Maintenance (Pump)
If the spray nozzle is blocked, slide the nozzle cover off and remove the nozzle. Clean it with
clean water and use a pin to unclog, then reinstall.

15
Accessories
Transport Trolley
The easily tted trolley provides for ease in movement when transporting the machine.
Using the Trolley
1. Empty all liquid from the machine.
2. With the machine handle in the upright position place the trolley in the middle
alongside the machine.
3. Hold the machine rmly, strap the Velcro with the machine to x the trolley.
4. Make sure that the Velcro strap is securely wrapped around the bottom
handle.
5. The trolley is ready for use. The machine can be maneuvered easily while
holding the top handle.
Side Brush
The side brush can be used to clean corners near the walls. Switch off and unplug the machine
before tting the side brush.
Warning: Do not use side brush in a room with no mop boards, otherwise, the wall may get dirty.
Fitting the Side Brush
1. Remove the front brush and brush shaft.
2. Fix the shield assembly on the side plate
3. Insert the side brush through the shield and main brush.
Using the Side Brush
1. Tilt the machine at an angle that will allow the rear brush to collect the dirty
water.
2. Use side brush only for washing the edges.

16
Technical Specication
Cleaning Width 13.5 Inches
Body Height 8.5 Inches
Handle Height 44 Inches
Width 17.5 Inches
Length 15 Inches
Weight 55 lbs...
Motor Power 1 HP
Brush Speed @ 110V
60Hz
820 RPM
Solution Tank
Capacity
1 Gallon
Noise Lever 69dB
Accessories
Item Part Number
Standard Brush (1
Pair)
33855
Soft Brush (1 Pair) 33856
Hard Brush (1 Pair) 33857
Side Brush 33858
Escalator Brush 33859
Trolley 05-3395-0000
Brush Selection Guide
Type of Floor First Time Cleaning Maintenance Cleaning
Granite, Ceramic, Vinyl Standard Standard/Soft
Mosaic Hard/Standard Standard/Soft
Marble Standard Soft
Smooth Concrete Hard Standard
Wood, Rubber Standard/Soft Standard/Soft
Carpet Soft Soft
Others To suit individual oor conditions

17
Warranty
Registration
Form
Please provide additional information on
Tornado equipment: (Check choices below)
__ Automatic Scrubbers __Sweepers
__Propane Floor Machines __Rotary Floor Machine
__High Speed Burnishers __Carpet Vacuums
__Carpet Extractors & Spotters __Wet/Dry Vacs
__ Steam Cleaners __Jumbo Vacs
__Ride-On Equipment __Pressure Washers
Selling Dealer:(Required)__________________________
Return to:
Tornado Industries
333 Charles Ct. Unit 109
West Chicago, IL 60185
Fax: (630)818-1301
__________________________________________________________________________
Company/Institution
_____________________________________ _______________________________
Contact Name Title
_____________________________________ _______________________________
Address City/State/Zip Code
_____________________________________ _______________________________
Phone Fax
_____________________________________ _______________________________
Date of Purchase E-mail
Please Print Clearly
See white metal plate or sticker on unit for this information.
MACHINE TYPE/MODEL NUMBER: MACHINE SERIAL NUMBER:
1. 1.
2. 2.
3. 3.
4. 4.
Facility Description (please circle all that apply)
1. School 9. Hospital 17. U.S. Govt.
2. Retail Store 10. Nursing Home 18. Other Govt.
3. Restaurant 11. Religious Institution 19. Auto Service
4. Ofce Building 12. Airport 20. Airport
5. Contract Cleaning 13. Warehouse 21. Non-Prot
6. Light Manufacturing 14. Apartment/Condo 22. Other (specify)
7. Heavy Manufacturing 15. Convenience Mart
8. College/University 16. Supermarket
How did you rst learn about
Tornado cleaning and
maintenance equipment?
In square feet (meters)
Total Hard Floor Area
Square feet (square meters)
Total Carpeted Area
Square feet (square meters)
o Contacted by local dealer
o Previous experience with
Tornado products
o Reputation/Recommendation
o Advertising
o Direct mail
o Internet
o Other
o 0-10,000 (0-930)
o 10-50,000 (930-4,650)
o 50-250,000 (4,650-23,250)
o Over 250,000 (over
23,260)
o 0-10,000 (0-930)
o 10-50,000 (930-4,650)
o 50-250,000 (4,650-23,250)
o Over 250,000 (over
23,260)
Damage or defect arising from abuse, neglect or other misuse is excluded from this warranty. Other
items may or may not apply based on your specic machine. If any defect occurs, the warranty is voided
if service is attempted by non-Authorized Tornado Service Centers.
©2013 Tornado Industries. All rights reserved.
X8449-TOR 1/2013

2
Table des matières
Garantie 3
Instructions de sécurité importantes 5
Connexion électrique 6
Pièces de l’appareil 9
Modalité de fonctionnement 10
Préparation à l’utilisation 10
Déballage 10
Assemblage 11
Commandes 11
Utilisation de l’appareil 12
Nettoyage de l’appareil 14
Entretien 14
Accessoires 10
Chariot de transport 15
Brosse latérale 15
Caractéristiques techniques 16
Accessoires 16
Guide de sélection des brosses 16
Enregistrement de la garantie 17
2

10 ans*
Réservoirs d’eau en plastique et corps rotomoulés
2 ans*
Pièces présentes dans tous les équipements de nettoyage Tornado
1 an*
Main-d’œuvre sur tous les équipements de nettoyage Tornado
1 an*
Batteries sous garantie, calculées au prorata pour un an
Toutes les garanties sur les batteries sont prises en charge directement par le fabricant des batteries,
sur la base d’une année pro rata temporis
3
*En vigueur le 1er janvier 2013. Conditions sujettes à modication sans préavis
1. À l’exception de toutes les souferies Windshears™, TV 2, côté et rabattant, les souferies isolantes, CV 30, CV 38,
CW 50, CW 100, CK 14/1, CK 14/1-QD, CK 14/1 PRO, SWM 31/9, CK LW13/1, CV 38/48 Dual, PV6,
PV10 et tous les chargeurs sont garantis pendant un (1) an aussi bien pour les pièces que pour la main-d’œuvre.
2. Toutes les pièces résistantes à l’usure achetées après l’expiration de la garantie sont garanties pendant 90 jours.
3. La garantie prend effet à la première des deux dates suivantes : date de la vente au consommateur ou, à la discrétion
de Tornado, 6 mois après la date d’achat de l’unité par le vendeur à Tornado.
4. L’EB 30 est garanti pendant 90 jours, tant pour les pièces que pour la main-d’œuvre.
5. La garantie des moteurs utilisés sur les équipements fonctionnant au gaz propane est limitée à la garantie du
fabricant du moteur.
6. Les laveuses auto-portées sont garanties pendant celle des durées suivantes qui expire la première : soit 24 mois
pour les pièces, 6 mois pour la main-d’œuvre, soit 1 000 heures.
Garantie limitée de protection de l’acheteur à long terme
Tornado Industries, LLC. (Tornado) garantit au client/à l’utilisateur nal que les produits Tornado sont exempts de tout vice
de matériaux et de main-d’œuvre pour la ou les durée(s) énoncée(s) ci-dessous. La présente garantie limitée NE COUVRE
PAS les machines et/ou pièces sujettes à l’usure ou à la détérioration normale du temps, les dommages survenant pendant
l’expédition, les défaillances ou les pannes résultant de modications, d’accidents, d’une utilisation dans un environnement
inadapté, d’une mauvaise utilisation, d’abus, de négligence ou d’un entretien inadéquat de votre part. Pour de plus amples
informations, contactez votre distributeur autorisé, le Centre de réparation ou le Centre d'assistance technique de Tornado.
Les représentants des ventes et des services de Tornado ne sont pas autorisés à renoncer ou à modier les clauses de la
présente garantie, ni à augmenter les obligations de Tornado en vertu de la présente garantie.
Remarque : Tornado, The Latest Dirt, Floorkeeper,
Carpetkeeper, Carpetrinser, Carpetrinser/Dryer,
Headmaster, Taskforce, PAC-VAC, T-Lite, Glazer,
Windshear, Max-Vac et Trot-Mop sont des
marques de Tornado Industries
Site Internet : www.tornadovac.com
Téléphone 1-800-VACUUMS
Télécopie (630) 818-1301
Adresse 333 Charles Court Suite 109
West Chicago, IL 60185
1-800-VACUUMS 80 ans d’innovation dans le domaine du nettoyage Une société du groupe Tacony
Formulaire F2662.©2013. Tous droits réservés

4
REMARQUES
Table of contents
Languages:
Other Tornado Scrubber manuals

Tornado
Tornado TS120-S53-U Manual

Tornado
Tornado 98262 Manual

Tornado
Tornado 98103 Manual

Tornado
Tornado BD 27 Manual

Tornado
Tornado VORTEX 13 MULTIWASH User manual

Tornado
Tornado BR 18/1 MW Manual

Tornado
Tornado OB 28/20 Manual

Tornado
Tornado 99780 BD 33/30 Manual

Tornado
Tornado Floorkeeper 20 PD User manual

Tornado
Tornado C660 User manual

Tornado
Tornado TS120-S59-U User manual

Tornado
Tornado ECO 500 AW Series Manual

Tornado
Tornado ExSELLerate BD 14/4 Manual

Tornado
Tornado BR 13/1 BAT Manual

Tornado
Tornado TE310-G15-U User manual

Tornado
Tornado VORTEX 9 MULTIWASH User manual

Tornado
Tornado 99795 Manual

Tornado
Tornado 99775 Manual

Tornado
Tornado BD 26/27 Manual

Tornado
Tornado BDSO 20/21 Manual