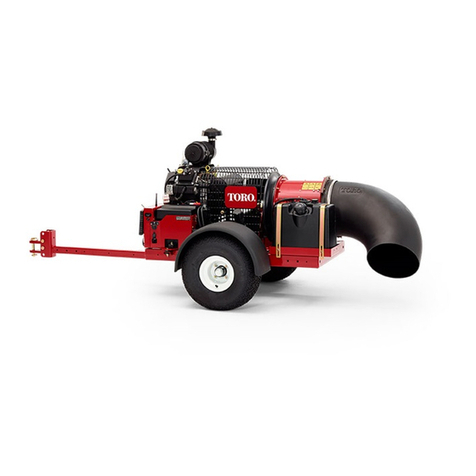
Toro Pro Force 44553 User manual

FormNo.3416-701RevA
ProForce®DebrisBlower
ModelNo.44553—SerialNo.316000001andUp
Registeratwww.Toro.com.
OriginalInstructions(EN)*3416-701*A

Important:Thisengineisnotequippedwith
asparkarrestermufer.Itisaviolationof
CaliforniaPublicResourceCodeSection4442to
useoroperatetheengineonanyforest-covered,
brush-covered,orgrass-coveredland.Other
statesorfederalareasmayhavesimilarlaws.
WARNING
CALIFORNIA
Proposition65Warning
Thisproductcontainsachemical
orchemicalsknowntotheStateof
Californiatocausecancer,birthdefects,
orreproductiveharm.
Theengineexhaustfromthisproduct
containschemicalsknowntotheStateof
Californiatocausecancer,birthdefects,
orotherreproductiveharm.
ElectromagneticCompatibility
Domestic:ThisdevicecomplieswithFCCrulesPart15.
Operationissubjecttothefollowingtwoconditions:(1)This
devicemaynotcauseharmfulinterferenceand(2)thisdevice
mustacceptanyinterferencethatmaybereceived,including
interferencethatmaycauseundesirableoperation.
Thisequipmentgeneratesandusesradiofrequencyenergy
andifnotinstalledandusedproperly,thatis,instrict
accordancewiththemanufacturer'sinstructions,maycause
interferencetoradioandtelevisionreception.Ithasbeentype
testedandfoundtocomplywiththelimitsforaFCCClass
Bcomputingdeviceinaccordancewiththespecications
inSubpartJofPart15ofFCCRules,whicharedesigned
toprovidereasonableprotectionagainstsuchinterference
inaresidentialinstallation.However,thereisnoguarantee
thatinterferencewillnotoccurinaparticularinstallation.If
thisequipmentdoescauseinterferencetoradioortelevision
reception,whichcanbedeterminedbyturningtheequipment
offandon,theuserisencouragedtotrytocorrectthe
interferencebyoneormoreofthefollowingmeasures:Reorient
thereceivingantenna,relocatetheremotecontrolreceiver
withrespecttotheradio/TVantennaorplugthecontrollerinto
adifferentoutletsothatthecontrollerandradio/TVareon
differentbranchcircuits.Ifnecessary,theusershouldconsult
thedealeroranexperiencedradio/televisiontechnicianfor
additionalsuggestions.Theusermayndthefollowingbooklet
preparedbytheFederalCommunicationsCommissionhelpful:
"HowtoIdentifyandResolveRadio-TVInterferenceProblems".
ThisbookletisavailablefromtheU.S.GovernmentPrinting
Ofce,Washington,DC20402.StockNo.004-000-00345-4.
FCCID:W7OMRF24J40MDME-BASE,
OA3MRF24J40MA-HANDHELD
IC:7693A-24J40MDME-BASE,7693A-24J40MA-HANDHELD
Operationissubjecttothefollowingtwoconditions:(1)this
devicemaynotcauseinterference,and(2)thisdevicemust
acceptanyinterference,includinginterferencethatmaycause
undesiredoperationofthedevice.
CAUTION
Ifausermakeschangesormodicationsnot
expresslyapprovedbythepartyresponsible
forcompliance,theycouldvoidtheuser's
authoritytooperatetheequipment.
©2017—TheToro®Company
8111LyndaleAvenueSouth
Bloomington,MN554202
Contactusatwww.Toro.com.
PrintedintheUSA
AllRightsReserved

Introduction
Thedebrisbloweristowedbehindaride-onmachine
whichisintendedtobeusedbyprofessional,hired
operatorsincommercialapplications.Itisprimarily
designedtousewindpowertoquicklyclearlarge
areasofunwanteddebrisonwell-maintainedlawnsin
parks,golfcourses,sportselds,andoncommercial
grounds.
Readthisinformationcarefullytolearnhowtooperate
andmaintainyourproductproperlyandtoavoid
injuryandproductdamage.Youareresponsiblefor
operatingtheproductproperlyandsafely.
YoumaycontactTorodirectlyatwww.Toro.comfor
productandaccessoryinformation,helpndinga
dealer,ortoregisteryourproduct.
Wheneveryouneedservice,genuineT oroparts,or
additionalinformation,contactanAuthorizedService
DealerorT oroCustomerServiceandhavethemodel
andserialnumbersofyourproductready.Figure1
identiesthelocationofthemodelandserialnumbers
ontheproduct.Writethenumbersinthespace
provided.
g029815
Figure1
1.Modelandserialnumberlocation
ModelNo.
SerialNo.
Thismanualidentiespotentialhazardsandhas
safetymessagesidentiedbythesafety-alertsymbol
(Figure2),whichsignalsahazardthatmaycause
seriousinjuryordeathifyoudonotfollowthe
recommendedprecautions.
g000502
Figure2
1.Safety-alertsymbol
Thismanualuses2wordstohighlightinformation.
Importantcallsattentiontospecialmechanical
informationandNoteemphasizesgeneralinformation
worthyofspecialattention.
TireInformation
TheDOTtireinformationislocatedonthesideof
eachtire.Thisinformationgivesloadandspeed
ratings.Replacementtiresshouldhavethesameor
betterratings.
Contents
Safety.......................................................................4
GeneralSafety...................................................4
FuelSafety.........................................................4
Operation............................................................5
RemoteControlOperation..................................5
Towing................................................................6
MaintenanceandStorage...................................6
SafetyandInstructionalDecals..........................7
Setup........................................................................8
1ConnectingtheBattery....................................8
2MountingtheHitchtotheMachine...................9
3ConnectingtheMachinetotheTowing
Vehicle............................................................9
4AssemblingtheHandheldRemote.................10
ProductOverview....................................................11
Controls............................................................11
Specications..................................................12
RadioSpecications.........................................12
Operation................................................................13
AttachingtheTrailer..........................................13
AddingFuel......................................................13
CheckingtheEngine-OilLevel..........................14
CheckingtheTirePressure...............................14
CheckingtheTorqueoftheWheelLug
Nuts..............................................................15
StartingandShuttingOfftheEngine.................15
Start,Stop,andInactivityTimeOut...................16
PowerSaveMode(Inactive).............................17
AdjustingtheNozzleDirection..........................17
HaulingtheMachine.........................................17
TowingtheMachine..........................................17
ConnectingtheMachinetotheTowing
Vehicle..........................................................17
OperatingTips..................................................18
Maintenance...........................................................19
RecommendedMaintenanceSchedule(s)...........19
3

DailyMaintenanceChecklist.............................20
ServicingtheAirCleaner..................................21
ServicingtheCarbonCanister..........................22
ServicingtheEngineOil....................................22
AssociatingtheRemoteControltothe
Machine.......................................................24
ServicingtheSparkPlugs.................................24
ReplacingtheFuelFilter...................................25
ServicingtheFuelT ank.....................................26
CleaningtheEngineScreenandtheOil
Cooler...........................................................26
CheckingtheNozzle.........................................27
AdjustingtheBelt..............................................27
InspectingtheTires..........................................27
ElectricalMaintenance.....................................28
Storage.............................................................30
WasteDisposal.................................................30
Troubleshooting......................................................31
CheckingFaultCodes......................................31
EnteringDiagnosticModeandCheckingthe
Codes...........................................................31
CheckingFaultCodes......................................32
ResettingtheFaultCodes................................32
ExitingDiagnosticMode...................................32
Safety
Hazardcontrolandaccidentpreventionare
dependentupontheawareness,concern,and
propertrainingofthepersonnelinvolvedinthe
operation,transport,maintenance,andstorageof
themachine.Improperuseormaintenanceofthe
machinecanresultininjuryordeath.Toreduce
thepotentialforinjuryordeath,complywiththe
followingsafetyinstructions.
GeneralSafety
Thisproductiscapableofamputatinghandsand
feetandofthrowingobjects.Alwaysfollowallsafety
instructionstoavoidseriouspersonalinjury.
Usingthisproductforpurposesotherthanitsintended
usecouldprovedangeroustoyouandbystanders.
•Readandunderstandthecontentsofthis
Operator’sManualbeforestartingtheengine.
•Donotputyourhandsorfeetnearmoving
componentsofthemachine.
•Donotoperatethemachinewithoutallguards
andothersafetyprotectivedevicesinplaceand
workingonthemachine.
•Keepclearofanydischargeopening.Keep
bystandersandpetsasafedistanceawayfrom
themachine.
•Keepchildrenoutoftheoperatingarea.Never
allowchildrentooperatethemachine.
•Stopthemachineandshutofftheenginebefore
servicing,fueling,oruncloggingthemachine.
Improperlyusingormaintainingthismachinecan
resultininjury.Toreducethepotentialforinjury,
complywiththesesafetyinstructionsandalwayspay
attentiontothesafety-alertsymbol,whichmeans
Caution,Warning,orDanger—personalsafety
instruction.Failuretocomplywiththeseinstructions
mayresultinpersonalinjuryordeath.
Youcanndadditionalsafetyinformationwhere
neededthroughoutthisOperator’sManual.
FuelSafety
•Toavoidpersonalinjuryorpropertydamage,use
extremecareinhandlingfuel.Fuelvaporsare
ammableandexplosive.
•Extinguishallcigarettes,cigars,pipes,andother
sourcesofignition.
•Useonlyanapprovedfuelcontainer.
•Donotremovethefuelcaporaddfueltothefuel
tankwhiletheengineisrunningorwhilehot.
•Donotrefuelthemachineindoors.
4

•Donotstorethemachineorfuelcontainerwhere
thereisanopename,spark,orpilotlight,such
asonawaterheateroronotherappliances.
•Donotllcontainersinsideavehicleoronatruck
ortrailerbedwithaplasticliner.Alwaysplace
containersontheground,awayfromyourvehicle
beforelling.
•Removetheequipmentfromthetruckortrailer
andrefuelitwhileitisontheground.Ifthisisnot
possible,thenrefuelfromaportablecontainer
ratherthanafuel-dispensernozzle.
•Donotoperatethemachinewithouttheentire
exhaustsysteminplaceandinproperworking
condition.
•Keepthefuel-dispensernozzleincontactwith
therimofthefueltankorcontaineropeningat
alltimesuntilfuelingiscomplete.Donotusea
nozzlelock-opendevice.
•Ifyouspillfuelonyourclothing,changeyour
clothingimmediately.Wipeupanyfuelthatspills.
•Neveroverllthefueltank.Replacethefuelcap
andtightenitsecurely.
•Storefuelinanapprovedcontainerandkeepit
outofthereachofchildren.Neverbuymorethan
a30-daysupplyoffuel.
•Donotllthefueltankcompletelyfull.Addfuelto
thefueltankuntilthelevelis6to13mm(1/4to
1/2inch)belowthebottomofthellerneck.This
emptyspaceinthetankallowsfueltoexpand.
–Avoidprolongedbreathingofvapors.
–Keepyourfaceawayfromthenozzleandgas
tankopening.
–Avoidcontactwithskin;washoffspillswith
soapandwater.
Operation
•Beforeeveryuse:
–Inspectthecoupler,ball,andhitch.
–Alwaysusesafetychains.
–Verifythatallofthelightsarefunctioning
properly.
–Verifythatthetiresareproperlyinated.
–Verifythatthelugnutsaretightandtorqued
properly.
–Verifythatthemachineisproperlysecuredto
thetowingvehicle.
•Neveroperatethemachinewhenitisnot
connectedtoatowingvehicle.
•Useextremecarewhenloadingorunloadingthe
machineintooroffofatrailerortruck.
•Usecarewhenapproachingblindcorners,shrubs,
trees,orotherobjectsthatmayobscurevision.
•Donotruntheengineinordirecttheblowernozzle
intoaconnedareawithoutadequateventilation.
Engineexhaustcontainscarbonmonoxide,an
odorlessgasthatisfatalifinhaled.
•Themachinemayexceednoiselevelsof85dB(A)
attheoperator’sposition.Hearingprotectionis
recommendedforprolongedexposuretoreduce
thepotentialofpermanenthearingdamage.
•Usingthemachinedemandsattention.Toprevent
lossofcontrol:
–Operateonlyindaylightorwhenthereisgood
articiallight.
–Driveslowlyandwatchforholesorother
hiddenhazards.
–Donotdriveclosetoasandtrap,ditch,creek,
orotherhazard.
–Reduceyourspeedwhenmakingsharpturns
andwhenturningonhillsides.
–Avoidsuddenstartsandstops.
–Beforebackingup,looktotherearandensure
thatnooneisbehindthemachine.
–Watchoutfortrafcwhennearorcrossing
roads.Alwaysyieldtherightofway.
•Stayawayfromthenozzleopeningwhenthe
machineisoperating.Keepallbystandersaway
fromthenozzleopeninganddon’tdirectdischarge
towardbystanders.
•Donotoperatethemachinewhileill,tired,or
undertheinuenceofalcoholordrugs.
•Lightningcancausesevereinjuryordeath.If
lightningisseenorthunderisheardinthearea,do
notoperatethemachine;seekshelter.
•Ifthetowing-vehicleenginestallsorthemachine
losesheadwayandcannotmakeittothetopof
aslope,donotturnthetowingvehiclearound.
Alwaysbackthetowingvehicleslowlystraight
downtheslope.
•Donottakeaninjuryrisk!Whenapersonor
petappearsunexpectedlyinorneartheoperating
area,stopoperation.Carelessoperation,
combinedwithterrainangles,ricochets,or
improperlypositionedguardscanleadtothrown
objectinjuries.Donotresumeoperationuntilthe
areaiscleared.
•Donottouchtheengineormuferwhiletheengine
isrunningorsoonafteritisstopped.Theseareas
couldbehotenoughtocauseaburn.
RemoteControlOperation
•Readandfollowallinstructions.
•Failuretoabidebythesafetyprecautionsmay
resultinequipmentfailure,lossofauthorityto
operatetheequipment,andpersonalinjury.
5

•Useandmaintaintheproperwiring.Followthe
equipmentmanufacturerinstructions.Improper,
loose,andfrayedwiringcancausesystemfailure,
equipmentdamage,andintermittentoperation.
•Changesormodicationsmadetothemachine
thatarenotexpresslyapprovedbythe
manufacturerwillvoidthewarranty
•Themachineownerandoperatorsmustabide
byallapplicablefederal,state,andlocallaws
concerningmachineinstallationandoperation.
Failuretocomplycouldresultinpenaltiesand
couldvoidtheuser’sauthoritytooperatethe
machine.
•Ensurethatthemachineryandsurroundingareais
clearbeforeoperating.Donotactivatetheremote
controlsystemuntilyouarecertainthatitissafe
todoso.
•YoucanremovethepowerfromtheRF2CAN
andTEC2403controllersbyremovingthesource
powerfromthecircuit.
•Useadampclothtokeeptheremoteclean.
Removemud,concrete,anddirtafteroperationto
preventobstructingorcloggingthebuttons,levers,
wiring,andswitches.
•Donotallowliquidtoentertheremotecontrolor
base-unitenclosures.Donotusehighpressure
equipmenttocleantheremotecontrolorbaseunit.
•DisconnecttheRF2CANandTEC2403controllers
beforeweldingonthemachine.Failureto
disconnectthecontrollersmayresultindestruction
ofordamagetothecontrollers.
•Operateandstorethemachineonlywithinthe
speciedoperationandstoragetemperatures.
Towing
•Beforetowingthemachine,checkwithyour
localcountyorstatesafetytowingregulations,in
additiontomeetingDepartmentofTransportation
(DOT)SafetyT owingRegulations.
•Alwaysshutofftheenginebeforetransporting.
•Alwaysinspectthehitchandcouplingforwear.
Nevertowthemachinewithdefectivehitches,
couplings,orchains.
•Checkthetireairpressureonthemachine.The
tiresshouldbeinatedto241kpa(35psi)cold.
Also,checkthetire-treadwearonthemachine.
•Alwaysproperlyattachthemachinesafetychains
tothetowingvehicle.
•Donottowthemachinefasterthan88km/h(55
mph).Recommendedoff-roadtowingisnotto
exceed24km/h(15mph).
•Avoidsuddenstopsandstarts.Thiscancause
skiddingorjackkning.Smooth,gradualstarts
andstopswillimprovetowing.
•Avoidsharpturnstopreventrolling.
•Ensurethattheblowerchuteispointingupwhen
towing.
•Placechockblocksunderneaththewheelsto
preventrollingwhileparked.
MaintenanceandStorage
•Lettheenginecoolbeforestoringthemachine.
Donotstorethemachinenearames.
•Shutoffthefuelwhilestoringortransporting.Do
notstorefuelnearamesordrainindoors.
•Parkthemachineonalevelsurface.Neverallow
untrainedpersonneltoservicethemachine.
•Usejackstandstosupportthemachinewhen
required.
•Disconnectthebatteryorremovethespark-plug
wiresbeforemakinganyrepairs.Disconnectthe
negativeterminalrstandthepositiveterminal
last.Connectthepositiveterminalrstandthe
negativeterminallast.
•Removethekeyfromtheignitionswitchtoprevent
accidentalstartingoftheenginewhenservicing,
adjusting,orstoringthemachine.
•Performonlythosemaintenanceinstructions
describedinthismanual.Ifmajorrepairsare
everneededorassistanceisdesired,contactan
authorizedT orodistributor.
•Toreduceapotentialrehazard,keeptheengine
freeofexcessivegrease,grass,leaves,and
accumulationsofdirt.Neverwashawarmengine
oranyelectricalpartswithwater.
•Ensurethatthemachineisinsafeoperating
conditionbykeepingnuts,bolts,andscrewstight.
Checkthefan-shaftbearingmountingboltsand
nutsfrequentlytoensurethattheyaretightenedto
theirspecications.
•Iftheenginemustberunningtoperforma
maintenanceadjustment,keepyourhands,feet,
clothing,andotherpartsofthebodyawayfrom
thefanandothermovingparts.
•Donotoverspeedtheenginebychanging
thegovernorsettings.T oensureofsafetyand
accuracy,haveanauthorizedT orodistributor
checkthemaximumenginespeedwitha
tachometer.
•Shutofftheenginebeforecheckingtheoilor
addingoiltothecrankcase.
•Keepyourhandsandfeetawayfrommoving
parts.Ifpossible,donotmakeadjustmentswith
theenginerunning.
•Chargebatteriesinanopen,well-ventilatedarea,
awayfromsparkandames.Unplugthecharger
beforeconnectingordisconnectingfromthe
6

battery.Wearprotectiveclothinganduseinsulated
tools.
•Keepallpartsingoodworkingconditionandall
hardwaretightened.Replaceallwornordamaged
decals.
•Toensureoptimumperformanceandcontinued
safetycerticationofthemachine,useonly
genuineTororeplacementpartsandaccessories.
Replacementpartsandaccessoriesmadeby
othermanufacturerscouldbedangerous,and
suchusecouldvoidtheproductwarranty.
SafetyandInstructionalDecals
Safetydecalsandinstructionsareeasilyvisibletotheoperatorandarelocatednearanyarea
ofpotentialdanger.Replaceanydecalthatisdamagedormissing.
decal115-5105
115-5105
1.Warning—readtheOperator'sManual.
2.Warning—donotoperatethismachineunlessyouaretrained.
3.Warning—stoptheengine;removetheignitionkeyandreadtheinstructionsbeforeservicingorperformingmaintenance.
4.Thrownobjecthazard—keepbystandersasafedistancefromthemachine.
5.Warning—stayawayfrommovingparts;keepallguardsinplace.
6.Warning—donotstarttheenginewhenmachineisdisconnectedfromthetowvehicle,hitchthemachinetothetowvehicle
beforestartingtheengine.
decal115-5106
115-5106
1.Warning—readtheOperator'sManual.
2.Thrownobjecthazard—keepbystandersasafedistance
fromthemachine.
3.Cutting/dismembermenthazard;hand—stayawayfrom
movingparts;keepallguardsandshieldsinplace.
decal115-5113
115-5113
1.Warning—readtheOperator'sManual,wearhearingand
eyeprotection.
decal119-6165
119–6165
1.Engine—Stop3.Engine—Start
2.Engine—Run
decal131-6766
131-6766
1.7.5A3.Electricalaccessory—15A
2.7.5A4.TEC-2403—2A
7

Setup
LooseParts
Usethechartbelowtoverifythatallpartshavebeenshipped.
ProcedureDescriptionQty.Use
1Petroleumjelly(notsupplied—useas
required)–Connectthebattery.
Machineassembly1
Hitch1
Bolt(3/8x3inches)2
2Flangenut(3/8inch)2
Mountthehitchtothemachine.
3Nopartsrequired–Connectthemachinetothetowing
vehicle.
Handheldremote1
AAAbatteries4
4Screws,small6
Assemblethehandheldremote.
MediaandAdditionalParts
DescriptionQty.Use
Operator'sManual1Readbeforeoperating.
EngineManual1Usetoreferencetheengineoperationandmaintenance.
OperatorTrainingMaterial1Viewbeforeoperatingthemachine.
Remotecontrol1Usetoremotelyoperatetheblower.
Note:Determinetheleftandrightsidesofthe
machinefromthenormaloperatingposition.
1
ConnectingtheBattery
Partsneededforthisprocedure:
–Petroleumjelly(notsupplied—useasrequired)
Procedure
1.Removetheclipssecuringthebatterycoverto
thebatterybox(Figure3).
g029816
Figure3
1.Batterycover2.Batteryclip
8

DANGER
Batteryelectrolytecontainssulfuricacid
whichisfatalifconsumedandcauses
severeburns.
•Donotdrinkelectrolyteandavoid
contactwithskin,eyesorclothing.
Wearsafetyglassestoshieldyour
eyesandrubberglovestoprotect
yourhands.
•Fillthebatterywherecleanwateris
alwaysavailableforushingtheskin.
2.Attachthepositivecable(redcable)tothe
positive(+)terminal.
WARNING
CALIFORNIA
Proposition65Warning
Batteryposts,terminals,andrelated
accessoriescontainleadandlead
compounds,chemicalsknownto
theStateofCaliforniatocause
cancerandreproductiveharm.Wash
handsafterhandling.
3.Attachthenegativecable(blackcable)tothe
negative(-)terminalofthebattery.
4.Coattheterminalsandmountingfastenerswith
petroleumjellytopreventcorrosion.
5.Installthebatterycoverandsecurewiththe
clips.
2
MountingtheHitchtothe
Machine
Partsneededforthisprocedure:
1Machineassembly
1Hitch
2Bolt(3/8x3inches)
2Flangenut(3/8inch)
Procedure
1.Positionthemachineonaat,levelsurface.
2.Insertthehitchtubeintotheframebrackets
(Figure4).Securethetubetotheframewith2
bolts(3/8x3inches)andangenuts(3/8inch).
g020731
Figure4
1.Framebrackets2.Hitchtube
3.Routethewireharnessalongtherightsideof
thehitchtube(Figure5).
g020732
Figure5
1.Wireharness2.Harnessclips
4.Plugtheharnessclipsintotheholesintheside
ofthehitchtubetosecureit(Figure5).
5.Storetheharnessconnectorinthehitchtube
holster(Figure6).
9

3
ConnectingtheMachineto
theTowingVehicle
NoPartsRequired
Procedure
Thistrailerusesacouplerthatrequiresa2-inchball
forthehitch.
1.Raisethetrailertoasuitableheightforyour
hitch.
2.Liftthecouplerleveronthetonguewhile
loweringthecoverovertheballhitch(Figure6).
g012872
Figure6
1.Tongue4.Safetychains
2.Ballsocket5.Lockingpin
3.Couplerlever—locked
position
6.Hitchtubeholster
3.Closethecouplerlevermakingsureitissecurely
locked.
4.Installthelockingpintolockthecouplerlever
(Figure6).
5.Crossthesafetychainsandattachthemtothe
holesonthehitch(Figure6).
6.Plugthemachinewire-harnessconnectorto
thetowingvehicleconnector.Checktomake
surethebrakelightsilluminateproperlywiththe
brakepedalappliedandthetaillightsashwhen
theturningsignalsareuse.
4
AssemblingtheHandheld
Remote
Partsneededforthisprocedure:
1Handheldremote
4AAAbatteries
6Screws,small
Procedure
1.Removetherubberbandssecuringtheremote
halvestogether,andremovethebackcover.
2.Plugeachbatteryintoaterminalcradle,
observingproperpolarity(Figure7).
Note:Ifthebatteriesareimproperlyinstalled,
theunitwillnotbedamaged,butitwillfailto
operate.Thecradleisembossedwithpolarity
markingsforeachterminal.
g029817
Figure7
1.Screw4.Steelgasket
2.Cover5.Batteries
3.Seal6.Handheldremote
3.Ensurethatthesteelgasketandrubbersealare
seatedinthechannelintheremoteandsetthe
backcoverinplace(Figure7).
4.Securethecoverwith6screws(Figure7)and
torquethemto1.5to1.7N∙m(13to15in-lb).
10

ProductOverview
Controls
EngineStop
PresstheENGINESTOPbuttontoshutofftheengine
(Figure8).
g029818
Figure8
1.LEDlight5.Rotateright
2.Rotateleft6.Increaseenginespeed
3.Decreaseenginespeed7.Enginestop
4.Enginestart
EngineStart
Aftercompletingthestartingsequence,pressthe
ENGINESTARTbuttontostarttheengine(Figure8).
RefertoStartingtheEngine(page15)forthestarting
sequence.
NozzleDirection
Presstherightorleftbuttontorotatethenozzletothe
desireddirection(Figure8).
EngineSpeed
PresstheINCREASEENGINESPEED(rabbit)or
DECREASEENGINESPEED(turtle)buttontoincreaseor
decreasethespeedoftheengine(Figure8).Pressing
theINCREASEENGINESPEEDandDECREASEENGINE
SPEEDbuttonsatthesametimereturnstheengine
toidle.
IgnitionSwitch
Theignitionswitch(Figure9),whichisusedtostart
andshutofftheengine,hasthreepositions:OFF,
RUNandSTART.RotatethekeyclockwisetoSTART
toengagethestartermotor.Releasethekeywhen
theenginestarts.Thekeymovesautomaticallytothe
RUNposition.Toshutofftheengine,rotatethekey
counterclockwisetotheOFFposition.
ChokeControl
Tostartacoldengine,movethechokecontrollever
(Figure9)totheONposition.
g029819
Figure9
1.Chokecontrol3.Ignitionswitch
2.Hourmeter
HourMeter
Thehourmeter(Figure9)indicatesthetotalhoursof
machineoperation.
11

DiagnosticLight
Thediagnosticlight(Figure10)islocatedbelowthe
hourmeterandindicatesmachinefaultcodes.After
youturnthekeytotheRUNposition,thediagnostic
lightwillilluminatefor5seconds,turnofffor5
seconds,andthenbeginashing3timesasecond
untilyoupushabuttononthehandheldremote.Ifthe
lightturnsonfor5secondsandthenstartsblinking10
timesasecond(withorwithouta5secondpause)
thereisafaultwiththemachine;refertoChecking
FaultCodes(page31).
Note:Ifyouhaveabuttonpressedonthehandheld
remotewhenyoustartthemachine,thelightwillnot
ash3timesasecondafteritturnsofffor5seconds.
g029824
Figure10
1.Diagnosticlight
Specications
RadioSpecications
Frequency2.4GHz
Maxoutputpower19.59dBm
12

Operation
Note:Determinetheleftandrightsidesofthe
machinefromthenormaloperatingposition.
AttachingtheTrailer
Thistrailerusesacouplerthatrequiresa2-inchball
forthehitch.
1.Raisethetrailertoasuitableheightforyour
hitch.
2.Liftthecouplerleveronthetonguewhile
loweringthecoverovertheballhitch(Figure11).
g012872
Figure11
1.Tongue4.Auxiliarychains
2.Ballsocket5.Lockingpin
3.Couplerlever—locked
position
6.Hitchtubeholster
3.Closethecouplerleverandensurethatitis
securelylocked.
4.Installthelockingpintolockthecouplerlever.
5.Crossthesafetychainsandattachthem
totheholesonthehitch.Connectthe
machine-wire-harnessconnectortothe
connectoronthetowingvehicle.
AddingFuel
•Fueltankcapacity:18.9L(5USgallons)
•RecommendedFuel:
–Forbestresults,useonlyclean,fresh(less
than30daysold),unleadedgasolinewithan
octaneratingof87orhigher((R+M)/2rating
method).
–Ethanol:Gasolinewithupto10%ethanol
(gasohol)or15%MTBE(methyltertiarybutyl
ether)byvolumeisacceptable.Ethanoland
MTBEarenotthesame.Gasolinewith15%
ethanol(E15)byvolumeisnotapprovedfor
use.Neverusegasolinethatcontainsmore
than10%ethanolbyvolume,suchasE15
(contains15%ethanol),E20(contains20%
ethanol),orE85(containsupto85%ethanol).
Usingunapprovedgasolinemaycause
performanceproblemsand/orenginedamage
whichmaynotbecoveredunderwarranty.
–Donotusefuelcontainingmethanol.
–Donotstorefueleitherinthefueltankor
fuelcontainersoverthewinterunlessafuel
stabilizerisused.
–Donotaddoiltofuel.
Important:Donotusefueladditivesotherthan
afuelstabilizer/conditioner.Donotusefuel
stabilizerswithanalcoholbase,suchasethanol,
methanol,orisopropanol.
DANGER
Incertainconditions,fuelisextremely
ammableandhighlyexplosive.Areor
explosionfromfuelcanburnyouandothers
andcandamageproperty.
•Fillthefueltankoutdoors,inanopenarea,
whentheengineiscold.Wipeupanyfuel
thatspills.
•Neverllthefueltankinsideanenclosed
trailer.
•Donotllthefueltankcompletelyfull.
Addfueltothefueltankuntilthelevelis6
to13mm(1/4to1/2inch)belowthebottom
ofthellerneck.Thisemptyspaceinthe
tankallowsgasolinetoexpand.
•Neversmokewhenhandlingfuel,andstay
awayfromanopenameorwherefuel
fumesmaybeignitedbyaspark.
•Storefuelinanapprovedcontainerand
keepitoutofthereachofchildren.Never
buymorethana30-daysupplyoffuel.
•Donotoperatewithoutentireexhaust
systeminplaceandinproperworking
condition.
13

DANGER
Incertainconditionsduringfueling,static
electricitycanbereleasedcausingaspark
whichcanignitethefuelvapors.Areor
explosionfromgasolinecanburnyouand
othersandcandamageproperty.
•Alwaysplacefuelcontainersontheground
awayfromyourvehiclebeforelling.
•Donotllfuelcontainersinsideavehicle
oronatruckortrailerbedbecauseinterior
carpetsorplastictruckbedlinersmay
insulatethecontainerandslowthelossof
anystaticcharge.
•Whenpractical,removegas-powered
equipmentfromthetruckortrailerand
refueltheequipmentwithitswheelsonthe
ground.
•Ifthisisnotpossible,thenrefuelsuch
equipmentonatruckortrailerfroma
portablecontainer,ratherthanfroma
gasolinedispensernozzle.
•Ifafueldispensernozzlemustbeused,
keepthenozzleincontactwiththerimof
thefueltankorcontaineropeningatall
timesuntilfuelingiscomplete.
WARNING
Fuelisharmfulorfatalifswallowed.
Long-termexposuretovaporscancause
seriousinjuryandillness.
•Avoidprolongedbreathingofvapors.
•Keepyourfaceawayfromthenozzleand
fueltankorconditioneropening.
•Keepfuelawayfromyoureyesandskin.
FillingtheFuelTank
1.Shutofftheengine.
2.Cleantheareaaroundthefueltankcapand
removethecap(Figure12).
Note:Thefueltankcapcontainsagaugewhich
showsthefuellevel.
g020714
Figure12
1.Fueltank
3.Addfueltothefueltank,untilthelevelis6mm
to13mm(1/4to1/2inch)belowthebottomof
thellerneck.
Note:Thisspaceinthetankallowsfuelto
expand.Donotllthefueltankscompletelyfull.
4.Installthefuel-tankcapsecurely.
5.Wipeupanyfuelthatmayhavespilled.
CheckingtheEngine-Oil
Level
Beforeyoustarttheengineandusethemachine,
checktheoillevelintheenginecrankcase;referto
CheckingtheEngine-OilLevel(page23).
CheckingtheTirePressure
Checkthetirepressure(Figure13).
Thecorrecttirepressureis241kPa(35psi).
g001055
Figure13
14

CheckingtheTorqueofthe
WheelLugNuts
ServiceInterval:Aftertherst10hours
Checkthetorqueofthewheellugnutsinitiallyand
aftertherst10hoursofoperation.
WARNING
Failuretomaintainthepropertorquecould
resultinfailureorlossofthewheel,andcould
resultinpersonalinjury.
Torquethewheellugnutsto95to122N∙m
(70to90ft-lb).
StartingandShuttingOff
theEngine
StartingtheEngine
WARNING
Rotatingpartscancauseseriouspersonal
injury.
•Keephandsandfeetawayfromthe
machinewhenitisrunning.
•Keephands,feet,hair,andclothingaway
fromallmovingpartstopreventinjury.
•Neveroperatethemachinewithcovers,
shrouds,orguardsremoved.
Beforeyoustarttheengine,youmustattachthe
machinetothetowingvehicle.
1.MovethechokecontroltotheONpositionbefore
startingacoldengine.
Note:Awarmorhotenginemaynotrequire
choking.Aftertheenginestarts,movethechoke
controltotheOFFposition.
2.RotatetheengineignitionkeytotheSTART
position(Figure14).
Note:IfthekeywasleftintheRUNposition
foranextendedtime,movethekeytothe
OFFpositionbeforeproceedingtothestarting
procedure.
g029819
Figure14
1.Chokecontrol3.Ignitionswitch
2.Hourmeter
3.EngineStartwillonlybecomeenergizedby
pressingtheStartbuttonwhiletheEngineStart
EnableConditionisactive.TheEngineStart
EnableConditionbecomesactiveonlywhenthe
followingEngineStartEnableSequencehas
beenperformed(Figure15):
•PresstheSTARTbutton.
•Then,presstherotateleftbutton.
•Then,presstherotaterightbutton.
•Then,pressandholdtheSTARTbuttonuntil
theenginestarts.
g029818
Figure15
1.LEDlight5.Rotateright
2.Rotateleft6.Increaseenginespeed
3.Decreaseenginespeed7.Enginestop
4.Enginestart
Note:Thereisatimelimitof3seconds
betweeneachbuttonpress.Ifthenextbuttonin
thesequenceisnotpressedwithin3secondsof
thelastbuttonpress,thesequenceisaborted
andmustbestartedfromthebeginning.
15

Note:Ifanybuttonotherthanthenext
appropriatebuttoninthesequenceispressed
thesequenceisaborted.
Note:IftheSTARTbuttonisnotpressedwithin
10secondsafterpressingtheROTATERIGHT
button,oranyotherbuttonispressedinthis
period,theEngineStartEnableCondition
expires
Note:EngineStartEnableConditionpersists
for10secondsafterpressingtheROTATERIGHT
buttonallowingmomentaryactivationofEngine
StartbypressingtheSTARTbutton.Pressing
theSTARTbuttondoesnotextendthistime
period—themaximumlengthoftimethatthe
StartRelayControlcanbeactiveis10seconds
frompressingtheROTATERIGHTbutton.After
theEngineStartEnableConditionexpires,
theEngineStartEnableSequencemustbe
performedagaininordertoenergizetheStart
RelayControlwiththeSTARTbutton.This
cannotbeperformedfor10secondsafterthe
STARTbuttonisreleased.
Note:Ifthesequenceisabortedorthe
EngineStartEnableConditionexpires,normal
functionalityoftheROTATERIGHTandROTATE
LEFTbuttonsreturntocontroltheChuteMotor.
Important:Donotengagestarterformore
than10secondsatatime.Ifenginefails
tostartallow10secondcool-downperiod
betweenattempts.Failuretofollowthese
instructionscanburnoutstartermotor.
4.Aftertheenginestarts,movethechokecontrolto
theOFFposition.Iftheenginestallsorhesitates,
movethechokebacktotheONpositionfora
fewseconds,thensettheenginespeedtothe
desiredsetting.Repeatthisasrequired.
ShuttingOfftheEngine
1.Decreasetheenginespeedto3/4throttle.
2.PresstheSTOPbuttonontheremotecontrol.
3.Ifleavingthemachine,rotatethekeytotheOFF
positionandremoveitfromtheignitionswitch
(Figure14).
Start,Stop,andInactivity
TimeOut
Theremotecontrolactivates(powersup)whenany
pushbuttonispressed.Toconservebatterypower,
theremotecontrolstaysactiveforapproximately3
secondsbeforeautomaticallyshuttingdownunless
thereisbuttonactivitywithinthe3secondlimit.When
theunittimesoutandpowersdown,allremotecontrol
LEDactivitystops(Figure16).Pressinganybutton
willreactivatetheremotecontrol
g029818
Figure16
1.LEDlight5.Rotateright
2.Rotateleft6.Increaseenginespeed
3.Decreaseenginespeed7.Enginestop
4.Enginestart
16

PowerSaveMode(Inactive)
TheRF2CANandTEC2403controllerswillrevert
toPowerSaveModeifthebaseunitisinactivefor
morethan2.5hourswithoutcommunicationfrom
theremotecontrol.PowerSaveModeisalow
currentstateofthemachine.Themachinedoesnot
communicatewiththeremotecontrol,willnotactivate
outputs,andwillnotgenerallyfunctionasnormal.
•Wheninthetime-outmodetheenginewillnotrun
(orwillquitrunning)andtheremotecontrolwill
notcontrolanyfunction.
•Towakecontrollerintime-outmode,turnthekey
switchtotheOFFpositionandthenturnthekey
switchtotheRUNposition.
•Toavoidcontrollertime-outduringoperation,use
theremotecontroltorotatethechuteorchange
theenginespeedatleastevery2.5hours.
AdjustingtheNozzle
Direction
Thedirectionofthenozzleopeningcanbechanged
fromrighttoleftbypressingtheappropriatebuttonon
theremotecontrol(Figure17).
g029818
Figure17
1.LEDlight5.Rotateright
2.Rotateleft6.Increaseenginespeed
3.Decreaseenginespeed7.Enginestop
4.Enginestart
HaulingtheMachine
•Usecarewhenloadingorunloadingthemachine
intoatrailerortruck.
•Usefull-widthrampsforloadingmachineinto
trailerortruck.
•Tiethemachinedownsecurelyusingstraps,
chains,cable,orropes.Bothfrontandrearstraps
shouldbedirecteddownandoutwardfromthe
machine.
TowingtheMachine
•Ensurethatthehitchandcouplingofthetowing
vehicleareratedequalto,orgreaterthan,the
trailergrossvehicleweightrating(GVWR).
•Alwaysinspectthehitchandcouplingforwear.
Nevertowthemachinewithdefectivehitches,
couplings,orchains.
•Checkthetireairpressureandthetire-treadwear
onthemachine.
•Ensurethatthemachineisequippedwiththe
safetychains.
•Alwaysattachthemachinesafetychaintothe
frameofthetowingvehicle.
•Beforetowingthemachine,checkyourlocalstate
andcountyvehicle-towingrequirements.Inmost
cases,themaximumspeedforhighwaytowingis
88km/h(55mph).Recommendedoff-roadtowing
speedmustnotexceed24km/h(15mph)orless.
•Whilethemachineisparkedanddisconnected
fromthetowingvehicle,placechockedblocks
underneaththewheelstopreventrolling.
•Ensurethatthetirepressureiscorrect;inateor
deateasnecessary.Inspectthetiresforcutsand
excessivewear.
•Rotatethechuteopeningsothatitfacesupwards.
•Checkthewheel-mountinglugnutswithatorque
wrench.Torquethewheellugnutsto95to122
N∙m(70to90ft-lb).
•Avoidsuddenstopsandstarts.Thiscancause
skiddingorjackkning.Smooth,gradualstarts
andstopswillimprovethegasmileage.
•Avoidsharpturnstopreventrolling.
CAUTION
Nevertowthemachinewithadefectivetow
bar.Useofadefectivetowbarmaycause
themachinetoseparatefromthetowing
vehicle.
Replaceadefectivetowbarbeforeyoutow
themachine.
ConnectingtheMachineto
theTowingVehicle
•Checkthetowing-vehiclehitchballandmachine
couplerforsignsofwearordamage.Replaceany
17

partsthatarewornordamagedbeforetowingthe
machine.
•Themachinecoupleris5.1cm(2inches).The
towingvehicleballhitchdiametermustbe.Use
ofdifferentballdiameterwillcreateanextremely
dangerousconditionwhichcanresultinseparation
ofthecouplerandballorballfailure.
•Afterthetowbarhasbeenconnectedtothe
machine,securethemachinecouplertothe
towing-vehiclehitchandensurethatthelocklever
isinthelockedposition.
CAUTION
Thesafetychainisintendedtoprevent
completeseparationofthemachinefromthe
towingvehicleintheeventofatowbarfailure.
Ifthesafetychainisremovedfromthe
machine,donottowthemachine.
OperatingTips
WARNING
Dischargedairhasconsiderableforceand
couldcauseinjuryorlossoffooting.
•Stayawayfromnozzleopeningwhen
machineisoperating.
•Keepbystandersawayfromnozzle
openingwhenmachineisrunning.
DANGER
Tipovercancauseseriousinjuryordeath.
•Neveroperateonsteepslopes.
•Operateonslopesupanddown,never
acrosstheface.
•Whengoinguphillordownhill,donotstop
orstartsuddenly.
•Stayalertforholesintheterrainorother
hiddenhazards.Toavoidtippingorlossof
control,donotdriveclosetoaditch,creek
ordropoff.
•Ifthetowvehiclestopswhilegoinguphill,
backslowlydownhill.Donotattemptto
turn.
•Neveroperatethemachinewhenitisnot
connectedtoatowvehicle.
•Practiceoperatingtheblower.Itisadvisable
toblowthesamedirectionthewindisblowing
topreventmaterialfromblowingbackintothe
clearedarea.
•Beawareoftheblowernozzledirectionanddonot
pointitatanyone.
•Usecarewhenapproachingblindcorners,shrubs,
trees,orotherobjectsthatmayobscurevision.
•Reduceyourspeedwhenmakingsharpturnsand
whenturningonhillsides
•Beforebackingup,looktotherearandensure
thatnooneisbehindthemachine.
•Donotruntheengineinordirecttheblowernozzle
intoaconnedareawithoutadequateventilation.
Exhaustfumesarehazardousandcouldpossibly
bedeadly.
•Runtheengineatfullthrottlewhenoperating.
•Adjustthenozzleopeningsoitblowsunderthe
debris.
•Usecautionwhenblowingaroundnewlyplanted
sodastheforceoftheaircoulddisruptthegrass.
•Donotuseonhighways.
•Stayawayfromthenozzleopeningwhenthe
machineisoperating.Keepallbystandersaway
fromthenozzleopeninganddon’tdirectdischarge
towardbystanders.
•Ifthetowing-vehicleenginestallsorthemachine
losesheadwayandcannotmakeittothetopofa
slope,donotturnthemachinearound.Always
backthetowingvehicleslowlystraightdownthe
slope.
•Donottakeaninjuryrisk!Whenapersonor
petappearsunexpectedlyinorneartheoperating
area,stopoperation.Carelessoperation,
combinedwithterrainangles,ricochets,or
improperlypositionedguardscanleadtothrown
objectinjuries.Donotresumeoperationuntilthe
areaiscleared.
•Donotexceed88km/h(55mph)whentransporting
themachine.
•Donottouchtheengineormuferwhiletheengine
isrunningorsoonafteritisstopped.Theseareas
couldbehotenoughtocauseaburn.
Important:Raisethenozzletoanupward
positionbeforetransportingthemachine.Ifthe
nozzleisleftinadownward-facingpositionduring
transport,thenozzlemaycontactthegroundand
causedamage.
18

Maintenance
RecommendedMaintenanceSchedule(s)
MaintenanceService
IntervalMaintenanceProcedure
Aftertherst8hours•Checktheconditionandthetensionofthebelt.
Aftertherst10hours•Checkthetorqueofthewheellugnuts.
Beforeeachuseordaily
•Checktheengine-oillevel.
•Cleantheenginescreenandtheoilcooler.
•Checkthenozzleclampandthenozzleguides.
Every50hours•Checktheconditionandthetensionofthebelt.
Every100hours
•Replacetheairlterelement(morefrequentlyifconditionsaredustyorsandy).
•Changetheengineoil.
•Checktheconditionofthetires.
Every200hours
•Replacethecarbon-canisterairlter(Servicemorefrequentlyifconditionsare
extremelydustyorsandy).
•Replacethecarbon-canisterpurge-linelter.
•Replacetheoillter.
•Checkthesparkplugs.
Every500hours•Replacethefuellter.
19

DailyMaintenanceChecklist
Duplicatethispageforroutineuse.
Fortheweekof: MaintenanceCheckItem
Mon.Tues.Wed.Thurs.Fri.Sat.Sun.
Checktheinstrument
operation
Checkthefuellevel.
Checktheengine-oillevel.
Cleantheengineaircooling
ns.
Inspecttheairlter
pre-cleaner.
Checkforanyunusual
enginenoises.
Checkforuidleaks.
Checkthetirepressure.
Checknozzlemounting
clamptorque.
Touchupdamagedpaint.
NotationforAreasofConcern
Inspectionperformedby:
ItemDateInformation
20
Other manuals for Pro Force 44553
2
Table of contents
Other Toro Blower manuals

Toro
Toro 3200 User manual

Toro
Toro Groundsmaster 4000-D User manual

Toro
Toro 319000001 User manual

Toro
Toro 51702A User manual

Toro
Toro 30357 User manual

Toro
Toro 51521 User manual

Toro
Toro QuieTech 51568 User manual

Toro
Toro 51544 User manual

Toro
Toro 51594 User manual

Toro
Toro Pro Force Debris Blower User manual

Toro
Toro 78551 User manual

Toro
Toro 51617 User manual

Toro
Toro Superblower 51591 User manual

Toro
Toro 08759 User manual

Toro
Toro Super 325 User manual

Toro
Toro Pro Force 44554 User manual

Toro
Toro Flex-Force Power System 60V MAX User manual

Toro
Toro 08759 User manual

Toro
Toro 44044 User manual

Toro
Toro Rake and Vac 51617 User manual