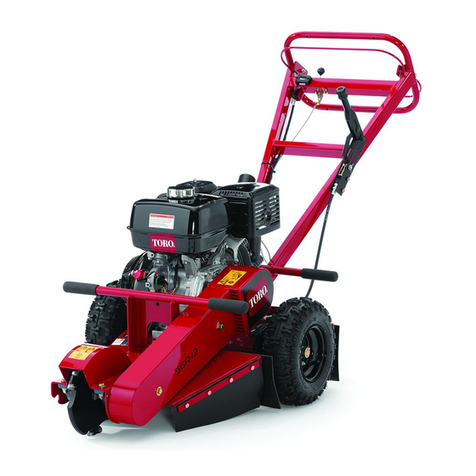
Toro STX-26 User manual

FormNo.3447-215RevA
STX-26StumpGrinder
ModelNo.23208—SerialNo.409550000andUp
ModelNo.23208G—SerialNo.405300000andUp
Registeratwww.Toro.com.
OriginalInstructions(EN)*3447-215*

ThisproductcomplieswithallrelevantEuropean
directiveswhenCEKit22368hasbeeninstalled;
fordetails,pleaseseetheseparateproductspecic
DeclarationofConformity(DOC)sheet.
ItisaviolationofCaliforniaPublicResourceCode
Section4442or4443touseoroperatetheengineon
anyforest-covered,brush-covered,orgrass-covered
landunlesstheengineisequippedwithaspark
arrester,asdenedinSection4442,maintainedin
effectiveworkingorderortheengineisconstructed,
equipped,andmaintainedforthepreventionofre.
Theenclosedengineowner'smanualissupplied
forinformationregardingtheUSEnvironmental
ProtectionAgency(EPA)andtheCaliforniaEmission
ControlRegulationofemissionsystems,maintenance,
andwarranty.Replacementsmaybeorderedthrough
theenginemanufacturer.
WARNING
CALIFORNIA
Proposition65Warning
Theengineexhaustfromthisproduct
containschemicalsknowntotheStateof
Californiatocausecancer,birthdefects,
orotherreproductiveharm.
Batteryposts,terminals,andrelated
accessoriescontainleadandlead
compounds,chemicalsknownto
theStateofCaliforniatocause
cancerandreproductiveharm.Wash
handsafterhandling.
Useofthisproductmaycauseexposure
tochemicalsknowntotheStateof
Californiatocausecancer,birthdefects,
orotherreproductiveharm.
Introduction
Thismachineisdesignedtogrindandremovetree
stumpsandsurfaceroots.Itisnotintendedtocut
rockoranyothermaterialotherthanwoodandthe
soilaroundastump.Usingthisproductforpurposes
otherthanitsintendedusecouldprovedangerousto
youandbystanders.
Readthisinformationcarefullytolearnhowtooperate
andmaintainyourproductproperlyandtoavoid
injuryandproductdamage.Youareresponsiblefor
operatingtheproductproperlyandsafely.
Visitwww.Toro.comforproductsafetyandoperation
trainingmaterials,accessoryinformation,helpnding
adealer,ortoregisteryourproduct.
Wheneveryouneedservice,genuineToroparts,or
additionalinformation,contactanAuthorizedService
DealerorToroCustomerServiceandhavethemodel
andserialnumbersofyourproductready.Figure
1illustratesthelocationofthemodelandserial
numbersontheproduct.Writethenumbersinthe
spaceprovided.
Important:Withyourmobiledevice,youcan
scantheQRcodeontheserialnumberdecal(if
equipped)toaccesswarranty,parts,andother
productinformation.
g242084
Figure1
1.Modelandserialnumberplate
ModelNo.
SerialNo.
©2021—TheToro®Company
8111LyndaleAvenueSouth
Bloomington,MN554202
Contactusatwww.Toro.com.
PrintedintheUSA
AllRightsReserved

Thismanualidentiespotentialhazardsandhas
safetymessagesidentiedbythesafety-alertsymbol
(Figure2),whichsignalsahazardthatmaycause
seriousinjuryordeathifyoudonotfollowthe
recommendedprecautions.
g000502
Figure2
1.Safety-alertsymbol
Thismanualuses2wordstohighlightinformation.
Importantcallsattentiontospecialmechanical
informationandNoteemphasizesgeneralinformation
worthyofspecialattention.
Contents
Safety.......................................................................4
GeneralSafety...................................................4
SafetyandInstructionalDecals..........................4
Setup........................................................................8
1InstallingtheGrinderControlLever..................8
2CheckingtheFluidLevels................................8
3ChargingtheBattery........................................8
ProductOverview.....................................................9
Controls.............................................................9
Specications..................................................12
Attachments/Accessories.................................12
BeforeOperation.................................................13
BeforeOperationSafety...................................13
AddingFuel......................................................13
PerformingDailyMaintenance..........................14
DuringOperation.................................................14
DuringOperationSafety...................................14
StartingtheEngine...........................................15
DrivingtheMachine..........................................16
ShuttingofftheEngine......................................16
GrindingaStump..............................................16
OperatingTips.................................................17
AfterOperation....................................................17
AfterOperationSafety......................................17
MovingaNon-FunctioningMachine..................17
SecuringtheMachineforTransport..................18
LiftingtheMachine...........................................18
Maintenance...........................................................19
MaintenanceSafety..........................................19
RecommendedMaintenanceSchedule(s)...........19
Pre-MaintenanceProcedures..............................21
RemovingtheCoverPlate................................21
RemovingtheBottomShield............................21
Lubrication..........................................................22
GreasingtheMachine.......................................22
EngineMaintenance...........................................23
EngineSafety...................................................23
ServicingtheAirCleaner..................................23
ServicingtheEngineOil....................................24
ServicingtheSparkPlug(s)..............................26
FuelSystemMaintenance...................................27
DrainingtheFuelT ank......................................27
ReplacingtheFuelFilter...................................28
ElectricalSystemMaintenance...........................28
ElectricalSystemSafety...................................28
ServicingtheBattery.........................................28
ReplacingtheFuses.........................................30
DriveSystemMaintenance..................................31
ServicingtheTracks.........................................31
BeltMaintenance................................................33
ReplacingthePump-DriveBelt.........................33
ControlsSystemMaintenance.............................34
AdjustingtheTraction-Control
Alignment......................................................34
HydraulicSystemMaintenance...........................37
HydraulicSystemSafety...................................37
HydraulicFluidSpecications...........................37
CheckingtheHydraulic-FluidLevel...................37
ReplacingtheHydraulicFilter...........................38
ChangingtheHydraulicFluid............................38
GrinderMaintenance............................................39
ReplacingtheTeeth..........................................39
Cleaning..............................................................40
RemovingDebrisfromtheMachine..................40
Storage...................................................................41
StorageSafety..................................................41
Storage.............................................................41
Troubleshooting......................................................42
3

Safety
GeneralSafety
DANGER
Theremaybeburiedutilitylinesinthework
area.Diggingintothemmaycauseashock
oranexplosion.
Havethepropertyorworkareamarkedfor
buriedlinesanddonotdiginmarkedareas.
Contactyourlocalmarkingserviceorutility
companytohavethepropertymarked(for
example,intheUS,call811orinAustralia,
call1100forthenationwidemarkingservice).
Thisproductiscapableofamputatinghandsandfeet.
Alwaysfollowallsafetyinstructionstoavoidserious
injuryordeath.
•Havethepropertyorworkareamarkedforburied
linesandotherobjects,anddonotdiginmarked
areas.
•Keepyourhandsandfeetawayfrommovingteeth
orotherparts.
•Keepbystandersandpetsawayfromthemachine.
•ReadandunderstandthecontentofthisOperator’s
Manualbeforestartingtheengine.
•Neverallowchildrenoruntrainedpeopleto
operatethemachine.
•Donotoperatethemachinewithouttheguards
andothersafetyprotectivedevicesinplaceand
workingonthemachine.
•Useyourfullattentionwhileoperatingthe
machine.Donotengageinanyactivitythat
causesdistractions;otherwise,injuryorproperty
damagemayoccur.
•Stopthemachine,shutofftheengine,andremove
thekeybeforeservicing,fueling,orunclogging
themachine.
Improperlyusingormaintainingthismachinecan
resultininjury.Toreducethepotentialforinjury,
complywiththesesafetyinstructionsandalways
payattentiontothesafety-alertsymbol,which
meansCaution,Warning,orDanger—personalsafety
instruction.Failuretocomplywiththeseinstructions
mayresultinpersonalinjuryordeath.
SafetyandInstructional
Decals
Safetydecalsandinstructionsare
easilyvisibletotheoperatorandare
locatednearanyareaofpotential
danger.Replaceanydecalthatis
damagedormissing.
decalbatterysymbols
BatterySymbols
Someorallofthesesymbolsareonyourbattery.
1.Explosionhazard6.Keepbystandersaway
fromthebattery.
2.Nore,opename,or
smoking
7.Weareyeprotection;
explosivegasescan
causeblindnessandother
injuries.
3.Causticliquid/chemical
burnhazard
8.Batteryacidcancause
blindnessorsevereburns.
4.Weareyeprotection.9.Flusheyesimmediately
withwaterandgetmedical
helpfast.
5.ReadtheOperator's
Manual.
10.Containslead;donot
discard
decal93-6686
93-6686
1.Hydraulicuid2.ReadtheOperator's
Manual.
decal93-7321
93-7321
1.Cutting/dismembermenthazardofhandsandfeet,rotating
knives/blades—stayawayfrommovingparts.
4

decal93-7814
93-7814
1.Entanglementhazard,belt—stayawayfrommovingparts.
decal93-9084
93-9084
1.Liftpoint/Tie-downpoint
decal100-4650
100-4650
1.Crushinghazardofhand—keepbystandersaway.
2.Crushinghazardoffoot—keepbystandersaway.
Decal107-8495isformachineswiththeCEKit
installedonly.
decal107-8495
107-8495
1.Parkingbrake
decal107-9366
107-9366
1.Thrownobjecthazard—keepbystandersawayfromthe
machine.
decal119-4560
119-4560
1.Ignitionkey
2.Engine—start
3.Engine—run
4.Engine—stop
5.Fast
6.Enginespeed
7.Slow
8.On/Closed
9.Choke
10.Off/Open
11.ReadtheOperator'sManualbeforestartingtheengine—1)
EnsurethatthetractioncontrolisintheNEUTRALposition;
2)MovethethrottlelevertotheFASTposition,closethe
choke(ifapplicable),anddonotoperatethejoystick;3)
Turnthekeytostarttheengine.
5

decal119-4561
119-4561
1.Pushforwardtolowerthestumpgrinder.
2.Moverighttomovethestumpgrindertotheright.
3.Pullbacktoraisethestumpgrinder.
4.Movelefttomovethestumpgrindertotheleft.
5.ReadtheOperator'sManualbeforeoperatingthecutter;
engagethesideleverandtopbuttonofthejoystickto
startthecutterblade;continueengagingthesideleverto
maintaincutterrotation.
6.1)T opowerthegrinder,pressthesafetylockandthetrigger
together;2)Tokeepthegrinderrunning,holdthetrigger.
7.1)Grindhorizontallyalongtheedgeofthestump;2)Lower
thegrinderslightlyintothestump;3)Grindhorizontally
downtogroundlevel;4)Movethegrinderforward.
8.Donotstartgrindinginthemiddleofthestump;start
grindingattheedgeofthestump.
decal133-8062
133-8062
decal137-3875
137-3875
1.ReadtheOperator’sManual.
decal115-4020
115-4020
1.Turnright3.Reverse
2.Forward4.Turnleft
6

decal119-4606
119-4606
1.Warning—readtheOperator'sManual.5.Explosionandelectricshockhazard—donotdiginareaswith
buriedutilitylines;contactlocalpowerorganizationsbefore
digging.
2.Cutting/dismembermenthazard;grinder—keepbystanders
awayfromthemachine;donotoperatethegrinderheadwhile
transportingthemachine.
6.Tipping/crushinghazard—lowerthecutterheadwhen
operatingonslopes.
3.Warning—stayawayfrommovingparts;waitforallmoving
partstostop.
7.Explosionhazard,fueling—shutofftheengineandextinguish
allameswhenfueling.
4.Warning—donotoperatethismachineunlessyouaretrained.8.Warning—lowerthegrinderhead,engagetheparkingbrake
(ifapplicable),shutofftheengine,andremovethekeybefore
leavingthemachine.
7

Setup
LooseParts
Usethechartbelowtoverifythatallpartshavebeenshipped.
ProcedureDescriptionQty.Use
Grindercontrollever1
1Jamnut1Installthegrindercontrollever.
2Nopartsrequired–Checktheuidlevels.
3Nopartsrequired–Chargethebattery.
1
InstallingtheGrinder
ControlLever
Partsneededforthisprocedure:
1Grindercontrollever
1Jamnut
Procedure
1.Threadthejamnutontothegrindercontrollever
(Figure3).
g013175
Figure3
1.Grindercontrollever3.4-pinconnector
2.Jamnut
2.Threadthegrindercontrolleverintothe
receptacleonthecontrolpanel(Figure3).
3.Withthetriggerorientedforward,tightenthejam
nutagainstthereceptacletosecuretheleverin
place(Figure3).
4.Connectthewireonthelevertothe4-pin
connectorunderthecontrolpanel(Figure3).
2
CheckingtheFluidLevels
NoPartsRequired
Procedure
Beforestartingtheengineforthersttime,check
theengine-oilandhydraulic-uidlevels.Refertothe
followingsectionsformoreinformation:
•CheckingtheEngine-OilLevel(page24)
•CheckingtheHydraulic-FluidLevel(page37)
3
ChargingtheBattery
NoPartsRequired
Procedure
Chargethebattery;refertoChargingtheBattery
(page29)formoreinformation.
8

ProductOverview
g018769
Figure4
1.Reversesafety
plate
4.Battery7.Track
2.Controlpanel5.Tie-down/lift
point
8.Chipshield
3.Engine6.Parking-brake
lever
(machineswith
CEkitonly)
9.Grinder
Controls
Becomefamiliarwithallthecontrols(Figure5)before
youstarttheengineandoperatethemachine.
ControlPanel
g025098
Figure5
1.Keyswitch5.Tractioncontrol
2.Throttlelever6.Referencebar
3.Chokelever7.Grinder
control/hydraulic-liftlever
4.Hourmeter
KeySwitch
Thekeyswitch,usedtostartandshutofftheengine,
has3positions:OFF,RUN,andSTART.Referto
StartingtheEngine(page15).
ThrottleLever
Movethecontrolforwardtoincreasetheenginespeed
andrearwardtodecreasetheenginespeed.
ChokeLever
Beforestartingacoldengine,movethechokelever
forward.Aftertheenginestarts,regulatethechoke
tokeeptheenginerunningsmoothly.Assoonas
possible,movethechokeleverallthewayrearward.
Note:Awarmenginerequireslittleornochoking.
HourMeter
Thehourmeterdisplaysthenumberofhoursof
operationthathavebeenloggedonthemachine.
9

ReferenceBar
Whendrivingthemachine,usethereferencebar
asahandleandaleveragepointforcontrollingthe
machine.T oensuresmooth,controlledoperation,
donottakebothhandsoffthereferencebarwhile
operatingthemachine.
Parking-BrakeLever(Machines
withCEKitOnly)
Toengagetheparkingbrake,lifttheleverupward.
Todisengagetheparkingbrake,pushthelever
downward.
g355524
Figure6
1.Parking-brakelever
TractionControl
g008128
Figure7
1.Referencebar
2.Tractioncontrol
•Tomoveforward,movethetractioncontrolforward
(Figure8).
g008129
Figure8
•Tomoverearward,movethetractioncontrol
rearward(Figure9).
Important:Whenreversing,lookbehindyou
forobstructionsandkeepyourhandsonthe
referencebar.
g008130
Figure9
10

•Toturnright,rotatethetractioncontrolclockwise
(Figure10).
g008131
Figure10
•Toturnleft,rotatethetractioncontrol
counterclockwise(Figure11).
g008132
Figure11
•Tostopthemachine,releasethetractioncontrol
(Figure7).
Note:Thefartheryoumovethetractioncontrolin
anydirection,thefasterthemachinemovesinthat
direction.
GrinderControl/Hydraulic-Lift
Lever
Operatethegrinderusingthegrindercontrollever
asfollows:
•Tostartthegrinder(Figure12),squeezethe
triggerandthenpresstheredbuttononthetopof
thelever.Oncethegrinderhasstarted,youcan
releasetheredbutton.
•Tostopthegrinder(Figure12),releasethetrigger
formorethanahalfsecond.
Note:Ifyouareoperatingthegrinderand
momentarilyreleasethetrigger(i.e.,lessthana
halfsecond),thegrindercontinuestooperate.
g013174
Figure12
1.Neutral3.Runthegrinder
2.Startthegrinder4.Stopthegrinder
11

•Toraisethegrinder,pulltheleverrearward(Figure
13).
g013623
Figure13
•Tolowerthegrinder,pushtheleverforward(Figure
14).
g013624
Figure14
•Torotatethegrindertotherightorleft,movethe
leverinthedesireddirection(Figure15).
g243266
g013626
Figure15
Specications
Note:Specicationsanddesignaresubjectto
changewithoutnotice.
Width84cm(33inches)
Length198.5cm(78inches)
Height113cm(44.5inches)
Weight544Kg(1,200lb)
Attachments/Accessories
AselectionofT oroapprovedattachmentsand
accessoriesisavailableforusewiththemachine
toenhanceandexpanditscapabilities.Contact
yourAuthorizedServiceDealerorauthorizedT oro
distributororgotowww.T oro.comforalistofall
approvedattachmentsandaccessories.
Toensureoptimumperformanceandcontinuedsafety
certicationofthemachine,useonlygenuineToro
replacementpartsandaccessories.Replacement
partsandaccessoriesmadebyothermanufacturers
couldbedangerous,andsuchusecouldvoidthe
productwarranty.
12

Operation
Note:Determinetheleftandrightsidesofthe
machinefromthenormaloperatingposition.
BeforeOperation
BeforeOperationSafety
GeneralSafety
•Havethepropertyorworkareamarkedforburied
linesandotherobjects,anddonotdiginmarked
areas;notethelocationofunmarkedobjectsand
structures,suchasundergroundstoragetanks,
wells,andsepticsystems.
•Inspecttheareawhereyouwillusetheequipment.
–Evaluatetheterraintodeterminewhat
accessoriesandattachmentsyouneedto
properlyandsafelyperformthejob.
–Removealldebris.
–Ensurethattheareaisclearofbystanders
beforeoperatingthemachine.
–Stopthemachineifanyoneentersthearea.
•Becomefamiliarwiththesafeoperationofthe
equipment,operatorcontrols,andsafetydecals.
–Theownerisresponsiblefortrainingall
operatorsandmechanics.
–Neverallowchildrenoruntrainedpeople
tooperateorservicethemachine.Local
regulationsmayrestricttheageorrequire
certiedtrainingoftheoperator.
–Knowhowtostopthemachineandshutoffthe
enginequickly.
–Checkthattheoperator'spresencecontrols,
safetyswitches,andshieldsareattached
andfunctioningproperly.Donotoperatethe
machineunlesstheyarefunctioningproperly.
–Locatethepinch-pointareasmarkedonthe
machineandattachments;keepyourhands
andfeetawayfromtheseareas.
–Stopthemachine,shutofftheengine,and
removethekeybeforeleavingtheoperating
position.
FuelSafety
•Useextremecareinhandlingfuel.Itisammable
anditsvaporsareexplosive.
•Extinguishallcigarettes,cigars,pipes,andother
sourcesofignition.
•Useonlyanapprovedfuelcontainer.
•Donotremovethefuelcaporllthefueltank
whiletheengineisrunningorhot.
•Donotaddordrainfuelinanenclosedspace.
•Donotstorethemachineorfuelcontainerwhere
thereisanopename,spark,orpilotlight,such
asonawaterheaterorotherappliance.
•Ifyouspillfuel,donotattempttostarttheengine;
avoidcreatinganysourceofignitionuntilthefuel
vaporshavedissipated.
•Donotllcontainersinsideavehicleoronatruck
ortrailerbedwithaplasticliner.Alwaysplace
containersontheground,awayfromyourvehicle
beforelling.
•Removetheequipmentfromthetruckortrailer
andrefuelitwhileitisontheground.Ifthisisnot
possible,thenrefuelfromaportablecontainer
ratherthanafuel-dispensernozzle.
•Keepthefuel-dispensernozzleincontactwith
therimofthefueltankorcontaineropeningat
alltimesuntilfuelingiscomplete.Donotusea
nozzlelock-opendevice.
AddingFuel
RecommendedFuel
•Forbestresults,useonlyclean,fresh(lessthan
30daysold),unleadedgasolinewithanoctane
ratingof87orhigher((R+M)/2ratingmethod).
•Ethanol:Gasolinewithupto10%ethanol
(gasohol)or15%MTBE(methyltertiarybutyl
ether)byvolumeisacceptable.Ethanoland
MTBEarenotthesame.Gasolinewith15%
ethanol(E15)byvolumeisnotapprovedforuse.
Neverusegasolinethatcontainsmorethan
10%ethanolbyvolume,suchasE15(contains
15%ethanol),E20(contains20%ethanol),orE85
(containsupto85%ethanol).Usingunapproved
gasolinemaycauseperformanceproblemsand/or
enginedamagewhichmaynotbecoveredunder
warranty.
•Donotusegasolinecontainingmethanol.
•Donotstorefueleitherinthefueltankorfuel
containersoverthewinterunlessyouuseafuel
stabilizer.
•Donotaddoiltogasoline.
UsingStabilizer/Conditioner
Usefuelstabilizer/conditionerinthemachinetokeep
thefuelfreshlongerwhenusedasdirectedbythe
fuel-stabilizermanufacturer.
Important:Donotusefueladditivescontaining
methanolorethanol.
13

Addtheamountoffuelstabilizer/conditionertofresh
fuelasdirectedbythefuel-stabilizermanufacturer.
FillingtheFuelTank
1.Parkthemachineonalevelsurface,engage
theparkingbrake(ifequipped),andlowerthe
grinder.
2.Shutofftheengine,removethekey,andallow
theenginetocool.
3.Cleanaroundthefuel-tankcapandremoveit
(Figure16).
g013176
Figure16
1.Fuel-tankcap
2.Fuelgauge
4.Addfueltothetankuntilthelevelis6to13mm
(1/4to1/2inch)belowthebottomoftheller
neck.
Important:Thisspaceinthetankallows
fueltoexpand.Donotllthefueltank
completelyfull.
5.Installthefuel-tankcapsecurely,turningituntil
itclicks.
6.Wipeupanyspilledfuel.
PerformingDaily
Maintenance
Beforestartingthemachineeachday,performthe
EachUse/DailyprocedureslistedinMaintenance
(page19).
DuringOperation
DuringOperationSafety
GeneralSafety
•Keepyourhandsandfeetawayfrommovingteeth
orotherparts.
–Keepbystandersandpetsawayfromthe
machineandnevercarrypassengers.
–Wearappropriateclothing,includingeye
protection,longpants,substantialslip-resistant
footwear,andhearingprotection.
–Tiebacklonghairanddonotwearloose
clothingorloosejewelry.
–Stopgrindingifanyoneentersthearea.
•Operatethemachineonlyinareaswherethereis
sufcientclearanceforyoutosafelymaneuver.
•Beawareofobstaclesincloseproximitytoyou.
Failuretomaintainadequatedistancefromtrees,
walls,andotherbarriersmayresultininjuryasthe
machinebacksupduringoperationifyouarenot
attentivetothesurroundings.
•Lookbehindanddownbeforebackingupto
ensurethatthepathisclear.
•Useyourfullattentionwhileoperatingthe
machine.Donotengageinanyactivitythat
causesdistractions;otherwise,injuryorproperty
damagemayoccur.
•Neverjerkthecontrols;useasteadymotion.
•Theowner/usercanpreventandisresponsible
foraccidentsthatmaycausepersonalinjuryor
propertydamage.
•Donotoperatethemachinewhenyouaretired,ill,
orundertheinuenceofalcoholordrugs.
•Operatethemachineonlyingoodlight.
•Ensurethatallthedrivesareinneutralandengage
theparkingbrakebeforestartingtheengine.Start
theengineonlyfromtheoperator'sposition.
•Usecarewhenapproachingblindcorners,shrubs,
trees,orotherobjectsthatmayobscurevision.
•Stopthegrinderwhenyouarenotgrinding.
•Stopthemachine,shutofftheengine,remove
thekey,andinspectthemachineifyoustrike
anobject.Makeanynecessaryrepairsbefore
resumingoperation.
•Neverrunanengineinanenclosedarea.
•Neverleavearunningmachineunattended.
Beforeleavingtheoperatingposition,dothe
following:
–Parkthemachineonalevelsurface.
–Lowerthegrindertotheground.
14

–Engagetheparkingbrake.
–Shutofftheengineandremovethekey.
•Checkforoverheadclearance(i.e.,electrical
wires,branches,anddoorways)beforedriving
underanyobjectsanddonotcontactthem.
•Donotoperatethemachinewhenthereistherisk
oflightning.
•UseonlyToro-approvedattachmentsand
accessories.
SlopeSafety
•Operateupanddownslopeswiththefrontofthe
machineuphill.
•Raisingthegrinderonaslopeaffectsthestability
ofthemachine.Keepthegrinderinthelowered
positionwhenonslopes.
•Slopesareamajorfactorrelatedtoloss-of-control
andtip-overaccidents,whichcanresultinsevere
injuryordeath.Operatingthemachineonany
slopeoruneventerrainrequiresextracaution.
•Establishyourownproceduresandrulesfor
operatingonslopes.Theseproceduresmust
includesurveyingthesitetodeterminewhich
slopesaresafeformachineoperation.Always
usecommonsenseandgoodjudgmentwhen
performingthissurvey.
•Slowdownanduseextracareonhillsides.Ground
conditionscanaffectthestabilityofthemachine.
•Avoidstartingorstoppingthemachineonaslope.
•Avoidturningonslopes.Ifyoumustturn,turn
slowlyandkeeptheheavyendofthemachine
uphill.
•Keepallmovementsonslopesslowandgradual.
Donotmakesuddenchangesinspeedor
direction.
•Ifyoufeeluneasyoperatingthemachineona
slope,donotdoit.
•Watchforholes,ruts,orbumps,asuneventerrain
couldoverturnthemachine.T allgrasscanhide
obstacles.
•Usecautionwhenoperatingonwetsurfaces.
Reducedtractioncouldcausesliding.
•Evaluatetheareatoensurethatthegroundis
stableenoughtosupportthemachine.
•Usecautionwhenoperatingthemachinenearthe
following:
–Drop-offs
–Ditches
–Embankments
–Bodiesofwater
Themachinecouldsuddenlyrolloverifatrack
goesovertheedgeortheedgecavesin.Maintain
asafedistancebetweenthemachineandany
hazard.
•Ifthemachinestartstotip,letgoofthecontrols
andstepawayfromthemachine.
•Donotparkthemachineonahillsideorslope.
StartingtheEngine
1.Movethethrottlelevermidwaybetweenthe
SLOWandFASTpositions(Figure17).
g013178
Figure17
1.Throttlelever3.Key
2.Chokelever
2.MovethechokelevertotheONposition(Figure
17).
Note:Awarmorhotenginemaynotrequire
choking.
3.TurnthekeytotheONposition(Figure17).
Whentheenginestarts,releasethekey.
Important:Donotengagethestarterfor
morethan10secondsatatime.Iftheengine
failstostart,allowa30-secondcooldown
periodbetweenattempts.Failuretofollow
theseinstructionscanburnoutthestarter
motor.
4.GraduallymovethechokelevertotheOFF
position(Figure17).Iftheenginestallsor
hesitates,engagethechokeagainuntilthe
enginewarmsup.
5.Movethethrottlelevertothedesiredsetting
(Figure17).
Important:Runningtheengineathigh
speedswhenthehydraulicsystemiscold
(i.e.,whentheairtemperatureisator
belowfreezing)coulddamagethehydraulic
system.Whenstartingtheengineincold
conditions,allowittoruninthemiddle
15

throttlepositionfor2to5minutesbefore
movingthethrottletotheFASTposition.
Note:Iftheoutdoortemperatureisbelow
freezing,storethemachineinagaragetokeep
itwarmerandaidinstarting.
DrivingtheMachine
Usethetractioncontrolstomovethemachine.The
fartheryoumovethetractioncontrolsinanydirection,
thefasterthemachinemovesinthatdirection.
Releasethetractioncontrolstostopthemachine.
CAUTION
Whenreversing,youmaybackintostationary
objectsoroverbystandersandcauseserious
personalinjuryordeath.
Lookbehindyouforobstructionsor
bystandersandkeepyourhandsonthe
referencebar.
Thethrottlecontrolregulatestheenginespeedas
measuredinrpm(revolutionsperminute).Placethe
throttleleverintheFASTpositionforbestperformance.
Youcan,however,usethethrottlepositiontooperate
atslowerspeeds.
ShuttingofftheEngine
1.Parkthemachineonalevelsurface,engage
theparkingbrake(ifapplicable),andlowerthe
grinder.
2.MovethethrottlelevertotheSLOWposition.
3.Iftheenginehasbeenworkinghardorishot,let
itidleforaminutebeforeturningthekeyswitch
totheOFFposition.
Note:Thishelpstocooltheenginebeforeyou
shutitoff.Inanemergency,youcanshutoff
theengineimmediately.
4.TurnthekeyswitchtotheOFFpositionand
removethekey.
CAUTION
Achildoruntrainedbystandercould
attempttooperatethemachineandbe
injured.
Removethekeyfromtheswitchwhen
leavingthemachine,evenifjustforafew
seconds.
GrindingaStump
1.Starttheengine,raisethegrinder,setthe
throttlelevertotheFASTposition,andmovethe
machinetothestumptobeground.
2.Usethegrindercontrolleverandthetraction
controltopositionthegrindertothesideofthe
frontofthestump,about2cm(1inch)below
thesurface(Figure18).
3.Startthegrinderandwaitforittogetuptofull
speed.
4.Usethegrindercontrollevertoswingthegrinder
slowlyacrossthefaceofthestump,cutting
awayaswathofchips(Figure18).
Important:Thegrinderautomaticallyslows
downthespeedatwhichitswingsintothe
stumptomaintaintheoptimumywheel
speedandnotbogdowninthewood.
g013420
Figure18
5.Movethemachineforwardafewcentimeters
(inches)andrepeatstep4(Figure18).
6.Repeatsteps4through5untilyouhaveground
offtheentirefaceofthestump(Figure18).
7.Backupthemachine,positionthegrindertothe
sideofthefrontofthestump,andloweritto
about2cm(1inch)belowthesurface.
8.Repeatsteps4through7untilthestumpis
groundaway.
9.Ifthereareanylargerootstobeground,position
thegrinderovereachrootandusethetraction
controlandgrindercontroltomovethegrinder
alongtheroot,grindingitaway.
16

10.Cleandebrisfromthehydrauliclift,drives,
mufers,andengineaftereachuse;referto
RemovingDebrisfromtheMachine(page40).
OperatingTips
•Cleantheareaoftrash,branches,androcks
beforeoperatingtopreventequipmentdamage.
•Alwaysusefullthrottle(maximumenginespeed)
whengrinding.
•Cuttheedgesofthestumpformoreefcient
grinding.Onceyourcuttingswathiscloseto1/4
ofthewheeldiameter,lowerthegrinderandbegin
cuttingontheedgeagain.
g013671
Figure19
•Listentotheengineandwatchthegrinderwheel
speedtomaintainthespeedofthewheel.Slow
downtheheadsweepbyfeatheringthejoystickas
cuttingbecomesdifcult.
•Asyougrindfromlefttoright,mostofthedebris
goestotheleftofthegrinderwheel.Whenyou
grindfromtherighttoleft,thedebrisgoestothe
right.
•Youmayalsogrindastumpfromthesidetolessen
turfdamage.
AfterOperation
AfterOperationSafety
GeneralSafety
•Parkthemachineonalevelsurface,disengage
thegrinderhydraulics,lowerthegrinder,engage
theparkingbrake,shutofftheengine,andremove
thekey.Waitforallmovementtostopandallow
themachinetocoolbeforeadjusting,servicing,
cleaning,orstoringit.
•Cleandebrisfromthedrives,mufers,andengine
tohelppreventres.Cleanupoilorfuelspills.
•Keepallpartsingoodworkingconditionandall
hardwaretightened.
•Usecarewhenloadingorunloadingthemachine
intoatrailerortruck.
MovingaNon-Functioning
Machine
Important:Donottoworpullthemachine
withoutrstopeningthetowvalves,oryouwill
damagethehydraulicsystem.
1.Engagetheparkingbrakeandlowerthegrinder.
2.Shutofftheengineandremovethekey.
3.Removethebottomshield.
4.Usingawrench,turnthetowvalvesonthe
hydraulicpumpstwicecounter-clockwise(Figure
20).
g013179
Figure20
1.Towvalves
5.Installthebottomshieldandtowthemachine
asrequired.
6.Afterrepairingthemachine,closethetowvalves
beforeoperatingit.
17

SecuringtheMachinefor
Transport
Important:Donotoperateordrivethemachine
onroadways.Usecarewhenloadingorunloading
themachineintoatrailerortruck.
1.Parkthemachineonalevelsurface,engage
theparkingbrake(ifapplicable),andlowerthe
grinder.
2.Shutofftheengineandremovethekey.
3.Securethemachinetoatrailerwithchainsor
strapsusingthetie-down/liftloopsatthefront
andrearofthemachine(Figure21andFigure
22).Refertoyourlocalordinancesfortrailerand
tie-downrequirements.
g013180
Figure21
1.Fronttie-downloop
g013181
Figure22
1.Reartie-downloops
LiftingtheMachine
Youcanliftthemachineusingthetie-down/liftloops
asliftpoints(Figure21andFigure22).
18

Maintenance
Note:Determinetheleftandrightsidesofthemachinefromthenormaloperatingposition.
CAUTION
Ifyouleavethekeyinthekeyswitch,someonecouldaccidentlystarttheengineandseriously
injureyouorotherbystanders.
Removethekeyfromthekeyswitchanddisconnectthewiresfromthesparkplugsbefore
youdoanymaintenance.Setthewiresasidesothattheydonotaccidentallycontactthe
sparkplugs.
MaintenanceSafety
•Parkthemachineonalevelsurface,disengage
thegrinderhydraulics,lowerthegrinder,engage
theparkingbrake,shutofftheengine,andremove
thekey.Waitforallmovementtostopandallow
themachinetocoolbeforeadjusting,servicing,
cleaning,orstoringit.
•Cleanupoilorfuelspills.
•Donotallowuntrainedpersonneltoservicethe
machine.
•Usejackstandstosupportthecomponentswhen
required.
•Carefullyreleasepressurefromcomponentswith
storedenergy.
•Disconnectthebatterybeforemakinganyrepairs.
•Keepyourhandsandfeetawayfromthemoving
parts.Ifpossible,donotmakeadjustmentswith
theenginerunning.
•Keepallpartsingoodworkingconditionandall
hardwaretightened.Replaceallwornordamaged
decals.
•Donottamperwiththesafetydevices.
•UseonlygenuineTororeplacementparts.
RecommendedMaintenanceSchedule(s)
MaintenanceService
IntervalMaintenanceProcedure
Aftertherst8hours•Changetheengineoil.
Aftertherst50hours•Checkandadjustthetracktension.
Beforeeachuseordaily
•Greasethemachine.(Greaseimmediatelyaftereverywashing.)
•Checktheengine-oillevel.
•Checktheconditionofandcleanthetracks.
•Checktheconditionoftheteeth;rotateorreplaceanythatarewornordamaged
andtorquethenutsforallteeth.
•Checkforloosefasteners.
Aftereachuse•Removedebrisfromthemachine.
Every25hours•Checkthebatteryelectrolytelevel.
•Checkthehydraulic-uidlevel.
Every100hours
•Changetheengineoil.
•Replaceorcleanandgapthesparkplug(s).
•Checkandadjustthetracktension.
•Checkthehydrauliclinesforleaks,loosettings,kinkedlines,loosemounting
supports,wear,weather,andchemicaldeteriorationandrepairifnecessary.
Every200hours
•Changetheengine-oillter.
•Replacethefuellter.
•Replacethehydrauliclter.
Every250hours
•Replacetheprimaryairlterandchecktheconditionofthesafetylter(moreoften
indirtyordustyconditions).
•Checkandgreasetheroadwheels.
19

MaintenanceService
IntervalMaintenanceProcedure
Every400hours•Changethehydraulicuid.
Every500hours•Replacethesafetyairlter(moreoftenindirtyordustyconditions).
Every1,500hours•Replaceallmovinghydraulichoses.
Yearlyorbeforestorage•Checkandadjustthetracktension.
•Touchupchippedpaint.
Important:Refertoyourengineowner’smanualforadditionalmaintenanceprocedures.
20
Other manuals for STX-26
2
This manual suits for next models
2
Table of contents
Other Toro Grinder manuals


