Toro STX-38 EFI User manual
FormNo.3451-484RevA
STX-38EFIStumpGrinderwith
Intelli-Sweep®
ModelNo.23214—SerialNo.410500000andUp
Original Instructions (EN)*3451-484*
www.discount-equipment.com
Go to Discount-Equipment.com to order your parts

Discount-Equipment.com is your online resource for quality parts & equipment.
Florida: 561-964-4949 Outside Florida TOLL FREE: 877-690-3101
Need parts?
Click on this link: http://www.discount-equipment.com/category/5443-parts/ and
choose one of the options to help get the right parts and equipment you are looking
for. Please have the machine model and serial number available in order to help us
get you the correct parts. If you don’t find the part on the website or on one of the
online manuals, please fill out the request form and one of our experienced staff
members will get back to you with a quote for the right part that your machine needs.
We sell worldwide for the brands: Genie, Terex, JLG, MultiQuip, Mikasa, Essick, Whiteman,
Mayco, Toro Stone, Diamond Products, Generac Magnum, Airman, Haulotte, Barreto,
Power Blanket, Nifty Lift, Atlas Copco, Chicago Pneumatic, Allmand, Miller Curber, Skyjack,
Lull, Skytrak, Tsurumi, Husquvarna Target, Stow, Wacker, Sakai, Mi-T-M, Sullair, Basic,
Dynapac, MBW, Weber, Bartell, Bennar Newman, Haulotte, Ditch Runner, Menegotti,
Morrison, Contec, Buddy, Crown, Edco, Wyco, Bomag, Laymor, EZ Trench, Bil-Jax, F.S.
Curtis, Gehl Pavers, Heli, Honda, ICS/PowerGrit, IHI, Partner, Imer, Clipper, MMD, Koshin,
Rice, CH&E, General Equipment ,Amida, Coleman, NAC, Gradall, Square Shooter, Kent,
Stanley, Tamco, Toku, Hatz, Kohler, Robin, Wisconsin, Northrock, Oztec, Toker TK, Rol-Air,
APT, Wylie, Ingersoll Rand / Doosan, Innovatech, Con X, Ammann, Mecalac, Makinex, Smith
Surface Prep,Small Line, Wanco, Yanmar

We sell worldwide for the brands: Genie, Terex, JLG, MultiQuip, Mikasa, Essick, Whiteman,
Mayco, Toro Stone, Diamond Products, Generac Magnum, Airman, Haulotte, Barreto, Power
Blanket, Nifty Lift, Atlas Copco, Chicago Pneumatic, Allmand, Miller Curber, Skyjack, Lull,
Skytrak, Tsurumi, Husquvarna Target, Stow, Wacker, Sakai, Mi-T-M, Sullair, Basic, Dynapac,
MBW, Weber, Bartell, Bennar Newman, Haulotte, Ditch Runner, Menegotti, Morrison, Contec,
Buddy, Crown, Edco, Wyco, Bomag, Laymor, EZ Trench, Bil-Jax, F.S. Curtis, Gehl Pavers, Heli,
Honda, ICS/PowerGrit, IHI, Partner, Imer, Clipper, MMD, Koshin, Rice, CH&E, General Equip-
ment ,Amida, Coleman, NAC, Gradall, Square Shooter, Kent, Stanley, Tamco, Toku, Hatz,
Kohler, Robin, Wisconsin, Northrock, Oztec, Toker TK, Rol-Air, APT, Wylie, Ingersoll Rand /
Doosan, Innovatech, Con X, Ammann, Mecalac, Makinex, Smith Surface Prep,Small Line,
Wanco, Yanmar
Discount-Equipment.com is your online resource for
commercial and industrial quality parts and equipment sales.
561-964-4949
visit us on line @ www.discount-equipment.com
TO PURCHASE THIS PRODUCT PLEASE CONTACT US
Select an option below to find your Equipment
Equipment Financing and
Extended Warranties Available

ThisproductcomplieswithallrelevantEuropean
directives;fordetails,pleaseseetheseparateproduct
specicDeclarationofConformity(DOC)sheet.
ItisaviolationofCaliforniaPublicResourceCode
Section4442or4443touseoroperatetheengineon
anyforest-covered,brush-covered,orgrass-covered
landunlesstheengineisequippedwithaspark
arrester,asdenedinSection4442,maintainedin
effectiveworkingorderortheengineisconstructed,
equipped,andmaintainedforthepreventionofre.
Theenclosedengineowner'smanualissupplied
forinformationregardingtheUSEnvironmental
ProtectionAgency(EPA)andtheCaliforniaEmission
ControlRegulationofemissionsystems,maintenance,
andwarranty.Replacementsmaybeorderedthrough
theenginemanufacturer.
WARNING
CALIFORNIA
Proposition65Warning
Theengineexhaustfromthisproduct
containschemicalsknowntotheStateof
Californiatocausecancer,birthdefects,
orotherreproductiveharm.
Batteryposts,terminals,andrelated
accessoriescontainleadandlead
compounds,chemicalsknownto
theStateofCaliforniatocause
cancerandreproductiveharm.Wash
handsafterhandling.
Useofthisproductmaycauseexposure
tochemicalsknowntotheStateof
Californiatocausecancer,birthdefects,
orotherreproductiveharm.
Introduction
Thismachineisdesignedtogrindandremovetree
stumpsandsurfaceroots.Itisnotintendedtocut
rockoranyothermaterialotherthanwoodandthe
soilaroundastump.Usingthisproductforpurposes
otherthanitsintendedusecouldprovedangerousto
youandbystanders.
Readthisinformationcarefullytolearnhowtooperate
andmaintainyourproductproperlyandtoavoid
injuryandproductdamage.Youareresponsiblefor
operatingtheproductproperlyandsafely.
Whenever you need service, genuine Toro parts, or
additional information, contact an Authorized Service
Dealer or Toro Customer Service and have the model
and serial numbers of your product ready. Figure 1
illustrates the location of the model and serial
numbers on the product. Write the numbers in the
space provided.
Important: With your mobile device, you can
scan the QR code on the serial number decal (if
equipped) to access warranty, parts, and other
product information.
g247193
Figure1
1.Modelandserialnumberplate
ModelNo.
SerialNo.
Thismanualidentiespotentialhazardsandhas
safetymessagesidentiedbythesafety-alertsymbol
(Figure2),whichsignalsahazardthatmaycause
seriousinjuryordeathifyoudonotfollowthe
recommendedprecautions.
g000502
Figure2
1.Safety-alertsymbol
© 2022—The Toro® Company
2
Printed in the USA
All Rights Reserved
Go to Discount-Equipment.com to order your parts

Thismanualuses2wordstohighlightinformation.
Importantcallsattentiontospecialmechanical
informationandNoteemphasizesgeneralinformation
worthyofspecialattention.
Contents
Safety.......................................................................4
GeneralSafety...................................................4
SafetyandInstructionalDecals..........................4
Setup........................................................................8
CheckingtheFluidLevels...................................8
ChargingtheBattery...........................................8
OpeningtheLiftValve.........................................8
ProductOverview.....................................................8
Controls.............................................................8
Specications..................................................12
Attachments/Accessories.................................12
BeforeOperation.................................................12
BeforeOperationSafety...................................12
AddingFuel......................................................13
PerformingDailyMaintenance..........................13
DuringOperation.................................................14
DuringOperationSafety...................................14
StartingtheEngine...........................................15
DrivingtheMachine..........................................15
ShuttingofftheEngine......................................15
GrindingaStump..............................................16
OperatingTips.................................................16
AfterOperation....................................................16
AfterOperationSafety......................................16
MovingaNon-FunctioningMachine..................17
SecuringtheMachineforTransport..................17
LiftingtheMachine...........................................17
Maintenance...........................................................18
MaintenanceSafety..........................................18
RecommendedMaintenanceSchedule(s)...........18
Pre-MaintenanceProcedures..............................19
RemovingtheFrontCover................................19
RemovingtheBottomShield............................19
Lubrication..........................................................20
GreasingtheMachine.......................................20
EngineMaintenance...........................................21
EngineSafety...................................................21
ServicingtheAirCleaner..................................21
ServicingtheEngineOil....................................22
ServicingtheSparkPlug(s)..............................25
FuelSystemMaintenance...................................26
DrainingtheFuelTank......................................26
ReplacingtheLow-pressureFuelFilter.............26
ServicingtheHigh-PressureFuelFilter.............27
ElectricalSystemMaintenance...........................27
ElectricalSystemSafety...................................27
ServicingtheBattery.........................................27
ReplacingtheFuses.........................................29
DriveSystemMaintenance..................................30
ServicingtheTracks.........................................30
CoolingSystemMaintenance..............................32
CleaningtheEngineScreen.............................32
BeltMaintenance................................................33
ReplacingtheHydrostaticPumpDrive
Belt................................................................33
ControlsSystemMaintenance.............................33
AdjustingtheTraction-Control
Alignment......................................................33
HydraulicSystemMaintenance...........................35
HydraulicSystemSafety...................................35
HydraulicFluidSpecications...........................35
CheckingtheHydraulic-FluidLevel...................36
ReplacingtheHydraulicFilter...........................36
ChangingtheHydraulicFluid............................37
GrinderMaintenance............................................37
ReplacingtheTeeth..........................................37
Cleaning..............................................................38
RemovingDebrisfromtheMachine..................38
Storage...................................................................39
StorageSafety..................................................39
Storage.............................................................39
Troubleshooting......................................................40
3
Go to Discount-Equipment.com to order your parts
Safety
GeneralSafety
DANGER
Theremaybeburiedutilitylinesinthework
area.Diggingintothemmaycauseashock
oranexplosion.
Havethepropertyorworkareamarkedfor
buriedlinesanddonotdiginmarkedareas.
Contactyourlocalmarkingserviceorutility
companytohavethepropertymarked(for
example,intheUS,call811orinAustralia,
call1100forthenationwidemarkingservice).
Thisproductiscapableofamputatinghandsandfeet.
Alwaysfollowallsafetyinstructionstoavoidserious
injuryordeath.
•Havethepropertyorworkareamarkedforburied
linesandotherobjects,anddonotdiginmarked
areas.
•Keepyourhandsandfeetawayfrommovingteeth
orotherparts.
•Keepbystandersandpetsawayfromthemachine.
•ReadandunderstandthecontentofthisOperator’s
Manualbeforestartingtheengine.
•Neverallowchildrenoruntrainedpeopleto
operatethemachine.
•Donotoperatethemachinewithouttheguards
andothersafetyprotectivedevicesinplaceand
workingonthemachine.
•Useyourfullattentionwhileoperatingthe
machine.Donotengageinanyactivitythat
causesdistractions;otherwise,injuryorproperty
damagemayoccur.
•Stopthemachine,shutofftheengine,andremove
thekeybeforeservicing,fueling,orunclogging
themachine.
Improperlyusingormaintainingthismachinecan
resultininjury.Toreducethepotentialforinjury,
complywiththesesafetyinstructionsandalways
payattentiontothesafety-alertsymbol
,which
meansCaution,Warning,orDanger—personalsafety
instruction.Failuretocomplywiththeseinstructions
mayresultinpersonalinjuryordeath.
SafetyandInstructionalDecals
Safetydecalsandinstructionsareeasilyvisibletotheoperatorandarelocatednearanyarea
ofpotentialdanger.Replaceanydecalthatisdamagedormissing.
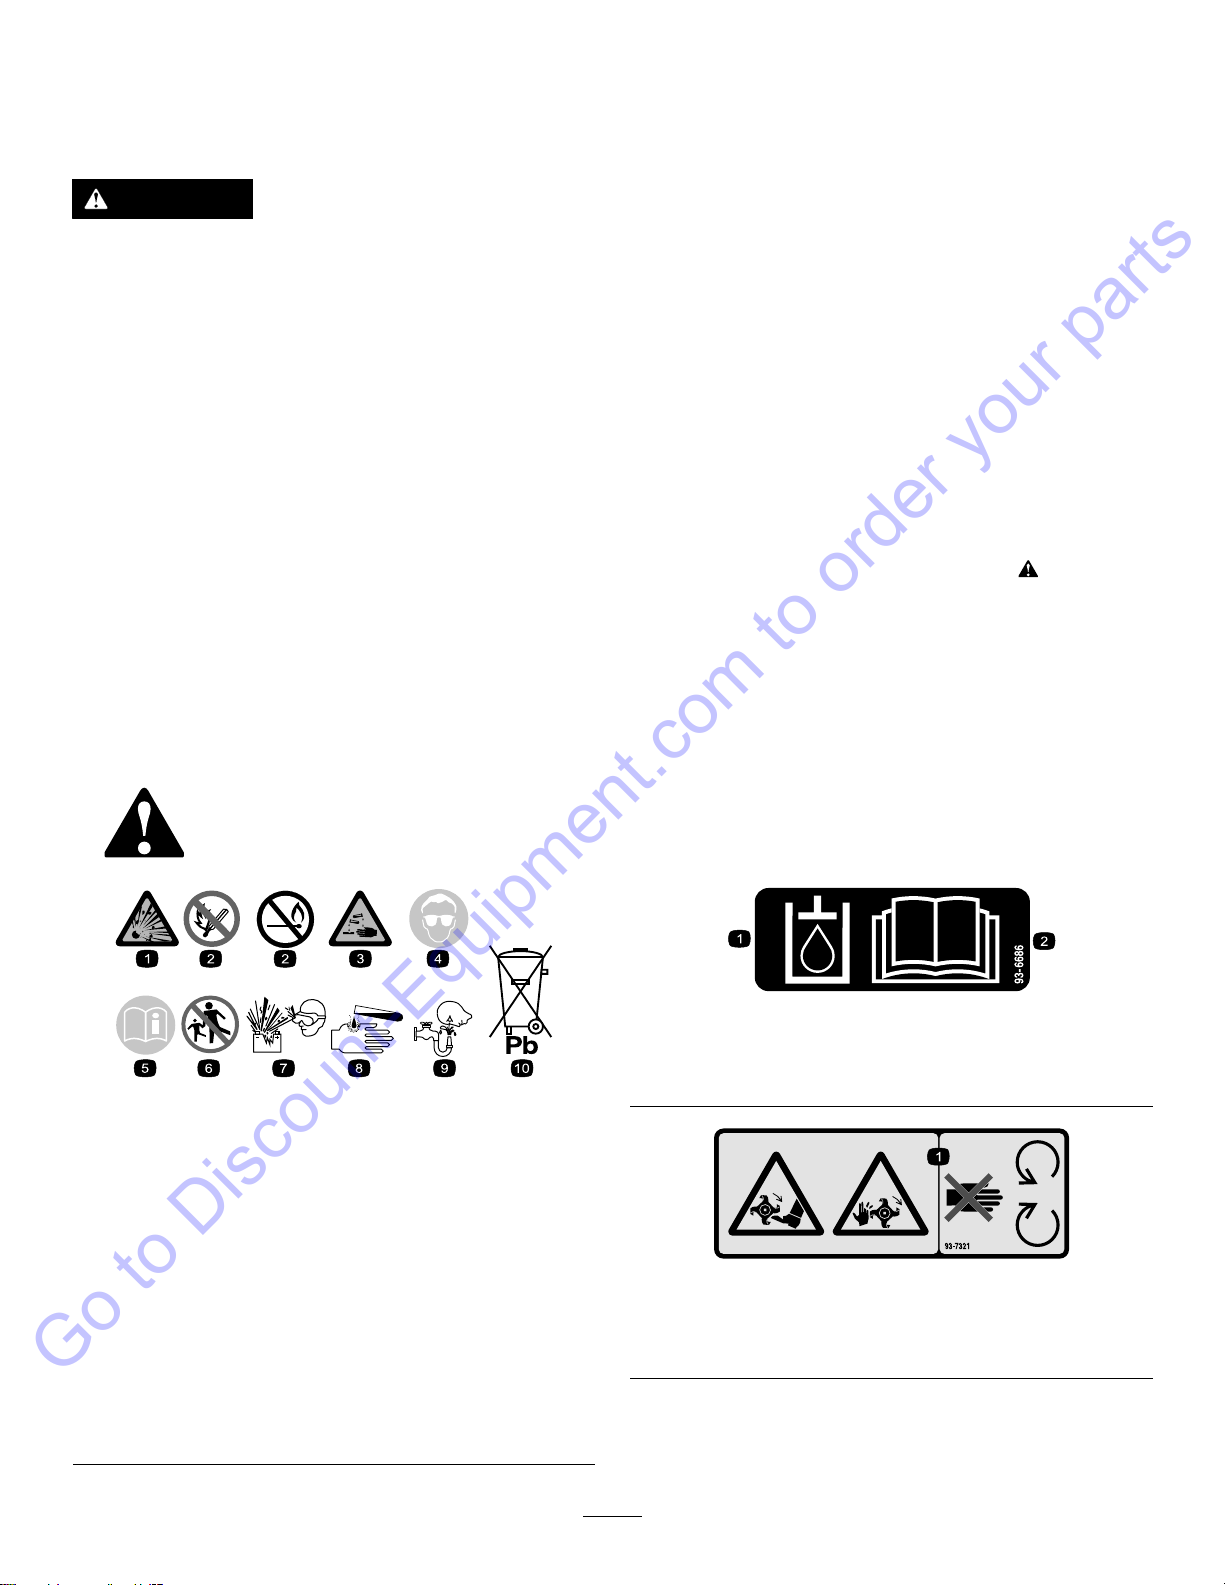
decalbatterysymbols
BatterySymbols
Someorallofthesesymbolsareonyourbattery.
1.Explosionhazard6.Keepbystandersaway
fromthebattery.
2.Nore,opename,or
smoking
7.Weareyeprotection;
explosivegasescan
causeblindnessandother
injuries.
3.Causticliquid/chemical
burnhazard
8.Batteryacidcancause
blindnessorsevereburns.
4.Weareyeprotection.9.Flusheyesimmediately
withwaterandgetmedical
helpfast.
5.ReadtheOperator's
Manual.
10.Containslead;donot
discard
decal93-6686
93-6686
1.Hydraulicuid2.ReadtheOperator's
Manual.
decal93-7321
93-7321
1.Cutting/dismembermenthazardofhandsandfeet,rotating
knives/blades—stayawayfrommovingparts.
4
Go to Discount-Equipment.com to order your parts
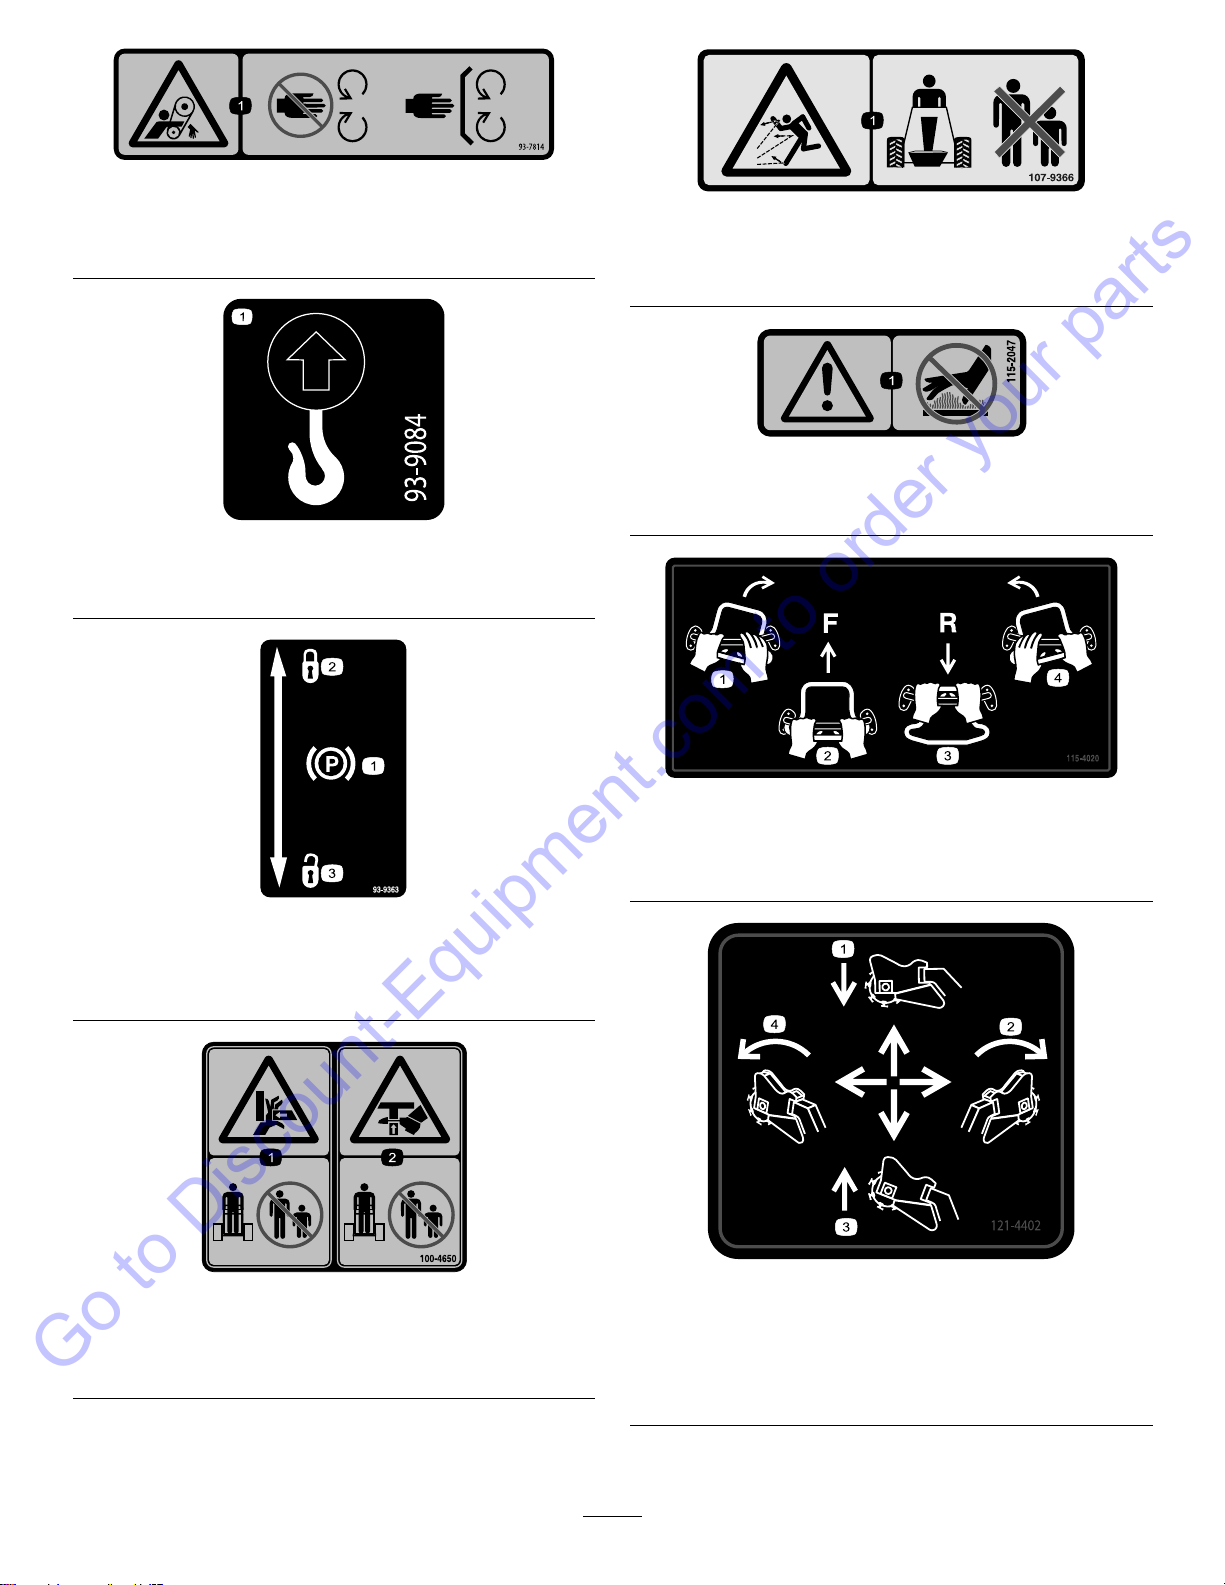
decal93-7814
93-7814
1.Entanglementhazard,belt—stayawayfrommovingparts;
keepallguardsandshieldsinplace.
decal93-9084
93-9084
1.Liftpoint/Tie-downpoint
decal93-9363
93-9363
1.Parkingbrake3.Unlocked
2.Locked
decal100-4650
100-4650
1.Crushinghazardofhand—keepbystandersaway.
2.Crushinghazardoffoot—keepbystandersaway.
decal107-9366
107-9366
1.Thrownobjecthazard—keepbystandersawayfromthe
machine.
decal115-2047
115-2047
1.Warning—donottouchthehotsurface.
decal115-4020
115-4020
1.Turnright3.Reverse
2.Forward4.Turnleft
decal121-4402
121-4402
1.Pushforwardtolowerthe
stumpgrinder.
3.Pullbacktoraisethe
stumpgrinder.
2.Moverighttomovethe
stumpgrindertotheright.
4.Movelefttomovethe
stumpgrindertotheleft.
5
Go to Discount-Equipment.com to order your parts

decal121-4538
121-4538
1.Attention—readtheOperator’sManual;releasethevalve
tolowerthegrinderheadbeforeusingthemachineforthe
rsttime.
decal130-7580
130-7580
1.Engine—start5.Enginespeed—slow
2.Engine—run6.Engineindicatorlight
3.Engine—stop7.ReadtheOperator's
Manualbeforestartingthe
engine—1)Ensurethat
thetractioncontrolisin
theneutralposition;2)
Movethethrottleleverto
theFastposition,close
thechoke(ifapplicable),
anddonotoperatethe
joystick;3)Turnthekeyto
starttheengine.
4.Enginespeed—fast
decal133-8062
133-8062
decal145-6921
145-6921
1.ReadtheOperator’sManual.
6
Go to Discount-Equipment.com to order your parts

decal119-4606
119-4606
1.Warning—readtheOperator'sManual.5.Explosionandelectricshockhazard—donotdiginareaswith
buriedutilitylines;contactlocalpowerorganizationsbefore
digging.
2.Cutting/dismembermenthazard;grinder—keepbystanders
awayfromthemachine;donotoperatethegrinderheadwhile
transportingthemachine.
6.Tipping/crushinghazard—lowerthecutterheadwhen
operatingonslopes.
3.Warning—stayawayfrommovingparts;waitforallmoving
partstostop.
7.Explosionhazard,fueling—shutofftheengineandextinguish
allameswhenfueling.
4.Warning—donotoperatethismachineunlessyouaretrained.8.Warning—lowerthegrinderhead,engagetheparkingbrake
(ifapplicable),shutofftheengine,andremovethekeybefore
leavingthemachine.
decal121-4382
121-4382
1.ReadtheOperator’sManualforinformationonoperatingthe
grinder—1)Grindhorizontallyalongtheedgeofthestump;2)
Lowerthegrinderslightlyintothestump;3)Grindhorizontally
downtogroundlevel;4)Movethegrinderforward.
3.1)T opowerthegrinder,pressthesafetylockandthetrigger
together;2)T okeepthegrinderrunning,holdthetrigger.
2.Donotstartgrindinginthemiddleofthestump;startgrinding
attheedgeofthestump.
7
Go to Discount-Equipment.com to order your parts

Setup
CheckingtheFluidLevels
Beforestartingtheengineforthersttime,check
theengine-oilandhydraulic-uidlevels.Refertothe
followingsectionsformoreinformation:
•CheckingtheEngine-OilLevel(page22)
•CheckingtheHydraulic-FluidLevel(page36)
ChargingtheBattery
Chargethebattery;refertoChargingtheBattery
(page28)formoreinformation.
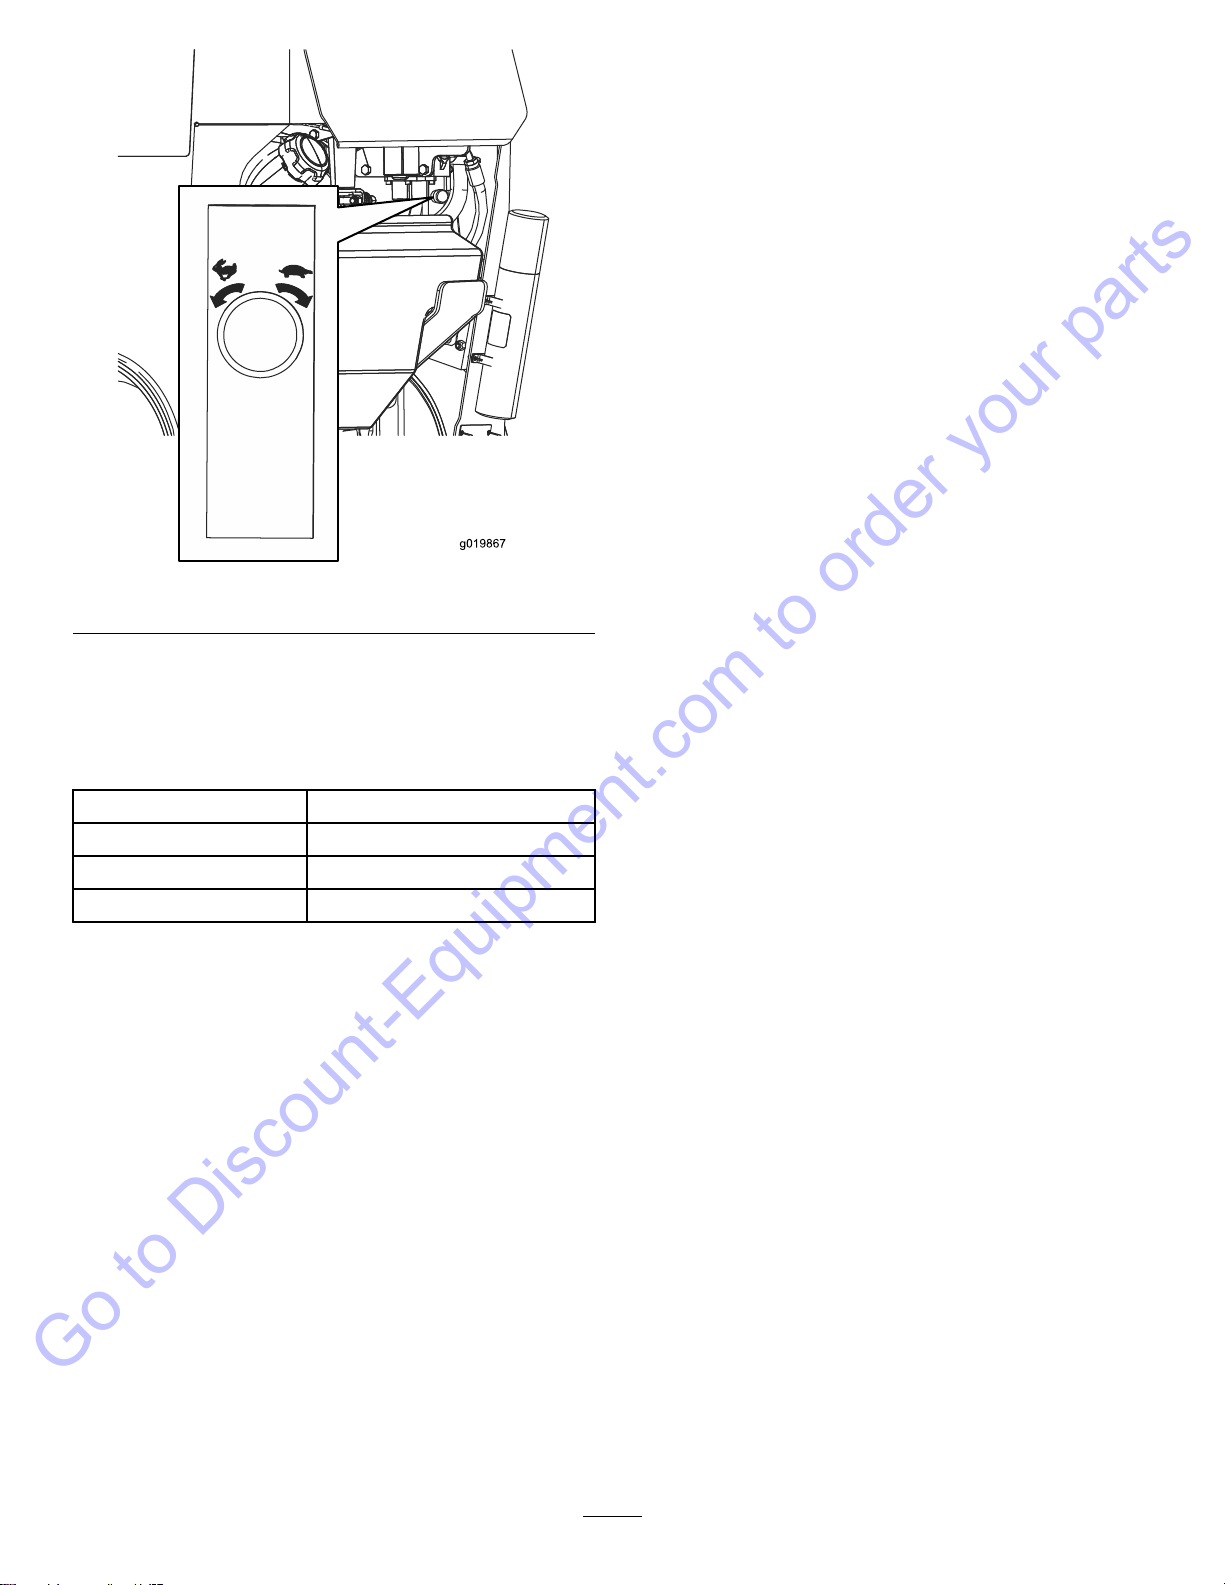
OpeningtheLiftValve
Beforeyoucanraisethegrinderandmovethe
machine,youmustopentheliftvalvelocatedunder
thecontrolpanel(Figure3).Turntheknobcounter
clockwisetoallowyoutoliftthegrinder.Thefarther
youturntheknob,thefastertheheadraisesand
lowerswhenactivated.
g019867
Figure3
ProductOverview
g319366
Figure4
1.Control
panel
3.Engine5.Tie-down
loop
7.Battery
2.Chip
shield
4.Grinder6.Track
Controls
Becomefamiliarwithallthecontrols(Figure5)before
youstarttheengineandoperatethemachine.
ControlPanel
g024907
Figure5
1.Keyswitch6.Referencebar
2.Throttlelever7.Reversesafetyplate
3.Engineindicatorlight8.Grindercontrollever
4.Hourmeter9.Handle
5.Tractioncontrol
8
Go to Discount-Equipment.com to order your parts

KeySwitch
Thekeyswitch,usedtostartandshutofftheengine,
has3positions:OFF,RUN,andSTAR
T.Referto
StartingtheEngine(page15).
ThrottleLever
Movethecontrolforwardtoincreasetheenginespeed
andrearwardtodecreasetheenginespeed.
HourMeter
Thehourmeterdisplaysthenumberofhoursof
operationthathavebeenloggedonthemachine.
ReferenceBar
Whendrivingthemachine,usethereferencebar
asahandleandaleveragepointforcontrollingthe
machine.T oensuresmooth,controlledoperation,
donottakebothhandsoffthereferencebarwhile
operatingthemachine.
Engine-IndicatorLight
Theengine-indicatorlightilluminateswhenthereisa
faultintheengineelectronic-controlunit.
Ifthelightilluminates,contactaKohlerenginedealer
fordiagnosisandservice.
Parking-BrakeLever
Toengagetheparkingbrake,lifttheleverupward.
Todisengagetheparkingbrake,pushthelever
downward.
g019832
Figure6
1.Parking-brakelever
TractionControl
g008128
Figure7
1.Referencebar
2.Tractioncontrol
•Tomoveforward,movethetractioncontrolforward
(Figure8).
g008129
Figure8
•Tomoverearward,movethetractioncontrol
rearward(Figure9).
Important:Whenreversing,lookbehindyou
forobstructionsandkeepyourhandsonthe
referencebar.
g008130
Figure9
9
Go to Discount-Equipment.com to order your parts

•Toturnright,rotatethetractioncontrolclockwise
(Figure10).
g008131
Figure10
•Toturnleft,rotatethetractioncontrol
counterclockwise(Figure11).
g008132
Figure11
•Tostopthemachine,releasethetractioncontrol
(Figure7).
Note:Thefartheryoumovethetractioncontrolin
anydirection,thefasterthemachinemovesinthat
direction.
GrinderControl
Operatethegrinderusingthegrindercontrollever
asfollows:
•Tostartthegrinder(Figure12),squeezethe
triggerandthenpresstheredbuttononthetopof
thelever.Oncethegrinderhasstarted,youcan
releasetheredbutton.
•Tostopthegrinder(Figure12),releasethetrigger
formorethanahalfsecond.
Note:Ifyouareoperatingthegrinderand
momentarilyreleasethetrigger(i.e.,lessthana
halfsecond),thegrindercontinuestooperate.
g019833
Figure12
1.Neutral3.Runthegrinder
2.Startthegrinder4.Stopthegrinder
10
Go to Discount-Equipment.com to order your parts

•Toraisethegrinder,pulltheleverrearward(Figure
13).
g019834
Figure13
•Tolowerthegrinder,pushtheleverforward(Figure
14).
g019835
Figure14
•Torotatethegrindertotherightorleft,movethe
leverinthedesireddirection(Figure15).
g019836
g019837
Figure15
Lift/LowerSpeedControl
Youcanchangehowquicklythegrinderheadraises
andlowersusingthelift/lowerspeedcontrol,located
undertherightsideofthecontrolpanel(Figure16).
Rotatethedialcounterclockwisetoincreasethe
speedorrotateitclockwisetoreducethespeed.
Ifyoumuststopthemachinewiththegrinderhead
raised,turnthecontroldialallthewayclockwiseto
lockthegrinderheadbeforeleavingthemachineor
performinganymaintenance
CAUTION
Ifyouleavethegrinderheadintheraised
positionwithoutturningthelift/lowerspeed
controldialallthewayclockwise,thegrinder
couldlower,crushingyouorbystanders.
Wheneverpossible,lowerthegrindertothe
groundbeforeshuttingofftheengine.If
youmustkeepthegrinderheadraised,turn
thelift/lowerspeedcontroldialalltheway
clockwisetolockthegrinder.
11
Go to Discount-Equipment.com to order your parts
g019867
Figure16
Specications
Note:Specicationsanddesignaresubjectto
changewithoutnotice.
Width86cm(34inches)
Length241cm(95inches)
Height130cm(51inches)
Weight794kg(1,750lb)
Attachments/Accessories
To ensure optimum performance and continued safety
certication of the machine, use only genuine Toro
replacement parts and accessories. Replacement
parts and accessories made by other manufacturers
could be dangerous, and such use could void the
product warranty.
Operation
Note:Determinetheleftandrightsidesofthe
machinefromthenormaloperatingposition.
BeforeOperation
BeforeOperationSafety
GeneralSafety
•Havethepropertyorworkareamarkedforburied
linesandotherobjects,anddonotdiginmarked
areas;notethelocationofunmarkedobjectsand
structures,suchasundergroundstoragetanks,
wells,andsepticsystems.
•Inspecttheareawhereyouwillusetheequipment.
–Evaluatetheterraintodeterminewhat
accessoriesandattachmentsyouneedto
properlyandsafelyperformthejob.
–Removealldebris.
–Ensurethattheareaisclearofbystanders
beforeoperatingthemachine.
–Stopthemachineifanyoneentersthearea.
•Becomefamiliarwiththesafeoperationofthe
equipment,operatorcontrols,andsafetydecals.
–Theownerisresponsiblefortrainingall
operatorsandmechanics.
–Neverallowchildrenoruntrainedpeople
tooperateorservicethemachine.Local
regulationsmayrestricttheageorrequire
certiedtrainingoftheoperator.
–Knowhowtostopthemachineandshutoffthe
enginequickly.
–Checkthattheoperator'spresencecontrols,
safetyswitches,andshieldsareattached
andfunctioningproperly.Donotoperatethe
machineunlesstheyarefunctioningproperly.
–Locatethepinch-pointareasmarkedonthe
machineandattachments;keepyourhands
andfeetawayfromtheseareas.
–Stopthemachine,shutofftheengine,and
removethekeybeforeleavingtheoperating
position.
FuelSafety
•Useextremecareinhandlingfuel.Itisammable
anditsvaporsareexplosive.
•Extinguishallcigarettes,cigars,pipes,andother
sourcesofignition.
•Useonlyanapprovedfuelcontainer.
12
Go to Discount-Equipment.com to order your parts

•Donotremovethefuelcaporllthefueltank
whiletheengineisrunningorhot.
•Donotaddordrainfuelinanenclosedspace.
•Donotstorethemachineorfuelcontainerwhere
thereisanopename,spark,orpilotlight,such
asonawaterheaterorotherappliance.
•Ifyouspillfuel,donotattempttostarttheengine;
avoidcreatinganysourceofignitionuntilthefuel
vaporshavedissipated.
•Donotllcontainersinsideavehicleoronatruck
ortrailerbedwithaplasticliner.Alwaysplace
containersontheground,awayfromyourvehicle
beforelling.
•Removetheequipmentfromthetruckortrailer
andrefuelitwhileitisontheground.Ifthisisnot
possible,thenrefuelfromaportablecontainer
ratherthanafuel-dispensernozzle.
•Keepthefuel-dispensernozzleincontactwith
therimofthefueltankorcontaineropeningat
alltimesuntilfuelingiscomplete.Donotusea
nozzlelock-opendevice.
AddingFuel
RecommendedFuel
•Forbestresults,useonlyclean,fresh(lessthan
30daysold),unleadedgasolinewithanoctane
ratingof87orhigher((R+M)/2ratingmethod).
•Ethanol:Gasolinewithupto10%ethanol
(gasohol)or15%MTBE(methyltertiarybutyl
ether)byvolumeisacceptable.Ethanoland
MTBEarenotthesame.Gasolinewith15%
ethanol(E15)byvolumeisnotapprovedforuse.
Neverusegasolinethatcontainsmorethan
10%ethanolbyvolume,suchasE15(contains
15%ethanol),E20(contains20%ethanol),orE85
(containsupto85%ethanol).Usingunapproved
gasolinemaycauseperformanceproblemsand/or
enginedamagewhichmaynotbecoveredunder
warranty.
•Donotusegasolinecontainingmethanol.
•Donotstorefueleitherinthefueltankorfuel
containersoverthewinterunlessyouuseafuel
stabilizer.
•Donotaddoiltogasoline.
UsingStabilizer/Conditioner
Usefuelstabilizer/conditionerinthemachinetokeep
thefuelfreshlongerwhenusedasdirectedbythe
fuel-stabilizermanufacturer.
Important:Donotusefueladditivescontaining
methanolorethanol.
Addtheamountoffuelstabilizer/conditionertofresh
fuelasdirectedbythefuel-stabilizermanufacturer.
FillingtheFuelTank
1.Parkthemachineonalevelsurface,engage
theparkingbrake(ifequipped),andlowerthe
grinder.
2.Shutofftheengine,removethekey,andallow
theenginetocool.
3.Cleanaroundthefuel-tankcapandremoveit
(Figure17).
g020516
Figure17
1.Fuel-tankcap
2.Fuelgauge
4.Addfueltothetankuntilthelevelis6to13mm
(1/4to1/2inch)belowthebottomoftheller
neck.
Important:Thisspaceinthetankallows
fueltoexpand.Donotllthefueltank
completelyfull.
5.Installthefuel-tankcapsecurely,turningituntil
itclicks.
6.Wipeupanyspilledfuel.
PerformingDaily
Maintenance
Beforestartingthemachineeachday,performthe
EachUse/DailyprocedureslistedinMaintenance
(page18).
13
Go to Discount-Equipment.com to order your parts

DuringOperation
DuringOperationSafety
GeneralSafety
•Keepyourhandsandfeetawayfrommovingteeth
orotherparts.
–Keepbystandersandpetsawayfromthe
machineandnevercarrypassengers.
–Wearappropriateclothing,includingeye
protection,longpants,substantialslip-resistant
footwear,andhearingprotection.
–Tiebacklonghairanddonotwearloose
clothingorloosejewelry.
–Stopgrindingifanyoneentersthearea.
•Operatethemachineonlyinareaswherethereis
sufcientclearanceforyoutosafelymaneuver.
•Beawareofobstaclesincloseproximitytoyou.
Failuretomaintainadequatedistancefromtrees,
walls,andotherbarriersmayresultininjuryasthe
machinebacksupduringoperationifyouarenot
attentivetothesurroundings.
•Lookbehindanddownbeforebackingupto
ensurethatthepathisclear.
•Useyourfullattentionwhileoperatingthe
machine.Donotengageinanyactivitythat
causesdistractions;otherwise,injuryorproperty
damagemayoccur.
•Neverjerkthecontrols;useasteadymotion.
•Theowner/usercanpreventandisresponsible
foraccidentsthatmaycausepersonalinjuryor
propertydamage.
•Donotoperatethemachinewhenyouaretired,ill,
orundertheinuenceofalcoholordrugs.
•Operatethemachineonlyingoodlight.
•Ensurethatallthedrivesareinneutralandengage
theparkingbrakebeforestartingtheengine.Start
theengineonlyfromtheoperator'sposition.
•Usecarewhenapproachingblindcorners,shrubs,
trees,orotherobjectsthatmayobscurevision.
•Stopthegrinderwhenyouarenotgrinding.
•Stopthemachine,shutofftheengine,remove
thekey,andinspectthemachineifyoustrike
anobject.Makeanynecessaryrepairsbefore
resumingoperation.
•Neverrunanengineinanenclosedarea.
•Neverleavearunningmachineunattended.
Beforeleavingtheoperatingposition,dothe
following:
–Parkthemachineonalevelsurface.
–Lowerthegrindertotheground.
–Engagetheparkingbrake.
–Shutofftheengineandremovethekey.
•Checkforoverheadclearance(i.e.,electrical
wires,branches,anddoorways)beforedriving
underanyobjectsanddonotcontactthem.
•Donotoperatethemachinewhenthereistherisk
oflightning.
•UseonlyT oro-approvedattachmentsand
accessories.
SlopeSafety
•Operateupanddownslopeswiththefrontofthe
machineuphill.
•Raisingthegrinderonaslopeaffectsthestability
ofthemachine.Keepthegrinderinthelowered
positionwhenonslopes.
•Slopesareamajorfactorrelatedtoloss-of-control
andtip-overaccidents,whichcanresultinsevere
injuryordeath.Operatingthemachineonany
slopeoruneventerrainrequiresextracaution.
•Establishyourownproceduresandrulesfor
operatingonslopes.Theseproceduresmust
includesurveyingthesitetodeterminewhich
slopesaresafeformachineoperation.Always
usecommonsenseandgoodjudgmentwhen
performingthissurvey.
•Slowdownanduseextracareonhillsides.Ground
conditionscanaffectthestabilityofthemachine.
•Avoidstartingorstoppingthemachineonaslope.
•Avoidturningonslopes.Ifyoumustturn,turn
slowlyandkeeptheheavyendofthemachine
uphill.
•Keepallmovementsonslopesslowandgradual.
Donotmakesuddenchangesinspeedor
direction.
•Ifyoufeeluneasyoperatingthemachineona
slope,donotdoit.
•Watchforholes,ruts,orbumps,asuneventerrain
couldoverturnthemachine.T allgrasscanhide
obstacles.
•Usecautionwhenoperatingonwetsurfaces.
Reducedtractioncouldcausesliding.
•Evaluatetheareatoensurethatthegroundis
stableenoughtosupportthemachine.
•Usecautionwhenoperatingthemachinenearthe
following:
–Drop-offs
–Ditches
–Embankments
–Bodiesofwater
Themachinecouldsuddenlyrolloverifatrack
goesovertheedgeortheedgecavesin.Maintain
14
Go to Discount-Equipment.com to order your parts

asafedistancebetweenthemachineandany
hazard.
•Ifthemachinestartstotip,letgoofthecontrols
andstepawayfromthemachine.
•Donotparkthemachineonahillsideorslope.
StartingtheEngine
1.Movethethrottlelevermidwaybetweenthe
SLOWandFASTpositions(Figure18).
g024908
Figure18
1.Key2.Throttlelever
2.TurnthekeytotheONposition(Figure18).
Whentheenginestarts,releasethekey.
Important:Donotengagethestarterfor
morethan10secondsatatime.Iftheengine
failstostart,allowa30-secondcooldown
periodbetweenattempts.Failuretofollow
theseinstructionscanburnoutthestarter
motor.
3.Movethethrottlelevertothedesiredsetting
(Figure18).
Important:Iftheengineisrunathigh
speedswhenthehydraulicsystemiscold
(i.e.,whentheambientairtemperatureis
nearfreezingorlower),hydraulicsystem
damagecouldoccur.Whenstartingthe
engineincoldconditions,allowtheengine
toruninthemiddlethrottlepositionfor
2to5minutesbeforemovingthethrottle
tofast(rabbit).Atnormaltohighambient
temperatures,runthemachineatfullthrottle
forthebestperformanceandcooling.
Note:Iftheoutdoortemperatureisbelow
freezing,storethemachineinagaragetokeep
itwarmerandaidinstarting.
DrivingtheMachine
Usethetractioncontrolstomovethemachine.The
fartheryoumovethetractioncontrolsinanydirection,
thefasterthemachinemovesinthatdirection.
Releasethetractioncontrolstostopthemachine.
CAUTION
Whenreversing,youmaybackintostationary
objectsoroverbystandersandcauseserious
personalinjuryordeath.
Lookbehindyouforobstructionsor
bystandersandkeepyourhandsonthe
referencebar.
Thethrottlecontrolregulatestheenginespeedas
measuredinrpm(revolutionsperminute).Placethe
throttleleverintheFASTpositionforbestperformance.
Youcan,however,usethethrottlepositiontooperate
atslowerspeeds.
ShuttingofftheEngine
1.Parkthemachineonalevelsurface,engage
theparkingbrake(ifapplicable),andlowerthe
grinder.
2.MovethethrottlelevertotheSLOWposition.
3.Iftheenginehasbeenworkinghardorishot,let
itidleforaminutebeforeturningthekeyswitch
totheOFFposition.
Note:Thishelpstocooltheenginebeforeyou
shutitoff.Inanemergency,youcanshutoff
theengineimmediately.
4.TurnthekeyswitchtotheOFFpositionand
removethekey.
CAUTION
Achildoruntrainedbystandercould
attempttooperatethemachineandbe
injured.
Removethekeyfromtheswitchwhen
leavingthemachine,evenifjustforafew
seconds.
15
Go to Discount-Equipment.com to order your parts

GrindingaStump
1.Starttheengine,raisethegrinder,setthe
throttlelevertotheFASTposition,andmovethe
machinetothestumptobeground.
2.Usethegrindercontrolleverandthetraction
controltopositionthegrindertothesideofthe
frontofthestump,about2cm(1inch)below
thesurface(Figure19).
3.Startthegrinderandwaitforittogetuptofull
speed.
4.Usethegrindercontrollevertoswingthegrinder
slowlyacrossthefaceofthestump,cutting
awayaswathofchips(Figure19).
Important:Thegrinderautomaticallyslows
downthespeedatwhichitswingsintothe
stumptomaintaintheoptimumywheel
speedandnotbogdowninthewood.
g019845
Figure19
5.Lowerthegrinderaboutaninchandswingit
backoverthestump.
6.Repeatsteps4and5untilyouhavereached
groundlevel.
7.Raisethegrindersothatitisabout2.5cm(1
inch)belowthetopoftheremainingstump,
movethemachineforwardafewcentimeters
(inches),andrepeatsteps4through6untilyou
havegroundawaytheentirestump.
8.Ifthereareanylargerootstobeground,position
thegrinderovereachrootandusethetraction
controlandgrindercontroltomovethegrinder
alongtheroot,grindingitaway.
9.Cleandebrisfromthegrinder,drives,mufers,
andengineaftereachuse.
OperatingTips
•Cleantheareaoftrash,branches,androcks
beforeoperatingtopreventequipmentdamage.
•Alwaysusefullthrottle(maximumenginespeed)
whengrinding.
•Cuttheedgesofthestumpformoreefcient
grinding.Onceyourcuttingswathiscloseto1/4
ofthewheeldiameter,lowerthegrinderandbegin
cuttingontheedgeagain.
g019845
Figure20
•Listentotheengineandwatchthegrinderwheel
speedtomaintainthespeedofthewheel.Slow
downtheheadsweepbyfeatheringthejoystickas
cuttingbecomesdifcult.
•Asyougrindfromlefttoright,mostofthedebris
goestotheleftofthegrinderwheel.Whenyou
grindfromtherighttoleft,thedebrisgoestothe
right.
•Youmayalsogrindastumpfromthesidetolessen
turfdamage.
AfterOperation
AfterOperationSafety
GeneralSafety
•Parkthemachineonalevelsurface,disengage
thegrinderhydraulics,lowerthegrinder,engage
theparkingbrake,shutofftheengine,andremove
thekey.Waitforallmovementtostopandallow
themachinetocoolbeforeadjusting,servicing,
cleaning,orstoringit.
•Cleandebrisfromthedrives,mufers,andengine
tohelppreventres.Cleanupoilorfuelspills.
16
Go to Discount-Equipment.com to order your parts
•Keepallpartsingoodworkingconditionandall
hardwaretightened.
•Usecarewhenloadingorunloadingthemachine
intoatrailerortruck.
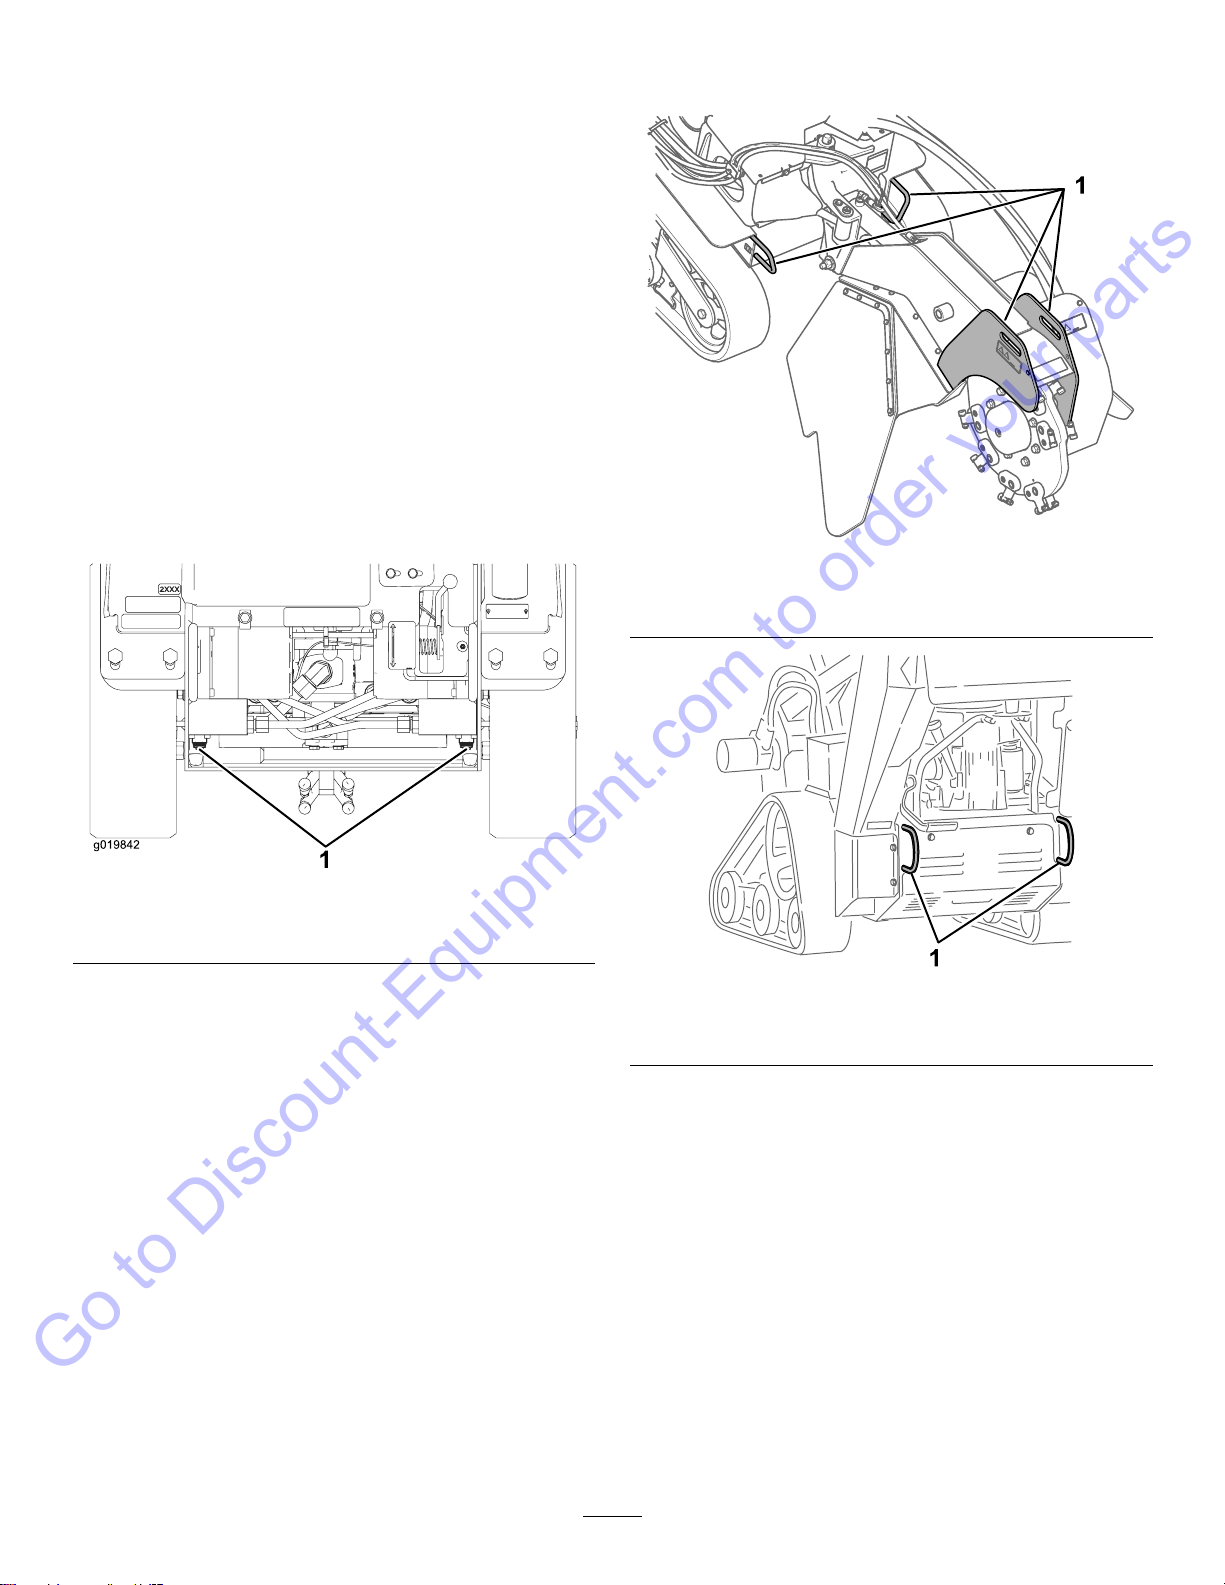
MovingaNon-Functioning
Machine
Important:Donottoworpullthemachine
withoutrstopeningthetowvalves,oryouwill
damagethehydraulicsystem.
1.Engagetheparkingbrakeandlowerthegrinder.
2.Shutofftheengineandremovethekey.
3.Removethebottomshield.
4.Usingawrench,turnthetowvalvesonthe
hydraulicpumpstwicecounter-clockwise(Figure
21).
g019842
Figure21
1.Towvalves
5.Installthebottomshieldandtowthemachine
asrequired.
6.Afterrepairingthemachine,closethetowvalves
beforeoperatingit.
SecuringtheMachinefor
Transport
Important:Donotoperateordrivethemachine
onroadways.
1.Parkthemachineonalevelsurface,engage
theparkingbrake(ifapplicable),andlowerthe
grinder.
2.Shutofftheengineandremovethekey.
3.Securethemachinetoatrailerwithchainsor
strapsusingthetie-down/liftloopsatthefront
andrearofthemachine(Figure22andFigure
23).Refertoyourlocalordinancesfortrailerand
tie-downrequirements.
g319379
Figure22
1.Fronttie-down/liftloops
g319380
Figure23
1.Reartie-down/liftloops
LiftingtheMachine
Youcanliftthemachineusingthetie-down/liftloops
asliftpoints(Figure22andFigure23).
17
Go to Discount-Equipment.com to order your parts

Maintenance
Note:Determinetheleftandrightsidesofthemachinefromthenormaloperatingposition.
CAUTION
Ifyouleavethekeyinthekeyswitch,someonecouldaccidentlystarttheengineandseriously
injureyouorotherbystanders.
Removethekeyfromthekeyswitchanddisconnectthewiresfromthesparkplugsbefore
youdoanymaintenance.Setthewiresasidesothattheydonotaccidentallycontactthe
sparkplugs.
MaintenanceSafety
•Parkthemachineonalevelsurface,disengage
thegrinderhydraulics,lowerthegrinder,engage
theparkingbrake,shutofftheengine,andremove
thekey.Waitforallmovementtostopandallow
themachinetocoolbeforeadjusting,servicing,
cleaning,orstoringit.
•Cleanupoilorfuelspills.
•Donotallowuntrainedpersonneltoservicethe
machine.
•Usejackstandstosupportthecomponentswhen
required.
•Carefullyreleasepressurefromcomponentswith
storedenergy.
•Disconnectthebatterybeforemakinganyrepairs.
•Keepyourhandsandfeetawayfromthemoving
parts.Ifpossible,donotmakeadjustmentswith
theenginerunning.
•Keepallpartsingoodworkingconditionandall
hardwaretightened.Replaceallwornordamaged
decals.
•Donottamperwiththesafetydevices.
•UseonlygenuineTororeplacementparts.
RecommendedMaintenanceSchedule(s)
MaintenanceService
IntervalMaintenanceProcedure
Aftertherst50hours•Checkandadjustthetracktension.
Beforeeachuseordaily
•Greasethemachine.(Greaseitimmediatelyaftereverywashing.)
•Checktheengine-oillevel.
•Checktheconditionofandcleanthetracks.
•Cleantheenginescreen.
•Checktheconditionoftheteeth;rotateorreplaceanythatarewornordamaged
andtorquethenutsforallteeth.
•Checkforloosefasteners.
Aftereachuse•Removedebrisfromthemachine.
Every25hours•Checkthebatteryelectrolytelevel.
•Checkthehydraulic-uidlevel.
Every100hours
•Changetheengineoil(moreoftenindirtyordustyconditions).
•Checkandadjustthetracktension.
•Checkthehydrauliclinesforleaks,loosettings,kinkedlines,loosemounting
supports,wear,weather,andchemicaldeteriorationandrepairifnecessary.
Every150hours•Inspecttheprimarylter.
•Replacethelow-pressurefuellter(moreoftenindirtyordustyconditions).
Every200hours•Changetheengine-oillter.
•Replacethehydrauliclter.
Every250hours•Replacetheprimaryairlter(moreoftenindustyorsandyconditions).
•Checkandgreasetheroadwheels.
Every300hours•Checktheinnerairlter.
18
Go to Discount-Equipment.com to order your parts
This manual suits for next models
1
Table of contents
Other Toro Grinder manuals


