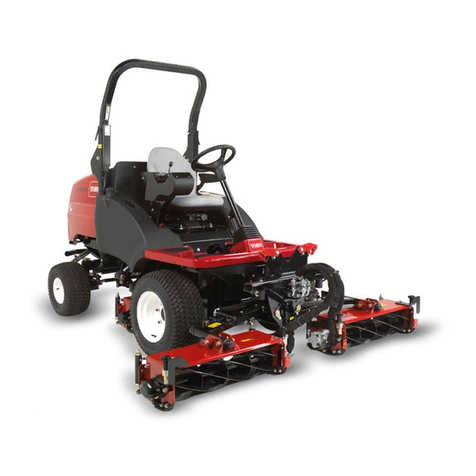
Toro Groundsmaster 4500-D User manual

FormNo.3439-564RevA
Groundsmaster®4500-Dor
4700-DRotaryMower
ModelNo.30885—SerialNo.407000000andUp
ModelNo.30887—SerialNo.407000000andUp
Registeratwww.Toro.com.
OriginalInstructions(EN)*3439-564*A

ThisproductcomplieswithallrelevantEuropean
directives;fordetails,pleaseseetheseparateproduct
specicDeclarationofConformity(DOC)sheet.
ItisaviolationofCaliforniaPublicResourceCode
Section4442or4443touseoroperatetheengineon
anyforest-covered,brush-covered,orgrass-covered
landunlesstheengineisequippedwithaspark
arrester,asdenedinSection4442,maintainedin
effectiveworkingorderortheengineisconstructed,
equipped,andmaintainedforthepreventionofre.
Theenclosedengineowner'smanualissupplied
forinformationregardingtheUSEnvironmental
ProtectionAgency(EPA)andtheCaliforniaEmission
ControlRegulationofemissionsystems,maintenance,
andwarranty.Replacementsmaybeorderedthrough
theenginemanufacturer.
WARNING
CALIFORNIA
Proposition65Warning
Dieselengineexhaustandsomeofits
constituentsareknowntotheStateof
Californiatocausecancer,birthdefects,
andotherreproductiveharm.
Batteryposts,terminals,andrelated
accessoriescontainleadandlead
compounds,chemicalsknownto
theStateofCaliforniatocause
cancerandreproductiveharm.Wash
handsafterhandling.
Useofthisproductmaycauseexposure
tochemicalsknowntotheStateof
Californiatocausecancer,birthdefects,
orotherreproductiveharm.
Introduction
Thismachineisaride-on,rotary-bladelawnmower
intendedtobeusedbyprofessional,hiredoperators
incommercialapplications.Itisprimarilydesigned
forcuttinggrassonwell-maintainedlawnsinparks,
sportselds,andoncommercialgrounds.Usingthis
productforpurposesotherthanitsintendedusecould
provedangeroustoyouandbystanders.
Readthisinformationcarefullytolearnhowtooperate
andmaintainyourproductproperlyandtoavoid
injuryandproductdamage.Youareresponsiblefor
operatingtheproductproperlyandsafely.
Visitwww.Toro.comforproductsafetyandoperation
trainingmaterials,accessoryinformation,helpnding
adealer,ortoregisteryourproduct.
Wheneveryouneedservice,genuineToroparts,or
additionalinformation,contactanAuthorizedService
DealerorToroCustomerServiceandhavethemodel
andserialnumbersofyourproductready.Figure1
identiesthelocationofthemodelandserialnumbers
ontheproduct.Writethenumbersinthespace
provided.
Important:Withyourmobiledevice,youcan
scantheQRcodeontheserialnumberdecal(if
equipped)toaccesswarranty,parts,andother
productinformation.
g284120
Figure1
1.Modelandserialnumberlocation
ModelNo.
SerialNo.
Thismanualidentiespotentialhazardsandhas
safetymessagesidentiedbythesafety-alertsymbol
(Figure2),whichsignalsahazardthatmaycause
seriousinjuryordeathifyoudonotfollowthe
recommendedprecautions.
g000502
Figure2
1.Safety-alertsymbol.
Thismanualuses2wordstohighlightinformation.
Importantcallsattentiontospecialmechanical
informationandNoteemphasizesgeneralinformation
worthyofspecialattention.
©2020—TheToro®Company
8111LyndaleAvenueSouth
Bloomington,MN554202
Contactusatwww.Toro.com.
PrintedintheUSA
AllRightsReserved

Contents
Safety.......................................................................4
GeneralSafety...................................................4
SafetyandInstructionalDecals..........................5
Setup......................................................................12
1InstallingtheDecals(CEMachines
Only).............................................................12
2InstallingtheHoodLatch................................13
3AdjustingtheRollerScraper...........................14
4InstallingtheMulchingBafe..........................15
5PreparingtheMachine...................................15
ProductOverview...................................................16
Controls...........................................................16
Specications..................................................19
MachineSpecications.....................................20
CuttingUnitSpecications................................20
Attachments/Accessories.................................20
BeforeOperation.................................................21
BeforeOperationSafety...................................21
CheckingtheEngine-OilLevel..........................21
CheckingtheCoolingSystem...........................21
CheckingtheHydraulicSystem........................21
DrainingtheWaterSeparator...........................21
CheckingtheRearAxleandGearboxfor
Leaks............................................................21
FillingtheFuelTank..........................................22
CheckingtheTirePressure...............................23
CheckingtheTorqueoftheWheelLug
Nuts..............................................................23
AdjustingtheRollBar.......................................24
AdjustingtheHeightofCut...............................25
CheckingtheInterlockSwitches.......................25
CheckingtheBlade-StoppingTime...................26
SelectingaBlade..............................................26
ChoosingAccessories......................................27
UsingtheInfoCenterLCDDisplay....................28
UsingtheMenus...............................................30
ProtectedMenus..............................................31
DuringOperation.................................................33
DuringOperationSafety...................................33
UnderstandingtheOperatingCharacteristics
oftheMachine..............................................35
OperatingtheMachine.....................................35
UsingtheHighandLowSpeedRange
Switch...........................................................36
UsingtheTractionPedal...................................36
SettingtheMaximumTractionSpeed(Pedal
Stop)............................................................37
UsingtheBrakePedals....................................37
OperatingtheCruiseControl............................37
UnderstandingtheAccelerationMode..............38
UnderstandingtheTurnaroundMode...............39
UnderstandingCounterbalance........................39
UnderstandingToroSmartPower™.................39
StartingtheEngine...........................................39
ShuttingOfftheEngine.....................................40
CuttingGrasswiththeMachine........................40
DieselParticulateFilterRegeneration...............41
OperatingtheEngine-CoolingFan....................53
OperatingTips.................................................54
AfterOperation....................................................55
GeneralSafety.................................................55
UsingtheCutting-UnitStorageLanyard............55
UsingtheTransportLatches.............................56
HaulingtheMachine.........................................56
PushingorTowingtheMachine........................56
LocatingtheTie-DownPoints...........................57
Maintenance...........................................................58
MaintenanceSafety..........................................58
RecommendedMaintenanceSchedule(s)...........58
DailyMaintenanceChecklist.............................60
Pre-MaintenanceProcedures..............................61
LiftingtheMachine...........................................61
OpeningtheHood............................................62
AccessingtheHydraulicLift
Compartment................................................62
Lubrication..........................................................63
GreasingtheBearingsandBushings................63
EngineMaintenance...........................................64
EngineSafety...................................................64
ServicingtheAirCleaner..................................64
ServicingtheEngineOil....................................65
ServicingtheDiesel-OxidationCatalyst
(DOC)andtheSootFilter..............................67
FuelSystemMaintenance...................................67
DrainingtheFuelT ank......................................67
InspectingtheFuelLinesand
Connections..................................................67
ServicingtheFuel-WaterSeparator..................68
ServicingtheFuelFilter....................................69
CleaningtheFuel-PickupTubeScreen.............69
PrimingtheFuelSystem...................................70
ElectricalSystemMaintenance...........................70
ElectricalSystemSafety...................................70
CheckingtheBatteryCondition.........................70
ChargingandConnectingtheBattery...............71
LocatingtheFuses...........................................72
DriveSystemMaintenance..................................73
CheckingforEnd-PlayinthePlanetary
Drives............................................................73
CheckingthePlanetaryGear-Drive
Lubricant.......................................................73
ChangingthePlanetary-Gear-Drive
Oil.................................................................74
CheckingtheRearAxleandGearboxfor
Leaks............................................................75
CheckingtheRear-AxleLubricant....................75
ChangingtheRear-AxleLubricant....................76
CheckingtheRear-Axle-Gearbox
Lubricant.......................................................76
CheckingtheRearWheelT oe-In......................77
CoolingSystemMaintenance..............................78
CoolingSystemSafety.....................................78
CheckingtheCoolingSystem...........................78
CleaningtheCoolingSystem............................78
3

BrakeMaintenance.............................................80
AdjustingtheServiceBrakes............................80
BeltMaintenance................................................80
ServicingtheAlternatorBelt.............................80
HydraulicSystemMaintenance...........................81
HydraulicSystemSafety...................................81
ServicingtheHydraulicFluid............................81
CheckingtheHydraulicLinesand
Hoses............................................................83
CuttingUnitMaintenance.....................................84
RemovingtheCuttingUnits..............................84
InstallingtheCuttingUnits................................84
ServicingtheFrontRoller.................................84
BladeMaintenance..............................................85
BladeSafety.....................................................85
ServicingtheBladePlane.................................85
RemovingandInstallingtheCutting-Unit
Blade(s)........................................................86
InspectingandSharpeningtheCuttingUnit
Blade(s)........................................................87
Storage...................................................................88
StorageSafety..................................................88
PreparingtheMachineforStorage...................88
PreparingaCuttingUnit....................................89
Safety
Thismachinehasbeendesignedinaccordance
withENISO5395(whenyoucompletethesetup
procedures)andANSIB71.4-2017.
GeneralSafety
Thisproductiscapableofamputatinghandsand
feetandofthrowingobjects.Alwaysfollowallsafety
instructionstoavoidseriouspersonalinjury.
•Readandunderstandthecontentsofthis
Operator’sManualbeforestartingtheengine.
•Useyourfullattentionwhileoperatingthe
machine.Donotengageinanyactivitythat
causesdistractions;otherwise,injuryorproperty
damagemayoccur.
•Donotoperatethemachinewithoutallguards
andothersafetyprotectivedevicesinplaceand
functioningproperlyonthemachine.
•Keepyourhandsandfeetawayfromrotating
parts.Keepclearofthedischargeopening.
•Keepbystandersandchildrenoutoftheoperating
area.Neverallowchildrentooperatethemachine.
•Shutofftheengine,removethekey,andwait
forallmovementtostopbeforeyouleavethe
operator’sposition.Allowthemachinetocool
beforeadjusting,servicing,cleaning,orstoringit.
Improperlyusingormaintainingthismachinecan
resultininjury.Toreducethepotentialforinjury,
complywiththesesafetyinstructionsandalways
payattentiontothesafety-alertsymbol,which
meansCaution,Warning,orDanger—personalsafety
instruction.Failuretocomplywiththeseinstructions
mayresultinpersonalinjuryordeath.
4

SafetyandInstructionalDecals
Safetydecalsandinstructionsareeasilyvisibletotheoperatorandarelocatednearanyarea
ofpotentialdanger.Replaceanydecalthatisdamagedormissing.
decal93-7818
93-7818
1.Warning—readtheOperator'sManualforinstructionson
torquingthebladebolt/nutto115to149N∙m(85to110
ft-lb).
decal98-4387
98-4387
1.Warning—wearhearingprotection.
decal106-6754
106-6754
1.Warning—donottouchthehotsurface.
2.Cutting/dismembermenthazard,fan;entanglementhazard,
belt—stayawayfrommovingparts.
decal106-6755
106-6755
1.Enginecoolantunder
pressure.
3.Warning—donottouchthe
hotsurface.
2.Explosionhazard—read
theOperator'sManual.
4.Warning—readthe
Operator'sManual.
decal107-1972
107-1972
1.Thrownobjecthazard—useastandardbladewhenthe
mulchbafeisinstalled;donotuseahigh-liftbladewhen
themulchbafeisinstalled.
decal112-5297
112-5297
1.Warning—readtheOperator'sManual;donotoperatethe
machineunlessyouaretrained.
2.Warning—readtheOperator'sManualbeforetowingthe
machine.
3.Tippinghazard—turnatlowspeeds;donotturnathigh
speeds;lowerthecuttingunitwhendrivingdownslopes;
usearolloverprotectionsystemandweartheseatbelt.
4.Warning—donotparkthemachineonslopes;engagethe
parkingbrake,lowerthecuttingunits,shutofftheengine,
andremovethekeybeforeleavingthemachine.
5.Thrownobjecthazard—keepbystandersaway.
6.Entanglementhazard,belt—stayawayfrommovingparts;
keepallguardsandshieldsinplace.
5

decal117-4763
117-4763
1.T oengagetheparking
brake,securethebrake
pedalswiththelockingpin,
presstheparking-brake
pedalsandengagethetoe
pedal.
2.T odisengagetheparking
brake,disengagethe
lockingpinandreleasethe
pedals.
decal117-4764
117-4764
1.Thrownobjecthazard—keepbystandersaway.
2.Cuttinghazardofhand,mowerblade—stayawayfrom
movingparts;keepallguardsandshieldsinplace.
3.Cuttinghazardoffoot,mowerblade—stayawayfrom
movingparts;keepallguardsandshieldsinplace.
decal117-4765
117-4765
1.ReadtheOperator'sManual.
2.Donotusestartingaids.
decal117-4766
117-4766
1.Cutting/dismembermenthazard;fan—stayawayfrom
movingparts,keepallguardsandshieldsinplace.
decal120-8947
120–8947
1.Warning—readthe
Operator’sManual.
4.Iftherollbarisraised,
weartheseatbelt.
2.Thereisnorollover
protectionwhentheroll
barisdown.
5.Iftherollbarislowered,
donotweartheseatbelt.
3.Thereisrolloverprotection
whentherollbarisup.
6.Driveslowlywhenturning.
6

decal121-3884
121–3884
1.Engine—stop3.Engine—start
2.Engine—preheat
decal121-3887
121–3887
1.ReadtheOperator’sManual.
decal136-2931
136-2931
ForGroundsmaster4500Only
1.Raisethedecks.3.Disengagethecruise
control.
2.Setthecruisecontrol.
decal127-3700
127-3700
ForGroundsmaster4700Only
1.Raisetheleftcuttingunit.4.Setthecruisecontrol.
2.Raisethecentercutting
units.
5.Disengagethecruise
control.
3.Raisetherightcuttingunit.
decalbatterysymbols
BatterySymbols
Someorallofthesesymbolsareonyourbattery.
1.Explosionhazard6.Keepbystandersaway
fromthebattery.
2.Nore,opename,or
smoking
7.Weareyeprotection;
explosivegasescan
causeblindnessandother
injuries.
3.Causticliquid/chemical
burnhazard
8.Batteryacidcancause
blindnessorsevereburns.
4.Weareyeprotection.9.Flusheyesimmediately
withwaterandgetmedical
helpfast.
5.ReadtheOperator's
Manual.
10.Containslead;donot
discard
decal133-8062
133-8062
7

decal136-3185
136-3185
1.Headlights—Off5.Low
2.Headlights—On6.Lowertheleftcuttingunit.
3.High/Low—Auto7.Lowerthecentercutting
unit.
4.Tractioncontrols8.Lowertherightcutting
unit.
decal136-3338
136-3338
1.TEC—7.5A6.Powerseat—10A
2.Power—10A7.Engine—10A
3.InfoCenter—2A8.TEC—2A
4.Auxiliarypower—10A9.T elematics—10A
5.Worklights—10A10.Cab—60A
8

decal136-3566
136-3566
1.ReadtheOperator’sManualformoreinformationon
servicingthemachine.
decal121-3627
121-3627
1.Height-of-cutsettings
9

AfxoverPartNo.112-5297forCE*for4500seriesmachines(ModelNo.30885)
decal127-6447
127-6447
Note:Thismachinecomplieswiththeindustrystandardstabilitytestinthestaticlateralandlongitudinaltestswiththemaximum
recommendedslopeindicatedonthedecal.ReviewtheinstructionsforoperatingthemachineonslopesintheOperator’sManualas
wellastheconditionsinwhichyouwouldoperatethemachinetodeterminewhetheryoucanoperatethemachineintheconditionson
thatdayandatthatsite.Changesintheterraincanresultinachangeinslopeoperationforthemachine.
1.Warning—readthe
Operator’sManual;all
operatorsshouldbetrained
beforeoperatingthe
machine.
3.Tippinghazard—donot
driveonslopesgreaterthan
16°.
5.Warning—donotparkon
slopes;engagetheparking
brake,lowerthecutting
units,shutofftheengine,
andremovethekeybefore
leavingthemachine.
7.Entanglementhazard,
belt—stayawayfrom
movingparts;keepall
guardsandshieldsinplace.
2.Warning—readthe
Operator’sManualfor
towinginformation.
4.Keepthecuttingunits
loweredwhiledrivingdown
slopes;alwaysweara
seatbeltwhenoperatingthe
machine.
6.Thrownobject
hazard—keepbystanders
away.
10

AfxoverPartNo.112-5297forCE*for4700seriesmachines(ModelNo.30887)
decal127-6448
127-6448
Note:Thismachinecomplieswiththeindustrystandardstabilitytestinthestaticlateralandlongitudinaltestswiththemaximum
recommendedslopeindicatedonthedecal.ReviewtheinstructionsforoperatingthemachineonslopesintheOperator’sManualas
wellastheconditionsinwhichyouwouldoperatethemachinetodeterminewhetheryoucanoperatethemachineintheconditionson
thatdayandatthatsite.Changesintheterraincanresultinachangeinslopeoperationforthemachine.
1.Warning—readthe
Operator’sManual;all
operatorsshouldbetrained
beforeoperatingthe
machine.
3.Tippinghazard—donot
driveonslopesgreaterthan
21°.
5.Warning—donotparkon
slopes;engagetheparking
brake,lowerthecutting
units,shutofftheengine,
andremovethekeybefore
leavingthemachine.
7.Entanglementhazard,
belt—stayawayfrom
movingparts;keepall
guardsandshieldsinplace.
2.Warning—readthe
Operator’sManualfor
towinginformation.
4.Keepthecuttingunits
loweredwhiledrivingdown
slopes;alwaysweara
seatbeltwhenoperatingthe
machine.
6.Thrownobject
hazard—keepbystanders
away.
11

Setup
LooseParts
Usethechartbelowtoverifythatallpartshavebeenshipped.
ProcedureDescriptionQty.Use
Warningdecal1
CEdecal1
1Production-yeardecal1
Replacethedecals(CEmachinesonly).
Hood-latchbracket1
Rivet2
Washer1
Screw(1/4x2inches)1
2
Locknut(1/4inch)1
Installthehoodlatch(CEmachines
only).
3Nopartsrequired–Adjusttherollerscraper(optional).
4Nopartsrequired–Installthemulchingbafe(optional).
5Nopartsrequired–Preparethemachine.
MediaandAdditionalParts
DescriptionQty.Use
Operator'sManual1Reviewbeforeoperatingthemachine.
Engineowner’smanual1Refertothemanualforadditionalmaintenanceinformation.
DeclarationofConformity1
Ignitionkeys2Starttheengine.
Note:Determinetheleftandrightsidesofthemachinefromthenormaloperatingposition.
1
InstallingtheDecals(CE
MachinesOnly)
Partsneededforthisprocedure:
1Warningdecal
1CEdecal
1Production-yeardecal
Procedure
OnmachinesrequiringCEcompliance,replace
thewarningdecal(127-6647[forModel30885]or
127-6648[forModel30887]),CEdecal,andthe
production-yeardecal(Figure3).
12

g279018
Figure3
1.Warningdecal3.Production-yeardecal
2.CEdecal
2
InstallingtheHoodLatch
CEMachinesOnly
Partsneededforthisprocedure:
1Hood-latchbracket
2Rivet
1Washer
1Screw(1/4x2inches)
1Locknut(1/4inch)
Procedure
1.Unhookthehoodlatchfromthehood-latch
bracket.
2.Removethe2rivetssecuringthehood-latch
brackettothehood(Figure4).
g012628
Figure4
1.Hood-latchbracket2.Rivets
3.Removethehood-latchbracketfromthehood.
4.Whilealigningthemountingholes,positionthe
CElockbracketandthehood-latchbracketonto
thehood(Figure5).
Note:Thelockbracketmustbeagainstthe
hood.Donotremovetheboltandnutfromthe
lock-bracketarm.
g012629
Figure5
1.CElockbracket2.Boltandnut
5.Alignthewasherswiththeholesontheinsideof
thehood.
6.Rivetthebracketsandthewasherstothehood
(Figure5).
7.Hookthelatchontothehood-latchbracket
(Figure6).
13

g012630
Figure6
1.Hoodlatch
8.Installtheboltintotheotherarmofthe
hood-latchbrackettolockthelatchinposition
(Figure7).Tightentheboltbutdonottighten
thenut.
g012631
Figure7
1.Bolt3.Armofhood-latchbracket
2.Nut
3
AdjustingtheRoller
Scraper
Optional
NoPartsRequired
Procedure
Theoptionalrearrollerscraperfunctionsbestwhen
thereisanevengapof0.5to1mm(0.02to0.04inch)
betweenthescraperandtheroller.
1.Loosenthegreasettingandthemounting
screw(Figure8).
g011346
Figure8
1.Rollerscraper3.Greasetting
2.Mountingscrew
2.Slidethescraperupordownuntilyouobtaina
gapof0.5to1mm(0.02to0.04inch)between
therodandtheroller.
3.Tightenthegreasettingandscrewto41N∙m
(30ft-lb)inanalternatingsequence.
14

4
InstallingtheMulching
Bafe
Optional
NoPartsRequired
Procedure
ContactyourauthorizedT orodistributorforthecorrect
mulchingbafe.
1.Thoroughlycleandebrisfromthemountingholes
ontherearwallandleftwallofthechamber.
2.Installthemulchingbafeintherearopening
andsecureitwith5ange-headbolts(Figure9).
g031579
Figure9
1.Mulchingbafe2.Flange-headbolt
3.Verifythatthemulchingbafedoesnotinterfere
withthetipofthebladeanddoesnotprotrude
insidethesurfaceoftherearchamberwall.
DANGER
Usingthehigh-liftbladewiththe
mulchingbafecouldcausetheblade
tobreak,resultinginpersonalinjuryor
death.
Donotusethehigh-liftbladewiththe
bafe.
5
PreparingtheMachine
NoPartsRequired
Procedure
1.Parkthemachineonalevelsurface.
2.ForGroundsmaster4500and4700machines,
releasetheNo.4andNo.5cutting-unitcables
(Figure70).
3.ForGroundsmaster4700machines,releasethe
No.6andNo.7cutting-unitlatches(Figure73).
4.Lowerthecuttingunits.
5.Engagetheparkingbrake.
6.Shutofftheengineandremovethekey.
7.Checkthetirepressurebeforeuse;referto
CheckingtheTirePressure(page23).
Important:Maintainpressureinalltires
toensureagoodquality-of-cutandproper
machineperformance.Donotunderinate
thetires.
8.Checktherear-axlelubricantlevelbefore
youstarttheengineforthersttime;referto
CheckingtheRear-AxleLubricant(page75).
9.Checktheengine-oillevelbeforestartingthe
engine;refertoCheckingtheEngine-OilLevel
(page65).
10.Checkthehydraulic-uidlevelbeforestarting
theengine;refertoCheckingtheHydraulic-Fluid
Level(page81).
11.Checkthecoolingsystembeforestartingthe
engine;refertoCheckingtheCoolingSystem
(page78).
12.Greasethemachinebeforeuse;referto
GreasingtheBearingsandBushings(page63).
Important:Failuretoproperlygreasethe
machinewillresultinprematurefailureof
criticalparts.
15

ProductOverview
Controls
g009979
Figure10
1.Brakepedal4.Tractionpedal
2.Pedal-lockinglatch5.Tilt-steeringpedal
3.Parking-brakepedal
TractionPedal
Thetractionpedal(Figure10)controlsforwardand
reverseoperation.Pressthetopofthepedaltomove
forwardandthebottomtomovebackward.Whenthe
cuttingunitsarefullyraised,thepedalcontrolsthe
engineandtractionspeedlikeacar.
Note:Inemergencybrakingsituations,removeyour
footfromthetractionpedalandthenpressthebrake
pedals.Thisisthequickestwaytostopthemachine.
BrakePedals
Thereare2footpedalsthatoperateindividualwheel
brakesforturningassistance,parking,andtoaidin
betterside-hilltraction.Alatchconnectsthepedals
forparking-brakeoperationandtransport(Figure10).
Pedal-LockingLatch
Thepedal-lockinglatchconnectsthepedalstogether
toengagetheparkingbrake(Figure10).
Tilt-SteeringPedal
Totiltthesteeringwheeltowardyou,pressthefoot
pedaldown,pullthesteeringtowertowardyouto
themostcomfortableposition,andreleasethepedal
(Figure10).T omovethesteeringwheelawayfrom
you,pressthefootpedalandreleaseitwhenthe
steeringwheelreachesthedesiredoperatingposition.
Parking-BrakePedal
Toengagetheparkingbrake,(Figure10)connectthe
pedalstogetherwiththepedal-lockinglatchandpush
downontherightbrakepedalwhileengagingthetoe
pedal.Toreleasetheparkingbrake,press1ofthe
brakepedalsuntiltheparkingbrakelatchretracts.
KeySwitch
Thekeyswitch(Figure11)has3positions:OFF,
ON/PREHEAT,andSTART.
g296364
Figure11
1.Liftswitches
(Groundsmaster4700
machineonly)
5.InfoCenter
2.Liftswitch(Groundsmaster
4500and4700machines)
6.Highandlowspeedrange
switch
3.PTOswitch7.Lightswitch
4.Keyswitch
PTOSwitch
ThePTOswitchhas2positions:OUT(ENGAGE)andIN
(DISENGAGE).PullthePTObuttonouttoengagethe
cutting-unitblades.Pushthebuttonintodisengage
thecutting-unitblades(Figure11).
HighandLowSpeedRangeSwitch
Thisswitch(Figure11)controlsthemachines2speed
ranges;highandlow.
SelecttheH/LAUTOpositiontoallowthemachineto
automaticallyselecthighorlowspeed.
SelecttheLOWpositiontomanuallyoverridetolow
speedonly.
Youcanchangetheswitchpositionatanytime,but
themachinewillonlyswitchbetweenspeedranges
whenthetractionpedalisinneutralandthemachine
isstopped.
Note:T ogettohighspeedintheH/LAUTOposition,
disengagethePTOandfullyraisethecuttingunits.
16

Note:IfyouhavetheswitchintheH/LAUTO
position,youcannotlowerthedecksfromthe
fully-raisedpositionunlessthetractionpedalisin
neutralandthemachineisstopped.
Cruise-ControlSwitch
Thecruise-controlswitchlocksinthecruisecontrol
tomaintainthedesiredgroundspeed(Figure12).
Pressingtherearoftheswitchturnsoffthecruise
control,themiddlepositionoftheswitchenablesthe
cruise-controlfunction,andthefrontoftheswitchsets
thedesiredgroundspeed.
Oncethecruisecontrolisset,youcanchangethe
speedusingtheInfoCenter(Figure32).
g028454
Figure12
1.Powerpoint2.Cruise-controlswitch
LiftSwitches
Theliftswitchesraiseandlowerthecuttingunits
(Figure11).Presstheswitchesforwardtolowerthe
cuttingunitsandrearwardtoraisethecuttingunits.
Whenstartingthemachine,withthecuttingunitsin
thedownposition,presstheliftswitchdowntoallow
thecuttingunitstooatandmow.
Note:Thecuttingunitsdonotlowerwhileinthe
high-speedrangeandtheydonotraiseorlowerifyou
areoutoftheseat.Also,thecuttingunitslowerwith
thekeyintheONpositionandyouareintheseat.
LightSwitch
Pressthelightswitchupwardtoturnthelightstothe
ONposition(Figure11).
Pressthelightswitchdownwardtoturnthelightsto
theOFFposition.
PowerPoint
Usethepowerpoint(Figure13)topoweroptional
12Velectricalaccessories.
g036845
Figure13
1.Powerpoint2.Bagholder
BagHolder
Usethebagholderforstorage(Figure13).
SeatAdjustments
Seat-AdjustmentLever
Movetheseatadjustmentleveronthesideofthe
seatoutward,slidetheseattothedesiredposition,
andreleasethelevertolocktheseatintoposition
(Figure14).
g024916
Figure14
1.Weightgauge4.Seat-backadjustment
lever
2.Weightadjustmentlever5.Armrestadjustmentknob
3.Seatadjustmentlever
17

ArmrestAdjustmentKnob
Rotatetheknobtoadjustthearmrestangle(Figure
14).
Seat-BackAdjustmentLever
Movethelevertoadjusttheseat-backangle(Figure
14).
WeightGauge
Theweightgaugeindicateswhentheseatisadjusted
totheoperator’sweight(Figure14).Adjusttheheight
bypositioningthesuspensionwithintherangeofthe
greenregion.
WeightAdjustmentLever
Usethislevertoadjusttheseattoyourweight(Figure
14).Pulltheleveruptoincreasetheairpressureand
pushtheleverdowntodecreasetheairpressure.The
properadjustmentiscorrectwhentheweightgaugeis
inthegreenregion.
InfoCenterLCDDisplay
TheInfoCenterLCDdisplay(Figure11)shows
informationaboutyourmachine,suchastheoperating
status,variousdiagnostics,andotherinformation
aboutthemachine
Thescreensthatdisplaydependonwhichbuttons
youselect.Thepurposeofeachbuttonmaychange
dependingonwhatisrequiredatthetime.
18

Specications
g322289
Figure15
1.Cuttingunit13.Cuttingunit35.Cuttingunit57.Cuttingunit7(4700only)
2.Cuttingunit24.Cuttingunit46.Cuttingunit6(4700only)
19

MachineSpecications
SpecicationsTable
Description4500-DFigure15reference4700-DFigure15reference
Widthofcut280cm(110inches)D380cm(150inches)F
Overallwidth
Cuttingunitsdown286cm(113inches)E391cm(154inches)G
Cuttingunitsup
(transport)
224cm(88inches)A224cm(88inches)A
Trackwidth
Front224cm(88inches)B224cm(88inches)B
Rear141cm(56inches)M141cm(56inches)M
HeightwithROPS
Raised226cm(88.8inches)C226cm(88.8inches)C
Lowered165cm(65.2inches)165cm(65.2inches)
Overalllength
Cuttingunitsdown370cm(146inches)H370cm(146inches)H
Cuttingunitsup
(transport)
370cm(146inches)L370cm(146inches)L
Groundclearance15cm(6inches)15cm(6inches)
Wheelbase171cm(68inches)K171cm(68inches)K
Netweight
(withcuttingunitsandno
fuel)
1937kg(4,270lb)2277kg(5,020lb)
Note:Specicationsanddesignaresubjecttochangewithoutnotice.
CuttingUnitSpecications
SpecicationsTable
Length86.4cm(34inches)
Width86.4cm(34inches)
24.4cm(9.6inches)tocarriermount
26.7cm(10-1/2inches)at3/4-inchheightofcut
Height
34.9cm(13-3/4inches)at4-inchheightofcut
Weight88kg(195lb)
Attachments/Accessories
AselectionofT oroapprovedattachmentsandaccessoriesisavailableforusewiththemachinetoenhance
andexpanditscapabilities.ContactyourAuthorizedServiceDealerorauthorizedT orodistributororgoto
www.T oro.comforalistofallapprovedattachmentsandaccessories.
UseonlygenuineT ororeplacementpartsandaccessories.Replacementpartsandaccessoriesmadebyother
manufacturerscouldbedangerous,andsuchusecouldvoidtheproductwarranty.
20
Other manuals for Groundsmaster 4500-D
16
This manual suits for next models
3
Table of contents
Other Toro Lawn Mower manuals

Toro
Toro LX500 User manual

Toro
Toro 20330 - Low Wheel Walk Power Mower User manual

Toro
Toro 74830 User manual

Toro
Toro 78292 User manual

Toro
Toro Super Recycler 20038 User manual

Toro
Toro Groundsmaster 360 Series User manual

Toro
Toro VACU-POWER User manual

Toro
Toro 74261 User manual

Toro
Toro Recycler 20965 User manual

Toro
Toro TurfMaster HDX User manual