Torpedo7 TAG-A-LONG T7 User manual

1
TAG A LONG
Owner’s Manual
(Please keep this Owner’s Manual for future reference. If you sell or give this product to
someone, please include this Owner’s Manual, and ask the new owner’s to read the instructions
completely before operating.)
PRIOR TO ASSEMBLY:
Please read this Owner’s Manual completely before assembling or operating this product.
Assembly of this product should be carried out by an adult.
Parts are wrapped in paper or protective covering to prevent damage during shipment.
Remove all parts and packing materials from the box prior to assembly. Save all packing
materials until assembly is complete to make sure no parts are accidentally thrown away.
After assembly is complete, properly discard all waste.
Refer to the Parts List and Diagram on page two of this manual to make sure all parts are
accounted for.
BICYCLE COMPATIBILITY:
This unit is designed to fit and attach securely to most adult bicycles using a wheel size of
26” (66cm) through to 29” (74cm).
It should not be fitted to bicycles with 20” or 24” wheels, as they may not have enough
pedal clearance between the Tag-a-long pedals and the ground when leaning or turning.
IMPORTANT SAFETY INFORMATION:
WARNING Always wear an approved safety helmet when riding!
WARNING Never leave your child unattended on this product!
WARNING This Tag-a-long does not have a brake. Make sure the adult bike brakes function properly!
WARNING Recommended for ages 5 plus. Maximum weight capacity of rider is 34 kg!
WARNING Make sure the child riding the Tag-a-long understands how to operate it correctly!
WARNING A bicycle with the Tag-a-long attached requires a wide turning radius! Use caution when
turning!
WARNING Do not ride over curbs! Avoid bumps and potholes! Do not turn sharply!
WARNING Before riding, check that all parts are assembled correctly per the manufacturers instructions!
WARNING Tire should be inflated to the pressure reading shown on the tire sidewall! Check before each
use!
WARNING Use a foot pump or hand pump to inflate tires! Pressurised air hoses can cause over-inflation!
WARNING Do not ride at night!
WARNING Do not ride barefoot!
WARNING Do not ride in wet weather or when road surface is slippery!
WARNING Periodically re-check all fasteners to make sure they are tight!
WARNING Before riding, check and ensure the coupler connection with adult bike correctly!
WARNING We recommend using only a high quality seat post to tow the Tag-a-long. Seat posts made of
thin alloy, steel, or carbon fiber, could bend or break.
2
TOOLS REQUIRED FOR ASSSEMBLY:
Adjustable wrench
6mm Allen key
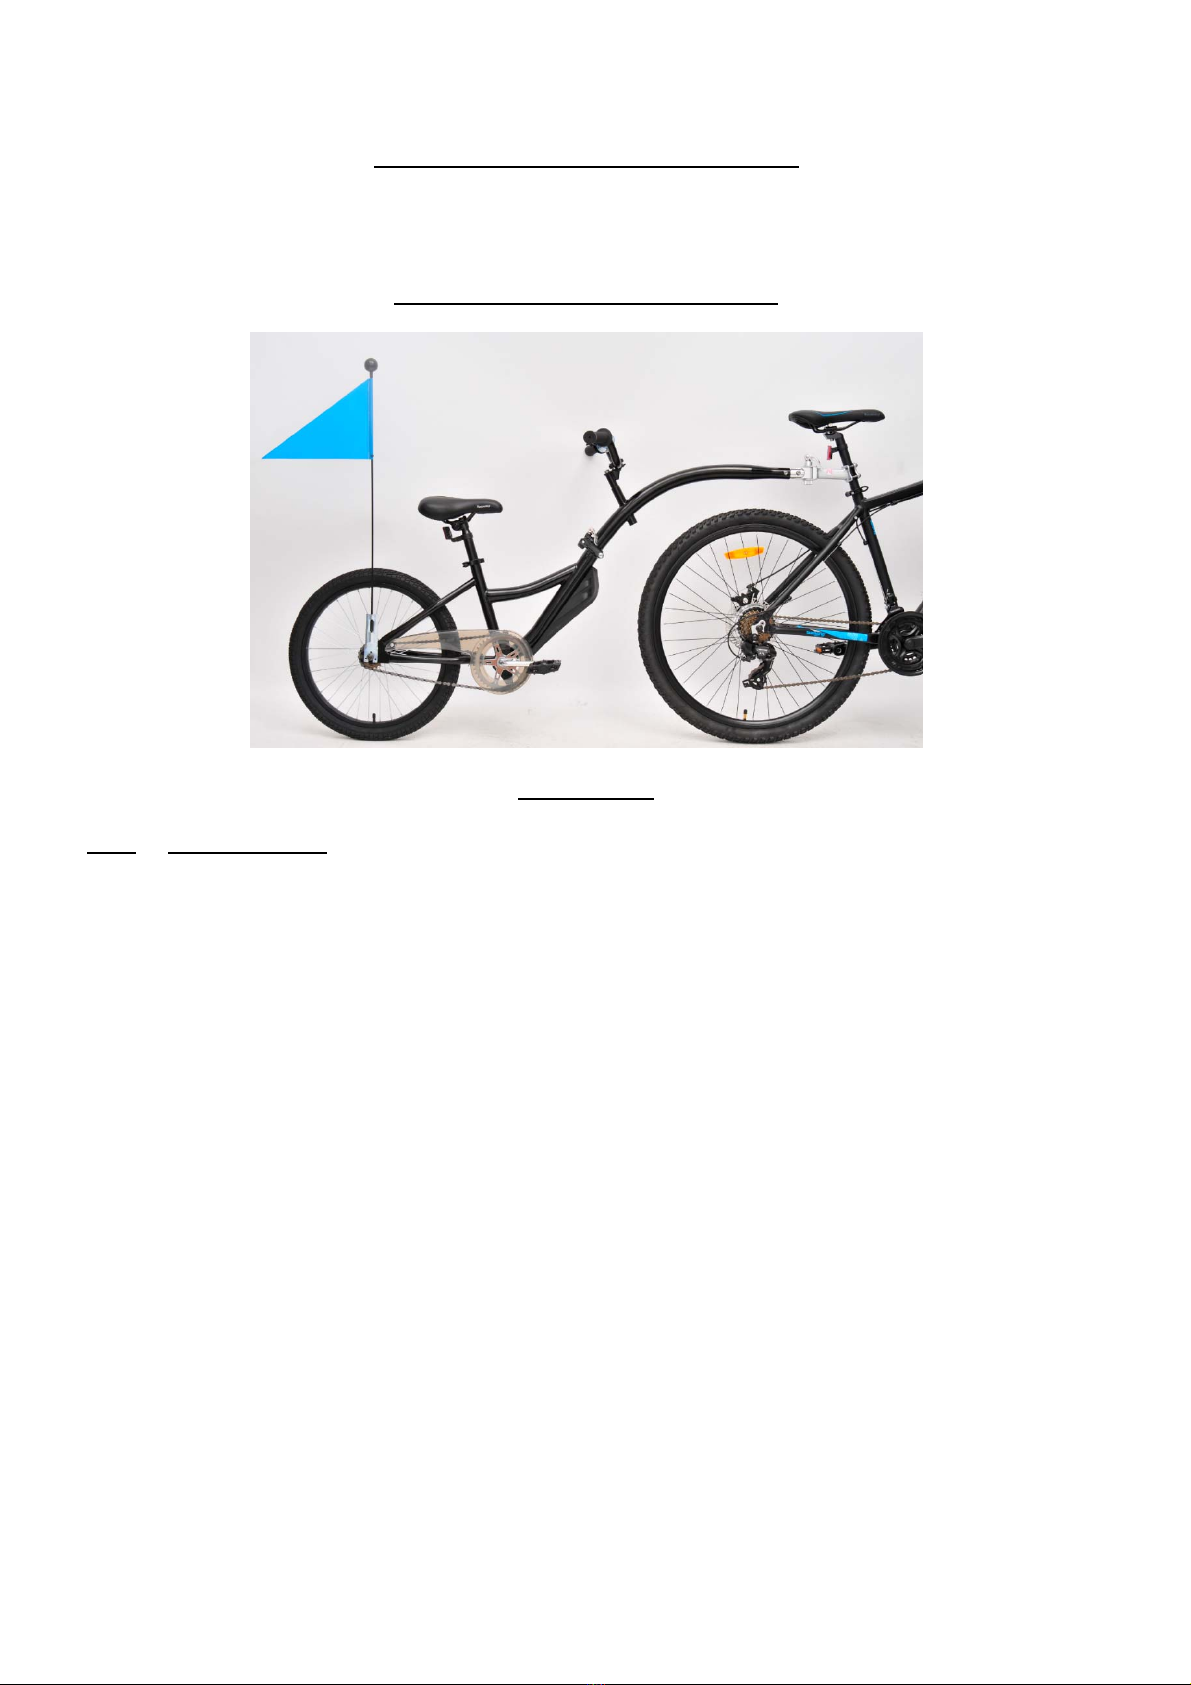
FULLY ASSEMBLED TAG-A-LONG
PARTS LIST
QTY DESCRIPTION
1 Frame w/ folding Tag-a-long arm, wheel, chain (w/ guard) and crank pre-assembled
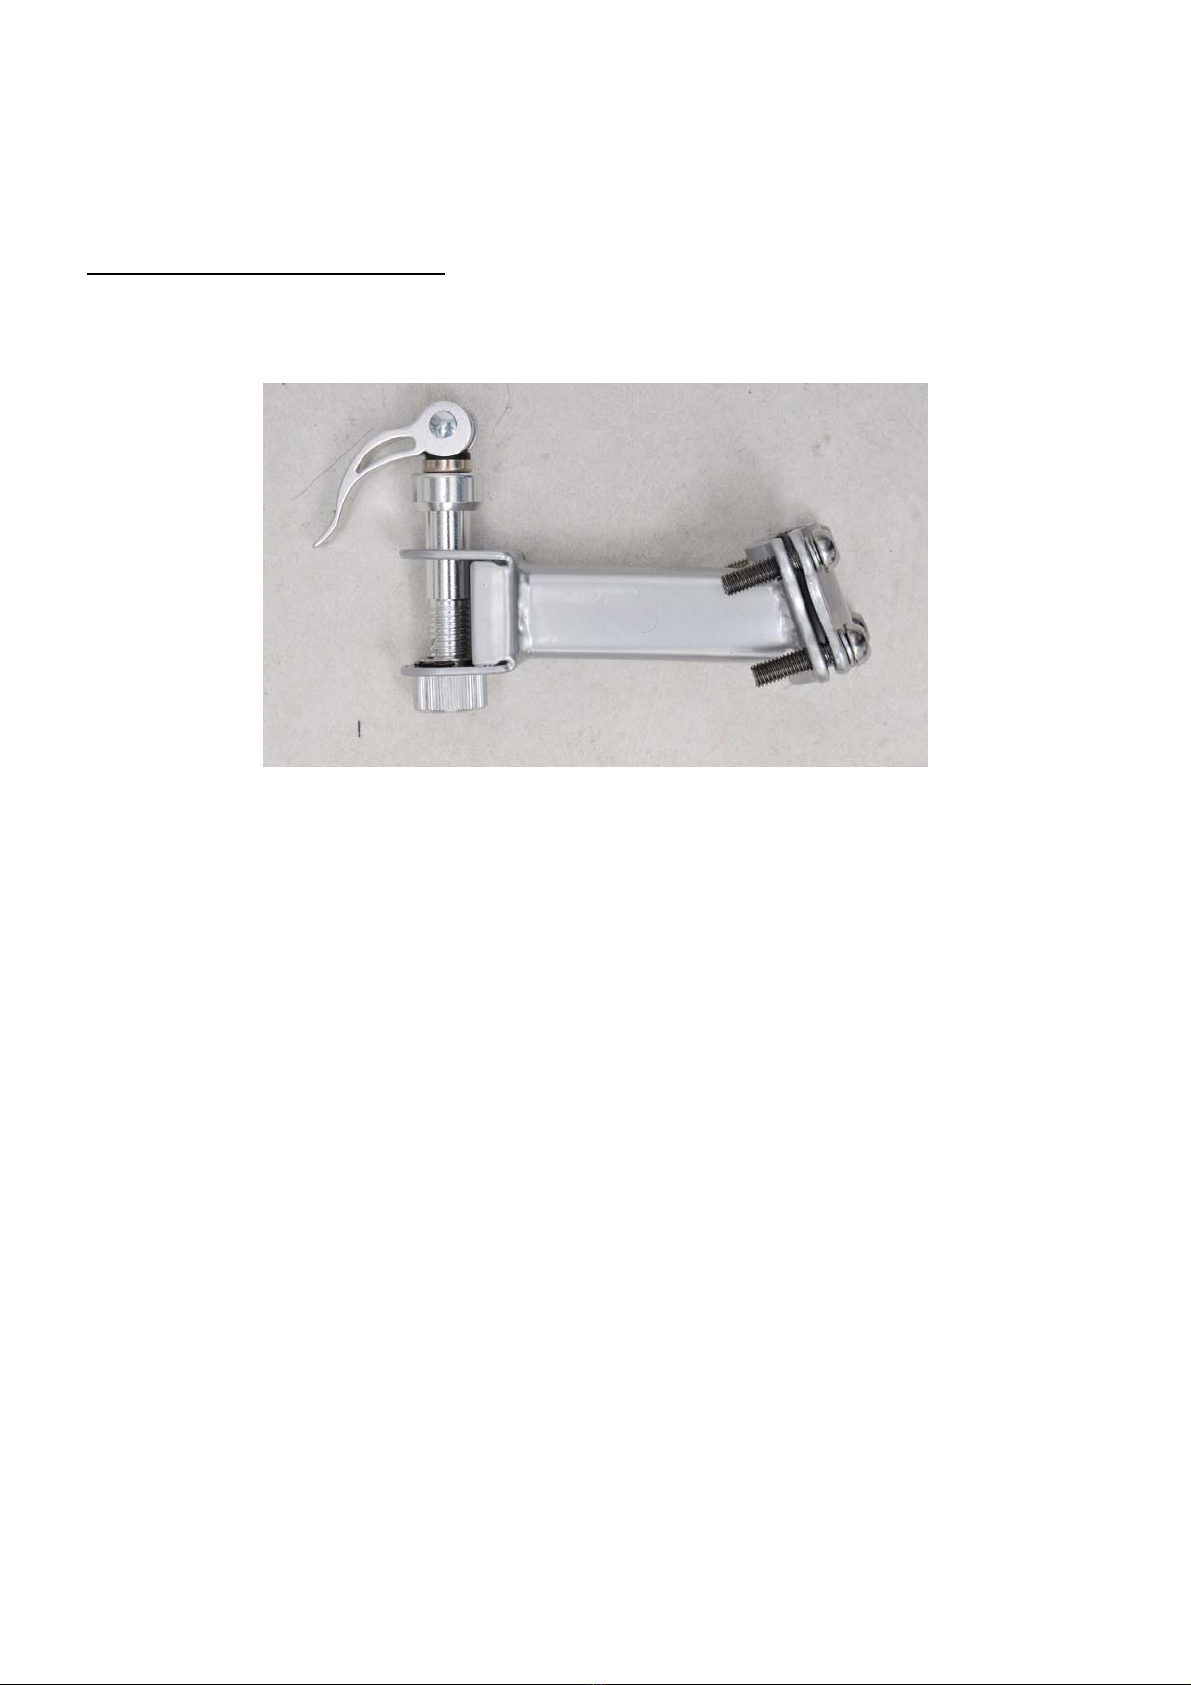
1 Coupler
1 Handlebar w/ grips
1 Handlebar pad w/ cover
1 Seat post assembly w/ padded seat
1 Right pedal
1 Left Pedal
1 Rear Reflector
1 Safety Flag

3
ASSEMBLY AND OPERATING INSTRUCTIONS
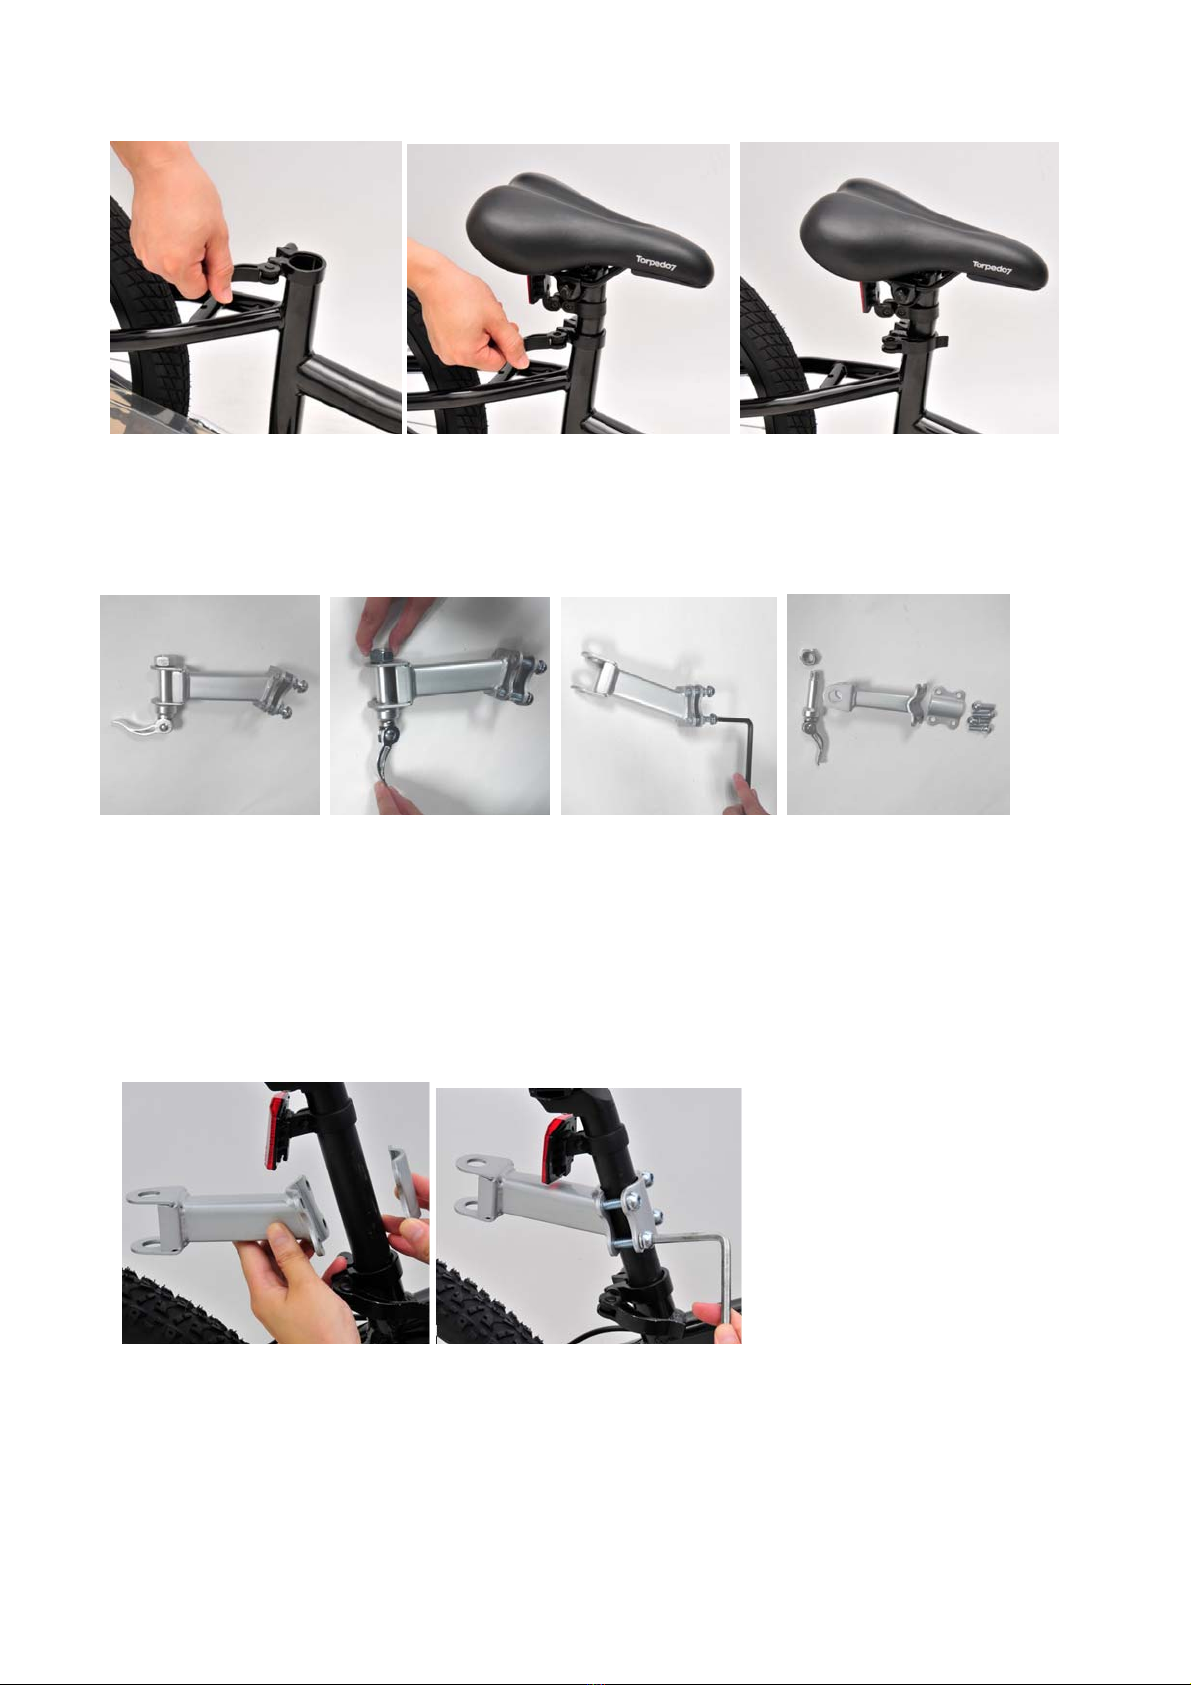
STEP 1 Tag-a-long arm
1. Extend the Tag-a-long arm until the two sections meet flush.
2. Insert the quick release through the two sections and tighten securely. The quick release
should be secured very firmly in place.
STEP 2 Attach the handlebar
1. Unscrew all four screws using a 5mm Allen key.
2. Place the handlebar into the stem.
3. Insert all four screws back into the clamp, and tighten with your fingers.
4. Adjust the handlebar to the desired position and tighten all screws securely with the Allen key.
IMPORTANT NOTE: As you tighten the screws, alternate among all four to make sure they
are tightened evenly. When properly tightened, the handlebar should not move.
STEP 3 Attach the handlebar pad
1. Remove the cover from the foam pad and slide the foam pad over the handlebar crossbar so
the opening is on the bottom.
2. Wrap the cover around the foam pad and secure along the bottom edge.

4
STEP 4 Attach the pedals to the cranks
1. Thread the right pedal clockwise into the right crank arm (the side with the chain) by hand.
Tighten using an adjustable wrench.
2. Thread the left pedal counter-clockwise into the left crank arm (the side opposite the chain) by
hand. Tighten using an adjustable wrench.
STEP 5 Install the seat post assembly and adjust the seat
1. Open the quick release lever, loosening the seat clamp.
2. Slide the tube of the seat post assembly into the frame seat tube to a depth of at least 7cm.
WARNING! Minimum insertion line must be completely inserted into frame and must not
be visible!
3. Adjust the seat to the desired height. With the seat facing forward, tighten the seat post
clamp by closing the quick release lever. Make sure the seat does not spin or move up and
down. If it does, open the lever and tighten the nut on the other side to adjust the clamp
tightness. Repeat this process until the seat doesn’t move while the lever is closed.
5
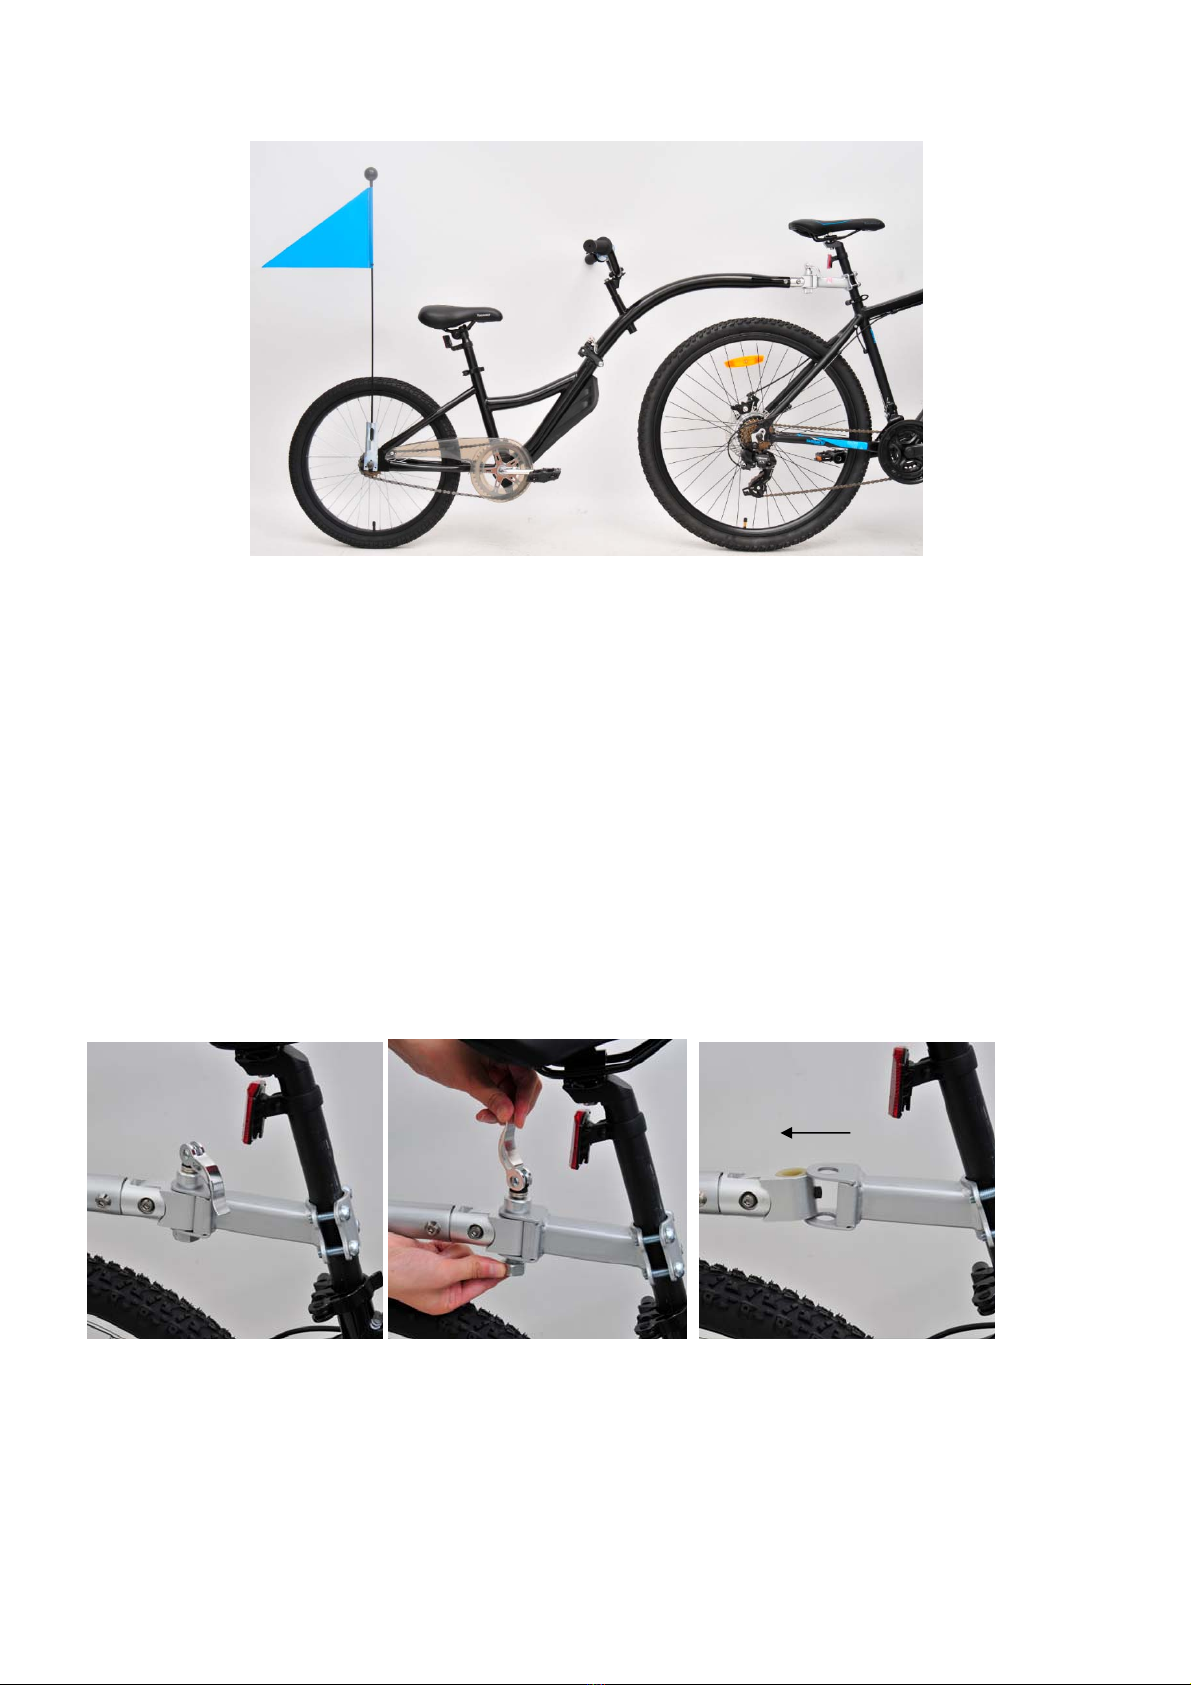
STEP 6 Attach Tag-a-long to adult bike and secure seat post clamp
1. Unscrew all the screws from the coupler using 6mm Allen key.
2. Attach the coupler to the adult bike
2.1 Assemble the clamp onto the seat post of adult bike, insert all four screws back into the
clamp, and tighten with your fingers.
2.2 Adjust the coupler to the desired position and tighten all screws securely with the 6mm Allen
key.
IMPORTANT NOTE: As you tighten the screws, alternate among all four to make sure they are
tightened evenly. When properly tightened, the coupler should not move.
3. Attach the coupler to Tag-a-long
3.1 Align the holes in the coupler and slide the quick-release bolt through.

6
3.2 Screw the nut over the threaded end of the pin and tighten with your fingers.
3.3 Clamp the quick-release lever all the way down
4. Position the Tag-a-long behind the adult bike so the coupler, Tag-a-long arm and bike are in a
straight line.
STEP 7 Install safety flag
1. Loosen rear axle nut
2. Position metal bracket as shown
3. Re-tighten rear axle nut
STEP 8 Check tire pressure and recheck all fasteners
The completed product should look like this. Check the tire pressure and inflate to correct PSI
reading indicated on the tire sidewall. Re-check all fasteners to make sure that they are all
secure.
7
STEP 9 Straddle the adult bike while the child climbs onto to Tag-a-long
The adult should straddle the adult bike while the child climbs onto Tag-a-long.
WARNING! The adult bike kickstand is not designed to support the additional weight of the child
seated on the Tag-a-long. The adult pulling the child should always straddle the adult bike
whenever the child is seated on the Tag-a-long, or getting on and off the Tag-a-long!
WARNING! Always wear an approved safety helmet while riding
STEP 10 Remove the Tag-a-long from the adult bike
1. Open the quick-release lever up, and unscrew the nut from the opposite side.
2. Remove the nut and slide the quick-release bolt completely out.
3. Slide the coupler apart and we suggest to replace the quick-release pin so it is not misplaced.
STEP 11 Maintenance
1. Inflate tires with a hand or foot pump to the correct PSI reading shown on the tyre.
8
2. Lube the chain monthly, or as needed, with bicycle chain oil.
3. Check all fasteners before each use to make sure they are secure.
Accessories for your Tag-a-long
Additional Coupler Kits allow you to switch the Tag-a-long from one bike to another quickly and
hassle free.
Please contact your store of purchase to arrange additional couplers.
Table of contents


