Toshiba MJ-1027 User manual

SERVICE MANUAL
FINISHER
MJ-1027/1028
File No. SME040041A0
R04102169300-TTEC
Ver01_2007-09

General Precautions for Installation/Servicing/Maintenance for the Finisher MJ-1027/1028
The installation and service should be done by a qualified service technician.
1. When installing the Finisher MJ-1027/1028 to the equipment, be sure to follow the
instructions described in the “Unpacking/Set-Up Procedure for the MJ-1027/1028”
booklet which comes with each unit of the MJ-1027/1028.
2. The MJ-1027/1028 should be installed by an authorized/qualified person.
3. Before starting installation, servicing or maintenance work, be sure to turn off and
unplug the equipment first.
4. When serivcing the machines with the power turned ON, be sure not touch live sec-
tions and rotating/operating sections.
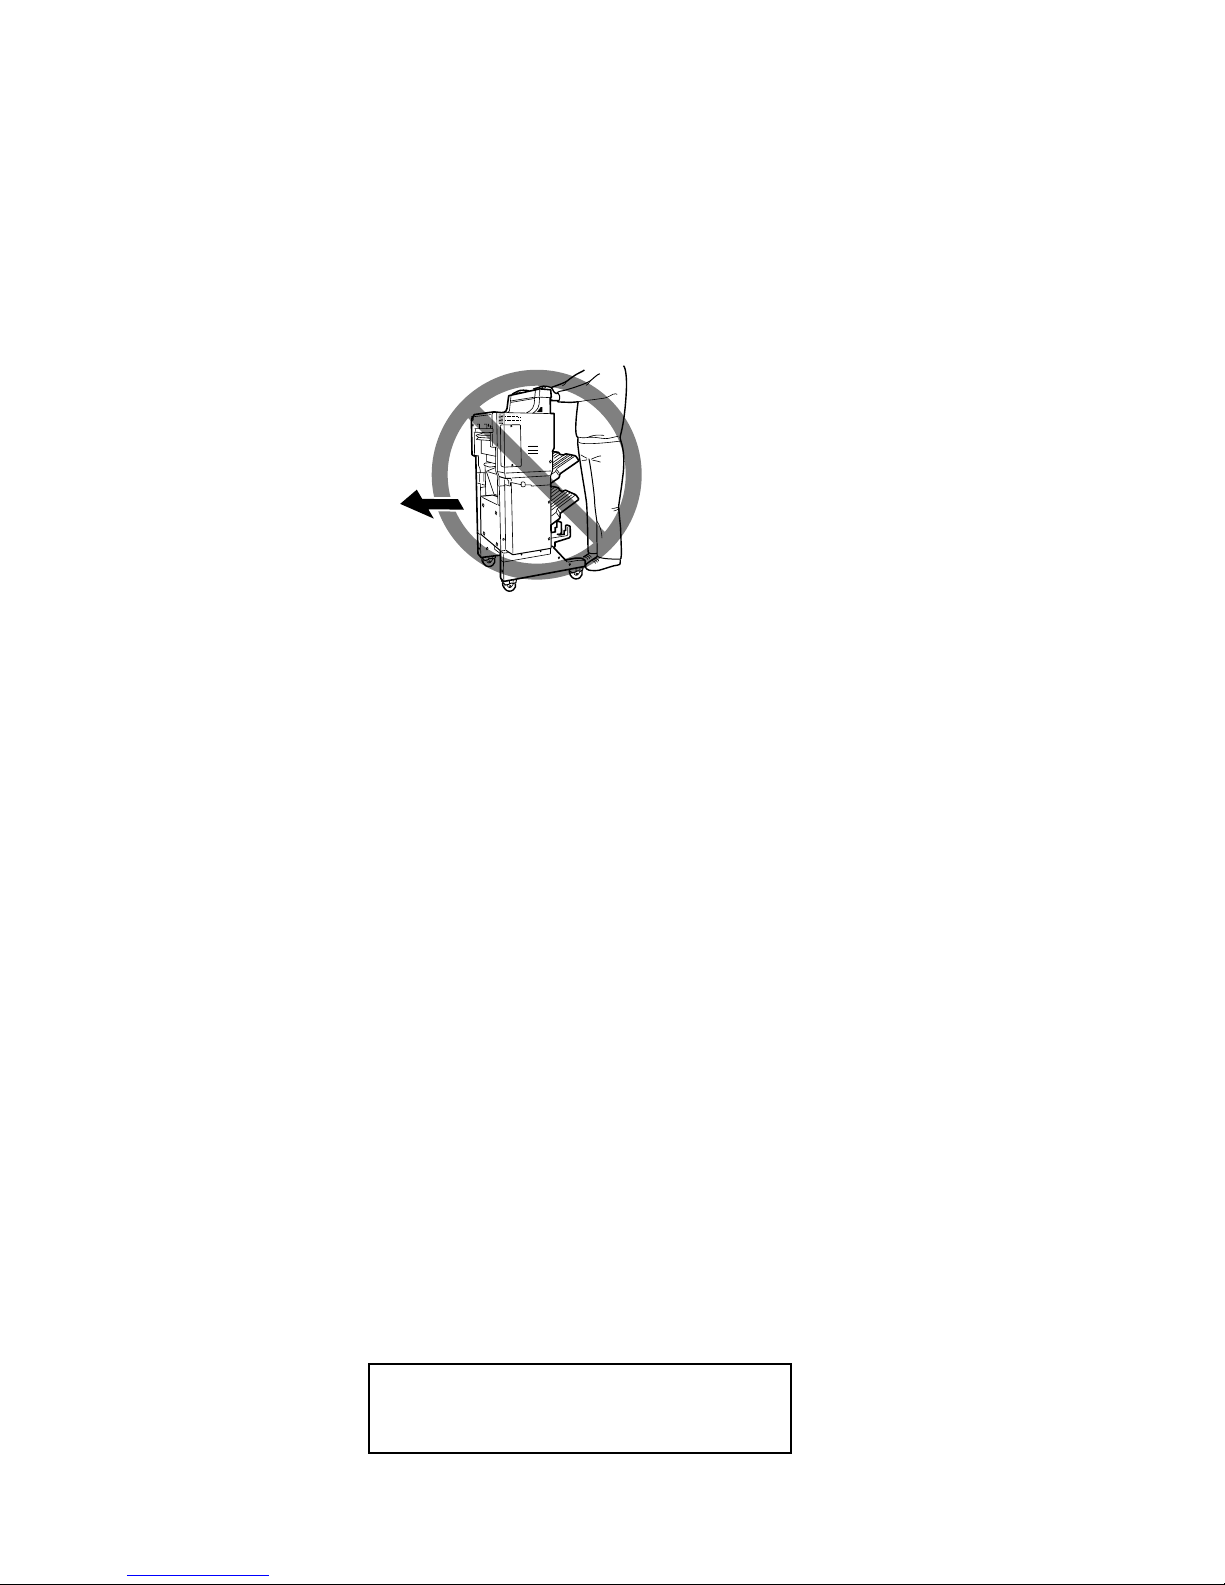
5. When selecting the installation site, avoid placing the MJ-1027/1028 and copier on
different levels or inclined floors.
6. When servicing or maintaining the MJ-1027/1028, be careful about the rotating or
operation sections such as gears, pulleys, sprockets, cams, belts, etc.
7. When parts are disassembled, reassembly is basically the reverse of disassembly
unless otherwise noted in this manual or other related materials. Be careful not to
reassemble small parts such as screws, washers, pins, E-rings, toothed washers to
the wrong places.
8. Basically, the machine should not be operated with any parts removed or disassembled.
9. Delicate parts for preventing safety hazard problems (such as breakers, thermofuses,
fuses, door switches, sensors, etc. if any) should be handled/installed/adjusted cor-
rectly.
10. Use suitable measuring instruments and tools.
11. During servicing or maintenance work, be sure to check the serial No. plate and other
cautionary labels (if any) to see if they are clean and firmly fixed. If not, take appropri-
ate actions.
12. The PC board must be stored in an anti-electrostatic bag and handled carefully using
a wristband, because the ICs on it may be damaged due to static electricity. Before
using the wrist band, pull out the power cord plug of the copier and make sure that
there is no uninsulated charged objects in the vicinity.
13. For the recovery and disposal of used MJ-1027/1028s, consumable parts, packing
materials, used batteries, and RAM-ICs including litium batteries, follow the relevant
local regulations/rules.
14. After completing installation, servicing and maintenance of the MJ-1027/1028, return
the MJ-1027/1028 to its original state, and check operation.

15. When you move the finisher, do not move it in the direction of the arrow as shown in
the figure below otherwise it might fall down.
© 2005 TOSHIBA TEC CORPORATION
ALL rights reserved

i
This Service Manual contains basic data and figures for the Finisher (MJ-1027)/Saddle
Stitch Finisher (MJ-1028) needed to service the machine in the field.
This manual comprises the following chapters:
Chapter 1 “General Description” introduces the finisher’s features, specifications, and
names of parts, and shows how to operate the finisher.
Chapter 2 “Finisher Unit Basic Operation” discusses the principles of operation used for
the finisher mechanical and electrical systems. It also explains the timing at
which these systems are operated.
Chapter 3 “Saddle Stitch Finisher Unit Basic Operation” discusses the principles of op-
eration used for the saddle stitcher unit’s mechanical and electrical systems.
It also explains the timing at which these systems are operated.
Chapter 4 “Mechanical System” discusses how the finisher is constructed mechanically,
and shows how it may be disassembled/assembled and adjusted.
Chapter 5 “Maintenance and Inspection” provides tables of periodically replaced parts
and consumables and durables, together with a scheduled servicing chart.
Chapter 6 “Troubleshooting” shows how to troubleshoot possible faults and gives electri-
cal parts arrangement diagrams, LED/check pin diagrams by PCB, and self
diagnosis tables.
“Appendix” contains diagrams showing tables of signals, overall circuit dia-
grams and tables of solvents/oils.
Descriptions regarding installation are not mentioned in this Service Manual as the
Finisher (MJ-1027)/Saddle Stitich Finisher (MJ-1028)’s packing boxes contain Installation
Procedures.
The descriptions in this Service Manual are subject to change without notice for prod-
uct improvement or other purposes, and major changes will be communicated in the form
of Service Information bulletins.
All service persons are expected to have a good understanding of the contents of this
Service Manual and all relevant Service Information bulletins, and be able to identify and
isolate faults in the machine.
INTRODUCTION

ii

iii
CHAPTER 1 GENERAL DESCRIPTION
CONTENTS
I. FEATURES ..................................1-1
II. SPECIFICATIONS .......................1-2
A. Specifications ...........................1-2
B. Cross Section ...........................1-7
III. Using the Machine .......................1-9
A. Removing Paper Jams from the
Finisher Unit .............................1-9
B. Supplying the Finisher Unit with
Staples ...................................1-10
C. Removing Staple Jams from the
Finisher Unit ...........................1-12
D. Removing Paper Jams from the
Saddle Stitcher Unit
(Saddle Stitch Finisher) ..........1-13
E. Supplying the Saddle Stitcher
Unit with Staples
(Saddle Stitch Finisher) ..........1-15
F. Removing Staple Jams from the
Saddle Stitcher Unit
(Saddle Stitch Finisher) ..........1-16
IV. MAINTENANCE BY THE
USER ........................................1-18
A. Maintenance by the User ....... 1-18
I. BASIC OPERATION ....................2-1
A. Outline ......................................2-1
B. Outline of Electrical Circuitry ....2-2
C. Inputs to and Outputs from the
Finisher Controller PCB ...........2-4
II. FEED/DRIVE SYSTEM .............2-10
A. Outline ....................................2-10
B. Type of Delivery Paths ............2-15
C. Feeding and Delivering .......... 2-18
D. Job Offset ...............................2-21
E. Staple Operation .................... 2-24
F. Stapler Unit ............................ 2-32
G. Tray Operation ........................2-38
H. Detecting the Height of
Stack on the Tray .................... 2-40
I. Shutter Operation ................... 2-42
J. Buffer Path Operation .............2-46
K. Detecting Jams ......................2-51
III. POWER SUPPLY SYSTEM....... 2-56
CHAPTER 2 FINISHER UNIT BASIC OPERATION

iv
I. BASIC OPERATION .................... 3-1
A. Outline ...................................... 3-1
B. Electrical Circuitry .................... 3-2
C. Inputs to and Outputs from the
Saddle Stitcher Controller
PCB .......................................... 3-3
II. FEEDING/DRIVE SYSTEM .........3-8
A. Outline ...................................... 3-8
III. PAPER OUTPUT
MECHANISM.............................3-14
A. Outline .................................... 3-14
B. Controlling the Inlet
Flappers .................................3-17
C. Controlling the Movement of
Sheets ....................................3-21
D. Aligning the Sheets ................ 3-23
E. Controlling the Phase of the
Crescent Roller ......................3-26
IV. STITCHING SYSTEM ...............3-28
V. FOLDING/DELIVERY
SYSTEM .................................... 3-31
VI. CHECKING FOR A JAM ...........3-38
VII. POWER SUPPLY ......................3-43
CHAPTER 3 SADDLE STITCHER UNIT
BASIC OPERATION
CHAPTER 4 MECHANICAL CONSTRUCTION
I. FINISHER UNIT ..........................4-1
A. Externals and Controls ............. 4-1
B. FEEDING SYSTEM .................4-9
C. PCBs ......................................4-13
II. SADDLE STITCHER UNIT ........4-14
A. Externals and Controls ........... 4-14
B. SADDLE STITCHER UNIT ....4-17
C. PCBs ......................................4-27
D. Accessory ..............................4-28
I. PERIODICALLY REPLACED
PA RTS .........................................5-1
A. Finisher Unit .............................5-1
B. Saddle Stitcher Unit ................. 5-1
II. CONSUMABLES AND
DURABLES .................................5-2
A. Finisher Unit .............................5-2
B. Saddle Stitcher Unit ................. 5-2
III. PERIODICAL SERVICING .......... 5-2
IV. FIRMWARE UPDATING .............. 5-3
A. Finisher Unit .............................5-3
B. Saddle Stitcher Unit ................. 5-5
CHAPTER 5 MAINTENANCE AND INSPECTION

v
CHAPTER 6 TROUBLESHOOTING
I. ADJUSTMENTS ..........................6-1
A. Electrical System
(finisher unit) ............................6-1
B. Electrical System
(saddle stitcher unit) ................. 6-5
II. ARRANGEMENT OF
ELECTRICAL PARTS ..................6-7
A. Finisher Unit .............................6-7
B. Saddle Stitcher Unit ............... 6-14
C. Light-Emitting Diodes (LED)
and Check Pins by PCB ......... 6-20
III. TROUBLESHOOTING ............... 6-22
A. Finisher Unit ...........................6-22
B. Saddle Stitcher Unit ............... 6-32
APPENDIX
A. FINISHER UNIT GENERAL
TIMING CHART .......................... A-1
B. SADDLE STITCHER UNIT
GENERAL TIMING CHART ........ A-2
C. SIGNAL AND
ABBREVIATIONS ....................... A-3
D. FINISHER UNIT CIRCUIT
DIAGRAM ................................... A-4
E. SADDLE STITCHER UNIT
CIRCUIT DIAGRAM ................. A-18

vi

CHAPTER 1
GENERAL DESCRIPTION
I. FEATURES ..................................1-1
II. SPECIFICATIONS ....................... 1-2
A. Specifications............................. 1-2
B. Cross Section ............................1-7
III. Using the Machine .......................1-9
A. Removing Paper Jams from the
Finisher Unit............................... 1-9
B. Supplying the Finisher Unit with
Staples .....................................1-10
C. Removing Staple Jams from the
Finisher Unit .............................1-12
D. Removing Paper Jams from the
Saddle Stitcher Unit
(Saddle Stitch Finisher) ...........1-13
E. Supplying the Saddle Stitcher
Unit with Staples
(Saddle Stitch Finisher) ...........1-15
F. Removing Staple Jams from the
Saddle Stitcher Unit
(Saddle Stitch Finisher) ...........1-16
IV. MAINTENANCE BY THE
USER ........................................1-18
A. Maintenance by the User ......... 1-18

1-1
CHAPTER 1 GENERAL DESCRIPTION
I. FEATURES
1. Accommodates large quantities of sheets
●Normally, the finisher holds a stack of sheets 250 mm in height in its two bins (small-size
paper: equivalent to 2000 sheets)/140 mm in height (large-size paper: equivalent to 1000
sheets)
2. Has high paper transportation performance
●The finisher is capable of handling papers between 60 and 256 gm/m2.
3. Offers a job offset function
●The finisher has a job offset function for sorting non-stapled stacks of copies.
4. Offers four types of auto stapling
●The finisher offers a choice of four stapling modes (1-point stapling at rear, diagonal sta-
pling at front, diagonal stapling at rear, 2-point stapling).
5. Uses a buffer roller
●The use of a buffer roller enables the finisher to accept copies without interruption from the
host machine even during stapling or offset operation.
6. Has a saddle stitch function (Saddle Stitch Finisher MJ-1028)
●The finisher can staple along the center of paper and fold it in two (up to 15 sheets).
7. Offers a punch function (option)
●The use of the puncher unit enables the finisher to punch sheets for binders before they are
output. (The puncher unit is capable of handling papers between 60 g/m2(16 lb. Bond) and
256 g/m2(141.4 lb. Index). It cannot handle special paper, postcards and transparencies.)
8. Insert function (option)
●Enable the use of special type of paper and printed paper in addition to the staple sorting or
the hole punching mode (Available when the optional staple sorting and the hole punching
mode units are installed.) This paper is not run through fuser (heat).

1-2
CHAPTER 1 GENERAL DESCRIPTION
II. SPECIFICATIONS
A. Specifications
1. Finisher Unit
Item
Stacking method
Stacking orientation
Stacking size
Paper weight
Bins
Modes
Stacking capacity
Size mixing
Stacking mixing
Description
Tray-1 and -2: by lifting tray
Face-down
AB: A3, A4, A4-R, A5-R, B4, B5, B5-R, FOLIO
Inch: LD, LG, LT, LT-R, ST-R, COMPUTER
60 to 256 g/m2(16 lb. Bond to 141.4 lb. Index)
Tray-1 and -2
Non-sort: tray-1 and -2
Sort: tray-1 and -2
Staple sort: tray-1 and -2
Non sort A4, B5, LT 250 mm (2000 sheets) (Note 1, 2)
Non staple sort A3, A4-R, A5-R, 140 mm (1000 sheets) (Note 1, 2)
B4, B5-R, LD,
LG, LT-R, ST-R,
FOLIO, COMPUTER
Staple sort A4, B5, LT 110 mm/100 sets (750 sheets) (Note 1)
A3, A4-R, B4, 74 mm/50 sets (500 sheets) (Note 1)
LD, LG, LT-R,
FOLIO, COMPUTER
Size mixing: 74 mm or less (500 sheets) (Note 1)
Staple mixing: 74 mm/50 sets or less (500 sheets) (Note 1)
Face-down
Notes:
1. Approximate when computed with reference to 80 g/m2(21.3 lb. Bond) paper.
2. Alignment may not be correct if 750 or more small-size sheets are stacked.
3. The accuracy of the stack height is ± 7 mm/0.28 in.
Table 1-201

1-3
CHAPTER 1 GENERAL DESCRIPTION
Description
By rotating cam
See Figure 1-201.
Small-size
50 sheets (60 ~ 80 g/m
2
30 sheets (90 g/m2
30 sheets (105 g/m
2
(16
~
21.3 lb. Bond)) (24 lb. Bond)) (28 lb. Bond))
Large-size
30 sheets (60 ~ 80 g/m
2
)
15 sheets (90 g/m2)
15 sheets (105 g/m
2
(16
~
21.3 lb. Bond)) (24 lb. Bond)) (28 lb. Bond))
Special staple cartridge (5000 staples)
Special (STAPLE-700: 3 cartridges of 5000 staples in a package)
Provided
Not provided
1-point diagonal Front A3, B4, A4, A4-R, B5, LD, LG, LT, LT-R,
stapling (diagonal) FOLIO, COMPUTER
Rear A3, B4, A4, B5, LD, LT, COMPUTER
1-point Rear A4-R, LT-R, LG, FOLIO
2-point A3, B4, A4, B5, A4-R, LD, LG, LT, LT-R, FOLIO,
COMPUTER
60 to 105 g/m2(16 lb. Bond to 28 lb. Bond)
Provided
Not provided
Not provided
616 × 630 × 1023 mm/24.25 × 24.88 × 40.38 in
740 × 630 × 1023 mm/29.25 × 24.88 × 40.38 in (sub-tray extended)
Finisher (MJ-1027): 43 kg/94.80 lb
Saddle stitch finisher (MJ-1028): 63 kg/138.89 lb
From host machine (DC 24V ± 10%, 5 VDC)
170 W or less
Item
Stapling
Stapling position
Stapling capacity
(Note1)
Staple supply
Staples
Staple detection
Manual stapling
Stapling size
Available paper
weight for stapling
Paper detection
Control panel
Display
Dimensions
(W × D × H)
Weight
Power supply
Maximum power
consumption
Table 1-202
Reference:
The term “small-size” stands for A4, A5-R, B5, LT, ST-R, while the term “large-size” stands for
A3, B4, A4-R, B5-R, LT-R, LD, LG, FOLIO, COMPUTER.
Note1: Including two sheets of thick stock or cover (200 ~ 256 g/m
2
(73.9 lb. Cover to 141.4 lb.
Index)).

1-4
CHAPTER 1 GENERAL DESCRIPTION
Stapling Positions (finisher unit)
1-point stapling
(diagonal; front)
4.4±4mm/
0.17±0.16in
2-point stapling
A3 and A4
A4-R and FOLIO LT-R and LG
1-point stapling (rear)
5±4mm/
0.2±0.16in
Specified paper width
6±4mm/
0.24±0.16in
4.4±4mm/
0.17±0.16in
30˚
1-point stapling
(diagonal; rear)
4±4mm/
0.16±0.16in
Specified paper width
6±4mm/
0.24±0.16in
30˚
B4, B5 and
COMPUTER
LD and LT
5±4mm/
0.2±0.16in
74±4mm/
2.9±0.16in
194±4mm/
7.63±0.16in
5±4mm/
0.2±016in
62.5±4mm/
2.46±0.16in
144.5±4mm/
5.69±0.16in
5±4mm/
0.2±0.16in
63±4mm/
2.47±0.16in
183±4mm/
7.19±0.16in
83±4mm/
3.26±0.16in
5±4mm/
0.2±0.16in
203±4mm/
7.98±0.16in
62.5±4mm/
2.46±0.16in
5±4mm/
0.2±0.16in
138.5±4mm/
5.45±0.16in
Figure 1-201

1-5
CHAPTER 1 GENERAL DESCRIPTION
Description
Center binding (double folding)
See Figure 1-202.
A3, B4, A4-R, LD, LT-R, LG
With binding : 1 sheet
Without binding (including single cover page)
: 2 to 15 sheets (60
~
80 g/m2/ 16~21.3 lb. Bond)
: 2 to 10 sheets (81
~
105 g/m2/ 21.4~28 lb. Bond)
60 to 105 g/m2(cover page up to 256 g/m2) (Note 1)
60 ~ 80g/m225 (25) sets: stack of 5 sheets or less
(16
~
21.3 lb. Bond) 20 (20) sets: stack of 6 to 10 sheets
10 (10) sets: stack of 11 to 15 sheets
81 ~ 105 g/m225 (5) sets: stack of 5 sheets or less
(21.4
~
28 lb. Bond) 15 (5) sets: stack of 6 to 10 sheets
60 ~ 80g/m220 (20) sets: stack of 5 sheets or less
(16
~
21.3 lb. Bond) 10 (10) sets: stack of 6 to 10 sheets
10 (10) sets: stack of 11 to 15 sheets
81 ~ 105 g/m220 (5) sets: stack of 5 sheets or less
(21.4
~
28 lb. Bond) 10 (5) sets: stack of 6 to 10 sheets
Stapling position 2 points (center distribution; fixed interval)
Staple accommodation 2000 staples
Staple supply Special cartridge
Staples Special staples (STAPLE-600: 3 cartridges
of 2000 staples in a package)
Staple detection Provided
Manual stapling Not provided
Folding method Roller contact
Folding mode Double folding
Folding position Paper center
Position adjustment Provided
From finisher unit
DC24V, DC5V
Item
Stapling method
Folding position
Paper size
Capacity
Paper weight
Stacking capacity
(Note 2)
Stapling
Folding
Power supply
2. Saddle Stitcher Unit
Table 1-203
Note1: Special paper, postcards, transparencies, reproducibles, label paper and hole-punched paper
cannot be handled.
Note2: The values in ( ) include a sheet of cover page (200 to 256 g/m2
(73.9 lb. Cover to 141.4 lb.
Index)).
LG
A3
B4
A4-R
LD
LT- R

1-6
CHAPTER 1 GENERAL DESCRIPTION
Staple and Folding Position (saddle stitcher unit)
203±4mm/
8.0±0.16in
210±1mm/
8.27±0.04in
83
±
4mm/
3.27
±0.16in
A3
183±4mm/
7.20±0.16in
182±1mm/
7.17±0.04in
63
±
4mm/
2.48
±0.16in
B4
159.5±4mm/
6.28±0.16in
148.5±1mm/
5.85±0.04in
39.5±4mm/
1.56±0.16in
A4-R
Edge
of staple
194±4mm/
7.64±0.16in
216±1mm/
8.5±0.04in
74
±
4mm/
2.91
±0.16in
LD
162±4mm/
6.38±0.16in
139.7±1mm/
5.5±0.04in
42±4mm/
1.65±0.16in
LT-R
162±4mm/
6.38±0.16in
177.8±1.0mm/
7.0±0.04in
42±4mm/
1.65±0.16in
LG
Stack front edge
Staple position
Edge of
staple
Figure 1-202

1-7
CHAPTER 1 GENERAL DESCRIPTION
B. Cross Section
1. Finisher Unit
[15][17][16] [14] [13] [12]
[1] [2] [3] [4] [5] [6] [8]
[7] [10] [11][9]
[1] Tray -1/-2
[2] Shutter
[3] Delivery roller
[4] Swing guide
[5] Feed roller 2
[6] Height sensor
[7] Wrap flapper
[8] Buffer roller
[9] Buffer inlet flapper
[10] Saddle stitcher flapper
[11] Inlet feed roller
[12] Feed roller 1
[13] Vertical path
[14] Stapler
[15] Feed belt
[16] Tray lift motor
[17] Saddle stitcher unit
(saddle stitch finisher MJ-1028)
Figure 1-203

1-8
CHAPTER 1 GENERAL DESCRIPTION
2. Saddle Stitcher Unit
[5]
[6]
[4]
[3]
[2]
[1]
[12]
[11]
[10]
[9]
[8]
[7]
[1] Guide plate
[2] Paper folding roller
[3] Delivery guide plate
[4] Holding roller
[5] Stitcher (front, rear)
[6] Inlet roller
[7] No.1 flapper
[8] No. 2 flapper
[9] Stitcher mount
[10] Paper pushing plate
[11] Crescent roller
[12] Paper positioning plate
Figure 1-204

1-9
CHAPTER 1 GENERAL DESCRIPTION
III. Using the Machine
A. Removing Paper Jams
from the Finisher Unit
If the host machine indicates the finisher
paper jam message, perform the following to
remove the jam.
1) Pressing the release button of the finisher,
move the finisher carefully away from the
host machine.
Figure 1-301
2) Remove any jam visible from the outside.
Figure 1-302
3) Open the upper cover, and check the in-
side of the finisher.
Figure 1-303
4) Lift the buffer roller cover, and remove the
jam.
Figure 1-304
5) Lift the buffer roller, and remove the jam.
Figure 1-305

1-10
CHAPTER 1 GENERAL DESCRIPTION
6) Return the buffer roller and the buffer roller
cover to their original positions, and close
the upper cover.
Figure 1-306
7) Connect the finisher to the host machine.
Figure 1-307
8) Operate as instructed on the display.
B. Supplying the Finisher
Unit with Staples
If the host machine indicates the finisher
unit staple supply message, perform the fol-
lowing to supply it with staples.
1) Open the front cover.
Figure 1-308
2) Shift down the green lever.
Figure 1-309
3) When the staple cartridge has slightly slid
out, hold and pull it out.
Figure 1-310
This manual suits for next models
1
Table of contents
Other Toshiba Finisher manuals