manuals.online logo
Brands
  1. Home
  2. •
  3. Brands
  4. •
  5. Toshiba
  6. •
  7. Remote Control
  8. •
  9. Toshiba RBC-IR2-PE User manual

Toshiba RBC-IR2-PE User manual

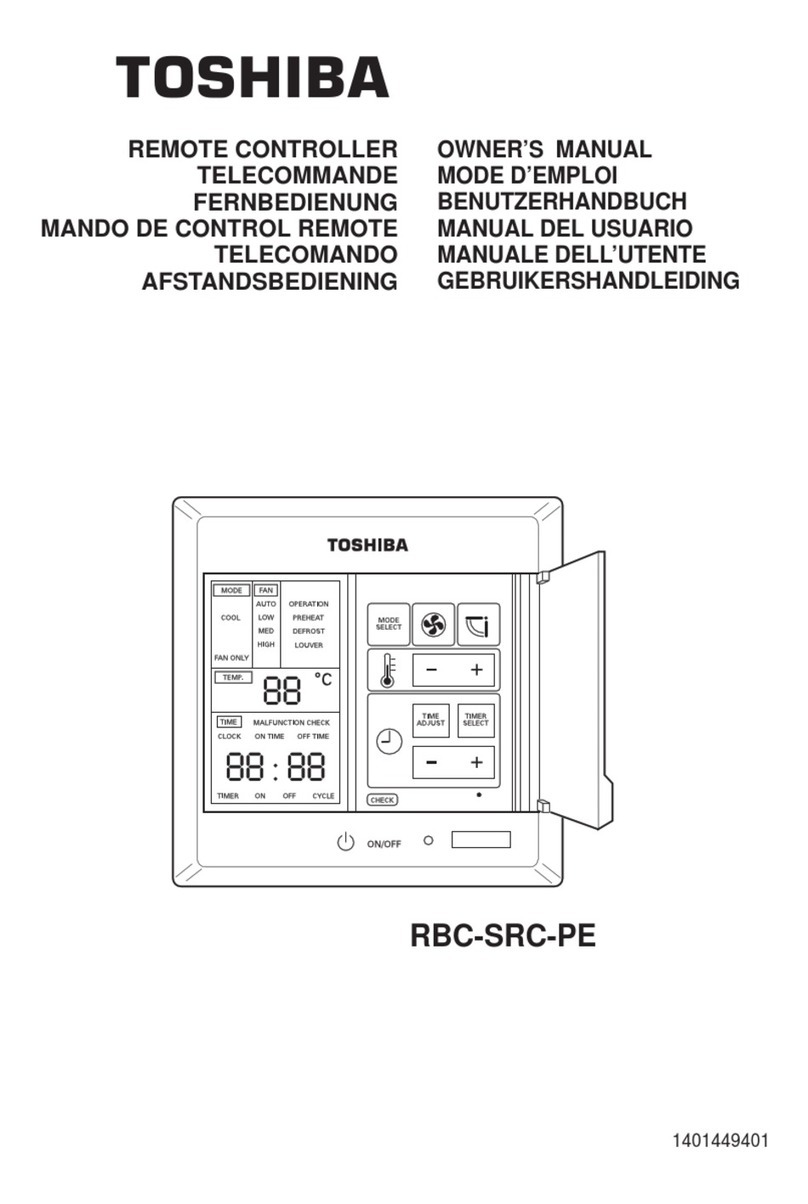
Infrared Remote Controller
Owner’s Manual
Télécommande à Infrarouge
Mode d’Emploi
Infrarot-fernbedienung
Benutzerhandbuch
Mando a Distancia
por Infrarrojos
Manual del Usuario
Telecomando ad Infrarossi
Manuale dell’Untente
Infrarood-Afstandsbediening
Gebruikershandleiding
RBC-IR2-PE
1401448901
K7020 Modular Multi Infra Red 12/1/01 11:07 am Page 1
Infrared Remote ControllerInfrared Remote Controller
2
GB
F
D
E
I
NL
3
Contents
Sommaire
Inhalt
Contenido
Indice
Inhoud
GB
F
D
E
I
NL
Names and Functions of Controls . . . . . . . . . . . . . . . . . . . . . . . . . . . . . . . . . . .4-7
Setting the Clock . . . . . . . . . . . . . . . . . . . . . . . . . . . . . . . . . . . . . . . . . . . . . . . . .8
Auto Operation . . . . . . . . . . . . . . . . . . . . . . . . . . . . . . . . . . . . . . . . . . . . . . . . . .9
Heating Operation . . . . . . . . . . . . . . . . . . . . . . . . . . . . . . . . . . . . . . . . . . . . . . .10
Cooling Operation . . . . . . . . . . . . . . . . . . . . . . . . . . . . . . . . . . . . . . . . . . . . . . .11
Dry Operation . . . . . . . . . . . . . . . . . . . . . . . . . . . . . . . . . . . . . . . . . . . . . . . . . .12
Timer Operation . . . . . . . . . . . . . . . . . . . . . . . . . . . . . . . . . . . . . . . . . . . . . .12-13
Désignations et Fonctions des Commandes . . . . . . . . . . . . . . . . . . . . . . . . . .14-17
Réglage de l’Horloge . . . . . . . . . . . . . . . . . . . . . . . . . . . . . . . . . . . . . . . . . . . . .18
Fonctionnement Automatique . . . . . . . . . . . . . . . . . . . . . . . . . . . . . . . . . . . . . . .19
Fonctionnement en Mode Chauffage . . . . . . . . . . . . . . . . . . . . . . . . . . . . . . . . . .20
Fonctionnement en Mode Refroidissement . . . . . . . . . . . . . . . . . . . . . . . . . . . . . .21
Fonctionnement en Mode Séchage . . . . . . . . . . . . . . . . . . . . . . . . . . . . . . . . . . .22
Fonctionnement du Programmateur . . . . . . . . . . . . . . . . . . . . . . . . . . . . . . . .22-23
Bezeichnungen und Funktionen der Regler . . . . . . . . . . . . . . . . . . . . . . . . . . .24-27
Einstellen der Uhr . . . . . . . . . . . . . . . . . . . . . . . . . . . . . . . . . . . . . . . . . . . . . . .28
Automatischer Betrieb . . . . . . . . . . . . . . . . . . . . . . . . . . . . . . . . . . . . . . . . . . . .29
Heizbetrieb . . . . . . . . . . . . . . . . . . . . . . . . . . . . . . . . . . . . . . . . . . . . . . . . . . . .30
Kühlbetrieb . . . . . . . . . . . . . . . . . . . . . . . . . . . . . . . . . . . . . . . . . . . . . . . . . . . .31
Trockenbetrieb . . . . . . . . . . . . . . . . . . . . . . . . . . . . . . . . . . . . . . . . . . . . . . . . . .32
Zeitgeberbedienung . . . . . . . . . . . . . . . . . . . . . . . . . . . . . . . . . . . . . . . . . . .32-33
Benamingen en Functies van de Bedieningsknoppen . . . . . . . . . . . . . . . . . . . .54-57
Instellen van de klok . . . . . . . . . . . . . . . . . . . . . . . . . . . . . . . . . . . . . . . . . . . . .58
Automatische Werking . . . . . . . . . . . . . . . . . . . . . . . . . . . . . . . . . . . . . . . . . . . .59
Werking van de verwarming . . . . . . . . . . . . . . . . . . . . . . . . . . . . . . . . . . . . . . . .60
Werking van de koeling . . . . . . . . . . . . . . . . . . . . . . . . . . . . . . . . . . . . . . . . . . .61
Droog draaien/proefdraaien . . . . . . . . . . . . . . . . . . . . . . . . . . . . . . . . . . . . . . .62
Werking van de timer . . . . . . . . . . . . . . . . . . . . . . . . . . . . . . . . . . . . . . . . . .62-63
• This Manual contains the operating instructions for the Remote Controller.
• Please read this Manual before operating your Air Conditioner.
• For the indoor and outdoor units please refer to the respective Owner’s Manual.
• Keep this Manual in a convenient location for future reference.
• Le présent manuel contient les consignes d’utilisation de la télécommande.
• Prière de lire ce manuel avant d’utiliser le climatiseur.
• Pour l’utilisation des unités intérieures et extérieures, prière de se reporter à leur mode
d’emploi respectif.
• Conserver ce manuel dans un endroit adéquat pour pouvoir le consulter ultérieurement.
•
In diesem Benutzerhandbuch wird die Bedienung der Fernbedienung beschrieben.
•
Bitte lesen Sie dieses Handbuch vor Inbetriebnahme Ihrer Klimaanlage sorgfältig durch.
•
Für Innen- bzw. Außenanlagen lesen Sie bitte das jeweilige Handbuch.
•
Das Handbuch immer leicht auffindbar aufbewahren.
•
Este manual contiene las instrucciones para el manejo del mando a distancia.
•
Lea este manual detenidamente antes de usar su acondicionador de aire.
•
Para las unidades de interior y exterior consulte los manuales del usuario correspondientes.
•
Mantenga este manual en un lugar conveniente para poder consultarlo en el futuro.
•
Questo manuale contiene le istruzioni per l’uso del telecomando.
•
Leggere attentamente questo manuale prima di usare il condizionatore d’aria.
•
Per le unità interne ed esterne consultare i rispettivi manuali.
•
Conservare questo manuale a portata di mano per poterlo consultare in futuro.
• In deze handleiding staan de bedieningsaanwijzingen voor de afstandsbediening.
• Lees deze handleiding door voordat u de airconditioning in werking stelt.
• Voor units voor binnen- en buitengebruik: raadpleeg de respectievelijke
gebruikershandleidingen.
•
Bewaar deze handleiding op een geschikte plaats voor toekomstige raadpleging.
Nomi e Funzioni dei Comandi . . . . . . . . . . . . . . . . . . . . . . . . . . . . . . . . . . . .44-47
Regolazione dell’Orologio . . . . . . . . . . . . . . . . . . . . . . . . . . . . . . . . . . . . . . . . .48
Funzionamento Automatico . . . . . . . . . . . . . . . . . . . . . . . . . . . . . . . . . . . . . . . .49
Funzionamento del Riscaldamento . . . . . . . . . . . . . . . . . . . . . . . . . . . . . . . . . . .50
Funzionamento del Raffreddamento . . . . . . . . . . . . . . . . . . . . . . . . . . . . . . . . . .51
Funzionamento con Deumidificazione . . . . . . . . . . . . . . . . . . . . . . . . . . . . . . . . .52
Funzionamento del Timer . . . . . . . . . . . . . . . . . . . . . . . . . . . . . . . . . . . . . . .52-53
Nombres y Funciones de los Mandos de Control . . . . . . . . . . . . . . . . . . . . . . .34-37
Ajuste del Reloj . . . . . . . . . . . . . . . . . . . . . . . . . . . . . . . . . . . . . . . . . . . . . . . . .38
Funcionamiento Automático . . . . . . . . . . . . . . . . . . . . . . . . . . . . . . . . . . . . . . .39
Funcionamiento de Calentamiento . . . . . . . . . . . . . . . . . . . . . . . . . . . . . . . . . . .40
Funcionamiento de Enfriamiento . . . . . . . . . . . . . . . . . . . . . . . . . . . . . . . . . . . . .41
Funcionamiento en Vacío . . . . . . . . . . . . . . . . . . . . . . . . . . . . . . . . . . . . . . . . . .42
Funcionamiento del Temporizador . . . . . . . . . . . . . . . . . . . . . . . . . . . . . . . . .42-43
K7020 Modular Multi Infra Red 12/1/01 11:04 am Page 2
4
Names and Functions of Controls
5
Names and Functions of Controls
GB
1. Infrared signal emitter
Transmits a signal to the indoor unit.
2. START/STOP Button
Push button to start operation.
(A receiving tone is heard).
Push button again to stop operation.
(A receiving tone is heard.)
If no receiving tone is heard from the
indoor unit, push the button again.
3. Mode select (MODE)
Push this button to set the operating mode
of air conditioner.
(A receiving tone is heard.)
4. Temperature   Buttons (TEMP)
The set temperature is
Up increased to 30°C.
The set temperature is
Down decreased to 17°C.
(A receiving tone is heard.)
5. Fan
Push this button to select fan speed.
When you select AUTO, the fan speed is
automatically adjusted according to the
room temperature. You can also
manually select the fan speed from
three settings .
(A receiving tone is heard.)
6. Auto Louver (CHR/KHR/UHR only)
Push this button to swing louver.
(A receiving tone is heard.)
Push this button again to stop louver
swinging.
(A receiving tone is heard.)
7. Off Timer Button
Push to allow the (OFF) time to be set.
8. On Timer Button
Push to allow the (ON) time to be set.
9. Time Adjust   Buttons
Increases time.
Decreases time.
Used to set clock and ON/OFF times.
10.CNL Cancel Button
Push to cancel on/off timer.
(A tone is heard.)
11.RSV Reserve Button
Transmit times from remote to
indoor unit.
Push to set timer setting.
(A tone is heard.)
4
GB
1. START/STOP Button
Push button to start operation.
(A receiving tone is heard.)
Push button again to stop operation.
(A receiving tone is heard.)
If no receiving tone is heard from the
indoor unit, push the button again.
2. Temperature   Buttons (TEMP)
The set temperature is
Up increased to 30°C.
The set temperature is
Down decreased to 17°C.
(A receiving tone is heard).
All of the display items are shown in the diagram below for the purpose of
explanation. Only selected items are displayed in actual operation.
REMOTE CONTROLLER
1. Battery Compartment
Use the two batteries supplied or two
AAA (LR03) 1.5V equivalents. To install
the batteries, insert as shown on legend
in battery compartment.
2. HEAT PUMP/COOL ONLY Switch
If the remote controller is to be used
with a cooling only system, move the
selector switch to ‘COOL ONLY’. This
will remove ‘AUTO’ and ‘HEAT’ options
from the remote.
3. CUSTOM/MULTI Switch
If the remote controller is to be used
with a Super Multi or Modular Multi
2-pipe system, then move the selector
switch to ‘MULTI’. This will disable
‘AUTO’ and ‘DRY’ modes.
Slide cover
downwards
to reveal the
concealed
buttons
Slide downwards
to remove cover
1
2
2
3
1
1
2
6
9
10
11
7
8
4
3
5
()
K7020 Modular Multi Infra Red 12/1/01 11:04 am Page 4
6
Names and Functions of Controls
GB
7
Names and Functions of Controls
GB
1. RED Lamp
OFF: Unit off
ON: Unit operating normally
FLASH: Initial system turn on.
2. GREEN Lamp
ON: Preheat/Defrost
3. AMBER Lamp
ON: Timer set
FLASH: Service mode
NOTE: All three lamps flashing
indicates system failure. Contact
service engineer.
4. REMOTE CONTROL
Remote mode.
5. AUTOMATIC (Mode)
Operates at last preset condition
(in case transmitter is lost).
6. TEST COOL (Mode)
Forced cooling operation
(test mode only).
7. INFRARED RECEIVER
8. BUZZER
The receiver on the wall mounted
unit is positioned behind the lens
marked with the Toshiba logo.
To gain access to the receiver, insert
a finger into the recess either side of
the lens and withdraw the lens from
the control panel.
To refit the lens, align both tabs with
the rectangular holes in the control
panel, ensuring the Toshiba logo is
correctly positioned, and push the
lens in place.
4. TEMP Display
Displays the temperature setting
(17°C to 30°C).
When you set the operating mode to
FAN ONLY or AUTO, no temperature
setting is displayed.
5. FAN Speed Display
Displays the selected fan speed.
Displays AUTO when the operating
mode is either AUTO or DRY.
6. CLOCK and TIMER Display
The current time is indicated. Also
time set for timer operation is
indicated.
7. Reset Button
For resetting transmitter from service
mode.
8. Clock Adjust
For adjusting the clock.
9. Service Mode
Push switch for more than 3 seconds
to enter Service Mode.
Display will be replaced with 00.
RECEIVER
(on Indoor Unit)
REMOTE-CONTROL
COOL AUTO
MANUAL-CONTROL
OPERATION
DEFROST
TIMER
1. Transmission Indicator
This transmission indicator lights
when remote controller transmits
signals to the indoor unit.
2. ON/OFF Display
Displayed by pushing the
START/STOP button.
3. MODE Display
Displays current operation mode.
1
4
5
78
9
6
2
3
2
3
4
5
6
1
8
7
K7020 Modular Multi Infra Red 12/1/01 11:04 am Page 6
8
Setting the Clock
GB
9
Auto Operation
9
GB
1. Mode
Select the operating mode.
Press the MODE SELECT button and
set the display to AUTO.
2. CHR/KHR/UHR only
To drive the outlet louvers
automatically, press this button.
3. Fan
When in AUTO mode, the fan is
locked in AUTO mode.
• In the AUTO position the fan
speed is changed automatically
with the room temperature.
4. Temperature
Set the desired temperature. Press
the   buttons to increase or
decrease the temperature up to 5°C
above or below the current room
temperature.
5. Operation
Press the START/STOP button.
• The START/STOP lamp (red) will
now light.
• With the indoor fan stopped, the
preheating operation lasts for
between 3 and 5 minutes. Warm
air is then blown out.
6. Operation
Press the START/STOP button again.
• The lamp goes off and operation
will stop.
• If the operation is stopped and then
the START/STOP button is pressed
immediately, the air conditioner will
not operate for about 3 minutes, to
protect the unit.
After about 3 minutes, operation
will be restarted automatically.
• For details on how to use the timer,
see pages 12 & 13.
Note: The air conditioner should not
be turned OFF except for servicing.
At initial power on RED LED on indoor
unit receiver will flash.
Press START/STOP button to turn on.
Initial Setting of the Clock
When batteries are inserted in
the remote controller, the clock
panel will display "12:00" and
A.M. will flash.
1. Time Adjust   Buttons
Increases time.
Decreases time.
Each time you push either
or button, the time moves
forward or backward by one
minute. If the button is held
then the time moves forward by
10 minutes.
2. RSV Button
Push this to set time, A.M. stops
flashing.
REMOTE-CONTROL
COOL AUTO
MANUAL-CONTROL
OPERATION
DEFROST
TIMER
1
2
5, 6
5
2
4
1
3
K7020 Modular Multi Infra Red 12/1/01 11:04 am Page 8
10
Heating Operation
GB
11
Cooling Operation
GB
1. Mode
Select the operating mode.
Press the MODE button and set the
display to COOL.
2. Fan
Select the air flow speed.
Press the FAN switch and set the
display to the desired speed at which
the cool air will be blown out.
AUTO, LOW , MED or
HIGH .
• At the AUTO position, the speed
is changed automatically with the
room temperature.
3. Temperature
Select the desired temperature.
Press the   buttons to set the
temperature as desired.
4. Operation
Press the START/STOP button.
• The START/STOP lamp (red) will
now light and operation will begin
after about a minute.
5. CHR/KHR/UHR only
To drive the outlet louvers
automatically, press this button.
6. Operation
Press the START/STOP button again.
• The lamp goes off and operation
will stop.
• If the operation is stopped and then
the START/STOP button is pressed
immediately, the air conditioner
will not operate for about 3
minutes, to protect the unit.
After about 3 minutes, operation
will be restarted automatically.
• For details on how to use the timer,
see pages 12 & 13.
1. Mode
Select the operating mode.
Press the MODE button and set the
display to HEAT.
2. Fan
Select the air flow speed.
Press the FAN button and set the
display to the desired speed at which
the hot air will be blown out.
AUTO, LOW , MED or
HIGH .
• At the AUTO position, the speed
is changed automatically with the
room temperature.
3. Temperature
Select the desired temperature.
Press the   buttons to set the
temperature as desired.
4. Operation
Press the START/STOP button.
• The START/STOP lamp (red) will
now light and the indoor fan will
stop, indicating preheating
operation lasting for between
3 and 5 minutes. Warm air is
then blown out.
5. CHR/KHR/UHR only
To drive the outlet louvers
automatically, press this button.
6. Operation
Press the START/STOP button again.
• The lamp goes off and operation
will stop.
• If the operation is stopped and then
the START/STOP button is pressed
immediately, the air conditioner will
not operate for about 3 minutes, to
protect the unit.
After about 3 minutes, operation
will be restarted automatically.
• For details on how to use the timer,
see pages 12 & 13.
4, 6
5
3
1
2
4, 6
5
3
1
2
)
(
()
()
)
(
()
()
K7020 Modular Multi Infra Red 12/1/01 11:04 am Page 10
12
Dry Operations
13
Timer Operations
GB
1. Select ON or OFF Timer
As required, set time using
  Buttons.
2. Set with RSV
• The ON/OFF lamp (red) lights
and timer operation starts.
• Only the ON/OFF lamp lights
during operation.
• Amber lamp lights to show
Timer mode.
TO STOP
Press the START/STOP button once
again.
• The lamp goes off even if there is
still time remaining in operation.
• The ON TIME and OFF TIME are
retained in the memory.
TO CANCEL TIMER OPERATION
To stop the timer operation, press CNL.
12
GB
Once the timer operations are
selected, the settings are saved in the
unit’s microcomputer memory.
Thereafter, the air conditioner will
start operating under the same
conditions, even when the unit has
been switched off and then on again.
1. ON/OFF TIMER Buttons
Push the ON or OFF button as
required.
• The current timer setting is
displayed along with ON/OFF
timer indicator, and the A.M. or
P.M. symbol will flash.
2. TIME ADJUST   Buttons
• Press to set the desired time.
Forward
Backward
(in intervals of 10 minutes, and if
held in intervals of one hour)
1. MODE Button
Select the operating mode.
Press the MODE button and set the
display to DRY.
2. TEMP Button
Set the desired temperature.
• Fan speed indicates AUTO, actual
fan speed will be low.
3. START/STOP Button
Operation begins after 3 minutes.
• The ON/OFF lamp (RED) lights.
4. START/STOP Button
Stop the air conditioner. ON Timer
(stop ➝operation)
The air conditioner will begin
operating at the preset time.
OFF Timer
(Operation ➝stop)
The air conditioner will stop
operating at the preset time.
ON ➝OFF Timer
(stop ➝operation ➝stop)
At the preset times, the air
conditioner will start operating
and then it will stop again.
OFF ➝ON Timer
(operation ➝stop ➝operation)
At the present times, the air
conditioner will stop operating
and then it will start again.
Timer Operations
3. RSV Reserve Button
Push this button to start the timer.
Check the TIMER lamp (AMBER) on unit.
4. CNL Cancel Button
Push to cancel timer settings.
3, 4
1
2
13
2
4
Stop
Stop
Stop Stop
Stop
Operation
Operation
Operation
Operation Operation
Operating lamp
Operating lamp
Operating lamp
Operating lamp
On
On
On
On
Off
Off
7 AM
8 PM
7 AM 8PM
8 PM 7 AM
K7020 Modular Multi Infra Red 12/1/01 11:04 am Page 12
MADE IN UK
1401448901
www.toshiba-aircon.co.uk
K7020 Modular Multi Infra Red 12/1/01 11:08 am Page 64

Other manuals for RBC-IR2-PE

1

Other Toshiba Remote Control manuals

Toshiba V211UK User manual

Toshiba

Toshiba V211UK User manual

Toshiba RBC-AMS55E-EN User manual

Toshiba

Toshiba RBC-AMS55E-EN User manual

Toshiba TCB-SC642TLE User manual

Toshiba

Toshiba TCB-SC642TLE User manual

Toshiba CT-8002 User manual

Toshiba

Toshiba CT-8002 User manual

Toshiba RBC-CR1-PE User manual

Toshiba

Toshiba RBC-CR1-PE User manual

Toshiba TCB-AX21E User manual

Toshiba

Toshiba TCB-AX21E User manual

Toshiba RB-RXS33-E User manual

Toshiba

Toshiba RB-RXS33-E User manual

Toshiba Lite-Vision plus RBC-AMS51E User manual

Toshiba

Toshiba Lite-Vision plus RBC-AMS51E User manual

Toshiba RBC-ASCU11-UL User manual

Toshiba

Toshiba RBC-ASCU11-UL User manual

Toshiba TCB-SC643TLE User manual

Toshiba

Toshiba TCB-SC643TLE User manual

Toshiba RBC-ASC11E User manual

Toshiba

Toshiba RBC-ASC11E User manual

Toshiba RBC-AX31U(W)-UL User manual

Toshiba

Toshiba RBC-AX31U(W)-UL User manual

Toshiba VCR remote Owner's manual

Toshiba

Toshiba VCR remote Owner's manual

Toshiba TCB-AX32E2 User manual

Toshiba

Toshiba TCB-AX32E2 User manual

Toshiba RBC-AMS51E-EN User manual

Toshiba

Toshiba RBC-AMS51E-EN User manual

Toshiba 15V300PG User manual

Toshiba

Toshiba 15V300PG User manual

Toshiba 2358 9721 User manual

Toshiba

Toshiba 2358 9721 User manual

Toshiba RG57A8/BGEF User manual

Toshiba

Toshiba RG57A8/BGEF User manual

Toshiba RBC-AX23UWW-E User manual

Toshiba

Toshiba RBC-AX23UWW-E User manual

Toshiba RBC-ASCU11-E User manual

Toshiba

Toshiba RBC-ASCU11-E User manual

Toshiba RBC-AS21E User manual

Toshiba

Toshiba RBC-AS21E User manual

Toshiba TCB-SC643TLE User manual

Toshiba

Toshiba TCB-SC643TLE User manual

Toshiba TCB-SC640U-E User manual

Toshiba

Toshiba TCB-SC640U-E User manual

Toshiba RBC-AS21UL User manual

Toshiba

Toshiba RBC-AS21UL User manual

Popular Remote Control manuals by other brands

Bowens XMSR user guide

Bowens

Bowens XMSR user guide

DSC WS4939 operating instructions

DSC

DSC WS4939 operating instructions

FUTABA 2PEKA instruction manual

FUTABA

FUTABA 2PEKA instruction manual

SKYDANCE RS8 user manual

SKYDANCE

SKYDANCE RS8 user manual

PROLED L513182 user manual

PROLED

PROLED L513182 user manual

Amazon Fire TV Stick 4K quick start guide

Amazon

Amazon Fire TV Stick 4K quick start guide

Century Comfort-Aire 7800-206 owner's manual

Century

Century Comfort-Aire 7800-206 owner's manual

Sony RM-X11M operating instructions

Sony

Sony RM-X11M operating instructions

Magnetek Flex Pro Tethered Controller instruction manual

Magnetek

Magnetek Flex Pro Tethered Controller instruction manual

TESA Power Panel Plus M 00760220 instruction manual

TESA

TESA Power Panel Plus M 00760220 instruction manual

Samsung SWPZ01-RX user manual

Samsung

Samsung SWPZ01-RX user manual

Regency FireGenie Installation & operating instructions

Regency

Regency FireGenie Installation & operating instructions

Fujitsu UTY-RNRT Operation manual

Fujitsu

Fujitsu UTY-RNRT Operation manual

Carrera RC 370301010 Assembly and operating instructions

Carrera RC

Carrera RC 370301010 Assembly and operating instructions

Pioneer RG57A6 owner's manual

Pioneer

Pioneer RG57A6 owner's manual

HomeMatic HMIP-WRC2 Mounting instruction and operating manual

HomeMatic

HomeMatic HMIP-WRC2 Mounting instruction and operating manual

Cisco DMRW1000 - Controller / Wireless-N Touchscreen Remote... user guide

Cisco

Cisco DMRW1000 - Controller / Wireless-N Touchscreen Remote... user guide

elsner elektronik Solexa II Operation

elsner elektronik

elsner elektronik Solexa II Operation

manuals.online logo
manuals.online logoBrands
  • About & Mission
  • Contact us
  • Privacy Policy
  • Terms and Conditions

Copyright 2025 Manuals.Online. All Rights Reserved.