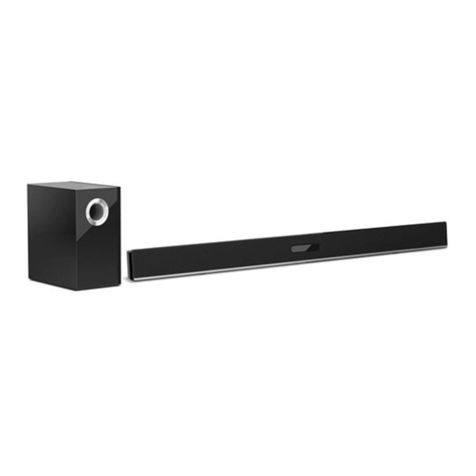
Toshiba TY-SBX1020 User manual

TY-SBX1020
Sound Bar
Operation Manual
5028300
Safety precautionsThe information you need to prevent danger to the user and other people as well
as property damage is described below. “Description of signs” shows different
categories of the degree of danger or damage that may occur due to wrong
handling. “Description of symbols” shows the meaning of the symbols.
Important notes
• This book is only a guide for user's operation, not a criterion for configuration.
• Only use attachments/accessories specified by the manufacturer.
The lightning flash is intended to alert the user to the
presence of dangerous voltage within the product's
enclosure, and touching the internal components may result
in a risk of electric shock to persons.
The exclamatory mark is intended to alert the user to the
presence of important operating instructions.
To reduce the risk of electric shock or fire, do not open the
cover. Refer servicing to qualified service personnel.
Description of signs
Indicates that there is a risk of death or
serious injury.
Indicates that there is a risk of light injury or
property damage.
Description of symbols
Indicates “Prohibition” or “You must not do” with pictures and text.
Indicates “Mandatory Action” or “Do as indicated” with pictures and
text.
What to do in the case of an abnormality
• Stop using the device immediately in case of an abnormality or failure.
• Remove the USB cable immediately when water or any foreign object
enters the interior of the device. It may cause a fire or electric shock.
Remove the USB cable immediately, and contact your dealer for a repair.
Usage
To reduce the risk of fire, electric shock or product damage,
• Do not disassemble, repair, or modify the unit. Refer servicing to
qualified service personnel.
• Do not step on, throw, or drop battery or the power supply or unit, or
expose them to a strong shock.
• Do not throw the unit into fire. The battery could explode causing injury
or death.
• Do not install this unit in a confined or built-in space such as a book
case or similar unit, and keep well-ventilated conditions. The ventilation
should not be impeded by covering the ventilation openings with items
such as newspaper, table-cloths, curtains etc.
• Do not expose this unit to rain, moisture, dripping or splashing.
• Do not place objects filled with liquids, such as vases, on this unit.
• Place the unit on a flat surface away from sources of direct sunlight or
excessive heat.
• The unit is not for use by children, and keep it out of reach of children.
Battery
DO NOT INGEST BATTERY, CHEMICAL BURN HAZARD
• The remote control supplied with this product contains a coin/button
cell battery. If the coin/button cell battery is swallowed, it can cause
severe internal burns in just 2 hours and lead to death. Keep new and
used batteries away from children. If the battery compartment does not
close securely, stop using the product and keep it away from children.
If you think batteries might have been swallowed or placed inside any
part of the body, seek immediate medical attention.
• Danger of explosion if battery is incorrectly replaced.
• Replace only with the same or equivalent type.
• The battery (batteries or battery pack) must not be exposed to excessive
heat such as sunshine, fire or the like.
Important Safety Instructions
1 Read these instructions - All the safety and operating instructions should be read
before this product is operated.
2 Keep these instructions - The safety and operating instructions should be
retained for future reference.
3 Heed all warnings - All warnings on the appliance and in the operating instructions
should be adhered to.
4 Follow all instructions - All operating and use instructions should be followed.
5 Do not use this apparatus near water - The appliance should not be used near
water or moisture - for example, in a wet basement or near a swimming pool and
the like.
6 Clean only with a dry cloth.
7 Do not block any ventilation openings. Install in accordance with the
manufacturer’s instructions.
8 Do not install near any heat sources such as radiators, heaters, stoves, or other
apparatus (including amplifiers) that produce heat.
9 Do not defeat the safety purpose of the polarized or grounding-type plug. A
polarized plug has two blades with one wider than the other. A grounding type
plug has two blades and a third grounding prong. The wide blade or the third
prong is provided for your safety. If the provided plug does not fit into your outlet,
consult an electrician for replacement of the obsolete outlet.
10 Protect the power cord from being walked on or pinched, particularly at plugs,
convenience receptacles and at the point where they exit from the apparatus.
11 Only use attachments/accessories specified by the manufacturer.
12 Use only with the cart, stand, tripod, bracket, or table specified by the
manufacturer, or sold with the apparatus. When a cart or rack is used,
use caution when moving the cart/apparatus combination to avoid
injury from tip-over.
13 Unplug the apparatus during lightning storms or when unused for long periods of
time.
14 Refer all servicing to qualified personnel. Servicing is required when the apparatus
has been damaged in any way, such as power supply cord or plug is damaged,
liquid has been spilled or objects have fallen into the apparatus, the unit has been
exposed to rain or moisture, does not operate normally, or has been dropped.
15 This equipment is a Class II or double insulated electrical appliance. It has been
designed in such a way that it does not require a safety connection to electrical
earth.
16 The apparatus shall not be exposed to dripping or splashing. No objects filled with
liquids, such as vases, shall be placed on the apparatus.
17 Minimum distance around the apparatus for sufficient ventilation is 5 cm.
18 The ventilation should not be impeded by covering the ventilation openings with
items, such as newspapers, table-cloths, curtains, etc...
19 No naked flame sources, such as lighted candles, should be placed on the
apparatus.
• The mains plug/appliance coupler is used as the disconnect device, the
disconnect device must remain readily operable.
• The rating label is pasted on the bottom or back of the equipment.
FCC Statement :
This device complies with Part 15 of the FCC Rules. Operation is subject to the
following two conditions:
1) This device may not cause harmful interference, and 2) This device must
accept any interference received, including interference that may cause
undesired operation.
Note: This equipment has been tested and found to comply with the limits
for a Class B digital device, pursuant to part 15 of the FCC Rules. These limits
are designed to provide reasonable protection against harmful interference
in a residential installation. This equipment generates, uses, and can radiate
radio frequency energy and, if not installed and used in accordance with
the instructions, may cause harmful interference to radio communication.
However, there is no guarantee that interference will not occur in a particular
installation. If this equipment does cause harmful interference to radio or
television reception, which can be determined by turning the equipment off
and on, the user is encouraged to try to correct the interference by one or more
of the following measures:
• Reorient or relocate the receiving antenna.
• Increase the separation between the equipment and receiver.
• Connect the equipment into an outlet on a circuit different from that to which
the receiver is connected.
• Consult the dealer or an experienced radio/TV technician for help.
Caution:Changesormodificationsnot expresslyapprovedby theparty responsible
for compliance could void the user’s authority to operate the equipment.
IC-CANADA :
California Prop 65 Warning :
This product contains chemicals, including lead, known
to the State of California to cause cancer and birth defects
or other reproductive harm. Wash hands after handling.
Disclaimer
• Toshiba shall not be responsible for any damage caused by an earthquake,
thunderstorm, flood damage, fire for which Toshiba is not responsible, acts of a third
party, other accidents, or damages caused by the user’s willful acts or negligence,
misuse, or use in abnormal conditions.
• Toshiba shall not be responsible for any damage caused by failure to observe the
information described in the operation manual.
Disposal
• When disposing of this device, observe the laws, or ordinances and rules of the local
government.
• When disposing of the battery, make a request to a recycle agency for disposal.
About using Bluetooth®
This unit is designed for use with Bluetooth® wireless devices compatible with the HFP, HSP,
A2DP and AVRCP streaming audio profiles. Refer to your Bluetooth® device’s user manual or
technical support to determine if your Bluetooth® device supports these profiles.
Frequency band used
This unit uses the 2.4 GHz frequency band. However other wireless devices may use 2.4 GHz
frequency band as well and may cause interference with each other. To avoid interference,
please refrain from the use of the unit at the same time with other wireless devices.
Certification of this device
This unit conforms to frequency restrictions and has received certification based on
frequency laws, so a wireless permit is not necessary.
However, the following action is punishable by law in some countries:
• Taking apart/modifying the unit.
Usage restrictions
• Wireless transmission and/or use with all Bluetooth® equipped devices is not guaranteed.
• A device featuring the Bluetooth® function is required to conform to the Bluetooth®
standard specified by Bluetooth SIG, and be authenticated. Even if the connected device
conforms to the above mentioned Bluetooth® standard, some devices may not be
connected or work correctly, depending on the features or specifications of the device.
Range of use
Use this device within an unobstructed 10 m range. The range of use or perimeter may be
shortened depending on any obstructions, devices causing interference, other people in
the room, or the construction of the building. Please note that the range mentioned above
is not guaranteed.
The Bluetooth® word mark and logos are owned by the Bluetooth SIG, Inc. and are used
under license.
Note
• This unit may receive radio interference caused by mobile telephones during use. If
such interference occurs, please increase separation between this unit and the mobile
telephone.
200820c1_TY-SBX1020_En.indd 1 2020/08/20 13:09:59
• To maintain compliance with the RF exposure guidelines, place the product at
least 20cm from nearby persons.
This device contains licence-exempt transmitter(s)/receiver(s) that comply with
Innovation, Science and Economic Development Canada’s licence-exempt
RSS(s). Operation is subject to the following two conditions:
(1) This device may not cause interference.
(2) This device must accept any interference, including interference that may
cause undesired operation of the device.
Placement and mounting
Wall mounting
Note
• Installation must be carried out by qualified personnel. Incorrect assembly can result in
severe personal injury and property damage (if you intend to install this product yourself,
you must check for installations such as electrical wiring and plumbing that may be
buried inside the wall). It is the installer’s responsibility to verify that the wall will safely
support the total load of the Main Unit and wall brackets.
• Additional tools (not included) are required for the installation.
• Do not overtighten screws.
• Keep this operation manual for future reference.
• Use an electronic stud finder to check the wall type before drilling and mounting.
640 mm
1. Remove the screws from the Main Unit.
2. Attach the wall brackets to the Main Unit with the screws removed from
the Main Unit.
3. Drill 2 parallel holes (Ø 3 - 8 mm each according to wall type) in the wall.
The distance between the holes should be 640 mm.
640 mm
4. Firmly fix 1 dowel into each hole in the wall if necessary.
Solid wall (i.e., Solid brick,
Solid concrete, Solid wood,
Solid wooden battens)
Drywall, Plaster wall,
Lath wall, etc.
Dowel
5. Leave a 5 mm gap between the wall and the screw’s head. Lift the Main
Unit with the attached wall brackets over the heads of the screws and
slot into place.
> 32 mm
4mm
5 mm
640 mm
1-1-8, Sotokanda, Chiyoda-ku Tokyo 101-0021, Japan
Power Supply
When using AC power supply
1. Insert the supply plug of the attached power cord fully into AC
Power Plug on the back.
2. Insert the power plug into an AC outlet.
Identifying the Parts
Terminal
AC~ AC Power Plug Connect a power cord.
OPTICAL OPTICAL socket Connect a digital optical
cable.
COAXIAL COAXIAL socket Connect a digital coaxial
cable.
SERVICE ONLY SERVICE ONLY
socket
The USB socket is for
service only.
It is not listen to music
and designed to charge
smartphones, tablets or
similar devices.
AUX AUX socket Connect an AUX cable.
HDMI ARC HDMI socket Connect a HDMI cable.
Buttons and indicators
LED indicators
Indicates the current mode.
Indicator color:
STANDBY : Red
AUX : Green
BT : Blue
OPTICAL : Orange
COAXIAL : Orange (flash)
HDMI ARC : White
Power button Switch the unit between
ON and STANDBY mode.
Function button
Select the play function.
EQ Equalizer button Select a preset sound effect.
/Volume /
button Increase/decrease the
volume level.
Remote Control
Power button Switch the unit between ON
and STANDBY mode.
Mute button Mute or resume the sound.
Function
buttons Select the play function.
Volume+/- button Increase/decrease the volume
level.
EQ buttons Select a preset sound effect.
Play/Pause/
Pairing button
Play/pause playback in
Bluetooth mode. Press and
hold to activate the pairing
function in Bluetooth mode or
disconnect the existing paired
Bluetooth device.
Fast forward/
backward button
Skip to previous/next track in
Bluetooth mode.
Information:
• Remove the protective tab to activate the remote control battery before use.
• Use a CR2025 lithium battery for the remote control. When replacing the battery, remove
it and place a CR2025 lithium battery into the battery tray with correct polarity (+/-) as
engraved on the remote control rear panel. There is a risk of injury due to fire, explosion
or leakage if the battery is not replaced, used, handled or disposed of properly. Dispose
of the used battery immediately as required by local regulations. Do not disassemble,
charge, crush the battery or expose it to fire or high temperature.
Basic Operation
Turning on/o the power
Press Power button.
When the power is on, the standby indicator (red) will go off and one of the function
indicators will light up.
When the power is off, the standby indicator (red) will light up.
Information:
• Auto power on
The unit turns on automatically under the following conditions:
-if you turn on the TV and its HDMI ARC port connected to the unit with a HDMI cable.
-if you start playing a music on the audio player connected to the unit with a 3.5mm to
3.5mm audio cable.
• Auto power o
The unit turns off automatically under the following conditions:
-if you turn off the TV connected to the unit with a HDMI cable.
-if no operation is done or no signal comes from the connected device for 15 minutes.
Adjusting the volume
Press Volume+/- button.
Press Mute buttton only for remote control.
Select a Mode
Press the Function button repeatedly on the unit or the AUX, HDMI ARC, OPTICAL, COAXIAL
or BT(Bluetooth) button on the remote control to select the desired mode.
Select a Preset Sound Eect
While playing, press the EQ button on the unit or the NEWS, MOVIE or MUSIC button on the
remote control to select the desired sound effect.
AUX / HDMI ARC / OPTICAL / COAXIAL Operation
1. Ensure that the unit is connected to the TV or audio device.
2. Press the Function button repeatedly on the unit or the AUX, HDMI
ARC, COAXIAL or OPTICAL button on the remote control to select
the desired mode.
Information:
• Operate your audio device directly for playback features.
Bluetooth® Operation
Pairing:
1. Press the Function button repeatedly on the unit or the BT
button on the remote control to select Bluetooth mode. The Blue
indicator will light flash.
2.
The system has entered pairing mode. Press and hold the “ /
PAIR”button on the remote control. The Blue indicator will flash
rapidly and the unit has entered pairing mode.
3. Activate your Bluetooth® device and select the search mode.
“TY-SBX1020” will appear on your Bluetooth device list.
4. Select “TY-SBX1020” in the pairing list. After the “Pairing sound”
prompt, the unit is successfully connected and the Blue indicator
will light up solidly.
Information:
• Enter "0000" for the password if necessary.
Playing Bluetooth® Music:
1. Pair your device with the player.
2. Play music via your device (by pressing the /PAIR, , or
button .
Specifications
Bluetooth®section
Bluetooth®spec. Version 4.2
Wireless equipment
Classification Class 2
Supported profile A2DP, AV RC P
Frequency range 2.402-2.480 GHz (2.4 GHz ISM Segment)
Service distance Up to 10 m
General
Power Supply AC100-240V ~ 50/60 Hz
Power Consumption 30 W
Power output 15 W x 2 + 30 W
Dimension 815 x 89 x 56 mm (W x H x D)
Weight Approx. 2.3 Kg
Speaker 8Ω x 2 + 4Ω
Accessories Power cord x 1, Remote control x 1, AUX cable x 1, Operation
manual x 1
The specifications may be changed without prior notice to improve product performance.
The images included in this guide may differ from the actual image and may change without
notice.
200820c1_TY-SBX1020_En.indd 2 2020/08/20 13:10:01

Placement and mounting
Wall mounting
Note
• Installation must be carried out by qualified personnel. Incorrect assembly can result in
severe personal injury and property damage (if you intend to install this product yourself,
you must check for installations such as electrical wiring and plumbing that may be
buried inside the wall). It is the installer’s responsibility to verify that the wall will safely
support the total load of the Main Unit and wall brackets.
• Additional tools (not included) are required for the installation.
• Do not overtighten screws.
• Keep this operation manual for future reference.
• Use an electronic stud finder to check the wall type before drilling and mounting.
640 mm
1. Remove the screws from the Main Unit.
2. Attach the wall brackets to the Main Unit with the screws removed from
the Main Unit.
3. Drill 2 parallel holes (Ø 3 - 8 mm each according to wall type) in the wall.
The distance between the holes should be 640 mm.
640 mm
4. Firmly fix 1 dowel into each hole in the wall if necessary.
Solid wall (i.e., Solid brick,
Solid concrete, Solid wood,
Solid wooden battens)
Drywall, Plaster wall,
Lath wall, etc.
Dowel
5. Leave a 5 mm gap between the wall and the screw’s head. Lift the Main
Unit with the attached wall brackets over the heads of the screws and
slot into place.
> 32 mm
4mm
5 mm
640 mm
1-1-8, Sotokanda, Chiyoda-ku Tokyo 101-0021, Japan
Power Supply
When using AC power supply
1. Insert the supply plug of the attached power cord fully into AC
Power Plug on the back.
2. Insert the power plug into an AC outlet.
Identifying the Parts
Terminal
AC~ AC Power Plug Connect a power cord.
OPTICAL OPTICAL socket Connect a digital optical
cable.
COAXIAL COAXIAL socket Connect a digital coaxial
cable.
SERVICE ONLY SERVICE ONLY
socket
The USB socket is for
service only.
It is not listen to music
and designed to charge
smartphones, tablets or
similar devices.
AUX AUX socket Connect an AUX cable.
HDMI ARC HDMI socket Connect a HDMI cable.
Buttons and indicators
LED indicators
Indicates the current mode.
Indicator color:
STANDBY : Red
AUX : Green
BT : Blue
OPTICAL : Orange
COAXIAL : Orange (flash)
HDMI ARC : White
Power button Switch the unit between
ON and STANDBY mode.
Function button
Select the play function.
EQ Equalizer button Select a preset sound effect.
/Volume /
button Increase/decrease the
volume level.
Remote Control
Power button Switch the unit between ON
and STANDBY mode.
Mute button Mute or resume the sound.
Function
buttons Select the play function.
Volume+/- button Increase/decrease the volume
level.
EQ buttons Select a preset sound effect.
Play/Pause/
Pairing button
Play/pause playback in
Bluetooth mode. Press and
hold to activate the pairing
function in Bluetooth mode or
disconnect the existing paired
Bluetooth device.
Fast forward/
backward button
Skip to previous/next track in
Bluetooth mode.
Information:
• Remove the protective tab to activate the remote control battery before use.
• Use a CR2025 lithium battery for the remote control. When replacing the battery, remove
it and place a CR2025 lithium battery into the battery tray with correct polarity (+/-) as
engraved on the remote control rear panel. There is a risk of injury due to fire, explosion
or leakage if the battery is not replaced, used, handled or disposed of properly. Dispose
of the used battery immediately as required by local regulations. Do not disassemble,
charge, crush the battery or expose it to fire or high temperature.
Basic Operation
Turning on/o the power
Press Power button.
When the power is on, the standby indicator (red) will go off and one of the function
indicators will light up.
When the power is off, the standby indicator (red) will light up.
Information:
• Auto power on
The unit turns on automatically under the following conditions:
-if you turn on the TV and its HDMI ARC port connected to the unit with a HDMI cable.
-if you start playing a music on the audio player connected to the unit with a 3.5mm to
3.5mm audio cable.
• Auto power o
The unit turns off automatically under the following conditions:
-if you turn off the TV connected to the unit with a HDMI cable.
-if no operation is done or no signal comes from the connected device for 15 minutes.
Adjusting the volume
Press Volume+/- button.
Press Mute buttton only for remote control.
Select a Mode
Press the Function button repeatedly on the unit or the AUX, HDMI ARC, OPTICAL, COAXIAL
or BT(Bluetooth) button on the remote control to select the desired mode.
Select a Preset Sound Eect
While playing, press the EQ button on the unit or the NEWS, MOVIE or MUSIC button on the
remote control to select the desired sound effect.
AUX / HDMI ARC / OPTICAL / COAXIAL Operation
1. Ensure that the unit is connected to the TV or audio device.
2. Press the Function button repeatedly on the unit or the AUX, HDMI
ARC, COAXIAL or OPTICAL button on the remote control to select
the desired mode.
Information:
• Operate your audio device directly for playback features.
Bluetooth® Operation
Pairing:
1. Press the Function button repeatedly on the unit or the BT
button on the remote control to select Bluetooth mode. The Blue
indicator will light flash.
2.
The system has entered pairing mode. Press and hold the “ /
PAIR”button on the remote control. The Blue indicator will flash
rapidly and the unit has entered pairing mode.
3. Activate your Bluetooth® device and select the search mode.
“TY-SBX1020” will appear on your Bluetooth device list.
4. Select “TY-SBX1020” in the pairing list. After the “Pairing sound”
prompt, the unit is successfully connected and the Blue indicator
will light up solidly.
Information:
• Enter "0000" for the password if necessary.
Playing Bluetooth® Music:
1. Pair your device with the player.
2. Play music via your device (by pressing the /PAIR, , or
button .
Specifications
Bluetooth®section
Bluetooth®spec. Version 4.2
Wireless equipment
Classification Class 2
Supported profile A2DP, AV RC P
Frequency range 2.402-2.480 GHz (2.4 GHz ISM Segment)
Service distance Up to 10 m
General
Power Supply AC100-240V ~ 50/60 Hz
Power Consumption 30 W
Power output 15 W x 2 + 30 W
Dimension 815 x 89 x 56 mm (W x H x D)
Weight Approx. 2.3 Kg
Speaker 8Ω x 2 + 4Ω
Accessories Power cord x 1, Remote control x 1, AUX cable x 1, Operation
manual x 1
The specifications may be changed without prior notice to improve product performance.
The images included in this guide may differ from the actual image and may change without
notice.
200820c1_TY-SBX1020_En.indd 2 2020/08/20 13:10:01

Placement and mounting
Wall mounting
Note
• Installation must be carried out by qualified personnel. Incorrect assembly can result in
severe personal injury and property damage (if you intend to install this product yourself,
you must check for installations such as electrical wiring and plumbing that may be
buried inside the wall). It is the installer’s responsibility to verify that the wall will safely
support the total load of the Main Unit and wall brackets.
• Additional tools (not included) are required for the installation.
• Do not overtighten screws.
• Keep this operation manual for future reference.
• Use an electronic stud finder to check the wall type before drilling and mounting.
640 mm
1. Remove the screws from the Main Unit.
2. Attach the wall brackets to the Main Unit with the screws removed from
the Main Unit.
3. Drill 2 parallel holes (Ø 3 - 8 mm each according to wall type) in the wall.
The distance between the holes should be 640 mm.
640 mm
4. Firmly fix 1 dowel into each hole in the wall if necessary.
Solid wall (i.e., Solid brick,
Solid concrete, Solid wood,
Solid wooden battens)
Drywall, Plaster wall,
Lath wall, etc.
Dowel
5. Leave a 5 mm gap between the wall and the screw’s head. Lift the Main
Unit with the attached wall brackets over the heads of the screws and
slot into place.
> 32 mm
4mm
5 mm
640 mm
1-1-8, Sotokanda, Chiyoda-ku Tokyo 101-0021, Japan
Power Supply
When using AC power supply
1. Insert the supply plug of the attached power cord fully into AC
Power Plug on the back.
2. Insert the power plug into an AC outlet.
Identifying the Parts
Terminal
AC~ AC Power Plug Connect a power cord.
OPTICAL OPTICAL socket Connect a digital optical
cable.
COAXIAL COAXIAL socket Connect a digital coaxial
cable.
SERVICE ONLY SERVICE ONLY
socket
The USB socket is for
service only.
It is not listen to music
and designed to charge
smartphones, tablets or
similar devices.
AUX AUX socket Connect an AUX cable.
HDMI ARC HDMI socket Connect a HDMI cable.
Buttons and indicators
LED indicators
Indicates the current mode.
Indicator color:
STANDBY : Red
AUX : Green
BT : Blue
OPTICAL : Orange
COAXIAL : Orange (flash)
HDMI ARC : White
Power button Switch the unit between
ON and STANDBY mode.
Function button
Select the play function.
EQ Equalizer button Select a preset sound effect.
/Volume /
button Increase/decrease the
volume level.
Remote Control
Power button Switch the unit between ON
and STANDBY mode.
Mute button Mute or resume the sound.
Function
buttons Select the play function.
Volume+/- button Increase/decrease the volume
level.
EQ buttons Select a preset sound effect.
Play/Pause/
Pairing button
Play/pause playback in
Bluetooth mode. Press and
hold to activate the pairing
function in Bluetooth mode or
disconnect the existing paired
Bluetooth device.
Fast forward/
backward button
Skip to previous/next track in
Bluetooth mode.
Information:
• Remove the protective tab to activate the remote control battery before use.
• Use a CR2025 lithium battery for the remote control. When replacing the battery, remove
it and place a CR2025 lithium battery into the battery tray with correct polarity (+/-) as
engraved on the remote control rear panel. There is a risk of injury due to fire, explosion
or leakage if the battery is not replaced, used, handled or disposed of properly. Dispose
of the used battery immediately as required by local regulations. Do not disassemble,
charge, crush the battery or expose it to fire or high temperature.
Basic Operation
Turning on/o the power
Press Power button.
When the power is on, the standby indicator (red) will go off and one of the function
indicators will light up.
When the power is off, the standby indicator (red) will light up.
Information:
• Auto power on
The unit turns on automatically under the following conditions:
-if you turn on the TV and its HDMI ARC port connected to the unit with a HDMI cable.
-if you start playing a music on the audio player connected to the unit with a 3.5mm to
3.5mm audio cable.
• Auto power o
The unit turns off automatically under the following conditions:
-if you turn off the TV connected to the unit with a HDMI cable.
-if no operation is done or no signal comes from the connected device for 15 minutes.
Adjusting the volume
Press Volume+/- button.
Press Mute buttton only for remote control.
Select a Mode
Press the Function button repeatedly on the unit or the AUX, HDMI ARC, OPTICAL, COAXIAL
or BT(Bluetooth) button on the remote control to select the desired mode.
Select a Preset Sound Eect
While playing, press the EQ button on the unit or the NEWS, MOVIE or MUSIC button on the
remote control to select the desired sound effect.
AUX / HDMI ARC / OPTICAL / COAXIAL Operation
1. Ensure that the unit is connected to the TV or audio device.
2. Press the Function button repeatedly on the unit or the AUX, HDMI
ARC, COAXIAL or OPTICAL button on the remote control to select
the desired mode.
Information:
• Operate your audio device directly for playback features.
Bluetooth® Operation
Pairing:
1. Press the Function button repeatedly on the unit or the BT
button on the remote control to select Bluetooth mode. The Blue
indicator will light flash.
2.
The system has entered pairing mode. Press and hold the “ /
PAIR”button on the remote control. The Blue indicator will flash
rapidly and the unit has entered pairing mode.
3. Activate your Bluetooth® device and select the search mode.
“TY-SBX1020” will appear on your Bluetooth device list.
4. Select “TY-SBX1020” in the pairing list. After the “Pairing sound”
prompt, the unit is successfully connected and the Blue indicator
will light up solidly.
Information:
• Enter "0000" for the password if necessary.
Playing Bluetooth® Music:
1. Pair your device with the player.
2. Play music via your device (by pressing the /PAIR, , or
button .
Specifications
Bluetooth®section
Bluetooth®spec. Version 4.2
Wireless equipment
Classification Class 2
Supported profile A2DP, AV RC P
Frequency range 2.402-2.480 GHz (2.4 GHz ISM Segment)
Service distance Up to 10 m
General
Power Supply AC100-240V ~ 50/60 Hz
Power Consumption 30 W
Power output 15 W x 2 + 30 W
Dimension 815 x 89 x 56 mm (W x H x D)
Weight Approx. 2.3 Kg
Speaker 8Ω x 2 + 4Ω
Accessories Power cord x 1, Remote control x 1, AUX cable x 1, Operation
manual x 1
The specifications may be changed without prior notice to improve product performance.
The images included in this guide may differ from the actual image and may change without
notice.
200820c1_TY-SBX1020_En.indd 2 2020/08/20 13:10:01
Table of contents
Other Toshiba Speakers System manuals

Toshiba
Toshiba SSC5300 User manual

Toshiba
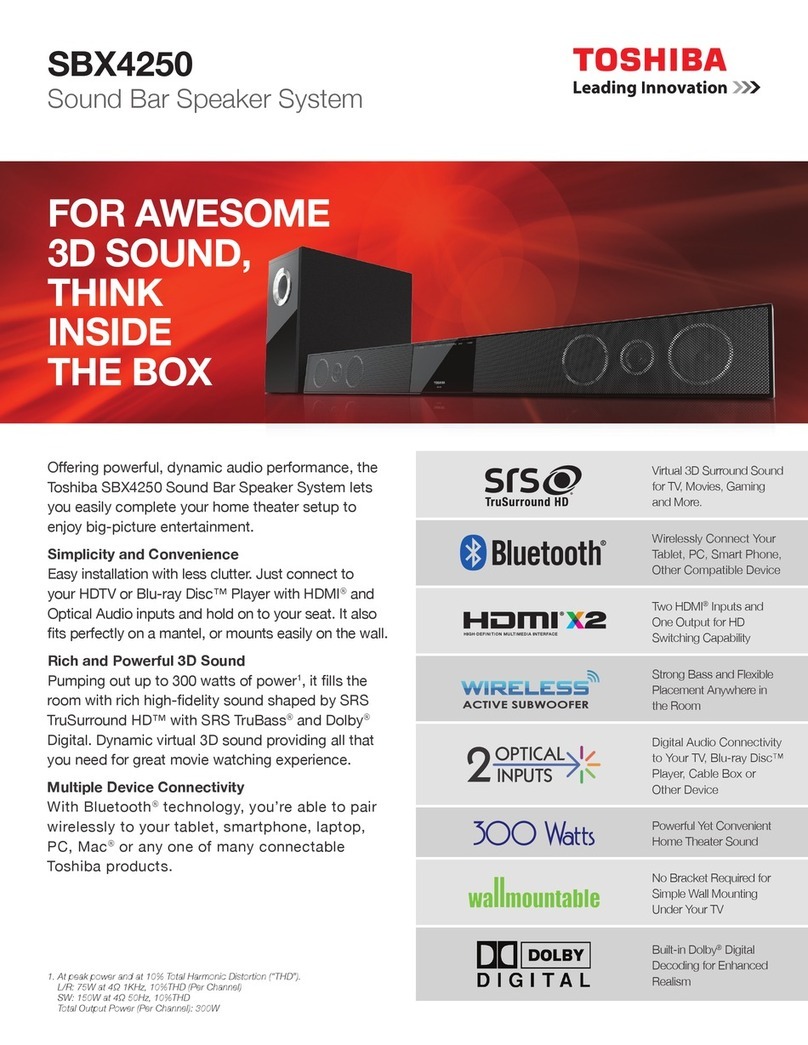
Toshiba SBX4250 User manual

Toshiba
Toshiba SSW1020 User manual

Toshiba
Toshiba SB3950E1 User manual

Toshiba
Toshiba TY-ASC402 User manual

Toshiba
Toshiba SBM1W User manual

Toshiba
Toshiba SBX5065KC User manual

Toshiba
Toshiba SBX4250KN User manual

Toshiba
Toshiba SB93719S-SW User manual

Toshiba
Toshiba SBX4250KN User manual