manuals.online logo
Brands
  1. Home
  2. •
  3. Brands
  4. •
  5. Toto
  6. •
  7. Toilet
  8. •
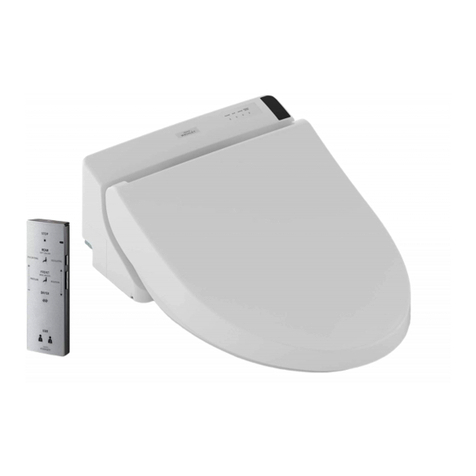
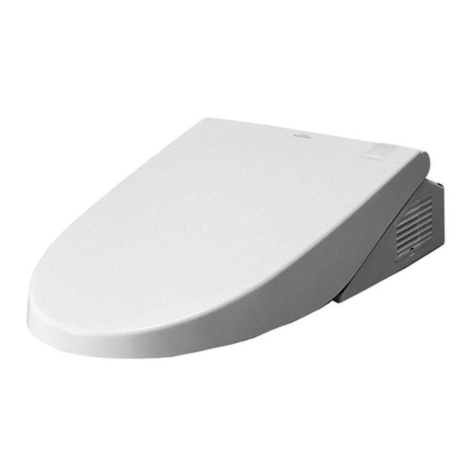
  9. Toto WH172AAT Series User manual

Toto WH172AAT Series User manual

This manual suits for next models

5

Other Toto Toilet manuals

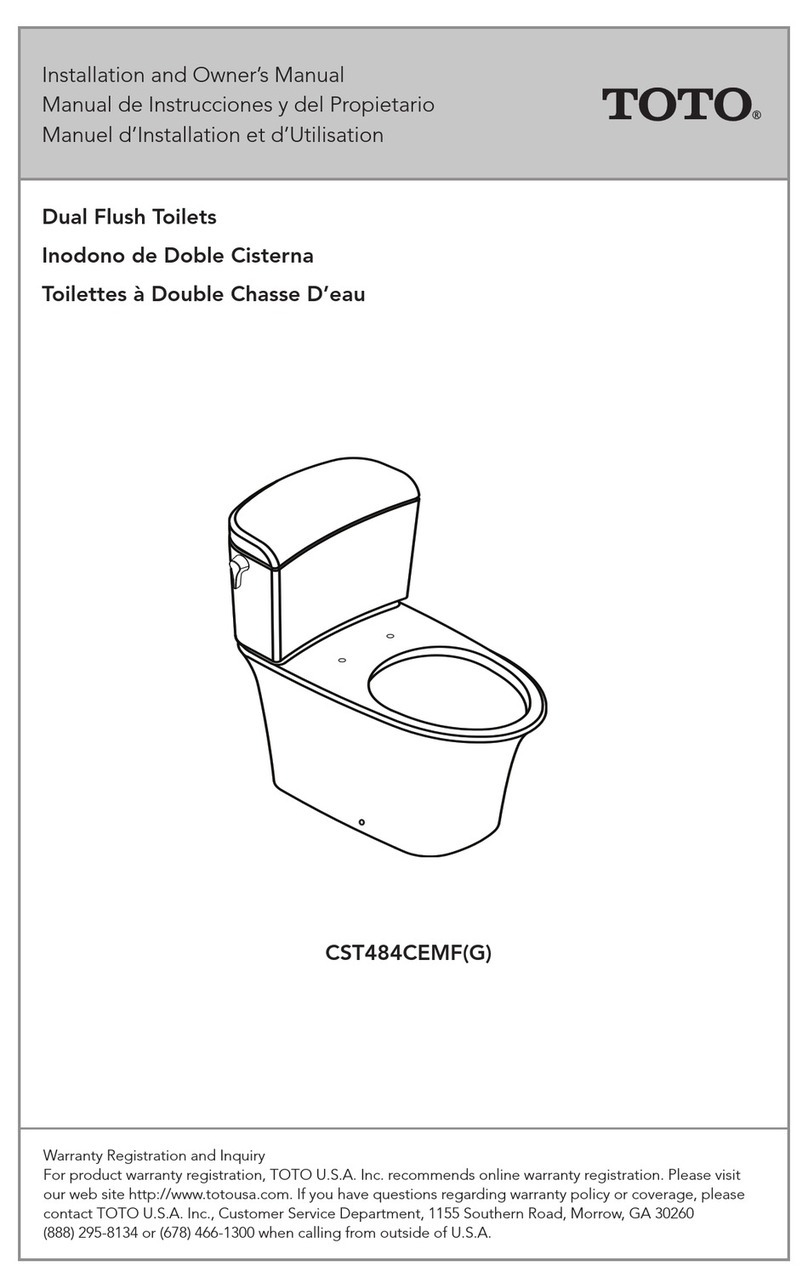
Toto CST442 User manual

Toto

Toto CST442 User manual

Toto Aquia CST412MF User manual

Toto

Toto Aquia CST412MF User manual

Toto MS604 Series User manual

Toto

Toto MS604 Series User manual

Toto CST748 User manual

Toto

Toto CST748 User manual

Toto NEOREST 750H User manual

Toto

Toto NEOREST 750H User manual

Toto AP WASHLET CWT4263056CMFGA User manual

Toto

Toto AP WASHLET CWT4263056CMFGA User manual

Toto CST424SF User manual

Toto

Toto CST424SF User manual

Toto washlet User manual

Toto

Toto washlet User manual

Toto USWN925 Series User manual

Toto

Toto USWN925 Series User manual

Toto CS300D Series User manual

Toto

Toto CS300D Series User manual

Toto washlet User manual

Toto

Toto washlet User manual

Toto C887 Series User manual

Toto

Toto C887 Series User manual

Toto Washlet Series User manual

Toto

Toto Washlet Series User manual

Toto G500 User manual

Toto

Toto G500 User manual

Toto Washlet G400 User manual

Toto

Toto Washlet G400 User manual

Toto MS914R Series User manual

Toto

Toto MS914R Series User manual

Toto AP WASHLET CWT4263046CMFG User manual

Toto

Toto AP WASHLET CWT4263046CMFG User manual

Toto USWN900 Series Guide

Toto

Toto USWN900 Series Guide

Toto Washlet C110 SW524 User manual

Toto

Toto Washlet C110 SW524 User manual

Toto UT105U User manual

Toto

Toto UT105U User manual

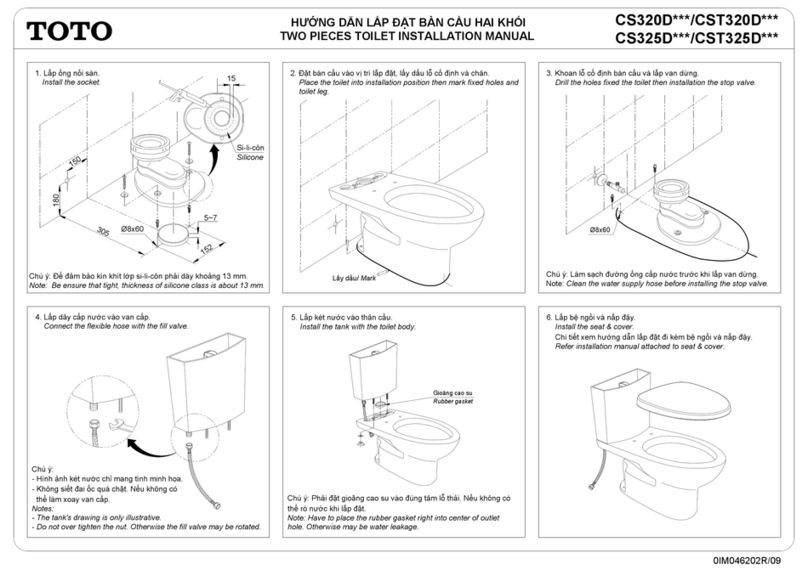
Toto CS320 Series User manual

Toto

Toto CS320 Series User manual

Toto MS625D Series User manual

Toto

Toto MS625D Series User manual

Toto NEOREST Hybrid User manual

Toto

Toto NEOREST Hybrid User manual

Toto washlet User manual

Toto

Toto washlet User manual

Popular Toilet manuals by other brands

nella LOCH NBMU-4062 ADA installation instructions

nella

nella LOCH NBMU-4062 ADA installation instructions

Crosswater US-PRO9005 manual

Crosswater

Crosswater US-PRO9005 manual

Kohler K-77780T-0 installation guide

Kohler

Kohler K-77780T-0 installation guide

Kohler K-6419 quick start guide

Kohler

Kohler K-6419 quick start guide

DENCK PURE-D user manual

DENCK

DENCK PURE-D user manual

Grohe Sensia ARENA user manual

Grohe

Grohe Sensia ARENA user manual

Kohler K-5171K Installation and care guide

Kohler

Kohler K-5171K Installation and care guide

Geberit AQUACLEAN MERA CLASSIC user manual

Geberit

Geberit AQUACLEAN MERA CLASSIC user manual

Kohler K-24097X Installation and care guide

Kohler

Kohler K-24097X Installation and care guide

Better Bathrooms BUN/BeBa 27555/78725 user manual

Better Bathrooms

Better Bathrooms BUN/BeBa 27555/78725 user manual

American Standard CONCEPT Cube TF-2704 installation manual

American Standard

American Standard CONCEPT Cube TF-2704 installation manual

BIOLAN ECO Instructions for installation, use and maintenance

BIOLAN

BIOLAN ECO Instructions for installation, use and maintenance

Thetford C260 Series user manual

Thetford

Thetford C260 Series user manual

KELISS T162A Series instruction manual

KELISS

KELISS T162A Series instruction manual

Silent Venus SVP600 Installation & maintenance

Silent Venus

Silent Venus SVP600 Installation & maintenance

Kohler K-22241K Installation and care guide

Kohler

Kohler K-22241K Installation and care guide

Kohler ESCALE K-32771T-NS installation instructions

Kohler

Kohler ESCALE K-32771T-NS installation instructions

BIOLAN GARDEN TOILET Instructions for installation, use and maintenance

BIOLAN

BIOLAN GARDEN TOILET Instructions for installation, use and maintenance

manuals.online logo
manuals.online logoBrands
  • About & Mission
  • Contact us
  • Privacy Policy
  • Terms and Conditions

Copyright 2025 Manuals.Online. All Rights Reserved.

WH173BAT
WH172AAT
WH173BAT
WH172AAT
WH173SGAT
563414-1
2
重要提示:
Important:
!
!
 ႌҦ൛ඪམ܆୆ƥ࿀ඪç࣐஍ඪًಿఝçъܲ൛ѓఝᆭࡖƗൗႯ܆୆฿ཊᄤႌҦ൛ඪམ܄ቛ૲ϷනଃඇᇖƦ
 Օනଃඇᇁ฻܉ႌҦ൛ඪམτሔཔܸୄಿè
 ᄤϖս৭࿷׀౼τሔ൏౯ቕ࿝);6B;༩њሠࠎᆇ֙׀њሠ
 τሔш྽ڟލ֙׀њሠè
1. Functions of the concealed cistern: storage water, inlet and outlet calve vessel, frame of wall-hung toilet,
The function reflected in the actuator panel instructions.
2. This instruction manual only supports the installation of the concealed cistern.
3. For Australia, the installation has to be in accordance with AS/NZS 3500 series of Standards and/or local standards.
4. The installation has to be in accordance with the local standard.
务必遵循当地标准并将电源线牢固插入插座。
请勿使用本地标准以外的其他电源。
τ಍ሆၰൠརƓເτ಍ఖࡵƗ౯༇шቕ൶༶ൠརƔ
Safety Precautions (Be sure to follow them for safety sake.)
3
Ventilating fan or ventilation hole
Be sure to read through this installation manual before installation work and install the product properly according to
the descriptions of this manual. Be sure to follow the warnings and cautions for safety sake.
This indication means the case where there is a possible
danger which may result in death or serious injury if the
product is used improperly.
This indication means the case where there is a possible
damage which may result in injury or only physical
damage if the product is used improperly.
Symbol example
means the actions that must not
be performed—“Prohibited”
  
means the actions that must be
performed—“Forced”
WARNING
Be sure
to follow
Do not install this product in a place exposed to water splash or humid place.
When using the product in the bathroom, provide a ventilating fan or ventilation hole so that air in the bathroom flows well. Install
the product more than 0.6m away from the bath tub.
Mount the outlet for electric wiring in the manner as follows: (Otherwise, fire or electric shock may be caused.)
a. Install a ground-fault interrupter or insulation transformer (higher than 1.5kVA, lower than 3kVA) in the outlet circuit.
* If the wiring work as shown in a. above has not been made, ask the installer for the work.
Connect the ground wire to the place where it can be connected securely. (If the ground
wire is not connected, electric shock may be caused in case of trouble or ground leakage.)
Note: For grounding, use copper wire having the diameter of more than 1.5mm and
grounding resistance of less than 100 ohm.
* If the ground wire has not been connected, ask the installer for the connection.
Be sure to follow the local standard and plug the electric cord firmly in the outlet.
(Otherwise, fire or electric shock may be caused.)
Be sure to connect this product to the cold water supply section.
(Otherwise, burn or trouble with equipment may be caused.)
CAUTIONWARNING
Install a ground-fault interrupter
or insulation transformer.
More than 0.6m
Power plug
Do not give direct impact to the product. Otherwise, the product may be broken, resulting in
injury, physical damage or water leak.
Be sure to hold the frame when carrying the product body, If you hold other part, the product may be broken,
resulting in injury, physical damage or water leak.
If it is not waterproofed, fire or electric shock may be caused.
* If it is not waterproofed, ask the installer for waterproof work.
Make sure that the electric plug is waterproofed by silicon rubber.
When using the product in the bathroom
CAUTION
Be sure
to follow
Perform the installation work surely and
properly according to the installation manual.
(Improper installation may cause water leak.)
Do not remove the water drain valve w/supply water filter while
the water shutoff valve is open. (Otherwise, water may gush out.)
Do not bend or crush the water supply hose.
(Otherwise, water leak may be caused.)
Do not install the product in open air, on slanted wall or in a place exposed to thumping vibration. Otherwise,
installation becomes unstable and the product may fall down to cause injury or death as the case may be.
Do not use other than tap water or well water (underground water) as supply water to the Washlet. (Otherwise, skin
irritation, etc. may be caused.)
Do not use other power supply than the local standard. (Otherwise, fire or electric shock may be caused.)
Prohibited
Prohibited
Panel
Silicon robber
ç౯ൗႯ౩ඪࠎ༕൫֬ᇖྦ౩ࢸ࠻Ɠ೉༨ࢸְ࣡Ɣҏൡދ౩ࢸඪམ૲ϷƗ؋Ⴏڱ൒ྦృ֬౩ࢸ࠻Ɠ೉ƥಇ
໱ٿç๷༕൫࠻çЭְƔࠎ๔ර౶࣐ྡྷҏൡƗၢ૮ڱ൒Ѱ௬ߑ૲Ϸ֬ૌܻè
Use water or dilute mild detergent (such as dishwashing detergent) to scrub and clean the surface, Never use strong
corrosive detergent (such as cleanser, paint thinner, benzene and so on) or wire ball to scrub, and to avoid corroding
the surface of the product.
ç೉ݛ୤ྺးٳఠЮӈ௝Ɨ౯༆ࢃఊቛເ၉ϵഺࠊঞࠔ԰য়Ɨ౯၎ᅽٌ݆ࣣႵ؆৲֬ߴ൳฿༩࣐ྡྷލ൨֬԰
য়ç߲ڶދߴ൳è
Please dispose of this product in accordance to the local waste disposal laws and regulations.
౩ࢸçٳ༅԰য়Cleaning and waste disposal
଩Table of contents
P. 4
···
简易故障判断及处理方式
Self diagnosis and troubleshooting
安全注意事项
Safety Precautions P. 2
···P. 5
···
安装说明
Installation instructions
P. 17
···
维修保养
Servicing procedures
4
温馨提示:
Note:
!
!
ၢ༶ѝ۳֬໠฼׋֬԰য়١ٌᇖႼሆଃƓᆓؚႯ߃Ɣ֬ƗႯ߃ၢҜᅽሸྡྷࢺè೉ݛࢺ҉Ɨ࿿໊࣓ࣣᆾ
׮֬٫ሌ၃ಭ൝࣐ྡྷሸྡྷҾࢺދໂྰƗྺࠪ൏৺༩པ႒֬ሌ၃ಭ൝ࢺƗь૮໠฼ছսߋࠎӈഺ҉шး֬ગٗ
ދ෬൅è
Users may fix the problems on their own if the corrective action is to be taken by the user according to the chart below.
Non-professionals are prohibited from disassembling and repairing the product. Please contact the relevant professionals
for futher troubleshooting to avoid aggravating the problem.
ӏࡵܪᅷ
ඪམ໴ٌ࣐ඪ
ඪམႼඪ҉ؕ
֥છ๨ৡ
ჷႀ ԰য়١ٌ
ç್߃ቀ࣐ඪቀً໊చࠎ๛ඪè
çඪམ࣐ඪً໊࢟ռè
ç࣐ඪًڣ๪Ⴜၺ༅ህࠎ࣐ඪًԵ׵ܙ
ࡸൗ֫ڣ๪໴ٌᆥӏ༶઒è
ç஍ԩၢഏჷႀƗ၎ಝ໴ٌ࣐ඪè
çඪམԢඪç஍ඪֿًቝᇢຽႼၺ༅
Ɠజు൏҉ཱིྖל࣐ಇ֬೰ࢄç്ཱི
ְƔƗᄶӵ஍ඪً໴ٌޚށ֬૨хè
ç૲Ϸןࢲઋۍບҍٺ௑ӐƗ૲Ϸሔഏ
ޱᄶӵ஍ඪًᆿඪ࢒׎ܬ׮ᄤଝ၉໑ᇉ
ഏƗ໴ٌ૨хè
çᄤඪམৡ૲֬૲Ϸןࢲઋۍ௑ӐƗ׫֥
ඪམୄҍ֬ѐᆵ೏ܼࠎఊඪམམ฿ഏƗ
Ⴜ൏߽໴ٌߴ໑è
çռ࣐ඪቀًࠎ৺༩༅၃ࢺ
ƓᆓؚႯ߃Ɣ
çռඪམ࣐ඪً࢟
Ɠᆓؚሌ၃ಭ჻Ɣ
çࡦҷ࣐ඪًѰ஍ԩၺ༅
Ɠᆓؚሌ၃ಭ჻Ɣè
ç۾ߗ࣐ඪً
Ɠᆓؚሌ၃ಭ჻Ɣè
ç౩য়ඪམୄҍ֬ၺ༅
Ɠᆓؚሌ၃ಭ჻Ɣè
çןᆣ૲Ϸןࢲઋۍ֬໑ᇉ
Ɠᆓؚሌ၃ಭ჻è
ç࡮ؒןࢲઋۍ
Ɠᆓؚሌ၃ಭ჻Ɣè
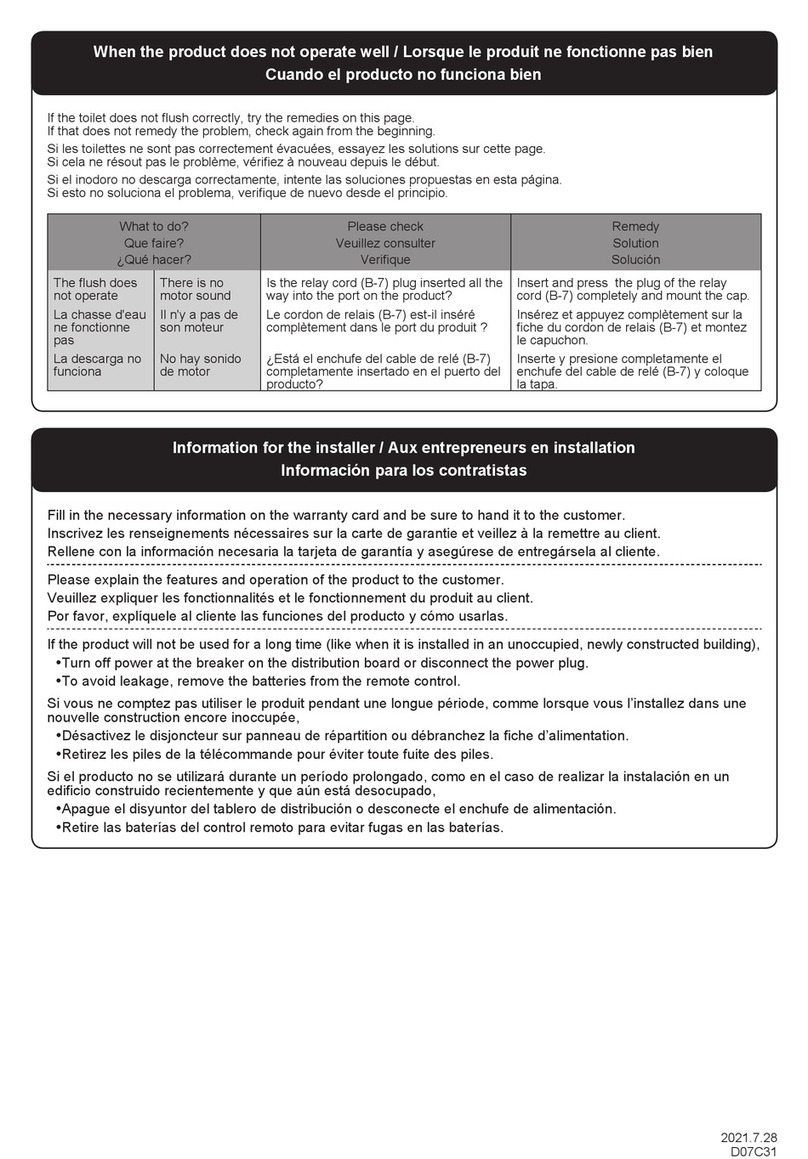
Common faults
Water does not
flow into the tank
Water is
constantly
running into
the bowl.
Possible causes Corrective actions
1 Household water supply has not been turned
on or has been cut off.
2. Angle valve has not been turned on.
3. Residuums in the inlet valve causing the float
device to not operate properly.
4. None of the above.
1. Flush valve seal is not completely closed due
to residuums around the outlet of the cistern
and flush valve (sand or debris lodged in
during installation).
2. The exposed part of the panel's adjust screw
is too long, which resulting the rubber of flush
valve can not fixed in a certain position and
can not sealed.
3. The part of panel's adjusting screw in the
cistern is too long, which may get stuck in the
soft pipe or cistern body and unable to return
sometimes.
1. Turn on the household water supply or
contact the relevant personnel (To be
done by the user).
2. Turn on the angle valve
(To be done by professionals only).
3. Check the fill valve and remove the
residuum (To be done by
professionals only).
4. Change the inlet valve
(To be done by professionals only).
1. Remove the residuums in the cistern
(To be done by professionals only).
2. Adjust the position of the panel's screw
(To be done by professionals only).
3. To cut back the adjust screw
(To be done by professionals only).
࡬ၥܪᅷ஘ؕࠪ԰য়١ٌ
Self diagnosis and troubleshooting
5
重要提示: Important:
! !
! !
! !
 τሔఴ౯ሴ༬ᄎ؇නଃඇƗЮ܋ය҉Ӽ֋ႀτሔ
ಭ჻໊φනଃඇး౷േ܄෵ᄶӵ֬෬൅ӈ௝ᇖЎ
ݪೕ߈࠻Ɨτሔѓఝ൏࿑Ⴏ
1. Please read through this Instructions carefully prior to
installation,and our company shall not be responsible
for any loss caused by not installating according with
this Instructions. Lubricants are provided for the
installation.
 ᄤᆭࡖτሔఴƗ႒༼ಙಱτሔ໑ᇉƗѰۻ൰ୄሔ
ྰ֬ቀ฿ҭߊಙ׮ሔྰຢӵޱ֬׀௠૲..4ᄤτሔ
ుഏߊԢ..4ནƗѰ൚ᇛၢՕቛເۡ؎֬ࠕሠན
Ɠࡵ๴Ɣ
2. Please confirm the FFL according to the overall indoor
fitment method. Line out the FFL on the wall and
always regard FFL as datum line of 0 height.
(refer to Figure 1)
 ᄤτሔᆭࡖఴƗ౯ಙಱ෵τሔుъ൥Ӽᇞ
ుƗుъޯ؎ᄤ UUၢഏƗౖ֙SONၢ
ഏ֬৶േࡍ჆ຢ܄ޱ֬ѓఝఴؑ൏Ɨుъ႒
୆Ӽൺᆊܩট৶è
3. Please confirm the wall is the main wall, the
thickness exceed 80mm and it can bear more
than 300kgf strength when the strength act on
the front of toilet bowl.
 ౯ᄤ๓ՓልఴτሔЮӈ௝Ʀ෵Ⴜ֬ԋձ֍໑
ເݿૣ
 ๴൜ࡸೖთ൓༅҉ڟƗ౯ၢ൓༅ເሠ
 ႒ۻ֙׀݆֬׮ؾ࣐ྡྷ׏ჾ֬஬ན԰য়è
 ׏ჾམເཊӍԛШ௝
1. Please install the frame before paving the tiles.
The dimensional unit is millimeter.
2. As the parts images are for illustrative purposes
only, please refer to the actual product if it varies
from the parts images.
3. As for the wiring of power supply, be sure to follow
the local standard.
4. The power supply box is on-site procurement item.
注: Note:
FFL =完成面地坪.
0FFL of finish face, all dimension is
millimeter
FFL =
0
FFL
0
3KN
图1
Fig. 1
τሔනଃ
INSTALLATION INSTRUCTION FOR CONCEALED CISTERN
஬ࡸ၉লѝ"Accessories List:
安装墙
Main wall
4
温馨提示:
Note:
!
!
ၢ༶ѝ۳֬໠฼׋֬԰য়١ٌᇖႼሆଃƓᆓؚႯ߃Ɣ֬ƗႯ߃ၢҜᅽሸྡྷࢺè೉ݛࢺ҉Ɨ࿿໊࣓ࣣᆾ
׮֬٫ሌ၃ಭ൝࣐ྡྷሸྡྷҾࢺދໂྰƗྺࠪ൏৺༩པ႒֬ሌ၃ಭ൝ࢺƗь૮໠฼ছսߋࠎӈഺ҉шး֬ગٗ
ދ෬൅è
Users may fix the problems on their own if the corrective action is to be taken by the user according to the chart below.
Non-professionals are prohibited from disassembling and repairing the product. Please contact the relevant professionals
for futher troubleshooting to avoid aggravating the problem.
ӏࡵܪᅷ
ඪམ໴ٌ࣐ඪ
ඪམႼඪ҉ؕ
֥છ๨ৡ
ჷႀ ԰য়١ٌ
ç್߃ቀ࣐ඪቀً໊చࠎ๛ඪè
çඪམ࣐ඪً໊࢟ռè
ç࣐ඪًڣ๪Ⴜၺ༅ህࠎ࣐ඪًԵ׵ܙ
ࡸൗ֫ڣ๪໴ٌᆥӏ༶઒è
ç஍ԩၢഏჷႀƗ၎ಝ໴ٌ࣐ඪè
çඪམԢඪç஍ඪֿًቝᇢຽႼၺ༅
Ɠజు൏҉ཱིྖל࣐ಇ֬೰ࢄç്ཱི
ְƔƗᄶӵ஍ඪً໴ٌޚށ֬૨хè
ç૲Ϸןࢲઋۍບҍٺ௑ӐƗ૲Ϸሔഏ
ޱᄶӵ஍ඪًᆿඪ࢒׎ܬ׮ᄤଝ၉໑ᇉ
ഏƗ໴ٌ૨хè
çᄤඪམৡ૲֬૲Ϸןࢲઋۍ௑ӐƗ׫֥
ඪམୄҍ֬ѐᆵ೏ܼࠎఊඪམམ฿ഏƗ
Ⴜ൏߽໴ٌߴ໑è
çռ࣐ඪቀًࠎ৺༩༅၃ࢺ
ƓᆓؚႯ߃Ɣ
çռඪམ࣐ඪً࢟
Ɠᆓؚሌ၃ಭ჻Ɣ
çࡦҷ࣐ඪًѰ஍ԩၺ༅
Ɠᆓؚሌ၃ಭ჻Ɣè
ç۾ߗ࣐ඪً
Ɠᆓؚሌ၃ಭ჻Ɣè
ç౩য়ඪམୄҍ֬ၺ༅
Ɠᆓؚሌ၃ಭ჻Ɣè
çןᆣ૲Ϸןࢲઋۍ֬໑ᇉ
Ɠᆓؚሌ၃ಭ჻è
ç࡮ؒןࢲઋۍ
Ɠᆓؚሌ၃ಭ჻Ɣè
Common faults
Water does not
flow into the tank
Water is
constantly
running into
the bowl.
Possible causes Corrective actions
1 Household water supply has not been turned
on or has been cut off.
2. Angle valve has not been turned on.
3. Residuums in the inlet valve causing the float
device to not operate properly.
4. None of the above.
1. Flush valve seal is not completely closed due
to residuums around the outlet of the cistern
and flush valve (sand or debris lodged in
during installation).
2. The exposed part of the panel's adjust screw
is too long, which resulting the rubber of flush
valve can not fixed in a certain position and
can not sealed.
3. The part of panel's adjusting screw in the
cistern is too long, which may get stuck in the
soft pipe or cistern body and unable to return
sometimes.
1. Turn on the household water supply or
contact the relevant personnel (To be
done by the user).
2. Turn on the angle valve
(To be done by professionals only).
3. Check the fill valve and remove the
residuum (To be done by
professionals only).
4. Change the inlet valve
(To be done by professionals only).
1. Remove the residuums in the cistern
(To be done by professionals only).
2. Adjust the position of the panel's screw
(To be done by professionals only).
3. To cut back the adjust screw
(To be done by professionals only).
࡬ၥܪᅷ஘ؕࠪ԰য়١ٌ
Self diagnosis and troubleshooting
5
重要提示: Important:
! !
!!
!!
 τሔఴ౯ሴ༬ᄎ؇නଃඇƗЮ܋ය҉Ӽ֋ႀτሔ
ಭ჻໊φනଃඇး౷േ܄෵ᄶӵ֬෬൅ӈ௝ᇖЎ
ݪೕ߈࠻Ɨτሔѓఝ൏࿑Ⴏ
1. Please read through this Instructions carefully prior to
installation,and our company shall not be responsible
for any loss caused by not installating according with
this Instructions. Lubricants are provided for the
installation.
 ᄤᆭࡖτሔఴƗ႒༼ಙಱτሔ໑ᇉƗѰۻ൰ୄሔ
ྰ֬ቀ฿ҭߊಙ׮ሔྰຢӵޱ֬׀௠૲..4ᄤτሔ
ుഏߊԢ..4ནƗѰ൚ᇛၢՕቛເۡ؎֬ࠕሠན
Ɠࡵ๴Ɣ
2. Please confirm the FFL according to the overall indoor
fitment method. Line out the FFL on the wall and
always regard FFL as datum line of 0 height.
(refer to Figure 1)
 ᄤτሔᆭࡖఴƗ౯ಙಱ෵τሔుъ൥Ӽᇞ
ుƗుъޯ؎ᄤ UUၢഏƗౖ֙SONၢ
ഏ֬৶േࡍ჆ຢ܄ޱ֬ѓఝఴؑ൏Ɨుъ႒
୆Ӽൺᆊܩট৶è
3. Please confirm the wall is the main wall, the
thickness exceed 80mm and it can bear more
than 300kgf strength when the strength act on
the front of toilet bowl.
 ౯ᄤ๓ՓልఴτሔЮӈ௝Ʀ෵Ⴜ֬ԋձ֍໑
ເݿૣ
 ๴൜ࡸೖთ൓༅҉ڟƗ౯ၢ൓༅ເሠ
 ႒ۻ֙׀݆֬׮ؾ࣐ྡྷ׏ჾ֬஬ན԰য়è
 ׏ჾམເཊӍԛШ௝
1. Please install the frame before paving the tiles.
The dimensional unit is millimeter.
2. As the parts images are for illustrative purposes
only, please refer to the actual product if it varies
from the parts images.
3. As for the wiring of power supply, be sure to follow
the local standard.
4. The power supply box is on-site procurement item.
注: Note:
FFL =完成面地坪.
0FFL of finish face, all dimension is
millimeter
FFL =
0
FFL
0
3KN
图1
Fig. 1
τሔනଃ
INSTALLATION INSTRUCTION FOR CONCEALED CISTERN
஬ࡸ၉লѝ"Accessories List:
安装墙
Main wall
6
ሴ༬ࡦҷƗಙГЎሔᇖ֬஬ࡸ఑಍ƥ
Check to make sure you have all these parts from the package:
Parts in Bag 2
Ўሔᇖ֬஬ࡸ
Ўሔᇖ֬஬ࡸ
Ўሔᇖ֬஬ࡸ
Parts in Bag 4
Parts in Bag 5
Ўሔᇖ֬஬ࡸ Parts in Bag 3
ుୄඪམƓᆭࡖƔ
In Wall Tank (Carrier)
ઋໜᇿ
Threaded
Mounting Stud (2)
ઋໜᇿ
Threaded
Mounting Stud (2)
༶ᆭࡖ
Lower
Bracket
஺ᅵೝ
Anchor (6)
ᅄւ
Cable Tie
ઋ釘
Lag Screw (6)
ઋඤ
Bolt (4) ు࢝ܬ׮
Angle Fixture
࣐ඪً࢟
Angle Valve
ઋඤ
Bolt (4)
ઋଢ
Nut (4)
ઋଢ
Nut (2)
ۉሷ
Cap (2)
׎௒
Washer (2)
ᇿ๯ઋඤٌম
Stud Bolt Flange (2)
ٌমܼ
Flange Pipe
࣐ඪܼ
Inlet Pipe
ೕ߈ݡ૬
Lubricated Sponge
ხ๾Ϸ
Push Plate Rough In
ხ๾Ϸ
Push Plate Rough In
τሔනଃඇ
Installation
Manual
Ўሔᇖ֬஬ࡸ Parts in Bag 1
஍ඪܼ
֚୊؈๯
Outlet Pipe
Mud Guard
࣐ඪܼ
֚୊؈๯
Inlet Pipe
Mud Guard
׮໑௒
Installation Template
஍ඪܼ
Outlet Pipe
ഏᆭࡖ
Upper Bracket
ٺ఍ܼ
Branch Pipe ؈๯
Plug
ઋඤ
Bolt (3)
૨چั
Seal Gasket
ЎሔಙಱIncluded Parts
7
ࠕЮԋձࠪ܉ඪܼ֨௲നƥ
Dimensions and Supply Pipe-laying
ྺး଩൱ಙಱè
Visual confirmation required.
ྺးඪ௣ಙಱè
Horizontal confirmation required.
ྺးՃᆷಙಱè
Vertical confirmation required.
౯ఖچ࢒ւè
Wrap the sealing tape.
ඪ௣ಙಱ
Horizontal
Ճᆷಙಱ
Vertical
چ࢒ւ
Sealing Tape
符号和意思ƥ
Symbols and their meanings
580
40
R1/2
њൔ໑ᇉè
Mark the location.
Mark
ቚњࡁ
τሔఴ֬ሆၰൠརBefore Installation
τሔ١ٌInstallation procedure
1180
180
230
320
1000
650
1165
100220 35
FFL
0
35(15~135)
152134
0110
安装墙
Main wall
135~220
20~60
70~130
200~220
180~220
155~215
135~195
70~90
70~110
70~130
70~130
130
110
85
65
◯
◯
-
-
40
410
110
安装墙
Main wall 䃝
㻺
䃝㻺 㻼
㻼
摆动45度*
45° swinging*
要求排水管中心到安装墙面的距离
(W)在70~130之间.
Please make sure W is between 70 to 130.
* 参见第8页“安装方法”
* Refer to page 8 for Installation Procedure
8
ඪ௣ಙಱ
Horizontal
D
Ճᆷಙಱ
Vertical
τሔ١ٌInstallation procedure
C
D
C
A
B
B
A
A
FFL
0
220
安装排水管:
Install the discharge pipe
安装墙脚固定块、调整地板固定支架:
Install Angle Fixture and adjust floor-fixing bracket
䃝䠎൏ઋඤӐ؎ເUU
䃝䠎170: Bolt length of 75 mm
䃝䍲൏ઋඤӐ؎ເUU
䃝䍲170: Bolt length of 120 mm
安装分歧管。
Install the branch pipe.
调整地板固定支架。
Adjust floor-fixing bracket.
安装墙脚固定块。
Install Angle Fixture.
䃝
چ࢒ւ
Sealing Tape
9
110/130
固定供电电缆(绝缘锁):
Secure the power supply cable (wire band)
安装上支架:
Install the upper bracket
位置2
Position 2
提示 : 排污管侧向安装角度一般不超过 45°,
否则很可能会影响排污效果。
Note: The drainage function may be affected when the installation
angle of drainage pipe exceed 45°
如下图所示拉出供电电缆的波纹管。
Pull the power supply cable from the corrugated pipe, as shown
in the figure below.
将波纹管固定在墙壁厚度+10mm的位置。
Use provided cable tie to secure the power supply cable in
place with an additional 10mm extended from the finished wall.
B
位置2
Position 2
A
位置1
Position 1
B
位置1
Position 1
A
墙壁厚度+10mm
+10 mm the wall thickness
注意
:
请勿卸下防护软管。
NOTICE: Do not remove the
protective tube.
130mm110mm 85mm 65mm
10
2.
1.
10mm
1
3
2
4
5
6
1165
0
FFL
490
152 134
650
ඪ௣ಙಱ
Horizontal
Ճᆷಙಱ
Vertical
深60mm
Depth 60 mm
B
C
B
AA
C
ҋᇮනଃƥ
቎@മƦ
ሔ್஺ᅵઋඤƦ
As shown on picture:
1. Drill 10*60;
2. Insert anchor;
在主墙和地板上标记:( 10X深60)
Draw on the main wall and floor
膨胀螺栓的使用方法:
Install Anchors
0
0
0
调节支架的水平和垂直,并锁紧螺栓:
Adjust horizontally and vertically, and tighten lag screw
11
1
19
2
3
1
1
2
1
2
3
چ࢒ւ
Sealing Tape
چ࢒ւ
Sealing Tape
“Click”
“Click”
安装角阀:
Install the Angle valve
B
C
D
E
A
安装供水管
Install the water supply pipe
“Click’’“Click’’
“Click’’“Click’’