manuals.online logo
Brands
  1. Home
  2. •
  3. Brands
  4. •
  5. Toyota
  6. •
  7. Automobile Accessories
  8. •
  9. Toyota Landcruiser SC 2400x1840 SGF TRAY BODY User manual

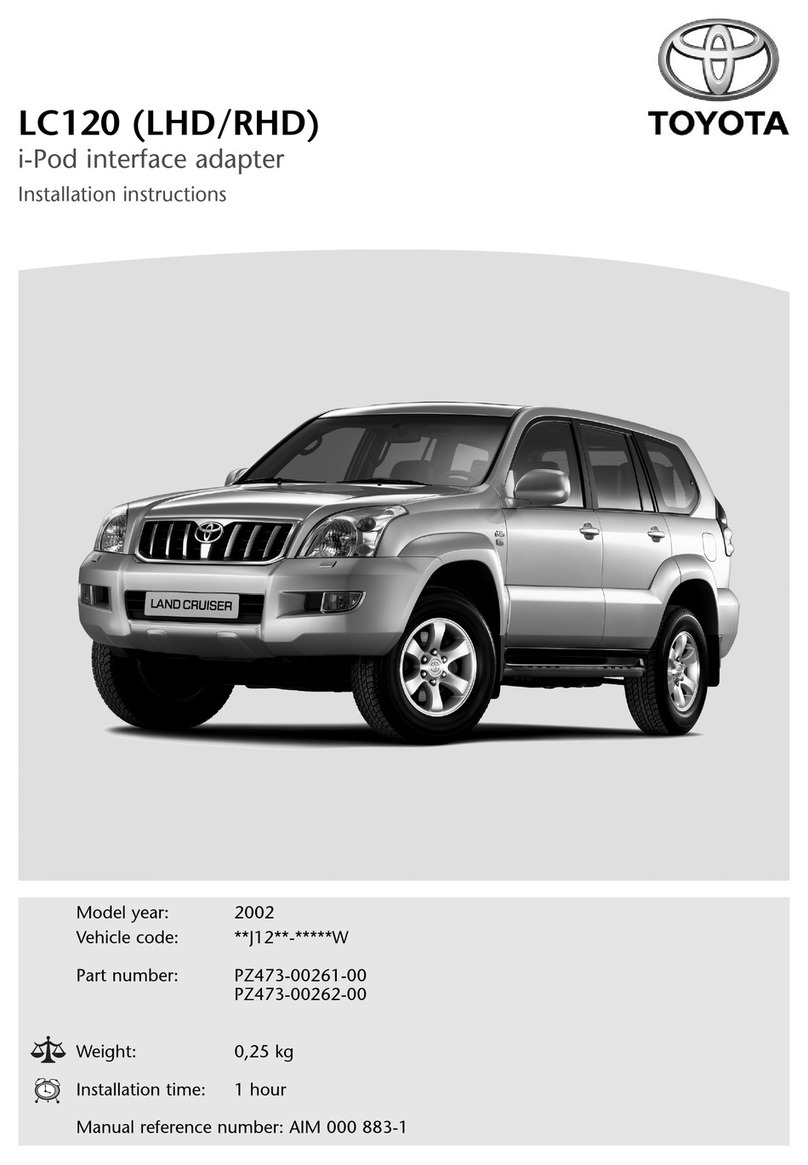
Toyota Landcruiser SC 2400x1840 SGF TRAY BODY User manual

© Toyota Motor Corporation Australia Ltd. 2011. All rights reserved.
REPAIR MANUAL REFERENCE LANDCRUISER - Steel S/Cab Tray Body ISSUE: 27/07/2012 Page
Refer to ServiceNet Accessory Part No.: PZQ8460320 Fitting Instr. Part No.: PZQ8460320-FI 1 of 35
FITTING INSTRUCTIONS FOR
SC 2400x1840 SGF TRAY BODY
PART NUMBER: PZQ8460320
PRODUCTION DATE : SEPT 2012 ONWARDS
LANDCRUISER
PZQ8460320 - SC 2400x1840 Steel Galvanized; Flat Floor (SGF) TRAY BODY
© Toyota Motor Corporation Australia Ltd. 2011. All rights reserved.
REPAIR MANUAL REFERENCE LANDCRUISER - Steel S/Cab Tray Body ISSUE: 27/07/2012 Page
Refer to ServiceNet Accessory Part No.: PZQ8460320 Fitting Instr. Part No.: PZQ8460320-FI 2 of 35
GENERAL NOTES and CAUTIONS
General Notes
 Read the fitting instructions prior to accessory fitment.
 Install this accessory following the fitting instructions. Failure to follow these fitting instructions could result in
vehicle or accessory damage.
 Ensure all recyclable discarded vehicle or accessory components and packaging are recycled following local
recycling regulations.
General Vehicle and Accessory Warranty Notes and Cautions
 For correct installation and proper operation of the vehicle and accessory, Toyota Motor Corporation Australia
Ltd. recommends that this accessory is installed by a qualified Toyota Technician.
 During the accessory fitment ensure all Australian automotive safety practices and regulations are followed.
 Do not modify the vehicle in any way other than specified in these accessory fitting instructions as this may void
the warranty.
General Vehicle Notes and Cautions
 Inspect the vehicle and note any damage or concerns found prior to accessory fitment.
 If damage or concerns are found that interfere with the installation of the accessory, inform the dealer or customer
prior to the accessory fitment.
 Ensure special care is taken and the applicable repair manual is followed to prevent damage to the vehicle
and/or vehicle components.
 Protect and safely store any removed vehicle components.
 Ensure all bare metal surfaces are protected using Automotive Bare Metal Primer and Toyota Touch-Up Paint.
 Ensure metal swarf and dust is removed from all vehicle surfaces.
© Toyota Motor Corporation Australia Ltd. 2011. All rights reserved.
REPAIR MANUAL REFERENCE LANDCRUISER - Steel S/Cab Tray Body ISSUE: 27/07/2012 Page
Refer to ServiceNet Accessory Part No.: PZQ8460320 Fitting Instr. Part No.: PZQ8460320-FI 3 of 35
GENERAL NOTES and CAUTIONS
Tray Body General Notes and Cautions
 Minimum allowable gaps between chassis and tray body protrusions must be no less than 10mm.
 It is advisable to seek assistance from another person when lifting heavy components.
 Do not repair or modify this accessory in any way as this will void the warranty.
 Do not remove any of the accessory labels unless instructed in the accessory fitting instructions.
 This accessory is designed for vehicles sold new in Australia by Toyota Motor Corporation Australia Ltd. and may
be unsafe if used on any other vehicle.
 Ensure there is adequate room for fuel filler nozzles to access the vehicles fuel filler hose.
 Clean the tray body using only PH neutral cleaners and a soft, not abrasive cloth/sponge.
Tray Body Ratings
MAXIMUM LOADING CAPACITIES
Tray Body Deck: Vehicle payload capacity (minus accessories) (Refer Owners manual)
Headboard & Rear Rack: 150Kg (total weight shared over both headboard and rear rack)
Load Restraint Rails: (Lesser Value) 450Kg or Strap load capacity
*Maximum loading only applies to vehicles sold new in Australia by Toyota Motor Corporation Australia Ltd.
Check that all work practices comply with safety standards.
Please wear appropriate clothing and use personal protection equipment.
Fitting Time: 2:00
Hours : Minute Need assistance?
Toyota Genuine Accessory fitting time are provided as a guide only and are
based on the third time accessory installation time attained by a Toyota
Technician following the Toyota Service Management requirements. Toyota
Genuine Accessory fitting times are for the installation of the Toyota Genuine
Accessory only and do not include administration or vehicle processing time.
OE - Original Equipment
Toyota Dealer Enquiry:
Please contact TMCA Dealer Support
Group
Customer Enquiry:
Please contact your local Toyota Dealer, or
Toyota’s Customer Experience Centre
1800 TOYOTA (869 682)
2:30
Hours : Minute
(With Under Body
Tyre Hanger Option)
© Toyota Motor Corporation Australia Ltd. 2011. All rights reserved.
REPAIR MANUAL REFERENCE LANDCRUISER - Steel S/Cab Tray Body ISSUE: 27/07/2012 Page
Refer to ServiceNet Accessory Part No.: PZQ8460320 Fitting Instr. Part No.: PZQ8460320-FI 4 of 35
KIT CONTENTS
Kit 9PSTF240CSN: Tray Deck Assembly Kit
Item Description Qty
1 Deck Assembly - Galvanized Floor 1
2 Hinge Pin 8
3 M8x20 Hex Bolt 8
4 M8 Nyloc Nut 8
1
2
3
4
Note: Hinge Pins are pre-assembled to painted tray bodies
Kit 9PSHC64G2H / 9PSS03005: Headboard & Corner Post Step Kit
Item Description Qty
9PSHC64G2H Headboard Kit
1 Headboard Bow 1
2 Headboard Panel 1
3 Headboard Gusset - Right Hand 1
4 Headboard Gusset - Left Hand 1
5 Headboard Latch 2
6 3/8” Cone Lock Nut 2
7 3/8” x 5/32” x 3/32” Spring Washer 4
8 3/8” x 3/4” x 16G Round Washer 2
9PSS03005 Corner Post Step Kit
9 Corner Post Step - Left Hand 1
10 Corner Post Step - Right Hand 1
11 M8 16G Round Washer 28
12 M10x55 Hex Bolt 4
13 M10x25 Hex Bolt 4
14 M10 Nyloc Nut 8
15 M8x20 Hex Bolt 20
16 M8x30 Hex Bolt 4
17 M8 Nyloc Nut 24
1
16
5
9
14
3
4
15
13
12
67
118
2
10
17
Kit 9PMKT44: Mounting Kit
Item Description Qty
Loose Items
1 1218-119 Mount Rail 3
2 105-130 External Mount 6
3 105-130 Mount Leg 2
4 Fuel Bracket 1
Bolt Bag
5 Mount Lug 8
6 Mount Brace RH 1
7 Mount Brace LH 1
8 M12x30x4mm Round Washer 4
9 M12x38x4mm Round Washer 22
10 M12 Nyloc Nut 24
11 M12x40 Hex Bolt 20
12 M12x25 Hex Bolt 4
13 M8x20 Hex Bolt 2
14 M8 Nyloc Nuts 2
15 Spiral Wrap 1
16 Cable Tie 1
13
9
12 10
1
8
11
32
6
5
7
414
15
16
© Toyota Motor Corporation Australia Ltd. 2011. All rights reserved.
REPAIR MANUAL REFERENCE LANDCRUISER - Steel S/Cab Tray Body ISSUE: 27/07/2012 Page
Refer to ServiceNet Accessory Part No.: PZQ8460320 Fitting Instr. Part No.: PZQ8460320-FI 5 of 35
KIT CONTENTS - Continued
Kit 9PRK92NP: Rope Rail Kit
Item Description Qty
1 450mm Multi-fit Rope Rail 1
2 600mm Multi-fit Rope Rail 3
Bolt Bag
3 40x34x3mm Rope Rail Washer 8
4 M8x20 Hex Bolt 8
5 M8 Nyloc Nut 8
1
3
4
5
2
Kit 9PBKT73: Body Kit
3
2
15 14
16
11
12
10
9
Item Description Qty
Loose Items
1 Tail Light Bracket 2
2 PP guard bracket LH 4
3 PP guard bracket RH 4
4 Tail Light Wiring Harness Patch (2EH02) 2
5 Registration Plate Light Wiring Patch (2EH04) 2
6 Reflector Bracket (suits GPA and GPS trays) 2
7 Reflector Bracket (suits HDA and HDS trays) 2
8 Retro Reflector 2
Bolt Bag
9 Saddleclip [8x13] Slegers BLUE 6
10 Cable Ties 300 4.8mm Black 2
11 1/4x1 1/4 Mudguard Washer 6
12 1/4x3/4x16G Bright Steel Washer 38
13 M6x35 Pan Head Screw 2
14 M6x25 Hex Bolt 6
15 M6x16 Set Screw 38
16 M6 Nyloc Nut 44
4
5
68
7
13
1
Kit 9PGKT41: Guard Kit
Item Description Qty
Loose Items
1 PP Mudguard front 2
2 PP Mudguard rear 1
3 PP Mudguard rear Cutout LH 1
4 Mudflap - Toyota 355x297 1
5 Mudflap -Toyota LH cutout 355x297 1
3
1
2
4
5
1
© Toyota Motor Corporation Australia Ltd. 2011. All rights reserved.
REPAIR MANUAL REFERENCE LANDCRUISER - Steel S/Cab Tray Body ISSUE: 27/07/2012 Page
Refer to ServiceNet Accessory Part No.: PZQ8460320 Fitting Instr. Part No.: PZQ8460320-FI 6 of 35
KIT CONTENTS - Continued
Kit 9PSD240CNT: Dropside & Tailgate Kit
Item Description Qty
Loose Items
1 Dropside Left Side - partial assembly 1
2 Dropside Right Side - partial assembly 1
3 Tailgate - full assembly 1
4 Toyota Rear Decal 1
Bolt Bag
5 Hinge Strap 6
6 M6x16 Set Screw 12
7 M6 Nyloc Nut 12
8 E Clip 4
Note: Dropsides are fully assembled for painted tray bodies
2
1
3
5
67
4
8
Kit 9PTHHT22: Head Board Tyre Hanger Kit
Item Description Qty
Loose Items
1 HBTH Tyre Hanger Bracket 1
2 Number Plate Bracket (suit GPA,HDA Alloy trays) 1
3 Number Plate Bracket (suit SGF, SGC Steel trays) 1
4 Number Plate Extension Bracket 1
Bolt Bag
5 M10x25 Hex Bolt 2
6 M10 Nyloc Nut 2
7 M14 Flat Washer 1
8 M14x170 Hex Bolt (Steel Tyre) 1
9 M14x200 Hex Bolt (Alloy Tyre) 1
10 M8x20 Hex Bolt 2
11 M8 Nyloc Nut 2
12 M6x16 Set Screw 7
13 M6 Nyloc Nut 7
8
5
7
1
6
9
11
3
4
12
10
9
2
© Toyota Motor Corporation Australia Ltd. 2011. All rights reserved.
REPAIR MANUAL REFERENCE LANDCRUISER - Steel S/Cab Tray Body ISSUE: 27/07/2012 Page
Refer to ServiceNet Accessory Part No.: PZQ8460320 Fitting Instr. Part No.: PZQ8460320-FI 7 of 35
KIT CONTENTS - Continued
Kit 9PTHUT13: Under Body Tyre Hanger Kit
Item Description Qty
Loose Items
1 Front Hanger LH 1
2 Front Hanger RH 1
3 Side Rail LH 1
4 Side Rail RH 1
5 Front Bearer 1
6 Centre panel 1
7 Rear Bearer 1
8 Gate 1
9 Gate Bolt 1
10 Rear Hanger LH 1
11 Rear Hanger RH 1
12 Number Plate Bracket 1
13 Tyre spacer (wide tyre) 1
14 Lynch Pin and Chain 1
Bolt Bag
15 *Packer 50x65x12mm 8
16 1/4x3/4x16G Bright Steel Washer 4
17 M12x38x4mm Washer 2
18 *M12x50 Hex Bolt 8
19 M12x40 Hex Bolt 2
20 M10x25 Hex Bolt 10
21 M10x20 Hex Bolt 12
22 M8x20 Hex Bolt 2
23 M6x16 Hex Bolt 3
24 M12 Nyloc Nut 10
25 M10 Nyloc Nut 22
26 M8 Nyloc Nut 2
27 M6 Nyloc Nut 3
14
9
8
11
12
6
7
4
13
5
1
3
10
2
18 19 20 21
22 23 24 25 26 27 16 17
15
* Component to be used with Mount Kit UBTH option
© Toyota Motor Corporation Australia Ltd. 2011. All rights reserved.
REPAIR MANUAL REFERENCE LANDCRUISER - Steel S/Cab Tray Body ISSUE: 27/07/2012 Page
Refer to ServiceNet Accessory Part No.: PZQ8460320 Fitting Instr. Part No.: PZQ8460320-FI 8 of 35
TRAYBODY ASSEMBLY
COMPONENTS :
Item Description Qty
ADeck Assembly (Galvanized) 1
BHeadboard Kit 1
CCorner Post Kit 1
DDropside Assembly 1
EMount Kit 1
FRail Kit 1
GBody Kit 1
HGuard Kit 1
FIXINGS :
Description H/T Class Torque
M6 Countersunk Screw - 9Nm
M6 Set Screw 8.8 9Nm
M6 Hex Bolt 8.8 9Nm
M6 Pan Head Screw - 9Nm
M8 Hex Bolt 8.8 23Nm
M10 Hex Bolt 8.8 45Nm
M12 Hex Bolt 8.8 79Nm
M6 Nyloc Nut - -
M8 Nyloc Nut - -
M10 Nyloc Nut - -
M12 Nyloc Nut - -
A
D
B
C
H
G
F
G
H
H
E
© Toyota Motor Corporation Australia Ltd. 2011. All rights reserved.
REPAIR MANUAL REFERENCE LANDCRUISER - Steel S/Cab Tray Body ISSUE: 27/07/2012 Page
Refer to ServiceNet Accessory Part No.: PZQ8460320 Fitting Instr. Part No.: PZQ8460320-FI 9 of 35
TOOLS REQUIRED
1Screwdriver - Phillips 2Screwdriver - Flat 3Torque Wrench
4Ratchet 5Ratchet Extension 6Socket
- 10; 12; 13; 14; 16; 18; 19mm
7Spanner
- 10; 12; 13; 14; 16; 18; 19mm
8Tape Measure 9Drill Bit
Ø 8.5mm
10 Cordless Drill 11 Builders Square
© Toyota Motor Corporation Australia Ltd. 2011. All rights reserved.
REPAIR MANUAL REFERENCE LANDCRUISER - Steel S/Cab Tray Body ISSUE: 27/07/2012 Page
Refer to ServiceNet Accessory Part No.: PZQ8460320 Fitting Instr. Part No.: PZQ8460320-FI 10 of 35
IMPORTANT - Wrap tail lights in a clean cloth to prevent
damage while storing
STEP
2
Unplug, then unbolt the tail light assemblies from the
chassis and discard the fixings.
Remove the tail lights from the temporary tail light
brackets and retain the tail lights, screws and white
plastic retainers in a safe area for later use.
Discard the original tail light brackets.
Unplug and unwind
harness
Remove and
discard fixings
Original Tail
Light Bracket
IMPORTANT - Take care not to damage any components
of the vehicle
STEP
1
Using a 17mm socket, remove the spare tyre from the
vehicle chassis, as shown in adjacent diagram.
Remove and discard Steel Frame and “J” Bolt from
underneath tyre.
Disconnect wiring harness from registration plate
bracket.
Remove registration plate bracket from chassis and
set aside for later fitment.
IMPORTANT - Take care not to damage any components
of the vehicle
STEP
3
Unbolt the fuel filler from the temporary bracket
mounted to the chassis pad.
Discard the original fuel bracket.
Original fuel Bracket
Chassis Mount Pad
Remove and
discard fixings
© Toyota Motor Corporation Australia Ltd. 2011. All rights reserved.
REPAIR MANUAL REFERENCE LANDCRUISER - Steel S/Cab Tray Body ISSUE: 27/07/2012 Page
Refer to ServiceNet Accessory Part No.: PZQ8460320 Fitting Instr. Part No.: PZQ8460320-FI 11 of 35
IMPORTANT - Underbody Tyre Hanger option
STEP
4
UNDER BODY TYRE HANGER OPTION
Note: Following steps are for the Under Body Tyre
Hanger option only. For Headboard Tyre Hanger op-
tion, proceed to step 11.
Find and unpack the Mount Kit: 9PMKT44 and Under
Body Tyre Hanger kit 9PTHUT13.
Locate bolt bag: 6PBBB93-UBTH-SINGLE CAB ON-
LY which is part of 9PTHUT13. Locate the 12mm
spacers and M12x50 bolts.
Check the contents of each kit to the kit contents page
(page 4 & 7). Lay the package contents out on an
even surface or work bench ready for assembly.
IMPORTANT - Ensure fastener torque does not exceed the
recommended torque for the specified fastener (refer pg.8)
STEP
6
Place assembled mount rail onto 3rd Chassis Mount
using 12mm Spacers between mount and mount pad.
Install Fuel Bracket to RH as shown and loosely se-
cure mount rail and fuel bracket using M12x50 bolts,
38x50x6mm washer, and M12 Nyloc Nut.
For LH side, secure mount rail using M12x50 bolts,
38x50x6mm washer, M12x38x4mm washer and M12
Nyloc Nut.
Ensure washer under the bolt head is orientated as
shown in the adjacent diagram.
M12x50 Bolt
Fuel Bracket
38x50x6 Washer
(longer edge to
inside)
M12 Nyloc Nut
12mm Spacer
RH side shown
IMPORTANT - Ensure fastener torque does not exceed the
recommended torque for the specified fastener (refer pg.8)
STEP
5
Pre-assemble 105/130 External Mounts, Mount Brac-
es and Mount Rail using M12x40 Bolts, M12x30 wash-
er, and M12 Nyloc Nut as shown in the adjacent dia-
gram.
105/130 External Mount
M12x40 Bolt
Mount Rail
Mount Brace
M12x30 Washer
+ M12 Nyloc Nut
FR
© Toyota Motor Corporation Australia Ltd. 2011. All rights reserved.
REPAIR MANUAL REFERENCE LANDCRUISER - Steel S/Cab Tray Body ISSUE: 27/07/2012 Page
Refer to ServiceNet Accessory Part No.: PZQ8460320 Fitting Instr. Part No.: PZQ8460320-FI 12 of 35
IMPORTANT - Ensure fastener torque does not exceed the
recommended torque for the specified fastener (refer pg.8)
STEP
9
Place assembled Mount Rails onto 1st & 2nd Chassis
Mounts (refer image in Step 8) using 12mm Spacers
between mount and mount pad.
Loosely secure mount rails using M12x50 bolts,
38x50x6mm Rectangle Washer, M12x38x4mm Round
Washer, and M12 Nyloc Nut.
Ensure the rectangular washer under the bolt head is
orientated as shown in the adjacent diagram.
M12x50 Bolt
12x38x4 Washer
38x50x6 Washer
(longer edge to
inside)
M12 Nyloc Nut
IMPORTANT - Ensure fastener torque does not exceed the
recommended torque for the specified fastener (refer pg.8)
STEP
8
Pre-assemble 105/130 External Mounts onto Mount
Rail using M12x25 Bolt and M12 Nyloc Nut as shown
in adjacent diagram.
Create 2 assembled mount rails, one for 1st and 2nd
Chassis Mounts.
M12x25 bolt
105/130 External Mount
Mount rail
M12 Nyloc Nut
12mm Spacer
RH side shown
Mount Rail
IMPORTANT - Ensure the fuel hose is not kinked or in a
position that will deteriorate fuel flow
STEP
7
Add Spiral wrap to fuel breather as shown.
Cable Tie fuel breather to fuel hose as shown.
Lift fuel filler up to the fuel bracket mounted to the
chassis. Fasten using M8x20 bolts, M8 Washers and
M8 Nyloc nuts as shown in adjacent diagram.
Fuel Filler Bracket
Cable Tie
Spiral Wrap
M8 Nyloc Nut
M8x20 bolt
+ M8 Washer
FR
© Toyota Motor Corporation Australia Ltd. 2011. All rights reserved.
REPAIR MANUAL REFERENCE LANDCRUISER - Steel S/Cab Tray Body ISSUE: 27/07/2012 Page
Refer to ServiceNet Accessory Part No.: PZQ8460320 Fitting Instr. Part No.: PZQ8460320-FI 13 of 35
IMPORTANT - Headboard Tyre Hanger option
STEP
11
HEADBOARD TYRE HANGER OPTION
Note: Following steps are for Headboard Tyre Hanger
option only.
Find and unpack the mount kit: 9PMKT44.
Check the contents of the kit to the kit contents page
(Pg.4).
Lay the package contents out on an even surface or
work bench ready for assembly.
IMPORTANT - Ensure fastener torque does not exceed the
recommended torque for the specified fastener (refer pg.8)
STEP
12
Fit 105/130 Mounts to the 3rd chassis mount.
Install Fuel Bracket to 3rd chassis mount as shown
and loosely secure mounts and fuel bracket using
M12x40 bolts, 38x50x6mm Washer, and M12 Nyloc
Nut.
Ensure washer under the bolt head is orientated as
shown in the adjacent diagram.
Repeat step for LH side.
M12x40 Bolt
Fuel Bracket
38x50x6 Washer
(longer edge to
inside)
M12 Nyloc Nut
105/130 Mount
IMPORTANT - Ensure fastener torque does not exceed the
recommended torque for the specified fastener (refer pg.8)
STEP
10
Ensure the mount assembled with mount braces is on
the third chassis mount.
Position Mount Rails so they are central to the longitu-
dinal plane of the vehicle. Tighten Mount Rails to
chassis.
Continue to Step 18.
Following steps are for Headboard Tyre Option
configuration only.
FR
3rd Mount Mount Brace
RH side shown
FR
© Toyota Motor Corporation Australia Ltd. 2011. All rights reserved.
REPAIR MANUAL REFERENCE LANDCRUISER - Steel S/Cab Tray Body ISSUE: 27/07/2012 Page
Refer to ServiceNet Accessory Part No.: PZQ8460320 Fitting Instr. Part No.: PZQ8460320-FI 14 of 35
IMPORTANT - Ensure fastener torque does not exceed the
recommended torque for the specified fastener (refer pg.8)
STEP
14
Pre-assemble 105/130 External Mounts onto Mount
Rail using M12x25 Bolt and M12 Nyloc Nut as shown
in adjacent diagram.
Create 2 assembled mount rails, one for 1st and 2nd
Chassis Mounts.
M12x25 bolt
105/130 External Mount
Mount rail
M12 Nyloc Nut
IMPORTANT - Ensure the fuel hose is not kinked or in a
position that will deteriorate fuel flow
STEP
13
Add Spiral wrap to fuel breather as shown.
Cable Tie fuel breather to fuel hose as shown.
Lift fuel filler up to the fuel bracket mounted to the
chassis. Fasten using M8x20 Bolts, M8 Washers and
M8 Nyloc nuts as shown in adjacent diagram.
Fuel Filler Bracket
Cable Tie
Spiral Wrap
M8 Nyloc Nut
M8x20 bolt
+ M8 Washer
IMPORTANT - Ensure fastener torque does not exceed the
recommended torque for the specified fastener (refer pg.8)
STEP
15
Pre-assemble 105/130 External Mounts, Mount Brac-
es and Mount Rail using M12x40 Bolts, M12x30 wash-
er, and M12 Nyloc Nut as shown in the adjacent dia-
gram.
105/130 external Mount
M12x40 bolt
Mount rail
Mount Brace
M12x30 Washer
+ M12 Nyloc Nut
FR
© Toyota Motor Corporation Australia Ltd. 2011. All rights reserved.
REPAIR MANUAL REFERENCE LANDCRUISER - Steel S/Cab Tray Body ISSUE: 27/07/2012 Page
Refer to ServiceNet Accessory Part No.: PZQ8460320 Fitting Instr. Part No.: PZQ8460320-FI 15 of 35
IMPORTANT - Take care not to damage any components
of the vehicle
STEP
17
Ensure the mount assembled with mount braces is on
the rear most chassis mount.
Note: Ensure Mount braces are not tightened and
turned “outboard” to ensure ease of later fitment.
Position Mount Rails so they are central to the longitu-
dinal plane of the vehicle. Tighten Mount Rails to
chassis using the M12x40 bolts supplied.
FR
Mount Brace
Rear Mount
IMPORTANT - Ensure fastener torque does not exceed the
recommended torque for the specified fastener (refer pg.8)
STEP
16
Place assembled Mount Rails onto 1st & 2nd Chassis
Mounts, and Mount Rail with Mount Braces to the rear
chassis mount (refer image in Step 8).
Loosely secure mount rails using M12x40 bolts,
38x50x6mm Rectangle Washer, M12x38x4mm Round
Washer, and M12 Nyloc Nut.
Ensure rectangular washer under the bolt head is ori-
entated as shown in the adjacent diagram.
Repeat step for LH side.
M12x40 Bolt
12x38x4 Washer
38x50x6 Washer
(longer edge to
inside)
M12 Nyloc Nut
RH side shown
IMPORTANT - Take care when lifting heavy components,
use a second person or mechanical aid if necessary
STEP
18
Find and unpack the headboard kit 9PSHC64G2H/
9PSS03005.
Check the contents of the kit to the kit contents page
(Pg.4).
Lay the package contents out on an even surface or
work bench ready for assembly.
Place the tray body deck on tressel stands, in order to
be able to safely work above and below the deck
height.
FR
© Toyota Motor Corporation Australia Ltd. 2011. All rights reserved.
REPAIR MANUAL REFERENCE LANDCRUISER - Steel S/Cab Tray Body ISSUE: 27/07/2012 Page
Refer to ServiceNet Accessory Part No.: PZQ8460320 Fitting Instr. Part No.: PZQ8460320-FI 16 of 35
IMPORTANT - Ensure fastener torque does not exceed the
recommended torque for the specified fastener (refer pg.8)
STEP
19
Insert the tongue of the corner post into the side
coaming, behind the corner post support plate.
Fasten into position using M8x30 hex bolts, M8
washers, and M8 Nyloc nuts.
Fasten the end of the step to the underside of the side
coaming using an M8x20 bolt and M8 Nyloc nut.
Before tightening fasteners, ensure the corner posts
are perpendicular to the deck, with the use of a
builders square. Once square, tighten fasteners to the
recommended torque (refer Pg.8)
FR
Corner Post
Side Coaming
M8x30 Bolts
+ M8 Washer
M8x20 Bolt
IMPORTANT - Take care when lifting heavy components,
use a second person or mechanical aid if necessary
STEP
20
Slide the headboard panel between the corner posts,
ensuring the orientation is correct to the adjacent
diagram.
Remove and discard four M8 bolts fixing the deck cap
to the deck, in order to slide the headboard panel all
the way down to the mounting holes.
Ensure the headboard panel sits neatly in front of the
deck cap and all holes line up, at the bottom of the
headboard panel, with the panel, deck and deck cap.
Fasten the headboard panel to the corner steps using
M8x20 bolts, M8 washers (both sides) and M8 Nyloc
nuts.
M8x20 Bolt Headboard upright
M8 Washer
M8 Nyloc Nut
Deck Cap
IMPORTANT - Ensure fastener torque does not exceed the
recommended torque for the specified fastener (refer pg.8)
STEP
21
Remove Headboard Gussets and retain (installed for
transportation).
Secure the bottom edge of the Headboard Panel to
the front of the tray body deck, using M8x20 bolts, M8
Washers and M8 Nyloc nuts. Ensure the washer is
used under the head of the bolt.
Re-fit Headboard Gussets over the Headboard Panel
and secure using M8x20 bolts and M8 Nyloc nuts, and
secure to Main Bearers using M10x25 bolts and M10
Nyloc nuts. M8x20 Bolt
M8 Washer
Headboard Gusset RH
M10x25 Bolt
M10 Nyloc Nut
Main Bearer
Headboard
Corner post
Headboard
Panel
© Toyota Motor Corporation Australia Ltd. 2011. All rights reserved.
REPAIR MANUAL REFERENCE LANDCRUISER - Steel S/Cab Tray Body ISSUE: 27/07/2012 Page
Refer to ServiceNet Accessory Part No.: PZQ8460320 Fitting Instr. Part No.: PZQ8460320-FI 17 of 35
Slide the Headboard Bow into the Corner Posts and
secure in position using M10x55 bolts and M10 Nyloc
nuts.
Tighten all fasteners to the recommended torque
(refer Pg.8), and repeat for the left side step.
IMPORTANT - Take care not to damage any components
of the accessory or vehicle
STEP
22
M10x55 Bolt
M10 Nyloc Nut
IMPORTANT - Take care not to damage any components
of the vehicle
STEP
23
Fit Mount Lugs to all 105/130 Mounts.
For Under Body Tyre Hanger option, use the 2nd slot
from the bottom of the Mounts (as shown in adjacent
diagram), for Headboard Tyre Hanger option use the
very bottom slot.
With an adequate number of people, or a mechanical
aid, carefully lower the tray body assembly onto the
Mounts ensuring the main bearers of the tray body are
resting on the Mount Lugs.
To lessen the risk of cabin damage, place the tray 150
-200mm rearward from the cabin.
Mount Lug
UBTH option
shown
This slot for
HBTH option
IMPORTANT - Incorrect positioning at this stage may
cause complications of the fuel filler position
STEP
24
Slide the tray body along the mounts, toward the
vehicle cabin.
Ensure that the uprights of the tray headboard are a
minimum of 35mm from vehicle cabin as shown in the
adjacent diagram.
Min 35mm
Headboard Bow
FR
FR
© Toyota Motor Corporation Australia Ltd. 2011. All rights reserved.
REPAIR MANUAL REFERENCE LANDCRUISER - Steel S/Cab Tray Body ISSUE: 27/07/2012 Page
Refer to ServiceNet Accessory Part No.: PZQ8460320 Fitting Instr. Part No.: PZQ8460320-FI 18 of 35
Main Bearer
(tray deck removed
for clarity)
IMPORTANT - Ensure fastener torque does not exceed the
recommended torque for the specified fastener (refer pg.8)
STEP
25
Fasten tray Main Bearer to Mounts using M12x40 bolt,
M12x38x4mm washer and M12 Nyloc nut.
Ensure washer is used with the Nyloc nut side of the
main bearer.
Tighten all fasteners to recommended torque.
Repeat for LH side.
M12x38x4mm washer
M12x40 bolt
M12 Nyloc nut
RH side shown
Main Bearer
(part of tray
deck)
IMPORTANT - Ensure fastener torque does not exceed the
recommended torque for the specified fastener (refer pg.8)
STEP
26
Fasten Tray main bearer to Brace Mounts using
M12x40 bolt, M12x30x4mm washer, M12x38x4mm
washer and M12 Nyloc nut.
Ensure M12x38x4mm washer is used with the Nyloc
nut side of the main bearer.
Tighten all fasteners to recommended torque.
Repeat for LH side.
M12x40 bolt
M12x38x4mm washer
M12 Nyloc nut
M12x30x4mm
washer
Brace Mount
RH side shown
IMPORTANT - Underbody Tyre Hanger Option
STEP
27
Note: Following steps are for the Under Body Tyre
Hanger option only. For Headboard Tyre Hanger op-
tion, proceed to step 43.
Find and unpack the Underbody Tyre Hanger kit:
9PTHUT13.
Check the contents of the kit as per the contents kit
page (Pg.7).
Lay the package contents out on an even surface or
work bench ready for assembly as per exploded view
image.
© Toyota Motor Corporation Australia Ltd. 2011. All rights reserved.
REPAIR MANUAL REFERENCE LANDCRUISER - Steel S/Cab Tray Body ISSUE: 27/07/2012 Page
Refer to ServiceNet Accessory Part No.: PZQ8460320 Fitting Instr. Part No.: PZQ8460320-FI 19 of 35
IMPORTANT - Ensure fastener torque does not exceed the
recommended torque for the specified fastener (refer pg.8)
STEP
28
Attach gate to rear bearer using M10x25 bolts and
M10 Nyloc nuts as shown in adjacent diagram.
Repeat for LH side.
M10x25 bolt
M10 Nyloc nut
Gate
Rear Bearer
RH side shown
IMPORTANT - Ensure fastener torque does not exceed the
recommended torque for the specified fastener (refer pg.8)
STEP
29
Loosely secure side rails to the inside of the rear bear-
er using M10x20 bolts and M10 Nyloc nuts.
RH side illustrated in adjacent diagram.
Repeat step for LH side.
M10x20 bolts
M10 Nyloc nuts
Side Rail
Rear Bearer
RH side shown
IMPORTANT - Ensure fastener torque does not exceed the
recommended torque for the specified fastener (refer pg.9)
STEP
30
Attach the Front Bearer using the inner most hole po-
sition, to the Side Rails using M10x20 bolt and M10
Nyloc nut.
Repeat step for LH side.
Front bearer
Side rail M10x20 bolt
M10 Nyloc nut
RH side shown
Use inner most holes
© Toyota Motor Corporation Australia Ltd. 2011. All rights reserved.
REPAIR MANUAL REFERENCE LANDCRUISER - Steel S/Cab Tray Body ISSUE: 27/07/2012 Page
Refer to ServiceNet Accessory Part No.: PZQ8460320 Fitting Instr. Part No.: PZQ8460320-FI 20 of 35
IMPORTANT - Ensure fastener torque does not exceed the
recommended torque for the specified fastener (refer pg.8)
STEP
31
Attach the Front Hangers to the Front Bearer using
M10x20 bolts and M10 Nyloc nuts.
Refer to adjacent diagram for correct orientation and
position.
Repeat for LH side.
M10x20 bolt
M10 Nyloc nut
Side Rail
Front Bearer Front Hangers
IMPORTANT - Ensure fastener torque does not exceed the
recommended torque for the specified fastener (refer pg.8)
STEP
33
For vehicles with 265/70R16 Tyres, fasten the Wide
Tyre Spacer and Centre Panel to the Front Bearer
using M10x25 bolts and M10 Nyloc nut.
See adjacent diagram.
M10x25 bolt
M10 Nyloc nut
Wide Tyre Spacer
Front Bearer
Centre Panel
IMPORTANT - Ensure fastener torque does not exceed the
recommended torque for the specified fastener (refer pg.8)
STEP
32
For vehicles with 7.50R16C Tyres, attach the Centre
Panel to the Front Bearer using M10x25 bolts and
M10 Nyloc nut as per adjacent diagram.
Continue to step 34.
M10x25 bolt
M10 Nyloc nut
Front Bearer
Centre Panel

This manual suits for next models

1

Other Toyota Automobile Accessories manuals

Toyota AUTO TAG User manual

Toyota

Toyota AUTO TAG User manual

Toyota 30-5SDK5 User manual

Toyota

Toyota 30-5SDK5 User manual

Toyota 74102-02140 User manual

Toyota

Toyota 74102-02140 User manual

Toyota VSS4 User manual

Toyota

Toyota VSS4 User manual

Toyota Prius HSD 2004 User manual

Toyota

Toyota Prius HSD 2004 User manual

Toyota Prius HSD 2004 User manual

Toyota

Toyota Prius HSD 2004 User manual

Toyota REAR SEAT ENTERTAINMENT User manual

Toyota

Toyota REAR SEAT ENTERTAINMENT User manual

Toyota PZQ44-89100 User manual

Toyota

Toyota PZQ44-89100 User manual

Toyota PVM User manual

Toyota

Toyota PVM User manual

Toyota Touch2 User manual

Toyota

Toyota Touch2 User manual

Toyota TPA 800 User manual

Toyota

Toyota TPA 800 User manual

Toyota Bluetooth hands-free system User manual

Toyota

Toyota Bluetooth hands-free system User manual

Toyota INTEGRATED DASHCAM User manual

Toyota

Toyota INTEGRATED DASHCAM User manual

Toyota PT427-89060 User manual

Toyota

Toyota PT427-89060 User manual

Toyota PZ457-B056E-00 User manual

Toyota

Toyota PZ457-B056E-00 User manual

Toyota CQ-TS7420K User manual

Toyota

Toyota CQ-TS7420K User manual

Toyota PW5D0-0R001 User manual

Toyota

Toyota PW5D0-0R001 User manual

Toyota PW5D0-0K001 User manual

Toyota

Toyota PW5D0-0K001 User manual

Toyota Sequoia 2014 User manual

Toyota

Toyota Sequoia 2014 User manual

Toyota PZ439-E9472-AB User manual

Toyota

Toyota PZ439-E9472-AB User manual

Toyota PZ 416 - T0968 - 00 User manual

Toyota

Toyota PZ 416 - T0968 - 00 User manual

Toyota PZ434-14790-3Z User manual

Toyota

Toyota PZ434-14790-3Z User manual

Toyota PC162-0K00H User manual

Toyota

Toyota PC162-0K00H User manual

Toyota PT278-42130 User manual

Toyota

Toyota PT278-42130 User manual

Popular Automobile Accessories manuals by other brands

Winmate FM10A Product reference guide

Winmate

Winmate FM10A Product reference guide

Road Angel vantage Product manual & user guide

Road Angel

Road Angel vantage Product manual & user guide

STO N SHO SNS 350 Installation procedures

STO N SHO

STO N SHO SNS 350 Installation procedures

Kargo Master 408TC installation guide

Kargo Master

Kargo Master 408TC installation guide

Masterbuilt HITCH-HAUL HPHSEK owner's manual

Masterbuilt

Masterbuilt HITCH-HAUL HPHSEK owner's manual

RECARO C 6000 MAN TGX installation instructions

RECARO

RECARO C 6000 MAN TGX installation instructions

Metra Electronics 95-5810 installation instructions

Metra Electronics

Metra Electronics 95-5810 installation instructions

Thule 724 Assembly manual

Thule

Thule 724 Assembly manual

Herd 404006 installation guide

Herd

Herd 404006 installation guide

Lund 84127 installation instructions

Lund

Lund 84127 installation instructions

Subaru F411SXC010 installation instructions

Subaru

Subaru F411SXC010 installation instructions

Webasto Telestart T70 installation instructions

Webasto

Webasto Telestart T70 installation instructions

Aukey CC-A3 user manual

Aukey

Aukey CC-A3 user manual

APS iBoard IB-R001 manual

APS

APS iBoard IB-R001 manual

Sharp IG-GC2Y Operation manual

Sharp

Sharp IG-GC2Y Operation manual

IAG IAG-ACC-F3069 quick start guide

IAG

IAG IAG-ACC-F3069 quick start guide

Victory 4x4 5TH GEN 4RUNNER Install instructions

Victory 4x4

Victory 4x4 5TH GEN 4RUNNER Install instructions

Cruz Evo Rack Alu A32-140 Assembly instructions

Cruz

Cruz Evo Rack Alu A32-140 Assembly instructions

manuals.online logo
manuals.online logoBrands
  • About & Mission
  • Contact us
  • Privacy Policy
  • Terms and Conditions

Copyright 2025 Manuals.Online. All Rights Reserved.