Tracer ROADSTER User manual


PL | Instrukcja obsługi
Wstęp
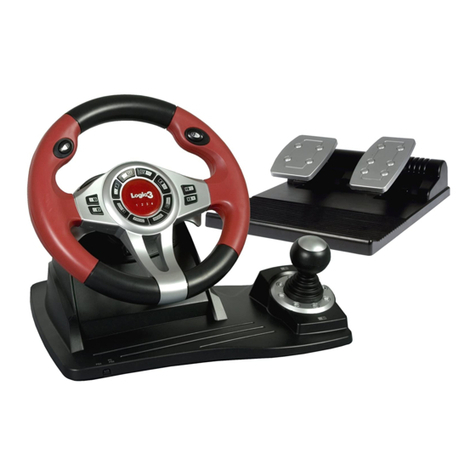
Dziękujemy za zakup kierownicy wyścigowej 4w1 z łącznością przewodo-
wą dla gier na platformy PS3, PS4*, PC i XBOX One*. Kontroler posiada
wbudowany mechanizm regulujący wibracje w grach obsługujących funk-
cję wibracji. Ergonomiczna kierownica została zaprojektowana tak, aby
zapewnić łatwość i wygodę w obsłudze przez długie godziny rozgrywki,
jednocześnie sprawiając, że gra staje się bardziej realistyczna i ekscytu-
jąca.
* Konsole PS4 i XBOX One wymagają podłączenia oryginalnego kontro-
lera w celu autoryzacji urządzenia.
Dane techniczne:
• Przycisk HOME do użytku na konsolach PS3/PS4/XBOX One
• Kompatybilność ze wszystkimi typami konsoli PS3/PS4/XBOX One,
w tym z wersjami U.S.A., japońskimi oraz europejskimi
• Wskaźnik z czterokanałową diodą LED do konsoli PS3
• Obsługiwane systemy operacyjne Windows 2000/XP/Vista/7/10
• 8 przycisków kierunku: góra, dół, lewo, prawo, oraz 4 przyciski diago-
nalne pod kątem 45 stopni
• 8 przycisków analogowych: /2A, /3/B, /4/Y, /1/X,
R1/6/RB, R2/8/RT, L1/5/LB i L2/7/LT
• 4 przyciski cyfrowe: OPTIONS/10/menu, SHARE/9/view, L3/11/SL,
R3/12/SR
• 8 przycisków służących do sterowania: R-wing, L-wing, hamulec, gaz,
L3, R3, drążek zmiany biegów (L2/7/LB, R2/8/RT)
• Konsole PS4 i XBOX One wymagają podłączenia oryginalnego kon-
trolera w celu ustanowienia połączenia
• Kąt obrotu kierownicy: 270°
• Regulacja 3 poziomów czułości
• Sprężynowy mechanizm przyspieszenia
TRACER ROADSTER Kierownica wyścigowa 4 w 1
Dla PS3/PS4/PC/XBOX ONE

PL | Instrukcja obsługi
Układ przycisków
Przyciski kierunku
Wskaźnik programu LED
Wskaźnik trybu LED
L-wing/hamulec R-Wing/gaz
Wskaźniki kanału LED
R2/8/RB
L2/7LB
Bieg

PL | Instrukcja obsługi
Tabela funkcji przycisków
Typ PS3 PS4 Xbox One PC
Przycisk
analogowy
A 2
B 3
1
Y 4
R1 R1 RB 6
L1 L1 LB 5
R2 R2 RT 8
L2 L2 LT 7
R3 R3 SR 12
L3 L3 SL 11
Przycisk
kierunku
GÓRA GÓRA GÓRA GÓRA
DÓŁ DÓŁ DÓŁ DÓŁ
LEWO LEWO LEWO LEWO
PRAWO PRAWO PRAWO PRAWO
Przycisk
funkcji
START OPTIONS Menu 10
SELECT SHARE View 9
Typ PS3 PS4 Xbox One PC
Kierunek LX LX ←/→ ←/→
L-Wing L2 LT 1
R-Wing R2 RT 2
Drążek
zmiany
biegów
L2 L1 LB 7
R2 R1 RB 8
Lewy pedał L2 LT 1
Prawy pedał R2 RT 2
Mode HOME HOME X-Guide 13

PL | Instrukcja obsługi
Funkcje:
Wprowadzenie do programowania przycisków
Przyciski źródłowe: /1/ , /3/B, /4/ Y, /2A, L1/5/LB, L2/7/LT, R1/6/RB,
R2/8/RT
Programowalne przyciski: L-Wing ( /1/LT), R-Wing ( /2/RT),
gaz ( /2/RT) , hamulec ( /1/LT), L3/11/SL, R3/12/SR,
Drążek zmiany biegów (L2/7/LB, R2/8/RB).
Programowanie przycisków
1. Wciśnij przycisk PROG lub przyciski SHARE/9/View + Options/10/
Menu i przytrzymaj przez 3 sekundy, aż zaświeci się zielona dioda LED.
2. Wciśnij przycisk, który chcesz zaprogramować; zielona dioda LED za-
cznie migać.
3. Wciśnij przycisk źródłowy; zielona dioda LED zgaśnie.
4. Przycisk został zaprogramowany.
Resetowanie pojedynczego programu
1. Wciśnij przycisk PROG lub przyciski SHARE/9/View + Options/10/
Menu i przytrzymaj przez 3 sekundy, aż zaświeci się zielona dioda LED.
2. Wciśnij zaprogramowany przycisk; zielona dioda LED zacznie migać.
3. Ponownie wciśnij zaprogramowany przycisk; zielona dioda LED zga-
śnie.
4. Pojedynczy zaprogramowany przycisk został zresetowany.
Resetowanie wszystkich programów
1. Wciśnij przycisk PROG lub przyciski SHARE/9/View + Options/10/
Menu i przytrzymaj przez 3 sekundy, aż zaświeci się zielona dioda LED.
2. Wciśnij przycisk OPTIONS/10/Menu i przytrzymaj przez 4 sekundy; zie-
lona dioda LED zgaśnie.
3. Wszystkie przyciski zostały zresetowane i zostały przywrócone usta-
wienia domyślne.
Uwaga: Wszystkie ustawienia zostają zresetowane przy wyłączeniu
kierownicy.
Programowanie pedałów do sterowania na osi Y
1. Wciśnij przycisk PROG lub przyciski SHARE/9/View + Options/10/
Menu i przytrzymaj przez 3 sekundy, aż zaświeci się zielona dioda LED.
2. Wciśnij lewy przycisk kierunku; zielona dioda LED zgaśnie.
3. Pedały zostały zaprogramowane do sterowania na osi Y.
Programowanie przycisków L-Wing i R-Wing do
sterowania na osi Y
1. Wciśnij przycisk PROG lub przyciski SHARE/9/View + Options/10/
Menu i przytrzymaj przez 3 sekundy, aż zaświeci się zielona dioda LED.
2. Wciśnij lewy przycisk kierunku; zielona dioda LED zgaśnie.
3. Przyciski zostały zaprogramowane do sterowania na osi Y.
Regulacja 3 poziomów czułości kierownicy
1. Wciśnij przycisk PROG lub przyciski SHARE/9/View + Options/10/
Menu i przytrzymaj przez 3 sekundy, aż zaświeci się zielona dioda LED.
Zwolnij przycisk.
2. Ponownie wciśnij przycisk SHARE/9/View. Zostanie wyświetlony aktu-
alny poziom czułości.
3. Ponownie wciśnij przycisk SHARE/9/View aby wybrać poziom czułości.
Dostępne są następujące poziomy czułości:
Średni (zielona dioda LED miga powoli)
Wysoki (zielona dioda LED miga szybko)
Niski (zielona dioda LED miga bardzo szybko)
4. Wciśnij górny przycisk kierunku aby zatwierdzić ustawienie i wyjść.
Pedały:
Pedały działają analogowo, tj. prędkość pojazdu w grze zależy od stopnia
przyciśnięcia pedałów; dioda LED miga szybciej lub wolniej, odpowiednio
do prędkości pojazdu.

PL | Instrukcja obsługi
Używanie z konsolą PS3
• Podłącz kierownicę do konsoli PS3; następnie podłącz pedały do
kierownicy.
• Włącz konsolę.
• Wskaźnik kanału LED zaświeci się gdy zostanie nawiązane połącze-
nie; kierownica jest wtedy gotowa do użycia.
• Podczas rozgrywki na konsoli PS3, wciśnij raz przycisk HOME aby
otworzyć okno XBM;
• Wciśnij i przytrzymaj przycisk MODE aby otworzyć okno ustawień
MENU.
Używanie z konsolą PS4
• Podłącz kierownicę do konsoli PS4; następnie podłącz pedały do
kierownicy.
• Włącz konsolę.
• Podłącz kierownicę do oryginalnego kontrolera PS4 kablem USB,
kontroler stanowi łącznik pomiędzy konsolą a kierownicą (kontroler
musi być wyłączony)
• Po nawiązaniu łączności zaświeci się czerwona dioda LED; wciśnij
przycisk HOME; kierownica jest wtedy gotowa do użycia.
• Podczas rozgrywki na konsoli PS4, wciśnij raz przycisk HOME aby
otworzyć okno XBM;
UWAGA!!!! Ustawienia sterowania w systemie PS4
Kierownica Tracer Roadster odwzorowuje ustawienia oryginalnego kon-
trolera Playstation 4 (mapowanie urządzeń). Chcąc zmienić ustawienia
sterowania kierownicy w konkretnej grze, należy w opcjach konguracyj-
nych gry zmienić przypisania poszczególnych klawiszy kontrolera Play-
station 4, zmapowanych z kierownicą (zmieniamy ustawienia sterowania
kontrolerem PS4 a nie kierownicą!). W przypadku gier, które nie oferują
zmiany sterowania kontrolerem Playstation 4, kierownica posiada jedną
kongurację ustawień, zmapowanych domyślnie z tymże kontrolerem
i wszelkie zmiany sterowania na kierownicy są niemożliwe.
Używanie z konsolą XBOX ONE
• Podłącz kierownicę do konsoli XBOX ONE; następnie podłącz pedały
do kierownicy.
• Włącz konsolę.
• Podłącz kierownicę do oryginalnego kontrolera XBOX ONE kablem
USB, kontroler stanowi łącznik pomiędzy konsolą a kierownicą (kontro-
ler musi być wyłączony)
• Po nawiązaniu łączności zaświeci się czerwona dioda LED na kierow-
nicy oraz wskaźnik LED na kontrolerze. Można uruchomić grę.
• Podczas rozgrywki na konsoli XBOX ONE, wciśnij przycisk HOME aby
powrócić do menu głównego.

PL | Instrukcja obsługi
Używanie z komputerem PC
Instalacja
• Pobierz sterowniki ze strony internetowej. Kliknij dwukrotnie ikonę
SETUP i postępuj zgodnie z instrukcjami wyświetlanymi na ekranie
aby dokończyć instalację.
• Aby podłączyć kierownicę do komputera, wykonaj następujące kroki:
• Start → Panel sterowania → Urządzenia i drukarki → kliknij prawym
przyciskiem myszy “urządzenia i drukarki” → Kontroler gry
→ Właściwości.
Testowanie kierownicy
• Wejdź w zakładkę “Test” aby przetestować wszystkie przyciski i stero-
wanie na osiach
• Wejdź w zakładkę „Kalibracja” aby skalibrować osie
• Wejdź w zakładkę „Wibracje” aby przetestować osie i pedały
Odinstalowywanie sterowników
• Start → Panel sterowania → Dodaj/usuń programy
• W oknie “aktualnie zainstalowane programy” odszukaj sterownik,
który chcesz odinstalować. Kliknij przycisk “usuń” i postępuj zgodnie z
instrukcjami wyświetlanymi na ekranie aby odinstalować sterownik.
Rozwiązywanie problemów
1. Jeśli wskaźnik LED nie zaświeci się, podłącz ponownie kontroler I
sprawdź, czy działa.
2. Jeśli kierownica nie odpowiada, a ekran/konsola zacięły się, wyłącz i
ponownie uruchom konsolę.
3. W przypadku problemów ze sprzętem podczas gry, odłącz I podłącz
ponownie kierownicę.
4. Przed podłączeniem kierownicy do konsoli PS4 lub XBOX ONE wyłącz
oryginalny kontroler.
Zalecenia
• Proszę przeczytać i zastosować się do instrukcji obsługi przed uży-
ciem kierownicy.
• Nie upuszczać i unikać wszelkiego rodzaju uszkodzeń powstałych w
wyniku uderzenia.
• Nie demontować, nie modykować ani nie próbować naprawiać
samodzielnie.
• Nie przechowywać w miejscu wilgotnym, gorącym lub tłustym.

EN | User manual
Introduction
Thank you for purchasing 4 IN 1 wired wheel designed for and compatible
with PS3, PS4*, PC and XBOX One*consoles and games. It features buil-
t-in motors for adjustable vibration provided the game software supports
the vibration function. The racing car wheel design is in keeping with hu-
man ergonomics for use with ease and comfort for extended periods while
making play more realistic, responsive and exciting.
* PS4 and XBOX ONE consoles require the original game pad to be plug-
ged in for authentication.
Specications
• Home button for setting on PS3/PS4/XBOX One console
• Compatible with all PS4/PS3/XBOX One consoles, including U.S.A,
Japan and European version;
• Four channel LED indicators when playing PS3
• Supports Windows 2000/XP/VISTA/7/10
• With four buttons 8 direction analog D-pad: up, down, left, right, and
four 45 degree angles
• With eight analog buttons: /2A, /3/B, /4/ Y, /1/X,
R1/6/RB, R2/8/RT, L1/5/LB i L2/7/LT
• With four digital buttons: OPTIONS /10/menu, SHARE/9/view,
L3/11/SL, R3/12/SR
• Eight buttons with relocation feature: R-wing, L-wing, brake pedal,
accelerator pedal, L3, R3, Gear Stick (L2/7/LB, R2/8/RT);
• When playing with PS4/XBOX ONE, connect the original controller to
establish connection.
• 270° turning angles
• 3 level adjustable sensitivity
• Spring loaded accelerating
TRACER ROADSTER 4 in 1 Racing wheel
For PS3/PS4/PC/XBOX ONE

EN | User manual
Buttons Layout
D-Pad
Program LED Indicators
Mode LED Indicator
L-wing/brake R-Wing/Accelerator
Channel LED Indicators
R2/8/RB
L2/7LB
Gear

EN | User manual
unction Key Table
Type PS3 PS4 Xbox One PC
Action Key A 2
B 3
1
Y 4
R1 R1 RB 6
L1 L1 LB 5
R2 R2 RT 8
L2 L2 LT 7
R3 R3 SR 12
L3 L3 SL 11
D-Pad UP UP UP UP
DOWN DOWN DOWN DOWN
LEFT LEFT LEFT LEFT
RIGHT RIGHT RIGHT RIGHT
Function
Key
START OPTIONS Menu 10
SELECT SHARE View 9
Type PS3 PS4 Xbox One PC
Direction LX LX ←/→ ←/→
L-Wing L2 LT 1
R-Wing R2 RT 2
Gear Stick L2 L1 LB 7
R2 R1 RB 8
L-Pedal L2 LT 1
R-Pedal R2 RT 2
Mode HOME HOME X-Guide 13

EN | User manual
Functions:
Program Functions Introduction
Program source buttons: /1/ , /3/B, /4/Y, /2A, L1/5/LB, L2/7/LT,
R1/6/RB, R2/8/RT
Programmable buttons: L-Wing ( /1/LT), R-Wing ( /2/RT),
Accelerator ( /2/RT),Brake ( /1/LT), L3/11/SL, R3/12/SR,
Gear Stick (L2/7/LB,R2/8/RB)
Program setup
1. Press PROG button or Press SHARE/9/View + Options/10/Menu but-
tons and hold for 3 seconds until the green LED is on.
2. Press the programmable button, and the green LED will start blinking
3. Press the program source button and the green LED will turn o.
4. Program is set.
Clear single program
1. Press PROG button or Press SHARE/9/View + Options/10/Menu but-
tons and hold for 3 seconds until the green LED turns on
2. Press programmed button and the green LED will start blinking.
3. Press programmed button again and the green LED will turn o.
4. Single programmed button is cleared.
Clear all programs
1. Press PROG or Press SHARE/9/View + Options/10/Menu buttons and
hold for 3 seconds until the green LED turns on
2. Press OPTIONS/10/Menuand hold for 4 seconds. The green LED will
turn o.
3. All of the programmed buttons are cleared and default settings are re-
stored.
Note: All of the settings will be cleared when the wheel is powered
o.
Program Pedals as Y axis
1. Press PROG button or Press SHARE/9/View + Options/10/Menu but-
tons and hold for 3 seconds until the green LED turns on.
2. Press LEFT of the D-PAD. The green LED will turn o.
3. Pedals are programmed as Y function.
Program L-Wing and R-Wing as Y axis
1. Press PROG button or Press SHARE/9/View + Options/10/Menu but-
tons and hold for 3 seconds until the green LED is on.
2. Press RIGHT of the D-PAD. The green LED will turn o.
3. Pedals are programmed as Y function.
3 levels wheel sensitivity adjustment
1. Press SHARE/9/View + Options/10/Menu buttons and hold for 3 se-
conds until green LED is on. Release the button.
2. Press SHARE/9/View again. Current sensitivity is displayed
3. Press SHARE/9/View a third time to select sensitivity level. It cycles as
below:
Middle (Green LED is ashing)
High (Green LED ashes quickly)
Low (Green LED ashes rapidly)
4. Press UP on the D-PAD to conrm and exit
Pedals:
The pedal functions are analogue. i.e. the response in the game increases
or decreases depending on how hard the pedals are pressed, and the LED
ashes faster or slower accordingly.

EN | User manual
For use with PS3
• Connect the wheel to PS3 console; and connect the pedal to the wheel
• Power on the PS3 console.
• The active channel LED indicator will light up when connection is
made, after which the wheel is ready for play or set up.
• During PS3 game play, press the HOME button once to enter the XBM
window;
• Press and hold the MODE button to enter MENU setup window.
For use with PS4
• Connect the wheel to PS4 console; and connect the pedal to the wheel
• Power on the PS4 console.
• Connect the racing wheel to original PS4 controller by a USB cable,
consider the controller as a key to establish the connection between
the controller and racing wheel( The controller must be powered o)
• When the connection been established, the red LED will turn on,
press the HOME button, and it is ready to play the game or set up the
console functions
• During PS4 game play, press the HOME button once to enter the XBM
window;
CAUTION!!!! Control settings on the PS4 system
The Tracer Roadster steering wheel has the same settings as the original
Playstation 4 controller by default (keys mapping). If you want to change
the steering wheel control settings in a specic game, in the game con-
guration options, change the assignments of individual keys of the Playsta-
tion 4 controller, mapped to the steering wheel .
For games that do not oer a change to the Playstation 4 controller keys
conguration, the steering wheel has one conguration mapped by default
to the controller, and any steering wheel conguration changes are not
possible.
For use with XBOX ONE
• Connect the wheel to XBOX ONE console; and connect the pedals to
the wheel
• Power on the XBOX ONE console.
• Connect the racing wheel to original XBOX ONE controller by a USB
cable, consider the controller as a key to establish the connection be-
tween the controller and racing wheel (The controller must be powered
o)
• After the connection been established, the red LED on racing wheel is
on, and a LED indicator on the controller also is on. Then, you can start
the game.
• During XBOX ONE game play, press the HOME button to return back
to the main menu;

EN | User manual
For use with PC
Installation
Please download drivers from the website. Double click SETUP and follow
on-screen instructions to complete the driver installation.
To connect the wheel to your PC, use the following sequence
Start → Control Panel → Device and Printer → right click the device and
printer → Game controller → Properties.
Wheel Test
• Enter Test interface to test buttons and axis functions
• Enter Calibration interface to calibrate the axis
• Enter Vibration interface to test axis and pedals
Driver Uninstall
Start → Control Panel → Add/Remove programs
Find the driver you want to remove in the Interface” current installed pro-
grams”. Click “Remove” and follow the instructions to get successful unin-
stall.
Trouble Shooting
1. If the connection LED is not on, please connect to the controller again
and check and controller is working.
2. If the racing wheel do not respond and the screen/console is frozen,
please power o the console and power on again
3. Please re-connect the racing wheel if you experience any malfunctions
in operation during the game
4. Please power o the original controller before connecting the racing
wheel to the PS4 or XBOX One consoles.
Precautions
• Please read the manual and follow instructions before using this racing
wheel.
• Do not drop and avoid any type of impact damage.
• Do not disassemble, modify or try to repair by yourself.
• Do not store it in place that is moist, hot or greasy.

P
Producent:
Megabajt Sp. z o.o.,
ul. Rydygiera 8,
01-793 Warszawa
Symbol of electronic and electrical equipment
waste (WEEE – Waste Electronic and Electrical
Equipment).
Using the WEEE symbol means that this product
cannot be treated as household waste. By providing
appropriate recycling you help to save the natural environment.
In order to get more detailed information about the recycling of
this product, contact the local authority representative, waste
treatment service provider or the store in which the product has
been purchased.
Table of contents
Languages:
Other Tracer Video Game Controllers manuals
Tracer
Tracer FREEZER User manual
Tracer
Tracer Gamepad Shogun Pro User manual
Tracer
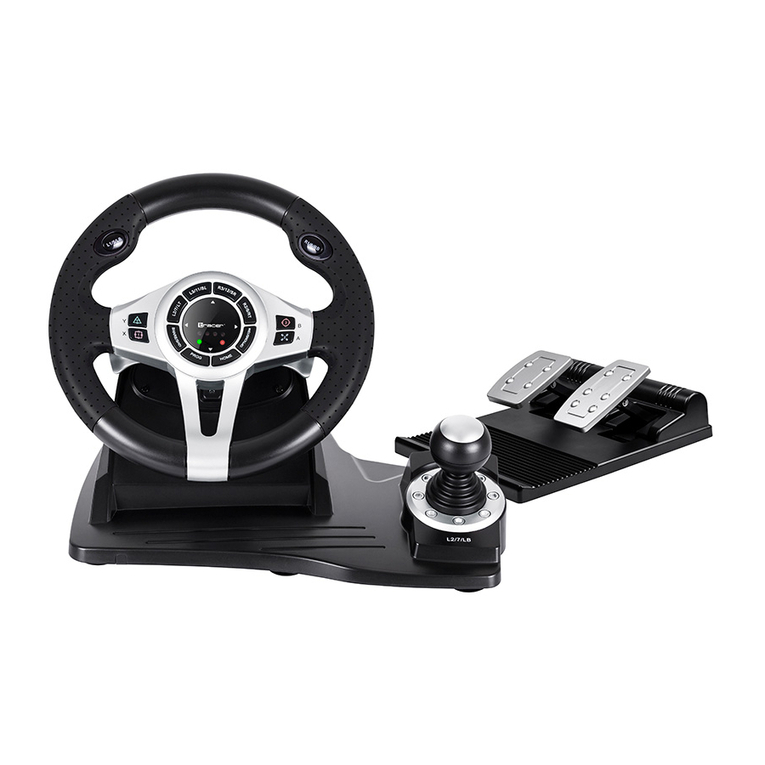
Tracer Roadster 4in1 User manual

Tracer
Tracer Roadster 4in1 User manual

Tracer
Tracer FT38E1 User manual
Tracer
Tracer Gamepad Ghost User manual
Tracer
Tracer Lizard User manual

Tracer
Tracer Rayder 4in1 User manual

Tracer
Tracer Steering Wheel Professional Carbon Racer User manual
Tracer
Tracer Zonda User manual
