Transcell Technology TI-500 FDI Series User guide

MODEL
TI-500 FDI
Force Data Instrument
Installer’s
Manual
Revision 1.1 October 14, 2016

1
© Transcell Technology, Inc. 2012-2016. All rights reserved.
The information contained herein is the property of Transcell Technology and is supplied without liability for errors or
omissions. No part may be reproduced or used except as authorized by contract or other written permission. The copy-
right and the foregoing restriction on reproduction and use extend to all media in which the information may be embod-
ied.
Contents subject to change without notice.
Contents
INSTALLATION & OVERVIEW .............................................................................................. 2
INSTALLATION OF TI-500 FORCE DATA INSTRUMENT ................................................ 2
GETTING STARTED .......................................................................................................... 3
SYSTEM CONFIGURATION .................................................................................................. 4
CONFIGURATION MENUS ................................................................................................ 4
ENTERING THE SETUP (“F”) CONFIGURATION MENU ................................................. 5
SETUP (“F”) MENU DESCRIPTIONS ................................................................................ 5
ENTERING THE USER (“A”) OR COM (“C”) MENU .......................................................... 8
USER (“A”) AND COM (“C”) MENU DESCRIPTIONS ....................................................... 9
SETTING SYSTEM TIME AND DATE (A20) .................................................................... 11
DIAGNOSTICS (A24) ........................................................................................................ 12
ENTERING THE BLUETOOTH (“B”) MENU .................................................................... 12
BLUETOOTH (“B”) MENU DESCRIPTIONS .................................................................... 13
SYSTEM CALIBRATION ...................................................................................................... 14
CALIBRATION OVERVIEW .............................................................................................. 14
DIGITAL CORNER CALIBRATION (DUAL WIRELESS UNITS ONLY) .......................... 14
DIGITAL SPAN CALIBRATION (F15 AND F17) .............................................................. 15
DIGITAL ZERO CALIBRATION (F16) .............................................................................. 16
KEY-IN SPAN CALIBRATION (F20) ................................................................................ 16
RESTORE FACTORY CALIBRATION (B6) – WIRELESS SYSTEMS ONLY ................. 16
SERIAL PORT INFO ............................................................................................................ 18
SERIAL PORT MODES .................................................................................................... 18
OUTPUT STRINGS .......................................................................................................... 19
“CE” logo here somewhere…

2
INSTALLATION & OVERVIEW
Remember that the installer is ultimately responsible to assure that a particular
installation will be and remain safe and operable under the specific conditions
encountered.
This manual covers the following products:
Model Display Enclosure Type Max. Sampling Rate
TI
-
500 FDI
-
01
LCD Aluminum/ABS 80 Hz
TI
-
500 FDI
-
02
LCD Aluminum/ABS 1200 Hz
This manual covers installation, configuration and calibration of the force data instrument. For
operation and troubleshooting, please refer to the separate user’s guide.
Installation of TI-500 force data instrument
Find a suitable location for the instrument and use the included bracket to mount the unit to a
wall or table. Use this handy guide for mounting the bracket to a wall or table:
The TI-500 force data instrument ships with a force sensor cable which plugs into the appropri-
ate connector. Use the following color codes to connect the force sensor.
Force Sensor Cable Leads
Color
Function
Color
Function
Black - Excitation White - Signal
Red + Excitation Green + Signal

3
The TI-500 force data instrument features one full duplex RS-232 serial port, designed for con-
nection to a computer or a serial printer. The same port may be also used as a simplex, RS-232
port designed for connection to a remote display.
DSUB9 Connector
Pin No.
Wire Name
2 RXD
3 TXD
5 Ground
The TI-500 force data instrument requires 4-AA batteries to operate (not included). To install the
batteries, remove the plastic battery cover from the rear panel. Observe proper direction (polari-
ty) of the batteries. Replace the battery cover.
The TI-500 force data instrument may also be powered by the included AC wall adaptor includ-
ed.
Getting Started
1. Press and hold the ON/PRINT key on the instrument for two seconds.
After a brief initialization period, the instrument will revert to a zero (“0”) force display.
Your force data instrument is now ready for configuration and system calibration.

SYSTEM CONFIGURATION
Configuration Menus
The TI-500 force data instrument contains three menus to configure the instrument system:
Setup (“F”) Menu – Configures all metrologically-related parameters including calibration procedures.
User (“A”) Menu – Configures COM2 communication parameters and other misc parameters, e.g. automatic turn off.
COM1 (“C”) Menu – Configures COM1 communication parameters. NOTE: This menu will not appear for wireless systems (see F29).
Bluetooth (“B”) Menu – Configures all parameters relating to the RF weighing module(s). NOTE: This menu will not appear for cabled systems (see F29).
The configuration menus are laid out in the following vertical arrangement:
Top [Menu selection] level
Parameter level
Selection level (or function level, e.g. span calibration)
Please review the following chart to get a feel for how to navigate among the various menus and parameters.
Top Level -F- -A- or -C- -B-
Parameter F1 F3 Etc. A1/C1 A2/C2 Etc. B1 B2 Etc.
Level Graduations Zero Track Band Baud Rate Data, Parity, Stop Bits Adjust Load Cell #1 Adjust Load Cell #2
Selection
100 to 50000 0, 0.25, 0.5, 1, 3, 5 600, 1200, 2400,
4800, 9600, 19200
8_n_1, 8_n_2, 7_n_1,
7_n_2, 7_E_1, 7_E_2,
7_o_1, 7_o_2
0 to 65535 0 to 65535
Level
NOTE: The -C- menu appears in place of the -B- menu for cabled systems.

Entering the Setup (“F”) Configuration Menu
To access this menu, please follow these directions:
1. Switch off the instrument by pressing and holding down the ZERO/OFF key for about 5 sec-
onds.
2. Press and hold down the ON/PRINT key (about 20 seconds) until the screen shows
“-F-”.
3. Scroll down using the ZERO/OFF (down) key to reach the parameter level. The instrument
shows “F 1”.
4. Move from one “F” menu parameter to the next by using the TARE (left) or ON/PRINT (right)
keys. For example, to go from F1 to F2, press the ON/PRINT key. To go from F2 back to
F1, press the TARE key.
5. Once you have arrived at the proper “F” menu parameter, e.g. ”F 1”, press the
ZERO/OFF (down) key once to arrive at the selection level. The instrument displays the cur-
rent parameter setting.
6. To scroll thru the available parameter settings, use the TARE (left) or ON/PRINT (right)
keys.
7. Once the setting you want is displayed on the screen, press the NET/GROSS (set) key to
save this value and revert back up to the parameter level, e.g. ”F 1”.
8. In order to save all parameter settings, it is imperative to exit all menus in the following
manner: At the parameter level, press the UNITS (up) key twice (two times) to exit the Setup
Menu. The instrument displays ‘SAvE’ and then automatically powers off.
Setup (“F”) Menu Descriptions
This section provides more detailed descriptions of the selections found in the Setup Menu
Chart. Factory-set defaults are shown in bold with a checkmark; (√).
CODE/NAME DESCRIPTION SELECTION LIST
F1
Graduations
Specifies number of full-scale graduations, i.e. capacity / division.
Pressing the ZERO/OFF key to scroll down one level begins the se-
quence.
Key-in
100 - 50000
50000
F2
Sampling Rate
(-02 Model)
Sets the sampling rate in Hertz (measurements per second).
NOTE: This menu is not applicable to wireless systems
Key-in
1.75 – 1200.00
1200.00
F2
Sampling Rate
(-01 Model)
Sets the sampling rate in Hertz (measurements per second). Use
10 Hz for most applications or 80 Hz for extra fast response time
NOTE: This menu is not applicable to wireless systems
10 80
F3
Zero Track
Band
Selects the range within which the instrument will automatically zero.
Note that the instrument must be in standstill to automatically zero.
Selections are in display divisions (d).
OFF 0.25d
0.5d 1d
3d 5d

6
CODE/NAME DESCRIPTION SELECTION LIST
F6
Digital Filter
Averages weight readings to produce higher stability. Lower number
provides a faster response. Choose the speed that works best for
your application.
0 to 12
8
F8
Calib. Unit
Selects the primary base unit to be used in the calibration process.
Also the default unit for normal operation.
"1" = primary unit is lb "2" = primary unit is in kg
"3" = primary unit is oz "4" = primary unit is in g
1 2
3 4
F9
Display
Divisions
Determines the desired weight increments. Value should be con-
sistent with legal requirements. 1
2
5
F10
Decimal Pt.
Determines location of the decimal point. 0 0.0
0.00 0.000
0.0000 00
F11
No. of L/C
wires
Selects the number of wires on the load cell(s) to be connected to the
instrument . Cabled systems only.
"4" = four wires "6" = six wires (SENSE)
4 6
F13
Gravity (g)
Allows you to select the gravity (g) of the location of the instrument
system. Expressed in m/s2. Pressing the ZERO/OFF key to scroll
down one level begins the sequence.
Key-in
9.750 to 9.850
9.797
F15
Span Calibra-
tion - Negative
Places instrument into the negative span calibration routine. Scrolling
down with the ZERO/OFF key one level begins the procedure.
Press ZERO/OFF
key to begin se-
quence
F16
Zero Calibra-
tion
Places instrument into the zero calibration routine. Scrolling down
with the ZERO/OFF key one level begins the procedure.
Press ZERO/OFF
key to begin se-
quence
F17
Span Calibra-
tion - Positive
Places instrument into the positive span calibration routine. Scrolling
down with the ZERO/OFF key one level begins the procedure.
Press ZERO/OFF
key to begin se-
quence
F18
View Calibra-
tion
Actuates the function that allows you to view both the zero and span
calibration value. The values displayed in this function are valid only
after Calibration (F16 & F17) has been successfully completed.
Scrolling down with the ZERO/OFF key one level begins the proce-
dure. Multi-point cal
Press ZERO/OFF
key to begin se-
quence
F19
Key-in Zero
Allows you to key-in known zero calibration value in case of memory
loss in the field. Scrolling down with the ZERO/OFF key one level
begins the procedure.
Press ZERO/OFF
key to begin se-
quence
F20
Key-in Span
Allows you to key-in span calibration values. Scrolling down with the
ZERO/OFF key one level begins the procedure.
Press ZERO/OFF
key to begin se-
quence
F21
Factory Reset
(US)
This sub-menu will reset all parameters in the “F” and “A” menu to the
default settings. It will not overwrite any previously saved calibration
data. USE WITH CAUTION!
Press the ZE-
RO/OFF key twice
to execute

7
CODE/NAME DESCRIPTION SELECTION LIST
F22
Factory Reset
(EU)
This sub-menu will reset all parameters in the “F” and “A” menu to the
default settings. It will not overwrite any previously saved calibration
data. USE WITH CAUTION!
Press the ZE-
RO/OFF key twice
to execute
F23
Full Factory
Reset
This sub-menu will reset all system parameters to the default set-
tings. It will not overwrite any previously saved calibration data. USE
WITH EXTREME CAUTION!
Press the ZE-
RO/OFF key twice
to execute
F24
Fine Tune
4-20 mA
Actuates the function that allows you to fine-tune the optional
4-20 mA analog output. Pressing the ZERO/OFF key to scroll down
one level begins the sequence.
Press the ZE-
RO/OFF key to
begin sequence
F25
Set Point
Function
Selects the number of function of the set points and relay outputs.
See user’s guide for definitions
0 to 10
0
F29
Load Cell Input
Selects the load cell input source.
“AdC” = Internal A/D (cabled),
“1rAdIo” = One external wireless A/D module,
“2rAdIo” = Two external wireless A/D modules
AdC
1rAdIo
2rAdIo
F30
Special Appli-
cation
Used to select one special application feature, subject to local legal
requirements.
“0” = None (Gross/Net), , “ “2” = Remote Display, “5” = Peak Hold, “
0 2 5
F32
Center of Zero
Band
Selects the range around gross zero within which the instrument will
display the Center of Zero annunciator. Selections are in display divi-
sions (d).
0.25d
0.5
F34
Auto Print Min.
Weight
Selects the minimum weight at which the auto print function will work
if enabled. Selections are in display divisions (d). Scrolling down with
the ZERO/OFF key one level begins the procedure.
“0” = Disabled
Key-in
0 - 100
1
F35
Default Units
Mode
Selects the power up units mode. Scrolling down with the ZE-
RO/OFF key one level begins the procedure.
“1” = Pounds (lb), “2” = Kilograms (kg), “3” = ounces (oz),
“4” = grams (g), “5” = Newtons
1 2
3 4
5
F36
Default Peak
Mode
Selects the power up peak mode. Scrolling down with the ZE-
RO/OFF key one level begins the procedure.
“rEAL” = Live, “HoLd P” = Positive Peak, “HoLd U” = Negative Peak
rEAL
HoLd P
HoLd U

8
Entering the User (“A”) or COM (“C”) Menu
NOTE: Follow the same steps to enter the COM (“C”) Menu– just substitute “C” for “A” be-
low
1. Switch off the RF force data instrument by pressing and holding down the ZERO/OFF key
for about 5 seconds.
2. Press and hold down the ON/PRINT key (about 20 seconds) until the screen shows
“-F-”.
3. Press the ON/PRINT (right) key once. The screen displays “-A-”.
4. Scroll down using the ZERO/OFF (down) key to reach the parameter level. The instrument
shows “A 1”.
5. Move from one “A” parameter to the next by using the TARE (left) or ON/PRINT (right) keys.
For example, to go from A1 to A2, press the ON/PRINT key. To go from A2 back to A1,
press the TARE key.
6. Once you have arrived at the proper “A” menu parameter, e.g. ”A 1”, press the
ZERO/OFF (down) key once to arrive at the selection level. The instrument displays the cur-
rent parameter setting.
7. To scroll thru the available parameter settings, use the TARE (left) or ON/PRINT (right)
keys.
8. Once the setting you want is displayed on the screen, press the NET/GROSS (set) key to
save this value and revert back up to the parameter level, e.g. ”A 1”.
9. In order to save all parameter settings, it is imperative to exit all menus in the following
manner: At the parameter level, press the UNITS (up) key twice (two times) to exit the User
Menu. The instrument displays ‘SAvE’ and then automatically powers off.

9
User (“A”) and COM (“C”) Menu Descriptions
This section provides more detailed descriptions of the selections found in the User Menu Chart.
Factory-set defaults are shown in bold with a checkmark; (√).
CODE/NAME DESCRIPTION SELECTION LIST
A1/C1
Baud Rate
Selects the baud rate for data transmission through the serial port. 600, 1200, 2400,
4800, 9600 ,
19200, 38400,
57600, 115200
A2/C2
Data Bits,
Parity and
Stop Bits
Selects the number of data bits and parity of serial transmission.
"8_n_1" = 8 data bits with no parity bit and one stop bit
"8_n_2" = 8 data bits with no parity bit and two stop bits
"7_n_1" = 7 data bits with no parity bit and one stop bit
"7_n_2" = 7 data bits with no parity bit and two stop bits
"7_E_1" = 7 data bits with even parity bit and one stop bit
"7_E_2" = 7 data bits with even parity bit and two stop bits
"7_o_1" = 7 data bits with odd parity bit and one stop bit
"7_o_2" = 7 data bits with odd parity bit and two stop bits
8_n_1
8_n_2
7_n_1
7_n_2
7_E_1
7_E_2
7_o_1
7_o_2
A3/C3
Serial Port
Mode
Selects the mode of the serial port: Refer to Appendix B for more
information.
"0" = Demand Full Duplex
"1" = Continuous Full Duplex
“2” = Auto Print
0
1
2
A4
MP-20 Print
Header
Tells MP-20 printer to print the header information. Valid only when
A6 is set to “2” or “4”.
"0" = Do NOT Print Header "1" = Print Header
0
1
A5
Units Key
Selects function of the Units key.
NOTE: The UNITS key will not function if ounces or grams are se-
lected for F8.
"no" = Disabled
"YES" = Enabled
no
YES
A6/C6
Output String
Selects fixed output string for serial port. Refer to Appendix B for de-
tails.
"0" = String Format 1 (Condec Demand)
"1" = String Format 2 (Condec Continuous)
"2" = Text Print Ticket
“3” = Text Print Ticket with MP-20 Auto Label Feed
0 (A6)
1
2 (C6)
3
A7
ID Number
Selects the ID number mode.
"no" = Disabled
"YES" = Enabled
no
YES
A8
Set ID Number
Allows you to key-in the ID number. Pressing the ZERO/OFF key to
scroll down one level begins the sequence.
Key-in
0 to 999999
123456

10
CODE/NAME DESCRIPTION SELECTION LIST
A9/C9
Line Feeds
Allows you to key-in the number of line feeds. Pressing the ZE-
RO/OFF key to scroll down one level begins the sequence.
Key-in
0 to 99
8
A10
Auto Power Off
- RF Digital
Instrument
Allows you to configure the automatic power off time for the RF force
data instrument. Expressed in minutes of inactivity (keys and weigh-
ing platform). Pressing the ZERO/OFF key to scroll down one level
begins the sequence.
Key-in
0 to 30
30
A12
Backlight
Brightness
Selects the brightness of the LCD backlight. Selections are in % of
full brightness.
0 (OFF)
20
50
75
100
A13/C13
Handshaking
Selects function of the hardware handshaking. (NOTE: Receive pin is
used for handshaking).
"0" = Disabled
"1" = Enabled
0
1
A18
Date
Selects function of the printed date.
"no" = Disabled
"YES" = Enabled
no
YES
A19
Date Format
Selects the printed format for date.
"USA" = mm/dd/yy "IntL" = dd/mm/yy USA IntL
A20
Set System
Time & Date
Allows you to set the system time and date. Pressing the ZERO/OFF
key to scroll down one level begins the sequence.
Press ZERO/OFF
key to begin se-
quence
A22
Low Battery
Auto Power Off
- RF Digital
Instrument
Allows you to configure the automatic power off time of the instru-
ment after it enters a low battery condition. Expressed in minutes.
Pressing the ZERO/OFF key to scroll down one level begins the se-
quence.
Key-in
0 to 99
2
A23
Audible Key
Feedback
Selects function of the audible key feedback (beeper).
"no" = Disabled
"YES" = Enabled
no
YES
A24
Diagnostics
Used to access the listed test functions (one at a time). Pressing the
ZERO/OFF key begins the sequence.
"A24-U1" = Display segment test, "A24-U2" = A/D converter test,
“A24-U3” = Input test, “A24-U4” = Output test (all)
“A24-U5” = Serial Port test (both), “A24-U6” = Keyboard test
Press ZERO/OFF
key to begin se-
quence
A25
Decimal Point
Selects printed (not displayed) decimal point character.
"0" = Period (‘.’)
"1" = Comma (‘,’)
0
1

11
Setting system time and date (A20)
1. Switch off the instrument by pressing and holding down the ZERO/OFF key for about 5 sec-
onds.
2. Press and hold down the ON/PRINT key (about 20 seconds) until the screen shows
“-F-”.
3. Press the ON/PRINT (right) key once. The screen displays “-A-”.
4. Scroll down using the ZERO/OFF (down) key to reach the parameter level. The instrument
shows “A 1”.
5. Move from A1 to A20 by pressing the TARE (left) key repeatedly until the screen shows
“A 20”.
6. Once you have arrived at A20 press the ZERO/OFF (down) key once. The screen displays
“ho_xx” where ‘xx’ is the current hour, e.g. “15”. One digit will be flashing.
7. Use the four directional keys to adjust the displayed value to the actual hour value. Increase
the flashing digit by pressing the UNITS key. Decrease the flashing digit by pressing the
ZERO/OFF key. Pressing the TARE key or the ON/PRINT key will change the position of
the flashing digit.
8. After entering the exact value, press the NET/GROSS key to save the value. The screen
displays “n¬_xx” where ‘xx’ is the current minute, e.g. “55”. One digit will be flashing.
9. Use the four directional keys to adjust the displayed value to the actual minute value. In-
crease the flashing digit by pressing the UNITS key. Decrease the flashing digit by pressing
the ZERO/OFF key. Pressing the TARE key or the ON/PRINT key will change the position
of the flashing digit.
10. After entering the exact value, press the NET/GROSS key to save the value. The screen
displays “dA_xx” where ‘xx’ is the current day of the month, e.g. “14”. One digit will be flash-
ing.
11. Use the four directional keys to adjust the displayed value to the actual day value. Increase
the flashing digit by pressing the UNITS key. Decrease the flashing digit by pressing the
ZERO/OFF key. Pressing the TARE key or the ON/PRINT key will change the position of
the flashing digit.
12. After entering the exact value, press the NET/GROSS key to save the value. The screen
displays “n¬_xx” where ‘xx’ is the current month of the year, e.g. “02”. One digit will be flash-
ing.
13. Use the four directional keys to adjust the displayed value to the actual month value. In-
crease the flashing digit by pressing the UNITS key. Decrease the flashing digit by pressing
the ZERO/OFF key. Pressing the TARE key or the ON/PRINT key will change the position
of the flashing digit.
14. After entering the exact value, press the NET/GROSS key to save the value. The screen
displays “yE_xx” where ‘xx’ is the current month of the year, e.g. “11”. One digit will be flash-
ing.
15. Use the four directional keys to adjust the displayed value to the actual year value. Increase
the flashing digit by pressing the UNITS key. Decrease the flashing digit by pressing the
ZERO/OFF key. Pressing the TARE key or the ON/PRINT key will change the position of
the flashing digit.
16. After entering the exact value, press the NET/GROSS key to save the value and revert back
up to the parameter level, e.g., “A 20”.

12
17. In order to save all parameter settings, it is imperative to exit all menus in the following
manner: At the parameter level, press the UNITS (up) key twice (two times) to exit the User
Menu. The instrument displays ‘SAvE’ and then automatically powers off.
Diagnostics (A24)
Here is a brief description of each test mode:
A24-U1 Display Test – Lights up all display segments, counting down from 666666 to
11111. Test ends automatically when complete.
A24-U2 ADC Test – Shows internal A/D converter counts – useful for troubleshooting
weighing issues. End test manually by pressing the NET/GROSS (Set) key.
A24-U3 Input Test – Displays input logic (0 or 1) of input terminal. “0” mean input pin is
grounded; “1” means input pin is open. End test manually by pressing the NET/GROSS
(Set) key.
A24-U4 Output Test – Sets all output pins ‘ON’. End test manually by pressing the
NET/GROSS (Set) key.
A24-U5 Serial Test – Transmits a data string continuously out both serial ports (“TEST1” on
COM1 and “TEST2” on COM2). End test manually by pressing the NET/GROSS (Set) key.
A24-U6 Keyboard Test – Displays a keycode for each key pressed on the keypad. See
Table below. End test manually by pressing the NET/GROSS (Set) key.
Key
Keycode
UNITS 1
ZERO/OFF 2
NET/GROSS 3
TARE 4
ON/PRINT 5
Entering the Bluetooth (“B”) Menu
NOTE: This menu applies to remote wireless A/D systems only.
1. Switch off the display unit by pressing and holding down the ZERO/OFF key for about 5
seconds.
2. Press and hold down the ON/PRINT key (about 20 seconds) until the screen shows
“-F-”.
3. Press the ON/PRINT key until the screen displays “-B-”.
4. Scroll down using the ZERO/OFF (down) key to reach the parameter level. The instrument
shows “B 1”.
5. Move from one “B” parameter to the next by using the TARE (left) or ON/PRINT (right) keys.
For example, to go from B1 to B2, press the ON/PRINT key. To go from B2 back to B1,
press the TARE key.
6. Once you have arrived at the proper “B” menu parameter, e.g. ”B 1”, press the
ZERO/OFF (down) key once to arrive at the selection level. The instrument displays the cur-
rent parameter setting.

13
7. To scroll thru the available parameter settings, use the TARE (left) or ON/PRINT (right)
keys.
8. Once the setting you want is displayed on the screen, press the NET/GROSS (set) key to
save this value and revert back up to the parameter level, e.g. ”B 1”.
9. In order to save all parameter settings, it is imperative to exit all menus in the following
manner: At the parameter level, press the UNITS (up) key twice (two times) to exit the
Bluetooth Menu. The instrument displays ‘SAvE’ and then automatically powers off.
Bluetooth (“B”) Menu Descriptions
This section provides more detailed descriptions of the selections found in the Bluetooth Menu
Chart. Factory-set defaults are shown in bold with a checkmark; (√).
CODE/NAME DESCRIPTION SELECTION LIST
B1
Adjust Load
Cell (Corner)
#1 Factor
This parameter allows you to adjust (‘tweak’) the digital corner com-
pensation factory for load cell/corner #1. Be sure to perform a digital
corner calibration (via B10) before using this procedure. Pressing the
ZERO/OFF key to scroll down one level begins the programming
sequence.
Key-in
0 to 6.5535
1.0000
B2
Adjust Load
Cell (Corner)
#2 Factor
This parameter allows you to adjust (‘tweak’) the digital corner com-
pensation factory for load cell/corner #2. Be sure to perform a digital
corner calibration (via B10) before using this procedure. Pressing the
ZERO/OFF key to scroll down one level begins the programming
sequence.
Key-in
0 to 6.5535
1.0000
B3
Adjust Load
Cell (Corner)
#3 Factor
This parameter allows you to adjust (‘tweak’) the digital corner com-
pensation factory for load cell/corner #3. Be sure to perform a digital
corner calibration (via B10) before using this procedure. Pressing the
ZERO/OFF key to scroll down one level begins the programming
sequence.
Key-in
0 to 6.5535
1.0000
B4
Adjust Load
Cell (Corner)
#4 Factor
This parameter allows you to adjust (‘tweak’) the digital corner com-
pensation factory for load cell/corner #4. Be sure to perform a digital
corner calibration (via B10) before using this procedure. Pressing the
ZERO/OFF key to scroll down one level begins the programming
sequence.
Key-in
0 to 6.5535
1.0000
B6
Restore factory
calibration
Restores factory calibration data. Scrolling down with the ZERO/OFF
key one level begins the procedure.
Press ZERO/OFF
key to begin se-
quence
B8
RFTM Auto
Power Off
This parameter allows you to set the automatic power off timeout for
the TI-500 RFTM.
"0" = Always on "1" = 30 minutes
“2” = 1 hour “3” = 2 hours
0
1
2
3
B9
RFTM Low
Battery Force
Off
This parameter allows you to set the automatic power off timeout in
minutes for the TI-500 RFTM during a low battery condition. Pressing
the ZERO/OFF key to scroll down one level begins the programming
sequence.
Key-in
0 to 99
10
B10
Digital Corner
Calibration
Places instrument into the digital corner calibration routine. Scrolling
down with the ZERO/OFF key one level begins the procedure.
Press ZERO/OFF
key to begin se-
quence

14
SYSTEM CALIBRATION
Calibration Overview
Digital system calibration is accomplished in two steps: zero calibration (F16) and positive span
calibration (F17). A third calibration for negative span calibration is also available via F15. You
can calibrate up to 7 points per side.
Here is the recommended sequence for multiple fixtures and multiple calibration points:
1. Put load cell onto test fixture
2. Go to F17 and press the down key; indicator prompts for the first calibration point
3. key in number 111111 and press NET/GROSS key ; indicator will show “FIT” mo-
mentarily and then automatically record the fixture reference point
4. Follow F17 procedure as written for up to seven calibration points (do not exit F17)
5. Repeat steps 2 thru 6 for negative span calibration (F15)
6. Put the Loadcell onto the final fixture
7. Go to F16 and perform zero calibration
For dual wireless A/D modules systems (e.g. TI-500 RFTM-2BE), a digital corner calibration fea-
ture is also available. It does not require a specific test weight value, but the maximum weight
that should be used is approximately 25% of the rated capacity of the platform.
NOTE: Please perform corner calibration prior to executing zero/span calibration.
Digital Corner Calibration (dual wireless units only)
1. Switch off the force data instrument by pressing and holding the ON/PRINT key for about 5
seconds.
2. Press and hold down the ON/PRINT key (about 20 seconds) until the screen shows “-F-”.
3. Press the ON/PRINT key until the screen displays “-B-”.
4. Scroll down once using the ZERO/OFF key to enter the “Bluetooth” menu. Instrument shows
“B 1”.
5. While in the Bluetooth Setup mode, scroll to "B 10", and then scroll down once using the
ZERO/OFF key to enter corner calibration menu. The instrument will display a value. This
value is the internal A/D count and can prove useful when trying to troubleshoot setup prob-
lems.
6. Remove all items from the weighing platform.
7. Press the NET/GROSS key to save the zero-point value. The display will show "Corn-1".
8. Place the test weight on the load cell/corner #1 of the weighing platform.
9. Wait 2-3 seconds to allow the internal reading to stabilize.
10. Press the NET/GROSS key to save the load cell/corner #1 calibration. The display will show
"Corn-2".
11. Repeat steps 8-10 for the remaining load cells/corners. At the conclusion of corner #4 cali-
bration, the display will show "Set--".
12. Press the NET/GROSS key to finish the corner calibration and revert back up to B10.
13. In order to save all parameter settings, it is imperative to exit all menus in the following
manner: At the parameter level, press the UNITS (up) key twice (two times) to exit the
Bluetooth Menu. The instrument displays ‘SAvE’ and then automatically powers off.

15
Digital Span Calibration (F15 and F17)
You must perform each span calibration point from lowest to highest absolute value.
1. Switch off the instrument by pressing and holding the ON/PRINT key for about 5 seconds.
2. Enter the Setup mode by pressing and holding the ON/PRINT key for about 20 seconds or
until the screen shows “F”.
3. Scroll down once using the ZERO/OFF key to enter the “Setup” menu. Instrument shows “F
1”.
4. While in the Setup mode, scroll to "F 17", and then scroll down once using the
ZERO/OFF key to enter positive span calibration menu. The display will momentarily show
"C 1" for the span calibration point, followed by a value with one flashing digit.
5. Use the four directional keys to adjust the displayed value to 111111 and press the
NET/GROSS (Set) key; indicator will show “FIT” momentarily and then automatically record
the fixture reference point
6. Place the first test weight onto the load cell.
7. Use the four directional keys to adjust the displayed value to the actual test weight value.
Increase the flashing digit by pressing the UNITS key. Decrease the flashing digit by press-
ing the ZERO/OFF key. Pressing the TARE key or the ON/PRINT key will change the posi-
tion of the flashing digit.
8. After entering the exact value, press the NET/GROSS (Set) key to save the value. If the
calibration was successful, the display will show "EndC1" momentarily, followed by "C 2" for
the second calibration point.
9. Repeat steps 7-8 for C2 thru C7. At the conclusion of C7, the instrument displays the cur-
rent gravity settings, e.g. “9.800”.
10. If the local gravity factor is known, then use the up/down and left/right keys to adjust the
displayed value. Otherwise, just press the NET/GROSS key. The display will show “-donE”.
11. Press the NET/GROSS key to revert back up to “F17”.
12. Follow Step 4 thru 11 for negative span calibration (F15) if needed.
13. If the calibration was not successful, one of the error messages below will appear. Take the
indicated action to correct the problem, and then perform a new calibration.
"Err0" - The calibration test weight or the keyed-in weight is larger than the full capacity
of the instrument. Change the calibration test weight or check the input data.
"Err1" - The calibration test weight or the keyed-in weight is smaller than 1% of the full
capacity of the instrument. Change the calibration test weight or check the input data.
"Err2" – There is not enough signal from the load cells to establish a proper calibration.
Most commons causes include incorrect load cell wiring, a mechanical obstruction or a
faulty (damaged) load cell.
In order to save all parameter settings, you must exit all menus in the following manner: At
the parameter level, press the UNITS (up) key twice (two times) to exit the Setup Menu. The
instrument displays ‘SAvE’ and then automatically powers off.

16
Digital Zero Calibration (F16)
1. Switch off the instrument by pressing and holding the ON/PRINT key for about 5 sec-
onds.
2. Enter the Setup mode by pressing and holding the ON/PRINT key for about 20 seconds
or until the screen shows “F”.
3. Scroll down once using the ZERO/OFF key to enter the “Setup” menu. Instrument
shows “F 1”.
4. While in the Setup mode, scroll to "F 16", and then scroll down once using the
ZERO/OFF key to enter zero calibration menu. The display will momentarily show "C 0"
followed by a value. This value is the internal A/D count and can prove useful when try-
ing to troubleshoot setup problems.
5. Remove all items from the weighing platform and press the ZERO/OFF key to zero out
the displayed value.
6. Press the NET/GROSS key to save the zero-point value. The display will show "EndC0"
momentarily, and then revert back up to F16.
Key-in Span Calibration (F20)
1. While in the Setup mode, scroll to "F 20", and then scroll down once using the ZE-
RO/OFF (down) key. The indicator will prompt you to enter the positive rated capacity ‘P
T’.
2. Use the four directional keys to enter in the actual positive rated capacity value.
3. After setting the exact value, press the NET/GROSS (Set) key to save the value. The
indicator will prompt you to enter the positive span in mV/V ‘P S’.
4. Use the four directional keys to enter in the actual positive span value.
5. After setting the exact value, press the NET/GROSS (Set) key to save the value. The
indicator will prompt you to enter the negative rated capacity ‘n T’.
6. Use the four directional keys to enter in the actual negative rated capacity value.
7. After setting the exact value, press the NET/GROSS (Set) key to save the value. The
indicator will prompt you to enter the negative span in mV/V ‘n S’.
8. Use the four directional keys to enter in the actual positive span value.
9. After setting the exact value, press the NET/GROSS (Set) key to save the value.
10. If the entered values are entered successfully, the display will show "E CAL 1" momen-
tarily before reverting back up to F20.
Restore Factory Calibration (B6) – wireless systems only
Caution: This action cannot be undone.
1. Switch off the instrument by pressing and holding the ON/PRINT key for about 5 seconds.
2. Enter the Setup mode by pressing and holding the ON/PRINT key for about 20 seconds or
until the screen shows “F”.
3. Use the ON/PRINT key to change the display to “B”.

17
4. Scroll down once using the ZERO/OFF key to enter the “Bluetooth” menu. Instrument shows
“B 1”.
5. While in the Bluetooth mode, scroll to "B 6”.
6. Press the ZERO/OFF key once; the display says “F-CAL”.
7. To view all of the factory corner calibration values, press the ZERO/OFF key once; the in-
strument automatically displays the calibration values for each corner (1-4) in sequence and
then returns to the “F-CAL” level.
8. To view all of the factory span calibration values, press the UNITS key once; the instrument
automatically displays the following in sequence and then returns to the “F-CAL” level.
Span Point #1 Weight Value
Span Point #1 A/D Count
Span Point #2 Weight Value
Span Point #2 A/D Count
Span Point #3 Weight Value
Span Point #3 A/D Count
9. To exit without restoring the factory calibration values, press the TARE key; the instrument
reverts back up to B6.
10. To restore the factory calibration values, press and hold the NET/GROSS key for 3 sec-
onds; the instrument briefly displays “dOnE” and then reverts back up to B6.
11. In order to save all parameters, it is imperative to exit all menus in the following manner: At
the parameter level, press the UNITS (up) key twice (two times) to exit the Bluetooth Menu.
The instrument displays ‘SAvE’ and then automatically powers off.

18
SERIAL PORT INFO
SERIAL PORT MODES
DEMAND DUPLEX MODE
The Demand Duplex Mode provides a two way serial transmission mode. In this mode,
the output information is transmitted on demand; either by pressing the ON/PRINT key
on the instrument’s front panel or upon receiving a recognized command from a host
device (i.e. computer).
NOTE: Ensure that your cabling contains the proper handshaking.
CONTINUOUS DUPLEX MODE
The Continuous Duplex Mode provides a two-way serial transmission mode. In this
mode, the output information is transmitted continuously making it a popular choice for
remote displays and other remote devices requiring a constant data stream. The trans-
mission automatically occurs at the end of each display update. The instrument will re-
act upon receiving a recognized command from a host device.
RECOGNIZED HOST COMMANDS (applies to both demand and continuous duplex
modes)
“P” - This command is sent to the instrument to print the indicated display.
“Z” - This command is sent to the instrument to zero the instrument.
“C” - This command is sent to the instrument to toggle among the configured units of
measure.
AUTO PRINT MODE
The Auto Print Mode provides a one-time serial transmission once a non-zero, stable
condition is achieved.

19
OUTPUT STRINGS
TEXT PRINT TICKET
The Text Print Ticket is designed specifically for a serial printer.
ID. NO. 123456
GROSS 25.00
lb
DATE 03/01/2011
NOTES:
1. The ID number field is not printed if it is disabled in A7 of the User Menu.
2. The date is not printed if it is disabled in A18 of the User Menu.
STRING FORMAT 1 (Condec Demand String)
String Format 1 is designed for two-way communication.
<STX> <POL> xxxxx.xx <LB/KG> <GR/NT> <CR> <LF>
Polarity:
<SP> = Positive
"–" = Negative
Weight Data
Units:
LB = pound
KG = kilogram
Gross/Net:
GR = Gross
NT = Net
Start
Transmission
Carriage
Return
Line
Feed
<SP> <SP>
SpaceSpace
pc = pieces
cu = cusotm unit
pcs = pieces
NOTE: Additional unit is available: NT = Newtons
oz = ounce
g<space> = grams
lb = pounds
kg = kilograms
This manual suits for next models
2
Table of contents
Other Transcell Technology Measuring Instrument manuals
Transcell Technology
Transcell Technology TI-1680 User manual
Transcell Technology
Transcell Technology TI-1500 Parts list manual
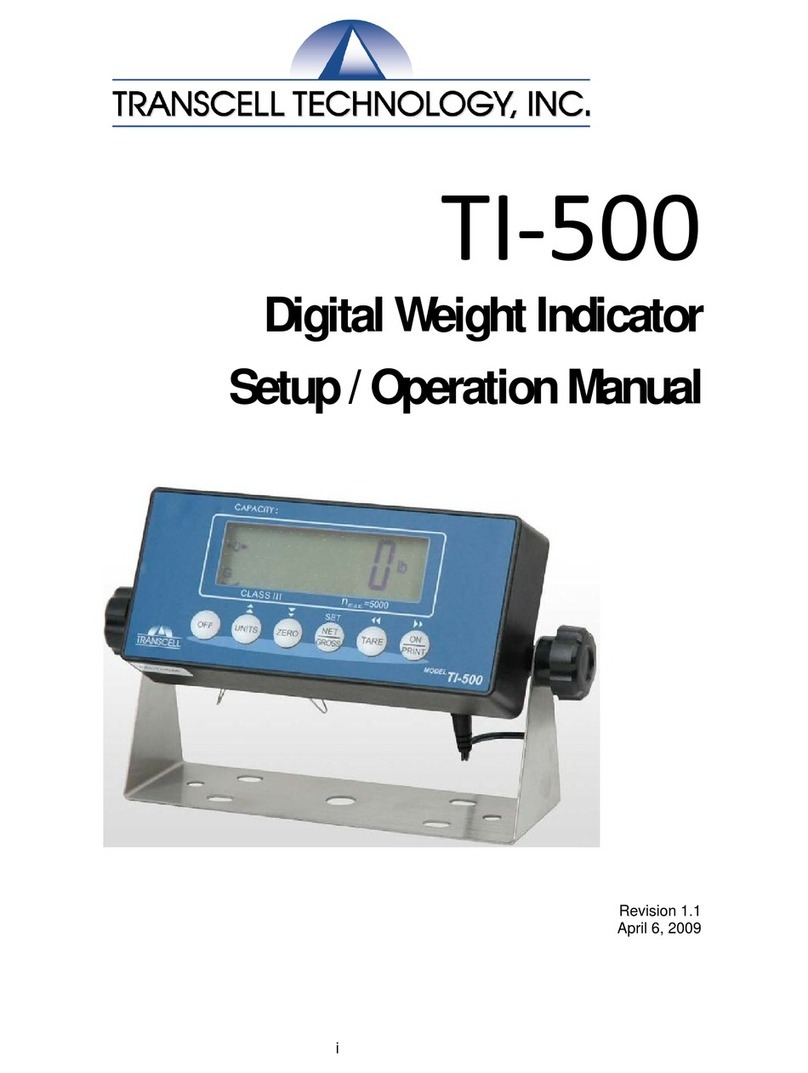
Transcell Technology
Transcell Technology TI-500 Parts list manual
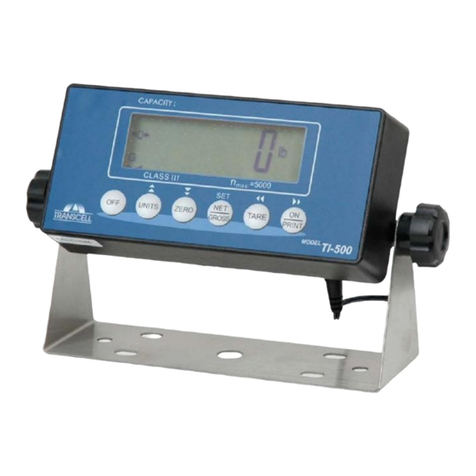
Transcell Technology
Transcell Technology TI-500 User manual

Transcell Technology
Transcell Technology TI-500E3 Parts list manual
Popular Measuring Instrument manuals by other brands

Eaton
Eaton Cutler-Hammer IQ 300 Series Instructions for installation, operation and maintenance
Minebea
Minebea CSD-709 instruction manual

Luxinar
Luxinar MULTISCAN VS user manual
Siemens
Siemens SITRANS F US Hardware installation instructions

Shimpo
Shimpo FG-7000 Operation manual
TESTO
TESTO 625 instruction manual
