Traveler Slimline X5 User manual

EN-1
User’s Manual >>
FCC STATEMENT
This device complies with Part 15 of the FCC Rules. Operation is subject to the
following two conditions:
(1) This device may not cause harmful interference, and
(2) This device must accept any interference received, including interference
that may cause undesired operation.
Note:
This equipment has been tested and found to comply with the limits for Class B
digital devices, pursuant to Part 15 of the FCC rules. These limits are designed
to provide reasonable protection against harmful interference in a residential
installation. This equipment generates uses and can radiate radio frequency
energy and, if not installed and used in accordance with the instructions, may
cause harmful interference to radio communications. However, there is no
guarantee that interference will not occur in a particular installation. If this
equipment does cause harmful interference to radio or television reception,
which can be determined by turning the equipment off and on, the user is
encouraged to try to correct the interference by one or more of the following
measures:
Reorient or relocate the receiving antenna.
Increase the separation between the equipment and receiver.
Connect the equipment into an outlet on a circuit different from that to which
the receiver is connected.
Consult the dealer or an experienced radio/TV technician for help.
Use of shielded cable is required to comply with Class B limits in Subpart B of
Part 15 of the FCC rules.
Do not make any changes or modifications to the equipment unless otherwise
specified in the manual. If such changes or modifications should be made, you
could be required to stop operation of the equipment.

EN-2
Digital Camera >>
READ THIS FIRST
Trademark Information
Microsoft®and Windows®are U.S. registered trademarks of Microsoft
Corporation.
Pentium®is a registered trademark of Intel Corporation.
Macintosh is a trademark of Apple Computer, Inc.
SDTM is a trademark.
Photo Explorer and Photo Express are trademarks.
Other names and products may be trademarks or registered trademarks of
their respective owners.
Product Information
Product design and specifications are subject to change without notice. This
includes primary product specifications, software, software drivers, and user’s
manual. This User Manual is a general reference guide for the product.
The product and accessories that come with your digital still camera may be
different from those described in this manual. This is due to the fact that
different retailers often specify slightly different product inclusions and
accessories to suit their market requirements, customer demographics, and
geographical preferences. Products very often vary between retailers
especially with accessories such as batteries, chargers, AC power adapters,
memory cards, cables, carrying cases/pouches, and language support.
Occasionally a retailer will specify a unique product color, appearance, and
internal memory capacity. Contact your dealer for precise product definition
and included accessories.
The illustrations in this manual are for the purpose of explanation and may
differ from the actual design of your digital still camera.
The manufacturer assumes no liability for any errors or discrepancies in this
user manual.
For user manual and driver updates, refer to our website or contact your
dealer.
EN-3
User’s Manual >>
SAFETY INSTRUCTIONS
Read and understand all Warnings and Cautions before using this product.
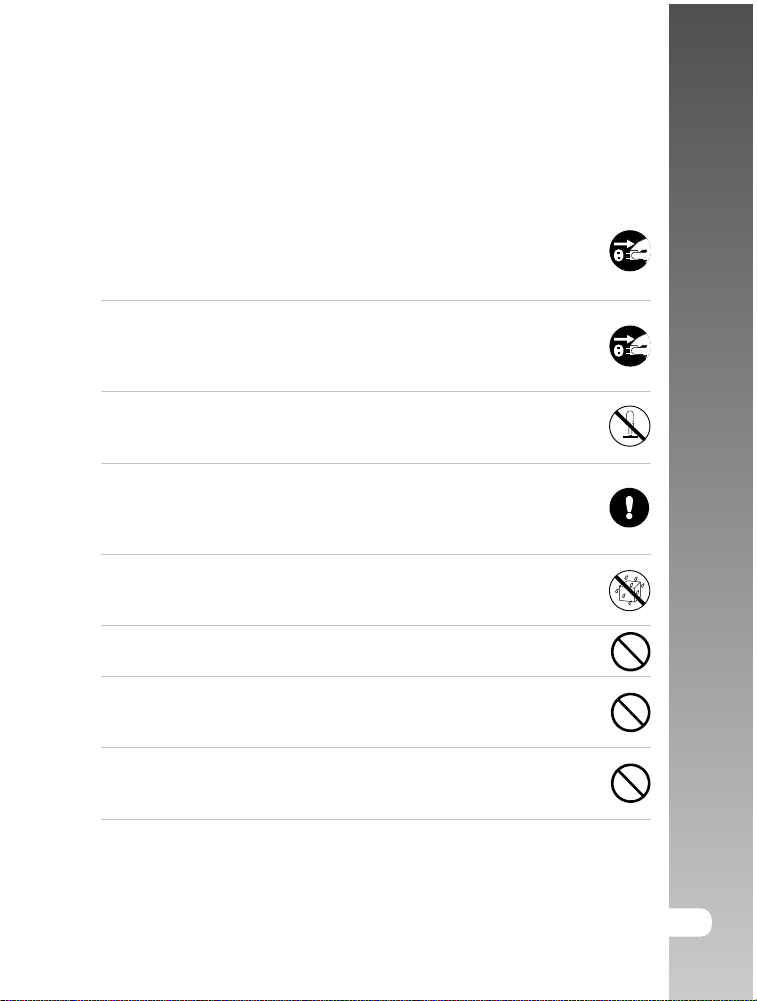
Warning
If foreign objects or water have entered the camera, turn the power
OFF and remove the batteries and the AC power adapter.
Continued use in this state might cause fire or electric shock. Consult
the store of purchase.
If the camera has fallen or its case has been damaged, turn the
power OFF and remove the batteries and the AC power adapter.
Continued use in this state might cause fire or electric shock. Consult
the store of purchase.
Do not disassemble, change or repair the camera.
This might cause fire or electric shock. For repair or internal inspection,
ask the store of purchase.
Use the supplied AC power adapter only with the indicated power
supply voltage.
Use with any other power supply voltage might cause fire or electric
shock.
Do not use the camera in areas near water.
This might cause fire or electric shock. Take special care during rain,
snow, on the beach, or near the shore.
Do not place the camera on inclined or unstable surfaces.
This might cause the camera to fall or tilt over, causing injury.
Keep the battery out of the reach of children.
Swallowing battery might cause poisoning. If the battery is accidentally
swallowed, immediately consult a physician.
Do not use the camera while you are walking, driving or riding a
vehicle.
This might cause you to fall over or result in traffic accident.

EN-4
Digital Camera >>
Caution
Insert the battery paying careful attention to the polarity (+ or –) of
the terminals.
Inserting the battery with its polarities inverted might cause fire and
injury, or damage to the surrounding areas due to the battery rupturing
or leaking.
Do not fire the flash close to anyone’s eyes.
This might cause damage to the person’s eyesight.
Do not subject the LCD monitor to impact.
This might damage the glass on the screen or cause the internal fluid
to leak. If the internal fluid enters your eyes or comes into contact with
your body or clothes, rinse with fresh water. If the internal fluid has
entered your eyes, consult a physician to receive treatment.
A camera is a precision instrument. Do not drop it, strike it or use
excessive force when handling the camera.
This might cause damage to the camera.
Do not use the camera in humid, steamy, smoky, or dusty places.
This might cause fire or electric shock.
Do not remove the battery immediately after long period of
continuous use.
The battery becomes hot during use. Touching a hot battery might
cause burns.
Do not wrap the camera or place it in cloth or blankets.
This might cause heat to build up and deform the case, resulting in
fire. Use the camera in a well-ventilated place.
Do not leave the camera in places where the temperature may rise
significantly, such as inside a car.
This might adversely affect the case or the parts inside, resulting in
fire.
Before you move the camera, disconnect cords and cables.
Failure to do this might damage cords and cables, resulting in fire and
electric shock.

EN-5
User’s Manual >>
Notes on Battery Usage
When you use the battery, carefully read and strictly observe the Safety
Instructions and the notes described below:
Different battery types and surrounding temperatures may affect the battery
performance.
Avoid using batteries in extremely cold environments as low temperatures
can shorten the battery life and reduce camera performance.
Using the new rechargeable battery or rechargeable battery that has not
been used for an extended period of time (the battery that passed the expiry
date is an exception) might affect the number of pictures that can be taken.
Therefore, to maximize its performance and lifetime, we recommend that you
fully charge the battery and discharge it for at least one complete cycle
before use.
The battery may feel warm after long period of continuous use of the camera
or the flash. This is normal and not a malfunction.
The camera may feel warm after long period of continuous use. This is
normal and not a malfunction.
If the battery is not to be used for a long period of time, remove it from the
camera to prevent leakage or corrosion.
If the battery is not to be used for a long period of time, store it after no
battery power left. If the battery is stored for a long time in a fully charged
state, its performance may be impaired.
Always keep the battery terminals in a clean state.
Risk of explosion if battery is replaced by an incorrect type.
Dispose of used batteries according to the instructions.

EN-6
Digital Camera >>
CONTENTS
8 INTRODUCTION
8 Overview
9 Package Contents
10 GETTINGTOKNOWYOUR CAMERA
10 Front View
11 RearView
12 LCD Monitor Information
14 LED Indicators
15 PREPARINGTHECAMERA
15 Installing the Battery
16 Charging the Battery
17 Using an AC Adapter/Charger
17 Attaching the Camera Strap
18 Inserting and Removing an SD Memory Card
19 GETTING STARTED
19 Turning the Power On/Off
20 Setting the Date and Time
21 Choosing the Screen Language
22 Formatting an SD Memory Card or Internal Memory
23 Setting Image Resolution and Quality
25 CAMERA MODE
25 Capturing Images
26 Setting the Scene Mode
28 Using the Optical Zoom
29 Using the Digital Zoom
30 Using the Flash
32 Using the Self-Timer
33 Adjusting the Exposure
34 Setting the White Balance
35 ADVANCED CAPTURE
35 Continuous Capture
36 Auto-Exposure Bracketing (AEB)
37 Adjusting White Balance Manually
38 PLAYBACKMODE-THEBASICS
38 Viewing Images
39 Magnifying Images
40 Thumbnail Display (Index Playback)
41 Slideshow Display
41 Resizing an Image

EN-7
User’s Manual >>
42 MOVIEMODE
42 Recording Video Clips
43 Playing Back Video Clips
44 PLAYBACKMODE-ADVANCEDFUNCTIONS
44 Playing Back Images/Video Clips on TV
45 Deleting Images/Video Clips
46 Protecting Images/Video Clips
47 Setting the DPOF
49 Changing the Camera Startup Screen
50 AUDIOMODE
50 Recording Voice Files
50 Playing Back a Voice File
51 Deleting a Voice File
52 TRANSFERRINGFILESFROMYOUR DIGITALSTILLCAMERA TOCOMPUTER
53 Step 1: Installing the USB driver
54 Step 2: Connecting the digital still camera to your computer
55 Step 3: Downloading images, videos or voice files
56 CONNECTINGTOAPICTBRIDGECOMPLIANTPRINTER
59 USINGTHE DIGITAL STILL CAMERAASA PC CAMERA
59 Step 1: Installing the PC camera driver
60 Step 2: Connecting the digital still camera to your computer
60 Step 3: Running your application software (i.e. Windows NetMeeting)
61 EDITING SOFTWARE INSTALLATION
61 Installing Photo Explorer
62 Installing Photo Express
63 MENUOPTIONS
63 CameraMenu
66 MovieMenu
67 Play Menu
69 Setup Menu (In Camera and Movie Modes)
70 Setup Menu (In Playback Mode)
71 CONNECTINGYOUR CAMERATOOTHERDEVICES
72 SPECIFICATIONS
73 TROUBLESHOOTING

EN-8
Digital Camera >>
INTRODUCTION
Overview
Congratulations on your purchase of the new digital still camera.
Capturing high-quality digital images is fast and easy with this state-of-the-art smart
camera. Equipped with a 5.2 Mega pixels CCD, this camera is capable of capturing
images with a resolution of up to 2560 x 1920 pixels.
2.5” LTPS color LCD monitor
The LCD monitor makes it easy to
frame your subject when capturing
images. It also displays the images
you have captured.
Optical zoom
The 3x optical zoom lens allows
you to capture telephoto and wide-
angle images.
Digital zoom
4x digital zoom in conjunction with
the 3x optical zoom permit zoom
photography of up to 12 times.
Captured images may be reviewed
and a selected portion of an image
may be enlarged up to 8x.
Automatic flash
An auto-flash sensor automatically
detects the shooting (lighting)
conditions and determines
whether the flash should be used.
9MB internal (built-in) memory
You may capture and store
images without the immediate
need for an additional memory
card.
SD memory card support
You may wish to expand the
memory capacity (up to 512MB
capacity) by using a Secure Digital
(SD) memory card.
Camcorder, PC Camera, and
voice-recorder support
USB connection (USB 2.0
compliant)
Still images, video clips, or voice
files that you have recorded can
be downloaded to your computer
using the USB cable (A USB driver
is required for Win 98).
DPOF support
You can print your images on a
DPOF compatible printer by simply
inserting the memory card with
embedded printing information.
PictBridge support
You can connect the camera
directly to a PictBridge compatible
printer and perform image selection
and printing using the camera
monitor screen and controls.
Other features provided by the camera include the following:

EN-9
User’s Manual >>
Package Contents
Carefully unpack your kit box and ensure that you have the following items. In
the event that any item is missing or if you find any mismatch or damage,
promptly contact your dealer.
Common Product Components:
1 x Traveler Slimline X5 Digital Still Camera
1 x Traveler 256MB SD Memory Card
1 x Traveler Conversion adapter
1 x Traveler AC Adapter/Charger
2 x Traveler Rechargeable Lithium-ion Batteries
1 x Traveler Camera Pouch
1 x Software CD-ROM
1 x USB Cable
1 x AV Cable
1 x Camera Strap
1 x User’s Manual
1 x Traveler battery charger
1 x Car adapter for charger
1 x Traveler docking station
EN-10
Digital Camera >>
GETTING TO KNOW YOUR CAMERA
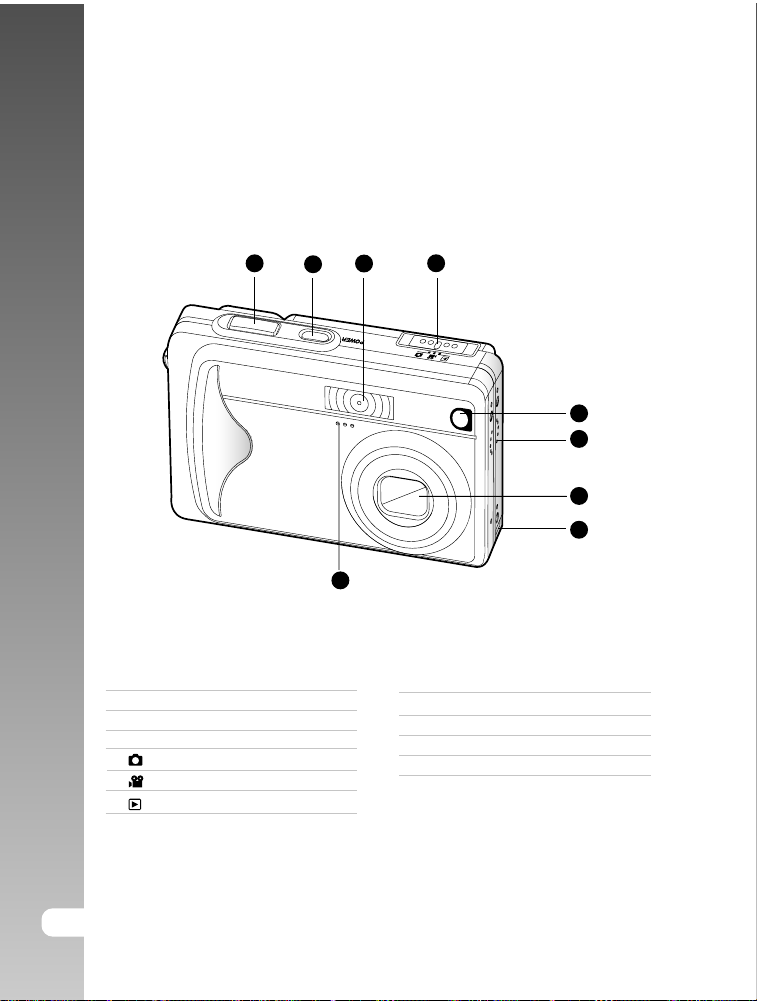
Front View
1 2 3
6
7
4
5
8
9
1. Shutter button
2. POWER Power button
3. Flash
4. Mode switch
Camera mode
Movie mode
Playback mode
5. Self-timer LED (AF auxiliary light)
6. Speaker
7. Lens
8. Conversion adapter terminal
9. Microphone

EN-11
User’s Manual >>
1 2 3
6
7
4
5
8
9
10
Rear View
1. LCD monitor
2. Display button/
Audio mode button
3. Status LED
4. TZoom in (Telephoto) button
WZoom out (Wide-angle) button
5. Menu button
6. Delete button
7. Strap eyelet
8. Control buttons
9. Battery/SD memory card cover
10.Tripod socket
Control Buttons
1
2
3
4
5
1. Flash button
SUp button
2. Exposure compensation/
Backlight correction button
WLeft button
3. Scene mode button
TDown button
4. Self-timer button
XRight button
5. OK Set button

EN-12
Digital Camera >>
T
W
1 2 3 6
7
4
5
8
9
10
16
14
11
15 13 12
LCD Monitor Information
Camera Mode
1. Camera mode
2. Image quality
[] SUPER FINE
[] FINE
[] NORMAL
3. Image size (resolution)
[
5M
] 2560 x 1920
[
3M
] 2048 x 1536
[
M
1.2
] 1280 x 960
[
M
0.3
] 640 x 480
[] TIFF IMAGE
4. Available number of shots
5. SD memory card indicator
(if present)
6. [ ] Adapter indicator/
Battery power indicator
[] Full battery power
[] Medium battery power
[] Low battery power
[] Virtually no battery power
7. Scene mode
[]AUTO
[] PORTRAIT
[] LANDSCAPE
[] NIGHT SCENE
[] SPORTS
[] MACRO
8. Flash mode
[] RED EYE
[] NO FLASH
[] AUTO FLASH
[]FORCED FLASH
9. Self-timer icon (if used)
[] 3-second delay
[] 10-second delay
10.White balance
[AUTO] AUTO
[] DAYLIGHT
[] CLOUDY
[] SUNSET
[] TUNGSTEN
[] FLUORESCENT
11. Capture mode icon
[
S
] SINGLE
[] CONTINUOUS
[
A
] AEB
12. Time
13. Date
14. Focus area
15. [ ] Exposure compensation
[] Backlight correction
16. Zoom status

EN-13
User’s Manual >>
1 2 3
6
4
5
Movie Mode
1. Movie mode
2. Available recording time/Elapsed time
3. Video size
[
VGA
] 640 x 480
[
QVGA
] 320 x 240
4. SD memory card indicator (if present)
5. Battery power indicator
6. Time
7. Date
8. Exposure compensation (no indication
with 0EV)
9. Zoom status
1 2 4
5
9
T
W
678
VGA
3
Playback mode -Image Playback
1. Playback mode
2. Frame number
3. SD memory card indicator (if present)
4. Battery power indicator
5. Image size (resolution)
6. Camera mode
Playback mode -Video Playback
1. Playback mode
2. Frame number
3. Video size
4. SD memory card indicator (if present)
5. Battery power indicator
6. Stop indicator
7. Fast reverse playback indicator
8. Fast forward playback indicator
9. Video status bar
10.Movie mode
1 2 4
10
5
100-0001
8
3
VGA
STOP :
1X
67
9
EN-14
Digital Camera >>
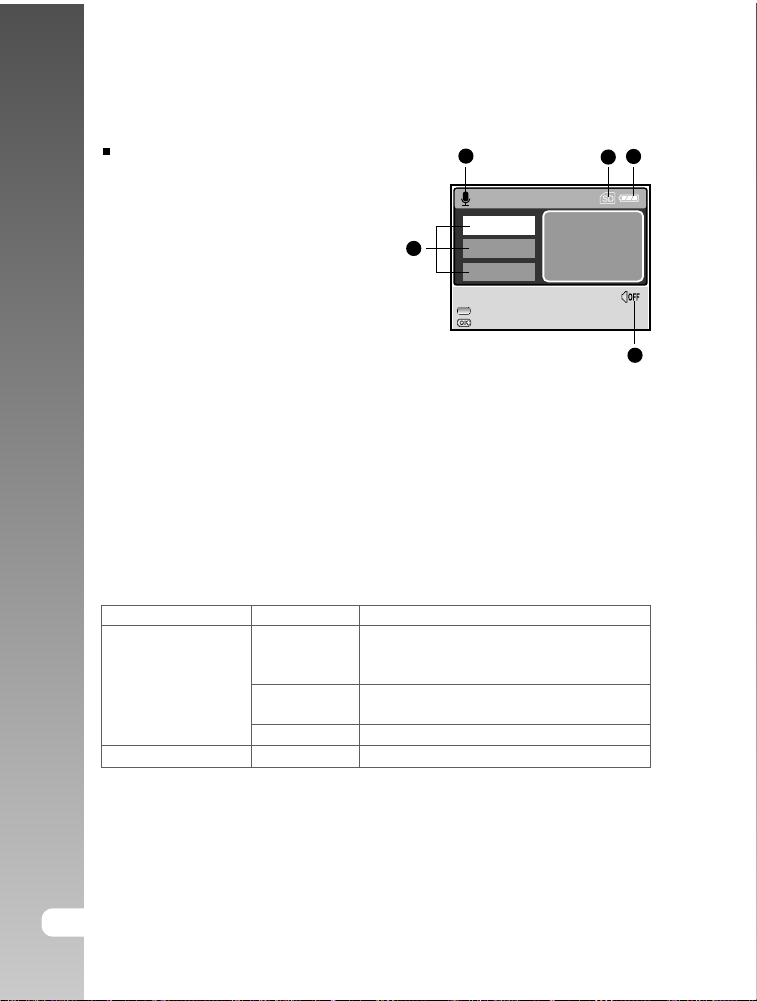
Audio Mode
1. Audio mode
2. SD memory card indicator (if present)
3. Battery power indicator
4. Sound level (speaker volume)
5. Audio file name
:RECORD
AUD_0001
AUD_0002
:PLAY W:VOLUME -
T:VOLUME +
12 3
4
5
SELECT FILE!
AUD_0003
LED Indicators
Indicator Status Description/Activity
1.The digital still camera is powering up.
Solid red 2.The digital still camera is in the process
of battery charge.
Status LED Image is being processed and stored
to memory.
USB communication is in progress.
Self-timer LED Blinking red The self-timer function is activated.
Blinking red
Solid green
EN-15
User’s Manual >>
PREPARING THE CAMERA
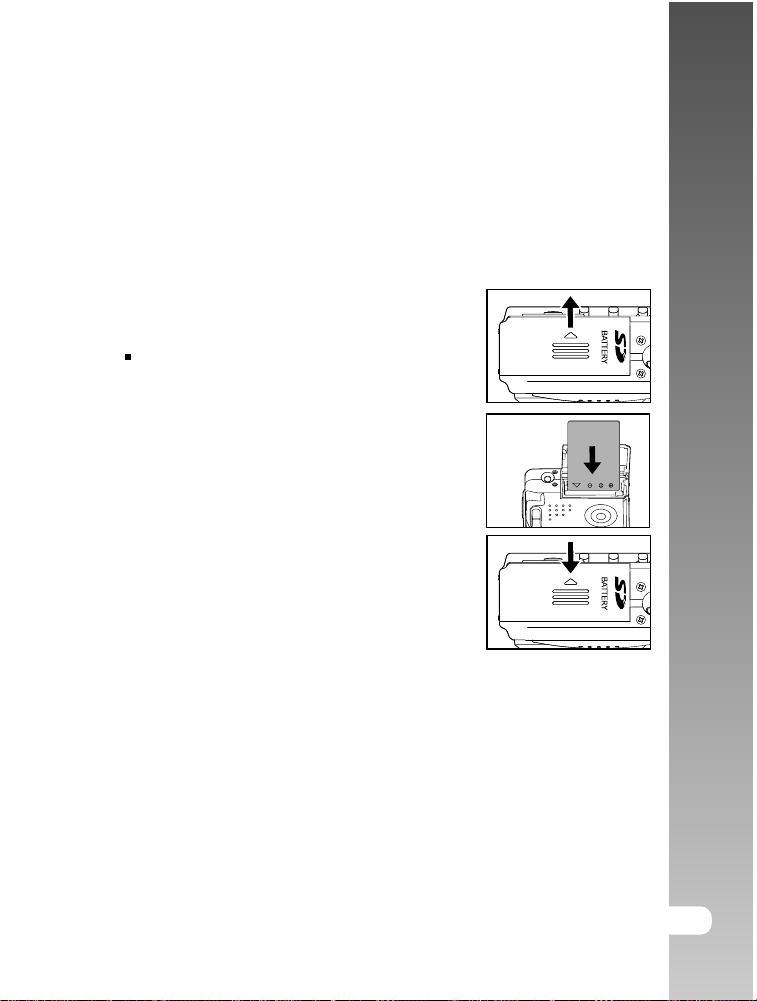
Installing the Battery
We highly recommend you to use the specified rechargeable lithium-ion battery
to realize the full capability of your digital still camera. Make sure that the power
of the digital still camera is off before inserting or removing the battery.
1. Open the battery/SD memory card cover.
2. Insert the battery in the correct orientation
shown.
Tilt the battery lock lever in the
direction of the arrow and orient the
battery so that its label is facing to
the rear side of the camera, and then
insert the battery.
3. Close the battery/SD memory card cover.
To remove the battery
Open the battery/SD memory card cover and then release the battery lock lever.
When the battery has come out a little, slowly pull it out the rest of the way.

EN-16
Digital Camera >>
Charging the Battery
The state-of-charge of the battery will affect the performance of the digital still
camera. To maximize battery performance and lifetime, it is recommended that
you fully charge the battery using the AC adapter/charger and then fully
discharge it (through normal use) at least one time. Make sure that the power of
the digital still camera is off and then insert the battery before starting.
1. Insert the conversion adapter into the
conversion adapter terminal of the
camera as shown in the illustration.
2. Connect one end of the AC adapter/
charger to the DC IN terminal of the
conversion adapter.
3. Connect the other end of the AC
adapter/charger to a wall outlet.
Charging time differs depending on
the ambient temperature and the
status of battery.
The digital still camera must be used with the specified AC adapter/
charger. Damage caused by the use of an incorrect adapter is not
covered under the warranty.
Always make sure that the digital still camera is off before removing the
battery.
The battery may feel warm after it has been charged or immediately after
being used. This is normal and not a malfunction.
When using the digital still camera in cold environments, keep the digital
still camera and its battery warm by holding it inside your jacket or other
warm protective environment.
EN-17
User’s Manual >>
Using an AC Adapter/Charger
Using an AC adapter/charger prevents the digital still camera from automatically
powering off while transferring files to your computer.
Perform the steps in the preceding section "Charging the Battery".
Make sure to use only the AC adapter/charger specified for the camera.
Damage caused by the use of an incorrect adapter is not covered under
the warranty.
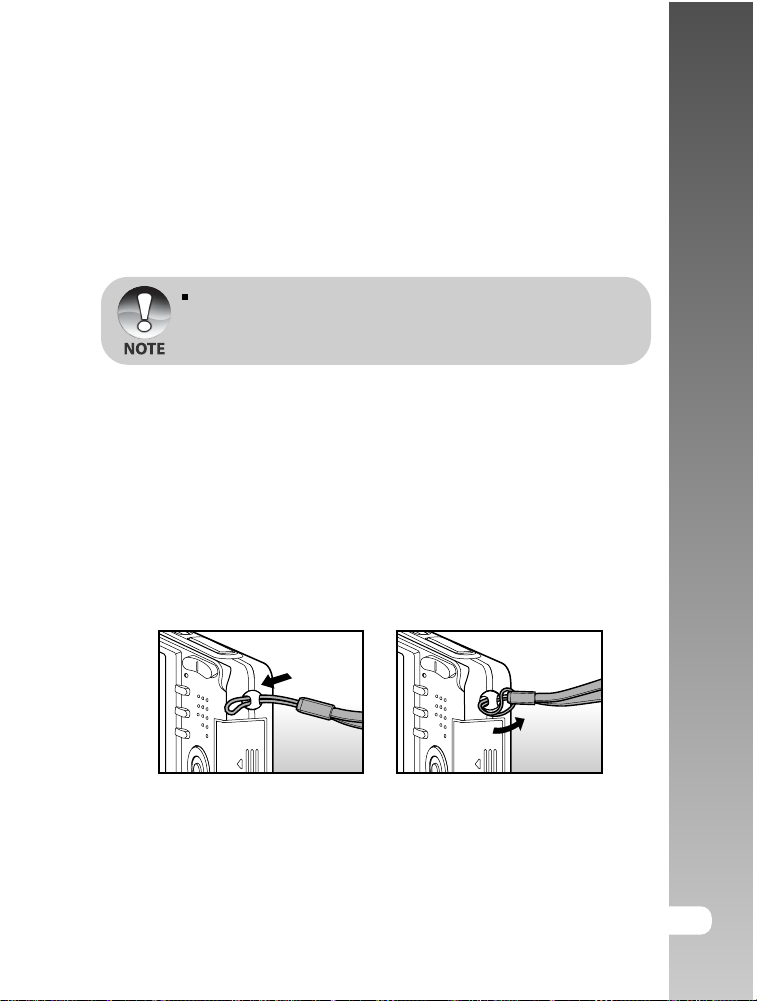
Attaching the Camera Strap
Attach the strap as shown in the illustration.
EN-18
Digital Camera >>
Inserting and Removing an SD Memory Card
You can also expand the memory capacity by using an optional SD (Secure
Digital) memory card so that you can store more files.
1. Always make sure the digital still camera
is turned off before inserting or removing
a memory card.
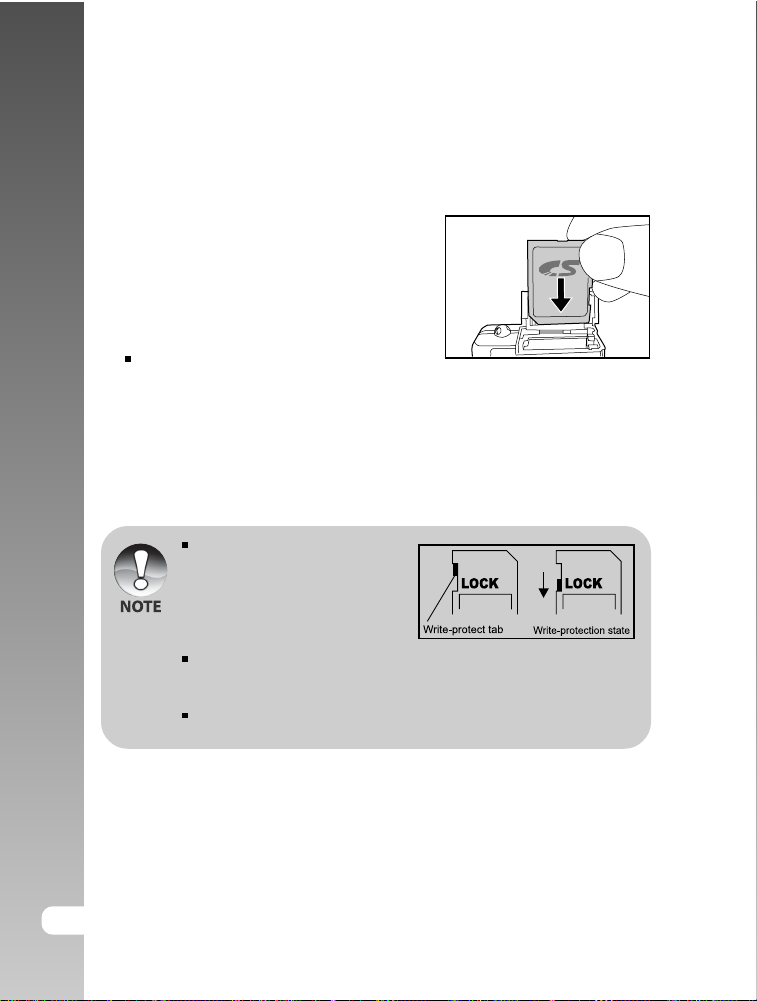
2. Insert an SD memory card in the correct
orientation as shown in the illustration.
3. Close the battery/SD memory card
cover.
To remove the SD memory card,
make sure the camera is turned off.
Press lightly on the edge of the
memory card and it will eject.
Be sure to format an SD memory
card with this digital still camera
before using it. Refer to section
in the manual titled “Formatting
an SD Memory Card or Internal
Memory” for further details.
To prevent valuable data from being accidentally erased from an SD
card, you can slide the write protect tab (on the side of the SD memory
card) to “LOCK”.
To save, edit, or erase data on an SD memory card, you must unlock the
card.
EN-19
User’s Manual >>
GETTING STARTED
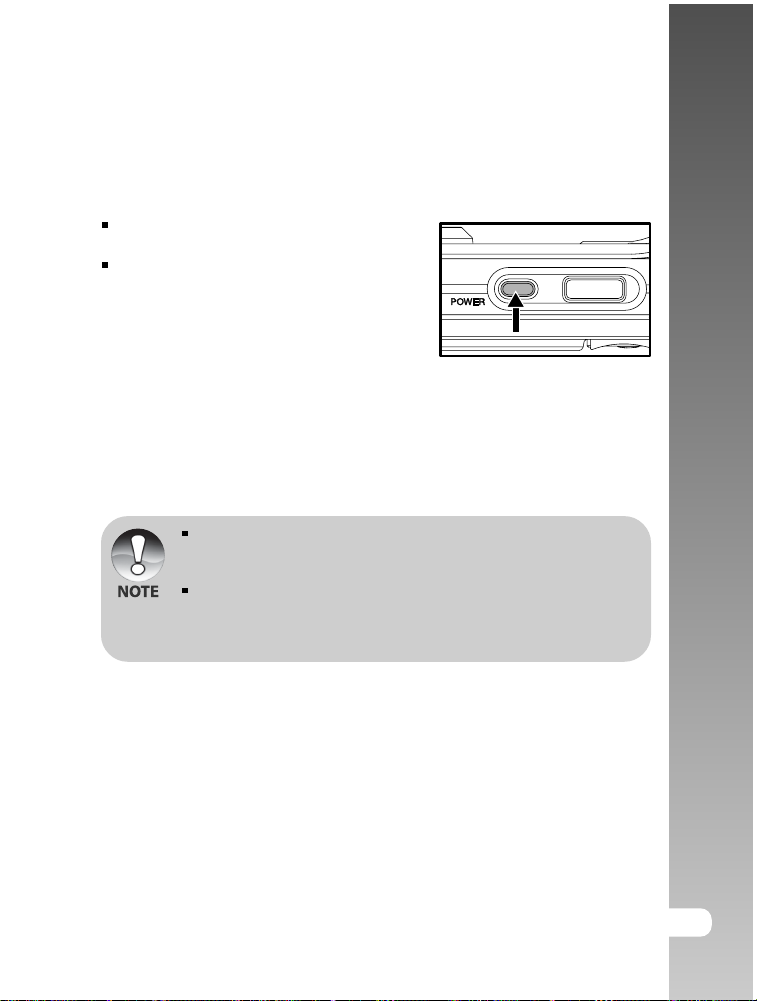
Turning the Power On/Off
Press the POWER button to turn on
your digital still camera.
To turn off your digital still camera, press
the POWER button again.
If the camera goes unused for a certain period of time while the camera
is powered on, the camera will switch to an idle mode, and eventually
turn itself off to conserve power.
The power is turned off automatically when the camera has not been
operated for a defined period time. To resume the operation condition,
turn the power on again. Refer to section in this manual titled "POWER
OFF" in the Setup Menu (In Camera and Movie Modes) for further details.

EN-20
Digital Camera >>
Setting the Date and Time
The date/time setting screen will automatically appear:
When first turning the camera on.
When turning the power on after leaving the camera without battery for an
extended period of time.
1. Press the POWER button to turn on the
camera.
2. Slide the mode switch to [ ].
3. Press the Xbutton to select [SETUP]
menu.
4. Use the S/T/W/Xbuttons to select
[DATE SETUP], then press the OK
button.
5. Press the W/Xbuttons to select the
Year, Month, Day and Time fields.
To increase the value, press the Sbutton.
To decrease the value, press the Tbutton.
The time is displayed in 24-hours format.
6. Press the OK button after all fields are set.
DATE SETUP
SELECT ITEM : SET :
2004.01.01
YMD
00:11
SELECT ITEM:
PLAY
SETUP
SELECT PAGE:
DATE SETUP
NTSC
PAL
ENTRY:
2004.01.03
EXIT:
Y/M/D
Table of contents
Other Traveler Digital Camera manuals

Traveler
Traveler DC 8500 User manual

Traveler
Traveler DC-55 User manual

Traveler
Traveler Super Slim X10 User manual

Traveler
Traveler Z 1400 User manual

Traveler
Traveler Z 2000 User manual

Traveler
Traveler DV-5070 User manual

Traveler
Traveler IS 12 User manual

Traveler
Traveler FX 5 User manual

Traveler
Traveler DC-XZ6 User manual


