Trevi HE 3368 T2 User manual

MINI RICEVITORE
DVB-T2 HD
CON H.265/HEVC
MINI HD DVB-T2
RECEIVER
WITH H.265/HEVC
MINI RICEVITORE DVB-T2 HD PER
RICEZIONE CANALI GRATUITI
DIGITALE TERRESTRE
Manuale d’uso e collegamento
MINI HD DVB-T2 RECEIVER TO
VIEW FREE DIGITAL TERRESTRIAL
CHANNELS
User’s guide
HE 3368 T2
* GX version


3
HE 3368T2
INDICE
1. PREFAZIONE ................................................................................................................................pag. 4
2. PRECAUZIONI DI SICUREZZA.....................................................................................................pag. 4
3. CURA E MANUTENZIONE............................................................................................................pag. 5
4. ALL’INTERNO DELL’IMBALLO.......................................................................................................pag. 5
5. DESCRIZIONE COMANDI RICEVITORE DVB-T2 ........................................................................pag. 5
6. INSTALLAZIONE E COLLEGAMENTI...........................................................................................pag. 6
7. TELECOMANDO
7.1 INSTALLAZIONE......................................................................................................................pag. 6
7.2 DESCRIZIONE COMANDI.......................................................................................................pag. 7
8. PRIMA INSTALLAZIONE ...............................................................................................................pag. 8
9. TELEVISIONE DIGITALE TERRESTRE (DTV)
9.1 OPERAZIONI PRELIMINARI...................................................................................................pag. 8
9.1.1 RICERCA AUTOMATICA DEI CANALI ...........................................................................pag. 8
9.1.2 RICERCA MANUALE DEI CANALI.................................................................................pag. 8
9.1.3 FUNZIONE LCN..............................................................................................................pag. 8
9.1.4 SPOSTAMENTO CANALI MEORIZZATI.........................................................................pag. 9
9.2 VISUALIZZAZIONE CANALI MEMORIZZATI...........................................................................pag. 9
9.3 REGOLAZIONE VOLUME .......................................................................................................pag. 9
10. MENU PRINCIPALE DTV
10.1 MENU PROGRAMMA............................................................................................................pag. 9
10.2 MENU IMMAGINE..................................................................................................................pag. 10
10.3 MENU CERCA.......................................................................................................................pag. 10
10.4 MENU DATA E ORA...............................................................................................................pag. 10
10.5 MENU OPZIONI.....................................................................................................................pag. 11
10.6 MENU SISTEMA....................................................................................................................pag. 11
11. USB................................................................................................................................................pag. 11
11.1 MEDIA CENTRE (MULTIMEDIA)...........................................................................................pag. 11
11.1.1 RIPRODUZIONE VIDEO..............................................................................................pag. 12
11.1.2 RIPRODUZIONE MUSICA...........................................................................................pag. 12
11.1.3 RIPRODUZIONE FOTO...............................................................................................pag. 12
12. TELETEXT DVB-T .........................................................................................................................pag. 12
12.1 RICERCA DI UNA PAGINA....................................................................................................pag. 12
13. PROBLEMI E SOLUZIONI.............................................................................................................pag. 12
14. CARATTERISTICHE TECNICHE...................................................................................................pag. 13
ITALIANO

4
HE 3368T2ITALIANO
1 PREFAZIONE
Grazie per aver acquistato questo prodotto Trevi!
Prima di utilizzarlo si prega di leggere attentamente il seguente manuale d’uso.
Accertarsi che il prodotto non sia danneggiato, in tal caso rivolgersi al venditore.
Controllare che siano presenti tutti gli accessori.
Non aprire l’apparecchio: all’interno non vi sono nè comandi manipolabili dall’utente nè parti di ricambio. Per
tutte le operazioni rivolgersi ad un Centro Assistenza Autorizzato Trevi.
Conservare il seguente manuale d’uso per future consultazioni.
TREVI persegue una politica di continua ricerca e sviluppo, pertanto i prodotti possono presentare caratteristiche
diverse da quelle descritte.
2 PRECAUZIONI DI SICUREZZA
Posizionare l’apparecchio in un luogo areato.
Non coprire le fessure di ventilazione.
L’apparecchio non deve essere esposto a stillicidio o a spruzzi d’acqua. Nessun oggetto pieno di liquido, quali
vasi, deve essere posto sull’apparecchio.
Nessuna sorgente di fiamma nuda, quali candele accese, deve essere posta sull’apparecchio.
I cavi devono essere nascosti e protetti.
Tenere l’apparecchio lontano dai seguenti luoghi:
- vicino a fonti di calore (caloriferi, stufe, raggi diretti del sole, ecc...);
- vicino a zone umide (stanze da bagno, piscine, ecc...);
- zone polverose;
- zone soggette a forti vibrazioni.
Scollegare il cavo di alimentazione durante i temporali o per lunghi periodi di inutilizzo.
Istruire al corretto utilizzo bambini e persone con scarse conoscenze del prodotto.
ATTENZIONE
Questo simbolo riportato sul retro dell’apparecchio ed in questo manuale indicano la
presenza sugli stessi di importanti istruzioni per la sicurezza d’uso. Leggetele attentamente
prima di utilizzare l’apparecchio.
CAUTION
DANGER OF ELECTRIC SHOCK!
DO NOT EXPOSE TO
RAIN OR HUMIDITY
CAUTION: TO REDUCE THE RISK OF ELECTRIC SHOCK, DO NOT REMO-
VE COVER OR BACK. NO USER SERVICEABLE PERTS INSIDE. REFER
SERVICING TO QUALIFIED PERSONNEL ONLY.
ATTENZIONE
RISCHIO DI SCOSSE ELETTRICHE
NON ESPORRE
A PIOGGIA E UMIDITÀ
ATTENZIONE: NON APRIRE L’APPARECCHIO. ALL’INTERNO NON VI SONO
COMANDI MANIPOLABILI DALL’UTENTE NE PARTI DI RICAMBIO. PER
TUTTE LE OPERAZIONI DI SERVIZIO RIVOLGERSI AD UN CENTRO DI
ASSISTENZA AUTORIZZATO TREVI
UKPLUG ONLY
WIRES CONNECTIONSTOATHREE-PIN PLUG
The wires in this mains lead are coloured in accordance
with the following wiring codes:
Blue:...................................... Neutral
Brown:.................................. Live
The wires in this mains lead must be connected to the
terminals in the plug as follows:
Blue wire:............................ N or Black
Brown wire:........................ L or Red
Neither wire is to be connected to the earth (E or W)
terminal of three-pin plug.
Should the fuse fail in the plug remove the plug form
the wall socket and replace the fuse with a 3 Amp.ASTA
approved BS 1362 fuse.

5
HE 3368T2 ITALIANO
5 DESCRIZIONE COMANDI RICEVITORE DVB-T2
1. Ingresso antenna
2. Uscita HDMI (al TV)
3. Uscita SCART (al TV)
4. Cavo alimentazione AC 220-240V~50Hz
5. Sensore infrarosso
6. Indicatore Led di funzionamento (Rosso Stand-by,
Verde acceso)
7. Ingresso USB
5 6
7
4321
3 CURA E MANUTENZIONE
Scollegare l’apparecchio prima di pulirlo.
Non usare solventi o liquidi, ma solo un panno morbido e asciutto.
4 ALL’INTERNO DELL’IMBALLO
Ricevitore DVB-T2
Telecomando Manuale d’uso

6
HE 3368T2
7 TELECOMANDO
7.1 INSTALLAZIONE
Attenzione: batterie non incluse
Aprire il vano batterie posto sul retro del telecomando.
Inserire le batterie (formato AAA) assicurandosi di rispettare la polarità e i segni guida all’interno del vano
batterie.
Richiudere il vano batterie.
Per prevenire la perdita di liquido da parte delle batterie con il conseguente danneggiamento del telecomando,
assicurarsi di installare correttamente le batterie e di non installare tipologie di batterie diverse (vecchie e nuove,
alcaline e zinco-carbone, ecc...).
Rimuovere le batterie dal telecomado se non viene utilizzato per lunghi periodi.
ITALIANO
6 INSTALLAZIONE E COLLEGAMENTI
Collegare il cavo d’antenna 75 ohm all’ingresso antenna.
Collegare l’uscita SCART dell’HE 3368T2 al televisore tramite un cavo SCART (NON INCLUSO NELLA
CONFEZIONE).
Per usufruire al meglio della qualità dell’HE 3368T2 e per poter visualizzare i canali HD ricevuti, collegare
l’uscita HDMI dell’HE 3368T2 al televisore tramite un cavo HDMI (NON INCLUSO NELLA CONFEZIONE).
Collegare il cavo di alimentazione ad una presa elettrica 220-240V~ 50Hz; l’indicatore di accensione (6) posto
frontalmente diventerà Rosso.

7
HE 3368T2
7.2 DESCRIZIONE COMANDI
ITALIANO
1. Tasto POWER, per accendere o portare in modalità
Stand-by l’apparecchio.
2. Tasto MUTE, per escludere momentaneamente l’au-
dio. Premerlo nuovamente o utilizzare i tasti volume
per ripristinare l’audio.
3. Tasto , non attivo.
4. Tasto 4/;PLAY/PAUSE, consente di avviare/
arrestare momentaneamente la riproduzione dei file
multimediali.
5. Non abilitato.
6. Tasto <STOP, consente di arrestare la riproduzione
dei file multimediali.
7. Tasto 9PREV, consente di passare al file multime-
diale precedente + tasto funzione rosso.
8. Tasto :NEXT, consente di passare al file multime-
diale successivo + tasto funzione verde.
9. Tasto8FWD,consente diandare avantivelocenella
riproduzione dei file multimediali + tasto funzione blu.
10. Tasto 7REV, consente di andare indietro veloce
nellariproduzione deifile multimediali+tasto funzione
giallo.
11. Tasto TV/R, consente di passare dai canali TV alle
stazioni Radio e viceversa.
12. Tasto AUDIO;consente di selezionare il canale audio
preferito tra quelli disponibili dal canale TV.
13. Tasto CH+/, consente di selezionare il canale
successivo a quello che si sta guardando/tasto di
navigazione menù alto.
14. Tasto VOL-/, consente di diminuire il volume d’a-
scolto/tasto di navigazione menù sinistra.
15. Tasto VOL+/4, consente di aumentare il volume
d’ascolto/tasto di navigazione menù destra.
16. Tasto OK, perconfermare/attivareuna vocedelmenù,
visualizza la lista dei canali TV.
17. Tasto CH-/, selezione canale precedente a quello
che si sta guardando + tasto di navigazione menù
basso.
18. Tasto MENU, attivazione OSD (menù).
19. Tasto EXIT, consente di uscire dai menù.
20. Tasto PAGE+, consente di portarsi alla pagina suc-
cessiva.
21. Tasto INFO, visualizza le informazioni sulle trasmis-
sioni del canale.
22. Tasto TTX, attivazione dell Teletext (se disponibile).
23. Tasto PAGE-, consente di portarsi alla pagina prece-
dente.
24. Tasto LAST, ritorno all’ultimo canale visualizzato.
25. Tasto SUB, per selezionare la lingua dei sottotitoli
trasmessi (se disponibili).
26. Tastierino numerico (0-9).
27. Tasto TIMER, non abilitato.
28. TastoFAVOR,consentedi accederedirettamente alla
pagina di gestione dei canali preferiti.
.1 .2
.12.11
.9.7
.10.8
.26
.15.14
.16
.13
.5.3
.6.4
.21
.20
.19.18 .17
.24
.23
.22
.25
.28
.27

8
HE 3368T2
8 PRIMA INSTALLAZIONE
Se si utilizza l’unità per la prima volta o si è ripristinata l’unità alle impostazioni di fabbrica, il menu guida all’instal-
lazione apparirà sullo schermo del televisore e verrà richiesto di impostare la configurazione di base del decoder.
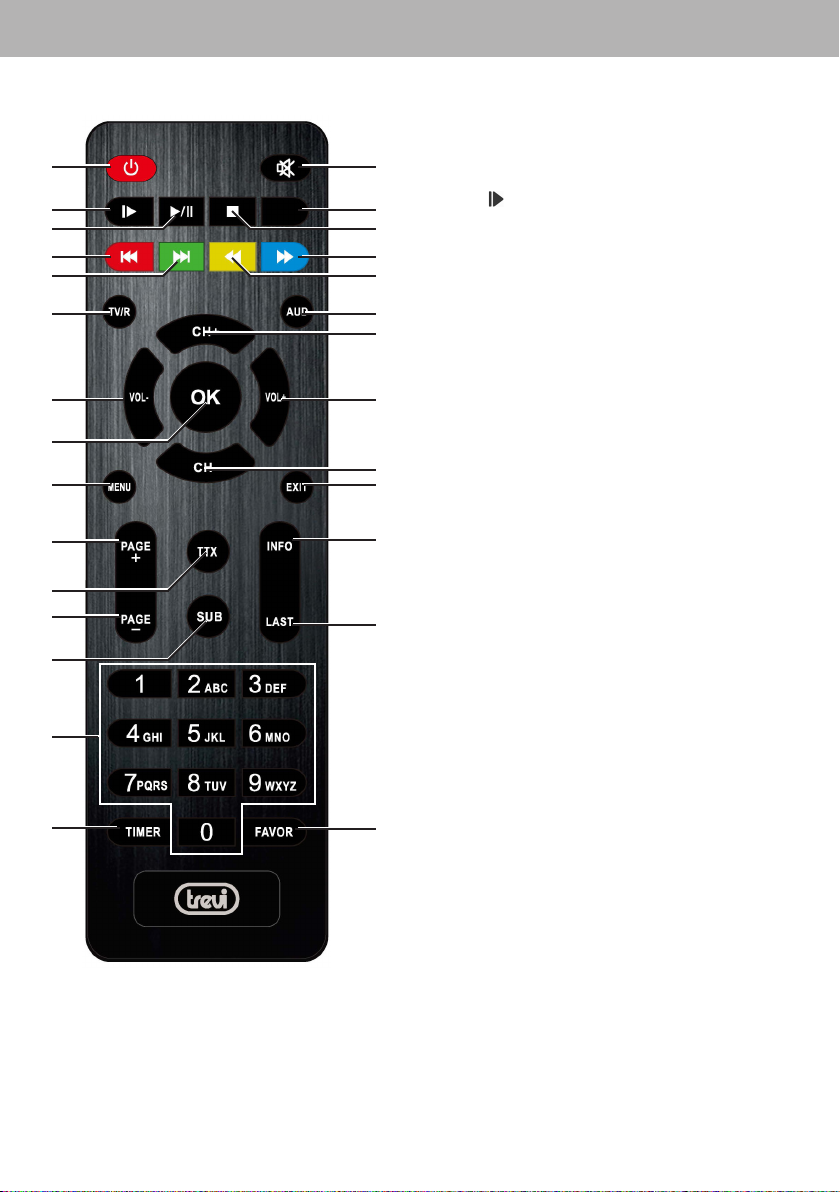
Per navigare all’interno dei menù occorre utilizzare i tasti di navigazione e , premere OK per confermare
la selezione oppure premere il tasto EXIT per uscire.
LINGUA OSD: premere i tasti 4fino a selezionare la lingua del menu desiderata.
PAESE: premere i tasti 4fino a selezionare il paese dove si effettua la scansione dei canali.
Solo FTA: premere i tasti 4per scansionare solo i canali gratuiti (FTA - Free to Air) o tutti i canali (TUTTI).
ALIMENTAZIONE DELL’ANTENNA: premere i tasti 4e selezionare “Accendi” se si utilizza una antenna
esterna che necessita di alimentazione, selezionare “Spegni” se si utilizza una normale antenna da casa
posizionata sul tetto.
CERCA CANALI: premere il tasto OK per avviare la scansione automatica dei canali.
La ricerca inizia automaticamente e vengono memorizzati in maniera progressiva tutti i programmi TV disponibili;
l’operazione richiede alcuni minuti.
È possibile terminare la scansione dei canali digitali premendo il tasto EXIT.
Nota: Al termine della scansione dei canali del digitale terrestre possibile che venga visualizzato lo
stesso canale con frequenze diverse in conflitto di numerazione LCN. Selezionare la frequenza a cui
assegnare il numero LCN e premere il tasto OK per confermare.
9 TELEVISIONE DIGITALE TERRESTRE (DTV)
Per navigare all’interno dei menù occorre utilizzare i tasti di navigazione 4, e , premere il tasto OK
per entrare ed il tasto EXIT per uscire dalle voci menù. Premere il tasto OK per confermare la selezione. Premere
il tasto EXIT per uscire dal menù.
9.1 OPERAZIONI PRELIMINARI
9.1.1 RICERCA AUTOMATICA DEI CANALI
Premere il tasto MENU per entrare nel menu principale;
Premere i tasti 4 fino a selezionare la voce RICERCA CANALI;
Premere i tasti fino a selezionare la voce RICERCA AUTOMATICA;
Premere il tasto OK per avviare la scansione automatica dei canali.
La ricerca inizia automaticamente e vengono memorizzati in maniera progressiva tutti i programmi TV disponibili;
l’operazione richiede alcuni minuti.
Nota: Se il TV visualizza il messaggio “NESSUN SEGNALE” significa che non è stato ricevuto alcun
segnale, occorre quindi verificare il cavo o l’impianto d’antenna.
9.1.2 RICERCA MANUALE DEI CANALI
Consente di sintonizzare manualmente i programmi sul canale desiderato.
Premere il tasto MENU per entrare nel menu principale;
Premere i tasti 4 fino a selezionare la voce RICERCA CANALI;
Premere i tasti fino a selezionare la voce RICERCA MANUALE e premere il tasto OK;
Selezionare il canale su cui effettuare la ricerca manuale tramite i tasti 4. Ad ogni canale corrisponde
una frequenza;
Premere i tasti fino a selezionare la voce AVVIO, premere il tasto OK per avviare la scansione.
Nota: Se selezionando il canale compare il messaggio “NESSUN SEGNALE” significa che su quel
canale non viene trasmesso/ricevuto nessun segnale.
9.1.3 FUNZIONE LCN
Questo decoder è dotato di funzione LCN (Logical Channel Number) che è uno standard a livello nazionale che
assegna i numeri ai canali uguali per tutto il paese in cui si effettua la scansione.
Di fabbrica questa funzione è attiva.
Se a causa del segnale d’antenna la numerazione dei canali non rispetta lo standard nazionale, o si vuole
cambiare la numerazione dei canali a proprio piacimento, occorre disattivare questa funzione e spostare i canali
come descitto precedentemente.
Premere il tasto MENU per entrare nel menu principale;
Premere i tasti 4 fino a selezionare la voce PROGRAMMA;
Premere i tasti fino a selezionare la voce LCN;
Premere i tasti 4 per impostare LCN su SPEGNI;
ITALIANO

9
HE 3368T2 ITALIANO
9.1.4 SPOSTAMENTO CANALI MEMORIZZATI
Consente di spostare la posizione di un canale precedentemente memorizzato.
Premere il tasto MENU per entrare nel menu principale;
Premere i tasti 4 fino a selezionare la voce PROGRAMMA;
Premere i tasti fino a selezionare la voce MODIFICA CANALI. Premere il tasto OK per accedere alla
voce;
Premere il tasto 2;
Premere i tasti fino a selezionare il canale da spostare premendo il tasto OK, verrà visualizzato un
simbolo con due frecce;
Premere i tasti fino a selezionare la destinazione del canale da spostare;
Premere nuovamente il tasto OK per confermare la nuova posizione;
Ripetere le precedenti operazioni per tutti i canali da spostare.
9.2 VISUALIZZAZIONE CANALI MEMORIZZATI
Premere il tasto CH+ per posizionarsi sul canale memorizzato successivo.
Premere il tasto CH- per posizionarsi sul canale memorizzato precedente.
È possibile utilizzare anche il tastierino numerico; per cercare canali a doppia/tripla cifra digitare i numeri che
compongono il canale e attendere il cambio del canale oppure premere il tasto OK per avviare subito il cambio.
Nel caso il cambio canale non avvenga significa che il canale digitato non esiste.
9.3 REGOLAZIONE VOLUME
Premere i tasti VOL-/ ,VOL+/4del telecomando per aumentare/diminuire il volume del decoder.
Premere il tasto MUTE per escludere momentaneamente l’audio, ripremerlo per ripristinarlo.
10 MENU PRINCIPALE DTV
10.1 MENU PROGRAMMA
Premere il tasto MENU per entrare nel menu principale;
Premere i tasti 4 fino a selezionare la voce PROGRAMMA;
Premere i tasti fino a selezionare la voce desiderata e regolarla tramite i tasti 4;
Premere il tasto EXIT per uscire.
Modifica canali
Consente di effettuare operazioni su uno o più canali memorizzati.
1 DEL (ELIMINA): selezionare un canale tramite i tasti e premere il tasto 1 per eliminare il canale dalla
lista. Premere il tasto OK per confermare, sul lato destro comparirà un X.
2 MOVE (SPOSTA): selezionare il canale da spostare tramite i tasti e premere il tasto 2. Verrà visua-
lizzato un simbolo con due frecce.
Premere i tasti fino a selezionare la destinazione del canale da spostare. Premere il tasto OK per
confermare la nuova posizione.
3 SKIP (SALTA): selezionare un canale tramite i tasti e premere il tasto 3.Verrà visualizzato il simbolo
di un quadrato con una freccia. Il canale non verrà visualizzato quando si utilizzano i tasti CH+, CH- per
cambiare canale.
4 LOCK (BLOCCO): Premere il tasto 4. Occorere confermare il blocco inserendo il codice sicurezza (default
000000), selezionare un canale tramite i tasti di navigazione e confermare con il tasto OK. Verrà
visualizzato il simbolo di un lucchetto. Attivando questa funzione il canale potrà essere visionato solo dopo
aver inserito la password di sicurezza.
5 FAV (FAVORITO): Premere il tasto 5, selezionare un canale tramite i tasti e confermare con il tasto
OK, selezionare una delle liste di categorie di preferiti che compariranno (Movies, Music, Cartoons, News,
Sports, Education, ecc...) per inserirlo al suo interno. Selezionare la lista desiderata tramite i tasti
e premere il tasto OK per confermare. L’aggiunta del canale a una delle categorie verrà confermato dalla
presenza di un simbolo a forma di cuore. Per eliminare un canale da una categoaria, ripetere i passaggi e,
posizionandosi sul canale contrassegnato come preferito, togliere il segno di spunta dalla lista dove era stato
memorizzato. L’eliminazione verrà confermata dalla sparizione del simbolo a forma di cuore.
RINOMINA: selezionare un canale tramite i tasti e premere il tasto VERDE per rinominare il canale.
Utilizzare i tasti di navigazione per muoversi e selezionare le lettere o i caratteri sulla tastiera virtuale che
comparirà a video.

10
HE 3368T2
Ordinamento canali
Consente di disporre la lista dei canali in base a determinati parametri. Di fabbrica i canali sono disposti per
numerazione LCN.
LCN
Fare riferimento al paragrafo 9.1.3.
ACU
Funzione per attivare/ disattivare l’aggiornamento automatico dei canali.
Volume Scope
Impostazione livello volume uguale per tutti i canali (Global) o variabile in base al volume specifico di ogni
canale (Canale).
10.2 MENU IMMAGINE
Premere il tasto MENU per entrare nel menu principale;
Premere i tasti 4 fino a selezionare la voce IMMAGINE;
Premere i tasti fino a selezionare la voce desiderata e regolarla tramite i tasti 4;
Premere il tasto EXIT per uscire.
Descrizione delle regolazioni:
PROPORZIONI: consente di scegliere il formato dello schermo tra: Automatico, 16:9 Wide screen (Schermo
panoramico), 16:9 PillarBox, 16:9 Pan Scan,4:3 Leterbox, 4:3 Pan Scan, 4:3 Full (Intero).
RISOLUZIONE: 1080p, 576i, 576p, 720p, 1080i.
FORMATO TV: PAL o NTSC.
TV-SCART: consente di impostare l’uscita Scart come RGB o CVBS.
IMPOSTAZIONI OSD: consente di regolare i paramentri della finestra OSD come: Trasparenza, Luminosità,
Crominanza, Contrasto e il tempo di visualizzazione.
IMPOSTAZIONI DISPLAY: consente di regolare i paramentri del display dell’apparecchio come: il grado di
luminosità, cosa visualizzare (ora o numero del canale) e se mostrare o meno l’ora quando l’apparecchio è
in Stand-by.
10.3 MENU RICERCA CANALI
Premere il tasto MENU per entrare nel menu principale;
Premere i tasti 4 fino a selezionare la voce RICERCA CANALI;
Premere i tasti fino a selezionare la voce desiderata e regolarla tramite i tasti 4;
Premere il tasto EXIT per uscire.
Descrizione delle regolazioni:
SOLO FTA only: per scansionare solo i canali gratuiti (FTA - Free to Air) o tutti i canali (TUTTO).
RICERCA AUTOMATICA: premere il tasto OK per avviare la scansione automatica dei canali.
La ricerca inizia automaticamente e vengono memorizzati in maniera progressiva tutti i programmi TV dispo-
nibili; l’operazione richiede alcuni minuti.
RICERCA MANUALE: selezionare il canale su cui effettuare la ricerca manuale tramite i tasti 4. Ad ogni
canale corrisponde una frequenza. Premere il tasto OK per avviare la scansione.
PAESE: premere i tasti 4 per selezionare il paese dove si effettua la scansione.
ALIMENTAZIONE DELL’ANTENNA: premere i tasti 4 per attivare/disattivare la funzione per l’utilizzo di
un’antenna amplificata nella ricezione e scansione dei canali.
10.4 MENU DATA E ORA
Premere il tasto MENU per entrare nel menu principale;
Premere i tasti 4 fino a selezionare la voce DATA E ORA;
Premere i tasti fino a selezionare la voce desiderata e regolarla tramite i tasti 4;
Premere il tasto EXIT per uscire.
ITALIANO

11
HE 3368T2 ITALIANO
Descrizione delle regolazioni:
IMPOSTAZIONI DATA E ORA: consente di impostare la città, il fuso orario e l’attivazione o meno dell’ora
legale.
AUTO SPEGNIMENTO: si imposta lo spegnimento automatico del decoder in caso di inattività da parte
dell’utente.
Premere i tasti di navigazione 4 fino a selezionare dopo quanto tempo il decoder si deve spegnere; si
può scegliere da 1 fino a 12 ORE o SPEGNI (decoder sempre acceso).
ACCENDI/SPEGNI: si imposta l’accensione e/o lo spegnimento in base ad una pianificazione oraria.
10.5 MENU OPZIONI
Premere il tasto MENU per entrare nel menu principale;
Premere i tasti 4 fino a selezionare la voce OPZIONI;
Premere i tasti fino a selezionare la voce desiderata e regolarla tramite i tasti 4;
Premere il tasto EXIT per uscire.
Descrizione delle regolazioni:
LINGUA OSD: consente di cambiare la lingua dell’OSD (menu).
LINGUA EPG: consente di cambiare la lingua dell’EPG.
LINGUA DEI SOTTOTITOLI: consente di modificare la lingua dei sottotitoli predefinita del DVBT.
SOTTOTITOLI PER NON UDENTI: Attivazione/ disattivazione sottotitoli descrittivi per persone con problemi
di udito (se trasmesso dal canale TV).
LINGUA TTX: Impostazione lingua Teletext.
LINGUA AUDIO PRINCIPALE: consente di modificare la prima lingua d’ascolto predefinita del DVBT.
LINGUA AUDIO SECONDARIA: consente di modificare la seconda lingua d’ascolto predefinita del DVBT.
10.6 MENU SISTEMA
Premere il tasto MENU per entrare nel menu principale;
Premere i tasti 4 fino a selezionare la voce SISTEMA;
Premere i tasti fino a selezionare la voce desiderata e regolarla tramite i tasti 4;
Premere il tasto EXIT per uscire.
Descrizione delle regolazioni:
CONTROLLO PARENTALE: consente di selezionare il livello di blocco desiderato in base all’età. Si può
scegliere tra Spento e da livello 4 fino a livello 18. Occorre inserire la password di sicurezza.
CONTROLO ACCESSI: consente di cambiare la password di sicurezza. È necessario inserire il vecchio
codice e poi il nuovo, e riconfermare il nuovo codice (default: 000000).
RIPRISTINO DATI DI FABBRICA: consente di riportare le impostazioni del TV alle condizioni iniziali (imposta-
zioni di fabbrica). Occorre inserire la password di sicurezza e confermare con il tasto OK l’avvio del ripristino
del sistema. Il TV riporterà i valori alle condizioni iniziali e resetterà la lista dei canali.
INFORMAZIONI DI SISTEMA: consente di visualizzare la versione del software del TV.
AGGIORNAMENTO SOFTWARE: consente di aggiornare il software del TV attraverso l’ingresso USB.
11 USB
Inserire un dispositivo USB nell’ingresso USB;
Premere il tasto MENU per entrare nel menu principale;
Premere i tasti 4 fino a selezionare la voce USB;
Premere i tasti fino a selezionare la voce desiderata e regolarla tramite i tasti 4.
11.1 MEDIA CENTRE (MULTIMEDIA)
Selezionare una delle 4 categorie disponibili: FILE (per visualizzare tutti ifile presenti sulla chiavetta esterna),
VIDEO (per visionare file video), MUSICA (per ascoltare file audio), IMMAGINE (per visualizzare file imma-
gine);
Confermare il tipo di file che si desidera visionare premendo il tasto OK;
Sulla sinistra dello schermo verrà visualizzato il contenuto della memoria del dispositivo USB. Selezionare il
file da riprodurre tramite i tasti e premere il tasto OK per avviare la riproduzione;
Premere il tasto EXIT per tornare alla schermata precedente.

12
HE 3368T2ITALIANO
11.1.1 RIPRODUZIONE VIDEO
Durante la riproduzione di un file video è possibile eseguire una serie di operazioni.
Premere il tasto4/;per arrestare momentaneamente la riproduzione del file video; ripremerlo per ripren-
derla.
Premere il tasto 7o 8per indietreggiare o avanzare velocemente la riproduzione.
Premere il tasto 9o :per riprodurre il file video precedente o successivo.
Premere il tasto <per arrestare la riproduzione del file video.
Premere il tasto tasto ROSSO per configurare le impostazioni di riproduzione.
11.1.2 RIPRODUZIONE MUSICA
Durante la riproduzione di un file musicale è possibile eseguire una serie di operazioni.
Premere il tasto4/;per arrestare momentaneamente la riproduzione del file musicale; ripremerlo per ripren-
derla.
Premere il tasto 7o 8per indietreggiare o avanzare velocemente la riproduzione.
Premere il tasto 9o :per riprodurre il file musicale precedente o successivo.
Premere il tasto <per arrestare la riproduzione del file musicale.
Premere il tasto tasto ROSSO per configurare le impostazioni di riproduzione.
11.1.3 RIPRODUZIONE FOTO
Durante la riproduzione di un file immagine è possibile eseguire una serie di operazioni.
Premere il tasto4/;per avviare lo slideshow (riproduzione automatica) dei file immagine presenti nella cartella.
Premere il tasto <per arrestare la riproduzione del file immagine.
Premere il tasto tasto ROSSO per configurare le impostazioni di riproduzione dei file immagine.
- DURATA: consente di impostare il tempo di permanenza dul display del file immagine.
- PLAY MODE: consente di impostare la modalità di visualizzazione.
12 TELETEXT DVB-T
Il Teletext è un sistema di di informazioni trasmesso da alcune emittenti che si consulta come un giornale, sfo-
gliandolo pagina per pagina.
Premere il tasto TTX per attivare il Teletext;
Sullo schermo apparirà il sommario con le varie rubriche formate da pagine di tre cifre;
Premere il tasto EXIT per uscire dal Teletext.
12.1 RICERCA DI UNA PAGINA
Comporre il numero di pagina voluta con il tastierino numerico. Digitare le tre cifre che compongono il numero
della pagina (per esempio “201”) premendo in sequenza il numero “2” - “0” - “1”, il numero viene visualizzato in
alto a sinistra, il conta pagine inizia la ricerca, la pagina viene visualizzata.
Per consultare un’altra pagina ripetere l’operazione.
13 PROBLEMI E SOLUZIONI
Se il vostro decoder non funziona correttamente controllare questa breve lista prima di portare il decoder presso
un centro assistenza autorizzato TREVI.
In ogni caso non tentare di riparare l’apparecchio da soli, questo farebbe decadere la garanzia. Solo i centri
assistenza tecnica TREVI sono autorizzati ad eseguire interventi su questo apparecchio.
Assenza di immagine
Controllare il collegamento d’antenna.
Controllare il corretto inserimento dei cavi.
Immagine scadente o nessun segnale
Controllare il cavo d’antenna.
Effettuare una ricerca manuale dei canali.

13
HE 3368T2
Assenza di suono
Controllare che non sia inserita la funzione MUTE.
Regolare il volume.
Solo audio, nessuna immagine
Il televisore non supporta la risoluzione Video del programma.
Il programma è un programma radiofonico, premere il tasto TV/Radio per passare alla modalità TV.
ll decoder si spegne automaticamente
È stato impostato lo Standby automatico (vedi voce AUTO SPEGNIMENTO al paragrafo 10.4).
Il telecomando non funziona
Sostituire le batterie.
I comandi non rispondono
Scollegare la presa d’alimentazione dell’apparecchio per 30 secondi per effettuare un reset.
14 CARATTERISTICHE TECNICHE
Alimentazione 110-240V 50/60Hz
Assorbimento 8W Max/ Stand-by <0,5W
Range di frequenza VHF: da 174MHz a 230MHz
UHF: da 470MHz a 862MHz
Larghezza di banda 7/8MHz
Impedenza d’ingresso 75 Ohm
Formato schermo 4:3 e 16:9
Decoding video MPEG-2 (MP@ e MP@HL)/
MPEG-4, H.264/AVC (HP@L4), HEVC (H.265) 10bit
Decoding audio MPEG-1 Layer I&II&III, MPEG-4 e HE-AACv2
Ingresso USB 2.0
File Media supportati MP3, JPEG, BMP, AVI, MKV
Dimensioni 140x83x28.5mm
Peso (senza accessori) 180g
INFORMAZIONI AGLI UTENTI ai sensi del Decreto Legislativo N° 49 del 14 Marzo 2014
“Attuazione della Direttiva 2012/19/UE sui rifiuti di apparecchiature elettriche ed elettroniche (RAEE)”
Il simbolo del cassonetto barrato riportato sull’apparecchiatura indica che il prodotto alla fine della propria vita
utile deve essere raccolto separatamente dagli altri rifiuti. L’utente dovrà, pertanto, conferire l’apparecchiatura
integra dei componenti essenziali giunta a fine vita agli idonei centri di raccolta differenziata dei rifiuti elettronici
ed elettrotecnici, oppure riconsegnarla al rivenditore al momento dell’acquisto di nuova apparecchiatura di tipo
equivalente, in ragione di uno a uno, oppure 1 a zero per le apparecchiature aventi lato maggiore inferiore a 25
cm. L’adeguata raccolta differenziata per l’avvio successivo dell’apparecchiatura dimessa al riciclaggio, al trat-
tamento e allo smaltimento ambientale compatibile contribuisce ad evitare possibili effetti negativi sull’ambiente
e sulla salute e favorisce il riciclo dei materiali di cui è composta l’apparecchiatura. Lo smaltimento abusivo del
prodotto da parte dell’utente comporta l’applicazione delle sanzioni amministrative di cui al D.Lgs n. Decreto
Legislativo N° 49 del 14 Marzo 2014.
ITALIANO

14
HE 3368T2ENGLISH
1 FOREWORD
Thank you for purchasing this Trevi product!
Before using it, please read the following user manual carefully
Make sure the product is not damaged, if so, contact the seller.
Check that all accessories are present.
Do not open the device: inside there are no controls that can be manipulated by the user or spare parts. For
all operations, contact an Authorized Trevi Service Center.
Keep the following user manual.
TREVI pursues a policy of continuous research and development, therefore the products may have different
characteristics from those described.
2 SAFETY PRECAUTIONS
Place the appliance in an airy place.
Do not cover the ventilation slots.
The appliance must not be exposed to dripping or splashing water. No objects filled with liquid, such as vases,
must be placed on the appliance.
No naked flame sources, such as lighted candles, must be placed on the appliance.
Cables must be hidden and protected.
Keep the appliance away from the following places:
- near heat sources (radiators, stoves, direct sunlight, etc...);
- near wet areas (bathrooms, swimming pools, etc...);
- dusty areas;
- areas subject to strong vibrations.
Unplug the power cord during lightning storms or for long periods of non-use.
Instruct children and people with little knowledge of the product to use it correctly.
ATTENTION
This symbol shown on the back of the device and in this manual indicate the presence
on the same of important instructions for safe use. Read them carefully before using the
appliance.
3 CARE AND MAINTENANCE
Unplug the appliance before cleaning it.
Do not use solvents or liquids, only a soft, dry cloth.
4 INSIDE THE PACKAGING
DVB-T2 Receiver
Remote control User Manual

15
HE 3368T2 ENGLISH
5 DESCRIPTION OF DVB-T2 RECEIVER COMMANDS
1. Antenna input
2. HDMI output (to TV)
3. SCART output (to TV)
4. Power cable AC 220-240V~50Hz
5. Infrared sensor
6. Power indicator (Red Stand-by, Green on)
7. USB input
6 REMOTE CONTROL
6.1 INSTALLATION
Attention: batteries not included
Open the battery compartment on the back of the remote control.
Insert the batteries (size AAA) making sure to respect the polarity and the guide marks inside the battery
compartment.
Close the battery compartment.
To prevent the batteries from leaking with consequent damage to the remote control, be sure to install the
batteries correctly and not to install different types of batteries (old and new, alkaline and zinc-carbon, etc...).
Remove the batteries from the remote control if it is not used for long periods.
5 6
7
4321

16
HE 3368T2ENGLISH
6.2 COMMANDS DESCRIPTION
1. POWER button, to Turn On/Stand-by the unit.
2. MUTE button, to switch On/Off volume.
3. button, not enabled.
4. 4/;PLAY/PAUSE button,usedformultimediafiles.
5. Not enabled.
6. <STOP button, for multimedia files.
7. 9PREV button, skip previous track + Red button
function.
8. :NEXT button, skip next track + Green button
function.
9. 8FWD button, fast forward + Blu button function.
10. 7REV button, fast back + Yellow button function.
11. TV/R button, switch between digital radio and DVB-T.
12. AUDbutton, toselect yourfavorite audio channel from
those available from the TV channel.
13. CH+/button, to select next channel, press to move
the cursor.
14. VOL-/button, to decrease volume, ress to move
the cursor.
15. VOL+/4button, to increase volume, press to move
the cursor.
16. OK button,toconfirm current setting,ordisplaychannel
list in no-menu mode.
17. CH-/button, to select previous channel, press to
move the cursor.
18. MENU button, display main menu on TV screen, and
press again to disappear menu.
19. EXIT button, to quit current menu.
20. PAGE+ button.
21. INFO button, display information about the current
channel.
22. TTX button, switch on teletext, if current channel has
this option, and use EXIT key to quit teletext.
23. PAGE- button.
24. LAST button, return to previous channel.
25. SUB button, display subtitle options (availability de-
pends on the channel).
26. Numeric keys (0-9).
27. TIMER button, not enabled.
28. FAVOR button, displays your favorite channels list;
press FAVOR again to access to the other favorite
lists.
.1 .2
.12.11
.9.7
.10.8
.26
.15.14
.16
.13
.5.3
.6.4
.21
.20
.19.18 .17
.24
.23
.22
.25
.28
.27

17
HE 3368T2 ENGLISH
7 FIRST TIME INSTALLATION
After all connections have been make sure the unit is connected to the Main power. Press power button to switch
On the unit.
If you are using the unit for the first time or have restored the unit to factory default, the installation guide menu
will appear on your TV screen.
To navigate the menus, use the navigation keys and , press OK to confirm the selection or press the EXIT
button to exit.
OSD LANGUAGE: press 4 key to select a language.
COUNTRY: press 4 key to select your country of residence.
FTA ONLY: press 4 key to scan only free channels (FTA - Free to Air) or all channels (ALL).
CHANNEL SEARCH: press 4or OK key to begin Automatic channel search.
Once channel tuning is complete, you can start watching TV programs.
You can finish scanning for digital channels by pressing the EXIT button.
Note: At the end of the digital terrestrial channel scan, the same channel with different frequencies
in conflict of LCN numbering may be displayed. Select the frequency to assign the LCN number and
press the OK button.
8 DIGITAL TERRESTRIAL TELEVISION (DTV)
To navigate the menus, use the navigation keys 4, and , press the OK key to enter and the EXIT key
to exit the menu items. Press the OK button to confirm the selection. Press the EXIT button to exit the menu.
8.1 BASIC OPERATION
8.1.1 AUTO SEARCH
This option will automatically search for channels and save them once the scanning is complete. All previously
saved channels and settings will be deleted.
Press MENU button to enter the main menu;
Press 4 keys and select SEARCH;
Press keys and select AUTO SEARCH;
Press OK button to start automatic channel scan.
To cancel channel search, press EXIT. Any channels that have been found will be saved.
Note: If the TV displays “NO SIGNAL” message, it means that it is not receiving any TV signal, so you
have to check aerial cable and connections.
8.1.2 MANUAL SEARCH
This option allows you to scan for new channels without deleting previously saved channels and settings.
Press MENU button to enter the main menu;
Press 4 keys and select SEARCH;
Press keys to select MANUAL SEARCH and press OK or 4, the channel search screen will appear;
Press 4 keys to select the channel frequency;
Press keys to select START and press OK button to start searching channels.
If a channel is found it is saved and added to the channels list. If channels can not be found during searching
the unit will exit automatically.
Note: If the message “NO SIGNAL” appears when selecting the channel, it means that no signal is
transmitted on that channel.
8.1.3 LCN FUNCTION
This decoder is equipped with the Logical Channel Number (LCN) function which is a national standard that
assigns numbers to the same channels throughout the country where you are scanning.
This function is enabled by default.
If due to the antenna signal the channel numbering does not comply with the national standard, or you want to
change the channel numbering to your liking, you must disable this function and move the channels as described
above.
Press MENU button to enter the main menu;
Press 4 keys to select PROGRAM;
Press keys to select LCN;
Press 4 keys to set the LCN to OFF.

18
HE 3368T2ENGLISH
9 SYSTEM SETTING
9.1 PROGRAM MENU
Press MENU button to enter the main menu;
Press 4 keys to select PROGRAM;
Press keys until the desired item is selected and adjust it using the buttons 4;
Press EXIT button to exit.
Channel Edit
Allows you to perform operations on one or more stored channels.
1 DEL: select a channel using the keys and press the 1 key to delete the channel from the list. Press
the OK button to confirm, an X will appear on the right side.
2 MOVE: select the channel to be moved using the keys and press the 2 key. A symbol with two arrows
will be displayed.
Press the keys until the destination of the channel to be moved is selected. Press the OK button to
confirm the new position.
3 SKIP: select a channel using the keys and press the 3 key to activate the SKIP function. A square
symbol with an arrow will appear. The channel will not be displayed when using the CH+, CH- buttons to
change channels.
4 LOCK: Press key 4. Confirm the lock by entering the security code (default 000000), select a channel using
the navigation keys and confirm with the OK key. A padlock symbol will be displayed. By activating this
function, the channel can only be viewed after entering the security password.
5 FAV: Press key 5, select a channel using the keys and confirm with the OK key, select one of the lists
of favorite categories that will appear (Movies, News, Sport, Music) to add it to its indoor. Select the desired
list using the keys and press the OK key to confirm.The addition of the channel to one of the categories
will be confirmed by the presence of a heart-shaped symbol.To delete a channel from a category, repeat the
steps and, positioning on the channel marked as favorite, remove the check mark from the list where it was
stored. The elimination will be confirmed by the disappearance of the heart-shaped symbol.
RENAME: select a channel using the keys and press the GREEN button to rename the channel. Use
the numeric keypad and the indications that appear on the screen.
Sort
Allows you to arrange the channel list according to certain parameters. In the factory, the channels are arranged
by LCN numbering.
LCN
This decoder is equipped with the Logical Channel Number (LCN) function which is a national standard that
assigns numbers to the same channels throughout the country in which you are scanning.
This function is enabled by default.
ACU
Function to activate/ deactivate the automatic channel update.
Volume Scope
Volume level setting equal for all channels (Global) or variable according to the specific volume of each
channel (Channel).
9.2 PICTURE MENU
Press the MENU key to enter the main menu;
Press 4 keys until the PICTURE item is selected;
Press keys until the desired item is selected and adjust it using the 4keys;
Press the EXIT button to exit.
Description of the adjustments:
ASPECT RATIO: Choose the screen format from: Auto, 16: 9 Wide screen, 16: 9 PillarBox, 16: 9 Pan Scan,
4: 3 Leterbox, 4: 3 Pan Scan, 4: 3 Full.
RESOLUTION: 1080p, 576i, 576p, 720p, 1080i.

19
HE 3368T2 ENGLISH
TV FORMAT: PAL or NTSC.
TV-SCART: allows you to set the Scart output as RGB or CVBS.
OSD SETTINGS: allows you to adjust the parameters of the OSD window such as:Transparency, Brightness,
Chroma, Contrast and the OSD timeout.
PANEL SETTINGS: to adjust the device display parameters such as: LED brightness, LED display (time or
channel number) and Standby Show time (whether or not to show the time when the device is in Stand-by).
9.3 SEARCH MENU
Press MENU button to enter the main menu;
Press 4 keys until the SEARCH item is selected;
Press keys until the desired item is selected and adjust it using the 4keys;
Press the EXIT button to exit.
Description of the adjustments:
FTA ONLY: to scan only free channels (FTA - Free to Air) or all channels (ALL).
AUTO SEARCH: Press the OK button to start automatic channel scan.
The search starts automatically and all available TV programs are stored progressively; the operation takes
a few minutes.
MANUAL SEARCH: select the channel to be searched manually using the 4keys. Each channel corre-
sponds to a frequency. Press the OK button to start scanning.
COUNTRY: press 4keys to select the country where you are scanning.
ANTENNA POWER: press 4keys to activate/ deactivate the function for the use of an amplified antenna
in the reception and scanning of channels.
9.4 TIME MENU
Press MENU button to enter the main menu;
Press 4 keys until the TIME item is selected;
Press keys until the desired item is selected and adjust it using the 4keys;
Press EXIT button to exit.
Description of the adjustments:
REGION AND TIME: allows you to set the city, the time zone and whether daylight saving time is activated
or not.
SLEEP (HOUR): you set the automatic shutdown of the decoder in case of user inactivity.
Press the navigation keys 4until you select the time after which the decoder should switch off; you can
choose from 1 to 12 HOURS or OFF (decoder always on).
POWER ON/OFF: you set the ignition and/ or shutdown according to an hourly schedule.
9.5 OPTION MENU
Press MENU button to enter the main menu;
Press 4 keys until the OPTION item is selected;
Press keys until the desired item is selected and adjust it using the 4keys;
Press EXIT button to exit.
Description of the adjustments:
OSD LANGUAGE: allows you to change the OSD language (menu).
EPG LANGUAGE: allows you to change the EPG language.
SUBTITLE LANGUAGE: Change the default DVBT subtitle language.
HOH SUBTITLE:Turn On/ Off descriptive subtitles for people with hearing impairments (if broadcast by the
TV channel).
TTX LANGUAGE: Teletext language setting.
FIRST AUDIO LANGUAGE: allows you to change the first default listening language of DVBT.
SECOND AUDIO LANGUAGE: allows you to change the second default DVBT listening language.

20
HE 3368T2ENGLISH
9.6 SYSTEM MENU
Press MENU button to enter the main menu;
Press 4 keys until the SYSTEM item is selected;
Press keys until the desired item is selected and adjust it using the 4keys;
Press EXIT button to exit.
Description of the adjustments:
PARENTAL GUIDANCE:allows you to select the desired blocking level based on age.You can choose between
Off and from level 4 to level 18. The security password must be entered.
LOCK CONTROL: Change the security password. It is necessary to enter the old code and then the new
one, and reconfirm the new code (default: 000000).
FACTORY RESET: allows you to restore the decoder settings to the initial conditions (factory settings). You
must enter the security password and confirm the start of the system recovery with the OK button.The decoder
will reset the values to the initial conditions and reset the channel list.
SYSTEM INFORMATION: View the decoder software version.
SOFTWARE UPGRADE: allows you to update the decoder software through the USB input.
9.7 USB MENU
Press MENU button to enter the main menu;
Press 4 keys until the USB item is selected;
Press keys until the desired item is selected and adjust it using the 4keys;
Press EXIT button to exit.
9.8 MEDIA CENTRE
Select one of the 4 categories available: FILE (to view all the files on the external key), VIDEO (to view video
files), MUSIC (to listen to audio files), PICTURE (to view image files);
Confirm the type of file you want to view by pressing the OK button;
The contents of the USB device memory will be displayed on the left of the screen. Select the file to be played
using the keys and press the OK button to start playback;
Press EXIT button to return to the previous screen.
10 TELETEXT DVB-T
Teletext is a system of information transmitted by some broadcasters that can be consulted like a newspaper,
leafing through it page by page.
Press TTX button to activate Teletext;
The table of contents will appear on the screen with the various headings made up of three-digit pages;
Press EXIT button to exit Teletext.
10.1 SEARCH FOR A PAGE
Dial the desired page number with the numeric keypad. Enter the three digits that make up the page number
(for example “201”) by pressing in sequence the number “2” - “0” - “1”, the number is displayed at the top left, the
page counter starts the search, the page is displayed.
To consult another page, repeat the operation.
11 TROUBLE SHOOTING
Problems Potential reason What to do
No picture Power isn’t connected Connect the power
The power switch is not On Switch On the power
Screen shows “No signal” DVB-T2 cable not connected Plug in the DVB-T cable
Aerial cable is faulty Check aerial cable and connections
Table of contents
Languages:
Other Trevi TV Receiver manuals