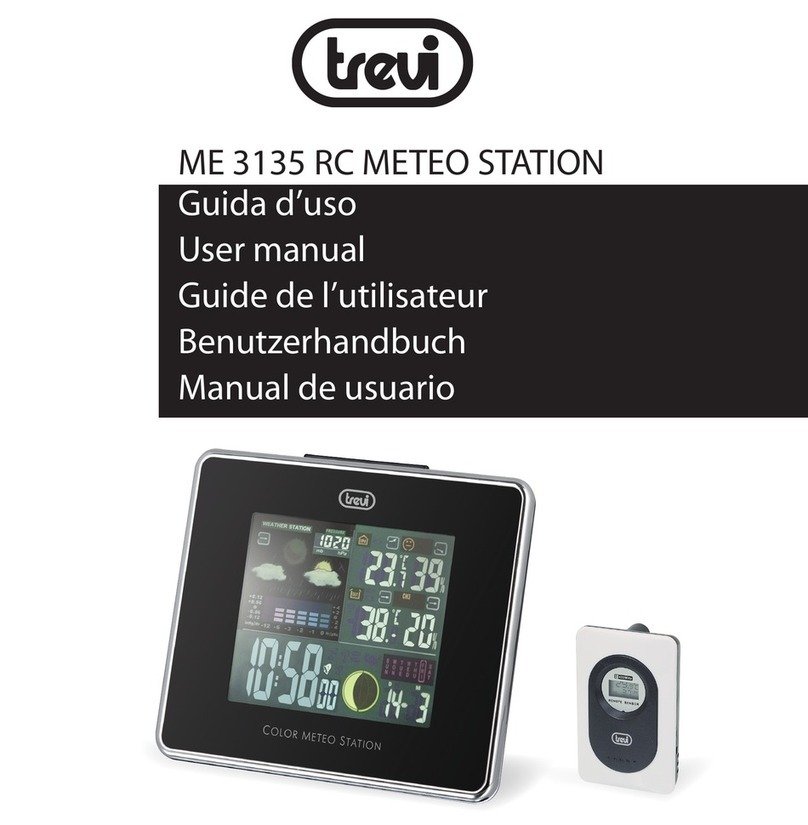
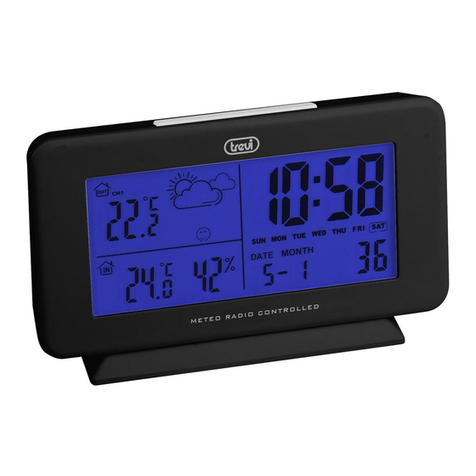
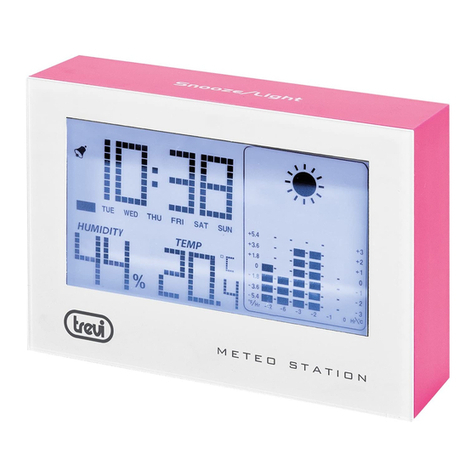
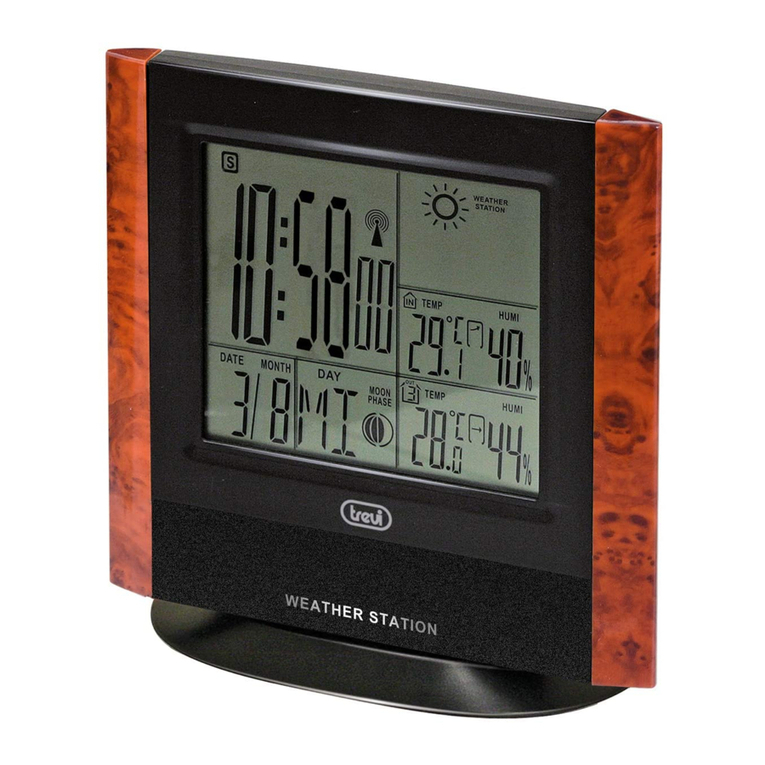
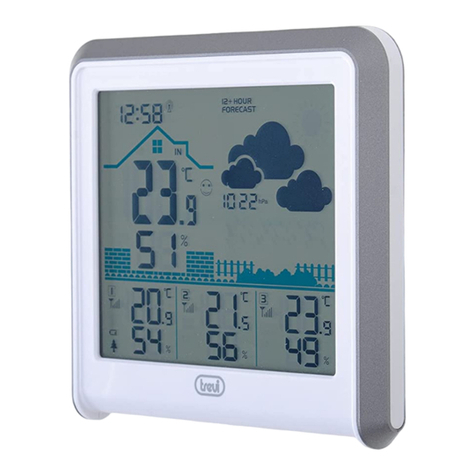
Trevi ME 3104 User manual

ME 3104
.1
.2
.4
.3
.5
.6
.7 .8 .9 .10 .11 .12 .13
SVEGLIA / METEOSTATION
Manuale d’uso
ALARM CLOCK / METEO STATION
Istruction manual
RÉVEIL / STATION MÉTÉO
Manual d’emploi
WECKER / WETTERSTATION
Anleitungsheft
DESPERTADOR ESTACIÓN METEO
Manual de instrucciones para el uso y la conexion
DESPERTADOR ESTAÇÃO METEO
Manual de uso e ligação
ΞΥΠΝΗΤΉΡΙ / ΜΕΤΕΩΡΟΛΟΓΙΚΌ
ΣΤΑΘΜΌ
Εγχειρίδιο χρήσης και σύνδεσης

ME 3104
DESCRIZIONE COMANDI
1. Icone simboli metereologici
2. Orologio 12/24 hr
3. Datario
4. Tendenza della temperatura
5. Umidità
6. Giorno della settimana
7. Vano batterie
8. Tasto SNZ
9. Tasto Mode
10. Tasto SET
11. Tasto ADJ
12. Tasto MEM
13. Cavalletto
ALIMENTAZIONE
Aprire il vano batterie (7) posto sul retro dell’apparecchio ed in-
serire due batterie formato “AAA” rispettando le polarità indicate.
Rimuovere le batterie se si prevede di non utilizzare l’apparecchio
per un lungo periodo.
REGOLAZIONE DELL’OROLOGIO
1. PremereiltastoMode(9)noadarrivareallaschermatadell’o-
rario.
2. Tenerepremuto iltastoSET(10) no aquandosuldisplay
comparirà la scritta “24 hr o 12 hr” lampeggiante.
3. Impostare il formato dell’ orario tramite il tastoADJ(11).
4. Premere il tasto SET (10), sul display comincerà a lampeggiare
l’ora.
5. Impostare l’ora tramite il tasto ADJ(11).
6. Premere il tasto SET (10), sul display cominceranno a lampeg-
giare i minuti.
7. Impostare i minuti tramite il tasto ADJ(11).
8. Premere il tasto MODE (9), per confermare.
REGOLAZIONE DEL CALENDARIO
1. PremereiltastoMode(9)noallacomparsadell’anno.
2. TenerepremutoiltastoSET(10)noaquandosuldisplayl’
anno comincierà a lampeggiare.
3. Impostare l’ anno tramite il tastoADJ(11).
4. Premere il tasto SET (10), sul display comincerà a lampeggiare
il mese.
5. Impostare il mese tramite il tasto ADJ(11).
6. Premere il tasto SET (10), sul display comincerà a lampeggiare
il giorno.
7. Impostare il giorno tramite il tasto ADJ(11).
8. Premere il tasto MODE (9), per confermare.
REGOLAZIONE E ATTIVAZIONE ALLARME
1. PremereiltastoMode(9)noadarrivareallaschermatadell’al-
larme.
2. Tenerepremuto iltastoSET(10) noaquandosuldisplay
comincerà a lampeggiare l’ora.
3. Impostare l’ora tramite il tasto ADJ(11).
4. Premere il tasto SET (10), sul display cominceranno a lampeg-
giare i minuti.
5. Impostare i minuti tramite il tasto ADJ(11).
6. Premere il tasto MODE (9), per confermare.
7. Premere il tasto ADJ (11), per attivare l’allarme.
8. Sul display apparirà il simbolo .
9. Premere il tasto ADJ(11) 3 volte per disattivare l’allarme.
10. Quando l’allarme è attivo e sta suonando premere il tasto SNZ(8)
una volta,l’allarme smetterà di suonare per 5 minuti.
11. Perspegnerel’allarmequandostasuonandopremereiltasto
Mode(9),inquestomodol’allarmerimarràattivaeverràripetuta
24 hr dopo.
FUNZIONE PROMEMORIA
La funzione promemoria orario scandisce ogni ora con un beep.
1. PremereiltastoMode(9)noadarrivareallaschermatadell’al-
larme.
2. Premere il tasto ADJ (11), per attivare l’allarme.
3. Premere nuovamente il tasto ADJ(11) per disattivare l’allarme e
attivare la funzione di promemoria.
4. Sul display apparirà il simbolo .
5. PremereiltastoADJ(11)perattivarel’allarme,quindipremere
nuovamente il tasto ADJ(11) per disattivare la funzione allarme
e promemoria.
PREVISIONI METEREOLOGICHE
Il barometro digitale rileva automaticamente le variazioni di
pressione atmosferica visualizzando di conseguenza il simbolo
di previsione metereologica (1). Tale previsione riguarda le
12/24 ore successive.
Per esempio: se il barometro rileva un’alta pressione, sul display
apparirà il simbolo del sole, ma esternamente potrebbe piovere,
la previsione riguarda le 12/24 ore successive.
Note:
Isimboli di previsionemetereologica possononon rietterele attuali
condizioni del tempo. Essi si riferiscono esclusivamente a condizioni future.
Le previsioni possono non essere sicure al 100% a causa di vari fattori.
Il costruttore non è responsabile di eventuali danni o situazioni causati
da una previsione errata.
TEMPERATURA E UMIDITÀ
L’indicazione relativa alla temperatura si trova in basso a sinistra
del display, mentre il valore dell’umidità è indicato a destra.
Premere il tasto SET (10) per selezionare l’unità di misura della
temperatura in °C o °F.
Per visualizzare la temperatura massima e minima registrata
dall’apparecchio premere il tasto MEM(12).
Per cancellare i valori registrati di temperatura minima, portarsi
su minima tramite il tasto MEM(12) premere e tenere premuto
il tasto MEM(12) per 2 secondi.
Per cancellare i valori registrati di temperatura massima, portarsi
su massima tramite il tasto MEM(12) premere e tenere premuto
il tasto MEM(12) per 2 secondi.
DATI TECNICI
Stazione meteo:..............da 0°C a +50°C
Umidità interna:...............da 20% a 90% RH (umidità relativa)
Avanzamento unitario:....0,1°C per la temperatura - 1% per l’umidità
Orologio: ..........................Quarzo
Alimentazione:.................2xAAA
Italiano

ME 3104
DESCRIPTION OF CONTROLS
1. Meteorological symbols icons
2. 12/24 hr clock
3. Daters
4. Trend of temperature
5. Humidity
6. Day
7. Battery compartment
8. SNZ Button
9. Mode Button
10. SET button
11. ADJ Button
12. MEM Button
13. Stand
POWER
Open the battery compartment (7) on the back of the unit and
insert two “AAA” batteries matching the polarities.
Remove the batteries if you do not plan to use the device for
a long time.
SETTING THE CLOCK
1. Press the Mode button (9) until you reach the screen of the time.
2. PressandholdtheSETbutton(10)thedisplaywillstarttoash.
3. Choose the hour format by pressing the ADJ button (11).
4. PresstheSETbutton(10),thehourwillstarttoash.
5. Set the hours by pressing the ADJ button (11).
6. PresstheSETbutton(10),theminuteswillstarttoash.
7. Set the minutes by pressing the ADJ button (11).
8. PresstheMODEbutton(9)toconrm.
ADJUST THE CALENDAR
1. Press the Mode button (9) until you reach the screen of the year.
2. PressandholdtheSETbutton(10)theyearwillstarttoash.
3. Set the year by the ADJ button (11).
4. PresstheSETbutton(10),themonthwillstarttoash.
5. Set the month by pressing the ADJ button (11).
6. PresstheSETbutton(10),thedaywillstarttoash.
7. Set the day by pressing the ADJ button (11).
8. PresstheMODEbutton(9)toconrm.
ADJUSTMENT AND ALARM ACTIVATION
1. Press the Mode button (9) until you reach the screen of the alarm.
2. PressandholdtheSETbutton(10)untilthedisplaystartstoash
the time.
3. Set the time by pressing the ADJ button (11).
4. PresstheSETbutton(10),thedisplaywillstarttoashtheminutes.
5. Set the minutes by pressing the ADJ button (11).
6. PresstheMODEbutton(9)toconrm.
7. Press the ADJ button (11), to activate the alarm.
8. The display will show the symbol .
9. Press the ADJ button (11) 3 times to turn off the alarm.
10. When the alarm is active and is playing press the SNZ button (8)
once, the alarm will stop ringing for 5 minutes.
11. To turn off the alarm when it is sounding, press the Mode button
(9), so the alarm will remain active and will be repeated after 24
hr.
REMINDER FUNCTION
The reminder function marks the hours time with a beep.
1. Press the Mode button (9) until you reach the screen of the alarm.
2. Press the ADJ button (11), to activate the alarm.
3. Press the ADJ button (11) to turn off the alarm and activate the
reminder function.
4. The display will show the symbol .
5. Press the ADJ button (11) to activate the alarm, then press the
ADJ button (11) to turn off the alarm and reminder.
WEATHER FORECAST
The digital barometer automatically detects the atmospheric
pressure changes accordingly to display the symbol of weather
forecasting (1). This forecast covers the next 12-24 hours.
For example, if the barometer detects a high pressure, the display
will show the symbol of the sun, but externally it could rain, it
applies the 12/24 hours.
notes:
Theweatherforecastsymbolsmaynotreectthecurrentweatherconditions.
They relate only to future conditions.
Forecasts can not be 100% safe due to various factors.
The manufacturer is not liable for any damages or situations caused by
a wrong prediction.
TEMPERATURE AND HUMIDITY
The indication of the temperature is in the lower left corner of the
display, while the humidity value is shown on the right.
Press the SET button (10) to select the unit of measurement of
temperature in °C or °F.
To display the maximum and minimum temperature recorded from
the unit, press the MEM button (12).
To delete the recorded values of minimum temperature, move to
a minimum through the MEM button (12) Press and hold the MEM
button (12) for 2 seconds.
To delete the recorded valuesof maximum temperature, maximum
carry on through the MEM button (12) Press and hold the MEM
button (12) for 2 seconds.
TECHNICAL DATA
Weather Station:..............0 °C to + 50 °C
Indoor humidity:...............20% to 90% RH (relative humidity)
Feed unit:.........................0.1 °C for the temperature - 1% for moisture
Clock:...............................Quartz
Power supply:..................2xAAA
English

ME 3104
Française
DESCRIPTION DES COMMANDES
1. Météorologiquessymbolesicônes
2 Horloge 12/24 h
3. Daters
4. Evolution de la température
5. Humidité
6. Jour
7. Compartiment batterie
8. Touche SNZ
9. Touche Mode
10. Touche SET
11. Touche ADJ
12. Touche MEM
13. Stand
ALIMENTATION
Ouvrez le compartiment de la batterie (7) sur le dos de l’appareil
et insérez deux piles de taille “AAA” en respectant les polarités.
Retirez les piles si vous ne comptez pas utiliser l’appareil pendant
une longue période.
RÉGLAGE DE L’HORLOGE
1. AppuyezsurlatoucheMode(9)jusqu’àcequevousatteignezle
l’écran du heures.
2. Appuyez et maintenez enfoncé sur la touche SET (10), le format
de l’heure se met à clignoter.
3. Choisissez le format de l’heure en appuyant sur la touche ADJ (11).
4. Appuyez sur la touche SET (10), l’heure se met à clignoter.
5. Réglez les heures en appuyant sur la touche ADJ (11).
6. Appuyez sur la touche SET (10), les minutes se met à clignoter.
7. Réglez les minutes en appuyant sur la touche ADJ (11).
8. AppuyezsurlatoucheMODE(9)pourconrmer.
AJUSTER LE CALENDRIER
1. Appuyez sur la touche Mode(9)jusqu’àcequevousatteigniez
l’écran du l’année.
2. Appuyez et maintenez enfoncé la touche SET (10), l’année se
met à clignoter.
3. Réglez l’année par la touche ADJ (11).
4. Appuyez sur la touche SET (10), le mois commence à clignoter.
5. Réglez le mois en appuyant sur la touche ADJ (11).
6. Appuyez sur la touche SET (10), la journée commence à clignoter.
7. Réglez la journée en appuyant sur la touche ADJ (11).
8. Appuyez
sur la touche MODE(9)pourconrmer.
CONFIGURATION ET ACTIVATION D’ALARME
1. AppuyezsurlatoucheMode(9)jusqu’àcequevousatteigniez
l’écran d’alarme.
2. AppuyezetmaintenezenfoncélatoucheSET(10)jusqu’àceque
l’écran se met à clignoter le temps.
3. Réglez l’heure en appuyant sur la touche ADJ (11).
4. Appuyez sur la touche SET (10), l’écran se met à clignoter les
minutes.
5. Réglez les minutes en appuyant sur la touche ADJ (11).
6. AppuyezsurlatoucheMODE(9)pourconrmer.
7. Appuyez sur la touche ADJ (11), pour activer l’alarme.
8. L’écranafchelesymbole .
9. Appuyez sur la touche ADJ (11) 3 fois pour éteindre l’alarme.
10.Lorsquel’alarmeestactiveetjoueappuyezsurlatoucheSNZ(8)
une fois, l’alarme arrêté de sonner pendant 5 minutes.
11. Pourdésactiverl’alarmequandellesonne,appuyezsurlatouche
Mode(9),desortequel’alarmeresteactiveetserarépétéeaprès
24 heures.
FONCTION DE RAPPEL
La fonction de rappel scanne l’heure avec un bip.
1. AppuyezsurlatoucheMode(9)usqu’àcequevousatteigniez
l’écran d’alarme.
2. Appuyez sur la touche ADJ (11), pour activer l’alarme.
3. Appuyez sur la touche ADJ (11) pour éteindre l’alarme et activer
la fonction de rappel.
4. L’écranafchelesymbole .
5. Appuyez surlatouche ADJ (11) pouractiverl’alarme, puisappuyez
sur la touche ADJ (11) pour éteindre l’alarme et rappel.
PRÉVISIONS MÉTÉOROLOGIQUES
Lebaromètrenumériquerelèveautomatiquementlesvariationsde
pressionatmosphérique,envisualisantsurl’afcheurlesymbole
correspondant (1).
Ces prévisions concernent les 12/24 heures successives.
Parexemple:silebaromètredétecteunehautepression,l’afcheur
montre le symbole du soleil, mais à l’extérieur il pourrait pleuvoir :
la prévision concerne les 12/24 heures successives.
Remarque:
Lessymbolesdesprévisionsmétéospeuventnepasreéterlesconditions
actuelles du temps. Ils se réfèrent exclusivement à des conditions futures.
Les prévisions peuvent ne pas être certaines à 100%, en raison de
plusieurs facteurs.
Le constructeur n’est pas responsable d’éventuels préjudices dus à de
fausses prévisions.
TEMPÉRATURE & HUMIDITÉ INTERNE/EXTERNE
L’indication de la température est dans le coin inférieur gauche de
l’écran,tandisquelavaleurd’humiditéestreprésentésurladroite.
Appuyez sur la touche SET (10) pour sélectionner l’unité de mesure
de la température en °C ou °F.
Pourafcherlatempératureminimaleenregistréeàpartirdel’unité
maximale et appuyez sur la touche MEM (12).
Pour effacer les valeurs enregistrées de la température minimum,
passer à un minimum grâce à la touche MEM (12) Appuyez et
maintenez enfoncé le bouton MEM (12) pendant 2 secondes.
Pour effacer les valeurs enregistrées de température maximale,
maximale Continuer le long de la touche MEM (12) Appuyez et
maintenez enfoncé le bouton MEM (12) pendant 2 secondes.
DONNÉES TECHNIQUES
Station météo :................. de 0°C à +50°C
Humidité intérieure :......... de 20% à 90% RH
Avancement unitaire :...... 0,1°C pour la température
1% pour l’humidité
Horloge : ........................... Quartz
Alimentation :.................... 2xAAA

ME 3104
BESCHREIBUNG DER BEDIENELEMENTE
1. Meteorologische Symbole Symbole
2. 24/12 h Uhr
3. Dater
4. Trend der Temperaturen
5.. Luftfeuchtigkeit
6. Tage
7. Batteriefach
8. SNZ-Taste
9. Modus-Taste
10. Set- Taste
11. ADJ-Taste
12. MEM-Taste
13. Stand
VERSORGUNG
Öffnen Sie das Batteriefach (7) auf der Rückseite des Gerätes
und legen Sie zwei ”AAA”-Batterien die Übereinstimmung der
Polaritäten.
Entfernen Sie die Batterien, wenn Sie nicht vorhaben, das Gerät
für eine längere Zeit nicht benutzen
EINSTELLUNG DER UHRZEIT
1. Drücken Siedie Mode-Taste (9),bis Sie denBildschirmder Stunden
zu erreichen.
2. Drücken und halten Sie die SET-Taste (10) dieAnzeige zu blinken.
3. Wählen Sie die Stunden-Format durch Drücken der ADJ-Taste (11).
4. Drücken Sie die SET-Taste (10), wird die Stunde zu blinken.
5. Stellen Sie die Stunden durch Drücken der ADJ-Taste (11).
6. Drücken Sie die SET-Taste (10), werden die Minuten zu blinken.
7. Stellen Sie die Minuten durch Drücken der ADJ-Taste (11).
8. Drücken Sie die MODE-Taste (9), um zu bestätigen.
STELLEN SIE DEN KALENDER
1. Drücken Sie die Mode-Taste (9), bis Sie den Bildschirm des
Kalender erreichen.
2. Drücken und halten Sie die SET-Taste (10) das Jahr beginnen
zu blinken.
3. Stellen Sie das Jahr durch die ADJ-Taste (11).
4. Drücken Sie die SET-Taste (10), wird der Monat zu blinken.
5. Geben Sie den Monat durch Drücken der ADJ-Taste (11) ein.
6. Drücken Sie die SET-Taste (10), wird der Tag zu blinken.
7. Stellen Sie den Tag durch Drücken der ADJ (11).
8. Drücken Sie die MODE-Taste (9), um zu bestätigen.
EINRICHTEN UND AKTIVIEREN VON ALARM
1. Drücken Sie die Mode-Taste (9) bis Sie den Bildschirm des
Alarmanzeige.
2. Drücken und halten Sie die SET-Taste (10), bis dieAnzeige beginnt
die Zeit zu blinken.
3. Stellen Sie das Jahr durch die ADJ-Taste (11).
4. Drücken Sie die SET-Taste (10), wird das Display zu starten, um
die Minuten blinken.
5. Stellen Sie die Minuten durch Drücken der ADJ-Taste (11).
6. Drücken Sie die MODE-Taste (9), um zu bestätigen.
7. Drücken Sie die ADJ-Taste (11), den Alarm zu aktivieren.
8. Das Display zeigt das Symbol .
9. Drücken SiedieADJ-Taste (11) 3-mal umdenAlarm auszuschalten.
10. Wenn der Alarm aktiv ist und drücken Sie spielen die SNZ-Taste
(8) einmal, wird der Alarm zu läuten für 5 Minuten.
11. Um den Wecker auszuschalten, wenn es ertönt, drücken Sie die
Mode-Taste (9), so dass der Alarm bleibt aktiv und wird nach 24
Stunden wiederholt werden.
ERINNERUNGSFUNKTION
Die Erinnerungsfunktion smarkiert den stunden mit einem Signalton.
1. Drücken Sie die Mode-Taste (9) bis Sie den Bildschirm des
Alarmanzeige.
2. Drücken Sie die ADJ-Taste (11), den Alarm zu aktivieren.
3. Drücken Sie die ADJ-Taste (11), um den Alarm auszuschalten
und aktivieren Sie die Erinnerungsfunktion.
4. Das Display zeigt das Symbol .
5. Drücken Sie dieADJ-Taste (11), um denAlarm zu aktivieren, drü-
cken Sie dann die ADJ-Taste (11), um den Alarm auszuschalten
und Mahnung.
WETTERVORHERSAGE
Das digitale Barometer erfasst automatisch die Schwankungen
des Luftdrucks und zeigt das entsprechende Symbol der Wet-
tervorhersage an (1).
Diese Vorhersage bezieht sich auf die kommenden 12/24 Stunden.
Beispiel: wenn das Barometer einen Hochdruck erfasst, erscheint
auf dem Display das Sonnensymbol. Da sich dieses Symbol auf
die Vorhersage für die kommenden 12/24 Stunden bezieht, könnte
es sein, dass es trotz dieses Symbols gerade regnet.
Hinweise:
Die Symbole der Wettervorhersage können nicht die aktuellen Wetterbe-
dingungen wiedergeben. Sie beziehen sich ausschließlich auf zukünftige
Bedingungen.
Aufgrund des Zusammenspiels verschiedener Faktoren können die Vorher-
sagen möglicherweise nicht zu 100% zutreffen.
Der Hersteller übernimmt keine Verantwortung für ev. Schäden, die durch
eine falsche Wettervorhersage verursacht wurden.
TEMPERATURUND INNEN- & AUSSENFEUCHTIGKEIT
Die Anzeige der Temperatur ist in der unteren linken Ecke der An-
zeige, während die Feuchtewert wird auf der rechten Seite gezeigt.
Drücken Sie die Set-Taste (10), um die Einheit der Messung der
Temperatur in °C oder °F. wählen
Um die maximale und Aufgenommen von der Einheit Mindesttem-
peraturen anzuzeigen, drücken Sie die MEM-Taste (12).
Um die aufgezeichneten Werte der Mindesttemperatur zu löschen,
auf ein Minimum bewegen sich durch die MEM-Taste (12) drücken
und halten Sie die MEM-Taste (12) für 2 Sekunden.
Um die aufgezeichneten Werte der maximalen Temperatur zu
löschen, maximal machen durch die MEM-Taste (12) drücken und
halten Sie die MEM-Taste (12) für 2 Sekunden.
TECHNISCHE DATEN
Wetterstation: ...................von 0°C bis +50°C
Interne Feuchtigkeit:.........von 20 % bis 90 % RH
Einheitsschritte:................0,1°C für die Temperatur
1 % für die Feuc
Uhr: ...................................Quarz
Versorgung: ...................... 2xAAA
Deutsch

ME 3104
DESCRIPCIÓN DE LOS MANDOS
1. Iconos símbolos meteorológicos
2. Reloj 24/12 h
3. Fechadores
4. Tendencia de la temperatura
5. Humedad
6. Semana Día
7. Compartimiento de la batería
8 Botón SNZ
9 Botón Mode
10 Botón SET
11 Botón ADJ
12 Botón MEM
13 Soporte
ALIMENTATION
Abra el compartimiento de la batería (7) en la parte posterior de
la unidad e inserte dos baterías “AAA” encajando las polaridades.
Quite las baterías si no se utiliza durante un largo período.
AJUSTE DEL RELOJ
1. Pulse el botón Mode (9) hasta la pantalla del Reloj.
2. PulseymantengapulsadoelbotónSET(10)hastaquelapantalla
se mostrará “24 horas o 12 horas” parpadeando en la pantalla de
tiempo.
3. Ajuste el formato de la hora pulsando el botón ADJ (11).
4. Pulse el botón SET (10), la hora comenzará a parpadear.
5. Ajuste la hora pulsando el botón ADJ (11).
6. Presione su el botón SET (10), los minutos comenzarán a
parpadear.
7. Ajuste los minutos pulsando el botón ADJ (11).
8. PulseelbotónMODE(9)paraconrmar.
AJUSTE EL CALENDARIO
1. Pulse el botón Mode (9) hasta la pantalla del calendario.
2. Pulse y mantenga pulsado el botón SET (10), el año comenzará
a parpadear.
3. Ajuste el año mediante el botón ADJ (11).
4. Pulse el botón SET (10), el mes comenzará a parpadear.
5. Ajuste el mes pulsando el botón ADJ (11).
6. Pulse el botón SET (10), el día comenzará a parpadear.
7. Ajuste el día pulsando el botón ADJ (11).
8. PulseelbotónMODE(9)paraconrmar.
CONFIGURACIÓN Y ACTIVACIÓN DE ALARMA
1. Pulse el botón Mode (9) hasta la pantalla de alarma.
2. PulseymantengapulsadoelbotónSET(10)hastaquelapantalla
comienza a parpadear el tiempo.
3. Ajuste la hora pulsando el botón ADJ (11).
4. Pulse el botón SET (10), la pantalla comenzará a parpadear los
minutos.
5. Ajuste los minutos pulsando el botón ADJ (11).
6. PulseelbotónMODE(9)paraconrmar.
7. Pulse el botón ADJ (11), para activar la alarma.
8. La pantalla mostrará el símbolo .
9. Pulse el botón ADJ (11) 3 veces para apagar la alarma.
10. Cuando la alarma está activa y se reproduce pulse el botón SNZ
(8) una vez, la alarma deja de sonar durante 5 minutos.
11. Para apagar la alarma cuando está sonando, presione el botón
de mode(9),porloquelaalarmapermaneceráactivayserepetirá
después de 24 horas.
FUNCIÓN RECORDATORIO
La función de recordatorio escanea cada vez las horas con un pitido.
1. Pulse el botón Mode (9) hasta la pantalla de alarma.
2. Pulse el botón ADJ (11), para activar la alarma.
3. Pulse el botónADJ (11) para apagar la alarma y activar la función
de recordatorio.
4. La pantalla mostrará el símbolo .
5. Pulse el botón ADJ (11) para activar la alarma, luego pulse el
botón ADJ (11) para apagar la alarma y recordatorio.
PREVISIONES METEOROLÓGICAS
El barómetro digital mide automáticamente las variaciones de
presión atmosférica mostrando consiguientemente el símbolo
de previsión meteorológica (1).
Dichaprevisiónsereerealas12/24horassiguientes.
Por ejemplo: si el barómetro mide una alta presión, en la pantalla
aparecerá el símbolo del sol, pero fuera podría estar lloviendo, la
previsiónsereerealas12/24horassucesivas.
Notas:
Lossímbolosdeprevisiónmeteorológicapuedennoreejarlascondiciones
actualesdeltiempo.Sereerenexclusivamenteacondicionesfuturas.
Las previsiones podrían no corresponder a la realidad al 100% debido
a varios factores.
El fabricante no se hace responsable de posibles daños causados por una
previsión incorrecta.
TEMPERATURA Y HUMEDAD INTERNA/EXTERNA
Laindicaciónde la temperatura estáenlaesquina inferior
izquierdadelapantalla,mientrasqueelvalordehumedadse
muestra a la derecha.
Pulse el botón SET (10) para seleccionar la unidad de medida
de la temperatura en °C o °F.
Para mostrar la temperatura máxima y mínima registrada desde
la unidad, presione el botón MEM (12).
Para eliminar los valores registrados de temperatura mínima, vaya
a un mínimo mediante el botón MEM (12) Mantenga pulsado el
botón MEM (12) por 2 segundos.
Para eliminar los valores registrados de temperatura máxima,
máxima seguir adelante a través del botón MEM (12) Pulse y
mantenga pulsado el botón MEM (12) por 2 segundos.
DATOS TÉCNICOS
Estación meteorológica: de 0°C a +50°C
Humedad interior:............de 20% a 90% RH
Avance unitario: ..................0,1°C para la temperatura
1% para lahumedad
Reloj:................................Cuarzo
Alimentación:...................2xAAA
Español

ME 3104
GARANZIA
1. L’apparecchio è garantito per 24 mesi dalla data di fabbricazione
indicata sull’etichetta applicata sul prodotto.
2. La garanzia si applica solo ad apparecchi, non manomessi, riparati
da centri assistenza TREVI, essa comprende la riparazione dei
componenti per difetti di fabbricazione con l’esclusione di etichette,
manopole e parti asportabili.
3. TREVI non risponde di danni diretti o indiretti a cose o/e persone
causati dall’uso o sospensione d’uso dell’apparecchio.
WARRANTY
1. This unit is guaranteed for a period of 24 months from the date of
production printed on the product itself or on label on product.
2. The warranty is valid only if the unit has not been tampered with.
The warranty is valid only at authorized TREVI assistance centres,
that will repair manufacturing defects, excluded replacement of
labels and removable parts.
3. TREVI is not liable for damage to people or things caused by the
use of this unit or by the interruption in the use of this unit.
GARANTIE
1. L’appareil est garanti pendant une période de 24 mois de la date
defabricationindiquéesurl’étiquettesetrouvantsurleproduit.
2. Lagarantien’estappliquéequesurlesappareilsnonaltérés,ayant
été réparés chez un ServiceAprès-Vente TREVI. Elle comprend la
réparation des composantes à la suite de défauts de fabrication, à
l’exclusiond’étiquettes,boutonsderéglageetpartiesamovibles.
3. TREVI ne répond pas des dommages directs ou indirects aux
choses et/ou aux personnes entraînés pendant l’usage ou la
suspension d’usage de l’appareil.
GARANTIEBESTIMMUNGEN
1. Das Gerät hat eine Garantie von 24 Monaten ab dem Herstel-
lungsdatum. Das Herstellungsdatum ist auf der am Produkt
angebrachten Etikette angegeben.
2. Die Garantie gilt nur für Geräte, an denen nicht selbst ausgeführte
Reparaturen erfolgt sind, sondern die von TREVI-Kundendienst-
stellen durchgeführt wurden. Die Garantie umfaßt die Reparatur
von Bauteilen, wenn diese auf Herstellungsfehler zurückzuführen
sind. Die Garantie gilt hingegen nicht für Etiketten, Drucktasten,
Knöpfe und entfernbare Teile.
3. TREVI haftet nicht für direkte oder indirekte Sach- und/oder
Personenschäden, die vom Gebrauch des Gerätes verursacht
worden sind.
GARANTIA
1. El aparato tiene una garantía de 24 meses a partir de la fecha de
fabricación indicada en la tarjeta sobre el producto.
2. La garantía está aplicada solamente a los productos no desarre-
glados y reparados por los centros de asistencia TREVI.Además,
la garantía incluye la reparación de los componentes a causa de
defectosdefabricación,conlaexclusióndeetiquetas,botonesy
partes removibles.
3. TREVI no es responsable por daños directos o indirectos a
cosas y/o personas causados por el uso o suspensión del uso
del aparato.
GARANTIA
1. O aparelho tem uma garantia de 24 meses a partir da data de
fabricaçãoindicadanaetiquetaqueconstanoproduto.
2. Somenteaparelhosnãoviolados,equeforamreparadospelo
Centro de Assistência TREVI incluem-se nesta garantia. Esta
compreende a reparação dos componentes em caso de defeitos
defabricaçãocomaexclusãodeetiquetas,botõesepartesque
podem ser extraídas.
3. A TREVI não considera-se responsável por danos directos ou
indirectos, causados pelo uso ou suspensão do uso do aparelho,
à objectos e/ou pessoas.
ΕΓΓΎΗΣΗ
1. Η συσκευή είναι εγγυημένη για 24 μήνες από την
ημερομηνία κατασκευής που αναγράφεται στην ετικέτα
προσαρτάταιστοπροϊόν.
2. Ηεγγύησηισχύειμόνογιαεξοπλισμού,δενανακατεύτηκα,
επισκευαστείαπόκέντραβοήθειαςTREVI,περιλαμβάνει
την επισκευή εξαρτημάτων για κατασκευαστικά
ελαττώματα,εκτόςαπόετικέτες,λαβέςκαιαποσπώμενα
μέρη.
3. Φοντάναντιδενείναιυπεύθυνηγιατηνάμεσηήέμμεση
ζημίαναπράγματαή/καιπροσώπωνπουπροκαλούνται
απότηχρήσηήτηναναστολήτηςχρήσηςτηςσυσκευής.
Warranty

ME 3104
Avvertenze per il corretto smaltimento del prodotto.
Ilsimboloriportatosull’apparecchiaturaindicacheilriutodeve
essere oggetto di “raccolta separata” pertanto il prodotto non deve
esseresmaltitoinsiemeairiutiurbani.
L’utente dovrà consegnare il prodotto presso gli appositi “centri
di raccolta differenziata” predisposti dalle amministrazioni
comunali,oppureconsegnarloalrivenditorecontroacquistodi
un nuovo prodotto.
Laraccoltadifferenziatadelriutoelesuccessiveoperazionidi
trattamento, recupero e smaltimento favoriscono la produzione
di apparecchiature con materiali riciclati e limitano gli effetti
negativi sull’ambiente e sulla salute causati da una gestione
impropriadelriuto.
Lo smaltimento abusivo del prodotto comporta l’applicazione di
sanzioni amministrative.
Precautions for correct disposal of the product.
Thesymbolshownontheequipmentindicatesthatwastemust
be disposed of in “separate collection” and so the product must
not be disposed of together with urban waste.
The user must take the product to special “separate waste
collection centres” provided by local government, or deliver it to
the retailer against the purchase of a new product.
Separatecollectionofwasteandsubsequenttreatment,recycling
anddisposaloperationspromotestheproductionofequipment
with recycled materials and limits negative effects on the envi-
ronment and on health caused by improper handling of waste.
Illegal disposal of the product leads to the enforcement of
administrative penalties.
Recommandations pour l’élimination correcte du produit.
Lesymbolegurantsurl’appareilindiquequeleproduitfaitl’objet
d’une“collecteséparée“.C’estpourquoi,leproduitnedoitpas
être éliminé avec les déchets urbains.
L’utilisateur doit remettre le produit auprès de “ décharges
spécialisées de collecte séparée “ prévues par les autorités
locales,oubien le rendre au revendeurquandil achètera un
nouvelappareiléquivalent.
La collecte séparée du produit et les opérations successives
de traitement, recyclage et élimination favorisent la production
d’appareils composés par des matériaux recyclés ainsi que
permettent d’éviter des effets négatifs sur l’environnement et sur
la santé des personnes suite à une gestion impropre du déchet.
Toute élimination abusive du produit entraîne l’application de
sanctions administratives.
Hinweise zur ordnungsgemäßen Entsorgung des Produkts.
Das auf dem Gerät angebrachte Symbol weist darauf hin, dass
das Altgerät “getrennt zu sammeln” ist und das Produkt daher
nicht zusammen mit dem Gemeindeabfall entsorgt werden darf.
Der Benutzer muss das Produkt zu den entsprechenden, von der
Gemeindeverwaltung eingerichteten “Wertstoffsammelstellen”
bringen oder dem Händler beim Kauf eines neuen Produkts
übergeben.
Die getrennte Müllsammlung und anschließende Aufbereitung,
Wiederverwertung und Entsorgung fördern die Herstellung von
Geräten unter Verwendung wiederverwerteter Materialien und
vermindern die negativen Auswirkungen auf die Umwelt und
Gesundheit in Folge einer falschen Müllverwaltung.
Die widerrechtliche Entsorgung des Produkts führt zurAuferlegung
von Verwaltungsstrafen.
Advertencias para la correcta eliminación del producto.
Elsímboloqueapareceenelaparatoindicaqueelresiduodebe
ser objeto de “recogida selectiva” por tanto el producto no se debe
eliminar junto con residuos urbanos.
El usuario deberá entregar el producto a los “centros de recogida
selectiva” creados por las administraciones municipales o bien al
distribuidorcuandoadquieraunnuevoproducto.
La recogida selectiva del residuo y las sucesivas operaciones de
tratamiento, recuperación y eliminación favorecen la fabricación
de aparatos con materiales reciclados y limitan los efectos
negativos en el medio ambiente y la salud causados por una
gestión incorrecta del residuo.
La eliminación abusiva del producto da lugar a la aplicación de
sanciones administrativas.
Advertências para a correcta demolição do produto.
Osímboloindicadonaaparelhagemindicaqueoresíduodeve
ser objecto de “recolha separada” portanto o produto não deve
ser desmantelado junto dos resíduos urbanos.
O utilizador deverá entregar o produto nos apropriados “centros
derecolhadiferenciada” predispostos pelas administrações
comunais, ou entregá-lo ao revendedor em troca de uma compra
de um novo produto.
A recolhadiferenciadado resíduoeas sucessivasoperações
de tratamento, recuperação e desmantelamento favorecem a
produção de aparelhagens com materiais reciclados e limitam
os efeitos negativos no ambiente e na saúde causados por uma
gestão imprópria do resíduo.
O desmantelamento abusivo do produto comporta a aplicação
desançõesadministrativas.
Οδηγίες για τη σωστή απόρριψη του
προϊόντος.
Το σύμβολο που εκτίθεται στον εξοπλισμό δηλώνει ότι
πρέπειναδοθείηάρνηση«χωριστήσυλλογή»σημαίνειότι
τοπροϊόνδενπρέπειναδιατίθεταιμεοικιακάαπορρίμματα.
Πρέπει να παραδώσει το προϊόν στην ειδική «κέντρα
ξεχωριστήσυλλογήτωναποβλήτων»πουπαρέχεταιαπό
τουςδήμους,ήνατοπαραδώσειστολιανοπωλητήκατά
τηναγοράενόςνέουπροϊόντος.
Χωριστή συλλογή απόρριψη και επόμενη επεξεργασία,
ανάκτηση και διάθεση εξοπλισμό με ανακυκλωμένα
υλικά και να περιορίσουν τις αρνητικές επιπτώσεις
στο περιβάλλον και την υγεία που προκαλούνται από
ακατάλληληδιαχείρισητωναποβλήτων.
Καταχρηστική διάθεση του προϊόντος περιλαμβάνει την
εφαρμογήδιοικητικώνκυρώσεων.
TREVI S.p.A. Strada Consolare Rimini-San Marino, 62 47924
Rimini (RN) Italy
Tel. 0541-756420 - Fax 0541-756430
Table of contents
Languages:
Other Trevi Weather Station manuals

Trevi
Trevi ME 3P80 RC User manual

Trevi
Trevi SLD 3200 T User manual

Trevi
Trevi ME 3P08 RC User manual

Trevi
Trevi ME 3P08 RC User manual

Trevi
Trevi ME 3120 RC User manual

Trevi
Trevi ME 3165 RC User manual

Trevi
Trevi ME 3108 RC User manual

Trevi
Trevi ME 3103 User manual

Trevi
Trevi ME 3P20 RC User manual

Trevi
Trevi DME 3228 User manual