Trevi SLD 3200 T User manual

SLD 3200 T
.2
.3
.1
.8 .9 .10 .11 .12 .13
OROLOGIO / METEO STATION
Manuale d’uso
CLOCK / WEATHER STATION
Istruction manual
HORLOGE / STATION MÉTÉO
Manual d’emploi
UHR / WETTERSTATION
Anleitungsheft
RELOJ / ESTACIÓN METEOROLÓGICA
Manual de instrucciones para el uso
.4
.5
.7
.6
.14

2
SLD 3200 T
DESCRIZIONE COMANDI
1. Tasto SNOOZE/LIGHT, disattivazione temporanea allarme /
attivazione retroilluminazione
2. Orologio
3. Simbolo allarme
4. Datario
5. Indicazione giorno della settimana
6. Fase lunare
7. Indice di comfort
8. Temperatura
9. Tasto Time Set, impostazione datario e orologio
10. Tasto Up / ON/OFF, tasto su / attivazione/disattivazione allarme
11. Tasto Down / CF, tasto giù / cambio temperatura °C/°F
12. Tasto Alarm Set, impostazione allarme
13. Umidità interna
14. Vano batterie 3xAAA (non incluse)
ALIMENTAZIONE
Aprire il vano batterie (14) posto sul retro dell’apparecchio ed
inserire tre pile formato “AAA” rispettando le polarità indicate.
REGOLAZIONE DELL’OROLOGIO
1. Tenere premuto il tasto Time Set (9) per avviare la regolazione
dell’orologio.
2. Impostare l’ora tramite i tasti Up (10) o Down (11).
3. Premere il tasto Time Set (9), sul display cominceranno a
lampeggiare i minuti.
4. Impostare i minuti tramite i tasti Up (10) o Down (11).
5. Premere il tasto Time Set (9), sul display cominceranno a
lampeggiare i secondi.
6. Impostare i secondi tramite i tasti Up (10) o Down (11).
7. Premere il tasto Time Set (9), sul display comincerà a lampeg-
giare l’anno.
8. Impostare l’anno tramite i tasti Up (10) o Down (11).
9. Premere il tasto Time Set (9), sul display comincerà a lampeg-
giare il datario.
10. Impostare la visualizzazione del datario mese/giorno o giorno/
mese tramite i tasti Up (10) o Down (11).
11. Premere il tasto Time Set (9), sul display comincerà a lampeg-
giare il mese.
12. Impostare il mese tramite i tasti Up (10) o Down (11).
13. Premere il tasto Time Set (9), sul display comincerà a lampeg-
giare il giorno.
14. Impostare il giorno tramite i tasti Up (10) o Down (11).
15. Premere il tasto Time Set (9), sul display comincerà a lampeg-
giare la lingua.
16. Impostare la lingua tramite i tasti Up (10) o Down (11).
17. Premere il tasto Time Set (9) per confermare e terminare la
regolazione dell’orologio.
18. Impostare la visualizzazione dell’orario in 12/24 ore tramite il
tasto Time Set (9).
REGOLAZIONE E ATTIVAZIONE ALLARME
1. Tenere premuto il tastoAlarm Set (12) per avviare la regolazione
dell’allarme.
2. Impostare l’ora tramite i tasti Up (10) o Down (11).
3. Premere il tasto Alarm Set (12), sul display cominceranno a
lampeggiare i minuti.
4. Impostare i minuti tramite i tasti Up (10) o Down (11).
5. Premere il tasto Alarm Set (12), sul display cominceranno a
lampeggiare i minuti di intervallo dello Snooze.
6. Impostare i minuti di intervallo dello Snooze tramite i tasti Up
(10) o Down (11).
7. Premere il tasto Alarm Set (12) per confermare e terminare la
regolazione dell’allarme.
8. Premere il tasto ON/OFF (10) per attivare l’allarme. Sul display
comparirà il simbolo di allarme
(3).
9. All’ora stabilita l’allarme si attiverà. Per disattivare temporanea-
mente l’allarme, premere il tasto SNOOZE/LIGHT (1). L’allarme
si riattiverà automaticamente dopo l’intervallo impostato al
punto 6.
10. Premere il tasto ON/OFF (10) per disattivare l’allarme. Sul
display scomparirà il simbolo di allarme
(3).
INDICE DI COMFORT
L’indice di comfort visualizza lo stato di temperatura e umidità.
DRY: qualsiasi valore di temperatura, umidità sotto il 50%.
COMFORT: temperatura tra i 20°C e i 27°C, umidità tra il 50%
e il 70%.
WET: qualsiasi valore di temperatura, umidità sopra il 70%.
NESSUNAINDICAZIONE: temperatura sotto i 20°C o sopra i 27°C,
umidità tra il 50% e il 70%.
TEMPERATURA °C/°F
Premere il tasto CF (11) per selezionare l’unità di misura della
temperatura in °C o °F.
FASE LUNARE
Viene mostrato il ciclo lunare in quattro fasi (6).
DATI TECNICI
Intervallo di Snooze:..... da 5 a 60 minuti
Stazione meteo:............ da 0°C a +50°C
Umidità interna: ............ da 20% a 99% RH (umidità relativa)
............................... +/- 5%
Avanzamento unitario:.. 0,1°C per la temperatura
............................... 1% per l’umidità
Orologio:....................... Quarzo
Alimentazione:.............. 3xAAA
Italiano

3
SLD 3200 T
English
FUNCTIONS DESCRIPTION
1. Key SNOOZE / LIGHT, temporary deactivation of the alarm /
turn on backlight
2. Clock
3. Alarm symbol
4. Date
5. Weekday indicator
6. Moon phase
7. Weather forecast indication
8. Temperature
9. Key Time Set, setting the date and clock
10. Key Up / ON/OFF, Up key / enable/disable alarm
11. Key Down / CF, Down key / change temperature °C/°F
12. Key Alarm Set, setting the alarm
13. Indoor humidity
14. Battery compartment 3xAAA (not included)
POWER SUpPLY
Open the battery compartment (14) on the rear of the appliance
and insert three “AAA” size batteries respecting the polarities.
SETTING THE CLOCK
1. Press and hold the Time Set key (9) to start the clock setting.
2. Set the hour using the Up (10) or Down (11) keys.
3. PresstheTimeSetkey(9),theminuteswillashonthedisplay.
4. Set the minutes using the Up (10) or Down (11) keys.
5. PresstheTimeSetkey(9),thesecondswillashonthedisplay.
6. Set the seconds using the Up (10) or Down (11) keys.
7. PresstheTimeSetkey(9),theyearwillashonthedisplay.
8. Set the year using the Up (10) or Down (11) keys.
9. PresstheTimeSetkey(9),thedatewillashonthedisplay.
10. Set the date view month/day or day/month using the Up (10)
or Down (11) keys.
11.PresstheTimeSetkey(9),themonthwillashonthedisplay.
12. Set the month using the Up (10) or Down (11) keys.
13.PresstheTimeSetkey(9),thedaywillashonthedisplay.
14. Set the day using the Up (10) or Down (11) keys.
15.PresstheTimeSetkey(9),the language will ash on the
display.
16. Set the language using the Up (10) or Down (11) keys.
17.PresstheTimeSetkey(9)toconrmandnishtheclock
setting.
18. Set the time display 12/24 hours in by using the Time Set (9)
key.
SETTING AND ACTIVATING ALARM
1. Press and hold the Alarm Set key (9) to start the alarm setting.
2. Set the hour using the Up (10) or Down (11) keys.
3. PresstheAlarmSetkey(9),theminuteswillashonthedisplay.
4. Set the minutes using the Up (10) or Down (11) keys.
5. Press the Alarm Set key (9), minutes of Snooze interval will
ashonthedisplay.
6. Set minutes of Snooze interval using the Up (10) or Down (11)
keys.
7. PresstheAlarmSetkey(9)toconrmandnishthealarm
setting.
8. Press the ON/OFF key (10) to turn on the alarm. The display
will show the alarm symbol
(3).
9. At the setted hour the alarm will be activated. To temporarily
turn off the alarm press the SNOOZE/LIGHTkey (1). The alarm
will reactivate automatically after the interval set in point 6.
10. Press the ON/OFF key (10) to turn off the alarm. The display
will disappear the alarm symbol
(3).
COMFORT INDEX
The comfort index displays the status of temperature and humidity.
DRY: any temperature, humidity under 50%.
COMFORT: temperature between 20° C and 27°C, humidity
between 50% and 70%.
WET: any temperature, humidity above 70%.
NO INDICATION: temperature below 20°C or above 27°C, humidity
between 50% and 70%.
TEMPERATURE °C/°F
Press the CF key (11) to select the unit of measurement of tem-
perature in °C or °F.
MOON PHASE
Shows the lunar cycle in four phases (6).
TECHNICAL DATA
Snooze range:.............. from 5 to 60 minutes
Weather station: ........... from 0°C to +50°C
Indoor humidity:............ from 20% to 99% RH (relative humidity)
Unit:.............................. 0,1°C for the temperature
............................... 1% for the humidity
Watch: .......................... Quartz
Power SUpply:.............. 3xAAA

4
SLD 3200 T
Française
DESCRIPTION DE FONCTIONS
1. Bouton SNOOZE / LIGHT, désactivation temporaire de l’alarme
/ rétro-éclairage s’allume
2. Horloge
3. Symbole de l’alarme
4. Dateur
5. Indicateur de jour de la semaine
6. Phase de lune
7. Indication de prévisions météorologiques
8. Température
9. Bouton Time Set, régler la date et horloge
10. Bouton Up / ON/OFF, bouton Up / activation/désactivation de
l’alarme
11. Bouton Down / CF, bouton enfoncée / changement de tempéra-
ture °C/°F
12. Bouton Alarm Set, régler l’alarme
13. Humidité intérieure
14. Compartiment à piles 3xAAA (non incluse)
BLOC D’ALIMENTATION
Ouvrez le compartiment à piles (14) à l’arrière de l’appareil et
insérez trois piles « AAA » respectant les polarités.
RÉGLAGE DE L’HORLOGE
1. Appuyez et maintenez le bouton Time Set (9) pour commencer
le réglage de l’horloge.
2. Régler l’heure en utilisant les touches Up (10) ou Down (11).
3. Appuyez sur le bouton Time Set (9), le minutes clignote sur
l’écran.
4. Régler le minutes en utilisant les touches Up (10) ou Down
(11).
5. Appuyez sur le bouton Time Set (9), les secondes clignote sur
l’écran.
6. Régler les secondes en utilisant les touches Up (10) ou Down
(11).
7. Appuyez sur le bouton Time Set (9), l’année clignote sur l’écran.
8. Régler l’annéee en utilisant les touches Up (10) ou Down (11).
9. Appuyez sur le bouton Time Set (9), le dateur clignote sur
l’écran.
10.Réglerl’afchagedeladatemois/jouroujour/moisenutilisant
les touches Up (10) ou Down (11).
11. Appuyez sur le bouton Time Set (9), le mois clignote sur l’écran.
12. Régler le mois en utilisant les touches Up (10) ou Down (11).
13. Appuyez sur le bouton Time Set (9), la journée clignote sur
l’écran.
14. Régler la journée en utilisant les touches Up (10) ou Down (11).
15. Appuyez sur le bouton Time Set (9), la langue clignote sur
l’écran.
16. Régler la langue en utilisant les touches Up (10) ou Down (11).
17.AppuyezsurleboutonTimeSet(9)pourconrmeretterminer
le réglage de l’horloge.
18.Dénirl’afchagedel’heure12/24heuresenutilisantlebouton
Time Set (9).
CONFIGURATION ET ACTIVATION D’ALARME
1. Maintenez enfoncée le boutonAlarm Set (12) pour commencer
le réglage de l’alarme.
2. Régler l’heure en utilisant les touches Up (10) ou Down (11).
3. Appuyez sur le bouton Alarm Set (12), le minutes clignote sur
l’écran.
4. Régler le minutes en utilisant les touches Up (10) ou Down
(11).
5. Appuyez sur le bouton Alarm Set (12), le minutes d’intervalle
de répétition clignote sur l’écran.
6. Régler le minutes d’intervalle de répétition en utilisant les
touches Up (10) ou Down (11).
7. AppuyezsurleboutonAlarmSet(12)pourconrmeretterminer
le réglage de l’alarme.
8. Appuyez sur le bouton ON/OFF (10) pour activer l’alarme.
L’écranafchelesymboledel’alarme
(3).
9. À l’heure réglée, l’alarme s’activera. Pour désactiver temporai-
rement l’alarme, appuyez sur le bouton SNOOZE/LIGHT (1).
L’alarmeseréactiveautomatiquementaprèsl’intervalledéni
au point 6.
10. Appuyez sur le bouton ON/OFF (10) pour désactive l’alarme.
Sur l’écran va disparaître le symbole de l’alarme
(3).
INDICE DE CONFORT
L’indicedeconfortafchel’étatdelatempératureetl’humidité.
DRY: n’importe quelle température, humidité inférieure à 50%.
COMFORT: température entre 20° C et 27°C, humidité entre
50% et 70%.
WET: n’importe quelle température, humidité supérieur à 70%.
AUCUNE INDICATION: température inférieure à 20°C ou supérieu-
re à 27°C, humidité entre 50% et 70%.
TEMPÉRATURE °C/°F
Appuyez sur le bouton CF (11) pour sélectionner l’unité de mesure
de la température en °C ou °F.
PHASE DE LUNE
Montre le cycle lunaire en quatre phases (6).
DONNÉES TECHNIQUES
Intervalle de répétition: . de 5 à 60 minutes
Station météo: .............. partir 0°C à +50°C
Humidité intérieure: ...... partir 20% à 99% RH (humidité relative)
............................... +/- 5%
Unité:............................ 0,1°C pour la température
............................... 1% pour l’humidité
Montre: ......................... Quartz
Bloc d’alimentation: ...... 3xAAA

5
SLD 3200 T
Deutsch
BESCHREIBUNG DER FUNKTIONEN
1. SNOOZE-Taste / LIGHT-Taste, vorübergehende Deaktivie-
rung des Alarms / Hintergrundbeleuchtung einschalten
2. Uhr
3. Wecker-symbol
4. Dater
5. Wochentag-Anzeige
6. Mondphase
7. Wettervorhersage-Angabe
8. Temperatur
9. Time Set-Taste, Einstellen von Datum und Uhrzeit
10.Up/ON/OFF-Taste,Schaltäche/Alarmein-/ausschalten
11.Down/CF-Taste,gedrückt/Temperaturänderung°C/°F
12. Alarm Set-Taste, Einstellen von Alarm
13. Innen-Luftfeuchtigkeit
14. Batteriefach 3xAAA (nicht enthalten)
NETZTEIL
ÖffnenSiedasBatteriefach(14)aufderRückseitedesGerätesund
fügenSiedrei“AAA”BatterienAchtungdiePolaritäten.
EINSTELLEN DER UHR
1. Drücken Sie und halten Sie die Time Set-Taste (9) starten,
Einstellen der Uhr.
2. Legen Sie die Stunden mit den Tasten Up (10) oder Down (11).
3. Drücken Sie die Time Set-Taste (9), die Minuten blinkt auf dem
Display.
4. Legen Sie die Minuten mit den Tasten Up (10) oder Down (11).
5. Drücken Sie die Time Set-Taste (9), die Sekunden blinkt auf
dem Display.
6. Legen Sie die Sekunden mit den Tasten Up (10) oder Down
(11).
7. Drücken Sie die Time SetE-Taste (9), im Jahr blinkt auf dem
Display.
8. Legen Sie im Jahr mit den Tasten Up (10) oder Down (11).
9. Drücken Sie die Time Set-Taste (9), der dater blinkt auf dem
Display.
10. Legen Sie die Termin-Ansicht Monat/Tag oder Tag/Monat mit
den Tasten Up (10) oder Down (11).
11. Drücken Sie die Time Set-Taste (9), des Monats blinkt auf dem
Display.
12. Legen Sie des Monats mit den Tasten Up (10) oder Down (11).
13. Drücken Sie die Time Set-Taste (9), der Tag blinkt auf dem
Display.
14. Legen Sie der Tag mit den Tasten Up (10) oder Down (11).
15. Drücken Sie die Time Set-Taste (9), die Sprache blinkt auf dem
Display.
16. Legen Sie die Sprache mit denTasten Up (10) oder Down (11).
17.DrückenSiedieTimeSet-Taste(9)zubestätigen,undbeenden
die Einstellung der Uhr.
18. Legen Sie die Zeitanzeige 12/24 Stunden mit die Time Set-
Taste (9).
EINRICHTEN UND AKTIVIEREN VON ALARM
1. Drücken Sie und halten Sie die Alarm Set-Taste (9) die
Alarmzeit zu starten.
2. Legen Sie die Stunden mit den Tasten Up (10) oder Down (11).
3. Drücken Sie die Alarm Set-Taste (9), die Minuten Snooze
Intervall blinkt auf dem Display.
4. Legen Sie die Minuten mit den Tasten Up (10) oder Down (11).
5. Drücken Sie die Alarm Set-Taste (9), die Minuten Snooze
Intervall blinkt auf dem Display.
6. Legen Sie die Minuten Snooze Intervall mit den Tasten Up (10)
oder Down (11).
7. DrückenSiedieAlarm Set-Taste(9)zubestätigenunddie
Alarmzeit zu beenden.
8. Drücken Sie ON/OFF-Taste (10), um den Alarm zu aktivieren.
Am Display wird das Alarmsymbol angezeigt
(3).
9. In der Stunde gestellt wird der Alarm aktiviert. Um vorüber-
gehend deaktivieren des Alarms drücken Sie die SNOOZE/
LIGHT-Taste (1). Der Alarm wird automatisch nachAblauf des
Intervalls Nummer 6 reaktivieren.
10. Drücken Sie ON/OFF-Taste (10), um den Alarm auszuschal-
tenn. Auf das Display verschwindet das Alarmsymbol
(3).
KOMFORT-INDEX
Der Komfort-Index zeigt den Status von Temperatur und Feuch-
tigkeit.
DRY: Jeder Temperaturwert, Luftfeuchtigkeit unter 50%.
COMFORT: Temperatur zwischen 20° C und 27°C, Luftfeuchtigkeit
zwischen 50% und 70%.
WET: Jeder Temperaturwert, Luftfeuchtigkeit über 70%.
KEINEAngabe: Temperatur unter 20°C oder über 27°C, Luftfeuch-
tigkeit zwischen 50% und 70%.
TEMPERATUR °C/°F
DrückenSiedieCF-Taste(11),wählendieMaßeinheitderTem-
peratur in °C oder °F.
MONDPHASE
Zeigt den Mondzyklus in vier Phasen (6).
TECHNISCHE DATEN
Snooze Intervall:........... von 5 bis 60 Minuten
Wetterstation: ............... von 0°C zu +50°C
Innen-Luftfeuchtigkeit:.......... von 20% zu 99% RH (Relative Luftfeuchtigkeit)
............................... +/- 5%
Einheit:.......................... 0,1°C für die Temperatur
............................... 1% für die Luftfeuchtigkeit
Watch: .......................... Quarz
Netzteil:......................... 3xAAA

6
SLD 3200 T
Español
DESCRIPCIÓN DE FUNCIONES
1. Botón SNOOZE / LIGHT, desactivación temporal de la alarma
/ activar retroiluminación
2. Reloj
3. Símbolo de alarma
4. Fechador
5. Indicador de día de la semana
6. Fases de la luna
7. Indicación previsión del tiempo
8. Temperatura
9. Botón Time Set, ajuste de fecha y reloj
10. Botón Up / ON/OFF, botón de encima / activación/desactivación
de alarma
11. Botón Down / CF, botón de abajo / cambio temperatura °C/°F
12. Botón Alarm Set, ajuste de alarma
13. Humedad interior
14. Compartimento de las pilas 3xAAA (no incluida)
FUENTE DE ALIMENTACIÓN
Abra el compartimento de la batería (14) en la parte posterior
del aparato e Inserte tres pilas de tamaño “AAA” respetando las
polaridades.
AJUSTE DEL RELOJ
1. Presione y sostenga el botón Time Set (9) para empezar el
ajuste del reloj.
2. Ajustar la hora utilizando las teclas Up (10) o Down (11).
3. Pulsar el botón Time Set (9), los minutos parpadeará en la
pantalla.
4. Ajustar los minutos utilizando las teclas Up (10) o Down (11).
5. Pulsar el botón Time Set (9), los segundos parpadeará en la
pantalla.
6. Ajustar los segundos utilizando las teclas Up (10) o Down (11).
7. Pulsar el botón Time Set (9), el año parpadeará en la pantalla.
8. Ajustar el año utilizando las teclas Up (10) o Down (11).
9. Pulsar el botón Time Set (9), el fechador parpadeará en la
pantalla.
10. Ajustar la vista del fechador mes/día o día/mes utilizando las
teclas Up (10) o Down (11).
11. Pulsar el botón Time Set (9), el mes parpadeará en la pantalla.
12. Ajustar el mes utilizando las teclas Up (10) o Down (11).
13. Pulsar el botón Time Set (9), el día parpadeará en la pantalla.
14. Ajustar el día utilizando las teclas Up (10) o Down (11).
15. Pulsar el botón Time Set (9), la lengua parpadeará en la
pantalla.
16. Ajustar la lengua utilizando las teclas Up (10) o Down (11).
17.PulsarelbotónTimeSet(9)paraconrmarynalizarelajuste
del reloj.
18. Ajustar la vista de hora 12/24 horas en mediante el uso del
botón Time Set (9).
CONFIGURACIÓN Y ACTIVACIÓN DE ALARMA
1. Presione y sostenga el botón Alarm Set (12) para iniciar la
programación de la alarma.
2. Ajustar la hora utilizando las teclas Up (10) o Down (11).
3. Pulsar el botón Alarm Set (12), los minutos parpadeará en la
pantalla.
4. Ajustar los minutos utilizando las teclas Up (10) o Down (11).
5. Pulsar el botón Alarm Set (12), los minutos del intervalo de
repetición parpadeará en la pantalla.
6. Ajustar los minutos del intervalo de repetición utilizando las
teclas Up (10) o Down (11).
7. PulsarelbotónAlarmSet(12)paraconrmaryterminarel
ajuste de la alarma.
8. Pulsa el botón ON/OFF (10) para activar la alarma. La pantalla
mostrará el símbolo de alarma
(3).
9. A la hora programada se activará la alarma. Para apagar
temporalmente la alarma Presione el botón SNOOZE/LIGHT
(1). La alarma se reactivará automáticamente tras el intervalo
establecido el punto 6.
10. Pulsa el botón ON/OFF (10) para apagar la alarma. En la
pantalla desaparecerá el símbolo de alarma
(3).
ÍNDICE DE CONFORT
El índice de confort muestra el estado de temperatura y humedad.
DRY: cualquier valor de temperatura, humedad inferior al 50%.
COMFORT: temperatura entre 20°C y 27°C, humedad entre
50% y 70%.
WET: cualquier valor de temperatura, humedad superior al 70%.
NINGUNA INDICACIÓN: temperatura inferior a 20°C o superior a
27°C, humedad entre 50% y 70%.
TEMPERATURA °C/°F
Pulsar el botón CF (11) para seleccionar la unidad de medida de
la temperatura en °C o °F.
FASES DE LA LUNA
Muestra el ciclo lunar en cuatro fases (6).
DATOS TÉCNICOS
Intervalo de repetición: . de 5 a 60 minutos
Estación meteorológica:de 0°C a +50°C
Humedad interior:......... de 20% a 99% RH (humedad relativa)
............................... +/- 5%
Unidad:......................... 0,1°C para la temperatura
............................... 1% para la humedad
Reloj: ............................ Cuarzo
Fuente de alimentación:3xAAA

7
SLD 3200 T
GARANZIA
1. L’apparecchio è garantito per 24 mesi dalla data di fabbrica-
zione indicata sull’etichetta applicata sul prodotto.
2. La garanzia si applica solo ad apparecchi, non manomessi, ripa-
rati da centri assistenza TREVI, essa comprende la riparazione
dei componenti per difetti di fabbricazione con l’esclusione di
etichette, manopole e parti asportabili.
3. TREVI non risponde di danni diretti o indiretti a cose o/e persone
causati dall’uso o sospensione d’uso dell’apparecchio.
WARRANTY
1. This unit is guaranteed for a period of 24 months from the date
of production printed on the product itself or on label on product.
2. The warranty is valid only if the unit has not been tampered
with. The warranty is valid only at authorized TREVI assistan-
ce centres, that will repair manufacturing defects, excluded
replacement of labels and removable parts.
3. TREVI is not liable for damage to people or things caused by
the use of this unit or by the interrUption in the use of this unit.
GARANTIE
1. L’appareil est garanti pendant une période de 24 mois de la
date de fabrication indiquée sur l’étiquette se trouvant sur le
produit.
2. La garantie n’est appliquée que sur les appareils non altérés,
ayant été réparés chez un Service Après-Vente TREVI. Elle
comprend la réparation des composantes à la suite de défauts
de fabrication, à l’exclusion d’étiquettes, boutons de réglage et
parties amovibles.
3. TREVI ne répond pas des dommages directs ou indirects aux
choses et/ou aux personnes entraînés pendant l’usage ou la
suspension d’usage de l’appareil.
GARANTIEBESTIMMUNGEN
1. DasGeräthateineGarantievon24MonatenabdemHerstel-
lungsdatum. Das Herstellungsdatum ist auf der am Produkt
angebrachten Etikette angegeben.
2. DieGarantiegiltnurfürGeräte,andenennichtselbst
ausgeführte Reparaturen erfolgt sind, sondern die von TREVI-
Kundendienststellendurchgeführtwurden.DieGarantieumfaßt
die Reparatur von Bauteilen, wenn diese auf Herstellungsfehler
zurückzuführen sind. Die Garantie gilt hingegen nicht für
Etiketten, Drucktasten, Knöpfe und entfernbare Teile.
3. TREVI haftet nicht für direkte oder indirekte Sach- und/oder
Personenschäden,dievomGebrauchdesGerätesverursacht
worden sind.
GARANTIA
1. El aparato tiene una garantía de 24 meses a partir de la fecha
de fabricación indicada en la tarjeta sobre el producto.
2. La garantía está aplicada solamente a los productos no de-
sarreglados y reparados por los centros de asistencia TREVI.
Además, la garantía incluye la reparación de los componentes a
causa de defectos de fabricación, con la exclusión de etiquetas,
botones y partes removibles.
3. TREVI no es responsable por daños directos o indirectos a
cosas y/o personas causados por el uso o suspensión del uso
del aparato.
GARANTIA
1. O aparelho tem uma garantia de 24 meses a partir da data de
fabricação indicada na etiqueta que consta no produto.
2. Somente aparelhos não violados, e que foram reparados
pelo Centro de Assistência TREVI incluem-se nesta garantia.
Esta compreende a reparação dos componentes em caso de
defeitos de fabricação com a exclusão de etiquetas, botões e
partes que podem ser extraídas.
3. A TREVI não considera-se responsável por danos directos
ou indirectos, causados pelo uso ou suspensão do uso do
aparelho, à objectos e/ou pessoas.
ΕΓΓΎΗΣΗ
1. Η συσκευή είναι εγγυημένη για 24 μήνες από την
ημερομηνίακατασκευήςπουαναγράφεταιστηνετικέτα
προσαρτάταιστοπροϊόν.
2. Η εγγύηση ισχύει μόνο για εξοπλισμού, δεν
ανακατεύτηκα, επισκευαστεί από κέντρα βοήθειας
TREVI,περιλαμβάνειτην επισκευή εξαρτημάτωνγια
κατασκευαστικάελαττώματα,εκτόςαπόετικέτες,λαβές
καιαποσπώμεναμέρη.
3.Φοντάνα ντι δεν είναι υπεύθυνη για την άμεση ή
έμμεση ζημία να πράγματα ή/και προσώπων που
προκαλούνται από τη χρήση ή την αναστολή της
χρήσηςτηςσυσκευής.
Warranty

8
SLD 3200 T
Avvertenze per il corretto smaltimento del prodotto.
Ilsimboloriportatosull’apparecchiaturaindicacheilriutodeve
essere oggetto di “raccolta separata” pertanto il prodotto non deve
esseresmaltitoinsiemeairiutiurbani.
L’utente dovrà consegnare il prodotto presso gli appositi “centri di
raccolta differenziata” predisposti dalle amministrazioni comunali,
oppure consegnarlo al rivenditore contro acquisto di un nuovo
prodotto.
Laraccoltadifferenziatadelriutoelesuccessiveoperazionidi
trattamento, recUpero e smaltimento favoriscono la produzione di
apparecchiature con materiali riciclati e limitano gli effetti negativi
sull’ambiente e sulla salute causati da una gestione impropria
delriuto.
Lo smaltimento abusivo del prodotto comporta l’applicazione di
sanzioni amministrative.
Precautions for correct disposal of the product.
The symbol shown on the equipment indicates that waste must be
disposed of in “separate collection” and so the product must not be
disposed of together with urban waste.
The user must take the product to special “separate waste collection
centres” provided by local government, or deliver it to the retailer
against the purchase of a new product.
Separate collection of waste and subsequent treatment, recycling
and disposal operations promotes the production of equipment with
recycled materials and limits negative effects on the environment
and on health caused by improper handling of waste.
Illegal disposal of the product leads to the enforcement of admi-
nistrative penalties.
Recommandations pour l’élimination correcte du produit.
Lesymbolegurantsurl’appareilindiquequeleproduitfaitl’objet
d’une “ collecte séparée “. C’est pourquoi, le produit ne doit pas
être éliminé avec les déchets urbains.
L’utilisateur doit remettre le produit aUprès de “ décharges spécia-
lisées de collecte séparée “ prévues par les autorités locales, ou
bien le rendre au revendeur quand il achètera un nouvel appareil
équivalent.
La collecte séparée du produit et les opérations successives de
traitement, recyclage et élimination favorisent la production d’ap-
pareils composés par des matériaux recyclés ainsi que permettent
d’éviter des effets négatifs sur l’environnement et sur la santé des
personnes suite à une gestion impropre du déchet.
Toute élimination abusive du produit entraîne l’application de
sanctions administratives.
Hinweise zur ordnungsgemäßen Entsorgung des Produkts.
DasaufdemGerätangebrachteSymbolweistdaraufhin,dass
dasAltgerät“getrenntzusammeln”istunddasProduktdaher
nicht zusammen mit dem Gemeindeabfall entsorgt werden darf.
Der Benutzer muss das Produkt zu den entsprechenden, von der
Gemeindeverwaltung eingerichteten “Wertstoffsammelstellen” brin-
genoderdemHändlerbeimKaufeinesneuenProduktsübergeben.
DiegetrennteMüllsammlungundanschließendeAufbereitung,
Wiederverwertung und Entsorgung fördern die Herstellung von
GerätenunterVerwendungwiederverwerteterMaterialienund
vermindern die negativen Auswirkungen auf die Umwelt und
Gesundheit in Folge einer falschen Müllverwaltung.
Die widerrechtliche Entsorgung des Produkts führt zurAuferlegung
von Verwaltungsstrafen.
Advertencias para la correcta eliminación del producto.
El símbolo que aparece en el aparato indica que el residuo debe
ser objeto de “recogida selectiva” por tanto el producto no se debe
eliminar junto con residuos urbanos.
El usuario deberá entregar el producto a los “centros de recogida
selectiva” creados por las administraciones municipales o bien al
distribuidor cuando adquiera un nuevo producto.
La recogida selectiva del residuo y las sucesivas operaciones de
tratamiento, recUperación y eliminación favorecen la fabricación
de aparatos con materiales reciclados y limitan los efectos nega-
tivos en el medio ambiente y la salud causados por una gestión
incorrecta del residuo.
La eliminación abusiva del producto da lugar a la aplicación de
sanciones administrativas.
Advertências para a correcta demolição do produto.
O símbolo indicado na aparelhagem indica que o resíduo deve
ser objecto de “recolha separada” portanto o produto não deve
ser desmantelado junto dos resíduos urbanos.
O utilizador deverá entregar o produto nos apropriados “centros
de recolha diferenciada” predispostos pelas administrações
comunais, ou entregá-lo ao revendedor em troca de uma compra
de um novo produto.
A recolha diferenciada do resíduo e as sucessivas operações
de tratamento, recUperação e desmantelamento favorecem a
produção de aparelhagens com materiais reciclados e limitam
os efeitos negativos no ambiente e na saúde causados por uma
gestão imprópria do resíduo.
O desmantelamento abusivo do produto comporta a aplicação de
sanções administrativas.
Οδηγίες για τη σωστή απόρριψη του
προϊόντος.
Τοσύμβολοπουεκτίθεταιστονεξοπλισμόδηλώνειότι
πρέπειναδοθείηάρνηση«χωριστήσυλλογή»σημαίνειότι
τοπροϊόνδενπρέπειναδιατίθεταιμεοικιακάαπορρίμματα.
Πρέπειναπαραδώσειτοπροϊόνστηνειδική«κέντρα
ξεχωριστήσυλλογήτωναποβλήτων»πουπαρέχεταιαπό
τουςδήμους,ήνατοπαραδώσειστολιανοπωλητήκατάτην
αγοράενόςνέουπροϊόντος.
Χωριστήσυλλογήαπόρριψηκαιεπόμενηεπεξεργασία,
ανάκτησηκαιδιάθεσηεξοπλισμόμεανακυκλωμέναυλικάκαι
ναπεριορίσουντιςαρνητικέςεπιπτώσειςστοπεριβάλλονκαι
τηνυγείαπουπροκαλούνταιαπόακατάλληληδιαχείρισητων
αποβλήτων.
Καταχρηστικήδιάθεσητουπροϊόντοςπεριλαμβάνειτην
εφαρμογήδιοικητικώνκυρώσεων.
TREVI S.p.A. Strada Consolare Rimini-San Marino, 62 47924
Rimini (RN) Italy
Tel. 0541-756420 - Fax 0541-756430
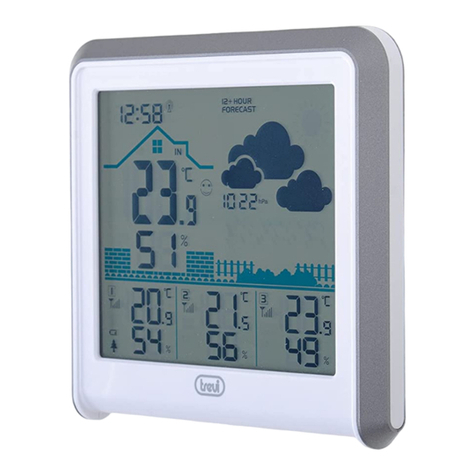
Table of contents
Languages:
Other Trevi Weather Station manuals

Trevi
Trevi ME 3135 User manual

Trevi
Trevi ME 3120 RC User manual

Trevi
Trevi ME 3P20 RC User manual

Trevi
Trevi ME 3P80 RC User manual

Trevi
Trevi ME 3104 User manual

Trevi
Trevi ME 3165 RC User manual

Trevi
Trevi ME 3P08 RC User manual

Trevi
Trevi ME 3108 RC User manual

Trevi
Trevi ME 3103 User manual

Trevi
Trevi DME 3228 User manual
Popular Weather Station manuals by other brands

Sima
Sima First Alert FWS-105 user manual

La Crosse Technology
La Crosse Technology S75617 Faqs

La Crosse Technology
La Crosse Technology WS-2811U-IT Operation manual

PHYWE
PHYWE Cobra SMARTsense operating instructions

Bresser
Bresser 7110300 instruction manual

Oregon Scientific
Oregon Scientific BAR623P user manual