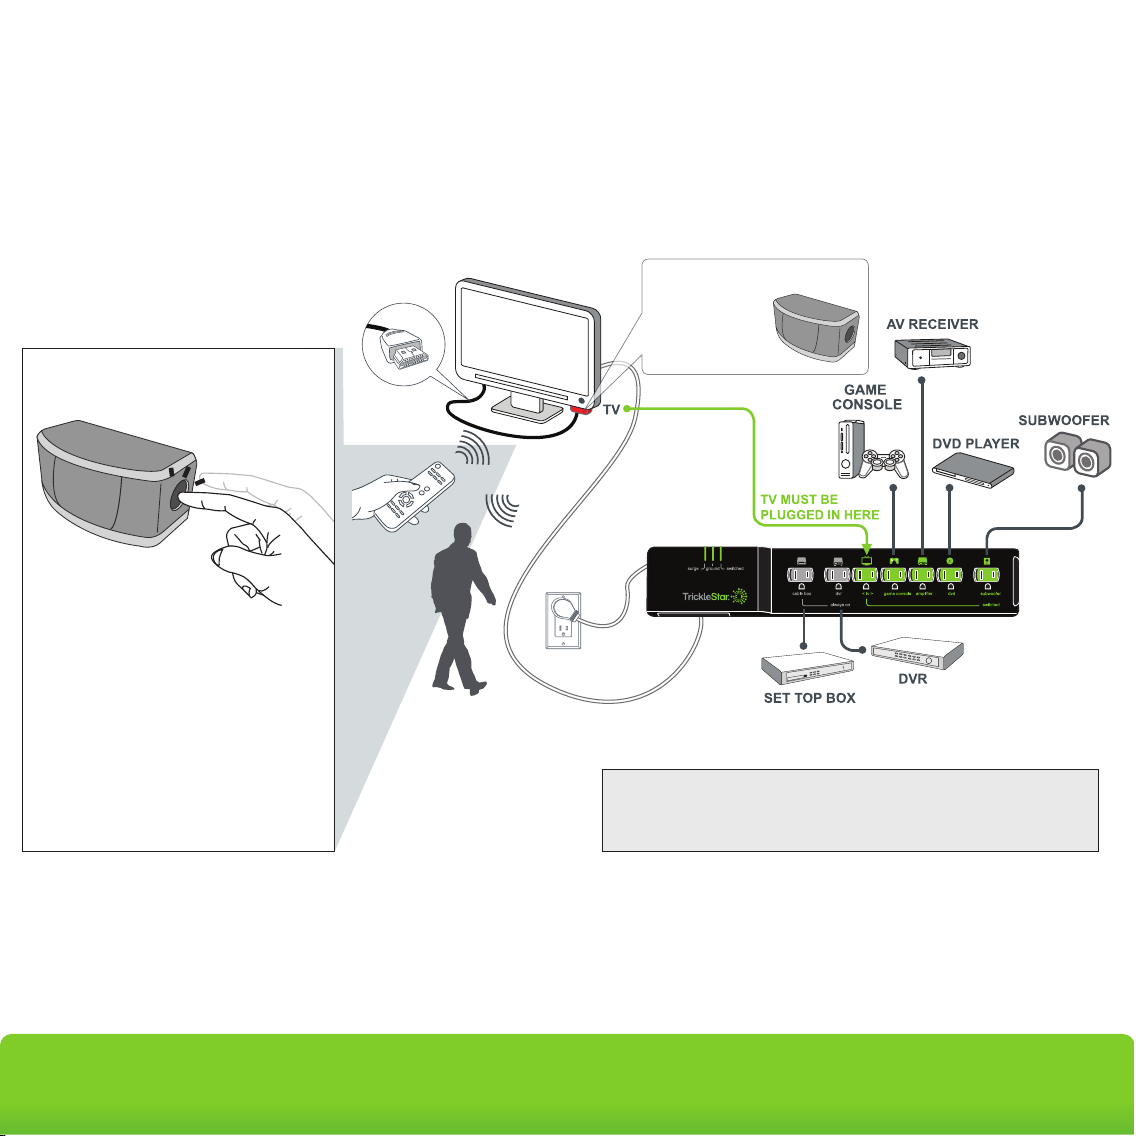
www.tricklestar.com TAV LinkTM Multi-Sensor
TAV LinkTM
Multi-Sensor
Operation
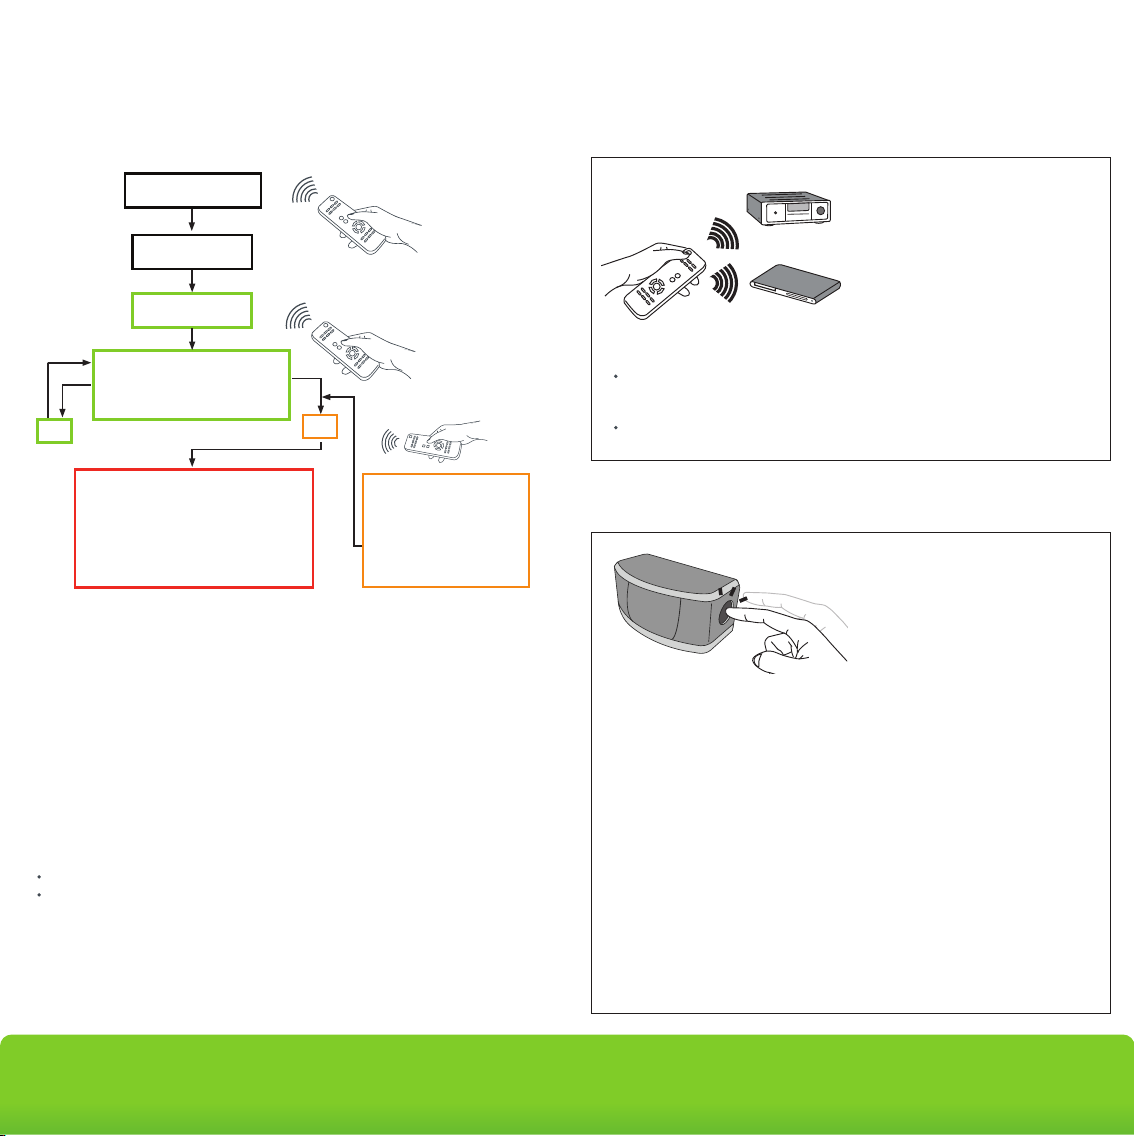
Press any button on AV receiver
or set-up box/DVD/CD player
remote control to turn on the
switched outlets.
Press power on all music
related devices to switch them
on.
If the TV is not switched on at any time in between, all switched outlets will
turn off after eight hours.
If the TV is switched on during music mode, the Advanced PowerStrip+ will
switch to TV mode.
Countdown Timer Setting
To configure the countdown timer, press and hold the button for 10 seconds
until the red LED illuminates. Then press:
• Once for 30 minutes (IR + motion sensing)
• Twice for 60 minutes (IR + motion sensing)
• Three times for 120 minutes (IR + motion sensing)
• Four times for 60 minutes (IR sensing only)
• Five times for 120 minutes (IR sensing only)
After countdown timer is set, the LED will flash the number of times that timer
has been set to.
The sensor has a default buzzer notification that will sound at both 10 minutes
and 3 minutes prior to countdown timer expiration. To disable the audible
notification, press and hold the button for 10 seconds until the red LED
illuminates, then press the button six times. The red LED will flash six times to
confirm that the countdown timer buzzer has been disabled.
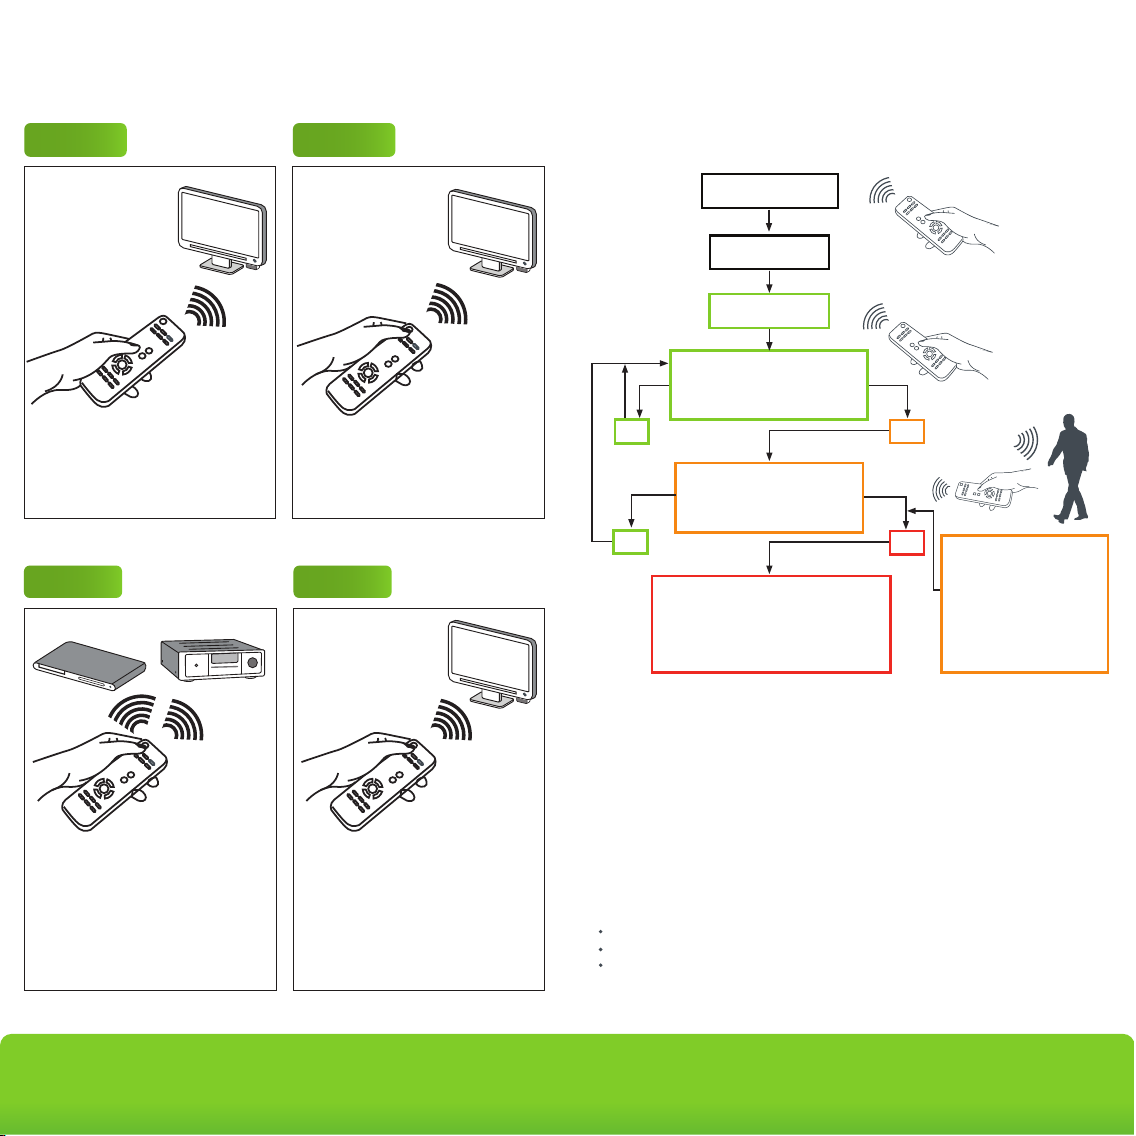
Music Mode
Note:
Note:
Energy Saving
IR-only Sensing
Countdown Timer Operation
For the 60/120 minutes - the multi-sensor senses for IR signal.
If no IR has been sensed during the 60/120 minute countdown period,the
switched outlets will switch off automatically.
IR - Infrared signal, transmitted by a remote control
IR Signal Sensor - Multi-sensor senses for an IR command
Countdown Timer - Time before the switched outlets are automatically switched off
Countdown Period - 60/120 minutes
LED - Red and Blue dual colour LED located in multi-sensor
- When IR is sensed, the Red LED will flash
Buzzer - Buzzer located in the multi-sensor
Terms
TV & peripherals switch off
TAV-Link sends commands to
soft-switch off HDMI-connected
peripherals plugged into the always-on
and switched outlets
No
Switched outlets
switch on
User switches
TV on
60/120 min countdown timer
starts
IR remote control button
press detected?
Yes
User presses IR
remote control
ALERTS START
Buzzer sounds at 10 min
and 3 min before
countdown timer expiration.
Red and blue dual-color
LED flashes