Trikdis SP231 User manual


©1997-2015 Trikdis 2 www.trikdis.com
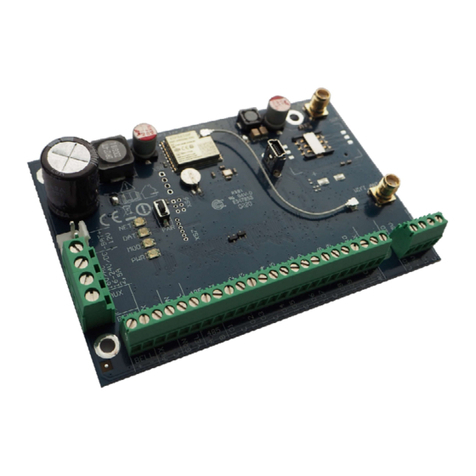
Control panel SP231
Attention!
Read this user manual carefully.
Representative of the company installing the alarm system will explain which security module
SP231 functions needs to be activated to ensure proper security of the object.
Copyright
© 2015 UAB Trikdis. All rights reserved.
Trademarks and patents
Other trade names mentioned in this document may be
registered trademarks or trademarks of respective product
manufacturers or vendor products.
Manufacturer
UAB Trikdis,
Draugystes g. 17, LT-51229 Kaunas, Lithuania
Version
This document applies to GSM security control panel SP231
with software version v150429 or more recent.
Certification
CE mark
European Union directives
2004/108/EC (EMC directive)
1999/5/EB (compliance directive)
Further information
Contact information may be found on www.trikdis.com

©1997-2015 Trikdis 3 www.trikdis.com
Control panel SP231
Contents
1ABOUT YOUR ALARM SYSTEM ........................................................................................... 4
2MAIN TECHNICAL PARAMETERS......................................................................................... 4
3POWER SUPPLY................................................................................................................. 5
4GENERAL ALARM SYSTEM OPERATION............................................................................... 5
4.1 TRANSMISSION OF ALARM SYSTEM MESSAGES............................................................................... 5
4.2 ALARM SYSTEM OPERATION MODES ............................................................................................ 5
4.3 ALARM SYSTEM CONTROL.......................................................................................................... 5
4.4 CONTROL ACCESS..................................................................................................................... 6
4.5 OTHER SECURITY FUNCTIONS ..................................................................................................... 6
4.6 OTHER NON-SECURITY FUNCTIONS.............................................................................................. 6
5ALARM SYSTEM CONTROL USING KEYPAD SK232LED B/W.................................................. 7
5.1 ARMING THE ALARM SYSTEM,ARM MODE .................................................................................. 8
5.2 ARMING THE ALARM SYSTEM,STAY MODE .................................................................................. 8
5.3 ARMING THE ALARM SYSTEM,SLEEP MODE................................................................................. 9
5.4 DISARMING THE ALARM SYSTEM,OFF MODE................................................................................ 9
5.4.1 Disarming the alarm system after it has been activated ................................................ 9
5.5 INVERSION OF ALARM SYSTEM MODE ........................................................................................ 10
5.6 TEMPORARY ZONE BYPASS (BYPASS FUNCTION) .......................................................................... 10
5.7 REVIEWING AND CLEARING ALARM SYSTEM MEMORY................................................................... 10
5.8 RESETTING TWO-WIRE FIRE (SMOKE)SENSORS............................................................................ 11
5.9 EMERGENCY CALL BUTTONS ..................................................................................................... 11
5.10 ALARM SYSTEM TROUBLESHOOTING.......................................................................................... 11
5.11 PROGRAMMING USER CODES................................................................................................... 12
5.11.1 Changing the Master user code ................................................................................ 12
5.11.2 Entering new User codes ........................................................................................... 12
5.11.3 Editing User codes ..................................................................................................... 13
5.11.4 Deleting User codes................................................................................................... 13
5.12 TESTING ALARM SYSTEM OPERATION......................................................................................... 13
5.12.1 Testing sensors and siren .......................................................................................... 13
5.12.2 Testing of message transmission system .................................................................. 14
6CONTROL USING IBUTTON KEYS ...................................................................................... 14
7CONTROL BY PHONE CALL ............................................................................................... 14
8CONTROL BY SMS MESSAGES .......................................................................................... 15

©1997-2015 Trikdis 4 www.trikdis.com
Control panel SP231
1About your alarm system
Control panel SP231 is a part of security and fire alarm system that is designed to process sensor
signals and control the alarm system with a built-in GSM modem that transmits alarm system
messages to central monitoring station (CMS) and user mobile phones.
Detailed operation of your alarm system, its configuration and control will be explained to you by
the representatives of the company installing the alarm system.
2Main technical parameters
Number of zones
8 zones,
may be extended to up to 32
Number of partitions
Up to 8
Alarm system notification
Sound, internal and/or external sirens
Flashing light
Message transmission to the monitoring station and/or
users
Alarm system messages
transmitted to
Monitoring station using GPRS connection and/or SMS
messages
Up to five user mobile phones using/via SMS messages
Security requirements
Conforms to security requirements of standard EN 60950
Security grade
Conforms to Security Grade II and Grade III requirements of
standard EN 50131
User codes for control
Up to 40 user codes,
1 million possible six-digit code combinations,
More than 1 million possible different iButton keys
Class of resistance to external
effects
Conforms to resistance to external effects Class II
requirements of standard EN 50131
Working environment
from -25°C to +50°C with relative humidity of up to 80 % at
+20°C, without condensation
Main power supply
230 V 50 Hz frequency one-phase AC network
(via power reducing transformer).
Used power up to 40 W
Backup power supply
12 V / 7 Ah battery capacity
Used current up to 2 A

©1997-2015 Trikdis 5 www.trikdis.com
Control panel SP231
3Power supply
Security control panel is powered by an alternating current network or, if it fails, by a backup battery.
AC network voltage is used to charge the battery which is then kept on standby. Time of backup
battery operation is limited and depends on the amount of current being used by the alarm system.
12V voltage is required to power additional equipment.
4General alarm system operation
Security-fire alarm system consists of a signal processing panel (control panel) that is installed in a
case alongside power reducing transformer, a backup power battery and attached burglary, break-
in, fire and other sensors, sound and light alarm systems and control equipment.
Sound and light alarm systems are activated and alarm system messages are transmitted to the
monitoring station and to the users when any of the sensors is triggered while security mode is on.
Only permanently armed sensors are triggered when security mode is off.
4.1 Transmission of alarm system messages
Alarm system messages may be transmitted to the monitoring station and/or users. Messages are
firstly transmitted to the monitoring station using set communication channels and only then sent
via SMS messages and/or by calls to the users. Two SIM cards from separate network operators may
be used in order to increase reliability of message transmission.
4.2 Alarm system operation modes
Mode
Description
ARM
Security mode when all zones are secured. Alarm system will be
activated by all possible triggers.
OFF (DISARM)
Security mode when only some zones are secured. Alarm system will
only be activated by events in zones set to Fire, Silent and 24-hour.
STAY
Security mode when only some zones are secured but movement is
allowed in zones set to Interior STAY and Instant STAY. Alarm system
will be activated only after entry time if alarm system is in security
mode and Delay zone is breached.
SLEEP
Security mode when only some zones are secured but movement is
allowed in zones set to Interior STAY and Instant STAY. Alarm system
will be activated immediately if alarm system is in security mode and
Delay zone is breached.
4.3 Alarm system control
Alarm system may be controlled using the following devices:
Trikdis keypad Protegus SK232LED W/B;
Paradox keypads K32+, K32LED, K636, K10LED;
iButton keys;
Codeswitch or another electronic switch when mode of Keyswitch zone is being changed;
Phone (by calling or sending an SMS message with a certain content);
Remote monitoring station command.

©1997-2015 Trikdis 6 www.trikdis.com
Control panel SP231
4.4 Control access
User codes according to which users are given different access levels are used to set alarm system
control access. Four-digit/six-digit user codes are allowed. Only numbers 0-9 may be used in user
codes, other symbols are not allowed.
Alarm system user codes:
Master user code –four-digit or six-digit combination to arm/disarm the alarm system,
temporarily bypass zones and grant access to other users. Only one Master user code is
allowed. It may be changed but not deleted. User may use the Master code to enter or
clear other user codes;
User code –four-digit or six-digit combination to arm/disarm the alarm system and
temporarily bypass zones. It is recommended to provide a personal alarm system user
code to every user. Module SP231 memory supports up to 39 user codes;
SMS password –six-digit combination to control the alarm system using SMS messages.
4.5 Other security functions
Name
Description
Bypass
Option to temporarily bypass the control of a secured zone. This option
is used to arm the alarm system when there is a malfunction in the
zone that cannot be easily terminated.
Bell Squawk
Module will indicate when alarm system is armed/disarmed using a short
siren alarm system.
Door Chime
Module will activate the buzzer and/or respectively programmed PGM
output and warn about breached Delay zone if the alarm system is off.
Re-ARM
Function to avoid unintentional disarm of the alarm system. Module will
activate the latest security mode if alarm system is disarmed by a phone
call and entry zone is not breached.
4.6 Other non-security functions
Name
Description
Measuring
temperature
Temperature sensors DS18B20, DS18S20 may be connected to module
SP231 and assigned permissible temperature fluctuation limits. A
corresponding message will be generated and sent to users once
temperature rises or falls beyond the limits.
Remote equipment
control
Additional electro-technical equipment may be connected to
programmable open collector outputs of security module SP231 and
controlled remotely.

©1997-2015 Trikdis 7 www.trikdis.com
Control panel SP231
5Alarm system control using keypad SK232LED B/W
Alarm system control keypad Trikdis SK232LED B/W supports the display of 32 zones and 2
partitions.
Buttons for setting operation modes and entering numbers
Button
Description
Backlit button indicates power supply from AC network, flashing light
indicates power supply from backup battery.
Button is also used to edit user codes.
MEM
Backlit button indicates new information in the memory, flashing light
indicates operation mode MEM.
Button is also used to select memory review mode.
BYP
Backlit button indicates that there are temporarily bypassed zones, flashing
light indicates operation mode BYP.
Button is also used to select temporary zone bypass mode.
TRB
Backlit button indicates operation trouble, flashing light indicates operation
mode TBL.
Button is also used to select trouble review mode.
1, 2 ...9, 0
Button to enter numbers.
C
Button to exit the mode and delete entered values.
OK
Button to confirm the selection.
ARM
Activates full security ARM mode.
SLEEP
Activates SLEEP mode.
STAY
Activates STAY mode.
OFF
Activates OFF (DISARM) mode.
Security and zone mode indicator
Backlit buttons for setting operation modes and entering numbers

©1997-2015 Trikdis 8 www.trikdis.com
Control panel SP231
5.1 Arming the alarm system, ARM mode
To activate security mode ARM:
1. Press [ARM].
2. Use the keypad to enter the alarm system user code.
a. Skip steps 3, 4 if the system has only one partition.
3. Select the required partition by pressing a button with its number.
4. Press [OK] to confirm the selection.
5. Exit the premises and close the door during the pre-set time for exit Exit Delay.
a. Keypad indicator [ARM] will start flashing during Exit Delay time and will light up
once the alarm system is armed.
b. Siren will briefly signal once when alarm system is armed if function Bell Squawk is
activated.
5.2 Arming the alarm system, STAY mode
To activate security mode STAY:
1. Press [STAY].
2. Use the keypad to enter the alarm system user code.
a. Skip steps 3, 4 if the system has only one partition.
3. Select the required partition by pressing a button with its number.
4. Press [OK] to confirm the selection.
5. Exit the premises and close the door during the pre-set time for exit.
a. Keypad indicator [STAY] will start flashing during Exit Delay time and will light up
once the alarm system is armed.
b. Siren will briefly signal once when alarm system is armed if function Bell Squawk is
activated.
Note. At least one zone must be set to Interior STAY or Instant STAY, otherwise STAY mode is
not allowed.
Notes:
1. Press [C] to deactivate the programming mode or delete an incorrectly entered value.
2. Alarm cannot be armed if at least one zone is breached.

©1997-2015 Trikdis 9 www.trikdis.com
Control panel SP231
5.3 Arming the alarm system, SLEEP mode
To activate security mode SLEEP:
1. Press [SLEEP].
2. Use the keypad to enter the alarm system user code.
a. Skip steps 3, 4 if the system has only one partition.
3. Select the required partition by pressing a button with its number.
4. Press [OK] to confirm the selection.
5. Exit the premises and close the door during the time for exit.
a. Keypad indicator [SLEEP] will start flashing during Exit Delay time and will light up
once the alarm system is armed.
b. Siren will briefly signal once when alarm system is armed if function Bell Squawk is
activated.
5.4 Disarming the alarm system, OFF mode
Time countdown to enter Entry Delay during which the alarm system must be disarmed will
activate if anyone enters the premises through Delay zone when premises are secured in ARM or
STAY mode.
To deactivate security mode (activate mode OFF / DISARM):
1. Press [OFF].
2. Use the keypad to enter the alarm system user code.
a. Skip steps 3, 4 if the system has only one partition.
3. Select the required partition by pressing a button with its number.
4. Press [OK] to confirm the selection.
a. Indicator [OFF] lights up once alarm system is disarmed.
b. Siren will briefly signal twice when alarm system is disarmed if function Bell
Squawk is activated.
5.4.1 Disarming the alarm system after it has been activated
To disarm the alarm system:
1. Press [OFF].
2. Use the keypad to enter the alarm system user code.
a. Skip steps 3, 4 if the system has only one partition.
3. Select the required partition by pressing a button with its number.
4. Press [OK] to confirm the selection.
a. Indicator [OFF] lights up once alarm system is disarmed.
b. Siren will briefly signal twice when alarm system is disarmed if function Bell
Squawk is activated.
c. Indicator [MEM] will light up notifying about new information in the memory
allowing to find out the reason alarm system was activated.
Note. At least one zone must be changed to Interior STAY or Instant STAY, otherwise STAY
mode is not allowed.

©1997-2015 Trikdis 10 www.trikdis.com
Control panel SP231
5.5 Inversion of alarm system mode
Inversion of alarm system mode may be used for quicker control of the alarm system.
Security modes ARM, STAY and SLEEP are changed to OFF/DISARM, OFF/DISARM is changed to
ARM or STAY mode.
To invert alarm system mode:
1. Enter the alarm system user code.
a. Skip step 2 if system has only one partition. Partition numbers will light up on the
keypad indicating those that may be changed if system has more than one
partition.
2. Select the required partition by pressing a button with its number.
3. Partitions that were in ARM, STAY or SLEEP mode will change to mode OFF/DISARM.
a. Indicator [OFF] light up once alarm system is disarmed.
b. Siren will briefly signal twice when alarm system is disarmed if function Bell
Squawk is activated.
4. Time countdown Exit delay will begin for partitions that were in OFF/DISARM mode. ARM
mode will be activated if Delay zone is breached during the countdown, STAY mode will
be activated if it was not breached.
a. Corresponding keypad indicator ([ARM] or [STAY]) will light up.
b. Siren will briefly signal once when alarm system is armed if function Bell Squawk is
activated.
5.6 Temporary zone bypass (Bypass function)
To activate function Bypass:
1. Press [BYP].
2. Enter the alarm system user code.
a. Indicator BYP will start flashing.
3. Enter two-digit numbers of the zones to bypass them.
4. Press [OK] to confirm the selection.
Repeat the same steps as to temporarily bypass zone monitoring in order to deactivate function
Bypass.
5.7 Reviewing and clearing alarm system memory
Button [MEM] will light up if alarm system is triggered. To diagnose the reason:
1. Press [MEM].
2. Enter the user code if needed.
a. Backlit buttons will indicate zones that triggered the alarm system.
3. Press [C] to clear the memory and exit this mode.
a. Information will stay in the memory and indicator [MEM] will light up if no action
is performed after a minute.

©1997-2015 Trikdis 11 www.trikdis.com
Control panel SP231
5.8 Resetting two-wire fire (smoke) sensors
To reset sensor indication after activation of fire (smoke) sensors:
Keep [ ] pressed for 3 seconds.
a. Two-wire fire (smoke) sensors connected to input ZN8 will reset.
b. PGM output will activate Fire Sensor Reset mode.
5.9 Emergency call buttons
Keypad may be used to send messages about imminent threat or necessary help to the security
firm. This option is available if services of a security firm are used and communication with the
monitoring station is established.
Keep pressed for 3 seconds:
[1] to send message Panic.
[4] to send message Medical.
[7] to send message Fire.
5.10 Alarm system troubleshooting
Keypad button indicator [TRB] lights up if there are operational troubles. To troubleshoot:
1. Press [TRB].
2. Enter the installer code if needed.
a. Trouble groups will light up on the keypad.
3. Press the button to select the trouble group.
4. Press [C] to exit this mode.
Trouble descriptions
Trouble group
Description of selected group backlit buttons
[1]: System
[1] No power supply
[2] Low battery voltage
[3] No battery (fully discharged or disconnected)
[4] Permissible current of power supply output AUX is exceeded
[5] Permissible current of siren output is exceeded
[6] No siren
[7] No timestamp (clock is not working)
[2]: Communications
[1] Faulty primary communication channel
[2] Faulty backup communication channel
[3] Faulty backup SMS communication channel
[4] Faulty operation of transmission device connected to MCI databus

©1997-2015 Trikdis 12 www.trikdis.com
Control panel SP231
[5] Faulty GSM network registration /network / SIM operation
[3]: Zones
Numbers of breached zones (or their tampers)
[4]: Databus Y/G
Numbers of Y/G databus expanders that are experiencing troubles
[5]: Databus MCI
Numbers of MCI databus expanders that are experiencing troubles
[6]: Fire or anti-
maskingcircuit
Fire sensor (ZN8) loop or anti-masking circuit is open if number [6]
lights up
5.11 Programming User codes
5.11.1 Changing the Master user code
To change the Master user code:
1. Press [ ].
2. Enter the Master user code.
a. Button [ ] will start flashing.
b. Button [1] will light up.
3. Enter the two-digit Master user code serial number [01].
4. Enter the new Master user code.
5. Repeat the new Master user code.
6. Enter numbers of partitions that the user will be able to control.
7. Press [OK] to confirm the selection.
8. Click [C] to exit this mode.
5.11.2 Entering new User codes
To enter a new User code:
1. Press [ ].
2. Enter the Master user code.
a. Button [ ] will start flashing.
b. Backlit numbers on the keypad will indicate serial numbers of users whose codes
are already entered.
3. Enter the two-digit user serial number.
4. Enter the new User code.
5. Repeat the new User code.
6. Enter numbers of partitions that the user will be able to control.
7. Press [OK] to confirm the selection.
8. Click [C] to exit this mode.

©1997-2015 Trikdis 13 www.trikdis.com
Control panel SP231
5.11.3 Editing User codes
To edit current User codes:
1. Press [ ].
2. Enter the Master user code.
a. Button [ ] will start flashing.
b. Backlit numbers on the keypad will indicate serial numbers of users whose codes
are already entered.
3. Enter the two-digit user serial number.
4. Enter the new User code.
5. Repeat the new User code.
6. Enter numbers of partitions that the user will be able to control.
7. Press [OK] to confirm the selection.
8. Click [C] to exit this mode.
5.11.4 Deleting User codes
To delete current User codes:
1. Press [ ].
2. Enter the Master user code.
a. Button [ ] will start flashing.
b. Backlit numbers on the keypad will indicate serial numbers of users whose codes
are already entered.
3. Enter the two-digit user serial number.
4. Press [SLEEP].
5. Press [C] to exit this mode.
5.12 Testing alarm system operation
5.12.1 Testing sensors and siren
To activate testing mode Walk-test:
1. Press [OK].
2. Enter the Installer code.
3. Press [TRB].
a. Buttons STAY and ARM will start flashing and alarm system will change to testing
mode.
b. Siren and keypad buzzer will signal about the operation of a zone when zone
modes change.
c. Testing mode will be automatically terminated if tamper or security mode is
activated during the testing.
To deactivate mode Walk-test repeat the same steps as to activate the mode.
Note. Keypad must be connected and Installer code must be entered to activate operation
testing mode Walk-test.

©1997-2015 Trikdis 14 www.trikdis.com
Control panel SP231
5.12.2 Testing of message transmission system
Communication test message E602 - Periodical test will be generated and transmitted to the
monitoring station. It is recommended to notify the security firm before performing the testing.
To test message transmission:
1. Press [OK].
2. Enter the Installer code.
3. Press [MEM].
6Control using iButton keys
Alarm system security modes ARM / STAY / OFF may be set using iButton keys. Security mode SLEEP
is not allowed.
Put iButton key against the key scan slot. Alarm system mode will change to the opposite mode. It
will be disarmed if it was armed. It will be armed and time countdown for exit will start if it was
disarmed. Security mode STAY will be activated if zones are set to Interior STAY and Instant STAY
and Delay zone is not breached during the exit time.
Parameter setting software TrikdisConfig may be used to delete current keys and enter new ones
in an already installed and operational alarm system.
7Control by phone call
Notes:
1. Alarm system cannot be armed if at least one of the zones is breached.
2. Only security mode ARM is allowed when controlling the alarm system by phone call.
3. It is recommended to specify current security mode by sending zone mode request via
SMS message (command 97 ˽4) before making a phone call.
Enter user phone numbers and specify what can be controlled using a phone call:
arming/disarming the alarm system or/and controlling the electro-technical equipment connected
to module output PGMx in order to program the module.
Call the number of the SIM card inserted in the security module SP231. Alarm system mode will
change to the opposite mode if the phone number is listed in the module memory and remote
control mode is activated.
Alarm system will automatically activate the latest security mode after pre-set entry time passes if
function Re-ARM is activated and Delay zone is not breached after the alarm system disarm
command.
Note. Alarm cannot be armed if at least one of the zones is breached.

©1997-2015 Trikdis 15 www.trikdis.com
Control panel SP231
8Control by SMS messages
Alarm system may be controlled and part of control panel parameters may be changed using SMS
messages. All module parameters may only be changed using TrikdisConfig.
Send an SMS message to change the desired module parameter using the following syntax:
PSW[Password] space [Command code] space [Content of a command]
SMS messages must begin with capital letters PSW and a six-digit remote access code of the
module.
Symbol ˽ refers to a space in the SMS message text.
Module will send an SMS message (response to a request) to the phone from which the request
was received.
SMS command text
Description
CFGxxxxxx ˽ 01 ˽ CCCC #
PPPPPPPPP #
Adds phone number to user. Command can be sent from any
phone number.
01 –command number, CCCC –user code, PPPPPPPPP –user
phone number.
Example adding a phone number to the user which code is
“1234”:
“CFG123456 01 1234#+37061111111#”
PSWxxxxxx ˽ 10 ˽
AAA.AAA.AAA.AAA#PPPP#
Sets the first IP address and port number.
AAA.AAA.AAA.AAA –IP address
PPPP –port number
PSWxxxxxx ˽ 11 ˽
AAA.AAA.AAA.AAA#PPPP#
Sets the second IP address and port number.
AAA.AAA.AAA.AAA –IP address
PPPP –port number
PSWxxxxxx ˽ 12 ˽
APN#LOGIN#PSW#ENC#PING#
Sets the connection settings for GSM operator network.
APN –access name (up to 50 characters),
LOGIN –user name (up to 29 characters),
PSW –user password (up to 29 characters),
ENC –data encryption key (6 characters),
PING –message sending interval (10 –65000).
Enter the end sign # after each entered value,
e.g. PSWxxxxxx 12 APN#LOGIN#PSW#123456#180#.
SMS message should match the following: PSWxxxxxx 12
APN###123456#180#, if operator does not request to specify
APN access name, user name LOGIN and password PSW.
Note. Change default remote access code (123456) to one that only you would know, e.g.
111111, by sending SMS message: PSW123456 ˽ 98 ˽111111

©1997-2015 Trikdis 16 www.trikdis.com
Control panel SP231
PSWxxxxxx ˽ 13 ˽
APN#LOGIN2#PSW2#
Set SIM2 card access to GSM network settings.
APN – access name (up to 50 characters),
LOGIN – user name (up to 29 characters)
PSW – user password (up to 29 characters)
PSWxxxxxx ˽ 50 ˽ N
Changes the mode of the N-th PGM output to the opposite
mode if it is set to “Remote Control“.
N values: 1, 2, 3, 4, 5.
PSWxxxxxx ˽ 5N ˽ 0
Changes the mode of the N-th PGM output to OFF if it is set to
“Remote Control“.
N values: 1, 2, 3, 4, 5.
PSWxxxxxx ˽ 5N ˽ 1
Changes the mode of the N-th PGM output to ON if it is set to
“Remote Control“.
N values: 1, 2, 3, 4, 5.
PSWxxxxxx ˽ 58˽PGM ˽TIME
Turns on pulsed activation of PGM output for a specified
amount of time. Specifying time overwrites time settings in the
control panel.
PGM –PGM output number.
TIME –time in seconds up to 999999.
PSWxxxxxx ˽ 59
Resets two-wire fire (smoke) sensors connected to input ZN8.
PSWxxxxxx ˽ 60 ˽ P # S
Changes the security mode of a partition.
P refers to the partition number (1 –8).
S values:
Number 0 –change to Disarm, 1 –ARM, 2 –SLEEP, 3 –STAY.
PSWxxxxxx ˽ 80˽NN˽S
Activates BYPASS mode in the zone numbered NN.
NN values: zone number 01 –32.
S values: number 1 –activate BYPASS, 0 –deactivate BYPASS.
PSWxxxxxx ˽ 94 ˽ N
Enable connection to the remote server.
N values: 1 –enable, 0 –disable.
PSWxxxxxx ˽ 96 ˽
yyyy/mm/dd#hh:mm#
Sets module date and time.
yyyy –year, mm –month, dd –day, hh –hour,
mm –minute.
PSWxxxxxx ˽ 97 ˽ 1
Sends SMS message with values of all registered temperature
sensors.
PSWxxxxxx ˽ 97 ˽ 2
Sends SMS message with system partition modes (DISARM,
ARM, STAY, SLEEP).
PSWxxxxxx ˽ 97 ˽ 3
Sends SMS message with modes of PGM outputs.
PSWxxxxxx ˽ 97 ˽ 4
Sends SMS message with modes of alarm system inputs and
power supply.
PSWxxxxxx ˽ 97 ˽ 5
Sends SMS message with GSM network strength and IMEI
number of the modem.
PSWxxxxxx ˽ 97 ˽ 6
Sends SMS message with the version of module firmware and
IMEI number of the modem.
PSWxxxxxx ˽ 98 ˽ ZZZZZZ
Sets a new six-digit module access code.
ZZZZZZ –new access code
PSWxxxxxx ˽ 99
Resets the module.

©1997-2015 Trikdis 17 www.trikdis.com
Control panel SP231
Information about the secured object
Fill in the table. Keep this document in a secure location.
Access codes
Your Master access code is ______________________________
Other access codes:
No.
Code
Control key No.
No.
Code
Control key No.
02
22
03
23
04
24
05
25
06
26
07
27
08
28
09
29
10
30
11
31
12
32
13
33
14
34
15
35
16
36
17
37
18
38
19
39
20
40
21
Zones
Zone
Secured space
Zone type
01
02

©1997-2015 Trikdis 18 www.trikdis.com
Control panel SP231
03
04
05
06
07
08
09
10
11
12
13
14
15
16
Zone
Secured space
Zone type
17
18
19
20
21
22
23
24
25
26
27
28
29

©1997-2015 Trikdis 19 www.trikdis.com
Control panel SP231
30
31
32
Temperature
Sensor
Serial number
Controlled space
Maximum
temperature
Minimum
temperature
01
02
03
04
05
06
07
08
09
10
Emergency call buttons
Alarm system __________________________
Ambulance __________________________
Fire __________________________
Time intervals
Time for entry _________________________ sec.
Time for exit _________________________ sec.
Siren operation time _________________________ sec.
Additional information
CSP ______________________ ____________________ __________________
(name) (phone number) (password)
Installer ______________________ ____________________
(name) (phone number)
Other manuals for SP231
1
Table of contents
Other Trikdis Control Panel manuals
Popular Control Panel manuals by other brands

FunkTronic
FunkTronic Major BOS 4VD manual
Dwyer Instruments
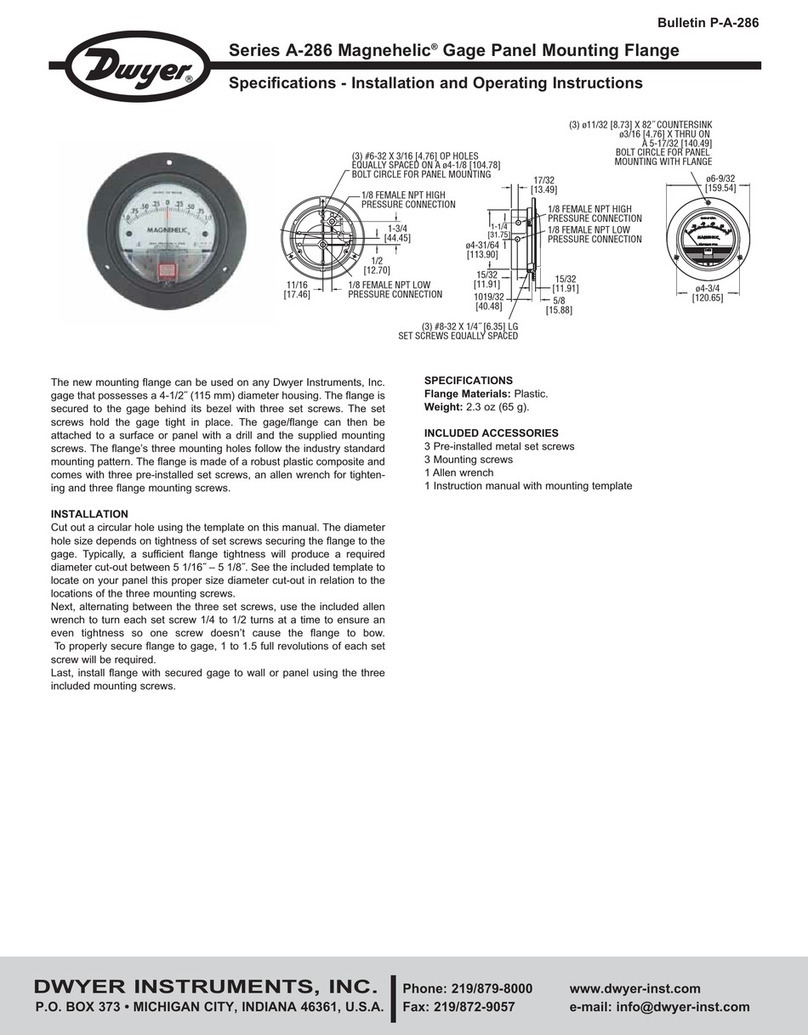
Dwyer Instruments Magnehelic A-286 Series Specifications-installation and operating instructions
Siemens
Siemens FC901 Installation instruction
Honeywell
Honeywell NOTIFIER AM-8200 Programming manual
York
York MILLENNIUM operating instructions
Sony
Sony RCP-D50 Service manual
Truma
Truma Panel BC (616) Operating instructions & installation instructions
HotSpring
HotSpring IQ 2020 Quick reference guide

Sleipner
Sleipner PJC421 user manual
Impromat Klima
Impromat Klima UTI-IQCP user guide

Integrated Technical Vision
Integrated Technical Vision U-PROX HUB LAN user manual

Brasch
Brasch GDCP-Touch Installation & operation manual
