manuals.online logo
Brands
  1. Home
  2. •
  3. Brands
  4. •
  5. Sealey
  6. •
  7. Tools Storage
  8. •
  9. Sealey SC01.V2 User manual

Sealey SC01.V2 User manual

INSTRUCTIONS FOR:
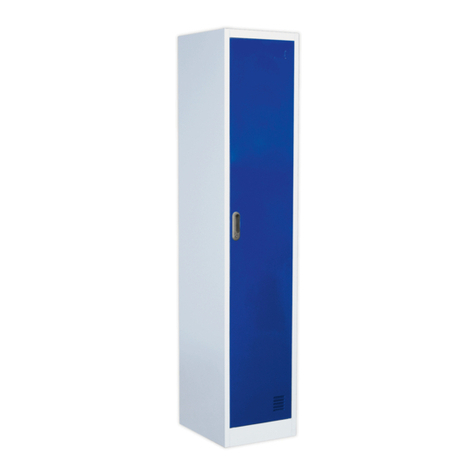
2 DOOR FLOOR CABINET
MODEL No: SC01.V2
1. SAFETY INSTRUCTIONS
2. INTRODUCTION
1.1 GENERAL SAFETY
 WARNING! Ensure Health & Safety, local authority, and
general workshop practice regulations are adhered to when
using this cabinet.
 WARNING! Use caution when handling and assembling
the metal components. The metal may have sharp edges
or corners, the use of protective gloves is recommended.
Locate cabinet in a suitable working area and secure to a
wall with suitable fasteners.
 Keep the work area clean and uncluttered.
Keep the cabinet clean and tidy in accordance with good
workshop practice.
Keep children and unauthorised persons away from the
working area.
 DO NOT climb, step or stand on the cabinet shelves.
 DO NOT use the cabinet for any purpose other than that
for which it is designed.
 DO NOT use in damp work areas.
 WARNING! The warnings, cautions and instructions
referred to in this instruction manual cannot cover all
possible conditions and situations that may occur. It must
be understood that common sense and caution are factors
which cannot be built into this product, but must be applied
by the operator.
Thank you for purchasing a Sealey product. Manufactured to a high standard this product will, if used according to these instructions and properly
maintained, give you years of trouble free performance.
IMPORTANT: PLEASE READ THESE INSTRUCTIONS CAREFULLY. NOTE THE SAFE OPERATIONAL REQUIREMENTS, WARNINGS & CAUTIONS.
USE THE PRODUCT CORRECTLY AND WITH CARE FOR THE PURPOSE FOR WHICH IT IS INTENDED. FAILURE TO DO SO MAY CAUSE DAMAGE
AND/OR PERSONAL INJURY, AND WILL INVALIDATE THE WARRANTY. PLEASE KEEP INSTRUCTIONS SAFE FOR FUTURE USE.
3. CONTENTS
Original Language Version SC01.V2 Issue:1 - 12/07/10
Use as an individual storage unit. Featuring two large
doors, four shelves and base storage. Added security
provided by cylinder lock, supplied with two keys. All steel
construction, stabilised by an inner cross member. Supplied
flat packed to save freight cost, simple assembly required.
Size (W x D x H): 900 x 400 x 1800mm
3.1 CONTENTS INSPECTION
Unpack all the parts and layout on the packing material.
Visually inspect all panels to check for transportation
damage.
A1 .....Back (left hand side) ............................................1 off
A2 .....Back (right hand side) ..........................................1 off
B1 .....Side (left hand side) .............................................1 off
B2 .....Side (right hand side)...........................................1 off
C.......Cross member......................................................1 off
D.......Base .....................................................................1 off
E.......Base outer fascia .................................................1 off
F........Top........................................................................1 off
G.......Shelf .....................................................................4 off
H1 .....Door (left hand side) ............................................1 off
H2 .....Door (right hand side) ..........................................1 off
I.........Bolt and butterfly nut ............................................4 off
J........Top panel retainer moulding.................................2 off
K.......Hinge pivot moulding............................................4 off
L........Locking rod recess moulding ...............................2 off
P.......Hinge pin ..............................................................4 off
Q.......Door stop moulding ..............................................4 off
S.......Shelf stop ...........................................................16 off
4. ASSEMBLY
4.5 TOP ASSEMBLY (Step 5)
4.5.1 Take the two top panel retainer mouldings (J) and fully
insert one into each hole at the top front edge of each
side panel in the orientation shown in Step 5.
4.5.2 Take the top panel (F) and hook it's front edge over the
two retainer mouldings, then swing the panel downwards
until the top edges of the back and side panels begin to
enter the receiving channels within the top panel. Tap the
top panel down into position using a rubber hammer until
the four indents in the back panels clip into the matching
holes in the back receiving channels.
4.4 BASE ASSEMBLY (Step 4)
4.4.1 Place the base (D) into position as shown above and
slide it down to the bottom until its edges make contact
with the receiving channels on the back and side panels.
Using a rubber hammer, tap the base down until it is fully
engaged in the channels.
4.3 CROSS MEMBER ASSEMBLY (Step 3)
4.3.1 Tie the side panels together at the bottom front edge by
attaching the cross member (C) using four bolts (I) and
 fourbutterynutsasshownintheinsetdiagramabove.
4.2 SIDE ASSEMBLY (Step 2)
4.2.1 Holdthesidepanels(B1&B2)ataslightangleandt 
the tabs on the back panels into the slots of the side
panels and slide up to engage.
Original Language Version SC01.V2 Issue:1 - 12/07/10
4.1 BACK ASSEMBLY (Step 1)
4.1.1 Place the back panels (A 1& A2) on a suitably protected
 atsurfacetopreventscratching.
4.1.2 Interlock the tabs into the slots on the back panels and
slide together until the two panels are fully engaged and
aligned.
4.7 SHELF ASSEMBLY (Step 7)
4.7.1 Insert shelf stops (S) at the desired height for each shelf
and lay the shelves onto the stops.
4.8 DOORS ASSEMBLY (Step 8)
4.8.1 Mount each door in turn by placing it between the upper
and lower hinge pivot mouldings. Align the upper hole in
the door edge with the hole in the upper pivot moulding
and insert a hinge pin upwards through the door and into
the moulding. Rotate the short arm of the pin around onto
the inner face of the door as shown above and bend over
the metal tab to retain it. Mount the lower hinge pin in the
same way. Repeat the process to mount the other door.
4.8.2 Fit the rubber door stops (Q) as shown in Step 8 to the
corners of each door
4.9 Using a mild solution of detergent and water and wipe
the unit down with a soft cloth.
4.6 BASE OUTER FASCIA ASSEMBLY (Step 6)
4.6.1 Fit the base outer fascia (E) over the cross member (C)
with the hinge pivot holes facing upwards. Tap the base
outer fascia down with a rubber hammer until the indents
in the sides of the fascia clip into the matching holes on
the cross member (C).
4.6.2 Insert a hinge pivot moulding (K) at each end of the
upper face of the base outer fascia (E). Insert the other
two hinge pivot mouldings at each end of the downward
facing edge of the cabinet top.
4.6.3 Insert a locking rod recess moulding (L) into the centrally
placed holes in the same faces used for mounting the
hinge pivot mouldings at both the top and the bottom.
Parts support is available for this product. To obtain a parts listing and/or diagram, please log on to
www.sealey.co.uk, email sales@sealey.co.uk or phone 01284 757500.
NOTE: It is our policy to continually improve products and as such we reserve the right to alter data, specifications and component parts without prior notice.
IMPORTANT: No liability is accepted for incorrect use of this product.
WARRANTY: Guarantee is 12 months from purchase date, proof of which will be required for any claim.
INFORMATION: For a copy of our latest catalogue and promotions call us on 01284 757525 and leave your full name and address, including postcode.
01284 757500
01284 703534
sales@sealey.co.uk
Sole UK Distributor, Sealey Group,
Kempson Way, Suffolk Business Park,
Bury St. Edmunds, Suffolk,
IP32 7AR
www.sealey.co.uk
Web
email
Original Language Version SC01.V2 Issue:1 - 12/07/10

Other Sealey Tools Storage manuals

Sealey AP0618.V3 User manual

Sealey

Sealey AP0618.V3 User manual

Sealey AP2405 User manual

Sealey

Sealey AP2405 User manual

Sealey AP2418.V2 User manual

Sealey

Sealey AP2418.V2 User manual

Sealey APMS22 User manual

Sealey

Sealey APMS22 User manual

Sealey CX1042D User manual

Sealey

Sealey CX1042D User manual

Sealey AP930M User manual

Sealey

Sealey AP930M User manual

Sealey AP5520SS User manual

Sealey

Sealey AP5520SS User manual

Sealey AP1248SS User manual

Sealey

Sealey AP1248SS User manual

Sealey AP2401 User manual

Sealey

Sealey AP2401 User manual

Sealey AP1640 User manual

Sealey

Sealey AP1640 User manual

Sealey AP6115BE User manual

Sealey

Sealey AP6115BE User manual

Sealey SCR90 User manual

Sealey

Sealey SCR90 User manual

Sealey AP28102BR User manual

Sealey

Sealey AP28102BR User manual

Sealey PTB660TR User manual

Sealey

Sealey PTB660TR User manual

Sealey AP5MB User manual

Sealey

Sealey AP5MB User manual

Sealey AP1100M User manual

Sealey

Sealey AP1100M User manual

Sealey PTB40506.V2 User manual

Sealey

Sealey PTB40506.V2 User manual

Sealey Power Products API1500 User manual

Sealey

Sealey Power Products API1500 User manual

Sealey APMSV Series User manual

Sealey

Sealey APMSV Series User manual

Sealey AP3508TB User manual

Sealey

Sealey AP3508TB User manual

Sealey AP0615 User manual

Sealey

Sealey AP0615 User manual

Sealey AP556CSHV User manual

Sealey

Sealey AP556CSHV User manual

Sealey PTB141007 User manual

Sealey

Sealey PTB141007 User manual

Sealey API Series User manual

Sealey

Sealey API Series User manual

Popular Tools Storage manuals by other brands

Yukon 64023 Owner's manual & safety instructions

Yukon

Yukon 64023 Owner's manual & safety instructions

kincrome Contour K7736 Operation manual

kincrome

kincrome Contour K7736 Operation manual

Flex WB 110-260 manual

Flex

Flex WB 110-260 manual

Discovery Kids WOODEN WORK BENCH instruction manual

Discovery Kids

Discovery Kids WOODEN WORK BENCH instruction manual

MSW Motor Technics MSW-TOOLC-003A user manual

MSW Motor Technics

MSW Motor Technics MSW-TOOLC-003A user manual

Trinity 72 inch ROLLING WORKBENCH owner's manual

Trinity

Trinity 72 inch ROLLING WORKBENCH owner's manual

FUXTEC FX-WB Original manual

FUXTEC

FUXTEC FX-WB Original manual

Westward 32H833 Operating instructions and parts manual

Westward

Westward 32H833 Operating instructions and parts manual

Metal Man Deluxe Welding Tool Cabinet owner's manual

Metal Man

Metal Man Deluxe Welding Tool Cabinet owner's manual

Husky HMT5212 Use and care guide

Husky

Husky HMT5212 Use and care guide

Craftsman 706.139920 operating instructions

Craftsman

Craftsman 706.139920 operating instructions

Arbor Technology Nanofex Craftsman/Jewellers Workbench Assembly instructions

Arbor Technology

Arbor Technology Nanofex Craftsman/Jewellers Workbench Assembly instructions

Denios PS 611 user manual

Denios

Denios PS 611 user manual

parktool BX-2.2 instructions

parktool

parktool BX-2.2 instructions

MasterForce 245-1676 Operator's manual

MasterForce

MasterForce 245-1676 Operator's manual

Greencut HEC112 instruction manual

Greencut

Greencut HEC112 instruction manual

TMG TMG-WBC72S product manual

TMG

TMG TMG-WBC72S product manual

kupper P1 Assembly instructions

kupper

kupper P1 Assembly instructions

manuals.online logo
manuals.online logoBrands
  • About & Mission
  • Contact us
  • Privacy Policy
  • Terms and Conditions

Copyright 2025 Manuals.Online. All Rights Reserved.