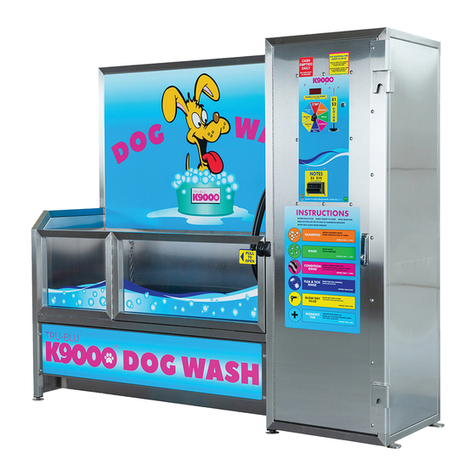
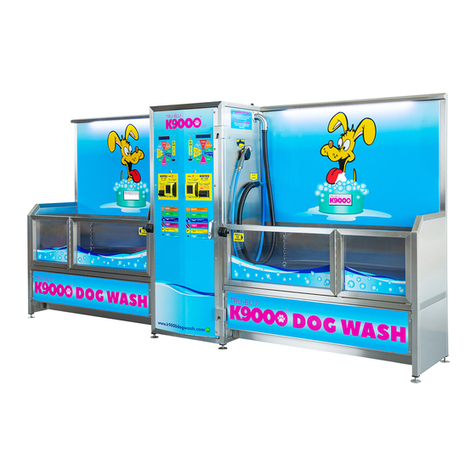
TRU-BLU K9000 2.0 User manual

K9000® 2.0
Operators Manual

https://k9000dogwash.sharepoint.com/sites/K9000/Shared Documents/General/Build/Furever Clean/Furever Clean K9000
2.0/K9000 2.0 Canadian Operators Manual v2.0.docx Page ii
Last edited 02/04/2019
© Tru Blu Dog Wash 2018
© Copyright 2016, Tru Blu Dog Wash, All rights reserved. K9000®2.0 is a registered
trademark of Tru Blu Dog Wash.
All requests and enquiries regarding the use of, and availability of this manual are to be
directed to:
Furever Clean Dog Wash
1654 Brousson Dr
Victoria
British Columbia
V8N5M9
Tel: 250-2179433
Email: info@fureverclean.ca
Website: fureverclean.ca

https://k9000dogwash.sharepoint.com/sites/K9000/Shared Documents/General/Build/Furever Clean/Furever Clean K9000
2.0/K9000 2.0 Canadian Operators Manual v2.0.docx Page iii
Last edited 02/04/2019
© Tru Blu Dog Wash 2018
Explanation of symbols used in this manual
Stop, following instructions prior to proceeding
Warning
Tip
Important - Take note
Date
Summary of Changes
Sections Changed/Added
Author/s
Version
21/02/2018
New Manual
1st Edition Published
Phil Worrell
1.0
29/05/2018
Detail Electricals
2.3, 4.1.1, 4.1.3, 4.4, 5.2 & 11.3
Phil Worrell
2.0
29/11/2018
K9000ECU Board Updates
All parts of section 9
Phil Worrell
13/12/2018
EJ Series pump new exploded
view
4.1.2.2
Phil Worrell
27/03/2019
Attaching a suction line to a
pump instructions
New section 2.4
Phil Worrell
Version
2.0
Status
Published
Date
02/04/2019
Author/s
Phil Worrell
Build Approver
Tim Darmanin
Sales Approver
Evelyn Rutherford

https://k9000dogwash.sharepoint.com/sites/K9000/Shared Documents/General/Build/Furever Clean/Furever Clean K9000
2.0/K9000 2.0 Canadian Operators Manual v2.0.docx Page 4
Last edited 02/04/2019
© Atlantic Industries 2018
Table of Contents
1K9000 2.0 Inspection and Acceptance on Delivery:........................................................ 6
1.1 K9000 2.0 System Specifications............................................................................ 7
2Installation:..................................................................................................................... 8
2.1 Levelling and Positioning the K9000 2.0.................................................................. 8
2.2 Connecting the Water Supply and Waste to the K9000 2.0..................................... 9
2.2.1 Connecting the Water Supply........................................................................... 9
2.2.2 Hot Water........................................................................................................10
2.2.3 Connecting the Waste.....................................................................................13
2.3 Connecting the Power –For Your Electrician.........................................................14
2.4 Attaching a Suction Line to a Pump........................................................................15
2.5 Completing the Installation.....................................................................................20
3Commissioning the Unit.................................................................................................21
4Main Board Components...............................................................................................22
4.1 K9000 2.0 Main Board with Iwaki EJ Series Pumps .............................................22
4.1.1 Control Module................................................................................................23
4.1.2 Product Dosing Pump Factory Settings (Iwaki EJ Series Pumps) ...................24
4.1.3 Breaker Box....................................................................................................27
4.2 Cash Box Components ..........................................................................................28
4.2.1 Top Section of Cash Box.................................................................................28
4.2.2 Coin Box Terminal Strip Wiring Schedule........................................................29
4.2.3 Bottom Section of Cash Box............................................................................30
4.3 Coin Acceptor –coin activation..............................................................................31
4.4 Coin Acceptor –Removal.......................................................................................33
4.5 Coin Acceptor Cleaning..........................................................................................34
5Note Acceptor (Mei) ......................................................................................................35
5.1 Note Acceptor Fault Codes ....................................................................................35
5.2 Note Acceptor Removal .........................................................................................36
5.3 Note Acceptor Cleaning .........................................................................................37
6Temperature Valve........................................................................................................38
6.1 Temperature Adjustment........................................................................................38
7Dryer.............................................................................................................................39
7.1 Dryer Hose Connection..........................................................................................40
8Override Key (Wash down Key) ....................................................................................41
9Dog Wash K9000ECU Board Operating & Service Menu Programming Instructions.....42
9.1 Service Menus .......................................................................................................42
9.1.1 Service Menu 1: PROGRAM MODE ...............................................................43
9.1.2 Service Menu 2: TEST....................................................................................44

https://k9000dogwash.sharepoint.com/sites/K9000/Shared Documents/General/Build/Furever Clean/Furever Clean K9000
2.0/K9000 2.0 Canadian Operators Manual v2.0.docx Page 5
Last edited 02/04/2019
© Atlantic Industries 2018
9.1.3 Service Menu 3: AUDIT...................................................................................45
9.1.4 Service Menu 4: INFO.....................................................................................45
9.1.5 Service Menu 5: IMPORT ...............................................................................45
9.1.6 Service Menu 6: EXPORT...............................................................................45
10 Floor Lifting Tool........................................................................................................46
11 Operator Maintenance...............................................................................................47
11.1 Maintenance Schedule...........................................................................................47
11.2 External Maintenance Items...................................................................................50
11.3 Dryer Maintenance.................................................................................................51
11.4 Cleaning.................................................................................................................53
12 General Information...................................................................................................56
12.1 Canine parvovirus..................................................................................................56
12.2 Instruction “How to Videos” ....................................................................................56
13 Maintenance Record..................................................................................................57

https://k9000dogwash.sharepoint.com/sites/K9000/Shared Documents/General/Build/Furever Clean/Furever Clean K9000
2.0/K9000 2.0 Canadian Operators Manual v2.0.docx Page 6
Last edited 02/04/2019
© Atlantic Industries 2018
1 K9000 2.0 Inspection and Acceptance on Delivery:
Inspect the K9000 2.0 on arrival and prior to unwrapping to ensure there is no travel damage.
If there is any damage, please contact Furever Clean Dog Wash before accepting delivery.
Caution should be taken when the K9000 2.0 has been delivered and is being unloaded. The
K9000 2.0 weighs approx. 630 pounds. Ensure a qualified operator of the unloading
equipment is used to lift or move the K9000 2.0 Dog Wash.
The K9000 2.0 (Within Australia) is first bubble wrapped and then wrapped in black plastic
cargo wrap. It is secured to the pallet with a tie down strap over the cabinet and 6 screws.
Position the K9000 2.0 while on the pallet near its final location. Take caution removing the
plastic and bubble wrap avoid using a knife as it may scratch the stainless steel or decals.
With a screw gun remove the screws from the feet and the tie down strap.
A second inspection should be undertaken to ensure no damage has occurred during travel.
It is recommended that the front kicker plate be removed prior to installation and
handling as this will allow safer lifting and the required access during installation. Care
should be taken not to damage the plumbing fittings during lifting and positioning of the unit.
It is also recommended that the white film protecting the unit is not removed until after
install as this will help prevent any installation damage.
A 4mm allen key is used
to remove the kicker
plate.
The kicker plate allen
key bolt positions (2 at
each end)

https://k9000dogwash.sharepoint.com/sites/K9000/Shared Documents/General/Build/Furever Clean/Furever Clean K9000
2.0/K9000 2.0 Canadian Operators Manual v2.0.docx Page 7
Last edited 02/04/2019
© Atlantic Industries 2018
1.1 K9000 2.0 System Specifications
SYSTEM WITHOUT ON BOARD HOT WATER UNIT
Power
208/240V
16 AMP (10 AMP max load)
WATER Inlet Pressure (Min)
40psi / 275kpa
Hot
½” Ball valve
Cold
½” Ball valve
WATER Inlet Pressure (Max)
72psi / 500kpa
Hot
½” Ball valve
Cold
½” Ball valve
COLD WATER Inlet temperature
Minimum
5 Degrees Celsius
Maximum
30 Degrees Celsius
HOT WATER Inlet temperature
Minimum
55 Degrees Celsius
Maximum
65 Degrees Celsius
Factory Set water temperature
35 Degrees Celsius at wash gun
WATER Maximum Operating Pressure
50psi / 350kpa
Factory set via water regulator
FILTRATION
Primary
Stainless steel mesh filter
Secondary
Vinidex DBA Lic. No. WMKA20071
Back Flow Prevention Device
Connections to be protected by a “high hazard” backflow prevention device. i.e.
“RPZ or Registered “Air-GAP” Recommended Watts 009M3-AUS RP 15 0r 20mm
AS2845.1 Lic WMKA1335
WASTE
2” DIA Outlet as well as, a minor trade waste application to be made to the local
water regulator (As per local requirements)
SYSTEM WITH ON BOARD HOT WATER UNIT
Power Instant Hot Water or
208/240V
16 AMP (10 AMP max load) for dog
wash as well as External (dependent
upon inlet water temperature and # of
dog wash units to be installed) (with
instant electric hot water service)
Power Hot Water Storage Tank
208/240V
40 AMP (32 AMP max load)
WATER Inlet Pressure (Min)
40psi / 275kpa
Cold
½” Ball valve
WATER Inlet Pressure (Max)
72psi / 500kpa
Cold
½” Ball valve
COLD WATER Inlet temperature
Minimum
45 Degrees Fahrenheit
Maximum
85 Degrees Fahrenheit
Factory Set water temperature
32-34 Degrees Celsius at wash gun
WATER Maximum Operating Pressure
50psi / 350kpa
Factory set via water regulator
FILTRATION
Primary
Stainless steel mesh filter
Secondary
Vinidex DBA Lic. No. WMKA20071
Back Flow Prevention Device
Connections to be protected by a “high hazard” backflow prevention device. i.e.
“RPZ or Registered “Air-GAP” Recommended Watts 009M3-AUS RP 15 0r 20mm
AS2845.1 Lic WMKA1335
WASTE
2” DIA Outlet as well as, a minor trade waste application to be made to the local
water regulator (As per local requirements)
Tundish
Required for hot water relief pipe (storage tank system only)
DIMENSIONS / WEIGHT
Dimensions
Length 2150mm / Height 1850mm / Depth 600mm
Weight
K9000 2.0 –285kg
APPROVALS
CSA Approved –Each machine is CSA inspected and labelled
Risk assessment performed by IAPMO (NATA accredited laboratory)
CE conformity with the following European Union Directives: EMC Directive 2004/108/EC & Low Voltage Directive
2006/95/EC
IEC 61000-6-3:2006 Electromagnetic compatibility (EMC) –Part 6.3: Generic standards –Emission standard for residential,
commercial and light-industrial environments
AS/NZS 60335.2.75:2005 + Admt 2009 in relation to vending machines AS 60204.1:2005 ‘Safety of machinery – Electrical
equipment of machines, General Requirements’
IEC 61000-6-1: 2005 Electromagnetic compatibility (EMC) Generic standards. Immunity for residential, commercial and light-
industrial environments.
ATS 5200.101:2005 –Strength of Assembly
EPA Registered Noise tested rating of 66dba @ 4 meters
USAGES
Water Usage: Average 10 litres per minute or 50 litres per wash (5 minutes)
Average power usage per wash cycle is .76kwh (dependent on hot water source)

https://k9000dogwash.sharepoint.com/sites/K9000/Shared Documents/General/Build/Furever Clean/Furever Clean K9000
2.0/K9000 2.0 Canadian Operators Manual v2.0.docx Page 8
Last edited 02/04/2019
© Atlantic Industries 2018
2 Installation:
The K9000 2.0 Dog Wash can be installed either indoors or outdoors.
2.1 Levelling and Positioning the K9000 2.0
The K9000 2.0 needs to be placed in a level horizontal position to operate correctly.
There are 4 adjustable feet and 2 mounting feet, place a level along the back of the K9000
2.0 and adjust the feet according to get the K9000 2.0 level, place the level along the top of
the cabinet running back to front to make sure it is not tilting forward or backwards.
Verify all door margins and open and close each door to ensure they open and close freely.
Ensure all doors open and close freely before securing the K9000 2.0!
Once the K9000 2.0 is level, use the supplied spacer washes and anchor screws to secure
the K9000 2.0 to the ground.

https://k9000dogwash.sharepoint.com/sites/K9000/Shared Documents/General/Build/Furever Clean/Furever Clean K9000
2.0/K9000 2.0 Canadian Operators Manual v2.0.docx Page 9
Last edited 02/04/2019
© Atlantic Industries 2018
2.2 Connecting the Water Supply and Waste to the K9000 2.0.
Before connecting the K9000 2.0 to water and waste ensure local regulations are
considered. Some sites may require an additional back flow prevention device. Local
regulations may also require sites to use copper pipes for waste.
2.2.1 Connecting the Water Supply
Flush the pipes prior to connecting to the K9000 2.0. Maximum allowable water pressure is
0.5Mpa. (72 psi / 500Kpa).
The picture at left shows the hot and cold-water entry points for a K9000 2.0 without an on-
board hot water unit. While the picture on the right shows the water entry point for a K9000
2.0 with an on-board hot water unit.
Once connected the regulator can be adjusted to ensure the K9000 2.0 has water pressure
of between 20 & 30 psi when the pressure gun is in use and between 40 & 50 psi when
pressure gun is not being utilised.
To verify the pressure when the gun is not being utilized you need to view the gauge at the
moment the pressure gun is turned off as it will give a true indication of the psi prior to
resetting to the hold psi of approximately 40psi.
•The psi verification can be done with the override key and a wash setting of stop or
with money/token and the rinse setting selected.
If adjustment required, you will need to adjust the regulator. The regulator is adjusted using
a screw driver, where pressure needs to be increased turn the screw anticlockwise and to
decrease pressure turn in a clockwise direction.
Cold water
connection
Cold water
connection
Hot water system
on board
Hot water
connection
Site Supplied
Hot Water

https://k9000dogwash.sharepoint.com/sites/K9000/Shared Documents/General/Build/Furever Clean/Furever Clean K9000
2.0/K9000 2.0 Canadian Operators Manual v2.0.docx Page 10
Last edited 02/04/2019
© Atlantic Industries 2018
2.2.2 Hot Water
Hot water can be sourced from the site, or the dog wash can include an on-board hot water
service. The on-board hot water service will be an instantaneous unit.
2.2.2.1 Site Supplied Hot Water
Shown below is a K9000 2.0 that was installed at a site that supplied HOT water, and as
such the unit did not require to have an on-board hot water service.
*Please consult with Furever Clean Dog Wash to ensure your existing hot water supply is
adequate.
2.2.2.2 On Board Hot Water Storage Unit - Breaker
The below picture is a K9000 2.0 with an on-board hot water storage service.
Hot Water
Cold Water
Approximately
150 to 200mm
above ground
level –needs
to fit below
bottom of dog
wash

https://k9000dogwash.sharepoint.com/sites/K9000/Shared Documents/General/Build/Furever Clean/Furever Clean K9000
2.0/K9000 2.0 Canadian Operators Manual v2.0.docx Page 11
Last edited 02/04/2019
© Atlantic Industries 2018
2.2.2.3 Shown picture below shows the water entry point for a K9000 2.0 with a hot
water storage service.
After the water is connected the hot water tap is to be turned on and the hot water system
filled and bled.
Once the hot water system is filled the hot water circuit breaker located in the control
box is to be turned on. The power must be isolated prior to removing the cover from
the Control Module refer to section 4 Main Board Components.
Hot water tap to be
turned on
Bleeding the hot water
system by pulling the
pressure valve until
water runs. (Top valve
only)
Cold water connection
for Storage Hot Water
System

https://k9000dogwash.sharepoint.com/sites/K9000/Shared Documents/General/Build/Furever Clean/Furever Clean K9000
2.0/K9000 2.0 Canadian Operators Manual v2.0.docx Page 12
Last edited 02/04/2019
© Atlantic Industries 2018
2.2.2.4 On Board Instantaneous Hot Water Unit
The pictures below are examples of instantaneous hot water units which may be fitted either
on the left-hand side of the cabinet or on the rear of the dog wash cabinet.
Only qualified personnel should access the on-board hot water unit as there is “live”
equipment inside.
The instantaneous water heater heats the water while it is flowing through the unit.
To adjust the water temperature, use the tempering valve, refer to section 6
Temperature Valve Adjustment.
The electronic instantaneous water heater heats the water while it is flowing through the unit.
Shown picture below shows the water entry point for a K9000 2.0 with an instantaneous hot
water service.
Cold water connection
for Instantaneous Hot
Water system

https://k9000dogwash.sharepoint.com/sites/K9000/Shared Documents/General/Build/Furever Clean/Furever Clean K9000
2.0/K9000 2.0 Canadian Operators Manual v2.0.docx Page 13
Last edited 02/04/2019
© Atlantic Industries 2018
2.2.3 Connecting the Waste
Connect the 2” (inch) waste using the P-trap (supplied in the install kit)
Waste plumbed
directly into ground
Waste
plumbed
away to
waste point
370mm
230mm
2” Waste
Connection

https://k9000dogwash.sharepoint.com/sites/K9000/Shared Documents/General/Build/Furever Clean/Furever Clean K9000
2.0/K9000 2.0 Canadian Operators Manual v2.0.docx Page 14
Last edited 02/04/2019
© Atlantic Industries 2018
2.3 Connecting the Power –For Your Electrician
The K9000 2.0 needs to be hardwired to the switch board on its own circuit. The size of the
circuit depends on the specific specification of your K9000 2.0, refer to the rating plate
located inside the cabinet to confirm your maximum load. This circuit needs to have a GFCI
(Ground Fault-Circuit Interrupter) on the switch board as the K9000 2.0 has no ground fault
protection.
The following bullet points highlight the necessary electrical safety requirements you
need as part of the electrical installation of your K9000 2.0:
•*Branch Circuit Breaker in site Switch Board
•*GFCI in site Switch Board
•External Disconnect Device, between site switch board & dog wash
*Size of circuits, breakers etc dependent on specifications of your K9000 2.0, refer to the
rating plate located inside the cabinet.
The photo below left is the main electrical cable inside the dog wash. It enters through the
gland at the bottom of the dog wash, close to ground level. Run the power cable in 25mm
flexible conduit as there is a socket already installed into the bottom of the breaker box.
1000mm
Isolate
Neutral
Ground
Wires
Hot 1
Hot 2
The below picture is a
close up of the breaker
box with wires labelled
to assist your electrician.

https://k9000dogwash.sharepoint.com/sites/K9000/Shared Documents/General/Build/Furever Clean/Furever Clean K9000
2.0/K9000 2.0 Canadian Operators Manual v2.0.docx Page 15
Last edited 02/04/2019
© Atlantic Industries 2018
2.4 Attaching a Suction Line to a Pump
Pictured on the left is that of a pump inside the dog wash with the pump head circled to
enable you to understand the orientation of the pump head when fitted in the dog wash. The
middle picture is a close up of the pump head while the last picture is of the suction line to be
fitted to the pump head.
Prior to attaching the suction line to the pump, attach it to the soap management system.
The photo left is of the main
electrical cable entry point to the
dog wash. Once you have run the
conduit to this point, THEN leave
another 1 meter for the
termination inside the dog wash.

https://k9000dogwash.sharepoint.com/sites/K9000/Shared Documents/General/Build/Furever Clean/Furever Clean K9000
2.0/K9000 2.0 Canadian Operators Manual v2.0.docx Page 16
Last edited 02/04/2019
© Atlantic Industries 2018
Step 1 Undoing the pump and identifying the pieces.
Starting with the pump head, undo the fitting nut at the bottom of the pump head. This is
where the suction line will be attached to the pump.
The first pieces we see when the fitting nut is removed are the:
Hose adaptor and Hose stopper.

https://k9000dogwash.sharepoint.com/sites/K9000/Shared Documents/General/Build/Furever Clean/Furever Clean K9000
2.0/K9000 2.0 Canadian Operators Manual v2.0.docx Page 17
Last edited 02/04/2019
© Atlantic Industries 2018
Remove the hose adaptor.
Between the hose adaptor and the pump head there is an O ring, sometimes it stays in the
pump head but mostly it comes out seated in the hose adaptor. The O ring is an important
part as it helps seal the pump head making for better suction.
The pictures below show the O ring seated in the hose adaptor, the hose adaptor without the
O ring and the O ring still in the pump head (left behind). It is vital that we locate the O ring
and ensure that it is seated into the hose adaptor.
We are now ready to attach the suction line to the pump.

https://k9000dogwash.sharepoint.com/sites/K9000/Shared Documents/General/Build/Furever Clean/Furever Clean K9000
2.0/K9000 2.0 Canadian Operators Manual v2.0.docx Page 18
Last edited 02/04/2019
© Atlantic Industries 2018
Step 2 Attaching the Suction Line to the Pump.
Firstly, we feed the suction line through the fitting nut.
Then we place the hose stopper on the suction line.
Push the hose onto the hose adaptor so that it is flush, this is vital to ensure a good seal.

https://k9000dogwash.sharepoint.com/sites/K9000/Shared Documents/General/Build/Furever Clean/Furever Clean K9000
2.0/K9000 2.0 Canadian Operators Manual v2.0.docx Page 19
Last edited 02/04/2019
© Atlantic Industries 2018
Then fit the hose adaptor to the hose, ensuring the O ring is seated into position. Push the
hose stopper onto the hose adaptor as firmly as possible.
Now we attach the suction line fittings back into the pump head.
As we tighten the fitting nut the hose stopper will close up on the hose adaptor and the task
is complete.

https://k9000dogwash.sharepoint.com/sites/K9000/Shared Documents/General/Build/Furever Clean/Furever Clean K9000
2.0/K9000 2.0 Canadian Operators Manual v2.0.docx Page 20
Last edited 02/04/2019
© Atlantic Industries 2018
A picture of a pump in position with its suction line attached.
2.5 Completing the Installation
Now that the K9000 2.0 has been installed you can now refit the front kicker plate removed
earlier to allow the installation to proceed and peel the protective white film from the unit.
You are now ready to commission the K9000 2.0.
Other manuals for K9000 2.0
2
Table of contents
Other TRU-BLU Pet Care Product manuals
Popular Pet Care Product manuals by other brands
juwel
juwel Rio 240 instruction manual

Creative Cedar Designs
Creative Cedar Designs K-9 Kabin Assembly instruction

E-Collar Technologies
E-Collar Technologies Easy Educator EZ-900 quick start guide
Hagen
Hagen Fresh&Clear user manual
Nature's Miracle
Nature's Miracle NMA500 user manual
Primetime Petz
Primetime Petz 33661-G17 Assembly instructions
