Tru-Turf R52-11T User manual

R52-11T GOLF ROLLER MANUAL

TRU-TURF R52-11T Golf Greens Roller Manual
1. Important
2. Machine Information Record
3. Safety Information
4. Warranty
5. Assembly
List of components
6. Mounting seat to seat base
Mounting steering joystick to the steering shaft
Attaching trailer arm to machine
Attaching dampener strut and trailer arm
Attaching draw bar to trailer arm
Attaching wheels to trailer arm
7. Correct dampener strut operation
Replacing oil
Transmission oil tank breather
Lubricating smoothing head pivot bearings
8. Operation
Pre-operation checks
Standard operation Procedures
9. Emergency and Park Brake
Points to remember
10. Maintenance
Transmission (pump, Eaton 11)
Storing
Service of drive chain system
Lubrication
Service of smoothing roller bearings
11. Change engine oil
Change transmission oil
Maintenance Schedule
12. Fault Finding
Roller will not move one or either way
Roller will not steer
Roller has excessive vibration
Smoothing rollers seized
Rubber drive roller will not rotate
13. Machine Components
36. Labels
37. Options
39. Parts List
Separate Engine Owners Manual Included
Contents

TRU-TURF R52-11T Golf Greens Roller Manual
1
Please read and understand before
operating machine.
1. Pre-check all nuts, bolts, grub screws for tightness
prior to operating machine.
2. Understand the operating procedures and the controls
before operating.
3. Use the machine to roll 18-36 greens then check that
all nuts, bolts etc. are tight. If loose and the Loctite seal
has been broken, treat item as per Loctite instructions,
reseal, then tighten securely.
4. Loose transmission and drive roller sprockets will
cause damage to shafts and keyways. Ensure they
are correctly tightened at all times.
5. Change the transmission oil after 50 hours of
operation, then as per the servicing schedule.
We use and recommend Penrite Synthetic 5 SAE 5W-60.
Available through our dealer network.
U.S.A. customers contact your dealer or visit
www.truturf.com to nd your nearest dealer.
Australian customers call 07 5594 7199.
International customers contact your dealer or visit
www.truturf.com to nd your nearest dealer.
Important

TRU-TURF R52-11T Golf Greens Roller Manual 2
Machine Information
Model. R52-11T Golf Green Roller
Serial No.
Engine No.
Transmission No.
Purchase Date No.
Congratulations on your investment in the R52-11T Golf
Green Roller and your move to smoother, faster, more
consistent putting Greens. The following operation and
maintenance manual has been prepared for use with the
R52-11T Golf Green Roller. It is intended as a guide and
supplemental updates to the manual may take place at a
future date, without prior notice.
This machine is engineered to be simple to operate and
easy to maintain. If you have any questions or concerns
that this manual does not address, please feel free to
contact your distributor.
Distributor Information
Name:
Address:
Telephone:
Fax:
Email:
Machine Information Record

TRU-TURF R52-11T Golf Greens Roller Manual
3
Safety Information
Safety is of the utmost importance when operating
turf equipment.
To ensure safe operation of the R52-11T Golf Greens
Roller, please follow the following safety guidelines.
Always make a pre-operation inspection before you•
start the engine. If this procedure is not carried out
damage to property or personnel may occur.
Keep children, pets and inexperienced personnel•
away from the machine. This machine should only be
operated by trained and skilled personnel - check with
your supervisor if you are unsure.
Know how to stop the engine when in motion. Read•
and understand engine manufacturers manual, as
supplied.
Never permit inexperienced operators to use the•
machine. This machine requires certain knowledge
and expertise to operate it; you must be a trained
person to use this machine. Unskilled persons can
harm themselves and others if they operate this
machine.
Do not use in enclosed areas unless well ventilated.•
Carbon monoxide gases are dangerous if inhaled, it
can cause death; use the machine outdoors.
When transporting the roller, make sure the trailer•
lock down mechanism is secure to prevent premature
release of the catch. If the trailer catch is not correctly
engaged while towing and releases accidentally, the
front of the roller can drop and dig into the ground,
causing the machine to move dangerously in any
direction causing bodily injury. When carrying out
maintenance ensure the catch is engaged correctly;
if it is not the trailer arm could y up making contact
with a person(s) causing serious injury.
When engine is running, always keep hands and•
loose clothing away from rotating shafts, chains and
sprockets in the transmission area. If hair, clothing or
loose objects become entangled on a rotating shaft
serious bodily injury could occur. Stop engine before
opening safety cover tted to the transmission area.
Never ride on the machine when machine is being•
towed.
Operator, remember it is your responsibility to be
aware of your surroundings. To avoid accidents, think
safe and operate safe.
Safety Information

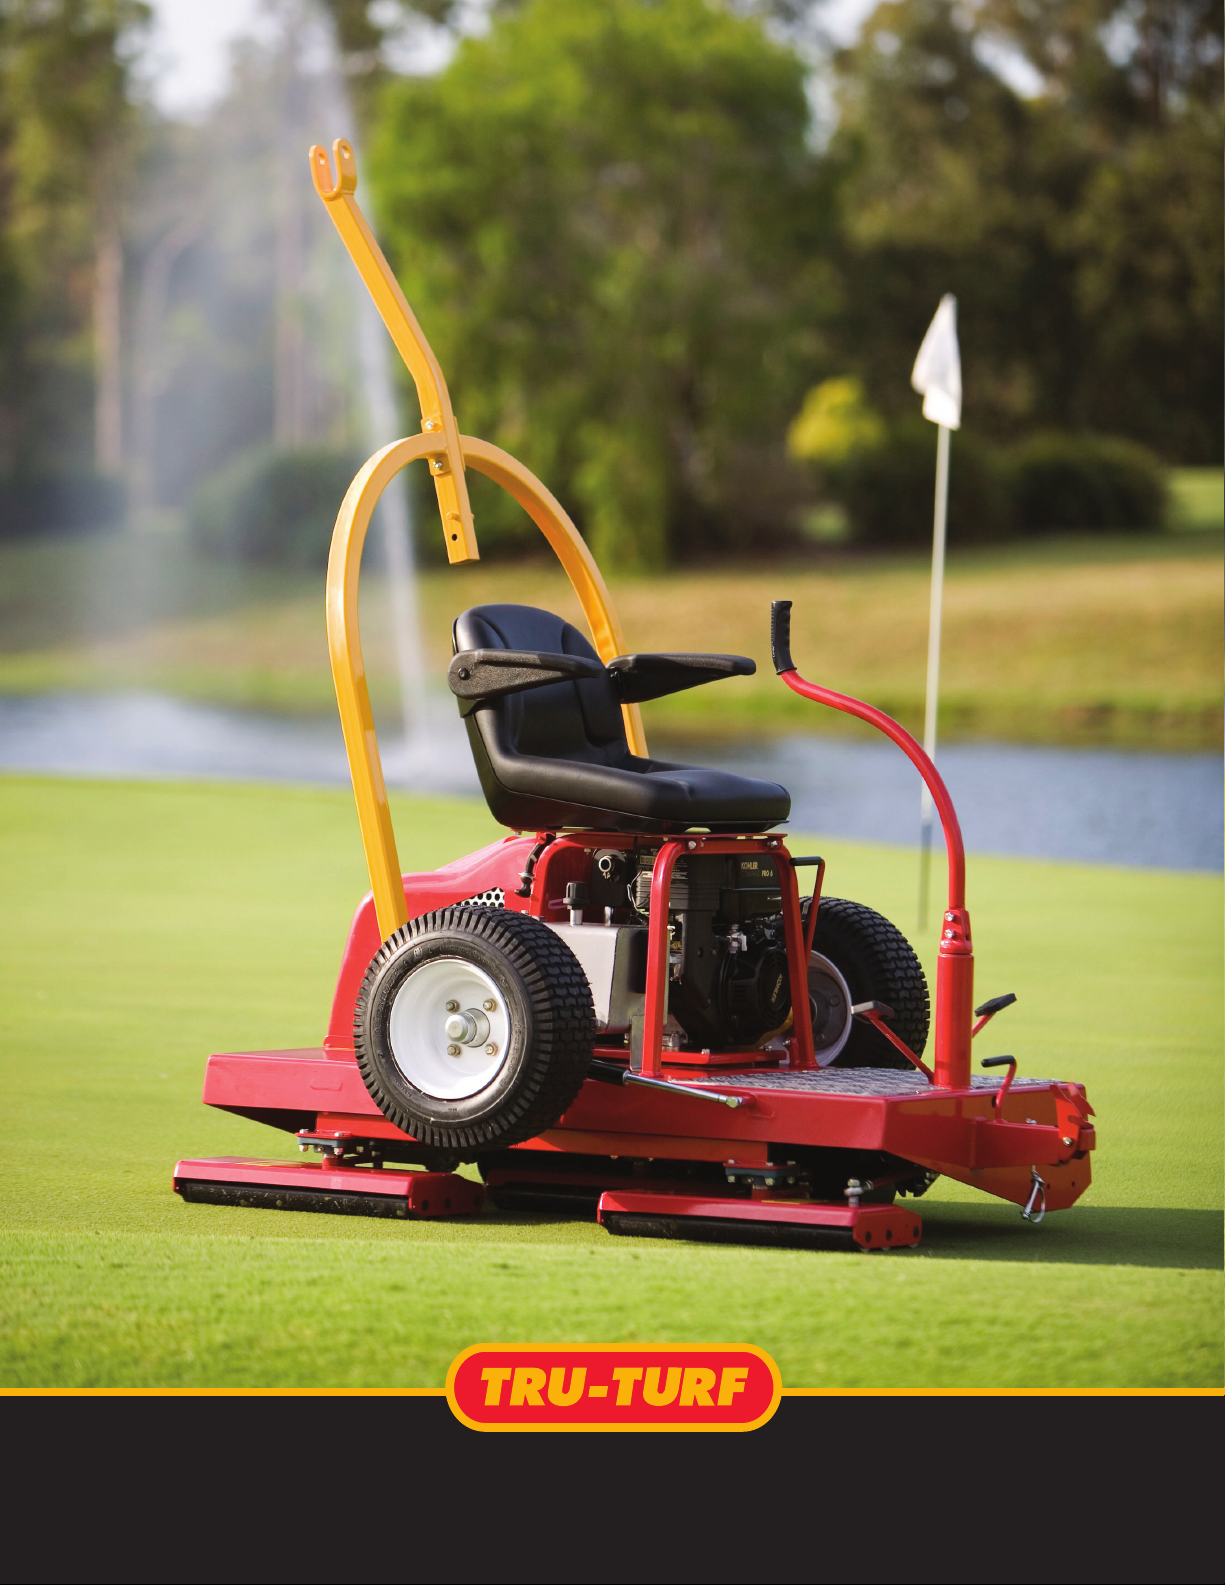
TRU-TURF R52-11T Golf Greens Roller Manual 4
One Year Warranty
Universal Conditions
Tru-Turf Equipment will either repair or replace any item
or part of a Tru-Turf Equipment turf maintenance product
that is defective in workmanship or material for a period
of twelve (12) months from the date of delivery of the
new product to the original end user. These items will be
repaired or replaced free of charge and freight free.
Products Protected By This Warranty
This Warranty relates to the following products
manufactured by Tru-Turf Equipment and parts used to
make these products:- GR39 Golf Greens Roller; GR48 Golf
Greens Roller; GR7000 Series Golf Greens Roller; GR11000
Series Golf Greens Roller; RS48 Roll ‘n’ Spike Golf Greens
Roller; RS48-11 Series, Roll ‘n’ Spike Golf Greens Roller;
R52-11T Tri Golf Greens Roller; R52-ELT Electric Golf Greens
Roller; Triplex Roll ‘n’ Spike Mower Attachment Heads and
Brackets; MT2000-S & D Single and Dual; MT5000-S&D
Single and Dual Tote for Walk Behind Mowers; SR72 Sports
Ground Roll ‘n’ Spike Turf Roller.
Parts Warranted By Suppliers To Tru-Turf
Specic component parts supplied to Tru-Turf Equipment
are covered by that supplier’s Warranty. These parts
include Eaton Transmission, Honda Engines and Kohler
Engines.
Normal Wear and Tear
Tru-Turf Equipment will not repair or replace parts subject
to normal maintenance routines as specied in the
products Operator’s Manual nor to parts subject to wear
and tear during the correct operation of the product.
These parts include, but are not limited to, oils, lters,
tires, shafts, bearings, blades, spikers, slicers, brakes, belts,
hoses and spark plugs.
Other Items Not Covered By This Warranty
Tru-Turf Equipment will not repair or replace free-of-
charge any item that has been damaged by accident,
lack of reasonable care and protection or lack of suitable
storage. We will not cover parts that have been altered
or modied by anyone other than Tru-Turf Equipment
nor will we cover used parts that are installed in place of
failed parts. We will not cover parts that have not been
installed correctly by the end user or its agents nor will
we cover parts that have not been maintained as per the
Operator’s Manual. Service calls and overtime labour rates
will not be covered. We will not cover freight costs related
to the return of the faulty product to Tru-Turf Equipment
or its agents. Tru-Turf Equipment will not be liable for
any consequential loss or damage or costs caused by or
incidental to the failure of any new part supplied with
the original purchase or any new part supplied as a
replacement for any failed part.
Lodging Warranty Claims
The nal purchaser of the new Tru-Turf Equipment
product must lodge a Warranty Claim with Tru-Turf
Equipment or its agents. The nal purchaser must provide
written evidence detailing the product’s delivery date
to that purchaser and the reasons why the purchaser
believes that the product or its part is defective in
the categories of faulty material or workmanship. The
purchaser is to deliver the faulty product or part to Tru-
Turf Equipment or its agents at the purchaser’s expense.
Acceptance or rejection of the Warranty Claim is entirely
at the discretion of Tru-Turf Equipment or their Suppliers
who warrant their own part/s.
No person or organization has the authority to modify the terms, conditions or
limitations of this Warranty without the written consent of Tru-Turf Equipment.
Warranty

TRU-TURF R52-11T Golf Greens Roller Manual
5
Initial Assembly
When you receive the crate, the machine will be broken
down into components ready for assembly. If you run into
any problems during assembly, please feel free to call
your local distributor or agent.
List of Components
QTY Description
1 Operation, Maintenance and Parts Manual
1MachineFrame/Body
1DriversSeat
2Armrests
4 /” x /” UNC Bolts
2 Tires mounted on Wheel Rim
1 Steering Joystick
1 Dampener Strut (attached to main body end)
1 Left-side Trailer Arm
1 Right-side Trailer Arm
2 30mm External Circlips
1 Drawbar Coupling Assembly
2 /” x 1/” UNF 2P Bolts
2 /” UNF Nyloc Nuts
Assembly

TRU-TURF R52-11T Golf Greens Roller Manual 6
Assembly Procedure
Step 1: Mounting the seat to the seat base.
• Use the four /” x /” UNC bolts to fasten the seat to
the seat base.
• Remove armrest screws from the seat, position left
and right side armrest, fasten and tighten.
Step 2: Mount the steering joystick to the steering
shaft.
• Select the steering joystick.
• Slide the joystick into the slot on the top of the
steering shaft, already installed in the steering
column directly in front of the foot pedal controls,
insert the /” bolt into the bottom bolt hole, select
a comfortable operating position, joystick forward
for extra operating room or back for less, once
determined insert the other /” bolt into the upper
hole and tighten both bolts securely.
Step 3: Attaching the left-hand trailer arm to machine
body.
• Locate the trailer arm support axle 30mm in diameter
(1¼”) which extends out on the left side of the
machine, remove the circlip from the support axle. Oil
machined portion. Slide the left hand side trailer arm,
onto the axle, replace the circlip, ensuring the circlip is
located in the groove correctly.
Step 4: Attaching dampener strut and right hand
trailer arm.
• Locate the trailer arm support axle 30 mm in diameter
(1¼”) which extends out on the right side of the
machine, remove the circlip from the axle. Hold the
right side trailer arm in the vertical position and slide
it part way onto the axle. Locate dampener strut.,
remove packing from the unattached end.
• Place strut onto locating pin and push completely on,
insert washer and cotter pin in place to prevent strut
from coming o the shaft.
• If necessary use a soft headed hammer and tap the
trailer arm onto the axle until the circlip groove is
revealed, t the circlip, ensuring it is located in the
groove correctly.
Step 5: Attaching draw bar to trailer arms.
• Locate the draw bar assembly.
• Gather the ends of the right and left trailer arms.
• Place the draw bar assembly between the trailer arms
and align the holes.
• Place one 2¾” x /” bolt through each hole, t /”
Nyloc nut to each bolt and tighten securely.
• Test to ensure the trailer catch is correctly locking the
trailer arms in the down position and the catch locking
pin ts correctly when transporting the roller, for
safety.
Step 6: Attaching wheels to trailer arms.
• Locate the two wheels for the left and right side trailer
arms.
• Check tires for the correct air pressure, approximately
18psi. Do not exceed this pressure. The tires act as the
suspension, hence the low P.S.I.
Assembly

TRU-TURF R52-11T Golf Greens Roller Manual
7
• Remove wheel nuts from both hubs, slide wheels onto
hub with air valves facing outwards. Replace wheel
nuts and tighten securely.
• Ensure the taper on the nuts, mate into the wheel
tapers correctly.
Step 7: Correct dampener strut operation
• When the roller is in the trailing position Carefully
hold the draw bar assembly, release the locking catch,
gently with a rm grip begin to raise the draw bar,
when it has travelled suciently the dampener strut
will take over and prevent the trailer arms rapidly
rotating on it’s axle, allowing the roller to lower to the
surface gently. This prevents the operator from being
injured. When the roller is resting on the ground push
the trailer arms back gently, (do not use excessive
force) until the trailer arms will travel no further. The
dampener strut is designed to hold the trailer arms
back behind the operator with the wheels o the
ground.
Step 8: Replace engine oil
• A tag is placed on the engine’s On/O switch
indicating you must ll the machine with oil prior
to operation. Low oil level will cause the engine to
stop on steep hills, the engine cut o safety switch is
designed this way to protect the engine from damage
if low in oil.
• The oil in the engine upon delivery (if not pre-
delivered) is to prevent the inside of the engine from
corroding, replace it with the correct engine oil, as per
the manufacturers specications.
Step 9: Transmission oil tank breather.
• Unscrew the plastic plug from the top of the tank and replace
it with the anti-splash breather supplied. Seal damage and oil
leakage will occur if the breather is not installed. If this is not
done damage to the seals in the transmission will occur.
Step 10: Lubricate smoothing head pivot bearings.
• There is a grease nipple or zirk located on the three (3)
smoothing head centre ball joint swivels. Apply grease to
lubricate ttings.
• Apply grease to the upper main bearing that supports and
carries the three smoothing heads.
Assembly

TRU-TURF R52-11T Golf Greens Roller Manual 8
Operation procedures
Pre-operation checks
• Check engine as per Honda manual.
• Ensure steering joystick has no looseness.
• Check that foot pedal depresses under normal foot
pressure in both directions and returns to the neutral
position. (Similar resistance to a motor vehicle clutch).
If this action is not smooth, check the yoke and
transmission struts for correct operation.
• Ensure that the draw bar locking catch mechanism is
securely locked to the main draw bar and the safety
pin is tted when trailing the roller.
• Check and tighten grub screws tted to the end
bearing lock rings on the rubber coated drive roller
bearings on each smoothing head and main support
bearing.
• Grease lightly Bearings tted to Drive Roller and
Smoothing Head pivot bearings. Replace plastic caps if
tted.
• Grease rod ends, sparingly.
• Check tire pressure for proper operating pressure
(18psi). Do not over inate.
• Check for oil and fuel leaks - rectify before using
machine.
• Lubricate the drive chain with a suitable chain
lubricant.
Standard operation procedures
• Inspect and check that the roller is serviceable prior to
departing from workshop.
• Use a suitable towing vehicle to move roller from
green to green.
• Maximum recommended towing speed would be
equal to a motorized golf buggy. Approximately
4mph/7kph. Towing at excess speed or across rough
terrain may cause damage to the machine and trailer.
• When approaching the green do not tow the roller
onto the green to set up, put the roller on the fringe
of the green. Put trailer in the up position, start up the
roller and drive it onto the green.
• Greens can be rolled in any direction; take care to
ensure there are no crease lines produced on the
surface.
• It is recommended that you place the smoothing head
rollers on the high side of the green when rolling.
This increases the weight on the rubber drive roller
and gives better traction, it also reduces slipping or
spinning of the drive roller on the green, depending
also on the operators ability. Whilst becoming familiar
with the roller, set the throttle at about / - / speed.
Press the left or right foot pedal down gently but not
suddenly. Be smooth with your action, hold in this
position until nearing the edge of the green, then take
your foot gently o the pedal, the roller will come to a
stop. Rest your other foot on the opposite pedal and
gently apply the pressure to the pedal. It then starts to
move the roller in the opposite direction. Once again
be gentle with the pedal, but not sudden. By using the
left and right pedal in this manner, will ensure there is
no damage to the green and less wear and tear on the
equipment and operator.
Operation procedures

TRU-TURF R52-11T Golf Greens Roller Manual
9
Points to remember
• Make sure the roller is serviceable before rolling.
• Start rolling from the fringe of the green.
• Smooth operation on the foot pedals.
• Pick a point on the other side of the green to roll to.
• Do not look at the green close to the roller; it makes it
dicult to steer the roller straight; look well ahead.
• Use 1/2 throttle until you are procient at operating
the roller.
• Once you choose your rolling line hold the joystick
steady, correcting direction gently as required.
• Move the steering joystick a little at a time to change
direction; excessive movement of the joystick makes it
dicult to maintain a straight line.
• Roll in straight lines.
• Do not leave the engine running with the roller parked
on the green; the engine vibration will cause roller
depression marks on the green.
• Move o the green when rolling is complete before
putting the trailer in the down position.
• When rolling steep greens and the engine stops, check
engine oil level. The engine is tted with a safety
switch; when the engine oil level is low the engine will
stop.
• The correct procedure for rolling the green is:
(a) Select the correct direction to roll the green,
remember this roller can roll the greens in all
directions.
(b) Start on one side of the green and work your
way across the green in a zigzag fashion, slightly
overlapping each lap you roll: this makes sure you
miss no part of the green and all of the green is
rolled. Avoid coming back across the green to roll
missed areas if possible. You should be able to
complete the rolling of 18 greens in the same time
or quicker than by mowing using a triplex mower.
• When rolling of the green is completed, move the
roller onto the fringe, stop the engine, lock the trailer
into the trailing position, connect it to the towing
vehicle then move o to the next green to be rolled.
Do not put the trailer down into the towing position
on the green; damage may occur to the green from
the roller tires and body.
• Remember turn o the fuel cock whilst towing the
roller.
Emergency and Park brake
• To engage, push parking lever forward until it will
travel no further, the lever operates on a over cam
principal, when it is fully engaged the lever will remain
in this position with the brake applied. To dis-engage
the park brake, pull the lever up and back. The lever
will remain in the o position until re-applied. Do not
operate the roller with the emergency brake engaged,
damage to the drive roller rubber coating will occur.
• Ensure the park brake is released prior to operating
the roller, if not irreparable damage to the rubber on
the drive roller will occur.
Operation procedures

TRU-TURF R52-11T Golf Greens Roller Manual 10
Maintenance
• Stop engine before performing any maintenance.
• Service the Honda engine according to the
manufacturers maintenance schedule.
Transmission (pump, Eaton 11)
• Initially, change the oil at 50 hours running time, then;
• Change oil every 500 hours or annually, whichever
occurs rst.
• Change hydraulic oil lter every 500 hours or annually,
whichever occurs rst.
• Only use the manufacturer’s recommended
replacement oil lter .
• When tting the lter, follow the instructions supplied
with the lter. This will ensure that the lter remains
tight and that no leaks occur.
• Check all hard line oil pipes for rubbing, excessive
vibration, leaks and tightness on a regular basis.
• Check transmission oil level on oil tank sight glass. Oil
level should remain at a minimum of 25mm (1”) and at
a maximum of 40mm (1.5”) from the top of the tank.
• Oil Capacity including lter is 6 liters or 5.3 U.S. quarts.
For the ultimate performance we use and recommend
the Penrite synthetic 5 SAE 5W-60 transmission oil.
(Part No. R5226)
Storing
• It is important to store this roller in the towing
position. This ensures the trailer strut is in the
closed position, protecting the shaft from
corrosion, then failure and also the weight is
taken o the roller bearings.
Service of the drive chain system
• Replacement - Some chains look a like, but
they are not, use only the chain and sprockets
recommended as per the correct spare parts
number. Wrong pitch drive chain tted will
cause excessive sprocket wear and possible
drive failure.
• Tensioning the drive chain - No adjustment
is required; the chain tension is automatically
adjusted.
Lubrication
• Lubricate Drive Chain with Chain Oil, WD40
or equivalent (CRC; Penetrene etc.) each time
prior to rolling of the Greens.
Service of smoothing roller bearings
• Whilst the Roller is suspended by the Trailer,
check operational smoothness of the bearings
tted to each smoothing roller by rotating
the rollers by hand. If bearing tightness,
roughness or excessive looseness is detected,
replace the faulty bearings.
Maintenance

TRU-TURF R52-11T Golf Greens Roller Manual
11
• If bearings are faulty
(a) Remove the complete smoothing head from the
machine, undo the four swivel mount bolts on
upper body and steering rod, wheel the roller away
until the total head is exposed to work on.
(b) Remove roller shaft bolts from end plates, remove
rollers from the heads.
(c) Screw a bolt back into the shaft end, knock out one
end bearing, then use the same shaft to knock out
the other end bearing.
(d) Fit new bearings, replace rollers into the heads,
lubricate shaft bolts with an anti seize compound
before installing them. Tighten securely and ensure
rollers rotate freely when fully tightened.
(e) Be sure the spacing washers are tted to the shaft
ends before installing the rollers into the heads, in
the correct sequence smaller diameter washer rst
and the larger diameter washer last.
(f) Sometimes, if the rollers do not rotate freely when
installed use a soft headed hammer to hit the
securing bolts on each end of the head, this will seat
all parts and allow the roller to rotate freely.
(g) If the rods are removed or lengths altered ensure
they are correctly adjusted so that the three heads
are parallel to each other when in the straight
ahead position. Adjust if necessary.
Changing engine oil
• Change oil and service as per the manufacturers
Servicing Schedule enclosed as a separate insert to
this manual.
Description Pre-Delivery Pre-Operating 12 Monthly
Check Engine oil √√
Check Transmission Oil Level √√
Beware of contaminants entering the transmission √√
Lubricate drive chain with WD40 or equivalent √√
Check Tires Max 18 P.S.I. √√
Check Gas √√
Check Smoothing Roller Bearing √√
Check Drive Roller Bearings √√
Check for loose Nuts and Bolts √√
Renew Engine Oil as per manufacturers Handbook
Renew Transmission Oil - See page 1 for correct oil every 500hrs or... √
Renew Transmission Oil Filter *√
Renew Smoothing Roller Bearings *√
Renew Drive Roller Bearings *√
Renew Chain Tensioner Sprocket Bearings *√
Renew Drive Chain *√
Replace Foot Pedal Struts *
Replace Trailer Strut *
Changing transmission oil
• See page 12 and 14.
Ongoing Maintenance, Lubricant and Replacement
Schedule (below)
Note. Areas indicated with a *need to be changed
when defective or as required. This may be before the
recommended replacement schedule. Please replace all
parts as necessary.
Maintenance

TRU-TURF R52-11T Golf Greens Roller Manual 12
Fault Finding
Roller will not move one or either way, check
• Chain is okay
• Sprockets are not worn or slipping on the shaft
• Foot control is operating - check all arms are secure
• For Sheared Sprocket Keys
• Rubber coupling broken
Roller will not steer, check
• Woodru Key is in place and not sheared
• Rod ends are connected to smoothing roller head and
the steering arm
• Rod ends are not broken or seized
• Centre swivel bearing on top centre of each
smoothing roller head has not seized
• Connecting rod are in place and serviceable
Roller has excessive vibration, check
• Disconnect engine-to- transmission and isolate the
drive chain to determine whether the problem is in the
engine or in the transmissions
• If engine is at fault contact your nearest engine agent
for rectication
• If the transmission is at fault, repair or replace as
necessary, or seek professional advice from a local
Eaton Service Center
• Any out of alignment between engine and
transmission.
• For damaged engine and transmission couplings
Smoothing rollers seized, check
• Bearings have not seized
• Replace if necessary
Rubber drive roller will not rotate, check
• Roller shaft end bearings have not seized
• Broken chain
• Slipping sprockets
• the Park Brake is not locked on
• Accumulated dry debris is not locking the
smoothing rollers.
Fault Finding

TRU-TURF R52-11T Golf Greens Roller Manual
13
ROLLING POSIITON
Towing Position
Rolling Position
Operating Positions

TRU-TURF R52-11T Golf Greens Roller Manual 14
T7001
R8082
R8076
R6023
T7003
R8078
T7002
R6025
R6024
R8072
E7030
R8035
R5049
R6017
R5014 R5016
R8075
R8082
R5239
T7000
R8056
R8077
Upper Body

TRU-TURF R52-11T Golf Greens Roller Manual
15
R5085
T7004
R5142
R8034
R8043
R8037
R8034
R9001
R8065
R8051
Engine

TRU-TURF R52-11T Golf Greens Roller Manual 16
R8075
R5016
R6013
R8035
R5239
R8043
R5129
R6055
R8055
R8048
R8067
R6054
R8055
R8025
R8026
R8024
R8034
R8051
R8068
R8077
R8080
Seat & Frame

TRU-TURF R52-11T Golf Greens Roller Manual
17
R8056
T7006
R8055
R8056
R8069
R8072
R8048
R8072
R8048
R5050
R6011
R8053
T7005
R5014
R8062
Emergency Brake

TRU-TURF R52-11T Golf Greens Roller Manual 18
R5234
R5230
R
5233
R5233
R5227
R5133
R5131
Transmission
Table of contents
Other Tru-Turf Lawn And Garden Equipment manuals

Tru-Turf
Tru-Turf RC50 User manual

Tru-Turf
Tru-Turf BH40 User manual

Tru-Turf
Tru-Turf RB48 User manual

Tru-Turf
Tru-Turf RB48 User manual

Tru-Turf
Tru-Turf RE50 User manual

Tru-Turf
Tru-Turf GR7000C User manual

Tru-Turf
Tru-Turf R52-ELTac User manual

Tru-Turf
Tru-Turf RB48-11A Golf Green Roller User guide

Tru-Turf
Tru-Turf RC50 User manual
Popular Lawn And Garden Equipment manuals by other brands

Nemaxx
Nemaxx EB52 Original operating instructions

Yard-Man
Yard-Man 107.249820 Operator's manual

Simplicity
Simplicity 990225 Operator's manual

Insect Detection Systems
Insect Detection Systems IDS-2020L Operator's guide

Troy-Bilt
Troy-Bilt Big Red Technical manual

MATALA
MATALA MEA Pro Mini 2000 installation instructions